Italian Herb and Cheese Bread

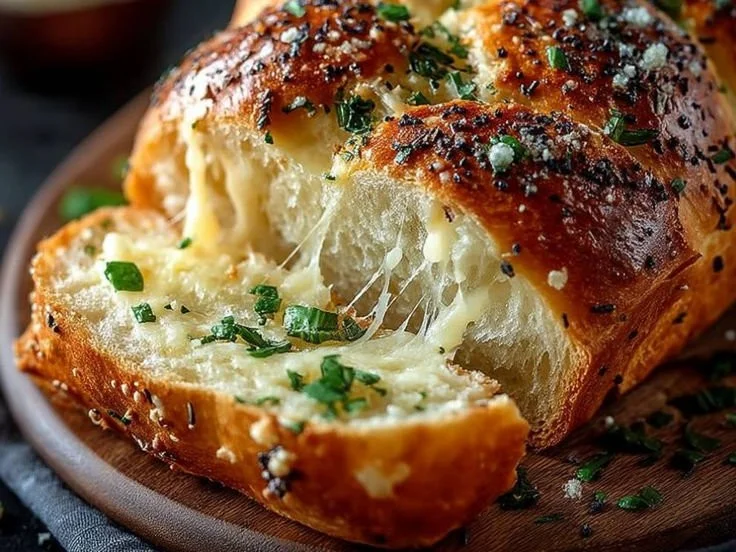
Freshly baked Italian Herb and Cheese Bread with herbs and cheese topping.

Italian Herb and Cheese Bread smells like a warm kitchen and tastes like a hug. This simple loaf mixes soft dough with fresh herbs and gooey cheese. It is great for family meals, parties, or just when you want something tasty with soup or salad. If you like baked breads that are full of flavor, this recipe will be a crowd-pleaser. It pairs well with other easy party foods, for example try it with baked beef and cheese sliders for a full table. You will love the crispy crust and soft inside, so get ready to bake and enjoy, you might not be able to stop at one slice.

how to prepare Italian Herb and Cheese Bread

Ingredients

  • 3 1/2 cups all purpose flour
  • 1 packet active dry yeast, about 2 1/4 tsp
  • 1 cup warm water, about 105 to 115 F
  • 1 tbsp sugar
  • 2 tbsp olive oil
  • 1 tsp salt
  • 2 tbsp dried Italian herbs, or 2 tbsp fresh chopped basil, oregano, rosemary mix
  • 1 cup shredded Parmesan or mozzarella, plus extra for top

Directions

  1. In a small bowl, mix warm water, sugar, and yeast. Wait 5 to 10 minutes until foamy.
  2. In a large bowl, mix flour, salt, and herbs. Add the yeast mix and olive oil.
  3. Stir until a soft dough forms. Add the shredded cheese and fold it in.
  4. Turn dough onto a lightly floured surface. Knead 6 to 8 minutes until smooth.
  5. Place dough in a lightly oiled bowl, cover with a clean towel. Let it rise in a warm place 1 hour, until doubled.
  6. Punch the dough down. Shape it into a loaf or oval. Place on a baking sheet or in a loaf pan.
  7. Cover and let rise 30 to 40 minutes until puffed.
  8. Preheat oven to 375 F. Brush top with a little olive oil and sprinkle extra cheese and herbs.
  9. Bake 25 to 30 minutes until golden and the crust sounds hollow when tapped.
  10. Cool on a rack 10 minutes before slicing, serve warm.

Italian Herb and Cheese Bread

Why You’ll Love Italian Herb and Cheese Bread

  • Simple ingredients you likely have at home, flour, yeast, cheese, herbs.
  • Great aroma, your kitchen will smell amazing while it bakes.
  • Versatile, use for sandwiches, dipping, or as a side for pasta and soup.
  • Crowd-pleaser, the mix of herbs and cheese makes many people happy.

tips for success

  • Use warm water, not hot, to wake the yeast. Too hot water kills the yeast.
  • Measure flour by spooning into the cup and leveling, do not pack it in.
  • If dough is sticky, add a little flour, one tablespoon at a time.
  • Fresh herbs give the best flavor, but dried herbs work well too.
  • Do not overbake, check at 25 minutes and cover with foil if top browns too fast.
  • Let the bread cool a bit, it slices cleaner when it rests.

Serving Suggestions

  • Serve warm with butter or garlic butter for a classic bite.
  • Make a sandwich with roasted vegetables and sliced turkey.
  • Tear into pieces and use as croutons for salad or soup.
  • Turn slices into bruschetta with chopped tomatoes and basil.
  • Pair with pasta dishes, especially marinara or creamy sauces.

Italian Herb and Cheese Bread

FAQs

Q: Can I use dried herbs instead of fresh? A: Yes, use about one third the amount of dried herbs compared to fresh. Dried herbs still give good flavor.

Q: How do I store the bread? A: Cool fully, then keep in a bread box or wrapped in a clean towel for 2 days at room temperature. For longer storage, freeze slices in a sealed bag.

Q: Can I make this with whole wheat flour? A: Yes, replace up to half the flour with whole wheat, the loaf will be denser. Add a little extra water if the dough feels dry.

Q: Can I add other cheeses or mix-ins? A: Yes, try mozzarella, cheddar, or a mix. You can add chopped olives or sun dried tomatoes for extra taste.

Conclusion

If you want a slightly different take or a copycat style loaf, try this Subway Bread Recipe (Italian Herb and Cheese Copycat) for more ideas and tips on a similar herbed, cheesy loaf. Enjoy baking and sharing this warm bread with people you love.

Italian Herb and Cheese Bread

This simple loaf mixes soft dough with fresh herbs and gooey cheese, making it a perfect companion for family meals, parties, or soups and salads.

For the Dough

  • 3.5 cups all purpose flour
  • 1 packet active dry yeast, about 2 1/4 tsp (Use warm water to activate.)
  • 1 cup warm water, about 105 to 115 F (Do not use hot water.)
  • 1 tbsp sugar
  • 2 tbsp olive oil
  • 1 tsp salt
  • 2 tbsp dried Italian herbs, or 2 tbsp fresh chopped basil, oregano, rosemary mix (Fresh herbs give the best flavor.)
  • 1 cup shredded Parmesan or mozzarella, plus extra for top

Preparation

  1. In a small bowl, mix warm water, sugar, and yeast. Wait 5 to 10 minutes until foamy.
  2. In a large bowl, mix flour, salt, and herbs. Add the yeast mix and olive oil.
  3. Stir until a soft dough forms. Add the shredded cheese and fold it in.
  4. Turn dough onto a lightly floured surface. Knead 6 to 8 minutes until smooth.
  5. Place dough in a lightly oiled bowl, cover with a clean towel. Let it rise in a warm place 1 hour, until doubled.
  6. Punch the dough down. Shape it into a loaf or oval. Place on a baking sheet or in a loaf pan.
  7. Cover and let rise 30 to 40 minutes until puffed.
  8. Preheat oven to 375 F. Brush top with a little olive oil and sprinkle extra cheese and herbs.

Baking

  1. Bake for 25 to 30 minutes until golden and the crust sounds hollow when tapped.
  2. Cool on a rack 10 minutes before slicing, serve warm.

Let the bread cool a bit; it slices cleaner when it rests. If the dough is sticky, add flour, one tablespoon at a time. Do not overbake, check at 25 minutes and cover with foil if top browns too fast.

Bread, Side
Italian
Cheese Bread, Herb Bread, Homemade Bread, Italian Bread

Croissant Inspired Breads

Freshly baked croissant inspired breads displayed on a wooden table.

I love a warm, flaky bread that smells like butter and makes the kitchen feel cozy. Croissant Inspired Breads are just that, soft inside, with crisp, buttery layers on the outside. This crowd pleaser tastes like a bakery treat, but you can make it at home with a bit of time and care. It is flaky, rich, and great for breakfast or a snack. If you like simple comfort food, you might also enjoy a bright soup to go with it, like this Thai inspired chicken soup. Get ready to make a loaf or rolls that will have people asking for more, and enjoy the warm, flaky bites.

how to prepare Croissant Inspired Breads

  1. Mix flour, sugar, salt, yeast, milk, and egg to make a soft dough. Knead until smooth, about 5 to 8 minutes.
  2. Chill the dough for 1 hour, wrapped in plastic. Keep it cold, so the butter stays firm later.
  3. Pound and roll cold butter into a thin square. Place the butter on the rolled dough, fold the dough over, and seal the edges. This makes the laminated dough, which gives flaky layers.
  4. Roll the dough into a long rectangle, then fold it like a letter, this is a single turn. Wrap and chill 30 minutes. Repeat rolling and folding 2 to 3 more times, chilling between turns.
  5. After the final chill, roll the dough to about 1/4 inch thick. Cut into shapes for a loaf, buns, or classic croissant shapes.
  6. Place shaped pieces on a baking tray. Let them proof until puffy, about 1 to 2 hours, but do not overproof.
  7. Brush with beaten egg for a shiny crust. Bake at 375°F (190°C) for 18 to 25 minutes, until deep golden and crisp. Cool a bit before serving, so the layers set.

Croissant Inspired Breads

Why You’ll Love Croissant Inspired Breads

  • Flaky layers give a nice crunch, while the inside stays soft and tender.
  • Rich, buttery flavor feels like a special treat, yet you can make it at home.
  • It works as a breakfast pastry, sandwich bread, or a party snack.
  • You can shape it many ways, from a loaf to rolls or classic crescent shapes, so it fits any meal.

tips for success

  • Keep the butter cold, it helps form nice flaky layers.
  • Use a light touch when rolling, press evenly to avoid tearing the dough.
  • Chill the dough between folds, this keeps the butter from melting into the dough.
  • Measure ingredients by weight if you can, it gives better results than cups.
  • Do not overproof, proof until the dough is puffed but not collapsed.
  • Bake until a deep golden brown, that color means the butter and sugar have cooked well.

Serving Suggestions

  • Serve warm with butter and jam for a simple breakfast.
  • Use slices for a rich ham and cheese sandwich.
  • Pair with coffee or tea for a cozy snack.
  • Offer small pieces at a brunch, guests will love tearing the flaky layers.

Croissant Inspired Breads

FAQs

Q: Can I make the dough ahead of time?

A: Yes, you can make and chill the dough overnight. Cold dough works well and saves time the next day.

Q: Do I need a stand mixer?

A: No, you can mix and knead by hand. A mixer helps, but it is not required.

Q: How do I keep the layers from getting soggy?

A: Keep the butter cold, chill the dough between folds, and bake at the right temperature so the crust becomes crisp.

Q: Can I freeze shaped dough?

A: Yes, freeze shaped pieces on a tray, then store in a bag. Bake from frozen or thaw and proof before baking.

Conclusion

Try a tested croissant bread loaf guide if you want extra help and a video demo, see Sally’s Baking Addiction croissant bread loaf recipe for more tips and a clear walkthrough. Enjoy making your own flaky, buttery Croissant Inspired Breads, and share the warm pieces with people you love.

Croissant Inspired Breads

Soft inside with crisp, buttery layers, this Croissant Inspired Bread is a warm, flaky treat perfect for breakfast or a snack.

Dough Ingredients

  • 4 cups all-purpose flour (Measure by weight for best results.)
  • 1 tablespoon sugar (Adjust based on taste preference.)
  • 1 teaspoon salt
  • 1 tablespoon yeast (Active dry yeast recommended.)
  • 1 cup milk (Warm milk helps activate the yeast.)
  • 1 large egg (For an enriched dough.)

Butter Layer

  • 1 cup cold butter (Must be cold to create flaky layers.)

Preparation

  1. Mix flour, sugar, salt, yeast, milk, and egg to make a soft dough.
  2. Knead until smooth, about 5 to 8 minutes.
  3. Chill the dough for 1 hour, wrapped in plastic to keep it cold.

Laminating the Dough

  1. Pound and roll cold butter into a thin square.
  2. Place the butter on the rolled dough, fold the dough over, and seal the edges.
  3. Roll the dough into a long rectangle, then fold it like a letter for a single turn.
  4. Wrap and chill for 30 minutes. Repeat rolling and folding 2 to 3 more times, chilling between each turn.

Shaping and Baking

  1. After the final chill, roll the dough to about 1/4 inch thick.
  2. Cut into shapes for a loaf, buns, or classic croissant shapes.
  3. Place shaped pieces on a baking tray and let them proof until puffy, about 1 to 2 hours.
  4. Brush with beaten egg for a shiny crust.
  5. Bake at 375°F (190°C) for 18 to 25 minutes until deep golden and crisp.
  6. Cool a bit before serving to allow the layers to set.

Keep the butter cold for flaky layers. Use a light touch when rolling to avoid tearing the dough. Chill the dough between folds to prevent butter melting. Do not overproof, proof until the dough is puffed but not collapsed. Bake until a deep golden brown for best results.

Breakfast, Snack
French
Baking, Bread, Comfort Food, Croissant, Pastry

World’s Easiest Yeast Bread Recipe

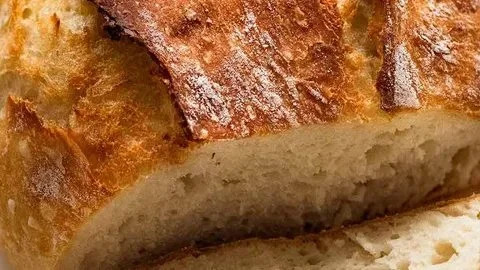
Freshly baked yeast bread loaf on a wooden table

This bread feels like a warm hug, and it is easy to make. The World’s Easiest Yeast Bread Recipe – Artisan, No Knead makes a crusty loaf with a soft, open crumb inside. People love it because it tastes like bakery bread but needs very little work. It fits busy days, beginners, and anyone who likes fresh bread. For a different homemade treat, you might also enjoy a simple cookie recipe I like, like this banana bread cookies recipe. Try this loaf and you will soon want to bake it again, it is that good and friendly.

how to prepare Yeast Bread Recipe

Ingredients

  • 3 cups all purpose flour
  • 1 teaspoon instant yeast
  • 1 1/4 teaspoons salt
  • 1 1/2 cups warm water

Directions

  1. In a big bowl, mix flour, yeast, and salt. Stir to combine.
  2. Pour in warm water, mix with a spoon until the dough comes together, it will be sticky.
  3. Cover the bowl with plastic wrap or a towel. Let it sit at room temperature for 12 to 18 hours, the dough will rise and get bubbles.
  4. After rising, dust your work surface with flour. Tip the dough out and fold it a few times to shape a rough ball. Do not knead.
  5. Place the dough on a piece of parchment paper. Cover and rest 30 minutes while you heat the oven.
  6. Heat oven to 450°F (230°C) with a heavy pot or Dutch oven inside, lid on, for 30 minutes.
  7. Carefully remove the hot pot, lift the dough with parchment into the pot, cover, and bake 30 minutes.
  8. Remove the lid, bake 10 to 15 more minutes until the crust is deep golden and crisp.
  9. Take the bread out and cool on a rack at least 30 minutes before slicing.

World's Easiest Yeast Bread Recipe - Artisan, No Knead

Why You’ll Love Yeast Bread Recipe

  • Very low work, no kneading, mix and wait.
  • Crunchy crust and soft inside, like artisan bread.
  • Uses simple pantry ingredients, no fancy tools.
  • Great for beginner bakers and busy cooks.
  • It fills your home with a warm, fresh bread smell.

tips for success

  • Use warm, not hot water, to help the yeast work.
  • Let the dough rest long enough, the long rise builds flavor.
  • Do not add too much flour when shaping, a sticky dough makes a better crumb.
  • Use a heavy lidded pot for best crust, a cast iron Dutch oven works well.
  • Cool the bread fully before you cut it, slicing too soon makes it gummy.

Serving Suggestions

  • Serve warm with butter and jam, simple and perfect.
  • Make sandwiches with slices of this crusty loaf.
  • Use for soup dipping, the crust holds up well.
  • Turn slices into toast or garlic bread for a quick treat.

World's Easiest Yeast Bread Recipe - Artisan, No Knead

FAQs

Q: How long can I store this bread?

A: Store at room temperature in a paper bag for 2 to 3 days. For longer, freeze sliced.

Q: Can I make smaller loaves?

A: Yes, divide the dough into two and bake in two smaller pots, adjust time a little.

Q: Do I need to use instant yeast?

A: Instant yeast works best for the no knead method, but active dry yeast will work if you proof it first.

Q: Can I add herbs or seeds?

A: Yes, fold in herbs or seeds after the first rise for extra flavor.

Conclusion

If you want the original detailed method and extra tips, see the full World’s Easiest Yeast Bread recipe – Artisan, NO KNEAD crusty bread page for more info and photos.

Yeast Bread

This no-knead, artisan-style bread features a crunchy crust and soft interior, making it a perfect choice for busy bakers looking for a simple and delicious bread option.

Main Ingredients

  • 3 cups all purpose flour
  • 1 teaspoon instant yeast
  • 1.25 teaspoons salt
  • 1.5 cups warm water (Use warm, not hot water.)

Preparation

  1. In a big bowl, mix flour, yeast, and salt. Stir to combine.
  2. Pour in warm water and mix with a spoon until the dough comes together; it will be sticky.
  3. Cover the bowl with plastic wrap or a towel and let it sit at room temperature for 12 to 18 hours to rise.
  4. After rising, dust your work surface with flour. Tip the dough out and fold it a few times to shape a rough ball. Do not knead.
  5. Place the dough on a piece of parchment paper, cover, and rest for 30 minutes while you heat the oven.
  6. Heat oven to 450°F (230°C) with a heavy pot or Dutch oven inside, lid on, for 30 minutes.

Baking

  1. Carefully remove the hot pot, lift the dough with parchment into the pot, cover, and bake for 30 minutes.
  2. Remove the lid and bake for an additional 10 to 15 minutes until the crust is deep golden and crisp.
  3. Take the bread out and cool on a rack for at least 30 minutes before slicing.

For best results, allow the bread to cool fully before cutting to prevent it from becoming gummy. Consider serving warm with butter and jam.

Bread, Snack
American, Artisan
Artisan Bread, Easy Bread Recipe, Homemade Bread, No Knead Bread, Yeast Bread

Homemade Focaccia Bread

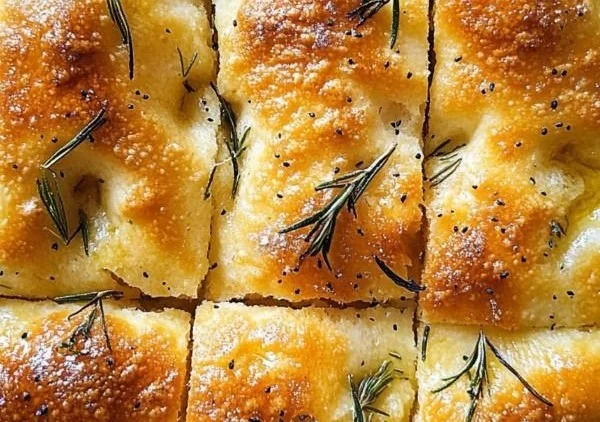
Homemade focaccia bread topped with herbs and olive oil

Focaccia bread is warm, soft, and full of flavor. This homemade focaccia bread makes a great snack, side, or party bread. It has a light, airy inside, a crispy top, and a nice olive oil taste. People love it plain, with herbs, or topped with olives and tomatoes. This recipe is simple and works for cooks of all levels, and it is a crowd-pleaser that fills the kitchen with a fresh, baked smell. If you enjoy easy home bakes, you might also like this Amish apple fritter bread for a sweet treat.

how to prepare Homemade Focaccia Bread

Ingredients

  • 3 1/2 cups all purpose flour
  • 1 packet (2 1/4 tsp) active dry yeast
  • 1 1/4 cups warm water, about 105 to 115 F
  • 2 tbsp olive oil, plus extra for the pan and top
  • 1 tsp sugar
  • 1 1/2 tsp salt
  • Coarse sea salt, for sprinkling
  • Fresh rosemary or other herbs, optional
  • Cherry tomatoes or olives, optional

Directions

  1. In a bowl, mix warm water, sugar, and yeast. Let sit 5 to 10 minutes, until it bubbles a little.
  2. In a large bowl, stir flour and salt. Add the yeast mix and 2 tablespoons olive oil. Mix until a soft dough forms.
  3. Turn the dough onto a floured surface and knead 5 to 7 minutes, until smooth and elastic. You can use a stand mixer with a dough hook.
  4. Lightly oil a bowl, put the dough in, and cover with a towel. Let rise in a warm spot 1 hour, until doubled.
  5. Oil a baking pan or sheet well. Press the dough into the pan to make an even layer about 1/2 to 3/4 inch thick. Cover and let rise 20 to 30 minutes.
  6. Preheat the oven to 425 F (220 C). Use your fingers to make dimples across the dough surface. Drizzle olive oil over the top. Add rosemary, sea salt, tomatoes, or olives as you like.
  7. Bake 20 to 25 minutes, until golden brown on top. Let cool a few minutes, slice, and serve warm.

Homemade Focaccia Bread

Why You’ll Love Homemade Focaccia Bread

  • It tastes fresh, with a rich olive oil flavor and a soft crumb.
  • You can change toppings to match any meal, like herbs, cheese, or veggies.
  • It is easy to make, even for new bakers, and it makes the house smell great.
  • Leftovers keep well and are great for sandwiches or toast the next day.
  • This easy focaccia is a simple way to enjoy classic Italian bread at home.

tips for success

  • Use warm, not hot, water so the yeast wakes up but does not die.
  • Give the dough time to rise, it makes the bread light and airy.
  • Oil the pan well, this gives a crisp bottom and easy release.
  • Press firmly to make dimples, they hold olive oil and herbs for more flavor.
  • Bake until the top is golden, not just pale, for a nice crust.

Serving Suggestions

  • Serve warm with olive oil and balsamic vinegar for dipping.
  • Pair with soups, salads, or pasta for a full meal.
  • Use slices to make sandwiches with cheese and roasted vegetables.
  • Add to a bread basket for parties, it pleases many tastes.

Homemade Focaccia Bread

FAQs

Q: Can I use instant yeast instead of active dry yeast?

A: Yes, you can. If you use instant yeast, mix it with the flour and skip the proof step with warm water. Add water and oil, then continue.

Q: How long does focaccia keep?

A: Store in an airtight container at room temperature for 2 to 3 days. Reheat in the oven to refresh the crust.

Q: Can I make focaccia ahead and bake later?

A: Yes, you can make the dough and keep it in the fridge overnight. Let it come to room temperature and rise a bit before baking.

Q: Can I use whole wheat flour?

A: You can swap part of the flour for whole wheat, but use less or add a bit more water, dough may be denser.

Q: What oven temperature is best?

A: 425 F gives a good rise and a golden crust. You can lower a bit if your oven runs hot.

Conclusion

Homemade focaccia bread is simple, tasty, and flexible. It fits many meals and tastes, from plain olive oil to herbed focaccia or topped versions. For another take on a simple bread recipe and more tips, check this Easy Focaccia Bread Recipe – Inspired Taste.

Focaccia Bread

This homemade focaccia bread is warm, soft, and full of flavor, making it a perfect snack, side, or party bread.

Dough Ingredients

  • 3 1/2 cups all purpose flour
  • 1 packet active dry yeast (2 1/4 tsp)
  • 1 1/4 cups warm water (about 105 to 115 F) (Warm, not hot, to activate yeast.)
  • 2 tbsp olive oil, plus extra for the pan and top
  • 1 tsp sugar
  • 1 1/2 tsp salt
  • Coarse sea salt, for sprinkling
  • Fresh rosemary or other herbs, optional
  • Cherry tomatoes or olives, optional

Preparation

  1. In a bowl, mix warm water, sugar, and yeast. Let sit for 5 to 10 minutes, until it bubbles a little.
  2. In a large bowl, stir flour and salt. Add the yeast mix and 2 tablespoons olive oil. Mix until a soft dough forms.
  3. Turn the dough onto a floured surface and knead for 5 to 7 minutes, until smooth and elastic.
  4. Lightly oil a bowl, put the dough in, and cover with a towel. Let rise in a warm spot for 1 hour, until doubled.
  5. Oil a baking pan or sheet well. Press the dough into the pan to make an even layer about 1/2 to 3/4 inch thick. Cover and let rise for 20 to 30 minutes.

Baking

  1. Preheat the oven to 425 F (220 C). Use your fingers to make dimples across the dough surface.
  2. Drizzle olive oil over the top. Add rosemary, sea salt, tomatoes, or olives as you like.
  3. Bake for 20 to 25 minutes, until golden brown on top. Let cool a few minutes, slice, and serve warm.

Use warm water to wake the yeast without killing it. Make sure to let the dough rise for a light and airy texture. A well-oiled pan gives a crisp bottom and easy release. Bake until the top is golden for the best crust.

Party Food, Side Dish, Snack
Italian
Baking, Easy Bread Recipe, Focaccia Bread, Homemade Focaccia, Italian Bread

Cheese Garlic Rolls

Delicious Cheese Garlic Rolls topped with herbs and melted cheese.

Cheese Garlic Rolls are soft, warm rolls filled with melty cheese and bright garlic flavor. They make any meal feel special, and people always ask for more at parties, family dinners, or a cozy night in. This recipe is easy to follow, uses simple ingredients, and gives you golden, cheesy rolls with a crisp top and a soft, buttery inside. If you enjoy quick, tasty treats, you might also like an easy yogurt cheesecake for a simple dessert after these rolls. Ready to make a batch and see smiles all around?

how to prepare Cheese Garlic Rolls

Ingredients

  • 2 cups all purpose flour
  • 1 cup warm milk
  • 1 tablespoon sugar
  • 1 teaspoon salt
  • 1 packet (2 1/4 tsp) active dry yeast
  • 2 tablespoons butter, melted
  • 1 to 1 1/2 cups shredded mozzarella or cheddar
  • 3 cloves garlic, minced
  • 2 tablespoons chopped fresh parsley or 1 tsp dried
  • 2 tablespoons olive oil or melted butter, for brushing

Directions

  1. In a bowl, mix warm milk, sugar, and yeast. Let sit 5 to 10 minutes, until frothy.
  2. Add flour, salt, and melted butter. Stir to form a soft dough.
  3. Turn dough onto a floured surface and knead 5 to 7 minutes, until smooth and elastic.
  4. Place dough in a lightly oiled bowl, cover, and let rise 45 to 60 minutes, until doubled.
  5. Punch down dough and roll into a rectangle about 12 by 8 inches.
  6. Mix minced garlic with a little olive oil or melted butter, and spread evenly over the dough.
  7. Sprinkle shredded cheese and chopped parsley over the garlic layer.
  8. Roll dough tightly from the long side, like a log. Pinch seam to seal.
  9. Cut the log into 8 equal pieces and place each piece cut side up in a greased baking dish.
  10. Cover and let rolls rise 20 to 30 minutes, until puffy.
  11. Preheat oven to 375°F (190°C). Brush tops with olive oil or butter.
  12. Bake 18 to 22 minutes, until golden brown and cheese melts.
  13. Let cool a few minutes, then serve warm.

Cheese Garlic Rolls

Why You’ll Love Cheese Garlic Rolls

  • They are cheesy, soft, and garlicky, a simple flavor combo that pleases most people.
  • You can make them ahead, freeze, and bake later for fresh rolls whenever you want.
  • The recipe uses common pantry items and a short hands-on time.
  • They pair well with soup, salad, or as a snack for kids and guests.

tips for success

  • Use warm, not hot, milk to proof yeast, warm feels like bath water.
  • Don’t add too much flour while kneading, dough should be slightly sticky for soft rolls.
  • If you like more garlic, add an extra clove or brush with garlic butter after baking.
  • For crisp tops, brush with butter and broil 30 seconds at the end, watching closely.
  • Use fresh grated cheese for the best melt and flavor.

Serving Suggestions

  • Serve warm with marinara sauce, a green salad, or a bowl of soup.
  • Add a side of roasted vegetables for a light meal.
  • Use leftover rolls to make mini sandwiches with ham or roasted chicken.
  • Sprinkle extra parsley or grated cheese on top before serving.

Cheese Garlic Rolls

FAQs

Q: Can I use store bought dough for this recipe? A: Yes, store bought pizza or bread dough works well and saves time.

Q: How do I store leftover rolls? A: Keep cooled rolls in an airtight container in the fridge for up to 3 days. Reheat in oven or microwave.

Q: Can I freeze the rolls before baking? A: Yes, place the cut rolls in a tray, freeze until firm, then store in a freezer bag. Bake from frozen, add a few extra minutes to the bake time.

Q: What cheese is best for melting? A: Mozzarella melts well and gives stretch, cheddar adds sharp flavor. You can mix both.

Q: Are these rolls spicy? A: No, they are mild. Add red pepper flakes if you want a bit of heat.

Conclusion

If you want another take on cheesy garlic rolls with a rich cheese mix and bold garlic, see this detailed version on Sip and Feast for extra ideas and tips, Cheesy Garlic Rolls recipe on Sip and Feast.

Cheese Garlic Rolls

Soft, warm rolls filled with melty cheese and bright garlic flavor, perfect for any meal or gathering.

Dough Ingredients

  • 2 cups all purpose flour
  • 1 cup warm milk (Warm, not hot, to proof yeast)
  • 1 tablespoon sugar
  • 1 teaspoon salt
  • 1 packet (2 1/4 tsp) active dry yeast
  • 2 tablespoons butter, melted

Filling and Topping Ingredients

  • 1 to 1 1/2 cups shredded mozzarella or cheddar cheese (Use fresh grated cheese for the best melt)
  • 3 cloves garlic, minced (Add more if desired)
  • 2 tablespoons chopped fresh parsley or 1 tsp dried
  • 2 tablespoons olive oil or melted butter, for brushing

Preparation

  1. In a bowl, mix warm milk, sugar, and yeast. Let sit for 5 to 10 minutes, until frothy.
  2. Add flour, salt, and melted butter. Stir to form a soft dough.
  3. Turn dough onto a floured surface and knead for 5 to 7 minutes, until smooth and elastic.
  4. Place dough in a lightly oiled bowl, cover, and let rise for 45 to 60 minutes, until doubled.
  5. Punch down dough and roll into a rectangle about 12 by 8 inches.
  6. Mix minced garlic with a little olive oil or melted butter, and spread evenly over the dough.
  7. Sprinkle shredded cheese and chopped parsley over the garlic layer.
  8. Roll dough tightly from the long side, like a log. Pinch seam to seal.
  9. Cut the log into 8 equal pieces and place each piece cut side up in a greased baking dish.
  10. Cover and let rolls rise for 20 to 30 minutes, until puffy.

Baking

  1. Preheat oven to 375°F (190°C). Brush tops with olive oil or butter.
  2. Bake for 18 to 22 minutes, until golden brown and cheese melts.
  3. Let cool for a few minutes, then serve warm.

For crisp tops, brush with butter and broil for 30 seconds at the end, watching closely. Store cooled rolls in an airtight container in the fridge for up to 3 days.

Appetizer, Snack
American
Cheese Garlic Rolls, Cheesy Rolls, easy rolls, Garlic Rolls, Party Food

Butternut Squash and Sweet Potato Soup

Creamy butternut squash and sweet potato soup served in a bowl with garnish

Butternut Squash and Sweet Potato Soup is like a warm hug on a chilly day. This comforting dish combines the natural sweetness of butternut squash and sweet potatoes, creating a smooth and creamy texture that will make you feel cozy inside. The bright orange color is not only inviting but also makes it a perfect dish for gatherings or family dinners. It’s easy to make, and once you smell it simmering on the stove, your family will gather around, eager to taste this delicious mix of flavors. Trust us, it’s a crowd-pleaser! Whether you are a seasoned cook or a beginner, you will love making this soup. So grab your pots and get ready for a delightful kitchen experience!

How to Prepare Butternut Squash and Sweet Potato Soup

To prepare Butternut Squash and Sweet Potato Soup, start by gathering your ingredients. You will need butternut squash, sweet potatoes, onion, garlic, vegetable broth, and a splash of cream or coconut milk. First, peel and chop the butternut squash and sweet potatoes into small cubes. In a pot, heat some oil and sauté chopped onion and garlic until they become soft and fragrant. Add the cubed squash and sweet potatoes to the pot, along with the vegetable broth. Bring it to a boil and then lower the heat to let it simmer. Cook until the vegetables are tender, about 20-25 minutes. Once cooked, use an immersion blender or regular blender to puree the soup until it is smooth and creamy. If you like a bit of extra richness, stir in some cream or coconut milk. Season with salt and pepper to taste, and your delicious soup is ready to serve!

Why You’ll Love Butternut Squash and Sweet Potato Soup

Butternut Squash and Sweet Potato Soup is loved for many reasons. First, it is incredibly simple to make, requiring just a few fresh ingredients. The natural sweetness of the squash and sweet potatoes, along with the savory notes from the onion and garlic, create a beautiful balance of flavors. This soup is not only tasty but also packed with vitamins and nutrients, making it a healthy choice for lunch or dinner. Plus, it’s very filling, so you won’t go hungry! The creamy texture is satisfying, and the bright orange color adds vibrancy to your table. It’s perfect for a cozy night in or served as an elegant starter for a dinner party. There’s something so special about enjoying a warm bowl of homemade soup, and this recipe will quickly become a favorite for you and your loved ones.

Tips for Success

To ensure your Butternut Squash and Sweet Potato Soup turns out perfectly, here are some helpful tips. First, make sure to chop the squash and sweet potatoes into similar sizes for even cooking. This helps them become tender at the same time. Don’t rush the sautéing of the onion and garlic, as this step builds a richer flavor base for your soup. If you prefer a chunkier texture, reserve a few cubes of the cooked vegetables and add them back into the soup after blending. To enhance the flavor, consider adding spices like cinnamon or nutmeg, which pair beautifully with the sweetness of the squash. Finally, taste your soup before serving and adjust the seasoning as needed. You might want to add a splash of lemon juice for brightness. With these tips in mind, you’ll have a delicious soup ready to impress!

Serving Suggestions

Serving suggestions for Butternut Squash and Sweet Potato Soup can elevate your meal. For a classic combination, serve the soup with warm, crusty bread or buttery rolls, perfect for dipping. You can also drizzle a little cream or coconut milk on top for a beautiful presentation. If you want to add some crunch, consider garnishing your soup with roasted pumpkin seeds or croutons. A sprinkle of fresh herbs, such as cilantro or parsley, can add a pop of color and flavor. For a more filling meal, pair the soup with a hearty salad or a grain dish, such as quinoa or brown rice. This soup is versatile and can be enjoyed as a starter or the main dish, making it a wonderful addition to any table.

FAQs

1. Can I make this soup ahead of time?

Yes, you can prepare the soup ahead of time. It will keep well in the fridge for about three to four days. Just reheat it on the stove when you’re ready to serve.

2. Can I freeze Butternut Squash and Sweet Potato Soup?

Absolutely! This soup freezes beautifully. Once cooled, store it in airtight containers or freezer bags. It will last for up to three months in the freezer.

3. How can I make this soup vegan?

To make a vegan version, simply use coconut milk instead of cream and ensure your vegetable broth is plant-based. The soup will still be creamy and delicious!

Sweet Potato Soup

A cozy and creamy sweet potato soup, lightly spiced and perfect for cool nights.

Main Ingredients

  • 2 pounds sweet potatoes (Peeled and cubed)
  • 1 onion (Chopped)
  • 2 cloves garlic (Mince)
  • 2 tablespoons oil (For cooking)
  • 4 cups vegetable or chicken broth (Use low-sodium for better control of salt)
  • 1 teaspoon salt (Adjust to taste)
  • 1/2 teaspoon black pepper (Adjust to taste)
  • 1/2 teaspoon ground cumin
  • 1/2 cup milk or coconut milk (For creaminess)

Garnishes

  • olive oil (For drizzling on top)
  • chopped parsley (For sprinkling)
  • roasted seeds (For topping)

Preparation

  1. Peel and cube the sweet potatoes, chop the onion, and mince the garlic.

Cooking

  1. Heat the oil in a pot, add the onion and garlic, and cook until soft, about 5 minutes.
  2. Add the sweet potatoes, broth, salt, black pepper, and cumin. Bring to a boil.
  3. Lower the heat, cover, and simmer until the sweet potatoes are very soft, about 15 to 20 minutes.
  4. Use an immersion blender or regular blender to puree the soup until smooth, adding hot water or broth if too thick.
  5. Stir in the milk or coconut milk, warm gently, and taste to adjust salt and pepper.

Serving

  1. Serve hot, garnished with olive oil, chopped parsley, or roasted seeds.

For deeper flavor, roast the sweet potatoes first. Use low-sodium broth for better salt control. Warm gently after adding milk to keep it smooth.

Appetizer, Soup
American, Comfort Food
Cozy Soup, fall recipes, Healthy Soups, Sweet Potato Soup

Banana Oatmeal Cookies

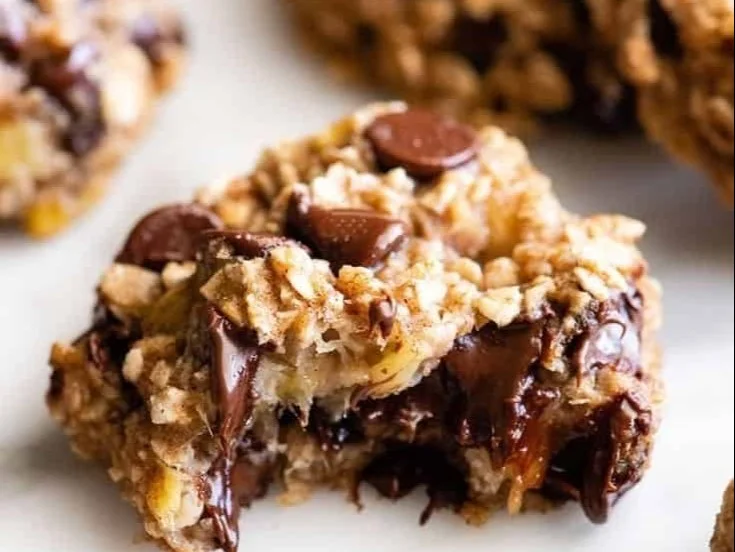
Freshly baked banana oatmeal cookies on a wooden table

Banana Oatmeal Cookies are warm, soft, and simple to make. They use ripe bananas and oats for a sweet, gentle flavor. These cookies are great for snacks, lunchboxes, or a quick treat after school. They feel homey and healthy at the same time, and people of all ages usually enjoy them.

This featured Banana Oatmeal Cookies recipe is a crowd-pleaser. It tastes like sweet banana with a chewy oat bite. The cookies are easy to make, low fuss, and perfect when you want a quick dessert or a healthy snack. Grab your ripe bananas and let’s make a batch that will vanish fast, you might need to hide a few for yourself!

How to prepare Banana Oatmeal Cookies

  1. Preheat the oven to 350°F (175°C). Line a baking sheet with parchment paper or lightly grease it.
  2. In a bowl, mash 2 very ripe bananas with a fork until smooth.
  3. Add 1 cup rolled oats to the mashed bananas. Stir until mixed.
  4. If you like, add a small pinch of salt, 1/2 teaspoon cinnamon, or a splash of vanilla for more flavor.
  5. Stir in optional mix-ins like 1/4 cup chocolate chips, chopped nuts, or dried fruit.
  6. Drop spoonfuls of the dough onto the baking sheet. Flatten each slightly with the back of the spoon.
  7. Bake for 10 to 15 minutes, until the edges are light golden.
  8. Let the cookies cool on the sheet for a few minutes, then move to a rack to cool fully.

Banana Oatmeal Cookies

Why You’ll Love Banana Oatmeal Cookies

  • They are quick and easy, using just a few simple ingredients like ripe bananas and oats.
  • The cookies are naturally sweet, so you can skip extra sugar if you want a healthier treat.
  • They are soft and chewy, with a warm banana taste that feels homemade.
  • You can change them with add-ins, like chocolate chips or nuts, to suit your taste.

Tips for success

  • Use very ripe bananas, the riper the sweeter and the better the texture.
  • Measure oats by cup, and use rolled oats for the best chew.
  • If the dough is too wet, add a little more oats, one tablespoon at a time.
  • If you want flatter cookies, press them gently before baking.
  • Watch the bake time, ovens vary, and cookies can go from golden to too brown fast.

Serving Suggestions

  • Serve warm with a glass of milk or a cup of tea.
  • Add a spoon of peanut butter on top for extra protein and flavor.
  • Pack them in lunchboxes for an easy snack.
  • Crumble them over yogurt for a quick breakfast boost.

Banana Oatmeal Cookies

FAQs

Q: Can I make these cookies without baking?

A: Yes, you can make no-bake banana oat bites by chilling spoonfuls in the fridge, but the texture will be softer and more like a firm snack.

Q: How long do the cookies keep?

A: Store them in an airtight container at room temperature for 2 days, or in the fridge for up to a week.

Q: Can I use instant oats or steel-cut oats?

A: Instant oats can work but may make cookies softer. Do not use steel-cut oats, they are too hard and will not soften well in this recipe.

Q: Are these cookies gluten-free?

A: They can be, if you use certified gluten-free oats. Check labels to be sure.

Q: Can I add eggs or flour for a firmer cookie?

A: Yes, adding an egg and a little flour will make the cookies firmer and more cookie-like if you prefer that texture.

Conclusion

For another simple, healthy take on banana oat cookies you can try this well-loved recipe online, see Healthy 3-Ingredient Banana Oatmeal Cookies – Skinnytaste.

Banana Oatmeal Cookies

Warm, soft, and simple to make, these Banana Oatmeal Cookies use ripe bananas and oats for a sweet, gentle flavor. A perfect treat for snacks, lunchboxes, or a quick dessert.

Main Ingredients

  • 2 pieces very ripe bananas (The riper, the sweeter and better the texture.)
  • 1 cup rolled oats (Use rolled oats for the best chew.)

Optional Flavorings

  • 1/2 teaspoon cinnamon (For added flavor.)
  • pinch salt (To enhance flavors.)
  • 1/4 cup chocolate chips or chopped nuts or dried fruit (Optional mix-ins to customize your cookies.)

Preparation

  1. Preheat the oven to 350°F (175°C). Line a baking sheet with parchment paper or lightly grease it.
  2. In a bowl, mash the very ripe bananas with a fork until smooth.
  3. Add the rolled oats to the mashed bananas and stir until mixed.
  4. If desired, add a small pinch of salt, cinnamon, and/or vanilla for more flavor.
  5. Stir in optional mix-ins like chocolate chips, chopped nuts, or dried fruit.
  6. Drop spoonfuls of the dough onto the baking sheet and flatten each slightly with the back of the spoon.

Baking

  1. Bake for 10 to 15 minutes, until the edges are light golden.
  2. Let the cookies cool on the sheet for a few minutes, then move to a rack to cool fully.

Use very ripe bananas for best sweetness and texture. Measure oats by cup. If the dough is too wet, add more oats one tablespoon at a time. For flatter cookies, press gently before baking. Watch the bake time as ovens vary.

Dessert, Snack
American
Banana Oatmeal Cookies, easy dessert, Healthy Cookies, Quick Snacks, Ripe Bananas

Air Fryer Chicken Breasts

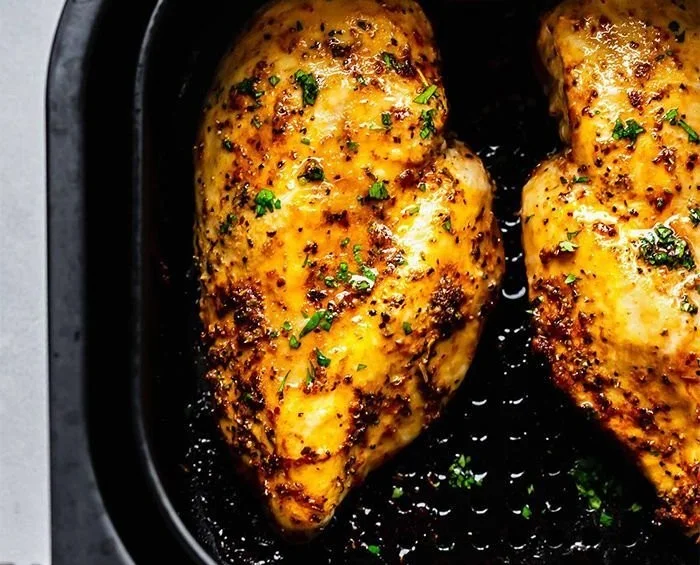
Delicious air fryer chicken breasts garnished with herbs and spices

Air fryer chicken breasts are a simple, fast way to get juicy and tender chicken with a bit of crisp on the outside. This recipe makes chicken that stays moist inside and browns nicely on the outside, so it works great for family dinners or meal prep. The featured recipe for Air Fryer Chicken Breasts is a crowd-pleaser, easy to make, and full of simple flavor from salt, pepper, garlic powder, and a little oil. If you like quick air fryer meals, you can also try an air fryer grilled cheese hot dogs for a fun side idea. You will smile when you taste how tender and juicy the chicken turns out, and you might make it on repeat.

how to prepare Air Fryer Chicken Breasts

  1. Pat 2 boneless skinless chicken breasts dry with paper towel. Trim fat if needed.
  2. Pound each breast to even thickness, about 1/2 inch to 3/4 inch, so they cook evenly.
  3. Brush or rub each breast with 1 to 2 teaspoons of olive oil.
  4. Season both sides with 1/2 teaspoon salt, 1/4 teaspoon black pepper, 1/2 teaspoon garlic powder, and 1/2 teaspoon paprika, or use your favorite spice mix.
  5. Preheat the air fryer to 380 F for 3 minutes.
  6. Place the chicken breasts in the air fryer basket in a single layer. Do not crowd.
  7. Cook at 380 F for 10 to 12 minutes, flipping once at the halfway point. Use a meat thermometer, chicken is done at 165 F internal.
  8. Let the chicken rest 3 to 5 minutes before slicing. This keeps the meat juicy.

Air Fryer Chicken Breasts

Why You’ll Love Air Fryer Chicken Breasts

  • Fast and easy, ready in about 20 minutes total time.
  • Tender and juicy inside, with a light crisp outside from the air fryer.
  • Low fuss, only a few pantry spices and a little oil.
  • Versatile, use for salads, sandwiches, bowls, or as a main dish.
  • Healthier than deep frying, with less oil and less mess.

tips for success

  • Pound the chicken to the same thickness so it cooks evenly.
  • Do not skip the rest time, it keeps juices inside.
  • Use a meat thermometer to be sure you hit 165 F, avoid overcooking.
  • Don’t overcrowd the basket, cook in batches if needed for even air flow.
  • If your chicken is thin, reduce time to avoid drying out, check at 8 minutes.

Serving Suggestions

  • Slice and serve over a green salad with a lemon vinaigrette for a light meal.
  • Make sandwiches with lettuce, tomato, and mayo on toasted bread.
  • Chop and add to rice bowls with roasted veggies and a drizzle of sauce.
  • Serve with steamed broccoli and roasted potatoes for a family plate.
  • Use leftovers in wraps, soups, or pasta for quick lunches.

Air Fryer Chicken Breasts

FAQs

Q: How long do I cook chicken breasts in the air fryer?

A: For average size breasts, cook at 380 F for 10 to 12 minutes, flipping once. Use a thermometer for best results.

Q: Can I cook frozen chicken breasts in the air fryer?

A: Yes, but add time. Cook at 360 F for about 18 to 22 minutes, flip halfway, and check the internal temperature.

Q: How do I keep chicken breasts from drying out?

A: Pound to even thickness, do not overcook, use a little oil, and let the chicken rest for a few minutes after cooking.

Q: Can I use bone-in chicken in the air fryer?

A: You can, but bone-in pieces need longer cooking time and slightly lower temperature, check often and use a thermometer.

Q: What spices work well with air fryer chicken?

A: Simple salt, pepper, garlic powder, paprika work well. You can also try Italian seasoning, lemon pepper, or paprika and cumin for more flavor.

Conclusion

Try the step by step tips and simple spice mix in this recipe, or compare methods with the Well Plated air fryer chicken breast recipe to see small ways to change time and heat. For another clear guide and ideas for juicy, tender results, read the cooking notes at Plating and Pairings air fryer chicken breast recipe.

Air Fryer Chicken Breasts

Quick, juicy, and tender chicken breasts with a crispy outside, perfect for dinner or meal prep.

Main Ingredients

  • 2 pieces boneless skinless chicken breasts (Pound to even thickness)
  • 1-2 teaspoons olive oil (Brush or rub on chicken breasts)
  • 1/2 teaspoon salt (Season both sides)
  • 1/4 teaspoon black pepper (Season both sides)
  • 1/2 teaspoon garlic powder (Season both sides)
  • 1/2 teaspoon paprika (Season both sides)

Preparation

  1. Pat the chicken breasts dry with paper towel and trim any fat if needed.
  2. Pound each breast to even thickness, about 1/2 inch to 3/4 inch.
  3. Brush or rub each breast with olive oil.
  4. Season both sides with salt, pepper, garlic powder, and paprika.

Cooking

  1. Preheat the air fryer to 380°F for 3 minutes.
  2. Place the chicken breasts in the air fryer basket in a single layer.
  3. Cook at 380°F for 10 to 12 minutes, flipping once halfway through.
  4. Use a meat thermometer to ensure the internal temperature reaches 165°F.
  5. Let the chicken rest for 3 to 5 minutes before slicing.

Pound the chicken to the same thickness for even cooking. Do not skip resting time. Avoid overcrowding the basket. If using thin chicken, check for doneness at 8 minutes.

Dinner, Main Course
American
Air Fryer Chicken, Chicken Breasts, Easy Recipes, Healthy Chicken, Quick Dinner

Air Fryer Cauliflower

Crispy air fryer cauliflower served in a bowl with spices

I love how air fryer cauliflower turns simple veg into a snack or side that everyone asks for again, it gets crispy outside and tender inside with little oil, and it feels a bit like a treat while still being healthy. This Air Fryer Cauliflower recipe is a crowd-pleaser, full of bright flavor and a crunch that makes veggies fun. It is easy to make, works for busy weeknights, and is great for parties, Friends and family will reach for seconds, and you might hide a few pieces for yourself, because yes, you will be excited to make it.

how to prepare Air Fryer Cauliflower

  1. Wash and cut one head of cauliflower into bite sized florets.
  2. In a bowl, toss florets with 1 to 2 tablespoons of olive oil, 1 teaspoon salt, 1/2 teaspoon black pepper, and 1 teaspoon garlic powder, mix until evenly coated.
  3. Preheat the air fryer to 400°F, about 3 to 5 minutes.
  4. Place cauliflower in the air fryer basket in a single layer, do not crowd, you may need two batches.
  5. Air fry at 400°F for 12 to 15 minutes, shake the basket gently at the 6 and 10 minute marks, cook until edges are golden and crisp.
  6. For extra flavor, toss with a squeeze of lemon juice and a sprinkle of chopped parsley before serving.

Air Fryer Cauliflower

Why You’ll Love Air Fryer Cauliflower

  • It cooks fast, you get a crisp finish in about 15 minutes.
  • It uses little oil, so it feels light but still tastes great.
  • It is flexible, you can change spices to make it spicy, smoky, or herby.
  • Kids and adults both enjoy the crisp texture and savory taste.

In case you want another fun air fryer snack idea while you cook, try this simple twist on air fryer grilled cheese hot dogs, it is another easy and fun treat.

tips for success

  • Cut florets to similar sizes so they cook evenly.
  • Do not overcrowd the basket, leave space so air moves and crisps the cauliflower.
  • Shake the basket once or twice while cooking for even browning.
  • If you like it extra crunchy, add 2 to 3 minutes to the cook time, watch closely to avoid burning.
  • Use a light spray of oil if you want a crisp finish but want to limit oil.

Serving Suggestions

  • Serve with a simple yogurt dip, ranch, or spicy mayo.
  • Add to grain bowls with rice, roasted chickpeas, and greens.
  • Toss with parmesan and herbs for a savory side.
  • Use in tacos with slaw and hot sauce for a meatless taco night.

Air Fryer Cauliflower

FAQs

Q: Can I use frozen cauliflower in the air fryer?
A: Yes, but thaw and pat dry first, then toss with oil and spices, cook a bit longer until crisp.

Q: What temperature is best for air frying cauliflower?
A: 400°F gives a good balance of crisp outside and tender inside.

Q: How do I keep the cauliflower from getting soggy?
A: Do not crowd the basket, dry the florets well, and use a little oil so the air fryer can crisp the surface.

Q: Can I add breadcrumbs for extra crunch?
A: Yes, toss florets in a light coating of seasoned breadcrumbs or panko after the oil step for extra crisp texture.

Conclusion

This Air Fryer Cauliflower is an easy, tasty way to make a healthy snack or side, try different spices to find your favorite flavor. For more crispy air fryer cauliflower tips and a slightly different seasoning method, see this Crispy Air Fryer Cauliflower Recipe – Little Sunny Kitchen. If you want another top rated take on air fryer cauliflower with bold seasoning ideas, check out Best Damn Air Fryer Cauliflower – RecipeTeacher.

Air Fryer Cauliflower

This Air Fryer Cauliflower recipe transforms simple vegetables into a crispy snack or side dish that everyone loves, full of flavor and easy to prepare.

Main ingredients

  • 1 head cauliflower (Cut into bite-sized florets)
  • 1-2 tablespoons olive oil (For tossing florets)
  • 1 teaspoon salt
  • 1/2 teaspoon black pepper
  • 1 teaspoon garlic powder

Preparation

  1. Wash and cut one head of cauliflower into bite-sized florets.
  2. In a bowl, toss florets with olive oil, salt, black pepper, and garlic powder until evenly coated.

Cooking

  1. Preheat the air fryer to 400°F for about 3 to 5 minutes.
  2. Place cauliflower in the air fryer basket in a single layer, avoiding crowding. You may need to cook in two batches.
  3. Air fry at 400°F for 12 to 15 minutes, shaking the basket gently at the 6 and 10-minute marks. Cook until edges are golden and crisp.
  4. For extra flavor, toss with a squeeze of lemon juice and a sprinkle of chopped parsley before serving.

Cut florets to similar sizes for even cooking. Use a light spray of oil for a crisp finish while limiting oil usage. If you prefer extra crunch, add 2-3 minutes to the cook time.

Side, Snack
American, Healthy
Air Fryer Cauliflower, Crispy Cauliflower, Easy Recipes, Healthy Snack, Vegetarian Side Dish

Air Fryer Honey Butter Garlic Chicken Tenders Recipe

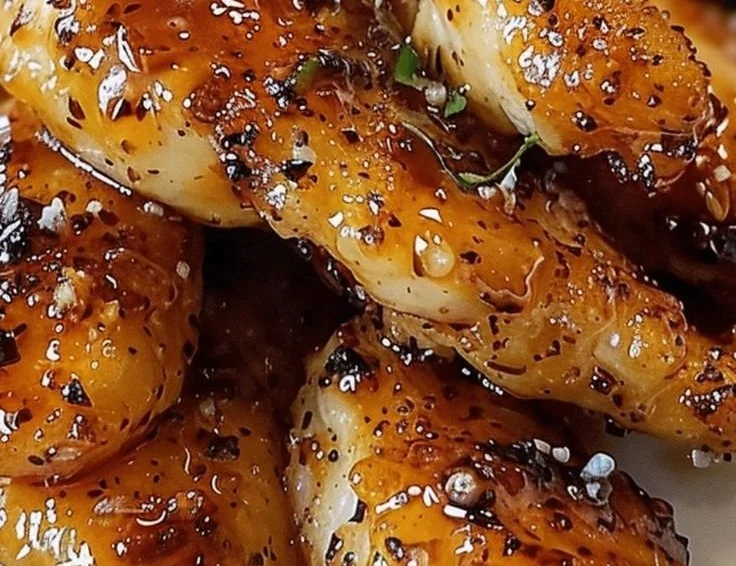
Air Fryer Honey Butter Garlic Chicken Tenders served with dipping sauce

I love simple recipes that taste like you spent hours cooking, but take just minutes to make, and these air fryer honey butter garlic chicken tenders fit that idea. They are crispy on the outside, soft inside, and have a sweet, garlicky sauce that everyone enjoys. This version is great for weeknights, snacks, or when you want a kid friendly meal that still feels special. If you like sweet and spicy chicken, you might also enjoy easy hot honey chicken thighs, they share the same bright sweet flavor that kids and adults love. Get ready to make a crowd pleaser that comes together fast, and tastes like a treat.

how to prepare Air Fryer Honey Butter Garlic Chicken Tenders

Ingredients

  • 1 pound chicken tenders, trimmed
  • 1 cup plain breadcrumbs or panko
  • 1/2 cup all purpose flour
  • 1 teaspoon salt
  • 1/2 teaspoon black pepper
  • 1 teaspoon garlic powder
  • 2 large eggs, beaten
  • 2 tablespoons oil, for coating
  • 3 tablespoons butter
  • 3 tablespoons honey
  • 2 cloves garlic, minced
  • 1 teaspoon soy sauce or a pinch of salt, optional
  • Lemon wedge, for serving, optional

Directions

  1. Pat the chicken tenders dry with paper towel, this helps them get crispy.
  2. Set up three bowls, one with flour mixed with a pinch of salt and pepper, one with beaten eggs, and one with breadcrumbs mixed with garlic powder.
  3. Dredge each tender in flour, then egg, then breadcrumbs. Press crumbs so they stick.
  4. Lightly brush or spray the tenders with oil, this helps them brown in the air fryer.
  5. Preheat air fryer to 400 F, if your model needs preheating.
  6. Place tenders in a single layer in the air fryer basket, do not crowd. Cook 8 to 10 minutes, turn once at about 4 to 5 minutes, until golden and cooked through, internal temp 165 F.
  7. While tenders cook, make the honey butter garlic sauce. In a small pan, melt butter over low heat. Add minced garlic and cook 30 seconds, do not let it brown. Stir in honey and soy sauce, warm until combined.
  8. Toss cooked tenders in the sauce, or brush sauce over them on a serving plate. Squeeze lemon over top if you like a bright finish.

Air Fryer Honey Butter Garlic Chicken Tenders Recipe - Recipes by Janet

Why You’ll Love Air Fryer Honey Butter Garlic Chicken Tenders

  • Quick, these chicken tenders cook fast in the air fryer, perfect for busy nights.
  • Crispy outside, tender inside, thanks to the breading and hot air cooking.
  • Sweet and savory, the honey butter garlic sauce adds flavor that kids and adults both like.
  • Less oil, air frying uses little oil so the tenders feel lighter than deep fried.
  • Versatile, you can serve them as a snack, main dish, or party finger food.

tips for success

  • Dry the chicken well before breading, this helps the crumbs stick and get crispy.
  • Do not overcrowd the air fryer, cook in batches if needed for even crisp.
  • Use panko for extra crunch if you like a very crispy coating.
  • Warm the sauce gently, do not boil, the butter and honey mix best at low heat.
  • Check internal temperature, chicken is safe at 165 F.
  • If you want extra sticky sauce, brush a second coat on right after cooking.

Serving Suggestions

  • Serve with fries, a simple salad, or steamed veggies for a full meal.
  • Offer ranch, ketchup, or extra honey garlic sauce for dipping.
  • Make sliders by placing tenders in small buns with slaw.
  • Add a side of roasted broccoli or carrots for a kid friendly plate.
  • Pair with rice and a light cucumber salad for a fresh dinner.

Air Fryer Honey Butter Garlic Chicken Tenders Recipe - Recipes by Janet

FAQs

Q: Can I use frozen chicken tenders?

A: Yes, you can, but cook time will be longer. Air fry frozen tenders at 400 F for about 12 to 15 minutes, flip once, check they reach 165 F inside.

Q: How do I make this gluten free?

A: Use gluten free flour and gluten free breadcrumbs or crushed cornflakes. The rest of the recipe stays the same.

Q: Can I bake these instead of using an air fryer?

A: Yes, bake on a rack at 425 F for 12 to 18 minutes, flip once, until golden and cooked through.

Q: Can I make the sauce less sweet?

A: Yes, reduce the honey or add a splash of lemon juice to balance the sweetness.

Q: Can I use chicken thighs instead of tenders?

A: You can use thinly sliced thigh meat, cut to similar size so cooking time is even.

Conclusion

If you want a simple, crispy, and sweet garlic chicken that cooks fast, this air fryer honey butter garlic chicken tenders recipe is a great choice. For another easy air fryer chicken idea, see this helpful guide on Air Fryer Chicken Tenders (Easy, No Breading) – Wholesome Yum, it shows a no breading method you may like. If you want a classic breaded style or different take on chicken fingers, check this tried and true recipe for Breaded Chicken Fingers Recipe – Allrecipes, it has good tips for breading and frying.

Air Fryer Honey Butter Garlic Chicken Tenders

These crispy and tender air fryer chicken tenders are coated in a sweet and garlicky honey butter sauce, perfect for a quick weeknight meal or kid-friendly snack.

Chicken Tenders

  • 1 pound chicken tenders, trimmed

Coating

  • 1 cup plain breadcrumbs or panko (Panko yields a crispier coating.)
  • 1/2 cup all purpose flour (Can use gluten-free flour if needed.)
  • 1 teaspoon salt
  • 1/2 teaspoon black pepper
  • 1 teaspoon garlic powder
  • 2 large eggs, beaten
  • 2 tablespoons oil, for coating (For browning in the air fryer.)

Honey Butter Garlic Sauce

  • 3 tablespoons butter (Melted over low heat.)
  • 3 tablespoons honey
  • 2 cloves garlic, minced
  • 1 teaspoon soy sauce or a pinch of salt, optional (For added depth of flavor.)

Serving

  • 1 wedge lemon, for serving, optional (Adds brightness to the dish.)

Preparation

  1. Pat the chicken tenders dry with paper towel.
  2. Set up three bowls: one with flour mixed with salt and pepper, another with beaten eggs, and the last with breadcrumbs mixed with garlic powder.
  3. Dredge each tender in flour, then egg, then breadcrumbs, pressing crumbs to ensure they stick.
  4. Lightly brush or spray tenders with oil.

Cooking

  1. Preheat air fryer to 400°F if required.
  2. Place tenders in a single layer in the air fryer basket and cook for 8 to 10 minutes, turning halfway through, until golden and cooked through (internal temp 165°F).

Sauce Preparation

  1. While tenders are cooking, melt butter in a small pan over low heat.
  2. Add minced garlic and cook for 30 seconds without browning.
  3. Stir in honey and soy sauce, warming until combined.

Serving

  1. Toss cooked tenders in the sauce or brush sauce over them on a serving plate.
  2. Squeeze lemon over top if desired.

For extra crunch, use panko breadcrumbs. Check chicken’s internal temperature to ensure it’s 165°F for safety. If you want extra sticky sauce, brush a second coat right after cooking.

Main Course, Snack
American
Air Fryer Recipes, chicken tenders, easy chicken recipes, family friendly meals, Quick Meals