Olive Cheese Bread

Nothing brings people together quite like the warm and inviting scent of freshly baked bread. Olive Cheese Bread is one such delight that truly shines at gatherings. This recipe combines the savory flavors of olives with the rich, creamy taste of cheese, resulting in a luscious loaf that is both easy to make and absolutely delicious. Your family and friends will rave about this tasty treat, making it a must-try for your next meal. Who wouldn’t want to whip up something so delectable?

How to prepare Olive Cheese Bread

To start, you will need the following ingredients for the Olive Cheese Bread:

  • 2 cups all-purpose flour
  • 1 tablespoon baking powder
  • 1 teaspoon salt
  • 1 cup shredded cheese (like cheddar or mozzarella)
  • 1 cup chopped olives (black or green)
  • 1 cup milk
  • 1/4 cup olive oil
  • 2 eggs

Directions

  1. Preheat your oven to 350°F (175°C). Grease a loaf pan.
  2. In a large bowl, mix together the flour, baking powder, and salt.
  3. Stir in the cheese and olives until well combined.
  4. In another bowl, whisk together the milk, olive oil, and eggs.
  5. Pour the wet ingredients into the dry mixture, stirring gently until just combined.
  6. Transfer the batter to the prepared loaf pan.
  7. Bake for 50-60 minutes or until a toothpick comes out clean.
  8. Allow to cool for a few minutes before serving.

Olive Cheese Bread

Why You’ll Love Olive Cheese Bread

This Olive Cheese Bread is packed with flavor, offering a delightful combination of savory olives and gooey cheese. It’s perfect as a snack, side dish, or even as a unique breakfast option. The light and fluffy texture makes it a hit with both kids and adults. If you’re looking for something that pairs wonderfully with soups or salads, this will not disappoint. For more bread inspiration, check out this simple recipe for 2-ingredient cottage cheese bread.

Tips for success

To ensure your Olive Cheese Bread turns out perfectly, make sure to measure your ingredients accurately. Fresh ingredients will make a big difference, especially with the olives and cheese. Additionally, letting the bread cool completely before slicing helps retain moisture and flavor.

Olive Cheese Bread

Serving Suggestions

Serve your Olive Cheese Bread warm, alongside a bowl of soup or a crisp salad. It also makes for a great toast base for various toppings like bruschetta or hummus. Feel free to get creative with the cheese and olive varieties, inviting exciting flavors to your table.

FAQs

Can I use different types of cheese?

Absolutely! Feel free to experiment with different cheeses like feta or gouda for varied flavors.

How should I store leftover bread?

Wrap the bread in plastic wrap or place it in an airtight container, and it will last for about 3-4 days at room temperature.

Can I freeze Olive Cheese Bread?

Yes, this bread freezes well! Wrap it tightly in foil or plastic wrap before placing it in a freezer bag. Just thaw and reheat when you’re ready to enjoy it again.

Olive Cheese Bread

A delightful and savory bread combining olives and cheese, perfect for gatherings and pairings with soups or salads.

Dry Ingredients

  • 2 cups all-purpose flour (For the base of the bread.)
  • 1 tablespoon baking powder (Leavening agent.)
  • 1 teaspoon salt (Enhances flavor.)

Wet Ingredients

  • 1 cup milk (Can use any type of milk.)
  • 1/4 cup olive oil (For richness.)
  • 2 large eggs (Binds the ingredients.)

Fillings

  • 1 cup shredded cheese (like cheddar or mozzarella) (Cheese of choice.)
  • 1 cup chopped olives (black or green) (Add variety according to preference.)

Preparation

  1. Preheat your oven to 350°F (175°C). Grease a loaf pan.
  2. In a large bowl, mix together the flour, baking powder, and salt.
  3. Stir in the cheese and olives until well combined.
  4. In another bowl, whisk together the milk, olive oil, and eggs.
  5. Pour the wet ingredients into the dry mixture, stirring gently until just combined.
  6. Transfer the batter to the prepared loaf pan.

Baking

  1. Bake for 50-60 minutes or until a toothpick comes out clean.
  2. Allow to cool for a few minutes before serving.

Tips for success: Ensure to measure ingredients accurately and allow the bread to cool completely before slicing to retain moisture and flavor.

Breakfast, Side Dish, Snack
American
Homemade Bread, Olive Cheese Bread, Quick Bread, Savory Bread

Mango Passionfruit Tart: 5 Sweet Reasons to Indulge

Get ready to indulge in the blissful flavors of a Mango Passionfruit Tart, a dessert that feels like a tropical escape in every bite. This tart is a real crowd-pleaser, combining the sweet, juicy taste of fresh mangoes with the tangy zest of passionfruit. It’s the perfect balance of sweetness and acidity, making it a show-stopper at any gathering. Whether you’re sharing it with friends or enjoying it solo, this treat promises to bring a smile to your face. So, let’s dive into how to whip up this delightful dessert!

How to prepare Mango Passionfruit Tart

To make this delicious Mango Passionfruit Tart, you will need the following ingredients:

  • 1 pre-made tart shell
  • 2 ripe mangoes, diced
  • 4 passionfruits, pulp scooped out
  • 1 cup heavy cream
  • 1/2 cup sugar
  • 2 tablespoons cornstarch
  • Fresh mint for garnish
  1. Preheat your oven to 350°F (175°C).
  2. In a bowl, combine the mangoes and passionfruit pulp with sugar and let it sit for 10 minutes.
  3. In a separate bowl, whip the heavy cream until it forms soft peaks.
  4. Gently fold the whipped cream into the mango and passionfruit mixture.
  5. Pour the mixture into your tart shell and bake for 20 minutes. Let it cool before serving.

Mango Passionfruit Tart: 5 Sweet Reasons to Indulge

Why You’ll Love Mango Passionfruit Tart

So why will you fall in love with this tart? Firstly, the vibrant colors make it a visual treat that draws everyone in. The combination of cultures in the mango and passionfruit flavors creates an exotic taste that transports you straight to the tropics. Plus, the creamy texture and hint of tartness make it an unforgettable dessert. For those seeking a bit of indulgence, learning to make this tart can also unlock a whole new world of dessert possibilities. If you’re interested in even more enticing dessert recipes, check out the homemade pop tarts for another indulgent option!

Tips for Success

  1. Choose ripe mangoes for maximum sweetness. They should slightly give when you gently squeeze them.
  2. Ensure your cream is cold before whipping, as this helps it whip better.
  3. Don’t hesitate to add more passionfruit pulp if you enjoy a more tangy flavor.

Mango Passionfruit Tart: 5 Sweet Reasons to Indulge

Serving Suggestions

This tart is perfect as a centerpiece for any dessert table. You can also serve it chilled with a sprig of mint on top for that extra pop. Pair it with a scoop of vanilla ice cream or serve slices alongside fresh fruit for a refreshing twist.

FAQs

Can I make this tart ahead of time?

Yes, you can prepare the tart a day in advance. Just keep it covered in the refrigerator until ready to serve.

What can I use instead of passionfruit?

If you can’t find passionfruit, you might consider using orange or lemon juice as an alternative, though the flavor will be different.

How do I store any leftovers?

Store any leftovers in an airtight container in the fridge for up to three days for the best taste and texture.

Mango Passionfruit Tart

A delightful and tropical dessert that combines fresh mangoes and tangy passionfruit in a creamy tart. Perfect for gatherings or a sweet treat at home.

For the tart

  • 1 pre-made tart shell 1 pre-made tart shell (Use a store-bought tart shell for convenience.)

Filling Ingredients

  • 2 ripe 2 ripe mangoes, diced (Choose mangoes that slightly give when squeezed.)
  • 4 pieces 4 passionfruits, pulp scooped out (Add more pulp for extra tanginess if desired.)
  • 1 cup 1 cup heavy cream (Ensure cream is cold before whipping.)
  • 1/2 cup 1/2 cup sugar (Adjust sweetness to taste.)
  • 2 tablespoons 2 tablespoons cornstarch (Helps to set the filling.)
  • to taste Fresh mint for garnish (Serve with mint for added freshness.)

Preparation

  1. Preheat your oven to 350°F (175°C).
  2. In a bowl, combine the mangoes and passionfruit pulp with sugar and let it sit for 10 minutes.
  3. In a separate bowl, whip the heavy cream until it forms soft peaks.
  4. Gently fold the whipped cream into the mango and passionfruit mixture.
  5. Pour the mixture into the tart shell and bake for 20 minutes.
  6. Let it cool before serving.

Store any leftovers in an airtight container in the fridge for up to three days for the best taste and texture. This tart can be made a day in advance.

Dessert
American, Tropical
Creamy Tart, Fruit Dessert, Mango Tart, Passionfruit Dessert, Tropical Tart

Dollywood Cinnamon Bread

Imagine the smell of warm cinnamon wafting through your kitchen, drawing everyone in for a comforting treat. Dollywood Cinnamon Bread is one of those delightful recipes that brings families together, filling hearts and homes with warmth. This soft, sweet bread, filled with rich cinnamon and topped with a sugary glaze, is not just a treat, it’s a celebration. Whether you enjoy it for breakfast, as a snack, or even dessert, this recipe is sure to impress friends and family alike. Get ready to roll up your sleeves and bake something that’ll become a star on your table!

How to prepare Dollywood Cinnamon Bread

Making Dollywood Cinnamon Bread is simple and fun. Here’s how you can whip up this delicious loaf at home:

  1. In a bowl, mix warm milk, sugar, and yeast. Let it sit to foam.
  2. In another bowl, combine flour and salt.
  3. Once the yeast is frothy, add it to the flour mix along with melted butter and eggs. Knead until smooth.
  4. Let the dough rise until it doubles in size.
  5. Prepare the filling by mixing sugar, cinnamon, and butter.
  6. Roll out the dough, spread the filling, and shape it into a loaf.
  7. Bake until golden brown and a toothpick comes out clean.

Dollywood Inspired Cinnamon Bread

Why You’ll Love Dollywood Cinnamon Bread

There are many reasons to love Dollywood Cinnamon Bread. Its soft texture and sweet, gooey cinnamon filling melt in your mouth. The glaze adds a perfect finishing touch that makes every bite delightful. It’s perfect for breakfast with a cup of coffee, a holiday treat, or just a way to enjoy a cozy afternoon. Plus, the simple steps to make this bread make it easy for anyone to try, whether you’re a baking novice or a pro.

Tips for success

  1. Proof the yeast: Ensure the milk isn’t too hot, or it may kill the yeast. Warm is best.
  2. Knead well: Kneading helps develop gluten, giving the bread its wonderful texture.
  3. Roll evenly: Roll the dough evenly to ensure consistent baking and filling throughout.
  4. Let the dough rise: Be patient, letting the dough rise properly results in a fluffier bread.

Dollywood Inspired Cinnamon Bread

Serving Suggestions

Dollywood Cinnamon Bread is fantastic on its own, but you can also serve it with a few variations. Try pairing it with a scoop of vanilla ice cream for dessert, or enjoy it with a cup of hot cocoa on a chilly day. You can also serve it warm with butter or cream cheese spread for a scrumptious breakfast treat.

FAQs

1. Can I freeze the cinnamon bread?

Yes, you can freeze it. Wrap the bread tightly in plastic wrap and then in aluminum foil. Thaw and warm it in the oven before serving.

2. How can I store leftover bread?

Store it in an airtight container at room temperature for up to three days. You can also refrigerate it for a longer shelf life.

3. What if I don’t have all the ingredients?

You can substitute similar ingredients, like using almond milk instead of dairy or brown sugar instead of white sugar, but it may slightly change the taste.

Now that you have all the details, why not give this delightful Dollywood Cinnamon Bread a try? You’re in for a tasty adventure that everyone will love!

Dollywood Cinnamon Bread

This soft and sweet cinnamon bread is filled with rich cinnamon and topped with a sugary glaze, perfect for breakfast, snacks, or dessert.

For the Dough

  • 1 cup warm milk (Ensure the milk is warm but not hot for proofing the yeast.)
  • 2 tablespoons sugar
  • 2 teaspoons active dry yeast (Make sure to proof the yeast.)
  • 4 cups all-purpose flour
  • 1 teaspoon salt
  • 1/4 cup melted butter
  • 2 large eggs

For the Filling

  • 1/2 cup sugar
  • 2 tablespoons ground cinnamon
  • 1/4 cup softened butter (For spreading on the dough.)

Preparation

  1. In a bowl, mix warm milk, sugar, and yeast. Let it sit to foam.
  2. In another bowl, combine flour and salt.
  3. Once the yeast is frothy, add it to the flour mix along with melted butter and eggs. Knead until smooth.
  4. Let the dough rise until it doubles in size.
  5. Prepare the filling by mixing sugar, cinnamon, and softened butter.
  6. Roll out the dough, spread the filling, and shape it into a loaf.

Baking

  1. Bake until golden brown and a toothpick comes out clean.

Tips: Ensure the milk isn’t too hot to avoid killing the yeast. Knead well for a great texture, and roll the dough evenly for consistent baking.

Breakfast, Dessert, Snack
American
Baking, Cinnamon Bread, Dollywood Inspired, Sweet Bread

Pumpkin Brownies

When the leaves start to change color and a cool breeze fills the air, it’s the perfect time to indulge in cozy fall treats. Pumpkin brownies are a delightful way to bring the warm flavors of autumn into your kitchen. These brownies are not only fudgy and rich, but they also boast a lovely pumpkin spice flavor that makes them truly special. Perfect for gatherings or a sweet afternoon treat, these brownies are sure to be a crowd-pleaser. So, roll up your sleeves and get ready for some mouthwatering pumpkin goodness!

How to prepare Pumpkin Brownies

Start by gathering your ingredients. You will need pumpkin puree, cocoa powder, flour, sugar, eggs, and a few spices to add that warm flavor. Preheat your oven and mix your wet and dry ingredients separately. Combine them until smooth, then pour the batter into a prepared baking dish. Bake until set, and allow them to cool before cutting into squares. These simple steps lead to a delicious dessert that you’ll want to make time and again.

Pumpkin Brownies

Why You’ll Love Pumpkin Brownies

These pumpkin brownies are perfect for anyone who loves the combination of chocolate and pumpkin. They are incredibly moist and have an irresistible taste that makes each bite delightful. With their rich, fudgy texture and just the right hint of spice, everyone will be reaching for seconds. Plus, they are easy to make and give an excellent twist to traditional brownie recipes. If you enjoy variations like these, you might also want to try banana bread brownies for another delicious treat.

Tips for success

To ensure your pumpkin brownies turn out perfectly, here are some handy tips. First, make sure to use fresh pumpkin puree for the best taste. If using canned, opt for pure pumpkin instead of pumpkin pie filling. Mixing your dry ingredients separately helps avoid lumps in your batter. Lastly, keep an eye on the baking time; you want them to be just set but not overbaked to maintain their fudginess.

Pumpkin Brownies

Serving Suggestions

These pumpkin brownies are delightful on their own, but you can also serve them with a scoop of vanilla ice cream or a dollop of whipped cream. Drizzle some caramel sauce on top for an extra sweet touch, or sprinkle some chopped nuts for a bit of crunch. Pairing them with a warm drink like cider or a latte could make for an amazing treat, making your fall season even more enjoyable.

FAQs

1. Can I freeze pumpkin brownies?

Yes, you can freeze them! Just wrap them tightly in plastic wrap and then store them in an airtight container. They should stay fresh for about three months.

2. How do I know when they are done baking?

Insert a toothpick in the center; if it comes out with a few moist crumbs, they are done. If it comes out clean, you may have overbaked them.

3. Can I add extra ingredients?

Absolutely! Feel free to mix in chocolate chips, nuts, or even white chocolate for a delicious twist.

Pumpkin Brownies

Indulge in these fudgy and rich pumpkin brownies that bring the warm flavors of autumn into your kitchen. Perfect for gatherings or an afternoon treat.

Main Ingredients

  • 1 cup pumpkin puree (Use fresh pumpkin puree for the best taste.)
  • 1/2 cup cocoa powder
  • 1 cup all-purpose flour
  • 1 cup sugar
  • 2 large eggs
  • 1 teaspoon pumpkin spice (Or a mix of cinnamon, nutmeg, and ginger.)

Preparation

  1. Gather all your ingredients.
  2. Preheat the oven to 350°F (175°C).
  3. In a bowl, mix the wet and dry ingredients separately.
  4. Combine these mixtures until smooth.
  5. Pour the batter into a prepared baking dish.

Baking

  1. Bake in the preheated oven for about 30 minutes, or until set.
  2. Allow the brownies to cool before cutting into squares.

These brownies are delicious on their own, but can also be served with vanilla ice cream, whipped cream, caramel sauce, or chopped nuts. They pair well with warm drinks like cider or a latte.

Dessert
American
Baking, Chocolate Pumpkin Treats, cozy treats, Fall Desserts, Pumpkin Brownies

The Best Southern Peach Cobbler Recipe

There’s nothing quite like the warm, comforting flavors of Southern peach cobbler. This delightful dessert isn’t just a recipe; it’s a memory, a celebration, and a crowd-pleaser all rolled into one. The juicy peaches, wrapped in a buttery, golden crust, offer a perfect balance of sweetness and satisfaction, making it impossible to resist. Whether you’re serving it at a family gathering or enjoying a slice with a scoop of vanilla ice cream, this peach cobbler recipe will have everyone asking for seconds.

How to prepare The Best Southern Peach Cobbler

To create the perfect Southern peach cobbler, you will need the following ingredients:

  • Fresh peaches (about 6-8, peeled and sliced)
  • Sugar (1 cup, adjust based on the sweetness of peaches)
  • Brown sugar (optional for added depth)
  • Cornstarch (for thickening, about 2 tablespoons)
  • Lemon juice (to brighten the flavors)
  • Cinnamon (a sprinkle for warmth)
  • Biscuit dough (store-bought or homemade)
  • Butter (to enhance the richness)

First, preheat your oven to 350°F (175°C). In a large mixing bowl, toss the sliced peaches with sugar, cornstarch, lemon juice, and cinnamon. Allow it to sit while you prepare your crust. Roll out your biscuit dough to fit the baking dish. Pour the peach mixture into the dish and top with the dough. Bake for about 30-40 minutes, until the top is golden and bubbly.

The Best Southern Peach Cobbler Recipe

Why You’ll Love The Best Southern Peach Cobbler

This peach cobbler stands out for several reasons. First, the simplicity of the ingredients allows the natural sweetness of the peaches to shine through. Additionally, it’s versatile; you can easily modify it by adding berries or other fruits. Moreover, this recipe offers a wonderful homemade experience, providing a delightful aroma that fills your kitchen, inviting family and friends to gather around. For a unique twist, you could even explore other dessert options like this peach cobbler cheesecake recipe.

Tips for success

To achieve the best results, here are a few tips to keep in mind:

  1. Use ripe peaches: The flavor is best when the peaches are in season and ripe.
  2. Don’t skip the lemon juice: A splash of lemon juice enhances the flavor and balances the sweetness.
  3. Keep an eye on baking time: Ovens can vary, so check the cobbler a few minutes before the suggested baking time to avoid overcooking.
  4. Let it cool: Allow the cobbler to cool slightly before serving, as this helps the filling to set.

The Best Southern Peach Cobbler Recipe

Serving Suggestions

Peach cobbler is delicious on its own, but you can elevate the experience with a few simple additions. Consider serving it warm with a scoop of vanilla ice cream or a dollop of whipped cream. You could also sprinkle a bit of cinnamon on top for extra flavor or pair it with a cup of coffee for a delightful afternoon treat.

FAQs

Can I use frozen peaches for this recipe?

Yes, you can use frozen peaches, but make sure to thaw and drain excess liquid before mixing them with the sugar and cornstarch.

How do I store leftover cobbler?

Store any leftovers in an airtight container in the refrigerator for up to 3 days. Reheat in the microwave or oven before serving.

Can I make this peach cobbler ahead of time?

Absolutely! You can prepare the peach filling in advance and assemble the cobbler just before baking. It’s a great option for gatherings or dinner parties!

Southern Peach Cobbler

A warm and comforting dessert featuring juicy peaches wrapped in a buttery crust, perfect for family gatherings and celebrations.

Peach Filling

  • 6-8 pieces Fresh peaches, peeled and sliced (Use ripe peaches for the best flavor.)
  • 1 cup Sugar (Adjust based on the sweetness of peaches.)
  • 2 tablespoons Cornstarch (For thickening the peach filling.)
  • 1 tablespoon Lemon juice (Enhances the flavor.)
  • 1 pinch Cinnamon (Adds warmth.)

Crust

  • 1 package Biscuit dough (Store-bought or homemade.)
  • 2 tablespoons Butter (To enhance the richness.)

Preparation

  1. Preheat your oven to 350°F (175°C).
  2. In a large mixing bowl, toss the sliced peaches with sugar, cornstarch, lemon juice, and cinnamon.
  3. Allow the peach mixture to sit while you prepare the crust.
  4. Roll out your biscuit dough to fit the baking dish.
  5. Pour the peach mixture into the baking dish and top with the dough.

Baking

  1. Bake for about 30-40 minutes, until the top is golden and bubbly.

Let the cobbler cool slightly before serving to help the filling set. Serve warm with vanilla ice cream or whipped cream for an elevated experience.

Dessert, Snack
American, Southern
Comfort Food, easy dessert, Fruit Dessert, Peach Cobbler, Southern Dessert

Doubletree Chocolate Chip Cookies

Doubletree Chocolate Chip Cookies are beloved for their warm, gooey centers and delightful crunch. Every bite brings a wonderful blend of rich chocolate and a hint of nutty flavors, making them an irresistible treat. Perfect for gatherings or a cozy night in, these cookies are sure to impress your family and friends. If you’re looking for a crowd-pleaser that’s easy to whip up at home, this recipe is just what you need. Let’s dive into how you can make these delicious cookies yourself!

How to prepare Doubletree Chocolate Chip Cookies

To start, gather your ingredients and preheat your oven. Following the right steps is crucial to achieving those iconic Doubletree cookies that everyone loves. The process involves mixing your wet and dry ingredients, folding in the chocolate chips, and forming dough balls.

Doubletree Chocolate Chip Cookies

Why You’ll Love Doubletree Chocolate Chip Cookies

These cookies are loved for many reasons. Firstly, the combination of semi-sweet chocolate chips and a bit of oatmeal adds a unique texture. The warmth of freshly baked cookies from the oven fills the kitchen with a comforting aroma that can’t be beaten. Plus, the cookie’s size and chewiness make them ideal for sharing, although you might not want to! If you enjoy chocolate chip cookies, you might also want to try some soft chocolate chip cookies, which offer a different twist on this classic treat.

Tips for success

For the best results, consider these tips. Make sure not to overmix the dough to keep the cookies tender. Using room temperature ingredients ensures everything combines well. Also, slightly underbake the cookies; they will continue to cook on the baking sheet after being pulled from the oven, resulting in a perfect chewy texture.

Serving Suggestions

Doubletree Chocolate Chip Cookies

Serve your Doubletree Chocolate Chip Cookies with a glass of cold milk, or pair them with a scoop of vanilla ice cream for an indulgent dessert. They’re perfect for birthdays, parties, or just as an afternoon snack.

FAQs

1. Can I freeze Doubletree Chocolate Chip Cookies?

Yes, these cookies freeze well! Just place them in an airtight container or a ziplock bag, and they can last for several weeks in the freezer.

2. What should I do if my dough is too sticky?

If your dough feels too sticky to handle, refrigerate it for about 30 minutes. This will make it easier to work with.

3. Can I substitute the chocolate chips?

Absolutely! You can use milk chocolate chips, white chocolate chips, or even chopped nuts for variety. Experimenting with different options can lead to new flavor combinations you might love!

Doubletree Chocolate Chip Cookies

Irresistible cookies with warm, gooey centers and a delightful crunch, perfect for gatherings or cozy nights in.

Dry Ingredients

  • 2 cups all-purpose flour
  • 1 teaspoon baking soda
  • 1 teaspoon salt
  • 1 cup old-fashioned oats

Wet Ingredients

  • 1 cup unsalted butter, room temperature
  • 3/4 cup granulated sugar
  • 3/4 cup brown sugar, packed
  • 1 teaspoon vanilla extract
  • 2 large eggs

Chocolate Chips

  • 2 cups semi-sweet chocolate chips

Preparation

  1. Preheat your oven to 350°F (175°C).
  2. In a bowl, mix together all-purpose flour, baking soda, salt, and oats.
  3. In another bowl, beat together the butter, granulated sugar, brown sugar, and vanilla extract until creamy.
  4. Add the eggs one at a time, mixing well after each addition.
  5. Gradually add the dry ingredient mixture to the wet ingredients, mixing just until combined.
  6. Fold in the chocolate chips.

Baking

  1. Scoop dough balls onto a baking sheet lined with parchment paper.
  2. Bake for 10 to 12 minutes or until edges are golden but centers remain soft.
  3. Allow cookies to cool on the baking sheet for 5 minutes before transferring to a wire rack.

For best results, avoid overmixing the dough and consider refrigerating sticky dough for easier handling. Slightly underbake to ensure chewiness.

Dessert, Snack
American
Chocolate Chip Cookies, cookie recipe, Crowd-Pleaser, Doubletree cookies, Easy Baking

Garlic Sourdough Focaccia

Imagine biting into a warm piece of focaccia, the rich flavors of garlic and cheese melting together in every mouthful. Garlic Sourdough Focaccia is not just a loaf of bread; it’s a celebration of tanginess and aroma that fills your kitchen with irresistible comfort. This recipe is ideal for gatherings or simply enjoying a cozy evening at home, making it a crowd-pleaser that will keep everyone coming back for more. You’ll find that making this focaccia at home is a delightful experience, and soon enough, you’ll want it on your table every week! You may also find Air Fryer Honey Butter Garlic Chicken Tenders Recipe useful.

How to prepare Garlic Sourdough Focaccia

To make your own Garlic Sourdough Focaccia, you’ll need a few simple ingredients and a little patience. Start by gathering your main ingredients: sourdough starter, flour, water, salt, garlic, and cheese. The first thing you’ll want to do is mix the starter with flour and water, then let it rise. After that, incorporate salt and minced garlic, along with shredded cheese for that ultimate cheesiness. Knead the dough gently before placing it in a greased baking dish to rise again. Once it has doubled in size, press your fingers into the top to create dimples, drizzle with olive oil, and sprinkle more garlic and cheese on top. Bake until golden brown, and enjoy the glorious aromas wafting through your home!

Garlic Sourdough Focaccia: The Ultimate Cheesy & Garlicky Recipe

Why You’ll Love Garlic Sourdough Focaccia

There are countless reasons to adore Garlic Sourdough Focaccia. Firstly, it has a delightful chewy crust, perfectly paired with a soft center that melts in your mouth. The blend of savory garlic and gooey cheese elevates each bite, making it an ideal accompaniment to soups and salads or as a standalone snack. What’s more, sourdough bread is known for its health benefits, such as better digestion and more nutrients compared to regular bread. Plus, making it can be a fun activity to share with family or friends, where everyone can get involved in the kneading or the baking process. Check out some mouth-watering dessert suggestions that pair beautifully with this focaccia, like a delicious German chocolate cake.

Tips for success

To ensure that your Garlic Sourdough Focaccia comes out perfect every time, keep a few handy tips in mind. First, using a mature sourdough starter is key as it ensures good fermentation and rise. Second, don’t rush the rising process, as allowing the dough to ferment longer can enhance the flavor. A third tip is to be generous with olive oil; it not only helps with flavor but also gives the focaccia that signature crunchy crust. Lastly, consider testing different cheeses to find your favorite combination, whether it’s mozzarella, cheddar, or even feta!

Garlic Sourdough Focaccia: The Ultimate Cheesy & Garlicky Recipe

Serving Suggestions

This focaccia is versatile and pairs beautifully with many dishes. Serve it alongside a fresh garden salad or a hearty bowl of soup for a complete meal. You can also present it as an appetizer with dips like hummus or olive tapenade. For a cozy movie night, slice it into strips and serve with garlic butter for dipping or drizzle it with balsamic glaze. The possibilities are endless!

FAQs

What can I do if my focaccia doesn’t rise?

If your focaccia isn’t rising, check that your sourdough starter is active. It should have a pleasant smell and bubbles on the surface. If not, give it more time or feed it before using.

Can I store Garlic Sourdough Focaccia?

Yes, you can store it in an airtight container at room temperature for a couple of days. For longer storage, slice and freeze pieces, then reheat when needed.

How do I know when the focaccia is done baking?

The focaccia is ready when it is golden brown on top and has a hollow sound when tapped on the bottom. It should also have an internal temperature of about 200°F (93°C).

Making Garlic Sourdough Focaccia is a rewarding experience that brings joy to both the cook and those who get to enjoy the end result. Don’t hesitate to experiment with garlic levels or toppings, and savor the deliciousness that you create!

Garlic Sourdough Focaccia

A rich and flavorful focaccia infused with garlic and cheese, perfect for gatherings or simply enjoying at home.

Main Ingredients

  • 1 cup Sourdough starter (Mature starter is recommended.)
  • 4 cups All-purpose flour (For best results, use bread flour.)
  • 1.5 cups Water (Room temperature.)
  • 1 tablespoon Salt (Adjust to taste.)
  • 4 cloves Garlic (Minced.)
  • 1 cup Shredded cheese (Mozzarella, cheddar, or your favorite type.)

Topping

  • 2 tablespoons Olive oil (For drizzling on top.)
  • 2 cloves Garlic (Minced, for topping.)
  • 1 cup Additional shredded cheese (Optional, for extra cheesiness.)

Preparation

  1. Mix the sourdough starter with flour and water in a large bowl.
  2. Let the mixture rise for about 3 hours or until doubled in size.
  3. Incorporate salt, minced garlic, and shredded cheese into the dough.
  4. Knead the dough gently until well combined.
  5. Place the dough in a greased baking dish and let it rise again until doubled.

Baking

  1. Preheat your oven to 400°F (200°C).
  2. Once the dough has risen, press your fingers into the top to create dimples.
  3. Drizzle with olive oil and sprinkle additional minced garlic and cheese on top.
  4. Bake in the oven for about 25 minutes or until golden brown.

Use a mature sourdough starter for best results. Allow the dough to ferment longer for enhanced flavor. Be generous with olive oil for a crunchy crust.

Appetizer, Snack
Italian
Baking, Focaccia, Garlic Bread, Homemade Bread, sourdough

Greek Yogurt Cookie Dough

Making Greek Yogurt Cookie Dough is a delightful way to enjoy a classic treat with a healthier twist. This cookie dough is creamy, sweet, and packed with flavor, making it a hit for both kids and adults. The use of Greek yogurt adds a hint of tanginess and moisture, while still allowing that yummy cookie dough taste to shine through. Plus, it’s simple to whip up, perfect for when those cravings strike.

This featured recipe is not just a treat for the taste buds, it’s also a crowd-pleaser at gatherings. Imagine serving this indulgent Greek Yogurt Cookie Dough at your next party, where everyone will appreciate its unique texture and delicious flavor. It’s a guaranteed hit, and you’ll find yourself savoring every bite. So grab your mixing bowl and let’s get started on this scrumptious creation!

How to prepare Greek Yogurt Cookie Dough

  1. In a large bowl, combine 1 cup of whole wheat flour, 1/2 teaspoon of baking soda, and a pinch of salt.
  2. In another bowl, mix together 1/2 cup of Greek yogurt, 1/4 cup of brown sugar, and 1/4 cup of granulated sugar until smooth.
  3. Gradually add the dry ingredients to the wet mixture and stir to combine.
  4. Fold in 1/2 cup of chocolate chips, or your favorite add-ins like nuts or dried fruit.
  5. Chill the dough in the refrigerator for about 30 minutes before serving.

Greek Yogurt Cookie Dough

Why You’ll Love Greek Yogurt Cookie Dough

You’ll love Greek Yogurt Cookie Dough because it feels indulgent while being a bit healthier than traditional cookie dough. The Greek yogurt provides a source of protein, making you feel good about snacking on it. The dough is incredibly versatile; add whatever mix-ins you prefer, and you can even adjust the sweetness to your liking. Plus, it’s super simple to make, which means you can enjoy this treat whenever the mood strikes!

Tips for success

  • Measure your flour correctly. Too much flour can make the dough dry, so spoon and level for accuracy.
  • Chill the dough before serving. This step helps the flavors meld together and makes it easier to scoop.
  • Play with different mix-ins. Try nuts, dried fruit, or even a swirl of peanut butter for a fun twist.

Greek Yogurt Cookie Dough

Serving Suggestions

Serve your Greek Yogurt Cookie Dough plain, or scoop it onto a graham cracker for a fun snack. You can also pair it with fresh fruit or a dollop of nut butter for a more filling treat. Feel free to add it to ice cream or yogurt for a delightful dessert experience!

FAQs

What can I use instead of Greek yogurt?

If you don’t have Greek yogurt, regular yogurt or cottage cheese can work, but the texture might change slightly.

Can I freeze the cookie dough?

Yes, you can freeze the dough! Just scoop it into small balls and freeze them on a baking sheet before transferring them to a bag. They can be enjoyed later, too!

Is this cookie dough safe to eat raw?

Yes! This Greek Yogurt Cookie Dough is safe to eat raw since it does not contain raw eggs. Enjoy without worry!

Greek Yogurt Cookie Dough

This Greek Yogurt Cookie Dough is a creamy and decadent treat with a healthier twist, perfect for both kids and adults.

Dry Ingredients

  • 1 cup whole wheat flour
  • 1/2 teaspoon baking soda
  • a pinch salt

Wet Ingredients

  • 1/2 cup Greek yogurt
  • 1/4 cup brown sugar
  • 1/4 cup granulated sugar

Mix-ins

  • 1/2 cup chocolate chips (or your favorite add-ins like nuts or dried fruit)

Preparation

  1. In a large bowl, combine whole wheat flour, baking soda, and a pinch of salt.
  2. In another bowl, mix together Greek yogurt, brown sugar, and granulated sugar until smooth.
  3. Gradually add the dry ingredients to the wet mixture and stir to combine.
  4. Fold in chocolate chips or your preferred mix-ins.
  5. Chill the dough in the refrigerator for about 30 minutes before serving.

Measure your flour correctly to avoid a dry dough. Chill the dough before serving to enhance flavors and make scooping easier. Experiment with various mix-ins for unique flavors.

Dessert, Snack
American, Greek
Dessert Snack, Greek Yogurt Cookie Dough, Healthy Cookie Dough, Homemade Cookie Dough, Protein Snack

Sourdough Discard Scones

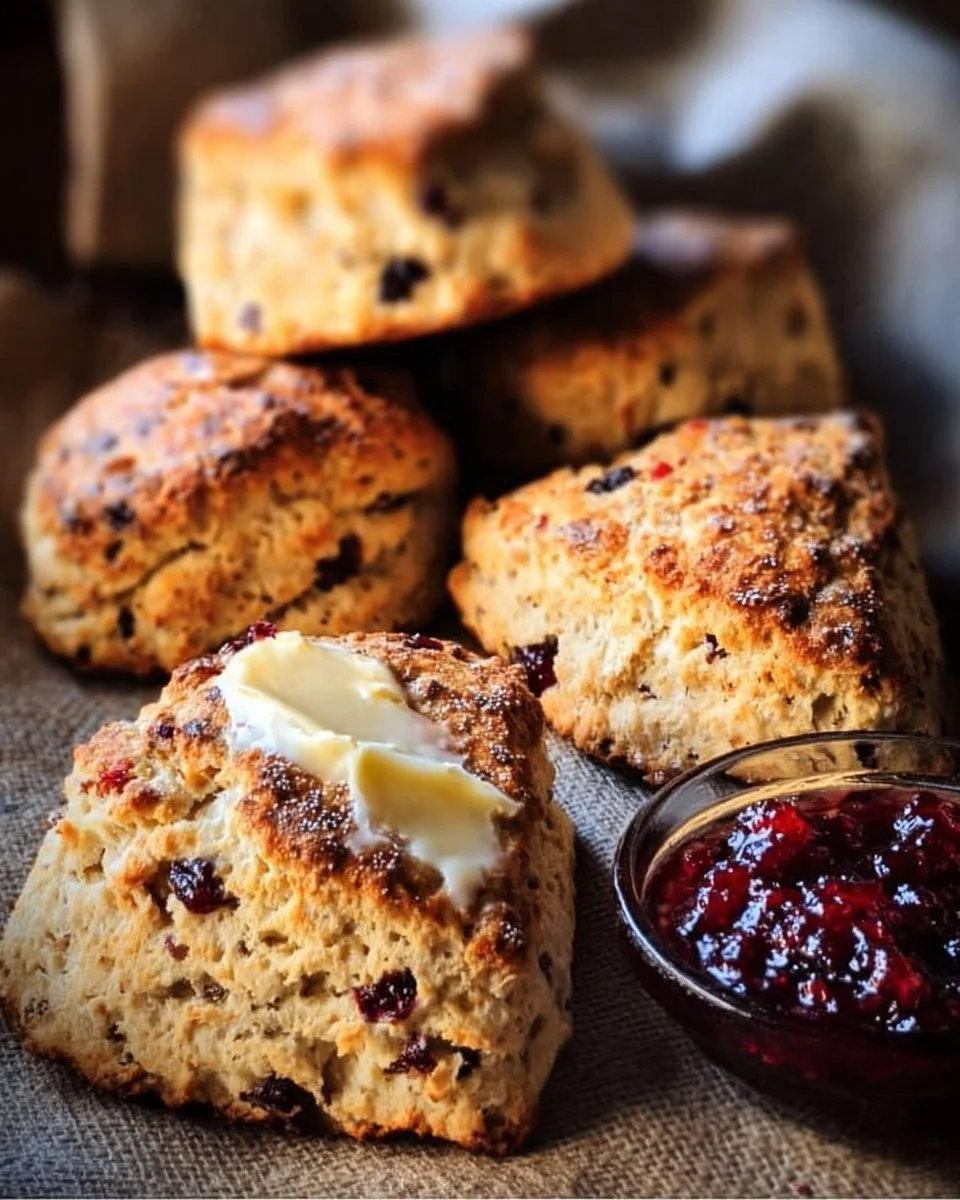
Delicious sourdough discard scones on a wooden board

If you love baking, you likely have some sourdough discard sitting around. Instead of tossing it away, why not turn it into something delicious? Sourdough Discard Scones are light, flaky, and simply delightful. They’re not just tasty, but they’re also a great way to use up that extra sourdough starter. Picture golden-brown scones with a hint of tanginess and buttery goodness, perfect with a cup of tea or coffee. They’re sure to impress your family and friends, and you’ll find yourself baking these scones again and again. Let’s dive into this simple recipe that will soon become a favorite in your kitchen!

How to prepare Sourdough Discard Scones

To make these scrumptious scones, you will need the following ingredients:

  • 1 cup sourdough discard
  • 2 cups all-purpose flour
  • 1/3 cup sugar
  • 1 tablespoon baking powder
  • 1/2 teaspoon baking soda
  • 1/2 teaspoon salt
  • 1/2 cup cold butter, cubed
  • 1/2 cup milk
  • 1 teaspoon vanilla extract
  • Optional: chocolate chips, dried fruits, or nuts
  1. Preheat your oven to 400°F (200°C).
  2. In a large bowl, mix the flour, sugar, baking powder, baking soda, and salt.
  3. Add the cold, cubed butter to the dry ingredients. Use a pastry cutter or your fingers to mix until the mixture resembles coarse crumbs.
  4. Stir in the sourdough discard, milk, and vanilla extract until just combined. If you want to add chocolate chips or dried fruits, now is the time!
  5. Turn the dough out onto a floured surface and knead gently until it comes together, being careful not to overwork it.
  6. Pat the dough into a circle about 1 inch thick. Cut into wedges or use a biscuit cutter to make rounds.
  7. Place the scones on a baking sheet lined with parchment paper and bake for 15-20 minutes, until they are golden brown.
  8. Allow to cool slightly before serving.

Sourdough Discard Scones

Why You’ll Love Sourdough Discard Scones

These scones are a fantastic way to use up your sourdough discard, and they come together quickly. The scones are light and fluffy, with a delightful texture that everyone loves. The subtle tang from the sourdough adds depth to the flavor, making them unique from regular scones. You can easily customize them with different add-ins like chocolate chips or nuts, which makes them even more appealing. It’s hard to resist having one (or two) fresh from the oven!

Tips for success

  1. Cold butter is key: Make sure your butter is very cold. This helps the scones rise and become flaky.
  2. Don’t overmix: Mix until just combined. Overworking the dough can lead to dense scones.
  3. Customize it: Feel free to play around with your favorite mix-ins to make these scones truly your own!

Sourdough Discard Scones

Serving Suggestions

Serve these scones warm with butter, jam, or clotted cream. Pair them with a hot cup of tea or coffee for the perfect afternoon snack. They’re great for breakfast or as a delicious treat any time of day!

FAQs

Can I freeze Sourdough Discard Scones?

Yes, you can freeze the baked scones. Just let them cool completely and store in an airtight container. They will last for about 2 months in the freezer.

Can I use whole wheat flour instead?

Absolutely! You can substitute some or all of the all-purpose flour with whole wheat flour, but the texture may be denser.

How can I make these scones sweeter?

Feel free to add more sugar to the dough or top the scones with a light glaze made from powdered sugar and milk for extra sweetness.

Get ready to impress your friends and family with these delightful Sourdough Discard Scones. You’ll find that baking them is as enjoyable as eating them!

Sourdough Discard Scones

Deliciously light and flaky scones made with sourdough discard, perfect for pairing with tea or coffee.

Dry Ingredients

  • 2 cups all-purpose flour
  • 1/3 cup sugar
  • 1 tablespoon baking powder
  • 1/2 teaspoon baking soda
  • 1/2 teaspoon salt

Wet Ingredients

  • 1 cup sourdough discard
  • 1/2 cup milk
  • 1 teaspoon vanilla extract

Fat

  • 1/2 cup cold butter, cubed (Ensure butter is very cold for best results.)

Optional Add-Ins

  • chocolate chips, dried fruits, or nuts (Optional for customization.)

Preparation

  1. Preheat your oven to 400°F (200°C).
  2. In a large bowl, mix the flour, sugar, baking powder, baking soda, and salt.
  3. Add the cold, cubed butter to the dry ingredients. Use a pastry cutter or your fingers to mix until the mixture resembles coarse crumbs.
  4. Stir in the sourdough discard, milk, and vanilla extract until just combined. If you want to add chocolate chips or dried fruits, now is the time!
  5. Turn the dough out onto a floured surface and knead gently until it comes together, being careful not to overwork it.
  6. Pat the dough into a circle about 1 inch thick. Cut into wedges or use a biscuit cutter to make rounds.

Baking

  1. Place the scones on a baking sheet lined with parchment paper and bake for 15-20 minutes, until they are golden brown.
  2. Allow to cool slightly before serving.

Serve these scones warm with butter, jam, or clotted cream. They are great for breakfast or as a delicious treat any time of day. Tips: Use cold butter for flakiness, don’t overmix, and feel free to customize with your favorite mix-ins.

Breakfast, Dessert, Snack
American
Baking, Easy Recipes, Scones, sourdough discard, Use Up Discard

Sourdough English Muffins

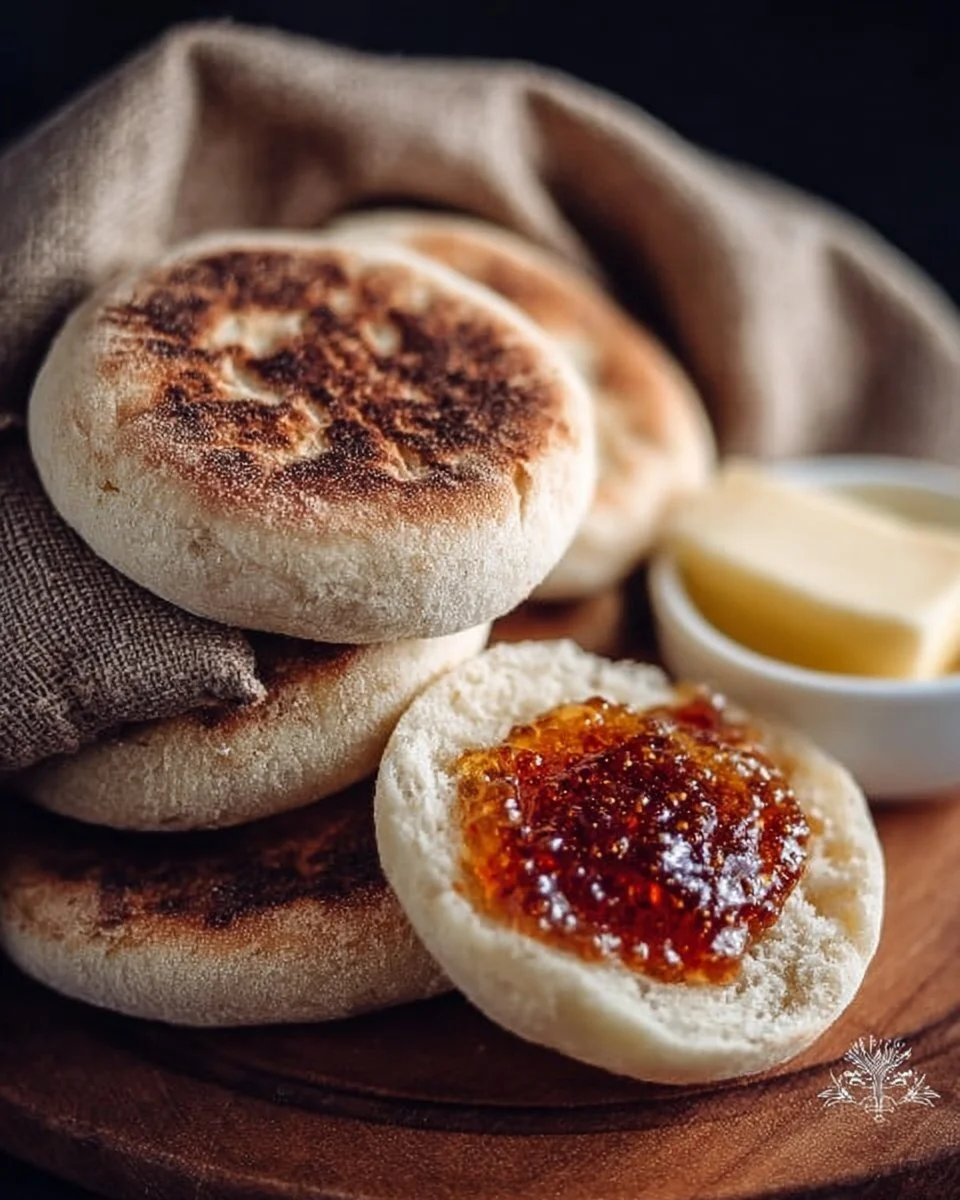
Freshly baked sourdough English muffins on a wooden surface.

There’s something special about homemade bread, and when it comes to breakfast, Sourdough English Muffins take the cake, or should I say muffin? These delightful treats are soft inside, crusty outside, and filled with nooks and crannies perfect for holding your favorite spreads and toppings. The slightly tangy flavor from the sourdough adds a fascinating twist, making them a crowd-pleaser for family and friends. Whether you enjoy them with butter and jam or alongside your morning eggs, these muffins are sure to brighten your day. So, let’s get ready to whip up a batch that will have everyone asking for seconds!

How to prepare Sourdough English Muffins

Making Sourdough English Muffins is easier than you think. Here’s how:

  1. Ingredients:
  • 1 cup sourdough starter
  • 1 cup all-purpose flour
  • 1 cup whole wheat flour
  • 1 teaspoon salt
  • 1 tablespoon honey
  • 1 cup water
  • Cornmeal for dusting
  1. Directions:
  2. In a large mixing bowl, combine the sourdough starter, honey, and water. Mix until smooth.
  3. Gradually add the flours and salt. Stir until a soft dough forms.
  4. Knead the dough on a floured surface for about 5-7 minutes until it’s smooth.
  5. Place the dough in a lightly greased bowl, cover it, and let it rise in a warm place for about 1-2 hours, or until doubled in size.
  6. Once risen, punch down the dough and divide it into 8 pieces. Shape each piece into a ball and flatten slightly.
  7. Dust both sides with cornmeal and place on a parchment-lined baking sheet. Cover and let rise for another hour.
  8. Heat a skillet or griddle over medium heat. Cook muffins for about 7-10 minutes on each side, or until golden brown and cooked through.
  9. Cool on a wire rack before serving.

Sourdough English Muffins

Why You’ll Love Sourdough English Muffins

The wonderful thing about Sourdough English Muffins is their versatility and flavor. You can enjoy them toasted for breakfast, serve them with brunch, or even turn them into mini pizzas. The chewy texture and hint of sour make each bite crave-worthy. Plus, you get to experience the joy of baking with sourdough, which adds a fun challenge and a delicious result. Who wouldn’t love that?

Tips for success

  • Make sure your sourdough starter is active and bubbly; this ensures the muffins rise well.
  • Don’t skip the cornmeal; it adds a delightful crunch and prevents sticking.
  • Adjust the cooking time based on your heat level; everyone’s stove is a little different, and you want a nice golden finish without burning.

Sourdough English Muffins

Serving Suggestions

Sourdough English Muffins are excellent served warm with butter and your choice of jam or honey. You can also pile on smashed avocado, a fried egg, or some bacon for a hearty brunch meal. Don’t forget to experiment with different toppings like cream cheese or peanut butter, depending on your mood!

FAQs

Q: Can I use all-purpose flour only?

A: Yes, you can use all-purpose flour if you prefer, but using a mix with whole wheat adds more flavor and nutrition.

Q: How do I store leftover muffins?

A: Keep them in an airtight container at room temperature for a few days, or freeze them for longer storage. Just toast them before enjoying!

Q: Can I make these muffins without a sourdough starter?

A: While the sourdough starter is key for flavor and texture, you can make English muffins using yeast as an alternative if you don’t have a starter. Just follow a traditional English muffin recipe.

With these tips and tricks, you’re all set to enjoy your baking adventure with Sourdough English Muffins. Happy baking!

Sourdough English Muffins

Delightfully soft and crusty, these Sourdough English Muffins are perfect for any topping and bring a tangy flavor that makes breakfast a treat.

Main ingredients

  • 1 cup sourdough starter (Active and bubbly for best results.)
  • 1 cup all-purpose flour
  • 1 cup whole wheat flour (Adds flavor and nutrition.)
  • 1 teaspoon salt
  • 1 tablespoon honey
  • 1 cup water
  • Cornmeal for dusting (Adds crunch and prevents sticking.)

Preparation

  1. In a large mixing bowl, combine the sourdough starter, honey, and water. Mix until smooth.
  2. Gradually add the flours and salt. Stir until a soft dough forms.
  3. Knead the dough on a floured surface for about 5-7 minutes until it’s smooth.
  4. Place the dough in a lightly greased bowl, cover it, and let it rise in a warm place for about 1-2 hours, or until doubled in size.
  5. Once risen, punch down the dough and divide it into 8 pieces. Shape each piece into a ball and flatten slightly.
  6. Dust both sides with cornmeal and place on a parchment-lined baking sheet. Cover and let rise for another hour.

Cooking

  1. Heat a skillet or griddle over medium heat. Cook muffins for about 7-10 minutes on each side, or until golden brown and cooked through.
  2. Cool on a wire rack before serving.

Serve warm with butter and your choice of jam, honey, or toppings like avocado or eggs. For storage, keep in an airtight container for a few days or freeze them for longer storage.

Breakfast, Brunch
American
Baking, Breakfast Muffins, Homemade Muffins, Sourdough English Muffins, Sourdough Recipes