Air Fryer Cajun Chicken

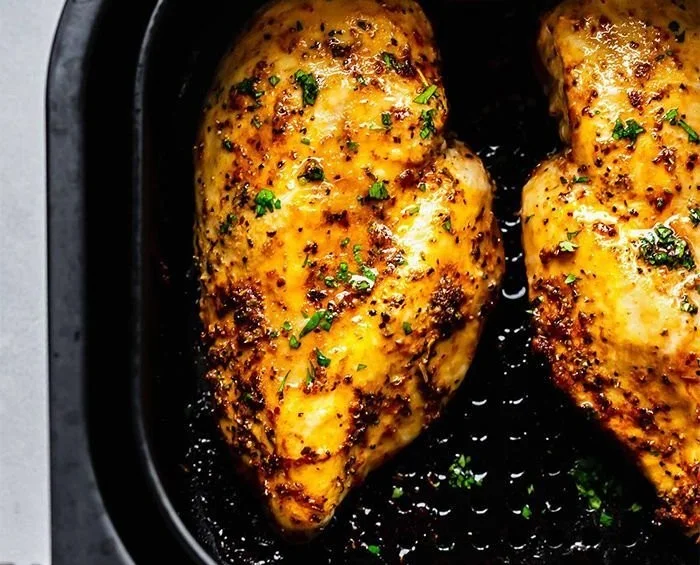
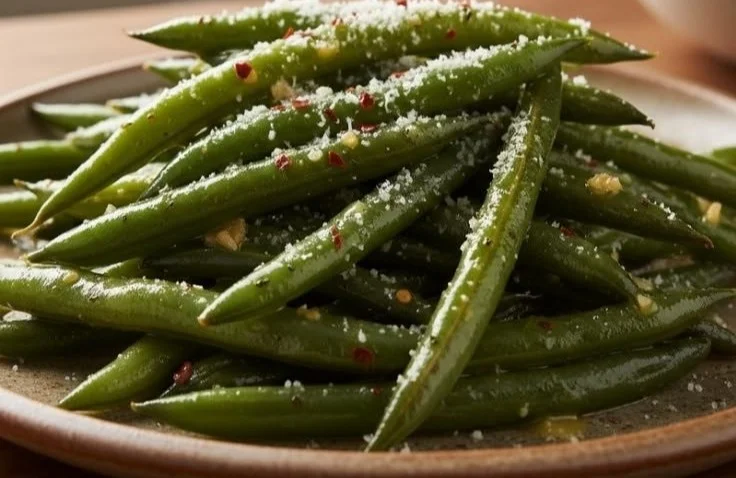
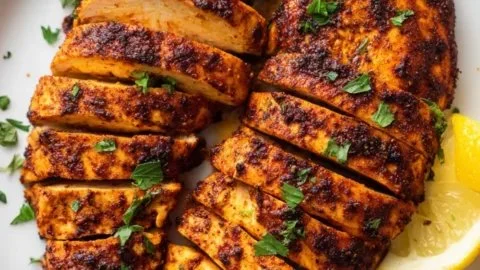
Delicious Air Fryer Cajun Chicken served with a side of vegetables.

This Air Fryer Cajun Chicken Recipe is simple, bold, and ready in minutes. The chicken gets a spicy, smoky crust and stays juicy inside, so it makes a great weeknight dinner or a party snack. If you like easy air fryer chicken ideas, you might also enjoy this air fryer honey butter garlic chicken tenders recipe for a sweeter change. This recipe is a crowd-pleaser, full of flavor and low fuss, you will want to make it again and again.

How to prepare Air Fryer Cajun Chicken Recipe

Ingredients

  • 4 boneless, skinless chicken breasts, about 1 pound
  • 2 tablespoons olive oil
  • 2 tablespoons Cajun seasoning
  • 1 teaspoon garlic powder
  • 1/2 teaspoon paprika
  • 1/2 teaspoon salt, or to taste
  • 1/4 teaspoon black pepper
  • Lemon wedges, for serving

Directions

  1. Pat the chicken dry with paper towels. This helps the spice mix stick and the outside get crispy.
  2. In a bowl, mix the olive oil, Cajun seasoning, garlic powder, paprika, salt, and pepper.
  3. Rub the spice mix over each chicken breast, coating all sides. Let sit 5 to 10 minutes, or refrigerate up to 2 hours for more flavor.
  4. Preheat the air fryer to 380°F (190°C) for 3 minutes if your model needs preheating.
  5. Place the chicken in the air fryer basket in a single layer. Do not crowd the basket.
  6. Cook at 380°F (190°C) for 10 minutes. Flip the chicken and cook another 6 to 8 minutes, until the internal temperature reaches 165°F (74°C).
  7. Let the chicken rest 5 minutes before slicing. Serve with lemon wedges.

Air Fryer Cajun Chicken Recipe

Why You’ll Love Air Fryer Cajun Chicken Recipe

  • Fast cooking, ready in about 25 minutes from start to finish.
  • Crispy outside, juicy inside, thanks to the air fryer.
  • Bold Cajun spice without a lot of work.
  • Low cleanup, no frying oil needed.
  • Great for meal prep, salads, sandwiches, and wraps.

Tips for success

  • Dry the chicken well before seasoning, this gives a better crust.
  • Do not overcrowd the air fryer, cook in batches if needed.
  • Use a meat thermometer to check for 165°F, this keeps chicken safe and juicy.
  • If your chicken pieces are very thick, pound them to even thickness for even cooking.
  • Adjust Cajun seasoning to your heat preference, add more for extra spice or less for mild taste.

Serving Suggestions

  • Slice and add to a salad with greens, tomatoes, and avocado.
  • Serve over rice or quinoa with steamed vegetables.
  • Make sandwiches or wraps with lettuce, mayo, and pickles.
  • Pair with roasted potatoes or air fryer fries for a fuller meal.

Air Fryer Cajun Chicken Recipe

FAQs

Q: Can I use chicken thighs instead of breasts?

A: Yes, boneless thighs work well. Cook times may be a few minutes longer, check for 165°F internal temp.

Q: Is this recipe very spicy?

A: Cajun seasoning brings heat, but you can reduce the amount or use a mild Cajun blend for less spice.

Q: Can I cook frozen chicken in the air fryer?

A: You can, but thawed chicken gives the best texture and even seasoning. If you must cook frozen, add extra time and check the temperature.

Q: How do I store leftovers?

A: Keep leftover chicken in an airtight container in the fridge for up to 4 days. Reheat in the air fryer at 350°F for a few minutes to keep it crisp.

Q: Can I double the recipe?

A: Yes, but cook in batches so the air can circulate and the chicken gets crispy on all sides.

Conclusion

This Air Fryer Cajun Chicken Recipe is a simple way to get big flavor fast, perfect for busy nights or casual gatherings. For another tasty take on air fryer chicken you can try a different flavor profile with the Air Fryer Cajun Chicken (An Easy Recipe Loaded with Flavor!).

Air Fryer Cajun Chicken
A simple and bold Air Fryer Cajun Chicken recipe that features a spicy, smoky crust and juicy interior, perfect for weeknight dinners or as a party snack.

Main ingredients

  • 4 pieces boneless, skinless chicken breasts, about 1 pound
  • 2 tablespoons olive oil
  • 2 tablespoons Cajun seasoning
  • 1 teaspoon garlic powder
  • 1/2 teaspoon paprika
  • 1/2 teaspoon salt, or to taste
  • 1/4 teaspoon black pepper
  • Lemon wedges, for serving

Preparation

  1. Pat the chicken dry with paper towels to help the spice mix stick and achieve a crispy outer layer.
  2. In a bowl, mix the olive oil, Cajun seasoning, garlic powder, paprika, salt, and pepper.
  3. Rub the spice mix over each chicken breast, coating all sides. Let sit for 5 to 10 minutes, or refrigerate for up to 2 hours for more flavor.
  4. Preheat the air fryer to 380°F (190°C) for 3 minutes if your model requires preheating.

Cooking

  1. Place the chicken in the air fryer basket in a single layer, avoiding crowding.
  2. Cook at 380°F (190°C) for 10 minutes. Flip the chicken and continue to cook for another 6 to 8 minutes, until the internal temperature reaches 165°F (74°C).

Serving

  1. Let the chicken rest for 5 minutes before slicing. Serve with lemon wedges.

For best results, dry the chicken well before seasoning. Cook in batches if necessary to avoid overcrowding. Adjust the Cajun seasoning according to your spice preference.

Dinner, Main Course
American, Cajun
Air Fryer Chicken, Cajun Chicken, easy chicken recipe, Healthy Dinner, Quick Meal

Canned Chicken Pizza Crust

Delicious pizza crust made with canned chicken, ready to be topped.

Canned Chicken Pizza Crust is a unique and easy way to make pizza. This clever Chicken Crust Pizza Recipe uses canned chicken to create a tasty, protein-rich base without traditional dough. The best part is that it requires minimal ingredients and comes together quickly. Whether you’re in a hurry or exploring new Chicken Pizza Ideas, this crust will surprise you with its simplicity and flavor.

why make this recipe

Many people enjoy pizza, but making a traditional dough can be time-consuming and complicated. This Chicken Breast Pizza Crust alternative is a fantastic shortcut. It allows you to skip the long waiting times associated with classic dough while still enjoying a satisfying homemade pizza.

Using canned chicken as the base gives the crust a unique texture and boosts the protein content, making it a filling option. It’s similar in concept to a Shredded Chicken Pizza Crust, but even faster because the chicken is already cooked and ready to use. Additionally, this recipe is perfect for those who want a gluten-free pizza without regular flour.

The ease of this recipe makes it accessible to everyone, from beginners to experienced home cooks. If you usually rely on Pillsbury Pizza Crust Recipes or other Canned Pizza Dough Recipes Ideas, this version offers a fun, low-carb twist worth trying.

You can also personalize your pizza with endless toppings. Turn it into a flavorful Chicken Ranch Pizza, a veggie-loaded pie, or even a bold Pizza Chicken Bake style dinner. It’s a fun way to engage kids in the kitchen, and they’ll love shaping their pizzas.

With all these benefits, making Canned Chicken Pizza Crust is a smart choice for busy weeknights or casual gatherings. In short, this recipe delivers a quick, tasty, and protein-packed way to satisfy your pizza cravings.

how to make Canned Chicken Pizza Crust

Making this Ground Chicken Pizza Crust Recipe style dish with canned chicken is very straightforward.

First, drain one can of chicken thoroughly. Place the chicken in a mixing bowl and break it apart with a fork until finely shredded.

Add:

  • ½ cup shredded mozzarella cheese

  • ¼ cup grated Parmesan cheese

  • 1 beaten egg

Mix until well combined. The egg acts as a binder to help hold the crust together.

Next, add:

  • 1 teaspoon Italian seasoning

  • Salt to taste

Stir until evenly mixed.

Preheat your oven to 425°F (220°C). Line a baking sheet with parchment paper. Spread the mixture into a circle or rectangle about ½ inch thick. Use your hands or a spatula to shape it evenly.

Bake for 15–20 minutes until the crust is golden brown and firm. Watch closely near the end to prevent over-browning.

Once baked, remove from the oven and let it cool slightly. Your Chicken Crust Pizza Recipe base is now ready for toppings. Add sauce, cheese, and your favorite toppings, then bake again until the cheese is melted and bubbly.

how to serve Canned Chicken Pizza Crust

Serving this pizza can be a fun and delicious experience. After baking with toppings, slice it just like a traditional pizza. Serve on a large plate or wooden board for a rustic presentation.

It pairs well with dipping sauces such as:

  • Marinara

  • Ranch dressing (perfect for Chicken Ranch Pizza)

  • Garlic butter

A fresh salad on the side balances the meal nicely.

One of the best parts of this recipe is customization. Some people may want extra cheese, while others prefer veggie-loaded slices. You can even host a DIY pizza night where guests build their own creations from your favorite Chicken Pizza Ideas.

For parties, cut into small squares and serve with toothpicks as a protein-packed appetizer. This versatile dish works as a main course or shareable snack.

how to store Canned Chicken Pizza Crust

Proper storage keeps your pizza tasting fresh.

First, allow the crust or finished pizza to cool completely. Then:

Refrigerator:

  • Store in an airtight container

  • Keeps up to 3 days

Freezer (best for plain crust):

  • Wrap tightly in foil or freezer-safe container

  • Freeze up to 3 months

To use frozen crust, thaw overnight in the refrigerator, add toppings, and bake.

To reheat topped pizza, warm in the oven at 350°F (175°C) until heated through and the cheese melts. Avoid the microwave, which can make the crust soft.

tips to make Canned Chicken Pizza Crust

Use these tips to get the best results every time.

Drain very well
Excess moisture is the main reason a chicken crust turns soggy. Press the canned chicken with paper towels if needed.

Experiment with cheeses
Mozzarella works best for structure, but mixing in cheddar, gouda, or pepper jack adds great flavor.

Boost the seasoning
Garlic powder, onion powder, or dried oregano can enhance the taste of your Chicken Breast Pizza Crust.

Pre-bake properly
Make sure the crust is firm and lightly golden before adding toppings.

Don’t overload with wet toppings
Too much sauce or watery vegetables can soften the crust.

Make it crispier
Bake a few extra minutes for a firmer, more sliceable base.

Get kids involved
Let them shape mini pizzas — one of the most fun Chicken Pizza Ideas for family cooking.

variation

There are many ways to customize this versatile crust.

Low-carb tweak
Replace a small portion of cheese with almond flour for a slightly different texture.

Veggie boost
Mix in finely chopped spinach or sun-dried tomatoes for added flavor.

BBQ version
Use barbecue sauce, cooked chicken, bacon, and red onions for a bold twist.

Chicken Ranch Pizza
Top with ranch dressing, mozzarella, and cooked chicken for a creamy favorite.

Pizza Chicken Bake style
Turn the mixture into a thicker base in a baking dish and load it like a casserole.

Mini pizzas
Shape small rounds for appetizers or lunchboxes.

Crazy Crust Pizza inspiration
Spread the mixture thinner and irregular for a rustic, crispy-edge finish similar in spirit to Crazy Crust Pizza.

This flexibility makes it one of the most adaptable Canned Pizza Dough Recipes Ideas you can try.

FAQs

1. Can I use fresh chicken instead of canned chicken?
Yes. Finely shredded cooked chicken works well and creates a similar Shredded Chicken Pizza Crust texture. Just remove excess moisture.

2. Is this recipe gluten-free?
Yes, the base Chicken Crust Pizza Recipe contains no flour. Always check labels on cheese and toppings to be safe.

3. Can I make this crust in advance?
Absolutely. Bake the crust, cool completely, then refrigerate or freeze for later use.

4. What toppings work best?
Popular options include pepperoni, bell peppers, olives, onions, extra cheese, or ranch drizzle for a Chicken Ranch Pizza variation.

5. How do I keep the crust crispy?
Drain the chicken thoroughly, pre-bake until golden, and avoid too many moist toppings.

Canned Chicken Pizza Crust

A unique and easy pizza crust alternative made from canned chicken that is protein-rich and gluten-free, perfect for quick homemade pizzas.

For the crust

  • 1 can canned chicken (Drained thoroughly)
  • ½ cup shredded mozzarella cheese
  • ¼ cup grated Parmesan cheese
  • 1 large beaten egg (Acts as a binder)
  • 1 teaspoon Italian seasoning
  • to taste salt salt

Preparation

  1. Drain one can of chicken thoroughly and place it in a mixing bowl.
  2. Break apart the chicken with a fork until finely shredded.
  3. Add shredded mozzarella, grated Parmesan, and beaten egg. Mix until well combined.
  4. Add Italian seasoning and salt, then stir until evenly mixed.
  5. Preheat your oven to 425°F (220°C) and line a baking sheet with parchment paper.
  6. Spread the mixture into a circle or rectangle about ½ inch thick, shaping it evenly.

Baking

  1. Bake for 15-20 minutes until the crust is golden brown and firm.
  2. Remove from the oven and let it cool slightly; your Chicken Crust Pizza base is ready for toppings.

Serving

  1. After baking with toppings, slice it like a traditional pizza and serve.
  2. Pair with dipping sauces and a fresh salad on the side.

Drain chicken well to avoid soggy crust. Mix different cheeses for flavor and avoid too many moist toppings to keep the crust crispy.

Appetizer, Main Course
American
Canned Chicken Recipes, Chicken Pizza Crust, Easy Pizza Recipe, Gluten-Free Pizza, Low-Carb Pizza

Air Fryer Chicken Breasts

Delicious air fryer chicken breasts garnished with herbs and spices

Air fryer chicken breasts are a simple, fast way to get juicy and tender chicken with a bit of crisp on the outside. This recipe makes chicken that stays moist inside and browns nicely on the outside, so it works great for family dinners or meal prep. The featured recipe for Air Fryer Chicken Breasts is a crowd-pleaser, easy to make, and full of simple flavor from salt, pepper, garlic powder, and a little oil. If you like quick air fryer meals, you can also try an air fryer grilled cheese hot dogs for a fun side idea. You will smile when you taste how tender and juicy the chicken turns out, and you might make it on repeat.

how to prepare Air Fryer Chicken Breasts

  1. Pat 2 boneless skinless chicken breasts dry with paper towel. Trim fat if needed.
  2. Pound each breast to even thickness, about 1/2 inch to 3/4 inch, so they cook evenly.
  3. Brush or rub each breast with 1 to 2 teaspoons of olive oil.
  4. Season both sides with 1/2 teaspoon salt, 1/4 teaspoon black pepper, 1/2 teaspoon garlic powder, and 1/2 teaspoon paprika, or use your favorite spice mix.
  5. Preheat the air fryer to 380 F for 3 minutes.
  6. Place the chicken breasts in the air fryer basket in a single layer. Do not crowd.
  7. Cook at 380 F for 10 to 12 minutes, flipping once at the halfway point. Use a meat thermometer, chicken is done at 165 F internal.
  8. Let the chicken rest 3 to 5 minutes before slicing. This keeps the meat juicy.

Air Fryer Chicken Breasts

Why You’ll Love Air Fryer Chicken Breasts

  • Fast and easy, ready in about 20 minutes total time.
  • Tender and juicy inside, with a light crisp outside from the air fryer.
  • Low fuss, only a few pantry spices and a little oil.
  • Versatile, use for salads, sandwiches, bowls, or as a main dish.
  • Healthier than deep frying, with less oil and less mess.

tips for success

  • Pound the chicken to the same thickness so it cooks evenly.
  • Do not skip the rest time, it keeps juices inside.
  • Use a meat thermometer to be sure you hit 165 F, avoid overcooking.
  • Don’t overcrowd the basket, cook in batches if needed for even air flow.
  • If your chicken is thin, reduce time to avoid drying out, check at 8 minutes.

Serving Suggestions

  • Slice and serve over a green salad with a lemon vinaigrette for a light meal.
  • Make sandwiches with lettuce, tomato, and mayo on toasted bread.
  • Chop and add to rice bowls with roasted veggies and a drizzle of sauce.
  • Serve with steamed broccoli and roasted potatoes for a family plate.
  • Use leftovers in wraps, soups, or pasta for quick lunches.

Air Fryer Chicken Breasts

FAQs

Q: How long do I cook chicken breasts in the air fryer?

A: For average size breasts, cook at 380 F for 10 to 12 minutes, flipping once. Use a thermometer for best results.

Q: Can I cook frozen chicken breasts in the air fryer?

A: Yes, but add time. Cook at 360 F for about 18 to 22 minutes, flip halfway, and check the internal temperature.

Q: How do I keep chicken breasts from drying out?

A: Pound to even thickness, do not overcook, use a little oil, and let the chicken rest for a few minutes after cooking.

Q: Can I use bone-in chicken in the air fryer?

A: You can, but bone-in pieces need longer cooking time and slightly lower temperature, check often and use a thermometer.

Q: What spices work well with air fryer chicken?

A: Simple salt, pepper, garlic powder, paprika work well. You can also try Italian seasoning, lemon pepper, or paprika and cumin for more flavor.

Conclusion

Try the step by step tips and simple spice mix in this recipe, or compare methods with the Well Plated air fryer chicken breast recipe to see small ways to change time and heat. For another clear guide and ideas for juicy, tender results, read the cooking notes at Plating and Pairings air fryer chicken breast recipe.

Air Fryer Chicken Breasts

Quick, juicy, and tender chicken breasts with a crispy outside, perfect for dinner or meal prep.

Main Ingredients

  • 2 pieces boneless skinless chicken breasts (Pound to even thickness)
  • 1-2 teaspoons olive oil (Brush or rub on chicken breasts)
  • 1/2 teaspoon salt (Season both sides)
  • 1/4 teaspoon black pepper (Season both sides)
  • 1/2 teaspoon garlic powder (Season both sides)
  • 1/2 teaspoon paprika (Season both sides)

Preparation

  1. Pat the chicken breasts dry with paper towel and trim any fat if needed.
  2. Pound each breast to even thickness, about 1/2 inch to 3/4 inch.
  3. Brush or rub each breast with olive oil.
  4. Season both sides with salt, pepper, garlic powder, and paprika.

Cooking

  1. Preheat the air fryer to 380°F for 3 minutes.
  2. Place the chicken breasts in the air fryer basket in a single layer.
  3. Cook at 380°F for 10 to 12 minutes, flipping once halfway through.
  4. Use a meat thermometer to ensure the internal temperature reaches 165°F.
  5. Let the chicken rest for 3 to 5 minutes before slicing.

Pound the chicken to the same thickness for even cooking. Do not skip resting time. Avoid overcrowding the basket. If using thin chicken, check for doneness at 8 minutes.

Dinner, Main Course
American
Air Fryer Chicken, Chicken Breasts, Easy Recipes, Healthy Chicken, Quick Dinner

Garlic Butter Green Beans

Sauteed garlic butter green beans garnished with fresh herbs

This Garlic Butter Green Beans recipe is a warm, simple side dish that fits dinner on busy nights, holiday meals, and weeknight plates. The beans stay crisp and get a soft garlic butter coat that most people love. If you enjoy rich garlic flavors, you might also like the garlic butter steak bites with parmesan cream sauce, they share a similar buttery garlic taste. This green bean dish is easy to make, quick to cook, and a real crowd pleaser, so get ready to enjoy a small, tasty side that will disappear fast.

how to prepare Garlic Butter Green Beans

Ingredients

  • 1 pound fresh green beans, trimmed
  • 2 tablespoons butter
  • 2 garlic cloves, minced
  • 1 tablespoon olive oil
  • Salt, to taste
  • Black pepper, to taste
  • Optional, a squeeze of lemon or a pinch of red pepper flakes

Directions

  1. Rinse and trim the green beans, dry them well.
  2. Heat a large pan over medium heat. Add the olive oil and 1 tablespoon of butter.
  3. Add the green beans and cook, stirring, for 4 to 6 minutes, until they start to get tender and bright green.
  4. Push the beans to one side of the pan. Add the remaining butter and the minced garlic. Cook the garlic for about 30 seconds, do not burn it.
  5. Mix the garlic and butter with the green beans. Cook 1 to 2 more minutes, until the beans are cooked but still crisp.
  6. Season with salt and black pepper. Add a squeeze of lemon or a pinch of red pepper flakes if you like.
  7. Serve hot.

Garlic Butter Green Beans

Why You’ll Love Garlic Butter Green Beans

  • Quick, they take about 10 minutes to cook.
  • Fresh taste, the green beans stay bright and crisp.
  • Rich garlic butter flavor, that most people find comforting.
  • Versatile, they pair with chicken, beef, fish, or a simple grain.
  • Easy to scale up for a crowd or make small for one or two people.

tips for success

  • Dry the beans well after rinsing, wet beans will steam not sauté.
  • Use a hot pan, the beans will get a nice color and keep a slight crunch.
  • Do not burn the garlic, add it near the end and watch it for 30 seconds.
  • Taste and season at the end, salt and pepper make the flavors pop.
  • If you want softer beans, cover the pan for a minute, then remove the lid to let the butter brown.

Serving Suggestions

  • Serve with roasted chicken or grilled fish for a simple weeknight meal.
  • Add to a holiday plate with mashed potatoes and roast turkey.
  • Toss with toasted almonds or grated parmesan for extra texture and flavor.
  • Serve over rice or with a slice of lemon for a bright finish.

Garlic Butter Green Beans

FAQs

Q: Can I use frozen green beans for this recipe? A: Yes, you can. Thaw and pat them dry first, then cook a little longer until they are hot through.

Q: How long can I store leftovers? A: Keep leftovers in an airtight container in the fridge for up to 3 days. Reheat gently in a pan.

Q: Can I make this without butter? A: Yes, use more olive oil if you need a dairy free option. The flavor will be a bit different but still good.

Q: Can I add other herbs or spices? A: Yes, try thyme, parsley, or a pinch of red pepper flakes for heat.

Q: How do I keep the beans crisp? A: Do not overcook, cook until bright and just tender. Shock in cold water if you want to stop the cooking fast.

Conclusion

For a quick and tasty side that goes with many meals, try this Garlic Butter Green Beans. If you want another version and a fast 15 minute idea, see Foolproof Living’s 15-minute Garlic Butter Green Beans recipe for more tips and a ready plan.

Garlic Butter Green Beans

A warm, simple side dish featuring crisp green beans coated in rich garlic butter. Perfect for busy nights and holiday meals.

Main Ingredients

  • 1 pound fresh green beans, trimmed (Use fresh beans for the best texture.)
  • 2 tablespoons butter (Divided: 1 tablespoon for cooking, 1 tablespoon for flavor.)
  • 2 cloves garlic, minced (Add near the end to avoid burning.)
  • 1 tablespoon olive oil (For sautéing the beans.)
  • Salt, to taste (Enhances flavor.)
  • Black pepper, to taste (Enhances flavor.)
  • Optional: squeeze of lemon or pinch of red pepper flakes (For added flavor.)

Preparation

  1. Rinse and trim the green beans, then dry them well.
  2. Heat a large pan over medium heat and add the olive oil and 1 tablespoon of butter.
  3. Add the green beans, cooking and stirring for 4 to 6 minutes, until they are tender and bright green.

Cooking

  1. Push the beans to one side of the pan and add the remaining butter and minced garlic.
  2. Cook the garlic for about 30 seconds, ensuring it doesn’t burn.
  3. Mix the garlic and butter with the green beans and cook for 1 to 2 more minutes until the beans are cooked but still crisp.
  4. Season with salt and black pepper, and add a squeeze of lemon or a pinch of red pepper flakes if desired.
  5. Serve hot.

For best results, dry the beans thoroughly before sautéing. Use a hot pan to get nice color and keep crunch. If you desire softer beans, cover the pan for a minute and then uncover to let the butter brown.

Side Dish
American
Garlic Butter Green Beans, green beans, quick recipe, side dish, vegetable recipe

Maple Balsamic Roasted Asparagus

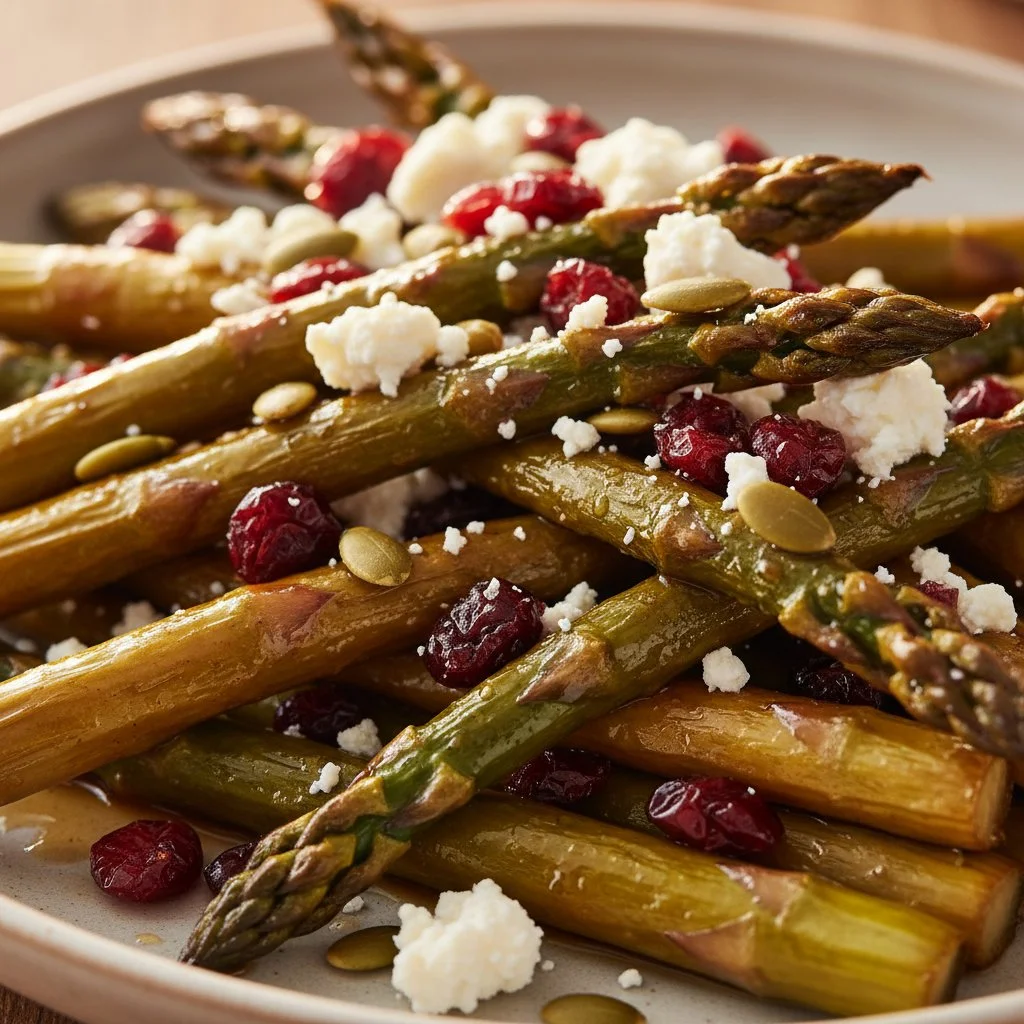
Plate of Maple Balsamic Roasted Asparagus garnished and ready to serve.

How to Prepare Maple Balsamic Roasted Asparagus

Making Maple Balsamic Roasted Asparagus is simple and fun! First, you’ll want to gather your fresh asparagus, maple syrup, balsamic vinegar, olive oil, garlic, salt, and pepper.

  1. Start by preheating your oven to 400°F (200°C).
  2. Wash the asparagus and trim the tough ends.
  3. In a bowl, mix together the maple syrup, balsamic vinegar, olive oil, minced garlic, salt, and pepper. This tasty mix will bring out the wonderful flavors of the asparagus.
  4. Toss the asparagus in the bowl with the mixture until it is well-coated.
  5. Spread the asparagus out in a single layer on a baking sheet.
  6. Roast in the oven for about 15 to 20 minutes, until the asparagus is tender and just starts to caramelize.
  7. Serve warm and enjoy!

Maple Balsamic Roasted Asparagus

Why You’ll Love Maple Balsamic Roasted Asparagus

This recipe is perfect for any occasion, whether it’s a weeknight dinner or a holiday feast. The sweetness of the maple syrup blends perfectly with the tanginess of the balsamic vinegar, creating a rich flavor that everyone will enjoy. Plus, the roasted asparagus is bright and beautiful, making it a great addition to your table. It’s simple enough for beginners, yet impressive enough to impress guests. After trying it, you’ll find yourself coming back for more!

Tips for Success

  • Make sure to use fresh asparagus for the best flavor.
  • You can adjust the amount of maple syrup and balsamic vinegar to suit your taste. If you prefer a sweeter dish, add a little more maple.
  • Keep an eye on the asparagus as it roasts, you don’t want it to get too soft.

Serving Suggestions

Maple Balsamic Roasted Asparagus pairs well with a variety of main dishes. Try it alongside grilled chicken, fish, or a hearty vegetable stew. It also makes a great addition to pasta dishes or as part of a fresh salad. Don’t forget to sprinkle some grated parmesan on top for an extra touch of flavor!

FAQs

Can I use frozen asparagus for this recipe?
While fresh asparagus is best, you can use frozen if that’s what you have. Just keep in mind that frozen asparagus may not get as crispy.

Can I prepare this dish ahead of time?
You can toss the asparagus in the maple balsamic mixture a few hours before roasting. Just keep it in the fridge until you’re ready to roast.

What can I use instead of balsamic vinegar?
If you don’t have balsamic vinegar, you can substitute with red wine vinegar or apple cider vinegar, though the flavor will be slightly different. Enjoy your cooking adventure with Maple Balsamic Roasted Asparagus!

Maple Balsamic Roasted Asparagus

Deliciously roasted asparagus coated in a sweet and tangy maple balsamic mixture, perfect as a side dish for any occasion.

Main ingredients

  • 1 bunch fresh asparagus (Trim the tough ends before use.)
  • 2 tablespoons maple syrup (Adjust for sweetness preference.)
  • 2 tablespoons balsamic vinegar (Can substitute with red wine or apple cider vinegar.)
  • 1 tablespoon olive oil
  • 2 cloves garlic, minced
  • 1 teaspoon salt (Adjust to taste.)
  • 1 teaspoon black pepper (Adjust to taste.)

Preparation

  1. Preheat your oven to 400°F (200°C).
  2. Wash the asparagus and trim the tough ends.
  3. In a bowl, mix together the maple syrup, balsamic vinegar, olive oil, minced garlic, salt, and pepper.
  4. Toss the asparagus in the bowl with the mixture until it is well-coated.

Cooking

  1. Spread the asparagus out in a single layer on a baking sheet.
  2. Roast in the oven for about 15 to 20 minutes, until the asparagus is tender and just starts to caramelize.

Serving

  1. Serve warm and enjoy!

Ensure fresh asparagus is used for the best flavor. Adjust maple syrup and balsamic vinegar to your taste. Keep an eye on the asparagus while roasting to avoid it getting too soft.

Side Dish, Vegetable
American
Easy Asparagus Recipe, Maple Balsamic Roasted Asparagus, Maple Syrup, Roasted Asparagus, Vegetable Side Dish