Mini Jalapeno Popper Egg Rolls

Mini Jalapeno Popper Egg Rolls are a delightful twist on two favorites: egg rolls and jalapeno poppers. These crispy treats are filled with creamy cheese, spicy jalapenos, and wrapped in a golden brown shell, making them a perfect appetizer or snack for any occasion. They bring a burst of flavor that will have your friends and family reaching for seconds. If you’re someone who enjoys a kick of spice and cheesy goodness, you’ll love making these fun bites.

How to prepare Mini Jalapeno Popper Egg Rolls

To start creating your own Mini Jalapeno Popper Egg Rolls, gather your fresh ingredients and get ready for a hands-on cooking experience. You’ll need egg roll wrappers, cream cheese, shredded cheese, diced jalapenos, and any spices you like.

Mini Jalapeno Popper Egg Rolls

  1. Begin by mixing the cream cheese, shredded cheese, jalapenos, and spices in a bowl.
  2. Take an egg roll wrapper and place a spoonful of the mixture in the center.
  3. Roll it up tightly, ensuring the filling is sealed inside.
  4. Repeat this process until all the ingredients are used.
  5. Finally, fry the egg rolls in hot oil until they turn golden brown and crispy.

These crispy rolls pair well with dipping sauces, elevating your snack game even further.

Why You’ll Love Mini Jalapeno Popper Egg Rolls

One of the best aspects of Mini Jalapeno Popper Egg Rolls is their versatility. They can be served as appetizers at a party, enjoyed during game day gatherings, or as a fun twist for a casual dinner. The combination of creamy filling and crispy exterior creates an irresistible texture. Plus, they are easy to customize. You can add other ingredients or spices to suit your taste. If you want something similar yet comforting, you might also enjoy a warm bowl of jalapeno popper soup.

Tips for success

  • Don’t Overfill: Make sure you don’t put too much filling in each wrapper; otherwise, they might burst while cooking.
  • Seal Well: Use a little water to wet the edges of the egg roll wrappers for a better seal.
  • Heat the Oil: Ensure your oil is hot enough before frying, which helps achieve that crispy texture.

Mini Jalapeno Popper Egg Rolls

Serving Suggestions

These egg rolls are perfect on their own, but they also shine when served with a variety of sauces. Try them with ranch dressing, sour cream, or a zesty salsa. You could even create a mini dipping bar with various sauces to let everyone choose their favorite. Pair these with a refreshing salad or veggies for a complete meal.

FAQs

  1. Can I bake the egg rolls instead of frying them? Yes, you can bake them for a lighter option. Brush them with oil and bake at 400°F until golden brown.
  2. How can I store leftover egg rolls? Store them in an airtight container in the fridge for up to 3 days. Reheat in the oven for best results.
  3. Can I make these egg rolls ahead of time? Absolutely! You can prepare the rolls and store them in the fridge before frying. Just fry them when you’re ready to serve.

Making Mini Jalapeno Popper Egg Rolls is a fun and rewarding activity, and with these tips and insights, you’re ready to impress your friends and family with your delicious creations!

Mini Jalapeno Popper Egg Rolls

Crispy and delicious, these Mini Jalapeno Popper Egg Rolls are filled with creamy cheese and spicy jalapenos, making them perfect for any occasion.

Filling

  • 8 oz cream cheese
  • 1 cup shredded cheese (Cheddar or a cheese blend works well.)
  • 2 medium jalapenos (Diced, adjust to taste.)
  • to taste spices (Use your favorite spices for flavor.)

Wraps

  • 12 egg roll wrappers

Cooking

  • as needed cups oil (For frying.)

Preparation

  1. In a bowl, mix the cream cheese, shredded cheese, diced jalapenos, and spices until well combined.
  2. Place a spoonful of the mixture in the center of each egg roll wrapper.
  3. Roll the wrapper tightly, ensuring the filling is fully sealed inside.
  4. Repeat the process until all ingredients are used.

Cooking

  1. Heat oil in a deep pan over medium-high heat until hot.
  2. Fry the egg rolls in the hot oil until golden brown and crispy on all sides.
  3. Remove from oil and drain on paper towels.

For best results, don’t overfill the wrappers, and seal the edges well with a little water. Serve with ranch, sour cream, or salsa.
Appetizer, Snack
American
Appetizer Recipes, Crispy Snacks, Egg Rolls, Game Day Food, Jalapeño Poppers

Overnight Yogurt Parfait Jars

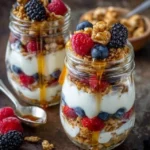
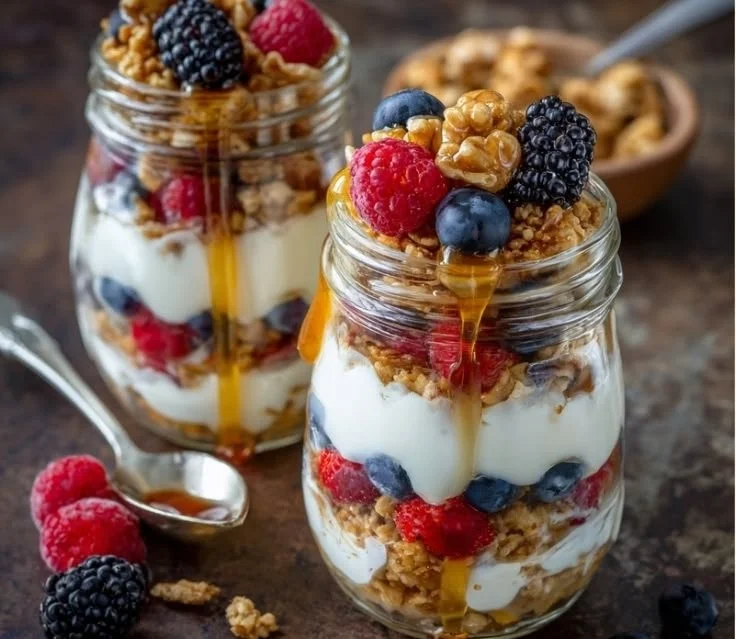
Overnight yogurt parfait jars with layers of yogurt, fruit, and granola.

There’s something truly special about starting your day with a breakfast that feels more like a treat, and Overnight Yogurt Parfait Jars do exactly that. They are delicious, nutritious, and oh-so-easy to prepare. Perfect for busy mornings or even as a delightful snack, these parfaits are a wonderful combination of creamy yogurt, fresh fruits, and crunchy granola. Each layer offers a burst of flavor and texture that will make your taste buds dance with joy. Plus, they are a crowd-pleaser at brunches or gatherings, leaving everyone wanting seconds. So, grab your jars and get ready to whip up this tasty recipe that you will surely want to make time and time again!

Overnight Yogurt Parfait Jars

How to prepare Overnight Yogurt Parfait Jars

To make these delightful parfaits, you will need:

  • 2 cups of your favorite yogurt (plain or flavored)
  • 1 cup of granola
  • 2 cups of fresh fruit (like berries, bananas, or peaches)
  • Honey or maple syrup (optional for extra sweetness)
  1. Start by layering half of the yogurt in the bottom of a jar.
  2. Add a layer of granola on top of the yogurt.
  3. Next, add a layer of your chosen fresh fruit.
  4. Repeat the layers with the remaining yogurt, granola, and fruit.
  5. If you want extra sweetness, drizzle honey or maple syrup on top.
  6. Close the jars and refrigerate them overnight.

{image_2}

Overnight Yogurt Parfait Jars

Why You’ll Love Overnight Yogurt Parfait Jars

You will love Overnight Yogurt Parfait Jars for many reasons. First, they are incredibly versatile. You can use any yogurt flavor and mix it up with different fruits and granola types weekly. This keeps breakfast exciting and never boring. Second, they are perfect for meal prep. Just prepare a few jars at once, and you have your breakfast ready for the week. Finally, they are not just tasty but also healthy. Packed with protein, vitamins, and fiber, these parfaits give you the energy you need to kick start your day!

Tips for success

  • Use a variety of fruits for added color and flavor.
  • Make sure to store the parfaits in airtight jars to keep them fresh.
  • For a more indulgent treat, add a layer of nuts or seeds.
  • Experiment with different yogurts, like Greek or plant-based, for various textures and flavors.

{image_1}

Serving Suggestions

These Overnight Yogurt Parfait Jars can be served chilled straight from the fridge. They also work great as a dessert or a snack during the day. For brunch, place a selection of parfait jars on a platter, and let your guests choose their favorite flavors. You might even add a sprinkle of cinnamon or a dollop of nut butter for an extra touch!

FAQs

Can I make these jars vegan?

Yes, you can use plant-based yogurt and make sure to choose granola that is dairy-free.

How long can I store these parfaits in the fridge?

They can be stored for up to three days in the fridge. Just make sure to cover them properly.

Can I use frozen fruit?

Yes, you can use frozen fruit! Just make sure to thaw them slightly before layering in the jars.

Overnight Yogurt Parfait Jars

Delicious and nutritious breakfast parfaits made with yogurt, fresh fruits, and granola, perfect for busy mornings or a satisfying snack.

For the parfaits

  • 2 cups favorite yogurt (plain or flavored) (Choose your preferred yogurt flavor.)
  • 1 cup granola (Use your favorite granola.)
  • 2 cups fresh fruit (like berries, bananas, or peaches) (You can mix and match different fruits.)
  • to taste Honey or maple syrup (Optional for extra sweetness.)

Preparation

  1. Layer half of the yogurt in the bottom of a jar.
  2. Add a layer of granola on top of the yogurt.
  3. Next, add a layer of your chosen fresh fruit.
  4. Repeat the layers with the remaining yogurt, granola, and fruit.
  5. If you want extra sweetness, drizzle honey or maple syrup on top.
  6. Close the jars and refrigerate them overnight.

These parfaits are versatile, great for meal prep, and packed with nutrients. Feel free to use plant-based yogurt and dairy-free granola for a vegan option. Store in airtight jars and consume within three days.

Breakfast, Brunch, Snack
American
Easy Recipe, Healthy Breakfast, Meal Prep, Nutritious Snack, Yogurt Parfait

Strawberry Yogurt Bites

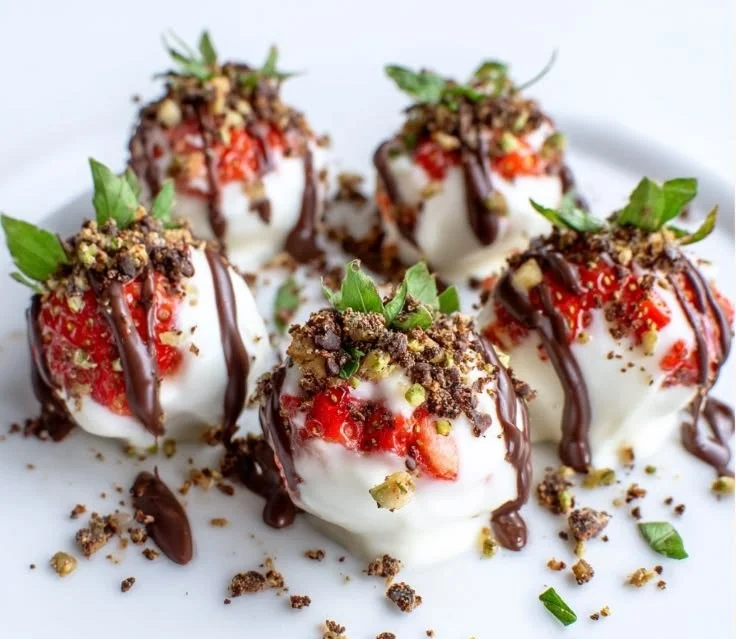
Delicious strawberry yogurt bites, a healthy and nutritious snack.

Making Strawberry Yogurt Bites is a fun and easy process that anyone can enjoy. First, gather your ingredients: fresh strawberries, Greek yogurt, honey, and a bit of granola for crunch. Start by washing the strawberries and removing the stems. Dip each strawberry into a bowl of Greek yogurt mixed with a touch of honey for sweetness. Once coated, place them on a tray lined with parchment paper. For a little extra texture, sprinkle some granola on top before freezing. After about two hours in the freezer, your tasty bites will be ready to enjoy!

Strawberry Yogurt Bites

{image_2}

Why You’ll Love Strawberry Yogurt Bites

Strawberry Yogurt Bites are not just delicious; they are also a healthy treat. Packed with protein from the yogurt and nutrients from the strawberries, they are perfect for kids and adults alike. The creamy yogurt contrasts perfectly with the juicy strawberries, creating a delightful pop of flavor in every bite. Plus, they are incredibly versatile and can be made with other fruits or toppings if you want to mix things up. These bites are a perfect snack for picnics, parties, or simply a treat after a long day. You really can’t go wrong with them!

Strawberry Yogurt Bites

Tips for success

To make sure your Strawberry Yogurt Bites turn out perfect, here are some helpful tips:

  1. Choose ripe strawberries: The riper the strawberry, the sweeter it will be, which enhances the flavor of your bites.
  2. Use a thick Greek yogurt: A thicker yogurt will coat the strawberries better and create a better texture.
  3. Don’t skip freezing: Freezing is crucial for getting the best texture. Give them enough time to set in the freezer.
  4. Experiment with flavors: Try different yogurt flavors or sweeteners to find what you like best.

{image_1}

Serving Suggestions

Serve your Strawberry Yogurt Bites as a refreshing snack on hot summer days. They make a fantastic dessert for gatherings or brunches. You can also pair them with a drizzle of melted dark chocolate or a side of fruit salad for a more colorful plate. Enjoy them as a healthy option for kids’ parties, ensuring everyone leaves with a smile!

FAQs

Can I use frozen strawberries?

Yes, you can use frozen strawberries, but fresh strawberries typically taste better and provide a firmer texture. If using frozen, thaw them beforehand.

How long do they last in the freezer?

Strawberry Yogurt Bites can last up to three months in the freezer if stored in an airtight container.

Can I add other fruits?

Absolutely! Feel free to try other fruits like blueberries, raspberries, or banana slices. Just remember to adjust the yogurt and honey amount based on the fruit you choose.

Strawberry Yogurt Bites

Delicious, healthy, and easy-to-make strawberry yogurt bites, perfect for a refreshing snack or dessert.

Main Ingredients

  • 1 cup fresh strawberries (Choose ripe strawberries for the best flavor.)
  • 1 cup Greek yogurt (Use thick Greek yogurt for better coating.)
  • 2 tablespoons honey (Adjust sweetness based on preference.)
  • 1/4 cup granola (For a crunchy topping.)

Preparation

  1. Wash the strawberries and remove the stems.
  2. In a bowl, mix Greek yogurt with honey until well combined.
  3. Dip each strawberry into the yogurt mixture, ensuring it is well coated.
  4. Place the coated strawberries on a tray lined with parchment paper.
  5. Sprinkle granola on top of each strawberry for added crunch.

Freezing

  1. Freeze the tray of yogurt-coated strawberries for about 2 hours.

These bites can be made with other fruits or yogurt flavors. For best results, don’t skip freezing, and experiment with toppings.

Dessert, Snack
American
Easy Recipe, Family-Friendly, Frozen Treat, Healthy Snack, Strawberry Yogurt Bites

Healthy Peanut Butter Banana Muffins

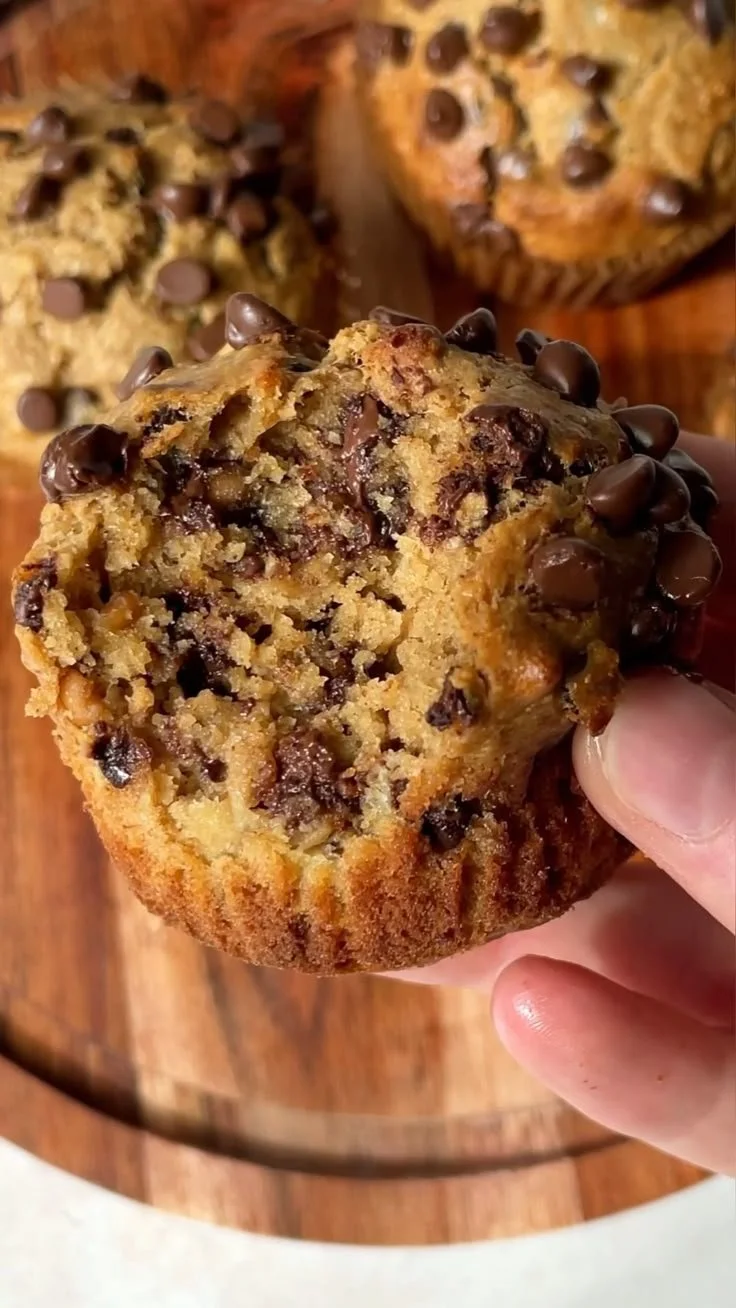
Healthy peanut butter banana muffins fresh out of the oven.

Peanut Butter Banana Muffins fit busy mornings, and this do just that. They are soft, nutty, and sweet from ripe bananas. The muffins make a great breakfast, snack, or lunchbox treat. This recipe is simple, uses real food, and pleases a crowd. You will love the peanut butter flavor with banana, and how easy they are to make. Ready to bake something warm and comforting, that still feels good to eat?

How to prepare Peanut Butter Banana Muffins

Yield: about 12 muffins, Bake time: 18 to 22 minutes, Oven: 350°F (175°C)

Ingredients

  • 3 ripe bananas, mashed
  • 1/2 cup peanut butter, smooth or crunchy
  • 1/3 cup honey or maple syrup
  • 2 eggs, room temperature
  • 1/4 cup milk, dairy or plant milk
  • 1 tsp vanilla extract
  • 1 cup whole wheat flour or oat flour
  • 1 tsp baking powder
  • 1/2 tsp baking soda
  • 1/4 tsp salt
  • 1/3 cup rolled oats or chopped nuts, optional
  • 1/4 cup dark chocolate chips, optional

Directions

  1. Preheat your oven to 350°F, line a muffin tin with paper cups or grease it lightly.
  2. In a big bowl, mash the bananas with a fork until smooth. Add peanut butter, honey, eggs, milk, and vanilla, mix well.
  3. In another bowl, stir together the flour, baking powder, baking soda, and salt.
  4. Pour the dry mix into the wet mix, stir until just combined, do not overmix. Fold in oats or nuts and chocolate chips if you like.
  5. Spoon the batter into the muffin cups, fill each about two thirds full.
  6. Bake 18 to 22 minutes, until tops are golden and a toothpick comes out clean.
  7. Let muffins cool in the tin for 5 minutes, then move to a rack to cool more. Enjoy warm or room temperature.

Healthy Peanut Butter Banana Muffins

Why You’ll Love Peanut Butter Banana Muffins

  • They use ripe bananas, so you get natural sweetness and moist muffins.
  • Peanut butter adds protein and rich flavor, making them filling and tasty.
  • They work as a quick breakfast, snack, or lunchbox treat.
  • You can make them with whole wheat or oat flour for a healthier twist.
  • They are easy to make, and kids usually love them.

Tips for success

  • Use very ripe bananas, they give the best taste and moisture.
  • Do not overmix the batter, a few lumps are okay, this keeps muffins soft.
  • If you want less sugar, use less honey or skip the chocolate chips.
  • For a gluten free option, use certified gluten free oat flour.
  • Check muffins at 18 minutes, ovens vary, and you do not want them dry.

Serving Suggestions

  • Serve warm with a thin spread of peanut butter on top.
  • Pair with yogurt and fruit for a quick breakfast.
  • Pack them in a lunch box with fresh apples or carrot sticks.
  • Crumble over plain yogurt for a simple parfait.

Healthy Peanut Butter Banana Muffins

FAQs

Q: Can I freeze these muffins?
A: Yes, cool them fully, wrap in foil or put in a freezer bag, freeze up to 3 months. Thaw at room temperature or warm in the oven.

Q: Can I make these without eggs?
A: Yes, use flax eggs, mix 2 tablespoons ground flax with 6 tablespoons water, let sit 5 minutes, then use in place of 2 eggs.

Q: Are these muffins high in protein?
A: They have more protein than plain banana muffins because of the peanut butter and eggs, but they are not a protein bar. Add Greek yogurt or extra peanut butter for more protein.

Q: Can I use almond butter instead of peanut butter?
A: Yes, almond butter or any nut butter works, the flavor will change slightly but they stay very good.

Q: Can I make mini muffins?
A: Yes, bake mini muffins 10 to 14 minutes, check often as they cook faster.

Conclusion

If you want one more simple reference for a similar version, you can find a good recipe example at Healthy Peanut Butter Banana Muffins – Broma Bakery.

Healthy Peanut Butter Banana Muffins

These soft, nutty, and sweet muffins are easy to make and perfect for a busy morning. Enjoy them as a breakfast, snack, or lunchbox treat!

Main Ingredients

  • 3 pieces ripe bananas, mashed (Use very ripe bananas for the best taste and moisture.)
  • 1/2 cup peanut butter, smooth or crunchy (Can substitute with almond butter or other nut butters.)
  • 1/3 cup honey or maple syrup (Use less if you prefer a less sweet muffin.)
  • 2 pieces eggs, room temperature (Optional: can use flax eggs as a substitute.)
  • 1/4 cup milk, dairy or plant milk
  • 1 tsp vanilla extract
  • 1 cup whole wheat flour or oat flour (For gluten-free, use certified gluten-free oat flour.)
  • 1 tsp baking powder
  • 1/2 tsp baking soda
  • 1/4 tsp salt
  • 1/3 cup rolled oats or chopped nuts, optional
  • 1/4 cup dark chocolate chips, optional

Preparation

  1. Preheat your oven to 350°F (175°C) and line a muffin tin with paper cups or grease it lightly.
  2. In a big bowl, mash the bananas with a fork until smooth. Add peanut butter, honey, eggs, milk, and vanilla, then mix well.
  3. In another bowl, stir together the flour, baking powder, baking soda, and salt.
  4. Pour the dry mix into the wet mix and stir until just combined. Do not overmix. Fold in oats or nuts and chocolate chips if desired.
  5. Spoon the batter into the muffin cups, filling each about two thirds full.
  6. Bake for 18 to 22 minutes, until tops are golden and a toothpick comes out clean.
  7. Let muffins cool in the tin for 5 minutes, then transfer to a rack to cool more. Enjoy warm or at room temperature.

For serving suggestions, enjoy warm with a thin spread of peanut butter, pair with yogurt and fruit, or crumble over yogurt for a parfait. Muffins can be frozen for up to 3 months.

Breakfast, Snack
American
Baking, Easy Breakfast Recipe, Healthy Muffins, Nutty Muffins, Peanut Butter Banana Muffins

Banana Oatmeal Cookies

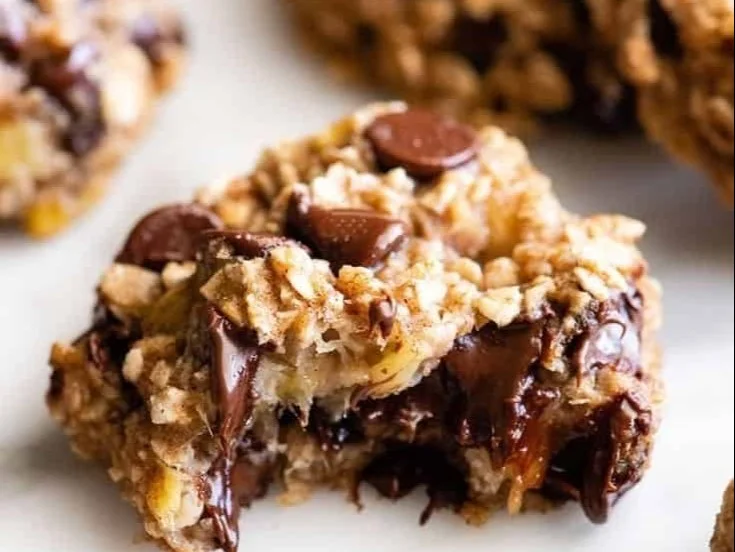
Freshly baked banana oatmeal cookies on a wooden table

Banana Oatmeal Cookies are warm, soft, and simple to make. They use ripe bananas and oats for a sweet, gentle flavor. These cookies are great for snacks, lunchboxes, or a quick treat after school. They feel homey and healthy at the same time, and people of all ages usually enjoy them.

This featured Banana Oatmeal Cookies recipe is a crowd-pleaser. It tastes like sweet banana with a chewy oat bite. The cookies are easy to make, low fuss, and perfect when you want a quick dessert or a healthy snack. Grab your ripe bananas and let’s make a batch that will vanish fast, you might need to hide a few for yourself!

How to prepare Banana Oatmeal Cookies

  1. Preheat the oven to 350°F (175°C). Line a baking sheet with parchment paper or lightly grease it.
  2. In a bowl, mash 2 very ripe bananas with a fork until smooth.
  3. Add 1 cup rolled oats to the mashed bananas. Stir until mixed.
  4. If you like, add a small pinch of salt, 1/2 teaspoon cinnamon, or a splash of vanilla for more flavor.
  5. Stir in optional mix-ins like 1/4 cup chocolate chips, chopped nuts, or dried fruit.
  6. Drop spoonfuls of the dough onto the baking sheet. Flatten each slightly with the back of the spoon.
  7. Bake for 10 to 15 minutes, until the edges are light golden.
  8. Let the cookies cool on the sheet for a few minutes, then move to a rack to cool fully.

Banana Oatmeal Cookies

Why You’ll Love Banana Oatmeal Cookies

  • They are quick and easy, using just a few simple ingredients like ripe bananas and oats.
  • The cookies are naturally sweet, so you can skip extra sugar if you want a healthier treat.
  • They are soft and chewy, with a warm banana taste that feels homemade.
  • You can change them with add-ins, like chocolate chips or nuts, to suit your taste.

Tips for success

  • Use very ripe bananas, the riper the sweeter and the better the texture.
  • Measure oats by cup, and use rolled oats for the best chew.
  • If the dough is too wet, add a little more oats, one tablespoon at a time.
  • If you want flatter cookies, press them gently before baking.
  • Watch the bake time, ovens vary, and cookies can go from golden to too brown fast.

Serving Suggestions

  • Serve warm with a glass of milk or a cup of tea.
  • Add a spoon of peanut butter on top for extra protein and flavor.
  • Pack them in lunchboxes for an easy snack.
  • Crumble them over yogurt for a quick breakfast boost.

Banana Oatmeal Cookies

FAQs

Q: Can I make these cookies without baking?

A: Yes, you can make no-bake banana oat bites by chilling spoonfuls in the fridge, but the texture will be softer and more like a firm snack.

Q: How long do the cookies keep?

A: Store them in an airtight container at room temperature for 2 days, or in the fridge for up to a week.

Q: Can I use instant oats or steel-cut oats?

A: Instant oats can work but may make cookies softer. Do not use steel-cut oats, they are too hard and will not soften well in this recipe.

Q: Are these cookies gluten-free?

A: They can be, if you use certified gluten-free oats. Check labels to be sure.

Q: Can I add eggs or flour for a firmer cookie?

A: Yes, adding an egg and a little flour will make the cookies firmer and more cookie-like if you prefer that texture.

Conclusion

For another simple, healthy take on banana oat cookies you can try this well-loved recipe online, see Healthy 3-Ingredient Banana Oatmeal Cookies – Skinnytaste.

Banana Oatmeal Cookies

Warm, soft, and simple to make, these Banana Oatmeal Cookies use ripe bananas and oats for a sweet, gentle flavor. A perfect treat for snacks, lunchboxes, or a quick dessert.

Main Ingredients

  • 2 pieces very ripe bananas (The riper, the sweeter and better the texture.)
  • 1 cup rolled oats (Use rolled oats for the best chew.)

Optional Flavorings

  • 1/2 teaspoon cinnamon (For added flavor.)
  • pinch salt (To enhance flavors.)
  • 1/4 cup chocolate chips or chopped nuts or dried fruit (Optional mix-ins to customize your cookies.)

Preparation

  1. Preheat the oven to 350°F (175°C). Line a baking sheet with parchment paper or lightly grease it.
  2. In a bowl, mash the very ripe bananas with a fork until smooth.
  3. Add the rolled oats to the mashed bananas and stir until mixed.
  4. If desired, add a small pinch of salt, cinnamon, and/or vanilla for more flavor.
  5. Stir in optional mix-ins like chocolate chips, chopped nuts, or dried fruit.
  6. Drop spoonfuls of the dough onto the baking sheet and flatten each slightly with the back of the spoon.

Baking

  1. Bake for 10 to 15 minutes, until the edges are light golden.
  2. Let the cookies cool on the sheet for a few minutes, then move to a rack to cool fully.

Use very ripe bananas for best sweetness and texture. Measure oats by cup. If the dough is too wet, add more oats one tablespoon at a time. For flatter cookies, press gently before baking. Watch the bake time as ovens vary.

Dessert, Snack
American
Banana Oatmeal Cookies, easy dessert, Healthy Cookies, Quick Snacks, Ripe Bananas