Spicy Potato Noodles

Bowl of spicy potato noodles garnished with herbs and spices

Spicy Potato Noodles feel like a hug with a kick. They are warm, spicy, and full of good textures, with soft noodles and crisp vegetables. This featured recipe is a crowd-pleaser because it balances heat, salt, and a touch of sweet, while the noodles soak up the sauce. It is simple to make, and many people ask for seconds. Give it a try and you may find it becomes a go-to dinner. Get ready to make a bowl that tastes bold, bright, and very comforting.

Why You’ll Love Spicy Potato Noodles

This spicy potato noodles recipe brings bold flavor with simple steps. The dish mixes soft potato noodles with a spicy, tangy sauce, fresh veggies, and a little crunch. It works as a quick weeknight meal, a fun party dish, or a cozy bowl when you want something warm and lively. If you like spicy noodles or potato noodle stir-fry, you will love how fast it comes together and how tasty it feels.

How to prepare Spicy Potato Noodles

Ingredients

  • 8 ounces potato noodles, or glass noodles, soaked or cooked as package says
  • 2 large potatoes, peeled and cut into thin matchsticks, or use pre-made potato noodles
  • 1 small carrot, thinly sliced
  • 1/2 cup green onion, sliced
  • 2 cloves garlic, minced
  • 1 tablespoon vegetable oil
  • 2 tablespoons soy sauce
  • 1 tablespoon gochujang, or chili paste, adjust to taste
  • 1 tablespoon rice vinegar or white vinegar
  • 1 teaspoon sugar or honey
  • 1/2 teaspoon sesame oil (optional)
  • Salt and pepper to taste
  • Sesame seeds for garnish (optional)

Directions

  1. If using dried noodles, cook them or soak them until soft, then drain and set aside. If using fresh potato noodles, rinse and drain.
  2. Heat oil in a large pan over medium heat. Add garlic and stir for 30 seconds.
  3. Add the potato matchsticks or potato noodles and carrot. Stir-fry until the potatoes soften and start to brown, about 6 to 8 minutes.
  4. Mix soy sauce, gochujang, vinegar, sugar, and sesame oil in a small bowl. Taste and change the spice level to your liking.
  5. Add the cooked noodles to the pan. Pour the sauce over the noodles and vegetables. Toss well so the noodles and vegetables get coated. Cook 2 to 3 minutes more so the flavors join.
  6. Add green onion, salt, and pepper. Stir and turn off the heat.
  7. Serve hot, sprinkle sesame seeds if you like.

Spicy Potato Noodles

Tips for success

  • Cut potatoes thin and even, this helps them cook fast and match the noodle texture.
  • Soak dried noodles as the package says, to avoid breaking when you stir them.
  • Taste the sauce before you add it, this lets you change the heat or salt easily.
  • Use a non-stick pan or a well-seasoned pan to stop the noodles from sticking.
  • If you want less heat, use half the gochujang and add a splash more soy sauce for flavor.
  • For a gluten-free version, use tamari instead of soy sauce.

Serving Suggestions

  • Top the noodles with extra green onion and sesame seeds for color and taste.
  • Serve with a side of pickled vegetables or a simple cucumber salad to cool the heat.
  • For protein, add cooked tofu, chicken, or shrimp to make it a full meal.
  • Pair with a light soup or steamed greens to make the meal balanced.

Spicy Potato Noodles

FAQs

Q: Can I make this dish ahead of time,
A: You can make the noodles ahead and store them in the fridge for a day. Reheat in a pan with a splash of water and mix the sauce again, the texture will be best fresh.

Q: What if I can not find potato noodles,
A: Use glass noodles or rice noodles as a good substitute. The sauce and method stay the same.

Q: Is this recipe vegetarian,
A: Yes, as written it is vegetarian. Use tofu or mushrooms to add protein and keep it meat free.

Q: How spicy is this recipe,
A: The heat level depends on how much gochujang or chili paste you use. Start with less, then add more if you want more spice.

Q: Can I freeze leftovers,
A: Freezing is not ideal because potato noodles can change texture. It is best to keep leftovers in the fridge and eat within 2 days.

Conclusion

If you want a tasty, simple spicy potato noodles recipe to try tonight, this one hits the spot. For another clear, tested version with step by step photos and tips, see Spicy Potato Noodles | Two Plaid Aprons.

Spicy Potato Noodles

A flavorful dish combining soft potato noodles and a spicy sauce with fresh veggies, perfect for a quick weeknight meal or a cozy dinner.

Noodles and Vegetables

  • 8 ounces potato noodles, or glass noodles, soaked or cooked as package says
  • 2 large potatoes, peeled and cut into thin matchsticks, or use pre-made potato noodles
  • 1 small carrot, thinly sliced
  • 1/2 cup green onion, sliced (For garnish and flavor)
  • 2 cloves garlic, minced

Sauce

  • 1 tablespoon vegetable oil
  • 2 tablespoons soy sauce
  • 1 tablespoon gochujang, or chili paste, adjust to taste
  • 1 tablespoon rice vinegar or white vinegar
  • 1 teaspoon sugar or honey
  • 1/2 teaspoon sesame oil (optional)
  • Salt and pepper to taste
  • Sesame seeds for garnish (optional)

Preparation

  1. If using dried noodles, cook them or soak them until soft, then drain and set aside. If using fresh potato noodles, rinse and drain.

Cooking

  1. Heat oil in a large pan over medium heat. Add garlic and stir for 30 seconds.
  2. Add the potato matchsticks or potato noodles and carrot. Stir-fry until the potatoes soften and start to brown, about 6 to 8 minutes.
  3. Mix soy sauce, gochujang, vinegar, sugar, and sesame oil in a small bowl. Taste and change the spice level to your liking.
  4. Add the cooked noodles to the pan. Pour the sauce over the noodles and vegetables. Toss well so the noodles and vegetables get coated. Cook 2 to 3 minutes more so the flavors join.
  5. Add green onion, salt, and pepper. Stir and turn off the heat.
  6. Serve hot, sprinkle sesame seeds if you like.

Cut potatoes thin and even to help them cook fast and match the noodle texture. Use a non-stick pan or a well-seasoned pan to stop the noodles from sticking. For a gluten-free version, use tamari instead of soy sauce.
Dinner, Main Course
Asian
Comfort Food, Potato Noodles, Quick Dinner, Spicy Potato Noodles, Stir-Fry

Broccoli Cheese Soup

A bowl of creamy Broccoli Cheese Soup garnished with fresh broccoli and cheese

This warm broccoli cheese soup feels like a hug in a bowl. It is creamy, cheesy, and full of tender broccoli. People love it on cold days and at simple family dinners. The featured recipe is a classic, easy broccoli cheese soup that cooks fast and pleases most tastes. It has a rich cheddar flavor, a smooth texture, and a homey feel that makes it a crowd pleaser, whether you make it for lunch or a cozy dinner. Get ready to make a pot that fills the house with a happy smell, and makes everyone ask for seconds.

How to prepare Broccoli Cheese Soup

Ingredients

  • 4 cups broccoli florets, chopped small
  • 1 small onion, diced
  • 2 cloves garlic, minced
  • 3 tablespoons butter
  • 3 tablespoons all purpose flour
  • 3 cups chicken or vegetable broth
  • 1 cup milk or half and half
  • 2 cups shredded cheddar cheese
  • Salt and pepper to taste
  • Optional, grated carrot or a pinch of mustard powder for extra flavor

Directions

  1. Melt butter in a large pot over medium heat. Add onion and cook until soft, about 5 minutes. Add garlic and cook 1 minute.
  2. Stir in flour, cook 1 minute to make a light roux.
  3. Slowly add broth while stirring, so the soup stays smooth.
  4. Add broccoli, bring to a simmer, cover and cook until broccoli is tender, about 10 minutes.
  5. Use an immersion blender for a smooth soup, or mash some broccoli with a spoon for a chunkier texture.
  6. Stir in milk, then lower heat. Add cheese a little at a time, stirring until melted and smooth. Do not boil after cheese is added.
  7. Taste and add salt and pepper. If the soup is too thick, add a splash of milk or broth.
  8. Serve hot, with extra cheese on top if you like.

Broccoli Cheese Soup

Why You’ll Love Broccoli Cheese Soup

  • Simple to make with common kitchen ingredients.
  • Comforting, creamy texture that kids and adults enjoy.
  • Flexible, you can make it thick or thin, smooth or chunky.
  • Good use of fresh or frozen broccoli, so it works any time.
  • A great base to add bacon, potatoes, or extra veggies.

Tips for success

  • Chop broccoli small so it cooks fast and blends well.
  • Add cheese off the heat or on very low heat, to keep it smooth.
  • Use sharp cheddar for more flavor, mild cheddar for a softer taste.
  • If the soup is grainy after adding cheese, stir in a little milk and heat gently to smooth it.
  • For a richer soup, use half and half or add a splash of cream.
  • Taste and season at the end, cheese can add salt.

Serving Suggestions

  • Serve with crusty bread or garlic toast for dipping.
  • Top with extra shredded cheddar, croutons, or crispy bacon bits.
  • Offer a side salad to make a light meal.
  • Spoon into bread bowls for a fun serving idea.
  • Pair with a sandwich, like a grilled cheese, for a classic combo.

Broccoli Cheese Soup

FAQs

Q, Can I use frozen broccoli?

A, Yes, frozen broccoli works well, add it a little longer if needed.

Q, How do I make the soup thicker?

A, Cook less broth, or mash some broccoli into the broth, or add a little more cheese.

Q, Can I make it ahead of time?

A, Yes, make it ahead and reheat gently. If it gets too thick, thin with a splash of milk or broth.

Q, Is this soup good for kids?

A, Yes, many kids like creamy broccoli cheese soup, and you can blend it smooth for picky eaters.

Q, Can I use a different cheese?

A, Yes, try Monterey Jack, Colby, or a mix with cheddar for different flavors.

Conclusion

If you want another version or step by step photos, check this helpful Broccoli Cheese Soup recipe for more ideas, Broccoli Cheese Soup – Tastes Better from Scratch.

Broccoli Cheese Soup

This warm broccoli cheese soup is creamy, cheesy, and full of tender broccoli, making it a comforting dish for cold days and family dinners.

Main Ingredients

  • 4 cups broccoli florets, chopped small (Chop broccoli small so it cooks fast and blends well.)
  • 1 small onion, diced
  • 2 cloves garlic, minced
  • 3 tablespoons butter
  • 3 tablespoons all purpose flour
  • 3 cups chicken or vegetable broth
  • 1 cup milk or half and half (For a richer soup, use half and half or add a splash of cream.)
  • 2 cups shredded cheddar cheese (Use sharp cheddar for more flavor, mild cheddar for a softer taste.)
  • to taste salt and pepper (Taste and season at the end, cheese can add salt.)
  • optional grated carrot or a pinch of mustard powder (Optional for extra flavor.)

Preparation

  1. Melt butter in a large pot over medium heat. Add onion and cook until soft, about 5 minutes.
  2. Add garlic and cook for 1 minute.
  3. Stir in flour, cook for 1 minute to make a light roux.

Cooking

  1. Slowly add broth while stirring, so the soup stays smooth.
  2. Add broccoli, bring to a simmer, cover and cook until broccoli is tender, about 10 minutes.
  3. Use an immersion blender for a smooth soup, or mash some broccoli with a spoon for a chunkier texture.
  4. Stir in milk, then lower heat. Add cheese a little at a time, stirring until melted and smooth. Do not boil after cheese is added.
  5. Taste and add salt and pepper. If the soup is too thick, add a splash of milk or broth.

Serving

  1. Serve hot, with extra cheese on top if you like.

Serve with crusty bread or garlic toast for dipping. Top with extra shredded cheddar, croutons, or crispy bacon bits. Offer a side salad to make a light meal. Spoon into bread bowls for a fun serving idea. Pair with a sandwich, like a grilled cheese, for a classic combo.

Dinner, lunch, Soup
American
Broccoli Cheese Soup, Cheesy Soup, Comfort Food, Easy Soup, Vegetarian Soup

Butternut Squash and Sweet Potato Soup

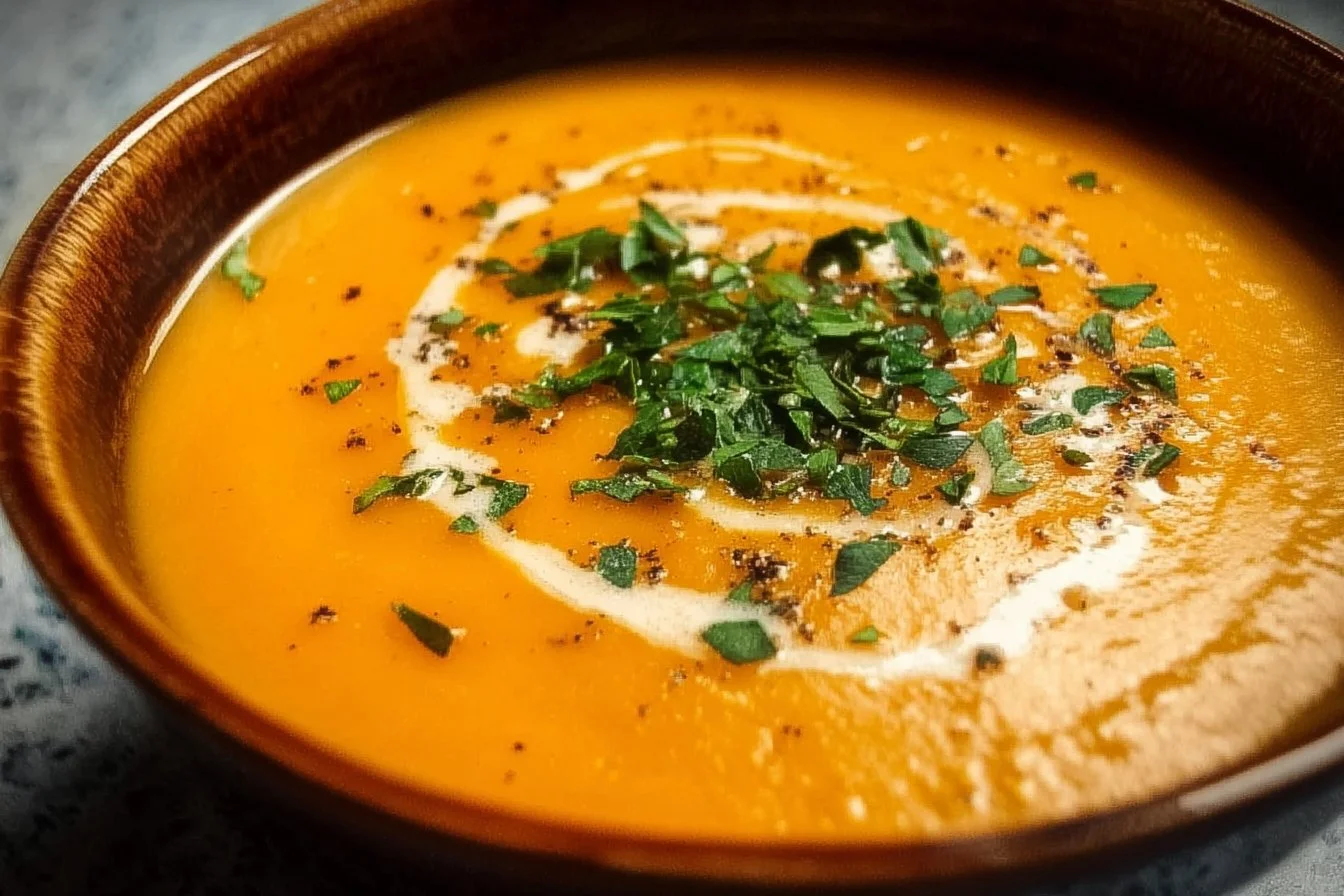
Creamy butternut squash and sweet potato soup served in a bowl with garnish

Butternut Squash and Sweet Potato Soup is like a warm hug on a chilly day. This comforting dish combines the natural sweetness of butternut squash and sweet potatoes, creating a smooth and creamy texture that will make you feel cozy inside. The bright orange color is not only inviting but also makes it a perfect dish for gatherings or family dinners. It’s easy to make, and once you smell it simmering on the stove, your family will gather around, eager to taste this delicious mix of flavors. Trust us, it’s a crowd-pleaser! Whether you are a seasoned cook or a beginner, you will love making this soup. So grab your pots and get ready for a delightful kitchen experience!

How to Prepare Butternut Squash and Sweet Potato Soup

To prepare Butternut Squash and Sweet Potato Soup, start by gathering your ingredients. You will need butternut squash, sweet potatoes, onion, garlic, vegetable broth, and a splash of cream or coconut milk. First, peel and chop the butternut squash and sweet potatoes into small cubes. In a pot, heat some oil and sauté chopped onion and garlic until they become soft and fragrant. Add the cubed squash and sweet potatoes to the pot, along with the vegetable broth. Bring it to a boil and then lower the heat to let it simmer. Cook until the vegetables are tender, about 20-25 minutes. Once cooked, use an immersion blender or regular blender to puree the soup until it is smooth and creamy. If you like a bit of extra richness, stir in some cream or coconut milk. Season with salt and pepper to taste, and your delicious soup is ready to serve!

Why You’ll Love Butternut Squash and Sweet Potato Soup

Butternut Squash and Sweet Potato Soup is loved for many reasons. First, it is incredibly simple to make, requiring just a few fresh ingredients. The natural sweetness of the squash and sweet potatoes, along with the savory notes from the onion and garlic, create a beautiful balance of flavors. This soup is not only tasty but also packed with vitamins and nutrients, making it a healthy choice for lunch or dinner. Plus, it’s very filling, so you won’t go hungry! The creamy texture is satisfying, and the bright orange color adds vibrancy to your table. It’s perfect for a cozy night in or served as an elegant starter for a dinner party. There’s something so special about enjoying a warm bowl of homemade soup, and this recipe will quickly become a favorite for you and your loved ones.

Tips for Success

To ensure your Butternut Squash and Sweet Potato Soup turns out perfectly, here are some helpful tips. First, make sure to chop the squash and sweet potatoes into similar sizes for even cooking. This helps them become tender at the same time. Don’t rush the sautéing of the onion and garlic, as this step builds a richer flavor base for your soup. If you prefer a chunkier texture, reserve a few cubes of the cooked vegetables and add them back into the soup after blending. To enhance the flavor, consider adding spices like cinnamon or nutmeg, which pair beautifully with the sweetness of the squash. Finally, taste your soup before serving and adjust the seasoning as needed. You might want to add a splash of lemon juice for brightness. With these tips in mind, you’ll have a delicious soup ready to impress!

Serving Suggestions

Serving suggestions for Butternut Squash and Sweet Potato Soup can elevate your meal. For a classic combination, serve the soup with warm, crusty bread or buttery rolls, perfect for dipping. You can also drizzle a little cream or coconut milk on top for a beautiful presentation. If you want to add some crunch, consider garnishing your soup with roasted pumpkin seeds or croutons. A sprinkle of fresh herbs, such as cilantro or parsley, can add a pop of color and flavor. For a more filling meal, pair the soup with a hearty salad or a grain dish, such as quinoa or brown rice. This soup is versatile and can be enjoyed as a starter or the main dish, making it a wonderful addition to any table.

FAQs

1. Can I make this soup ahead of time?

Yes, you can prepare the soup ahead of time. It will keep well in the fridge for about three to four days. Just reheat it on the stove when you’re ready to serve.

2. Can I freeze Butternut Squash and Sweet Potato Soup?

Absolutely! This soup freezes beautifully. Once cooled, store it in airtight containers or freezer bags. It will last for up to three months in the freezer.

3. How can I make this soup vegan?

To make a vegan version, simply use coconut milk instead of cream and ensure your vegetable broth is plant-based. The soup will still be creamy and delicious!

Sweet Potato Soup

A cozy and creamy sweet potato soup, lightly spiced and perfect for cool nights.

Main Ingredients

  • 2 pounds sweet potatoes (Peeled and cubed)
  • 1 onion (Chopped)
  • 2 cloves garlic (Mince)
  • 2 tablespoons oil (For cooking)
  • 4 cups vegetable or chicken broth (Use low-sodium for better control of salt)
  • 1 teaspoon salt (Adjust to taste)
  • 1/2 teaspoon black pepper (Adjust to taste)
  • 1/2 teaspoon ground cumin
  • 1/2 cup milk or coconut milk (For creaminess)

Garnishes

  • olive oil (For drizzling on top)
  • chopped parsley (For sprinkling)
  • roasted seeds (For topping)

Preparation

  1. Peel and cube the sweet potatoes, chop the onion, and mince the garlic.

Cooking

  1. Heat the oil in a pot, add the onion and garlic, and cook until soft, about 5 minutes.
  2. Add the sweet potatoes, broth, salt, black pepper, and cumin. Bring to a boil.
  3. Lower the heat, cover, and simmer until the sweet potatoes are very soft, about 15 to 20 minutes.
  4. Use an immersion blender or regular blender to puree the soup until smooth, adding hot water or broth if too thick.
  5. Stir in the milk or coconut milk, warm gently, and taste to adjust salt and pepper.

Serving

  1. Serve hot, garnished with olive oil, chopped parsley, or roasted seeds.

For deeper flavor, roast the sweet potatoes first. Use low-sodium broth for better salt control. Warm gently after adding milk to keep it smooth.

Appetizer, Soup
American, Comfort Food
Cozy Soup, fall recipes, Healthy Soups, Sweet Potato Soup

Air Fryer Stuffed Peppers

Colorful air fryer stuffed peppers filled with savory ingredients

I love simple meals that taste like you worked hard, when you did not. Air fryer stuffed peppers make a cozy, bright plate with little fuss. This recipe is a crowd-pleaser because it mixes sweet bell peppers, savory meat, and melty cheese in one fun bite. If you like quick air fryer meals, try this dish and later check a fun spin on air fryer sandwiches like air fryer grilled cheese hot dogs for another easy meal idea. You will smile when you see how good it smells, and you might want to make it every week.

How to prepare Air Fryer Stuffed Peppers.

Preheat your air fryer to 350°F (175°C). Wash four bell peppers, cut off the tops, and remove the seeds. In a bowl, cook 1 pound ground beef or turkey with one chopped onion until browned, then drain any extra fat. Stir in 1 cup cooked rice, 1 cup tomato sauce, 1 teaspoon salt, 1/2 teaspoon pepper, and 1/2 cup shredded cheese. Spoon the filling into each pepper, top with a little extra cheese if you like, and place the peppers upright in the air fryer basket. Cook for 10 to 15 minutes, until the peppers are tender and the cheese is melted. Let sit two minutes before serving.

Air Fryer Stuffed Peppers

Why You’ll Love Air Fryer Stuffed Peppers

  • Fast cook time, they are ready in about 20 to 30 minutes.
  • Easy to change, use beef, turkey, or a vegetarian mix with beans and veggies.
  • Healthy and filling, the peppers give color, vitamins, and fiber.
  • Great one-dish meal for kids and guests, this stuffed peppers recipe is simple to scale.

tips for success

  • Choose peppers that sit flat so they stay upright in the basket.
  • Par-cook rice or use leftover rice to save time.
  • Do not overfill, leave a little room so cheese melts on top.
  • Check at 10 minutes, air fryer models cook differently, add time if peppers are still firm.
  • For softer peppers, cook at 350°F for 15 minutes, for firmer peppers, check at 10 minutes.

Serving Suggestions

  • Serve with a simple green salad and a squeeze of lemon for brightness.
  • Add a spoon of sour cream or plain yogurt on top for creaminess.
  • Offer warm crusty bread or garlic bread on the side.
  • Leftovers reheat well in the air fryer for 5 minutes at 350°F.

Air Fryer Stuffed Peppers

FAQs

Q: Can I make stuffed peppers ahead of time?

A: Yes, stuff the peppers and keep them covered in the fridge for up to one day. Air fry when ready.

Q: Can I use frozen peppers?

A: Fresh peppers work best. If frozen, thaw and pat dry, then cook a bit longer.

Q: How do I make this recipe vegetarian?

A: Replace the meat with cooked lentils, chopped mushrooms, or a mix of beans and corn.

Q: Can I add more cheese?

A: Yes, add extra cheese on top before the last few minutes of cooking for a golden finish.

Q: What if my filling is wet?

A: Drain excess liquid from cooked ingredients and add a bit more rice or breadcrumbs to thicken.

Conclusion

Air fryer stuffed peppers bring comfort food to your table with less time and less fuss, they are an easy stuffed peppers recipe you will return to again and again. For another clear step by step air fryer stuffed peppers guide, see this helpful recipe on Air Fryer Stuffed Peppers – The Recipe Critic, and for more tips and variations check the recipe collection at Air Fryer Stuffed Peppers | AirFried.com.

Air Fryer Stuffed Peppers

These air fryer stuffed peppers are a quick, crowd-pleasing dish that combines bell peppers, savory meat, and melty cheese for a flavorful meal.

Main Ingredients

  • 4 pieces bell peppers (Choose peppers that sit flat for stability.)
  • 1 pound ground beef or turkey (Use your preferred type of meat or a vegetarian mix.)
  • 1 cup cooked rice (Par-cook rice or use leftover rice to save time.)
  • 1 cup tomato sauce (For added flavor, use your favorite brand.)
  • 1 teaspoon salt
  • 1/2 teaspoon black pepper
  • 1/2 cup shredded cheese (Add more cheese on top for a golden finish.)

Preparation

  1. Preheat your air fryer to 350°F (175°C).
  2. Wash the bell peppers, cut off the tops, and remove the seeds.
  3. In a bowl, cook the ground beef or turkey with the chopped onion until browned, then drain any extra fat.
  4. Stir in the cooked rice, tomato sauce, salt, pepper, and shredded cheese.
  5. Spoon the filling into each pepper, topping with extra cheese if desired.
  6. Place the peppers upright in the air fryer basket.

Cooking

  1. Cook for 10 to 15 minutes, or until the peppers are tender and the cheese is melted.
  2. Let sit for two minutes before serving.

Check at 10 minutes; air fryer models cook differently. Add time if peppers are still firm. Leftovers can be reheated in the air fryer for 5 minutes at 350°F.

Main Course
American
Air Fryer Stuffed Peppers, Easy Recipes, Healthy Dinners, Quick Meals, Stuffed Peppers

Maple Balsamic Roasted Asparagus

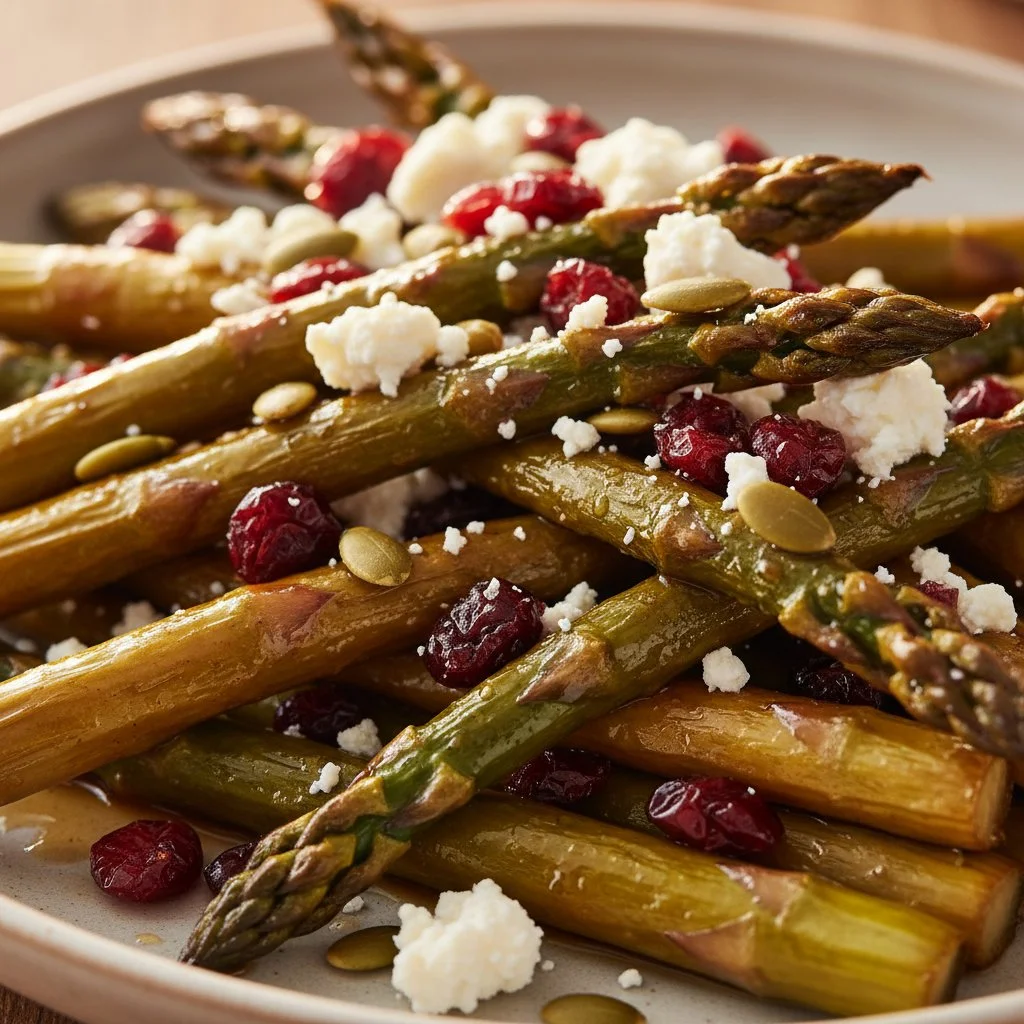
Plate of Maple Balsamic Roasted Asparagus garnished and ready to serve.

How to Prepare Maple Balsamic Roasted Asparagus

Making Maple Balsamic Roasted Asparagus is simple and fun! First, you’ll want to gather your fresh asparagus, maple syrup, balsamic vinegar, olive oil, garlic, salt, and pepper.

  1. Start by preheating your oven to 400°F (200°C).
  2. Wash the asparagus and trim the tough ends.
  3. In a bowl, mix together the maple syrup, balsamic vinegar, olive oil, minced garlic, salt, and pepper. This tasty mix will bring out the wonderful flavors of the asparagus.
  4. Toss the asparagus in the bowl with the mixture until it is well-coated.
  5. Spread the asparagus out in a single layer on a baking sheet.
  6. Roast in the oven for about 15 to 20 minutes, until the asparagus is tender and just starts to caramelize.
  7. Serve warm and enjoy!

Maple Balsamic Roasted Asparagus

Why You’ll Love Maple Balsamic Roasted Asparagus

This recipe is perfect for any occasion, whether it’s a weeknight dinner or a holiday feast. The sweetness of the maple syrup blends perfectly with the tanginess of the balsamic vinegar, creating a rich flavor that everyone will enjoy. Plus, the roasted asparagus is bright and beautiful, making it a great addition to your table. It’s simple enough for beginners, yet impressive enough to impress guests. After trying it, you’ll find yourself coming back for more!

Tips for Success

  • Make sure to use fresh asparagus for the best flavor.
  • You can adjust the amount of maple syrup and balsamic vinegar to suit your taste. If you prefer a sweeter dish, add a little more maple.
  • Keep an eye on the asparagus as it roasts, you don’t want it to get too soft.

Serving Suggestions

Maple Balsamic Roasted Asparagus pairs well with a variety of main dishes. Try it alongside grilled chicken, fish, or a hearty vegetable stew. It also makes a great addition to pasta dishes or as part of a fresh salad. Don’t forget to sprinkle some grated parmesan on top for an extra touch of flavor!

FAQs

Can I use frozen asparagus for this recipe?
While fresh asparagus is best, you can use frozen if that’s what you have. Just keep in mind that frozen asparagus may not get as crispy.

Can I prepare this dish ahead of time?
You can toss the asparagus in the maple balsamic mixture a few hours before roasting. Just keep it in the fridge until you’re ready to roast.

What can I use instead of balsamic vinegar?
If you don’t have balsamic vinegar, you can substitute with red wine vinegar or apple cider vinegar, though the flavor will be slightly different. Enjoy your cooking adventure with Maple Balsamic Roasted Asparagus!

Maple Balsamic Roasted Asparagus

Deliciously roasted asparagus coated in a sweet and tangy maple balsamic mixture, perfect as a side dish for any occasion.

Main ingredients

  • 1 bunch fresh asparagus (Trim the tough ends before use.)
  • 2 tablespoons maple syrup (Adjust for sweetness preference.)
  • 2 tablespoons balsamic vinegar (Can substitute with red wine or apple cider vinegar.)
  • 1 tablespoon olive oil
  • 2 cloves garlic, minced
  • 1 teaspoon salt (Adjust to taste.)
  • 1 teaspoon black pepper (Adjust to taste.)

Preparation

  1. Preheat your oven to 400°F (200°C).
  2. Wash the asparagus and trim the tough ends.
  3. In a bowl, mix together the maple syrup, balsamic vinegar, olive oil, minced garlic, salt, and pepper.
  4. Toss the asparagus in the bowl with the mixture until it is well-coated.

Cooking

  1. Spread the asparagus out in a single layer on a baking sheet.
  2. Roast in the oven for about 15 to 20 minutes, until the asparagus is tender and just starts to caramelize.

Serving

  1. Serve warm and enjoy!

Ensure fresh asparagus is used for the best flavor. Adjust maple syrup and balsamic vinegar to your taste. Keep an eye on the asparagus while roasting to avoid it getting too soft.

Side Dish, Vegetable
American
Easy Asparagus Recipe, Maple Balsamic Roasted Asparagus, Maple Syrup, Roasted Asparagus, Vegetable Side Dish

Roasted Carrots and Asparagus with Honey-Balsamic Glaze

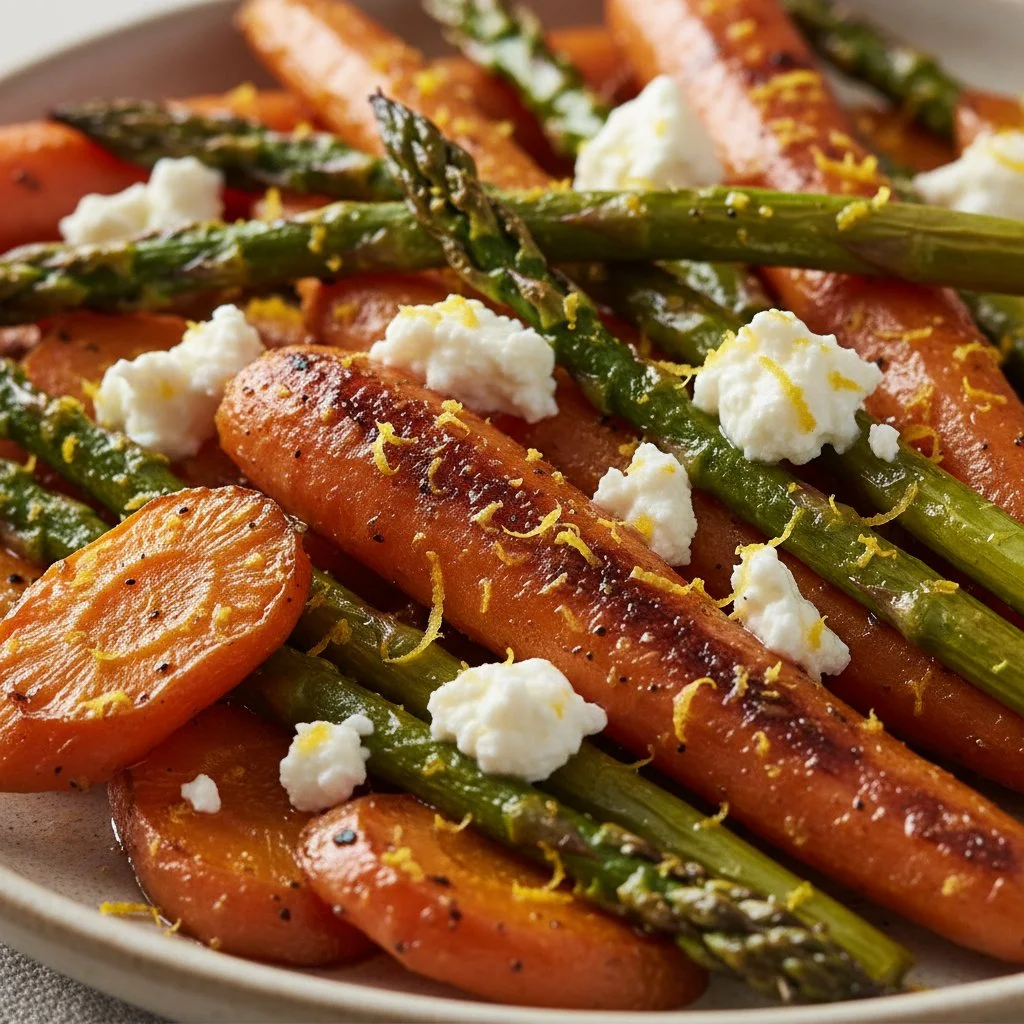
Roasted carrots and asparagus with honey-balsamic glaze on a serving plate.

How to Prepare Roasted Carrots and Asparagus with Honey-Balsamic Glaze

Roasted Carrots and Asparagus with Honey-Balsamic Glaze is truly a dish that brings joy to the table. This delightful recipe combines the natural sweetness of carrots and the fresh crunch of asparagus, all beautifully enhanced by a glossy honey-balsamic glaze. It’s easy to make and will impress anyone who takes a bite, making it a perfect choice for dinner parties or family gatherings. The glaze gives a unique twist, ensuring these veggies aren’t just good for you, but also incredibly tasty. Get ready to savor your new favorite side dish!

  1. Prepare the Vegetables: Start by washing and peeling your carrots. Cut them into uniform pieces. For the asparagus, trim the ends and cut the stalks into manageable sizes.

  2. Make the Glaze: In a small bowl, mix together honey, balsamic vinegar, olive oil, salt, and pepper. Whisk until combined.

  3. Combine Everything: Place your carrots and asparagus on a baking sheet. Drizzle the honey-balsamic glaze over the vegetables and toss to coat evenly.

  4. Roast: Preheat your oven to 425°F (220°C). Roast the vegetables for about 20-25 minutes, or until they are tender and slightly caramelized.

  5. Serve and Enjoy: Once roasted, take them out of the oven and let them cool slightly. Serve warm and enjoy the delicious flavors of your roasted carrots and asparagus!

Roasted Carrots and Asparagus with Honey-Balsamic Glaze

Why You’ll Love Roasted Carrots and Asparagus with Honey-Balsamic Glaze

This dish is not just about looks, it’s also packed with flavor. The honey-balsamic glaze offers a perfect balance of sweetness and tanginess, making every bite a pleasure. Plus, the vibrant colors of the carrots and asparagus make your plate pop, bringing brightness to any meal. Whether you’re serving it on a busy weeknight or at a festive gathering, this recipe is sure to be a hit.

Tips for Success

  • Vary the Veggies: Feel free to add other vegetables like bell peppers or red onions for extra flavor.
  • Cut Evenly: Make sure to cut your vegetables into similar sizes to ensure they cook evenly.
  • Don’t Overcrowd the Pan: Give the veggies space on the baking sheet for even roasting.

Serving Suggestions

Roasted Carrots and Asparagus with Honey-Balsamic Glaze pairs well with a variety of main dishes. You can serve it alongside grilled chicken, fish, or even a hearty grain salad. It also makes a great addition to a festive holiday feast, providing a colorful and healthy option for guests.

FAQs

1. Can I make this dish ahead of time?
Yes, you can prepare the vegetables and glaze ahead of time. Just toss them together and roast them right before serving for the best taste.

2. What can I substitute for honey?
If you’re looking for a vegan option, maple syrup is a great substitute for honey. It will add a different, but equally delicious flavor.

3. How do I store leftovers?
Store any leftover roasted vegetables in an airtight container in the fridge for up to three days. Just reheat them in the oven or a skillet before serving again.

Get ready to enjoy the simple, yet exquisite flavors of Roasted Carrots and Asparagus with Honey-Balsamic Glaze. Happy cooking!

Roasted Carrots and Asparagus with Honey-Balsamic Glaze

A delightful side dish featuring roasted carrots and asparagus drizzled with a honey-balsamic glaze, perfect for dinner parties or family gatherings.

Vegetables

  • 1 pound carrots, peeled and cut (Cut into uniform pieces)
  • 1 pound asparagus, trimmed and cut (Cut into manageable sizes)

Honey-Balsamic Glaze

  • 3 tablespoons honey (Can be substituted with maple syrup for a vegan option)
  • 2 tablespoons balsamic vinegar
  • 2 tablespoons olive oil
  • 1/2 teaspoon salt
  • 1/4 teaspoon black pepper

Preparation

  1. Start by washing and peeling your carrots. Cut them into uniform pieces.
  2. For the asparagus, trim the ends and cut the stalks into manageable sizes.

Make the Glaze

  1. In a small bowl, mix together honey, balsamic vinegar, olive oil, salt, and pepper. Whisk until combined.

Combine Everything

  1. Place your carrots and asparagus on a baking sheet.
  2. Drizzle the honey-balsamic glaze over the vegetables and toss to coat evenly.

Roasting

  1. Preheat your oven to 425°F (220°C).
  2. Roast the vegetables for about 20-25 minutes, or until they are tender and slightly caramelized.

Serving

  1. Once roasted, take them out of the oven and let them cool slightly.
  2. Serve warm and enjoy the delicious flavors of your roasted carrots and asparagus!

Feel free to add other vegetables like bell peppers or red onions for extra flavor. Make sure to cut your vegetables into similar sizes to ensure they cook evenly. Don’t overcrowd the pan for even roasting. Store any leftover roasted vegetables in an airtight container in the fridge for up to three days.

Side Dish
American
Asparagus, Carrots, Healthy Side Dish, Honey-Balsamic Glaze, Roasted Vegetables

Perfect Asparagus Risotto: Creamy & Flavorful

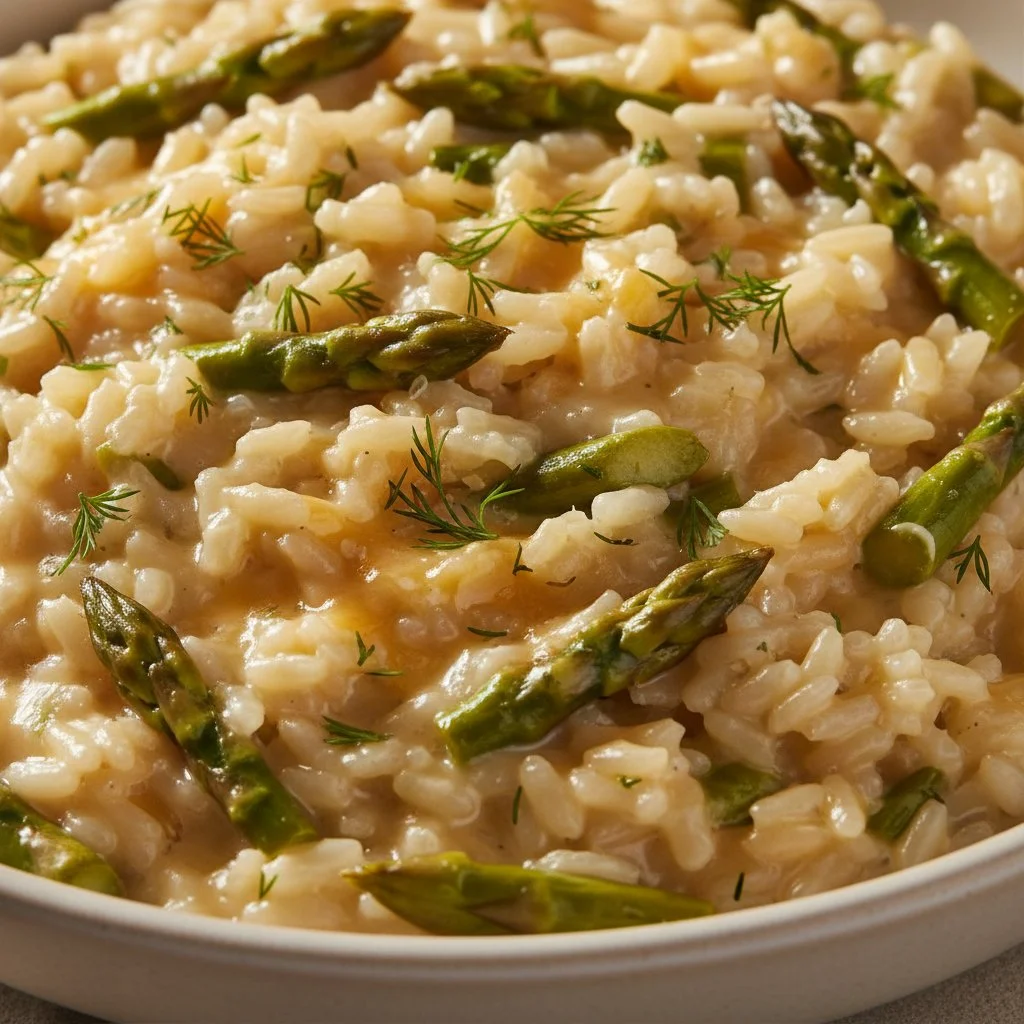
Creamy asparagus risotto served in a bowl with fresh herbs

How to Prepare Perfect Asparagus Risotto: Creamy & Flavorful

Making Perfect Asparagus Risotto is easier than you think. Here’s what you’ll need to do:

  1. Ingredients:

    • 1 cup Arborio rice
    • 1 bunch fresh asparagus, trimmed and cut into 1-inch pieces
    • 4 cups chicken or vegetable broth
    • 1 small onion, chopped
    • 2 cloves garlic, minced
    • 1 cup dry white wine
    • 1 cup grated Parmesan cheese
    • 2 tablespoons butter
    • Salt and pepper to taste
    • Olive oil
  2. Directions:

    1. In a pot, heat the broth over low heat. Keep it warm but not boiling.
    2. In a large pan, heat a bit of olive oil over medium heat. Add the onion and garlic, cooking until soft.
    3. Stir in the Arborio rice, coating it well. Cook for about 1 minute until the rice is slightly translucent.
    4. Pour in the white wine and stir until it’s mostly absorbed by the rice.
    5. Begin adding the warm broth, one ladle at a time, stirring frequently. Wait for the liquid to be absorbed before adding more.
    6. After about 15 minutes, add the asparagus pieces to the risotto.
    7. Continue stirring and adding broth until the rice is creamy and cooked to al dente, about 20-25 minutes total.
    8. Stir in the butter and Parmesan cheese, mixing until smooth. Season with salt and pepper to taste.
    9. Serve hot and enjoy your creamy risotto!

Perfect Asparagus Risotto: Creamy & Flavorful

Why You’ll Love Perfect Asparagus Risotto

This Perfect Asparagus Risotto is a standout dish that captivates your taste buds. The creamy texture of the risotto paired with fresh asparagus makes it both comforting and delightful. Each bite is filled with rich flavor, making it a fantastic choice for dinner parties or family meals. Plus, it’s a great way to showcase seasonal asparagus, bringing a touch of spring to your table.

Tips for Success

  • Use Fresh Asparagus: Fresh asparagus makes a big difference in flavor and texture, so try to choose the best quality available.
  • Keep the Broth Warm: Keeping the broth warm ensures that the cooking process isn’t interrupted when you add it to the rice.
  • Stir Often: Regular stirring helps to release the starches from the rice, giving you that creamy texture everyone loves.

Serving Suggestions

For a complete meal, serve your Perfect Asparagus Risotto with a light salad or grilled chicken. You can also pair it with a glass of white wine for added elegance. If you want a little extra flavor, sprinkle some toasted pine nuts or fresh herbs on top before serving.

FAQs

Can I make this risotto ahead of time?
Risotto is best served fresh, but you can prepare it a few hours ahead. Just reheat gently with a little extra broth or water to loosen it.

What other vegetables can I add?
Feel free to mix in other vegetables like peas, spinach, or mushrooms for added color and nutrition.

Can I use brown rice instead of Arborio rice?
While brown rice is healthier, it won’t give you the same creamy texture. If you’re in love with the health benefits, consider cooking them separately and adding them to the finished dish.

Now that you know how to make this creamy and flavorful Perfect Asparagus Risotto, it’s time to grab your apron and get cooking! Enjoy!

Asparagus Risotto

A creamy and flavorful asparagus risotto that is easy to prepare and perfect for any occasion.

Main Ingredients

  • 1 cup Arborio rice (Specialty rice for risotto.)
  • 1 bunch fresh asparagus, trimmed and cut into 1-inch pieces (Use fresh asparagus for best flavor.)
  • 4 cups chicken or vegetable broth (Keep warm while cooking.)
  • 1 small onion, chopped (For flavor base.)
  • 2 cloves garlic, minced (For added flavor.)
  • 1 cup dry white wine (Adds depth to the risotto.)
  • 1 cup grated Parmesan cheese (For creaminess and flavor.)
  • 2 tablespoons butter (For richness.)
  • Salt and pepper to taste (To season.)
  • Olive oil (For cooking the onion and garlic.)

Preparation

  1. In a pot, heat the broth over low heat. Keep it warm but not boiling.
  2. In a large pan, heat a bit of olive oil over medium heat. Add the onion and garlic, cooking until soft.
  3. Stir in the Arborio rice, coating it well. Cook for about 1 minute until the rice is slightly translucent.
  4. Pour in the white wine and stir until it’s mostly absorbed by the rice.
  5. Begin adding the warm broth, one ladle at a time, stirring frequently. Wait for the liquid to be absorbed before adding more.
  6. After about 15 minutes, add the asparagus pieces to the risotto.
  7. Continue stirring and adding broth until the rice is creamy and cooked to al dente, about 20-25 minutes total.
  8. Stir in the butter and Parmesan cheese, mixing until smooth. Season with salt and pepper to taste.
  9. Serve hot and enjoy your creamy risotto.

Use fresh asparagus for best results. Keep broth warm for a smoother cooking process. Stir often for that creamy texture.

Dinner, Main Course
Italian
Asparagus Risotto, Comfort Food, Creamy Risotto, Spring Recipe, Vegetarian Dish