Ground Turkey Skillet Casserole

If you’re looking for a delicious dinner option that’s easy to make and loved by everyone, Ground Turkey Skillet Casserole is sure to be your new go-to dish. This one-pan wonder combines the hearty flavors of ground turkey with a melty, cheesy topping, creating a meal that is both satisfying and comforting. It’s the perfect dish for busy weeknights or when you have friends over. Imagine gathering around the table, diving into this delightful casserole, and enjoying every last bite. It’s a crowd-pleaser that will have everyone asking for seconds!

How to prepare Ground Turkey Skillet Casserole

Cooking up this tasty casserole is as easy as pie. Here’s how you can whip it up in no time:

  1. Start by browning a pound of ground turkey in a large skillet over medium heat. Stir it occasionally until it’s cooked through.
  2. Once the turkey is ready, you can add chopped onions, bell peppers, and garlic to the skillet. These vegetables will add a lovely flavor to the dish.
  3. After sautéing the vegetables until they are soft, mix in some diced tomatoes and your favorite seasonings. Trust me, this combination is what makes the casserole pop!
  4. Allow everything to simmer for a few minutes, letting those flavors meld together beautifully.
  5. Finally, pour in some cooked pasta and top with shredded cheese. Cover the skillet until the cheese melts, and voila, you have a delicious Ground Turkey Skillet Casserole!

Ground Turkey Skillet Casserole

Why You’ll Love Ground Turkey Skillet Casserole

There are so many reasons to love this dish! It’s not only quick and easy to prepare, but the flavors and textures are simply delightful. The ground turkey is lean, making this casserole a healthier option without sacrificing taste. In addition, it’s packed with colorful veggies, so you can feel good about what you’re serving. Plus, the melted cheese on top brings everything together with a comforting touch. You can also customize the recipe by adding your favorite ingredients such as different vegetables or spices, allowing you to make it your own. If you’re in the mood for more turkey dishes, check out this ground turkey and zucchini skillet recipe for inspiration!

Tips for success

To get the best from your Ground Turkey Skillet Casserole, consider these helpful tips. First, make sure to drain any excess grease from the ground turkey after cooking. This will keep your dish light and healthy. Also, feel free to experiment with different types of cheese on top; cheddar and mozzarella work great! For a bit of crunch, try adding some breadcrumbs before baking. Lastly, don’t be afraid to include more veggies; this dish is flexible, and you can add what you love!

Ground Turkey Skillet Casserole

Serving Suggestions

Ground Turkey Skillet Casserole is fantastic on its own, but there are several fun ways to serve it. You can pair it with a simple garden salad for a refreshing contrast or serve it alongside some garlic bread for a cozy night in. For a hint of heat, sprinkle some red pepper flakes on top or serve with sliced jalapeños. Enjoying this casserole with a side of your favorite dipping sauce can also add an extra layer of flavor!

FAQs

1. Can I make Ground Turkey Skillet Casserole ahead of time?

Yes, you can prepare it a day ahead. Just store it in the fridge before baking, and when it’s time to eat, bake it right before serving!

2. Is it possible to freeze leftovers?

Absolutely! Allow the casserole to cool, then place in an airtight container and freeze for up to three months. To reheat, just bake from frozen or thaw in the fridge overnight before reheating.

3. What can I substitute for ground turkey?

You can easily swap ground turkey for ground chicken, beef, or even plant-based meat alternatives if you prefer a vegetarian option.

Ground Turkey Skillet Casserole

A delicious and easy one-pan casserole combining ground turkey, colorful veggies, and a melty cheese topping, perfect for busy weeknights or gatherings.

Main Ingredients

  • 1 lb ground turkey (Lean meat for a healthier option.)
  • 1 medium onion, chopped
  • 1 medium bell pepper, chopped
  • 2 cloves garlic, minced (Add more for additional flavor.)
  • 1 can diced tomatoes (Use your favorite variety.)
  • 2 cups cooked pasta (Any type of pasta works.)
  • 1 cup shredded cheese (Cheddar or mozzarella recommended.)

Preparation

  1. Brown the ground turkey in a large skillet over medium heat, stirring occasionally until cooked through.
  2. Add chopped onion, bell pepper, and garlic to the skillet and sauté until the vegetables are soft.
  3. Mix in diced tomatoes and your favorite seasonings, then let simmer for a few minutes.
  4. Pour in the cooked pasta and top with shredded cheese. Cover the skillet until the cheese melts.

Drain excess grease from the turkey for a lighter dish. Use different cheeses or add breadcrumbs for crunch. Feel free to include more vegetables.

Dinner, Main Course
American
Casserole, Easy Dinner, Ground Turkey, One-Pan Meal, Skillet Recipe

Cheddar Bay Biscuits

Freshly baked Cheddar Bay Biscuits served on a plate with herbs

Cheddar Bay Biscuits are warm, cheesy, and soft, with a light garlic butter on top. They melt in your mouth and please a crowd at dinner or a party. This Cheddar Bay Biscuits recipe is easy to make at home and tastes like a restaurant favorite, full of cheddar cheese and garlic flavor. If you enjoy rich, cheesy bread, you might also like a hearty soup, such as this bacon cheddar gnocchi soup, which pairs well with biscuits. Get ready to bake, because these biscuits are fun to make and even more fun to eat.

How to prepare Cheddar Bay Biscuits

Ingredients

  • 2 cups all-purpose flour
  • 1 tablespoon baking powder
  • 1 teaspoon salt
  • 1 teaspoon garlic powder
  • 1/2 cup cold butter, cut into cubes
  • 1 cup shredded sharp cheddar cheese
  • 3/4 cup milk or buttermilk
  • 1 egg, lightly beaten

Garlic butter topping

  • 1/4 cup melted butter
  • 1/2 teaspoon garlic powder
  • 1 tablespoon chopped fresh parsley, or 1 teaspoon dried parsley
  • Pinch of salt

Directions

  1. Preheat the oven to 425°F (220°C). Line a baking sheet with parchment paper.
  2. In a large bowl, mix the flour, baking powder, salt, and garlic powder.
  3. Add the cold butter. Use your fingers or a pastry cutter to work the butter into the flour until the mix looks like coarse crumbs.
  4. Stir in the shredded cheddar cheese.
  5. In a small bowl, mix the milk and beaten egg. Pour this into the dry mix and stir until just combined, do not overmix. The dough will be sticky.
  6. Drop spoonfuls of dough onto the baking sheet, about 12 biscuits. Space them so they can rise.
  7. Bake for 12 to 15 minutes, until the tops are golden and the centers are set.
  8. While the biscuits bake, mix the melted butter, garlic powder, parsley, and a pinch of salt for the topping.
  9. When the biscuits come out of the oven, brush them with the garlic butter right away so the butter soaks in. Serve warm.

Cheddar Bay Biscuits

Why You’ll Love Cheddar Bay Biscuits

  • They are cheesy and soft, with a light garlic butter that adds big flavor.
  • The biscuits bake fast, so you can make them for weeknight meals or guests.
  • Kids and adults both enjoy their mild, savory taste.
  • They go with many dishes, from soup to grilled chicken, making them a great side.

Tips for success

  • Use cold butter, it makes the biscuits flaky and tender.
  • Do not overmix the dough, overmixing makes biscuits tough.
  • Freshly shredded cheddar melts better than pre-shredded cheese.
  • Brush the garlic butter right after baking, while biscuits are hot, so they absorb the flavor.
  • If you like, add a pinch of cayenne or a little chopped chive for extra flavor.

Serving Suggestions

  • Serve warm with soup, like tomato or chicken soup.
  • Pair with grilled or roasted chicken for a full meal.
  • Offer butter, honey, or a little jam on the side for a sweet contrast.
  • Use the biscuits to make small sandwiches with ham or turkey.

Cheddar Bay Biscuits

FAQs

Q: Can I use self-rising flour instead of all-purpose?

A: Yes, you can. If you use self-rising flour, skip the baking powder and salt in the recipe.

Q: Can I freeze the biscuit dough?

A: Yes, scoop the dough onto a tray, freeze until firm, then move to a bag. Bake from frozen, add a few minutes to the bake time.

Q: How do I store leftover biscuits?

A: Keep leftovers in an airtight container at room temperature for up to 2 days, or freeze for up to 1 month. Reheat in the oven for best texture.

Q: Can I make these without garlic?

A: Yes, leave out the garlic powder and garlic butter, or use plain melted butter instead.

Conclusion

If you want a tried and loved copycat recipe that brings that Red Lobster feeling home, this Red Lobster Cheddar Bay Biscuits Copycat – Caroline Chambers page is a helpful reference for another easy version to try.

Cheddar Bay Biscuits

Warm, cheesy, and soft Cheddar Bay Biscuits topped with light garlic butter, perfect for dinner or parties.

Dry Ingredients

  • 2 cups all-purpose flour
  • 1 tablespoon baking powder
  • 1 teaspoon salt
  • 1 teaspoon garlic powder

Wet Ingredients

  • 1/2 cup cold butter, cut into cubes (Important for achieving flaky biscuits.)
  • 3/4 cup milk or buttermilk
  • 1 large egg, lightly beaten

Cheddar Cheese

  • 1 cup shredded sharp cheddar cheese (Freshly shredded melts better.)

Garlic Butter Topping

  • 1/4 cup melted butter
  • 1/2 teaspoon garlic powder
  • 1 tablespoon chopped fresh parsley, or 1 teaspoon dried parsley
  • 1 pinch salt

Preparation

  1. Preheat the oven to 425°F (220°C) and line a baking sheet with parchment paper.
  2. In a large bowl, mix the flour, baking powder, salt, and garlic powder.
  3. Add the cold butter and use your fingers or a pastry cutter to work it into the flour until the mix looks like coarse crumbs.
  4. Stir in the shredded cheddar cheese.
  5. In a small bowl, mix the milk and beaten egg, then pour into the dry mix and stir until just combined. Do not overmix; the dough will be sticky.
  6. Drop spoonfuls of dough onto the baking sheet, making about 12 biscuits, spaced for rising.

Baking

  1. Bake for 12 to 15 minutes until the tops are golden and the centers are set.
  2. While the biscuits bake, mix the melted butter, garlic powder, parsley, and pinch of salt for the topping.
  3. When the biscuits come out of the oven, brush them with the garlic butter immediately to allow it to soak in.
  4. Serve warm.

Use cold butter for flaky biscuits and avoid overmixing. Freshly shredded cheddar is recommended.

Side Dish, Snack
American
Cheddar Bay Biscuits, Cheesy Bread, Garlic Biscuits

Air Fryer Cauliflower

Crispy air fryer cauliflower served in a bowl with spices

I love how air fryer cauliflower turns simple veg into a snack or side that everyone asks for again, it gets crispy outside and tender inside with little oil, and it feels a bit like a treat while still being healthy. This Air Fryer Cauliflower recipe is a crowd-pleaser, full of bright flavor and a crunch that makes veggies fun. It is easy to make, works for busy weeknights, and is great for parties, Friends and family will reach for seconds, and you might hide a few pieces for yourself, because yes, you will be excited to make it.

how to prepare Air Fryer Cauliflower

  1. Wash and cut one head of cauliflower into bite sized florets.
  2. In a bowl, toss florets with 1 to 2 tablespoons of olive oil, 1 teaspoon salt, 1/2 teaspoon black pepper, and 1 teaspoon garlic powder, mix until evenly coated.
  3. Preheat the air fryer to 400°F, about 3 to 5 minutes.
  4. Place cauliflower in the air fryer basket in a single layer, do not crowd, you may need two batches.
  5. Air fry at 400°F for 12 to 15 minutes, shake the basket gently at the 6 and 10 minute marks, cook until edges are golden and crisp.
  6. For extra flavor, toss with a squeeze of lemon juice and a sprinkle of chopped parsley before serving.

Air Fryer Cauliflower

Why You’ll Love Air Fryer Cauliflower

  • It cooks fast, you get a crisp finish in about 15 minutes.
  • It uses little oil, so it feels light but still tastes great.
  • It is flexible, you can change spices to make it spicy, smoky, or herby.
  • Kids and adults both enjoy the crisp texture and savory taste.

In case you want another fun air fryer snack idea while you cook, try this simple twist on air fryer grilled cheese hot dogs, it is another easy and fun treat.

tips for success

  • Cut florets to similar sizes so they cook evenly.
  • Do not overcrowd the basket, leave space so air moves and crisps the cauliflower.
  • Shake the basket once or twice while cooking for even browning.
  • If you like it extra crunchy, add 2 to 3 minutes to the cook time, watch closely to avoid burning.
  • Use a light spray of oil if you want a crisp finish but want to limit oil.

Serving Suggestions

  • Serve with a simple yogurt dip, ranch, or spicy mayo.
  • Add to grain bowls with rice, roasted chickpeas, and greens.
  • Toss with parmesan and herbs for a savory side.
  • Use in tacos with slaw and hot sauce for a meatless taco night.

Air Fryer Cauliflower

FAQs

Q: Can I use frozen cauliflower in the air fryer?
A: Yes, but thaw and pat dry first, then toss with oil and spices, cook a bit longer until crisp.

Q: What temperature is best for air frying cauliflower?
A: 400°F gives a good balance of crisp outside and tender inside.

Q: How do I keep the cauliflower from getting soggy?
A: Do not crowd the basket, dry the florets well, and use a little oil so the air fryer can crisp the surface.

Q: Can I add breadcrumbs for extra crunch?
A: Yes, toss florets in a light coating of seasoned breadcrumbs or panko after the oil step for extra crisp texture.

Conclusion

This Air Fryer Cauliflower is an easy, tasty way to make a healthy snack or side, try different spices to find your favorite flavor. For more crispy air fryer cauliflower tips and a slightly different seasoning method, see this Crispy Air Fryer Cauliflower Recipe – Little Sunny Kitchen. If you want another top rated take on air fryer cauliflower with bold seasoning ideas, check out Best Damn Air Fryer Cauliflower – RecipeTeacher.

Air Fryer Cauliflower

This Air Fryer Cauliflower recipe transforms simple vegetables into a crispy snack or side dish that everyone loves, full of flavor and easy to prepare.

Main ingredients

  • 1 head cauliflower (Cut into bite-sized florets)
  • 1-2 tablespoons olive oil (For tossing florets)
  • 1 teaspoon salt
  • 1/2 teaspoon black pepper
  • 1 teaspoon garlic powder

Preparation

  1. Wash and cut one head of cauliflower into bite-sized florets.
  2. In a bowl, toss florets with olive oil, salt, black pepper, and garlic powder until evenly coated.

Cooking

  1. Preheat the air fryer to 400°F for about 3 to 5 minutes.
  2. Place cauliflower in the air fryer basket in a single layer, avoiding crowding. You may need to cook in two batches.
  3. Air fry at 400°F for 12 to 15 minutes, shaking the basket gently at the 6 and 10-minute marks. Cook until edges are golden and crisp.
  4. For extra flavor, toss with a squeeze of lemon juice and a sprinkle of chopped parsley before serving.

Cut florets to similar sizes for even cooking. Use a light spray of oil for a crisp finish while limiting oil usage. If you prefer extra crunch, add 2-3 minutes to the cook time.

Side, Snack
American, Healthy
Air Fryer Cauliflower, Crispy Cauliflower, Easy Recipes, Healthy Snack, Vegetarian Side Dish

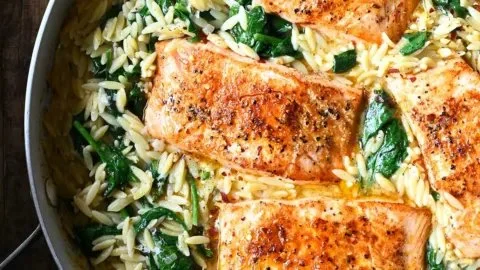
One Skillet Salmon with Lemon Orzo

One Skillet Salmon served with Lemon Orzo in a pan

There’s something truly special about a meal that comes together in one skillet, especially when it features delicious salmon and zesty lemon orzo. This relaxed yet vibrant dish is perfect for weeknight dinners, impressing guests, or simply enjoying a cozy evening at home. One Skillet Salmon with Lemon Orzo combines the rich flavors of salmon with the bright notes of lemon-infused orzo, creating a meal that feels gourmet but is quick and easy to prepare. So, if you’re looking for the perfect recipe to make hearts sing and stomachs happy, this is it. Let’s dive into making this easy and delightful dish!

How to Prepare One Skillet Salmon with Lemon Orzo

To start, gather your ingredients for this delicious meal. You will need:

  • Salmon fillets
  • Orzo pasta
  • Fresh lemon juice and zest
  • Olive oil
  • Garlic
  • Chicken broth
  • Spinach
  • Salt and pepper
  • Fresh parsley for garnish

Now, let’s get cooking!

  1. Begin by heating olive oil in a large skillet over medium heat.
  2. Season the salmon fillets with salt and pepper. Place the salmon skin-side down in the skillet. Cook for about 4-5 minutes until the salmon is golden. Flip and cook for another 3-4 minutes, then remove the salmon from the skillet and set aside.
  3. In the same skillet, add the minced garlic and cook for about 1 minute until fragrant.
  4. Next, add the orzo, chicken broth, lemon juice, and lemon zest. Bring to a simmer and cook for about 10-12 minutes or until the orzo is tender and most of the liquid has been absorbed.
  5. Stir in the fresh spinach until wilted.
  6. Return the salmon to the skillet, spooning some of the orzo over the fillets, and cook just until the salmon is heated through.
  7. Garnish with fresh parsley and serve.

One Skillet Salmon with Lemon Orzo

Why You’ll Love One Skillet Salmon with Lemon Orzo

One Skillet Salmon with Lemon Orzo is more than just a meal, it’s a celebration of flavors. The combination of flaky salmon, luscious orzo, and the bright notes of lemon creates a symphony on your palate. This dish is not only delicious but nutritious, making it a perfect choice for health-conscious eaters. Plus, the convenience of cooking everything in one skillet means less cleanup, so you can spend more time savoring your meal and less time washing dishes.

Tips for Success

  1. Use Fresh Ingredients: Fresh salmon and spinach make a noticeable difference in taste. Look for bright, vibrant ingredients.
  2. Don’t Overcook the Salmon: Keep an eye on the salmon while cooking. It’s best when it’s still slightly pink in the center.
  3. Adjust Lemon Flavor: Depending on your taste, you can add more or less lemon juice and zest to customize the dish to your preference.

Serving Suggestions

To truly elevate your dining experience with this dish, consider pairing it with a simple side salad or crusty bread. A glass of white wine, like Sauvignon Blanc, will complement the flavors beautifully. For a more filling meal, serve with roasted asparagus or grilled vegetables.

FAQs

1. Can I use pasta other than orzo?

Yes, you can use other small pasta shapes like couscous or ditalini. Just adjust the cooking time based on the pasta type.

2. How do I store leftovers?

Store any leftovers in an airtight container in the fridge for up to 2 days. Reheat gently on the stove with a splash of broth or water.

3. Can I make this recipe with other fish?

Absolutely! This recipe works well with trout, tilapia, or even shrimp, depending on your preference.

One Skillet Salmon with Lemon Orzo

One Skillet Salmon with Lemon Orzo

A vibrant and easy one-skillet dish featuring salmon and lemon-infused orzo, perfect for weeknight dinners or impressing guests.

Main Ingredients

  • 4 pieces Salmon fillets
  • 1 cup Orzo pasta
  • 2 tablespoons Fresh lemon juice
  • 1 tablespoon Lemon zest
  • 2 tablespoons Olive oil
  • 3 cloves Garlic (Minced)
  • 4 cups Chicken broth
  • 4 cups Fresh spinach
  • to taste Salt
  • to taste Pepper
  • to garnish Fresh parsley (For garnish)

Cooking Salmon

  1. Heat olive oil in a large skillet over medium heat.
  2. Season the salmon fillets with salt and pepper. Place the salmon skin-side down in the skillet. Cook for about 4-5 minutes until golden.
  3. Flip the salmon and cook for another 3-4 minutes, then remove from the skillet and set aside.

Cooking Orzo

  1. In the same skillet, add minced garlic and cook for about 1 minute until fragrant.
  2. Add orzo, chicken broth, lemon juice, and lemon zest. Bring to a simmer and cook for about 10-12 minutes or until the orzo is tender and most of the liquid is absorbed.
  3. Stir in fresh spinach until wilted.

Assembling the Dish

  1. Return the salmon to the skillet, spooning some of the orzo over the fillets, and cook just until the salmon is heated through.
  2. Garnish with fresh parsley and serve.

Use fresh ingredients for the best taste. Adjust lemon flavor to preference. Store leftovers in an airtight container in the fridge for up to 2 days.

Dinner, Main Course
American
Easy Recipes, Healthy Dinner, Lemon Orzo, One Skillet Meal, Salmon