Air Fryer Chicken Parmesan

Plate of crispy Air Fryer Chicken Parmesan garnished with herbs

Air Fryer Chicken Parmesan is a warm, cheesy, and crunchy meal that works for weeknights and guests. This recipe gives you golden breaded chicken, melted mozzarella, and tangy marinara without frying in oil. It’s a crowd-pleaser because it tastes like restaurant food, but you make it faster and cleaner at home. If you like quick air fryer meals, check another fun idea like air fryer grilled cheese hot dogs. You will smile while baking this, and your kitchen will smell amazing, so get ready to dig in.

how to prepare Air Fryer Chicken Parmesan

  1. Pat chicken breasts dry, slice in half if thick, and season with salt and pepper.
  2. Set three shallow bowls, one with flour, one with beaten egg, one with breadcrumbs mixed with grated parmesan and a little Italian seasoning.
  3. Dredge each chicken piece in flour, dip in egg, then press into the breadcrumb mix until well coated.
  4. Spray the air fryer basket with a little oil spray. Place chicken in a single layer, do not crowd.
  5. Cook at 380°F (190°C) for 8 minutes, flip, spray the top lightly with oil, then cook 6–8 more minutes until golden and cooked through.
  6. Spoon marinara over each piece, add a slice or sprinkle of mozzarella, then air fry 2–3 minutes more until cheese melts.
  7. Serve with extra parmesan and fresh basil if you like.

Air Fryer Chicken Parmesan

Why You’ll Love Air Fryer Chicken Parmesan

  • It is crispy outside and tender inside.
  • It uses less oil than pan frying, so it feels lighter.
  • Cheese and marinara make it comforting and familiar.
  • It cooks fast, perfect for busy nights.
  • You can make larger or smaller portions easily.

tips for success

  • Pound thick pieces to even thickness so they cook the same.
  • Press breadcrumbs firmly on the chicken so the crust stays put.
  • Do not crowd the basket, cook in batches if needed.
  • Use a meat thermometer, chicken should reach 165°F (74°C).
  • Spray the top of the chicken lightly with oil for extra browning.
  • Warm the marinara a bit before adding, so cheese melts faster.

Serving Suggestions

  • Serve over cooked pasta with extra marinara.
  • Make a salad with greens, tomatoes, and a light vinaigrette.
  • Serve on toasted rolls for chicken parmesan sandwiches.
  • Pair with roasted vegetables or steamed broccoli.

Air Fryer Chicken Parmesan

FAQs

Q: Can I use chicken thighs,

A: Yes, boneless thighs work well, adjust cooking time until they reach 165°F, they may need a few more minutes.

Q: Can I freeze breaded chicken before air frying,

A: Yes, flash freeze on a tray then store in a bag, cook from frozen but add a few extra minutes in the air fryer.

Q: What is the best breadcrumb to use,

A: Panko gives extra crunch, plain breadcrumbs also work, mix with parmesan for more flavor.

Q: Can I use pre-shredded mozzarella,

A: Yes, pre-shredded melts fine, fresh sliced mozzarella gives a creamier melt.

Q: Do I need to preheat the air fryer,

A: Many air fryers work well without preheat, but preheating for 2-3 minutes helps get a crisp start.

Conclusion

For another take on air fryer dinners and ideas for quick comfort food, see this recipe for Air Fryer Chicken Parmesan – Healthy Dinner! – Julie’s Eats & Treats ®. For a different method and tips from a major food site, check this Best Air Fryer Chicken Parmesan Recipe – Delish. Enjoy your crispy, cheesy meal and have fun cooking.

Air Fryer Chicken Parmesan

A warm, cheesy, and crunchy meal that offers golden breaded chicken, melted mozzarella, and tangy marinara without the mess of frying in oil. Perfect for weeknights and gatherings.

Chicken Preparation

  • 4 pieces boneless chicken breasts (Pat dry and slice in half if thick.)
  • 1 tsp salt (For seasoning.)
  • 1 tsp black pepper (For seasoning.)

Breading Station

  • 1 cup all-purpose flour (For dredging the chicken.)
  • 2 large eggs (Beaten, for dipping.)
  • 1 cup breadcrumbs (Panko is preferred for extra crunch.)
  • 1/2 cup grated parmesan cheese (Mixed into breadcrumbs.)
  • 1 tsp Italian seasoning (Mix with breadcrumbs for flavor.)

Toppings

  • 1 cup marinara sauce (Warm before adding to chicken.)
  • 1 cup mozzarella cheese (Sliced or shredded to top chicken.)

Garnish (optional)

  • 1/4 cup fresh basil (For serving.)
  • 1/4 cup extra parmesan cheese (For serving.)

Preparation

  1. Pat the chicken breasts dry and slice in half if they are thick. Season with salt and pepper.
  2. Set up three shallow bowls: one with flour, one with beaten egg, and one with breadcrumbs mixed with grated parmesan and Italian seasoning.
  3. Dredge each chicken piece in flour, dip in the egg, then press into the breadcrumb mix until well coated.

Cooking

  1. Spray the air fryer basket with oil spray. Place the chicken in a single layer, without crowding.
  2. Cook at 380°F (190°C) for 8 minutes. Flip the chicken, spray the top lightly with oil, and cook for another 6-8 minutes until golden and cooked through.
  3. Spoon marinara over each piece of chicken, add a slice or sprinkle of mozzarella, and air fry for an additional 2-3 minutes until the cheese melts.

Serving

  1. Serve with extra parmesan and fresh basil if desired.

To ensure even cooking, pound thick pieces to a uniform thickness. Firmly press breadcrumbs onto the chicken to keep the crust intact. Use a meat thermometer to check that the chicken reaches 165°F (74°C). Preheating the air fryer for 2-3 minutes can help achieve a crispier result.

Dinner, Main Course
Italian
Air Fryer Chicken Parmesan, Cheesy Chicken, Comfort Food, easy chicken recipe, Quick Dinner

Sourdough Discard Dinner Rolls

Freshly baked sourdough discard dinner rolls on a wooden table.

These sourdough discard dinner rolls are soft, warm, and full of good flavor. They use leftover sourdough starter, so you waste less and get a tasty bread. The rolls are fluffy on the inside, golden on the outside, and smell like home. This recipe is a simple crowd-pleaser, easy to shape, and great for family dinners or small parties. They pair well with soups, salads, or a roast, and are even delicious on their own with butter, or alongside an autumn chicken dinner with roasted vegetables. Get ready to pull these warm rolls from the oven and watch everyone smile.

how to prepare Sourdough Discard Dinner Rolls

  1. Mix 1 cup sourdough discard, 1/2 cup warm milk, 2 tablespoons sugar, and 1 beaten egg in a bowl. Stir to combine.
  2. Add 2 cups all-purpose flour, 1 teaspoon salt, and 2 teaspoons active dry yeast. Stir until the dough forms.
  3. Turn dough to a floured surface and knead 5 to 7 minutes until smooth and soft. If dough is sticky, add a little flour.
  4. Place dough in a greased bowl, cover with a towel, and let it rest in a warm spot for 30 to 45 minutes, until it has grown a bit.
  5. Divide dough into 12 equal pieces. Shape each into a round roll and place them in a greased 9×13 pan.
  6. Cover the pan and let the rolls rise 20 to 30 minutes, until puffy.
  7. Preheat oven to 375°F, brush rolls with melted butter or egg wash, and bake 15 to 20 minutes until golden brown.
  8. Brush hot rolls with more butter, let cool a few minutes, then serve warm.

Sourdough Discard Dinner Rolls

Why You’ll Love Sourdough Discard Dinner Rolls

  • They use sourdough discard, so you save the starter and cut waste.
  • The rolls are soft, tender, and have a mild, tangy flavor that everyone likes.
  • This recipe is quick and simple, so you can make fresh rolls without a long wait.
  • You can change the rolls easily, adding herbs, cheese, or garlic for more taste.

tips for success

  • Use warm milk, not hot, to help the yeast wake up.
  • If your discard is very thick, stir in a little water to loosen it before mixing.
  • Keep dough slightly sticky, it makes the rolls softer. Add flour slowly, only if needed.
  • Let the rolls rise in a warm spot, like near a warm oven or on top of the fridge.
  • Watch the rolls in the oven, baking times can change by a few minutes with different ovens.
  • Brush with butter right after baking, it gives a soft crust and good shine.

Serving Suggestions

  • Serve warm with salted butter or honey for simple comfort.
  • Pair with soups like tomato or chicken noodle for a cozy meal.
  • Use as a side for roast chicken or pork, they soak up gravy well.
  • Make small sandwiches with ham, cheese, or leftover turkey for lunch.
  • Add garlic butter and bake a few minutes for quick garlic rolls.

Sourdough Discard Dinner Rolls

FAQs

Q: What is sourdough discard, and can I use any starter?

A: Sourdough discard is the extra starter you remove when you feed it. You can use any fed or unfed starter, it will add mild tang and good texture.

Q: Do I need to add yeast if I use discard?

A: Yes, this recipe uses a small amount of yeast to help the rolls rise faster and stay light.

Q: Can I make these ahead and freeze them?

A: Yes, bake the rolls, cool them, then freeze in a bag. Reheat in the oven or microwave when ready to eat.

Q: How do I make them dairy free?

A: Use plant milk and a dairy-free butter or oil for brushing, the rolls will still turn out soft.

Q: Can I add seeds or cheese on top?

A: Yes, sprinkle seeds or shredded cheese before baking for extra flavor and texture.

Conclusion

These sourdough discard dinner rolls are simple, soft, and a smart way to use leftover starter, they make dinner feel special without extra work. For a fast, tested take on discard rolls you can compare with, see One Hour Sourdough Discard Rolls – Amy Bakes Bread.

Sourdough Discard Dinner Rolls

These soft and fluffy sourdough discard dinner rolls are easy to make and perfect for family dinners. They have a mild tangy flavor and pair well with various dishes.

Wet Ingredients

  • 1 cup sourdough discard (Use any type of sourdough starter)
  • 1/2 cup warm milk (Ensure the milk is warm, not hot)
  • 2 tablespoons sugar
  • 1 large beaten egg

Dry Ingredients

  • 2 cups all-purpose flour (Add flour as needed if the dough is sticky)
  • 1 teaspoon salt
  • 2 teaspoons active dry yeast (Helps the rolls rise)

For Baking

  • 2 tablespoons melted butter (For brushing before and after baking)

Mixing

  1. In a bowl, mix the sourdough discard, warm milk, sugar, and beaten egg until well combined.
  2. Add the all-purpose flour, salt, and active dry yeast. Stir until a dough forms.

Kneading

  1. Turn the dough onto a floured surface and knead for 5 to 7 minutes until smooth and soft.
  2. If the dough is sticky, add a little flour as needed.

First Rise

  1. Place the dough in a greased bowl, cover with a towel, and let it rest in a warm spot for 30 to 45 minutes, until it has grown.

Shaping

  1. Divide the dough into 12 equal pieces and shape each piece into a round roll.
  2. Place the rolls in a greased 9×13 pan.

Second Rise

  1. Cover the pan and let the rolls rise for 20 to 30 minutes until puffy.

Baking

  1. Preheat the oven to 375°F (190°C).
  2. Brush the rolls with melted butter or egg wash.
  3. Bake for 15 to 20 minutes until golden brown.
  4. Brush the hot rolls with more butter, let cool for a few minutes, and serve warm.

You can customize the rolls by adding herbs, cheese, or garlic. Let the rolls rise in a warm spot for the best results.

Appetizer, Side Dish
American, Baking
dinner rolls, easy rolls, Homemade Bread, sourdough discard, sourdough rolls

Baked Spaghetti Casserole

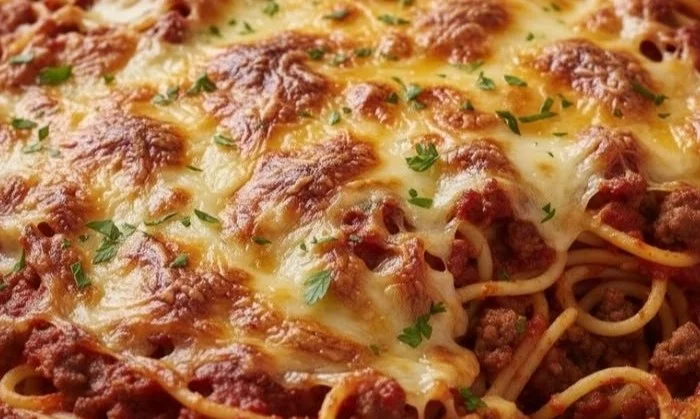
Delicious baked spaghetti casserole topped with cheese and herbs

This baked spaghetti casserole feels like a warm hug on a plate. It mixes tender pasta, rich tomato sauce, and lots of melty cheese. It is simple to make, feeds a crowd, and tastes like comfort food any night of the week. I call this dish a true crowd-pleaser because it turns pantry staples into a cheesy, oven baked pasta bake that everyone asks for seconds. If you like a spicy twist, try a spicy southern cheesy chicken spaghetti casserole for a different take on cheesy spaghetti.

how to prepare Baked Spaghetti Casserole

  1. Preheat the oven to 350°F, and grease a 9×13 inch baking dish.
  2. Cook 1 pound of spaghetti in salted boiling water until just shy of al dente, drain well.
  3. In a large pan, cook 1 pound of ground beef or turkey until browned, drain excess fat. Add 1 chopped onion and 2 cloves minced garlic, cook until soft.
  4. Stir in a 24 ounce jar of marinara sauce, 1 teaspoon dried oregano, salt and pepper to taste. Let simmer 5 minutes.
  5. Toss the drained spaghetti with the sauce in a large bowl, then stir in 2 cups shredded mozzarella and 1 cup grated Parmesan.
  6. Transfer the pasta mixture to the prepared baking dish, spread evenly. Top with 1 more cup of mozzarella and a little extra Parmesan.
  7. Bake 20 to 25 minutes, until cheese is bubbly and golden. Let rest 5 minutes before serving.

Baked Spaghetti Casserole

Why You’ll Love Baked Spaghetti Casserole

  • It uses simple pantry items, so you can make it any night.
  • The cheese melts into the pasta, making every bite creamy and satisfying.
  • It feeds many people, so it is great for family dinner or potlucks.
  • You can change the meat, add vegetables, or make it vegetarian, it is very flexible.

tips for success

  • Do not overcook the pasta, it will finish cooking in the oven and stay firm.
  • Drain pasta well, excess water can make the casserole watery.
  • Use a good melting cheese, like whole milk mozzarella, for best flavor.
  • Let the casserole rest after baking, it firms up and is easier to serve.
  • Add a pinch of red pepper flakes to the sauce for a small heat boost.

Serving Suggestions

  • Serve with a simple green salad and a splash of vinaigrette.
  • Offer garlic bread or crusty rolls to soak up sauce.
  • Top each plate with extra Parmesan and fresh chopped parsley.
  • Pair with a light red wine or iced tea for an easy meal.

Baked Spaghetti Casserole

FAQs

Q: Can I make baked spaghetti casserole ahead of time?

A: Yes, assemble it in the baking dish, cover and refrigerate up to 24 hours. Bake as directed, you may need a few extra minutes.

Q: Can I freeze this dish?

A: Yes, bake first or freeze unbaked. For unbaked, wrap well and freeze up to 2 months. Thaw overnight before baking and add a few extra minutes in the oven.

Q: How do I make it vegetarian?

A: Skip the meat and add sautéed mushrooms, bell peppers, zucchini, or a mix of vegetables. Use a vegetarian sauce and cheese.

Q: Can I use other pasta shapes?

A: Yes, penne, rigatoni, or rotini work well, they hold the sauce and cheese nicely.

Conclusion

For a reliable, cheesy family meal, this baked spaghetti casserole is hard to beat. For another tested version and more tips, see the Baked Spaghetti Casserole Recipe – Allrecipes.

Baked Spaghetti Casserole

This baked spaghetti casserole combines tender pasta, rich tomato sauce, and lots of melty cheese, perfect for a comforting family meal.

Pasta and Sauce

  • 1 pound spaghetti (Cook until just shy of al dente)
  • 1 pound ground beef or turkey (Browned and drained)
  • 1 large onion, chopped
  • 2 cloves garlic, minced
  • 24 ounces marinara sauce
  • 1 teaspoon dried oregano
  • to taste salt and pepper

Cheese

  • 2 cups shredded mozzarella (Plus 1 cup for topping)
  • 1 cup grated Parmesan (Plus a little extra for topping)

Preparation

  1. Preheat the oven to 350°F, and grease a 9×13 inch baking dish.
  2. Cook the spaghetti in salted boiling water until just shy of al dente, then drain well.
  3. In a large pan, cook the ground beef or turkey until browned, then drain excess fat.
  4. Add the chopped onion and minced garlic, cooking until soft.

Cooking

  1. Stir in the marinara sauce and dried oregano, adding salt and pepper to taste. Let simmer for 5 minutes.
  2. Toss the drained spaghetti with the sauce in a large bowl, then stir in shredded mozzarella and grated Parmesan.
  3. Transfer the pasta mixture to the prepared baking dish and spread evenly.
  4. Top with an additional cup of mozzarella and a little extra Parmesan.
  5. Bake for 20 to 25 minutes, until the cheese is bubbly and golden.
  6. Let rest for 5 minutes before serving.

Do not overcook the pasta, it will finish cooking in the oven and stay firm. Drain pasta well to avoid a watery casserole. Let the casserole rest to make it easier to serve. For added heat, add a pinch of red pepper flakes to the sauce.

Dinner, Main Course
Italian
Baked Spaghetti, Casserole, Cheesy Dish, Comfort Food, Pasta Bake

Garlic Butter Green Beans

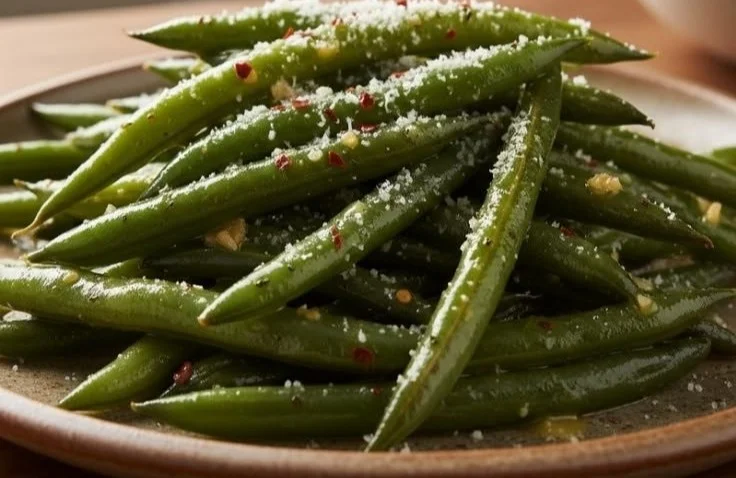
Sauteed garlic butter green beans garnished with fresh herbs

This Garlic Butter Green Beans recipe is a warm, simple side dish that fits dinner on busy nights, holiday meals, and weeknight plates. The beans stay crisp and get a soft garlic butter coat that most people love. If you enjoy rich garlic flavors, you might also like the garlic butter steak bites with parmesan cream sauce, they share a similar buttery garlic taste. This green bean dish is easy to make, quick to cook, and a real crowd pleaser, so get ready to enjoy a small, tasty side that will disappear fast.

how to prepare Garlic Butter Green Beans

Ingredients

  • 1 pound fresh green beans, trimmed
  • 2 tablespoons butter
  • 2 garlic cloves, minced
  • 1 tablespoon olive oil
  • Salt, to taste
  • Black pepper, to taste
  • Optional, a squeeze of lemon or a pinch of red pepper flakes

Directions

  1. Rinse and trim the green beans, dry them well.
  2. Heat a large pan over medium heat. Add the olive oil and 1 tablespoon of butter.
  3. Add the green beans and cook, stirring, for 4 to 6 minutes, until they start to get tender and bright green.
  4. Push the beans to one side of the pan. Add the remaining butter and the minced garlic. Cook the garlic for about 30 seconds, do not burn it.
  5. Mix the garlic and butter with the green beans. Cook 1 to 2 more minutes, until the beans are cooked but still crisp.
  6. Season with salt and black pepper. Add a squeeze of lemon or a pinch of red pepper flakes if you like.
  7. Serve hot.

Garlic Butter Green Beans

Why You’ll Love Garlic Butter Green Beans

  • Quick, they take about 10 minutes to cook.
  • Fresh taste, the green beans stay bright and crisp.
  • Rich garlic butter flavor, that most people find comforting.
  • Versatile, they pair with chicken, beef, fish, or a simple grain.
  • Easy to scale up for a crowd or make small for one or two people.

tips for success

  • Dry the beans well after rinsing, wet beans will steam not sauté.
  • Use a hot pan, the beans will get a nice color and keep a slight crunch.
  • Do not burn the garlic, add it near the end and watch it for 30 seconds.
  • Taste and season at the end, salt and pepper make the flavors pop.
  • If you want softer beans, cover the pan for a minute, then remove the lid to let the butter brown.

Serving Suggestions

  • Serve with roasted chicken or grilled fish for a simple weeknight meal.
  • Add to a holiday plate with mashed potatoes and roast turkey.
  • Toss with toasted almonds or grated parmesan for extra texture and flavor.
  • Serve over rice or with a slice of lemon for a bright finish.

Garlic Butter Green Beans

FAQs

Q: Can I use frozen green beans for this recipe? A: Yes, you can. Thaw and pat them dry first, then cook a little longer until they are hot through.

Q: How long can I store leftovers? A: Keep leftovers in an airtight container in the fridge for up to 3 days. Reheat gently in a pan.

Q: Can I make this without butter? A: Yes, use more olive oil if you need a dairy free option. The flavor will be a bit different but still good.

Q: Can I add other herbs or spices? A: Yes, try thyme, parsley, or a pinch of red pepper flakes for heat.

Q: How do I keep the beans crisp? A: Do not overcook, cook until bright and just tender. Shock in cold water if you want to stop the cooking fast.

Conclusion

For a quick and tasty side that goes with many meals, try this Garlic Butter Green Beans. If you want another version and a fast 15 minute idea, see Foolproof Living’s 15-minute Garlic Butter Green Beans recipe for more tips and a ready plan.

Garlic Butter Green Beans

A warm, simple side dish featuring crisp green beans coated in rich garlic butter. Perfect for busy nights and holiday meals.

Main Ingredients

  • 1 pound fresh green beans, trimmed (Use fresh beans for the best texture.)
  • 2 tablespoons butter (Divided: 1 tablespoon for cooking, 1 tablespoon for flavor.)
  • 2 cloves garlic, minced (Add near the end to avoid burning.)
  • 1 tablespoon olive oil (For sautéing the beans.)
  • Salt, to taste (Enhances flavor.)
  • Black pepper, to taste (Enhances flavor.)
  • Optional: squeeze of lemon or pinch of red pepper flakes (For added flavor.)

Preparation

  1. Rinse and trim the green beans, then dry them well.
  2. Heat a large pan over medium heat and add the olive oil and 1 tablespoon of butter.
  3. Add the green beans, cooking and stirring for 4 to 6 minutes, until they are tender and bright green.

Cooking

  1. Push the beans to one side of the pan and add the remaining butter and minced garlic.
  2. Cook the garlic for about 30 seconds, ensuring it doesn’t burn.
  3. Mix the garlic and butter with the green beans and cook for 1 to 2 more minutes until the beans are cooked but still crisp.
  4. Season with salt and black pepper, and add a squeeze of lemon or a pinch of red pepper flakes if desired.
  5. Serve hot.

For best results, dry the beans thoroughly before sautéing. Use a hot pan to get nice color and keep crunch. If you desire softer beans, cover the pan for a minute and then uncover to let the butter brown.

Side Dish
American
Garlic Butter Green Beans, green beans, quick recipe, side dish, vegetable recipe

High Protein Tiramisu Overnight Oats

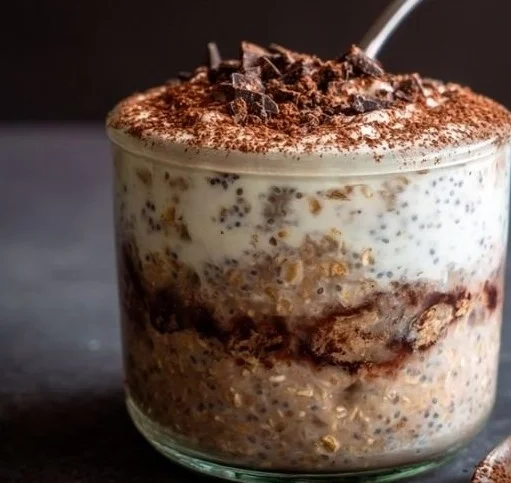
Bowl of high protein tiramisu overnight oats topped with cocoa and coffee beans

High Protein Tiramisu Overnight Oats are the perfect mix of dessert flavor and healthy breakfast fuel. Inspired by the classic Italian tiramisu, this recipe combines coffee, cocoa, creamy yogurt, and oats into a rich, satisfying meal that tastes indulgent but supports your nutrition goals.

The best part? It takes only a few minutes to prepare and works perfectly for busy mornings. Just mix everything the night before, let it chill overnight, and wake up to a creamy, protein-packed breakfast that feels like a treat.

Whether you’re looking for a high-protein breakfast, a healthy meal prep option, or simply a coffee-flavored oatmeal recipe, this tiramisu overnight oats recipe delivers.

How to prepare High Protein Tiramisu Overnight Oats

Ingredients

  • 1/2 cup rolled oats
  • 1/2 cup milk (dairy or plant)
  • 1/3 cup plain Greek yogurt
  • 1 scoop vanilla or unflavored protein powder (about 20–25 g)
  • 2 tablespoons strong brewed coffee, cooled, or 1 teaspoon instant espresso
  • 1 teaspoon cocoa powder plus extra to dust
  • 1 tablespoon chia seeds, optional
  • 1 tablespoon honey or maple syrup, to taste
  • 1/4 teaspoon vanilla extract
  • Pinch of salt
  • Optional, 1 tablespoon mascarpone or cottage cheese for extra creaminess

Directions

  1. In a jar or bowl, add oats, protein powder, cocoa powder, chia seeds, and salt. Stir dry mix.
  2. Pour in milk, Greek yogurt, coffee, vanilla, and sweetener. Stir well until mixed and smooth.
  3. If you use mascarpone or cottage cheese, fold it in now for a creamy layer.
  4. Cover the jar, place in the fridge, and chill at least 4 hours, or overnight for best texture.
  5. In the morning, stir the oats. Add a splash of milk if too thick.
  6. Dust cocoa on top and add a few coffee-soaked berries or shaved dark chocolate if you like.
  7. Eat cold or warm for 30 seconds in the microwave if you want it warm.

High Protein Tiramisu Overnight Oats

This High Protein Tiramisu Overnight Oats makes breakfast feel like a treat, while still keeping it healthy. It brings the cozy coffee taste of tiramisu into an easy make-ahead jar. The oats get creamy, the coffee shines, and the protein keeps you full longer. If you like hearty morning meals, you might also enjoy a savory option like this high protein creamy taco soup for dinner. This recipe is a crowd pleaser that tastes rich, yet simple to make, and you will want to make it again and again.

Why You’ll Love High Protein Tiramisu Overnight Oats

  • Tastes like dessert, but works as a healthy breakfast.
  • High in protein from Greek yogurt and protein powder, so it keeps you full.
  • Easy to make ahead, perfect for meal prep and busy mornings.
  • Coffee and cocoa give real tiramisu flavor without baking.
  • Very flexible, you can change sweetener, milk, or toppings to fit your taste.

tips for success

  • Use cold, strong coffee or instant espresso for a clear coffee flavor.
  • Let it sit overnight, at least 4 hours, for the oats to soften and flavors to meld.
  • Stir well before eating, add a little milk if the mix is too thick.
  • If protein powder makes it grainy, add more yogurt or a splash of milk and mix well.
  • Layer mascarpone or cottage cheese if you want a richer, more tiramisu-like texture.
  • Store jars in the fridge and eat within 3 days for best freshness.

Serving Suggestions

  • Top with a light dusting of cocoa powder and a few dark chocolate shavings.
  • Add sliced banana or berries for fresh fruit and a touch of sweetness.
  • Sprinkle chopped nuts or seeds for crunch.
  • Drizzle a little espresso or coffee syrup on top for extra coffee punch.
  • Serve with a small espresso shot on the side for a true tiramisu feel.

High Protein Tiramisu Overnight Oats

FAQs

Q: Can I make this without protein powder?

A: Yes, skip the powder and add a bit more Greek yogurt or cottage cheese to keep protein high.

Q: How long do these overnight oats last in the fridge?

A: They keep well for up to 3 days in a sealed jar.

Q: Can I use instant oats instead of rolled oats?

A: You can, but instant oats will be softer. Reduce soak time if you like a bit of chew.

Q: Can I make this dairy free?

A: Yes, use plant milk and dairy-free yogurt. Use a plant based protein powder for full protein.

Q: Is the coffee strong in the oats?

A: The recipe uses a small amount of strong coffee so you taste coffee, but it is not overpowering. Adjust to your taste.

Conclusion

This High Protein Tiramisu Overnight Oats recipe is an easy way to enjoy a tasty, high protein breakfast that feels like a treat. For another take on high protein meals you can try, see this High Protein Tiramisu Overnight Oats | Teri-Ann Carty Recipes.

High Protein Tiramisu Overnight Oats

This recipe combines coffee, cocoa, creamy yogurt, and oats into a rich, satisfying breakfast that tastes indulgent while supporting your nutrition goals.

Base Ingredients

  • 1/2 cup rolled oats
  • 1/2 cup milk (dairy or plant) (Can use dairy or plant-based milk)
  • 1/3 cup plain Greek yogurt (Can substitute with dairy-free yogurt)
  • 1 scoop vanilla or unflavored protein powder (about 20–25 g) (Optional, can skip for a protein-rich alternative)
  • 2 tablespoons strong brewed coffee, cooled, or 1 teaspoon instant espresso (Use strong coffee for best flavor)
  • 1 teaspoon cocoa powder plus extra to dust (For dusting on top)
  • 1 tablespoon chia seeds (Optional)
  • 1 tablespoon honey or maple syrup (Adjust to taste)
  • 1/4 teaspoon vanilla extract
  • 1 pinch salt
  • 1 tablespoon mascarpone or cottage cheese (Optional for extra creaminess)

Preparation

  1. In a jar or bowl, add oats, protein powder, cocoa powder, chia seeds, and salt. Stir dry mix.
  2. Pour in milk, Greek yogurt, coffee, vanilla, and sweetener. Stir well until mixed and smooth.
  3. If using mascarpone or cottage cheese, fold it in now for a creamy layer.
  4. Cover the jar, place in the fridge, and chill at least 4 hours, or overnight for best texture.

Serving

  1. In the morning, stir the oats. Add a splash of milk if too thick.
  2. Dust cocoa on top and add coffee-soaked berries or shaved dark chocolate if desired.
  3. Eat cold or warm for 30 seconds in the microwave if preferred.

Use cold, strong coffee for a clear coffee flavor. Let it sit overnight for the best texture. Store jars in the fridge and consume within 3 days for freshness.

Breakfast, Healthy
Italian
Healthy Breakfast, High Protein, Meal Prep, Overnight Oats, Tiramisu

Stuffed Bell Peppers with Ground Beef

Delicious stuffed bell peppers filled with ground beef and topped with cheese

Stuffed bell peppers with ground beef are warm, simple, and full of good flavor. This dish mixes savory ground beef, rice, tomato, and mild cheese inside bright bell peppers. It makes a filling family meal that many people enjoy. If you like easy comfort food, you will love this pepper recipe, and it fits into a weeknight or a casual weekend dinner. For another easy ground beef idea, try a tater tot casserole with ground beef recipe for a different, fun twist. These stuffed peppers are a real crowd-pleaser, and you will smile when you lift the lid, so get ready to cook and have fun making them.

how to prepare Stuffed Bell Peppers with Ground Beef

  1. Preheat your oven to 375°F, wash the bell peppers, and cut the tops off. Remove seeds and membranes.
  2. Cook 1 cup of rice according to package directions, set aside.
  3. In a pan, heat 1 tablespoon oil over medium heat. Add 1 chopped onion and 2 minced garlic cloves, cook until soft.
  4. Add 1 pound ground beef, break it up and cook until no pink remains. Drain excess fat.
  5. Stir in 1 cup cooked rice, 1 cup tomato sauce, 1 teaspoon salt, 1/2 teaspoon black pepper, and 1 teaspoon dried oregano. Cook 2 to 3 minutes to blend flavors.
  6. Spoon the beef and rice mix into each bell pepper, packing gently. Top each with a little shredded cheese if you like.
  7. Place the stuffed peppers in a baking dish. Pour 1/2 cup water into the dish to keep peppers moist. Cover with foil.
  8. Bake for 30 minutes, remove foil, and bake 10 more minutes until peppers are tender and cheese is melted. Let rest 5 minutes before serving.

Stuffed Bell Peppers with Ground Beef

Why You’ll Love Stuffed Bell Peppers with Ground Beef

  • They are easy to make with simple pantry items, like ground beef, rice, and tomato sauce.
  • The peppers look bright and make a nice plate for family meals or guests.
  • You can change fillings, add veggies, or swap cheese to suit taste.
  • They reheat well, so they work for meal prep and leftovers.

tips for success

  • Choose firm bell peppers that stand upright, so they hold the filling well.
  • Do not overfill, leave a little room at the top so filling does not spill in the oven.
  • Cook the rice first, so it does not add extra moisture while baking.
  • If peppers cook too fast on top, cover with foil until near the end, then uncover to brown.
  • Taste the filling before stuffing, and add a little more salt or pepper if needed.

Serving Suggestions

  • Serve with a simple green salad and a light vinaigrette.
  • Add crusty bread or garlic bread to soak up the extra sauce.
  • Top with fresh parsley or chopped basil for color.
  • A side of steamed vegetables or roasted potatoes makes a full meal.

Stuffed Bell Peppers with Ground Beef

FAQs

Q: Can I make these ahead and bake later?

A: Yes, you can stuff the peppers and keep them covered in the fridge for up to one day. Bake when ready.

Q: Can I use ground turkey or chicken instead of beef?

A: Yes, ground turkey or chicken works. Watch seasoning, they tend to be milder than beef.

Q: How do I make this low carb?

A: Skip the rice and add more chopped veggies or cauliflower rice to the beef mix.

Q: Can I freeze stuffed peppers?

A: Yes, bake them first, then cool and freeze. Reheat in the oven until hot all the way through.

Q: Do I have to use cheese?

A: No, cheese is optional. You can top with sauce or fresh herbs instead.

Conclusion

For another take on stuffed peppers and more recipe ideas, see this detailed recipe from another kitchen, Ground Beef Stuffed Peppers – Salt & Lavender.

Stuffed Bell Peppers with Ground Beef

These warm, simple stuffed bell peppers are filled with hearty ground beef, rice, and cheese, making a satisfying family meal that’s full of flavor.

For the Peppers

  • 4 bell peppers (Choose firm bell peppers that stand upright.)

Stuffing

  • 1 cup rice (Cook according to package directions.)
  • 1 tablespoon oil (For cooking the onion and garlic.)
  • 1 onion, chopped (Cook with garlic.)
  • 2 cloves garlic, minced (Cook until soft with onion.)
  • 1 pound ground beef (Cook until no pink remains.)
  • 1 cup tomato sauce
  • 1 teaspoon salt
  • 1/2 teaspoon black pepper
  • 1 teaspoon dried oregano
  • 1/2 cup water (To keep peppers moist.)
  • to taste shredded cheese (Optional topping.)

Preparation

  1. Preheat your oven to 375°F (190°C). Wash the bell peppers and cut the tops off. Remove seeds and membranes.
  2. Cook 1 cup of rice according to package directions, set aside.

Cooking

  1. In a pan, heat 1 tablespoon oil over medium heat. Add the chopped onion and minced garlic, cooking until soft.
  2. Add 1 pound of ground beef, breaking it up, and cook until no pink remains. Drain excess fat.
  3. Stir in the cooked rice, tomato sauce, salt, black pepper, and dried oregano. Cook for 2 to 3 minutes to blend flavors.

Assembly and Baking

  1. Spoon the beef and rice mixture into each bell pepper, packing gently.
  2. Top each with a little shredded cheese if desired.
  3. Place the stuffed peppers in a baking dish. Pour 1/2 cup water into the dish to keep peppers moist. Cover with foil.
  4. Bake for 30 minutes. Remove foil and bake for an additional 10 minutes until peppers are tender and cheese is melted.
  5. Let rest for 5 minutes before serving.

You can swap out ingredients to suit taste, such as using ground turkey or chicken, or adding different vegetables. These peppers store well for meal prep and leftovers.

Dinner, Main Course
American, Comfort Food
Comfort Food, Easy Dinner, Family Meal, Ground Beef, Stuffed Peppers

Pan-Seared Orange Roughy with Lemon-Caper Sauce

Pan-seared orange roughy fillet with lemon-caper sauce on a plate

This pan-seared orange roughy with lemon-caper sauce feels warm and easy. It has a light, clean taste, and it looks nice on the plate. The lemon sauce makes the fish bright, and the capers add small bursts of flavor. This recipe is a crowd-pleaser for family dinners and small guests. If you want a simple roasted side, try this Caprese roasted asparagus as a fresh partner. Give it a try, and you might find yourself making it again and again, with a little happy dance at the table.

how to prepare Pan-Seared Orange Roughy with Lemon-Caper Sauce

Ingredients

  • 4 orange roughy fillets, about 4 to 6 oz each
  • Salt and black pepper, to taste
  • 2 tablespoons olive oil
  • 2 tablespoons butter
  • 1 garlic clove, minced
  • 1/3 cup dry white wine or low-sodium chicken broth
  • 2 tablespoons fresh lemon juice
  • 1 tablespoon lemon zest
  • 2 tablespoons capers, drained
  • 1 tablespoon chopped fresh parsley

Directions

  1. Pat the fillets dry with paper towels. Season both sides with salt and pepper.
  2. Heat olive oil in a large skillet over medium-high heat until hot.
  3. Add the fillets, skin side up if they have skin, and cook without moving for 2 to 3 minutes, until the bottom is golden.
  4. Gently flip the fillets and add 1 tablespoon butter. Cook 1 to 2 more minutes, until the fish flakes with a fork. Remove fish to a warm plate.
  5. Lower the heat to medium. Add the remaining butter to the pan. Stir in the garlic and cook for 30 seconds, do not let it burn.
  6. Pour in the white wine or broth and scrape any browned bits from the pan. Let it simmer for 1 minute to reduce slightly.
  7. Add lemon juice, lemon zest, and capers. Stir and let the sauce warm for 30 seconds. Taste and add a little more salt or pepper if needed.
  8. Spoon the sauce over the fillets and sprinkle with parsley. Serve right away.

Pan-Seared Orange Roughy with Lemon-Caper Sauce

tips for success

  • Pat the fish dry, this helps a good sear.
  • Use a hot pan, but not smoking. Medium-high heat works best.
  • Do not overcook, orange roughy cooks fast and gets dry if left too long.
  • Warm the plate before serving, it keeps the fish hot.
  • Taste the sauce before you serve, add a touch more lemon if you want more brightness.

Serving Suggestions

  • Serve with simple steamed rice or boiled baby potatoes.
  • A green salad or quick roasted asparagus pairs well.
  • Add lemon wedges on the side for extra citrus.
  • A light white wine or a sparkling water with lemon will match the dish.

Pan-Seared Orange Roughy with Lemon-Caper Sauce

FAQs

Q: Can I use another fish instead of orange roughy?

A: Yes, use another mild, firm white fish like cod, haddock, or tilapia.

Q: Can I make the sauce ahead?

A: You can make the sauce ahead and reheat gently. Add a splash of water or broth to loosen it if it thickens.

Q: What if I do not have white wine?

A: Use low-sodium chicken broth or vegetable broth instead. It keeps the sauce tasty.

Q: How do I store leftovers?

A: Keep leftovers in an airtight container in the fridge for up to 2 days. Reheat gently in a low oven or cover and warm in a skillet.

Conclusion

If you want another take or to compare tips and timing, see this detailed version, Pan-Seared Orange Roughy – Champagne Tastes®, for more ideas and notes on cooking time and sauce variations.

Pan-Seared Orange Roughy with Lemon-Caper Sauce

This pan-seared orange roughy with lemon-caper sauce features a light and clean taste, making it a delightful crowd-pleaser for family dinners. The bright lemon sauce combined with the bursts of flavor from the capers makes this dish a favorite.

Fish and Seasoning

  • 4 fillets orange roughy fillets, about 4 to 6 oz each
  • Salt and black pepper, to taste

Cooking Ingredients

  • 2 tablespoons olive oil
  • 2 tablespoons butter (Divided into two parts)
  • 1 clove garlic, minced
  • 1/3 cup dry white wine or low-sodium chicken broth
  • 2 tablespoons fresh lemon juice
  • 1 tablespoon lemon zest
  • 2 tablespoons capers, drained
  • 1 tablespoon chopped fresh parsley

Preparation

  1. Pat the fillets dry with paper towels. Season both sides with salt and pepper.

Cooking the Fish

  1. Heat olive oil in a large skillet over medium-high heat until hot.
  2. Add the fillets, skin side up if they have skin, and cook without moving for 2 to 3 minutes, until the bottom is golden.
  3. Gently flip the fillets and add 1 tablespoon butter. Cook 1 to 2 more minutes, until the fish flakes with a fork. Remove fish to a warm plate.

Making the Sauce

  1. Lower the heat to medium. Add the remaining butter to the pan. Stir in the garlic and cook for 30 seconds, do not let it burn.
  2. Pour in the white wine or broth and scrape any browned bits from the pan. Let it simmer for 1 minute to reduce slightly.
  3. Add lemon juice, lemon zest, and capers. Stir and let the sauce warm for 30 seconds. Taste and add a little more salt or pepper if needed.

Serving

  1. Spoon the sauce over the fillets and sprinkle with parsley. Serve right away.

Pat the fish dry for a good sear. Use a hot pan but not smoking. Do not overcook the orange roughy. Warm the plate before serving to keep the fish hot. Taste the sauce before serving; add a touch more lemon if desired.

Dinner, Main Course
American, Seafood
Easy Dinner, fish recipe, lemon caper sauce, orange roughy, seafood dish

Sourdough Discard Banana Bread

Sourdough discard banana bread made with ripe bananas and sourdough starter.

Sourdough Discard Banana Bread is a warm, homey loaf that feels like a hug. It uses leftover sourdough discard, ripe bananas, simple pantry items, and a little love. This banana bread is moist, mildly tangy, and very easy to make, a real crowd-pleaser at coffee time or for a quick snack. If you like banana treats, try a small twist inspired by a banana bread cookies soft chewy easy recipe, then come back to this classic loaf. You will love how the sourdough discard adds depth, and the smell as it bakes will make everyone smile, so get ready to bake and enjoy.

how to prepare Sourdough Discard Banana Bread

  1. Preheat your oven to 350°F, and grease a 9×5 inch loaf pan or line it with paper.
  2. In a bowl, mash 3 ripe bananas until smooth. Add 1 cup sourdough discard, 1/2 cup melted butter or oil, 1 cup sugar, and 2 large eggs. Stir until mixed.
  3. In another bowl, whisk 1 1/2 cups flour, 1 teaspoon baking soda, 1/2 teaspoon salt, and 1 teaspoon cinnamon if you like.
  4. Add dry mix to wet mix, stir just until combined. Fold in 1/2 cup chopped nuts or chocolate chips if you want. Do not overmix.
  5. Pour batter into the pan, smooth the top, and bake 50 to 60 minutes, until a toothpick comes out clean or with a few crumbs.
  6. Cool in the pan 10 minutes, then turn out onto a rack to cool more before slicing.

Sourdough Discard Banana Bread

Why You’ll Love Sourdough Discard Banana Bread

  • It uses sourdough discard, so you waste less and get more flavor.
  • The bread stays moist for days, great for quick breakfasts.
  • It is simple to make with common ingredients, no fuss or special tools.
  • The mild tang from the discard balances the sweet banana taste, making it rich but not too sweet.

tips for success

  • Use very ripe bananas for the best banana flavor and natural sweetness.
  • Measure flour by spooning into the cup and leveling, do not pack it down.
  • Mix until the dry and wet parts just come together, overmixing can make the bread dense.
  • Check the loaf at 50 minutes, ovens vary, so test with a toothpick.
  • If the top browns too fast, tent with foil for the last 10 to 15 minutes.

Serving Suggestions

  • Serve warm with a thin spread of butter, it melts into the bread nicely.
  • Toast a slice and add cream cheese for a creamy contrast.
  • Pair with coffee or milk for a simple snack or breakfast.
  • Make a quick pudding by tearing slices into a dish, adding milk, eggs, and baking, for a dessert twist.

Sourdough Discard Banana Bread

FAQs

Q: Can I freeze this banana bread?

A: Yes, wrap slices or the whole loaf tight in foil and freeze up to 3 months. Thaw at room temperature.

Q: Do I need active sourdough starter for this recipe?

A: No, use unfed discard, you do not need active starter or to feed it first.

Q: Can I use less sugar?

A: Yes, you can reduce sugar a bit, the ripe bananas add sweetness, but the texture may change slightly.

Q: Can I make this in a muffin tin?

A: Yes, bake muffins at 350°F for about 18 to 22 minutes, check with a toothpick.

Conclusion

For a slightly different take or more tips on sourdough banana bread, you can explore Ultimate Sourdough Banana Bread – The Clever Carrot, it has helpful notes and ideas. Enjoy baking, and share a slice with someone you like.

Sourdough Discard Banana Bread

A moist and mildly tangy banana bread made with sourdough discard and ripe bananas, perfect for coffee time or a quick snack.

Wet Ingredients

  • 3 pieces ripe bananas (Use very ripe bananas for best flavor.)
  • 1 cup sourdough discard (Unfed, active starter is not needed.)
  • 1/2 cup melted butter or oil
  • 1 cup sugar (Can be reduced slightly for less sweetness.)
  • 2 pieces large eggs

Dry Ingredients

  • 1 1/2 cups flour (Measure by spooning into the cup and leveling.)
  • 1 teaspoon baking soda
  • 1/2 teaspoon salt
  • 1 teaspoon cinnamon (Optional, add if desired.)

Optional Add-ins

  • 1/2 cup chopped nuts or chocolate chips (Fold in if desired.)

Preparation

  1. Preheat your oven to 350°F (175°C) and grease a 9×5 inch loaf pan or line it with paper.
  2. In a bowl, mash the ripe bananas until smooth.
  3. Add sourdough discard, melted butter or oil, sugar, and eggs to the bananas and stir until mixed.
  4. In another bowl, whisk together flour, baking soda, salt, and cinnamon.
  5. Gradually mix the dry ingredients into the wet mixture, stirring just until combined.
  6. Fold in the optional nuts or chocolate chips without overmixing.

Baking

  1. Pour the batter into the prepared loaf pan and smooth the top.
  2. Bake for 50 to 60 minutes, or until a toothpick comes out clean or with a few crumbs.
  3. Cool the bread in the pan for 10 minutes before transferring to a rack to cool completely.

To avoid dense bread, don’t overmix the batter. Tent with foil if the top browns too quickly during baking.

Breakfast, Snack
American
banana bread, Easy Recipe, moist bread, quick snack, sourdough discard

Ground Beef Sweet Potato Bowl

Ground Beef Sweet Potato Bowl with fresh vegetables and seasonings

This Ground Beef Sweet Potato Bowl feels warm, simple, and full of flavor. It mixes savory ground beef with sweet, soft sweet potato, and a few fresh toppings for a meal the whole family will enjoy. It is a great choice for a quick weeknight dinner, a meal prep lunch, or a cozy comfort food night.

If you like easy bowls with good taste and simple steps, you will love this recipe. For another hearty bowl idea that uses ground beef in a bold way, try this spicy ground beef stir fry bowl for more dinner inspiration.

how to prepare Ground Beef Sweet Potato Bowl

  1. Cook the sweet potatoes, wash and peel if you like, then cut into cubes. Roast or microwave until soft.
  2. In a pan, cook ground beef over medium heat. Break it up and cook until no pink remains.
  3. Add salt, pepper, and any seasonings you like, stir and let flavors blend for a minute.
  4. If you want onions or garlic, sauté them first, then add the beef.
  5. Warm any vegetables you will add, like spinach, corn, or peppers.
  6. To build the bowl, start with a base of sweet potato, add the cooked ground beef, then top with veggies, herbs, and a drizzle of your favorite sauce.
  7. Serve right away, hot and ready.

Ground Beef Sweet Potato Bowl

Why You’ll Love Ground Beef Sweet Potato Bowl

  • It is simple and fast, perfect for busy nights.
  • The sweet potato adds natural sweetness and keeps it healthy.
  • Ground beef gives a good, filling protein boost.
  • You can change toppings to fit your taste, so it never gets boring.
  • It works great for meal prep, and it stays tasty the next day.

tips for success

  • Use firm, even cubes of sweet potato so they cook at the same time.
  • Drain extra fat from the beef for a cleaner taste.
  • Season the beef well, a little salt and pepper go a long way.
  • Roast the sweet potato with a little oil and salt for better flavor.
  • If you cook ahead, store components separately, then heat and assemble when ready.

Serving Suggestions

  • Top with fresh cilantro or parsley for a bright note.
  • Add a spoon of plain yogurt or cottage cheese for creaminess.
  • A splash of hot sauce or a drizzle of honey adds a nice contrast.
  • Serve with a side salad or steamed greens for extra veggies.
  • Try shredded cheddar or crumbled feta for a cheesy touch.

Ground Beef Sweet Potato Bowl

FAQs

Q: Can I use ground turkey instead of ground beef?

A: Yes, ground turkey works fine. Cook the same way and adjust seasoning to taste.

Q: How long will this keep in the fridge?

A: Store in an airtight container for up to 3 to 4 days. Reheat well before eating.

Q: Can I make this gluten free?

A: Yes, this bowl is naturally gluten free if you avoid sauces with gluten. Use gluten free condiments.

Q: Is this dish good for meal prep?

A: Yes, it keeps well. Keep the sweet potato and beef separate until you reheat and serve.

Conclusion

This Ground Beef Sweet Potato Bowl makes a warm, easy meal that is tasty and filling. It mixes simple ingredients for big flavor, and you can change the toppings to match your mood. If you want a similar sweet potato and beef idea with a creative twist, check out this take on a sweet potato beef bowl, Tiktok Hot Honey Cottage Cheese Sweet Potato Beef Bowl, for another way to serve sweet potato and beef together.

Ground Beef Sweet Potato Bowl

A warm, simple, and flavorful bowl featuring savory ground beef and sweet, soft sweet potato, topped with fresh vegetables.

For the Bowl Base

  • 2 medium sweet potatoes (Wash, peel (optional), and cut into cubes.)

For the Beef

  • 1 pound ground beef (Cook until no pink remains. Drain excess fat for a cleaner taste.)
  • 1 teaspoon salt (To taste.)
  • 1 teaspoon pepper (To taste.)

Vegetable Toppings

  • 1 cup spinach (Or substitute with corn, peppers, or any veggies of choice.)
  • 1 tablespoon fresh herbs (Such as parsley or cilantro.)

Optional Add-ons

  • 1 cup plain yogurt or cottage cheese (For creaminess.)
  • to taste hot sauce or honey (For added flavor.)

Preparation

  1. Cook the sweet potatoes until soft, by roasting or microwaving.
  2. In a pan, cook the ground beef over medium heat, breaking it up until no pink remains.
  3. Season the beef with salt, pepper, and any additional seasonings, letting the flavors blend for about a minute.
  4. If desired, sauté onions or garlic before adding the beef for added flavor.
  5. Warm any additional vegetables.

Assembly

  1. In a bowl, start with a base of sweet potato, followed by cooked ground beef and topped with your choice of veggies, herbs, and a drizzle of sauce.
  2. Serve immediately while hot.

For best results, use firm cubes of sweet potato for even cooking. This dish can be made gluten-free by ensuring any sauces used are gluten-free. Store leftovers in an airtight container for up to 3-4 days.

Dinner, Main Course
American
Comfort Food, Easy Dinner, Ground Beef, Meal Prep, Sweet Potato

High-Protein Cottage Cheese Bagels

Healthy high-protein cottage cheese bagels ready to be served

introduction

If you want a quick, tasty bagel that packs more protein, these High-Protein Cottage Cheese Bagels are a great pick. They use simple pantry items and cottage cheese to make a soft, chewy bagel with extra protein. This crowd-pleaser works well for a fast breakfast, a post-workout snack, or a light lunch that still fills you up. You can find other cottage cheese ideas like cottage cheese blueberry muffins if you like baking with cottage cheese. Try these bagels for a warm, fresh bite that tastes great plain or topped, and get ready to smile when you pull them from the oven.

how to prepare High-Protein Cottage Cheese Bagels

  1. Preheat your oven to 375 F, and line a baking tray with parchment paper.
  2. In a bowl, mix 1 cup cottage cheese, 2 cups self-rising flour, 1 large egg, and a pinch of salt. Stir until a soft dough forms.
  3. If the dough is very sticky, add a little more flour, one tablespoon at a time, until it is easy to handle.
  4. Divide the dough into 6 equal pieces. Roll each piece into a rope, then join the ends to make a bagel shape. Press gently to seal.
  5. Beat one egg and brush the tops of the bagels for a shiny crust. Sprinkle sesame seeds, poppy seeds, or everything seasoning if you like.
  6. Bake on the prepared tray for 18 to 22 minutes, until the bagels are light golden and firm. Cool on a rack for a few minutes before slicing.

High-Protein Cottage Cheese Bagels

Why You’ll Love High-Protein Cottage Cheese Bagels

  • High in protein, they help keep you full longer.
  • Simple ingredients, no long rise time, you can make them fast.
  • Soft inside, slightly chewy crust, great texture.
  • Versatile, you can top them sweet or savory.
  • Better for a health focus than many store-bought bagels, they cut refined carbs and add protein.

tips for success

  • Use full-fat cottage cheese for richer taste, or low-fat if you prefer fewer calories.
  • If you have no self-rising flour, mix 2 cups all-purpose flour with 3 teaspoons baking powder and 1 teaspoon salt.
  • Don’t add too much flour, the dough should be soft, not dry.
  • Press the ends well when shaping rings, so they do not open while baking.
  • Let bagels cool a few minutes before slicing, they finish setting as they cool.

Serving Suggestions

  • Slice and toast, then spread cream cheese and smoked salmon for a classic twist.
  • Top with mashed avocado, a squeeze of lemon, and a sprinkle of pepper for a fresh lunch.
  • Make a breakfast sandwich with egg, spinach, and cheese.
  • Serve with jam or honey for a sweet treat.
  • Pack one with turkey, tomato, and lettuce for an easy take-to-work meal.

High-Protein Cottage Cheese Bagels

FAQs

Q: Can I make these bagels without self-rising flour?
A: Yes, use all-purpose flour with 3 teaspoons baking powder and 1 teaspoon salt added, mix well, then follow the same steps.

Q: Can I freeze these bagels?
A: Yes, let the bagels cool, then freeze in a sealed bag. Toast or warm from frozen when you want one.

Q: How do I make them dairy free?
A: Cottage cheese is the main dairy ingredient, so for dairy free you can try a high-protein plant yogurt, but results will vary. These bagels work best with real cottage cheese.

Q: Can I add mix-ins like herbs or cheese?
A: Yes, fold chopped herbs, grated cheese, or minced garlic into the dough for extra flavor.

Q: How many calories and protein are in one bagel?
A: Exact numbers vary by ingredient brands and sizes, but a cottage cheese bagel often has more protein and fewer empty carbs than a store bagel. Use your ingredient labels to get a precise count.

Conclusion

These High-Protein Cottage Cheese Bagels are a simple, tasty way to boost breakfast or snacks with extra protein. For another step-by-step cottage cheese bagel approach with oven and air fryer tips, see High Protein Cottage Cheese Bagels (Oven or Air Fryer).

High-Protein Cottage Cheese Bagels

These soft, chewy bagels made with cottage cheese are high in protein and perfect for breakfast, snacks, or light lunches.

For the bagels

  • 1 cup cottage cheese (full-fat or low-fat) (Full-fat for richer taste; low-fat for fewer calories.)
  • 2 cups self-rising flour (Or substitute with 2 cups all-purpose flour mixed with 3 tsp baking powder and 1 tsp salt.)
  • 1 large egg (Beaten for brushing the tops.)
  • a pinch salt

Optional toppings

  • as desired sesame seeds, poppy seeds, or everything seasoning (For added flavor and texture.)

Preparation

  1. Preheat your oven to 375°F (190°C) and line a baking tray with parchment paper.
  2. In a bowl, mix cottage cheese, self-rising flour, a large egg, and a pinch of salt until a soft dough forms.
  3. If the dough is very sticky, add a little more flour, one tablespoon at a time, until it is easy to handle.
  4. Divide the dough into 6 equal pieces. Roll each piece into a rope, then join the ends to make a bagel shape.
  5. Press gently to seal the ends.

Baking

  1. Beat one egg and brush the tops of the bagels to create a shiny crust.
  2. Sprinkle with sesame seeds, poppy seeds, or everything seasoning if desired.
  3. Bake on the prepared tray for 18 to 22 minutes or until the bagels are light golden and firm.
  4. Cool on a rack for a few minutes before slicing.

Use full-fat cottage cheese for richer taste. Press the ends well when shaping the rings to avoid them opening while baking. Let bagels cool before slicing to allow them to finish setting.

Breakfast, Brunch, Snack
American
Cottage Cheese Bagels, Easy Bagel Recipe, Healthy Bagels, High-Protein Bagels, Protein Bagels