Garlic Sourdough Focaccia

Homemade Garlic Sourdough Focaccia topped with fresh herbs and garlic

There’s something magical about freshly baked bread, and when it comes to comfort food, Garlic Sourdough Focaccia truly steals the spotlight. This soft, golden flatbread is infused with the rich aroma of garlic and a hint of herbs, making it an irresistible treat for any gathering. Whether served warm as an appetizer, enjoyed with a hearty meal, or simply dipped in olive oil, this focaccia is sure to impress your friends and family. Plus, it’s easy to make and requires just a few simple ingredients. So, let’s dive into how you can whip up this delightful bread that everyone will rave about.

How to prepare Garlic Sourdough Focaccia

To make this Garlic Sourdough Focaccia, gather your ingredients and get ready to embark on a baking adventure. It’s all about mixing, kneading, and letting your dough rise to achieve that perfect texture. Here’s how to do it:

  1. Ingredients:
  • 2 cups active sourdough starter
  • 3 cups all-purpose flour
  • 1 ½ teaspoons salt
  • 1 cup water (lukewarm)
  • 4 tablespoons olive oil
  • 6 cloves garlic (minced)
  • Fresh herbs (like rosemary or thyme)
  • Flaky sea salt (for topping)
  1. Directions:
  2. In a large bowl, combine the sourdough starter, flour, salt, and water. Mix until a rough dough forms.
  3. Add 2 tablespoons of olive oil and the minced garlic to the dough, mixing until well incorporated.
  4. Turn the dough out onto a floured surface and knead for about 5-7 minutes until it’s smooth and elastic.
  5. Place the dough in a greased bowl, cover it, and let it rise for 4-6 hours, or until doubled in size.
  6. Once risen, punch down the dough and spread it in a greased baking pan.
  7. Dimple the surface with your fingers, drizzle the remaining olive oil, and sprinkle with herbs and flaky sea salt.
  8. Allow it to rise again for 1-2 hours.
  9. Preheat the oven to 425°F (220°C) and bake the focaccia for 20-25 minutes or until golden.
  10. Let it cool slightly before slicing and enjoying.

Garlic Sourdough Focaccia

Why You’ll Love Garlic Sourdough Focaccia

This focaccia is not just about its delicious taste, it also embodies a wonderful variety of textures. The crust is crisp and golden, while the inside is light and soft, inviting you to take another slice. The garlic enhances the flavors, making it a delightful addition to any meal. It’s perfect for sharing at parties, family gatherings, or even a cozy night in. Plus, it’s a great way to use your sourdough starter, making every bite a testament to your baking skills.

Tips for success

  • Use an active sourdough starter: It’s crucial for achieving that airy and fluffy focaccia.
  • Don’t skip the rising times: Allowing the dough to rise properly is key to developing flavor and texture.
  • Experiment with toppings: Feel free to top your focaccia with cheeses, olives, or different herbs to suit your taste.

Garlic Sourdough Focaccia

Serving Suggestions

Serve your Garlic Sourdough Focaccia warm to really savor its amazing flavor. It pairs wonderfully with a side of marinara sauce for dipping, or simply drizzle it with extra olive oil and balsamic vinegar. It also makes a fantastic base for sandwiches or can be enjoyed alongside soups and salads.

FAQs

Can I make this focaccia without sourdough starter? Yes, you can substitute the sourdough with instant yeast, although the flavor and texture will differ slightly.

How do I store leftover focaccia? Store it in an airtight container at room temperature for up to three days. You can also freeze it for longer storage.

Can I add cheese or other toppings to the focaccia? Absolutely! Cheese, olives, sun-dried tomatoes, or even vegetables can add a delightful twist to your focaccia. Enjoy experimenting!

Now that you know how to make this Garlic Sourdough Focaccia, why not gather your ingredients and start baking? Your kitchen is about to smell heavenly!

Garlic Sourdough Focaccia

This soft, golden flatbread is infused with the rich aroma of garlic and a hint of herbs, making it an irresistible treat perfect for any gathering.

Dough Ingredients

  • 2 cups active sourdough starter (Make sure it’s active for best results.)
  • 3 cups all-purpose flour
  • 1.5 teaspoons salt
  • 1 cup water (lukewarm) (Should be warm to the touch.)
  • 4 tablespoons olive oil (Divided for the dough and topping.)
  • 6 cloves garlic (minced) (Can adjust to taste.)

Toppings

  • to taste Fresh herbs (like rosemary or thyme) (Choose your favorite herbs.)
  • to taste Flaky sea salt (for topping)

Preparation

  1. In a large bowl, combine the sourdough starter, flour, salt, and lukewarm water. Mix until a rough dough forms.
  2. Add 2 tablespoons of olive oil and the minced garlic to the dough, mixing until well incorporated.
  3. Turn the dough out onto a floured surface and knead for about 5-7 minutes until it’s smooth and elastic.
  4. Place the dough in a greased bowl, cover it, and let it rise for 4-6 hours, or until doubled in size.
  5. Once risen, punch down the dough and spread it in a greased baking pan.
  6. Dimple the surface with your fingers, drizzle the remaining olive oil, and sprinkle with herbs and flaky sea salt.

Baking

  1. Allow it to rise again for 1-2 hours.
  2. Preheat the oven to 425°F (220°C) and bake the focaccia for 20-25 minutes or until golden.
  3. Let it cool slightly before slicing and enjoying.

Use an active sourdough starter for the best texture. Don’t skip the rising times for optimal flavor. Experiment with various toppings like cheeses or olives for added flair.
Appetizer, Bread
Italian
Bread Recipe, Comfort Food, Easy Focaccia, Garlic Sourdough Focaccia, Sourdough Bread

Cinnamon Roll Banana Bread

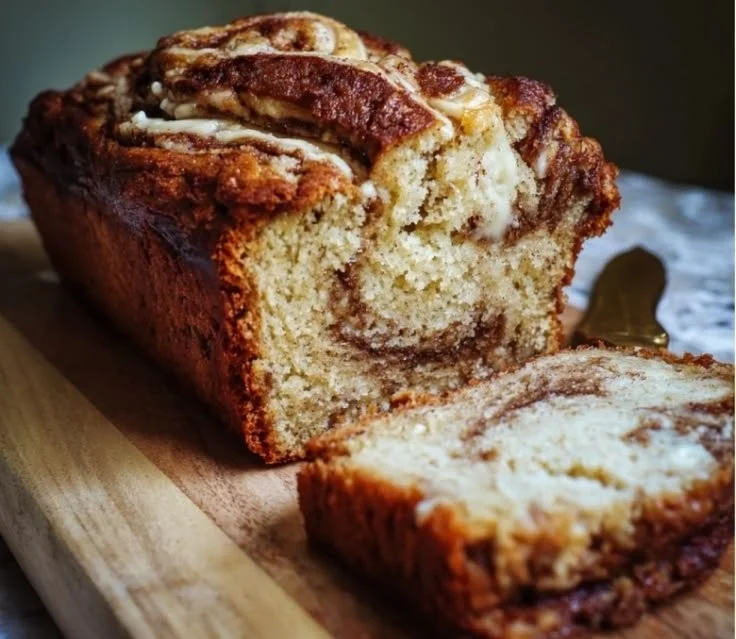
Delicious cinnamon roll banana bread with swirls and icing

Cinnamon Roll Banana Bread is a delightful twist on two beloved treats, bringing together the sweet, rich flavors of cinnamon rolls and the moist, comforting texture of banana bread. With its warm, inviting aroma wafting through your kitchen, this recipe is sure to make your mouth water. It’s a crowd-pleaser that’s perfect for breakfast, brunch, or even as a cozy snack with your coffee. The combination of gooey cinnamon swirl and banana makes this bread utterly irresistible. Plus, it’s so easy to make that you might find yourself baking it again and again. So, grab your overripe bananas and let’s dive into making this scrumptious treat!

Cinnamon Roll Banana Bread

How to prepare Cinnamon Roll Banana Bread

To create this delicious Cinnamon Roll Banana Bread, gather the following ingredients:

Ingredients

  • 3 ripe bananas
  • 1/3 cup melted butter
  • 1 teaspoon baking soda
  • Pinch of salt
  • 3/4 cup sugar
  • 1 large egg
  • 1 teaspoon vanilla extract
  • 1 1/2 cups all-purpose flour
  • 2 teaspoons cinnamon
  • 1/4 cup brown sugar
  1. Preheat your oven to 350°F (175°C) and grease a 9×5 inch loaf pan.
  2. In a mixing bowl, mash the ripe bananas with a fork until smooth.
  3. Stir in the melted butter until well combined.
  4. Mix in the baking soda and salt.
  5. Add the sugar, egg, and vanilla, then mix until everything is blended.
  6. Gradually stir in the flour until just combined.
  7. In a small bowl, mix the cinnamon and brown sugar together.
  8. Pour half of the batter into the prepared loaf pan.
  9. Sprinkle half of the cinnamon-sugar mixture over the batter.
  10. Add the remaining batter, followed by the rest of the cinnamon-sugar mixture on top.
  11. Use a knife to swirl the cinnamon mixture into the batter by gently running it through the loaf.
  12. Bake for 50-60 minutes, or until a toothpick comes out clean.
  13. Allow the bread to cool in the pan for about 10 minutes before transferring to a wire rack.

{image_2}

Cinnamon Roll Banana Bread

Why You’ll Love Cinnamon Roll Banana Bread

You will love Cinnamon Roll Banana Bread because it brings out the best of both worlds. The moist and fluffy banana bread is enhanced by the sweet, cinnamon swirls, making every slice a delightful experience. It’s the perfect go-to treat for breakfast, dessert, or a snack. With just a few simple ingredients, you can create a show-stopping loaf that everyone will enjoy. Whether you are sharing it with friends or keeping it all to yourself, this bread is sure to satisfy your cravings.

Tips for success

  • Make sure your bananas are really ripe for the best flavor.
  • Don’t overmix the batter; mixing just until combined will keep your bread tender.
  • If you want an extra boost of flavor, consider adding nuts or chocolate chips into the batter.

{image_1}

Serving Suggestions

Enjoy your Cinnamon Roll Banana Bread warm with a pat of butter, or serve it with a scoop of ice cream for a perfect dessert. Drizzling a little maple syrup over the top can also elevate the flavors. Pair it with a hot cup of coffee or tea for a relaxing afternoon treat.

FAQs

Can I freeze Cinnamon Roll Banana Bread?

Yes, this bread freezes very well. Just wrap it tightly in plastic wrap and then in aluminum foil before storing it in the freezer. It can last for up to three months.

What can I substitute for sugar?

You can use honey, maple syrup, or coconut sugar as alternatives to granulated sugar, though it might change the texture slightly.

How do I know when the bread is done?

The bread is done when a toothpick inserted into the center comes out clean or with few crumbs. Also, the top should be golden brown and spring back when lightly touched.

Cinnamon Roll Banana Bread

A delightful twist on two beloved treats, this Cinnamon Roll Banana Bread features gooey cinnamon swirls and moist banana bread, making it perfect for breakfast or as a cozy snack.

For the bread

  • 3 pieces ripe bananas (Make sure your bananas are really ripe for the best flavor.)
  • 1/3 cup melted butter
  • 1 teaspoon baking soda
  • 1 pinch salt
  • 3/4 cup sugar (Can be substituted with honey, maple syrup, or coconut sugar.)
  • 1 large egg
  • 1 teaspoon vanilla extract
  • 1 1/2 cups all-purpose flour

For the cinnamon swirl

  • 2 teaspoons cinnamon
  • 1/4 cup brown sugar

Preparation

  1. Preheat your oven to 350°F (175°C) and grease a 9×5 inch loaf pan.
  2. In a mixing bowl, mash the ripe bananas with a fork until smooth.
  3. Stir in the melted butter until well combined.
  4. Mix in the baking soda and salt.
  5. Add the sugar, egg, and vanilla, then mix until everything is blended.
  6. Gradually stir in the flour until just combined.

Assembly

  1. In a small bowl, mix the cinnamon and brown sugar together.
  2. Pour half of the batter into the prepared loaf pan.
  3. Sprinkle half of the cinnamon-sugar mixture over the batter.
  4. Add the remaining batter, followed by the rest of the cinnamon-sugar mixture on top.
  5. Use a knife to swirl the cinnamon mixture into the batter by gently running it through the loaf.

Baking

  1. Bake for 50-60 minutes, or until a toothpick comes out clean.
  2. Allow the bread to cool in the pan for about 10 minutes before transferring to a wire rack.

Don’t overmix the batter; mixing just until combined will keep your bread tender. For an extra boost of flavor, consider adding nuts or chocolate chips into the batter.

Breakfast, Dessert, Snack
American
Baking, banana bread, Cinnamon Roll, Comfort Food, Easy Recipes

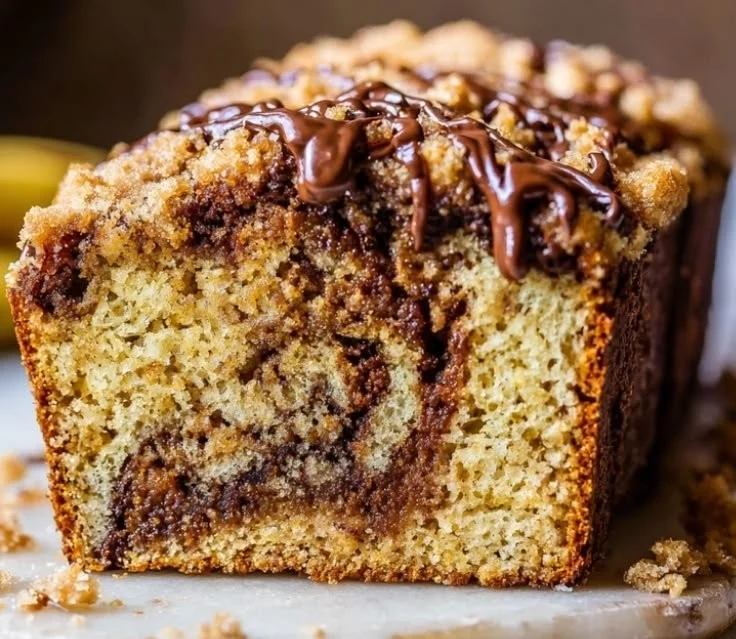
Coffee Cake Banana Bread with Espresso Swirl

Delicious coffee cake banana bread with espresso swirl slices on a plate

Have you ever found yourself torn between the desire for a cozy banana bread and a delicious coffee cake? Well, you don’t have to choose anymore! This Coffee Cake Banana Bread with Espresso Swirl combines the best of both worlds, creating a sweet, tender loaf that is perfect for breakfast or an afternoon treat. The flavorful espresso swirl adds just the right amount of coffee punch, making it a delightful crowd-pleaser at any gathering. Picture yourself sharing this warm, aromatic bread with friends and family, filling the room with its delightful scents. Trust me, this is a recipe you’ll want to try!

Coffee Cake Banana Bread with Espresso Swirl

How to prepare Coffee Cake Banana Bread with Espresso Swirl

  1. Preheat your oven to 350°F (175°C) and grease a loaf pan.
  2. In a large bowl, mash 3 ripe bananas until smooth.
  3. Stir in 1/3 cup melted butter, then add 1 teaspoon vanilla extract, 1 cup sugar, and 1 egg.
  4. In another bowl, whisk together 1 cup all-purpose flour, 1 teaspoon baking soda, and a pinch of salt.
  5. Gradually mix the dry ingredients into the wet mixture until combined.
  6. For the espresso swirl, mix 2 tablespoons of cocoa powder, 2 tablespoons of brewed espresso, and 1 tablespoon of sugar in a small bowl until smooth.
  7. Pour half of the banana bread batter into the loaf pan. Drizzle half of the espresso mixture over it, then repeat with the remaining batter and espresso.
  8. Using a knife, gently swirl the espresso mixture into the batter.
  9. Bake for 55-60 minutes or until a toothpick comes out clean.
  10. Let it cool for a bit before slicing, and enjoy!

{image_2}

Why You’ll Love Coffee Cake Banana Bread with Espresso Swirl

This Coffee Cake Banana Bread is not just your ordinary banana bread. The blend of sweet banana, rich espresso, and hints of cocoa creates a flavor explosion in each bite. It’s moist, fluffy, and has the perfect amount of sweetness. Plus, the espresso swirl adds a unique twist that makes this bread irresistible. It’s an ideal choice for brunches, picnics, or simply enjoying with a cup of coffee at home.

Coffee Cake Banana Bread with Espresso Swirl

Tips for success

  • Make sure your bananas are very ripe for the best flavor.
  • Don’t overmix the batter, as this can make the bread tough.
  • If you don’t have brewed espresso, you can use strong coffee instead.
  • Allow the bread to cool completely before slicing for neat cuts.

{image_1}

Serving Suggestions

This Coffee Cake Banana Bread is delicious on its own, but you can enhance the experience even more! Serve it with a side of butter or cream cheese for added richness. Pair it with a hot cup of coffee or some cold brew to complement the espresso flavors. Want to elevate it further? Top it with a sprinkle of powdered sugar or serve it alongside some fresh fruit.

FAQs

Can I use frozen bananas for this recipe?

Yes, frozen bananas work great! Just thaw them out and mash once soft.

How should I store leftover banana bread?

Wrap it tightly and store it at room temperature for up to 3 days, or refrigerate it for up to a week. You can also freeze it for longer storage.

Can I add nuts or chocolate chips to the bread?

Absolutely! Feel free to mix in some chopped nuts or chocolate chips for extra texture and flavor. Just be sure to adjust the baking time if needed.

Now, grab your apron and let’s whip up this delightful Coffee Cake Banana Bread with Espresso Swirl! It’s a recipe sure to charm your taste buds and brighten your day.

Coffee Cake Banana Bread with Espresso Swirl

This Coffee Cake Banana Bread with Espresso Swirl combines the best of both worlds, creating a sweet, tender loaf with a delightful espresso twist.

For the banana bread

  • 3 pieces ripe bananas (Make sure the bananas are very ripe for the best flavor.)
  • 1/3 cup melted butter
  • 1 teaspoon vanilla extract
  • 1 cup sugar
  • 1 piece egg
  • 1 cup all-purpose flour
  • 1 teaspoon baking soda
  • pinch none salt

For the espresso swirl

  • 2 tablespoons cocoa powder
  • 2 tablespoons brewed espresso (Strong coffee can be used as a substitute.)
  • 1 tablespoon sugar

Preparation

  1. Preheat your oven to 350°F (175°C) and grease a loaf pan.
  2. In a large bowl, mash the ripe bananas until smooth.
  3. Stir in the melted butter, then add vanilla extract, sugar, and egg.
  4. In another bowl, whisk together the all-purpose flour, baking soda, and salt.
  5. Gradually mix the dry ingredients into the wet mixture until combined.
  6. For the espresso swirl, mix cocoa powder, brewed espresso, and sugar in a small bowl until smooth.
  7. Pour half of the banana bread batter into the loaf pan.
  8. Drizzle half of the espresso mixture over it, then repeat with the remaining batter and espresso.
  9. Using a knife, gently swirl the espresso mixture into the batter.

Baking

  1. Bake for 55-60 minutes or until a toothpick comes out clean.
  2. Let it cool for a bit before slicing, and enjoy!

Allow the bread to cool completely before slicing for neat cuts. Top with powdered sugar or serve alongside fresh fruit for added appeal.

Breakfast, Snack
American
Baking, banana bread, Coffee Cake, Dessert, Espresso Swirl

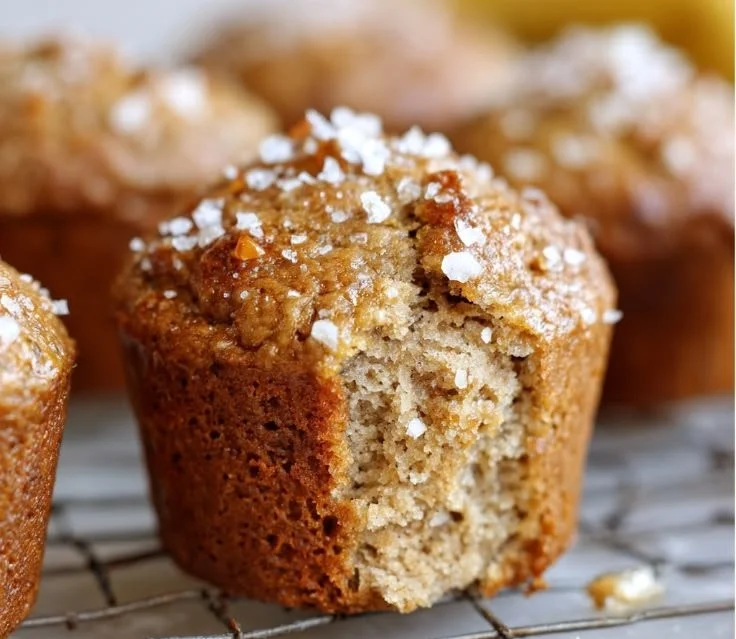
Brown Butter Banana Muffins

Delicious brown butter banana muffins fresh from the oven

Brown Butter Banana Muffins bring together the nostalgic flavors of ripe bananas and the rich, nutty essence of brown butter. This recipe is perfect for those who have overripe bananas sitting on the counter, as it transforms them into a delicious treat that everyone will love. Brown butter adds a lovely depth of flavor, making these muffins richer and more comforting than your average banana muffin. They are moist, flavorful, and have a delightful texture that will have your family and friends asking for seconds. This easy recipe is not just a treat, it’s a wonderful way to make your kitchen smell heavenly too. So, grab your bananas and let’s get started!

Brown Butter Banana Muffins

{image_1}

Why You’ll Love Brown Butter Banana Muffins

You’ll absolutely love Brown Butter Banana Muffins for several reasons. First, they are incredibly easy to make, requiring just a few simple ingredients. The combination of mashed bananas and brown butter creates a moist muffin that is bursting with flavor. Each bite offers a perfect balance of sweetness and nuttiness that can brighten any day. Plus, they are perfect for breakfast, snacks, or dessert, making them incredibly versatile. Once you make these muffins, you’ll never want to go back to plain banana muffins again!

Brown Butter Banana Muffins

Tips for success

  1. Use ripe bananas: The riper the bananas, the sweeter and more flavorful your muffins will be. Look for bananas that are brown and speckled.
  2. Don’t skip the browning of the butter: Browning the butter enhances its flavor, giving your muffins a delicious, nutty taste. Just be careful not to burn it.
  3. Mix just until combined: To keep your muffins light and fluffy, mix the batter until just combined. A few lumps are okay.
  4. Check for doneness: Use a toothpick inserted in the center of a muffin to check for doneness. It should come out clean or with a few moist crumbs.

{image_2}

Serving Suggestions

Brown Butter Banana Muffins are delightful on their own, but you can enhance them even more. Try spreading a bit of butter or cream cheese on top for extra richness. They also pair well with a cup of coffee or tea, making them perfect for a cozy morning or an afternoon snack. If you want to get creative, consider adding chocolate chips, nuts, or even a drizzle of honey for a special touch.

FAQs

Q: Can I use frozen bananas for this recipe?

A: Yes, frozen bananas work well. Just thaw them completely and drain any excess liquid before mashing.

Q: How should I store leftover muffins?

A: Store the muffins in an airtight container at room temperature for up to three days, or refrigerate them for a week. You can also freeze them for longer storage.

Q: Can I make these muffins vegan?

A: Yes, you can substitute the butter with a plant-based butter and use a flax egg or applesauce instead of regular eggs to make them vegan.

Try making these Brown Butter Banana Muffins today, and enjoy the love and warmth that fills your kitchen!

Brown Butter Banana Muffins

Deliciously moist and flavorful muffins made with ripe bananas and brown butter for a rich, nutty taste.

Main ingredients

  • 3 each ripe bananas (The riper the bananas, the sweeter and more flavorful the muffins will be.)
  • 1/2 cup brown butter (Be careful not to burn the butter while browning.)
  • 1 cup sugar
  • 2 each large eggs
  • 1 teaspoon vanilla extract
  • 2 cups all-purpose flour
  • 1 teaspoon baking soda
  • 1/2 teaspoon salt

Preparation

  1. Preheat the oven to 350°F (175°C) and line a muffin tin with paper liners.
  2. In a bowl, mash the ripe bananas with a fork.
  3. In a separate bowl, mix the browned butter and sugar until well combined.
  4. Add the eggs and vanilla extract to the butter mixture, and mix until combined.
  5. Stir in the mashed bananas.
  6. In another bowl, mix the flour, baking soda, and salt.
  7. Gradually add the dry ingredients to the wet ingredients and mix until just combined.

Baking

  1. Fill each muffin cup with the batter and bake for 18-22 minutes.
  2. Check for doneness by inserting a toothpick into the center of a muffin. It should come out clean or with a few moist crumbs.

For serving, try spreading butter or cream cheese on top, or add chocolate chips, nuts, or a drizzle of honey for a special touch. Store leftovers in an airtight container.

Breakfast, Dessert, Snack
American
Baking, Banana Muffins, Brown Butter, Comfort Food, Easy Muffin Recipe

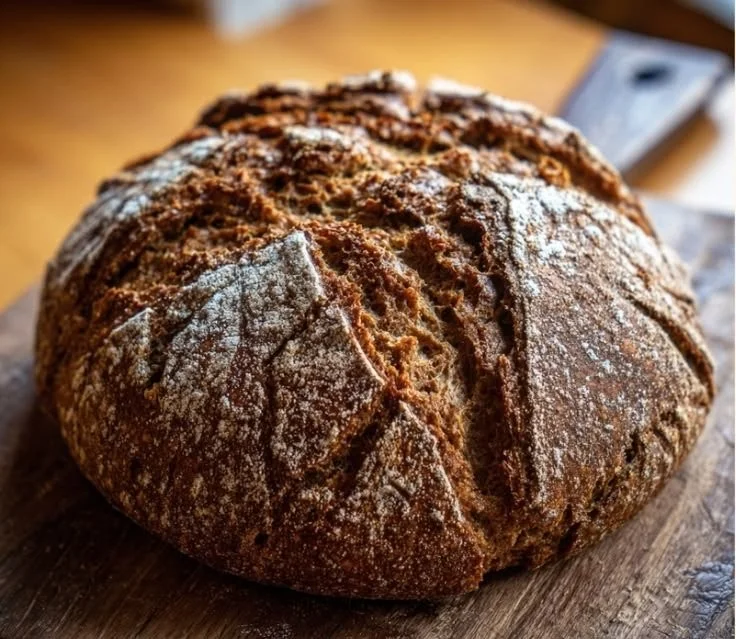
Rye Sourdough Bread

Freshly baked rye sourdough bread with a crispy crust and soft interior.

Rye Sourdough Bread is a delightful twist on the classic sourdough loaf. With its earthy flavor and chewy texture, this bread is sure to become a favorite in your household. Made with rye flour, it offers a unique taste that pairs well with a variety of toppings, from creamy butter to savory cheeses. Whether you’re enjoying it for breakfast, lunch, or dinner, this bread is a real crowd-pleaser. Plus, the aroma of freshly baked rye sourdough wafting through your kitchen is enough to make anyone’s mouth water. So, roll up your sleeves and get ready to create something delicious!

Rye Sourdough Bread

How to prepare Rye Sourdough Bread

To make your own Rye Sourdough Bread, you will need the following ingredients:

  • 2 cups rye flour
  • 1 cup all-purpose flour
  • 1 ½ cups water
  • 1 cup active sourdough starter
  • 1 tablespoon salt

Start by mixing the rye flour and all-purpose flour in a large bowl. In another bowl, combine the water, sourdough starter, and salt. Gradually add the wet mixture to the dry ingredients, mixing until a sticky dough forms. Knead the dough for about 10 minutes until it becomes smooth.

Rye Sourdough Bread

Cover the bowl with a damp cloth and let it rise in a warm spot for about 4 to 6 hours, or until it has doubled in size. Once risen, shape the dough into a round loaf and place it on a floured surface. Let it rest for another hour while you preheat your oven to 450°F (230°C).

Now, transfer the loaf to a baking stone or a baking sheet lined with parchment paper. Bake for 30-35 minutes, or until the crust is golden brown and the bread sounds hollow when tapped.

Let your Rye Sourdough Bread cool on a rack before slicing. This will ensure that the bread holds its shape and texture well.

{image_2}

Why You’ll Love Rye Sourdough Bread

You will fall in love with Rye Sourdough Bread for many reasons. Firstly, it’s packed with robust flavor that makes each bite enjoyable. The combination of rye and sourdough gives a tangy undertone, making it perfect for sandwiches or toasted with a bit of butter. Additionally, it is full of fiber and nutrients, making it a healthier choice compared to white bread. The texture is chewy yet tender, ensuring a satisfying experience. And, as an added bonus, this recipe allows you to impress friends and family with your baking skills!

Tips for success

  1. Make sure your sourdough starter is active and bubbly before using it. This will help your bread rise better.
  2. Don’t rush the rising times, as proper fermentation is key to great flavor.
  3. Use a digital kitchen scale for accurate measurements, especially with flour.
  4. Experiment with adding seeds or grains for added flavor and texture.

{image_1}

Serving Suggestions

Rye Sourdough Bread is versatile and pairs wonderfully with various toppings. Try it with cream cheese, smoked salmon, or your favorite jam. It’s also great for making classic sandwiches, especially with cured meats or strong cheeses. You can even enjoy it simply with a bit of olive oil and balsamic vinegar for dipping. The possibilities are endless!

FAQs

Can I use 100% rye flour for this recipe?

Yes, you can, but keep in mind that 100% rye flour will create a denser bread. Adjustments in water might be necessary to achieve the desired dough consistency.

How do I store leftover rye sourdough bread?

To keep it fresh, wrap the bread in a clean kitchen towel and store it at room temperature for a couple of days. For longer storage, slice the bread and freeze it in an airtight bag.

How can I tell if my bread is done baking?

Your loaf is done when it is golden brown and sounds hollow when you tap the bottom. You can also use a kitchen thermometer; the internal temperature should be around 200°F (93°C).

With these tips and their deliciousness waiting to be shared, you’re all set to bake your own Rye Sourdough Bread! Enjoy the process and the tasty results.

Rye Sourdough Bread

A delightful twist on the classic sourdough loaf, featuring earthy flavor and chewy texture, perfect for various toppings.

For the Dough

  • 2 cups rye flour
  • 1 cup all-purpose flour
  • 1.5 cups water (room temperature)
  • 1 cup active sourdough starter (must be bubbly)
  • 1 tablespoon salt

Preparation

  1. Mix the rye flour and all-purpose flour in a large bowl.
  2. In another bowl, combine the water, sourdough starter, and salt.
  3. Gradually add the wet mixture to the dry ingredients, mixing until a sticky dough forms.
  4. Knead the dough for about 10 minutes until it becomes smooth.
  5. Cover the bowl with a damp cloth and let it rise in a warm spot for about 4 to 6 hours, or until it has doubled in size.

Baking

  1. Shape the dough into a round loaf and place it on a floured surface. Let it rest for another hour while preheating your oven to 450°F (230°C).
  2. Transfer the loaf to a baking stone or a baking sheet lined with parchment paper.
  3. Bake for 30-35 minutes, or until the crust is golden brown and the bread sounds hollow when tapped.
  4. Let the bread cool on a rack before slicing to ensure it holds its shape and texture.

Make sure your sourdough starter is active and bubbly before using it. Don’t rush the rising times as proper fermentation is key to great flavor. Use a digital kitchen scale for accurate measurements, especially with flour. Experiment with adding seeds or grains for added flavor and texture.

Bread, Breakfast, Snack
Baking
Baking Recipes, Healthy Bread, Homemade Bread, Rye Bread, sourdough

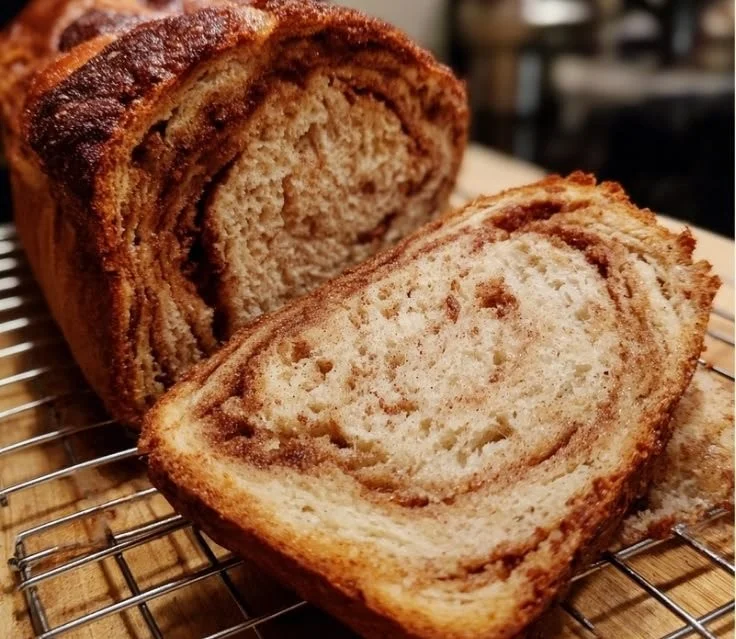
Cinnamon Sourdough Bread

Loaf of freshly baked cinnamon sourdough bread with a golden crust

Cinnamon Sourdough Bread is a delightful combination of warm spices and tangy sourdough. Imagine a loaf that is both soft and crusty, with the sweet aroma of cinnamon filling your kitchen. This bread is perfect for breakfast, a snack, or even dessert. Its unique flavor makes it a true crowd-pleaser, inviting everyone to gather around and enjoy a slice. If you’re looking to impress family and friends or simply want to treat yourself, this recipe is sure to do the trick. Let’s dive into how to prepare this delicious bread that will have everyone coming back for more!

Cinnamon Sourdough Bread

Ingredients

  • 2 cups active sourdough starter
  • 1 cup warm water
  • 4 cups bread flour
  • 1/4 cup sugar
  • 1 tablespoon salt
  • 2 teaspoons ground cinnamon
  • 1/4 cup melted butter (for brushing and enriching the dough)

Directions

  1. In a large bowl, combine the active sourdough starter and warm water. Mix until well blended.
  2. Add bread flour, sugar, salt, and ground cinnamon to the mixture. Stir until the dough starts to come together.
  3. Knead the dough on a floured surface for about 10 minutes until it is smooth and elastic.
  4. Place the dough in a greased bowl, cover it with a damp cloth, and let it rise for about 4 hours or until doubled in size.
  5. Once the dough has risen, punch it down and roll it out into a rectangle.
  6. Brush the rolled dough with melted butter and sprinkle with cinnamon and sugar mixture (mix cinnamon and sugar together beforehand).
  7. Roll the dough tightly to form a loaf and tuck the ends under. Place it in a greased loaf pan.
  8. Cover the loaf with a cloth and let it rise again for about 2 hours, or until it doubles in size.
  9. Preheat your oven to 375°F (190°C). Bake the loaf for 30-35 minutes, or until it is golden brown and sounds hollow when tapped.
  10. Let the bread cool on a wire rack before slicing. Enjoy warm with butter or on its own!

{image_2}

Why You’ll Love Cinnamon Sourdough Bread

Cinnamon Sourdough Bread not only fills your home with a comforting aroma but also creates the kind of cozy atmosphere that invites conversations and togetherness. The delightful blend of sourdough’s tanginess with cinnamon’s sweetness creates a balance that is both satisfying and unique. This bread is incredibly versatile; serve it fresh out of the oven, toast it for breakfast, or even use leftovers for incredible French toast. With every bite, you’ll experience the joy of homemade bread that’s sure to bring a smile to everyone’s face.

Cinnamon Sourdough Bread

Tips for success

  • Make sure your sourdough starter is active and bubbly. Feed it a few hours before you start the recipe to ensure it’s ready to go.
  • Knead the dough well for a good texture. A smooth and elastic dough will give you that perfect crust.
  • Don’t rush the rising times. Allowing your dough enough time to rise will improve flavor and texture.
  • You can add more cinnamon or even nuts for extra flavor. Feel free to get creative!

{image_1}

Serving Suggestions

Cinnamon Sourdough Bread is delicious on its own but serving it with a pat of butter and a drizzle of honey can elevate it even more. For breakfast, enjoy it toasted alongside a cup of coffee or tea. Additionally, it makes for fantastic sandwiches, especially with cream cheese or your favorite spread. Pair it with maple syrup for a delightful twist, turning it into a perfect brunch dish.

FAQs

Can I use regular yeast instead of sourdough starter?

Yes, you can substitute the sourdough starter with active dry yeast. However, the flavor will differ, and it won’t have that signature sourdough tang.

How should I store the bread?

Keep the bread in an airtight bag at room temperature for up to 3 days. You can also freeze leftovers by wrapping them tightly in plastic wrap and placing them in a freezer bag.

Can I make this recipe in advance?

Absolutely! You can prepare the dough, shape it into a loaf, and let it rise in the refrigerator overnight. Just take it out to allow it to come to room temperature before baking.

Get ready to enjoy a slice of homemade goodness that warms the heart and the home!

Cinnamon Sourdough Bread

A delightful combination of warm spices and tangy sourdough, this bread is soft, crusty, and perfect for any occasion.

Dough Ingredients

  • 2 cups active sourdough starter (Ensure the starter is active and bubbly.)
  • 1 cup warm water (Water should be comfortably warm, not hot.)
  • 4 cups bread flour (Use a high-protein bread flour for best results.)
  • 1/4 cup sugar (Regular granulated sugar works well.)
  • 1 tablespoon salt (Use kosher or sea salt.)
  • 2 teaspoons ground cinnamon (Add more for a stronger flavor, if desired.)
  • 1/4 cup melted butter (For brushing and enriching the dough.)

Preparation

  1. In a large bowl, combine the active sourdough starter and warm water. Mix until well blended.
  2. Add bread flour, sugar, salt, and ground cinnamon to the mixture. Stir until the dough starts to come together.
  3. Knead the dough on a floured surface for about 10 minutes until it is smooth and elastic.
  4. Place the dough in a greased bowl, cover it with a damp cloth, and let it rise for about 4 hours or until doubled in size.

Shaping

  1. Once the dough has risen, punch it down and roll it out into a rectangle.
  2. Brush the rolled dough with melted butter and sprinkle with cinnamon and sugar mixture.
  3. Roll the dough tightly to form a loaf and tuck the ends under. Place it in a greased loaf pan.
  4. Cover the loaf with a cloth and let it rise again for about 2 hours, or until it doubles in size.

Baking

  1. Preheat your oven to 375°F (190°C).
  2. Bake the loaf for 30-35 minutes, or until it is golden brown and sounds hollow when tapped.
  3. Let the bread cool on a wire rack before slicing.

Serve warm with butter, or toast for breakfast. Can also be used for French toast. Store in an airtight bag at room temperature for up to 3 days.

Breakfast, Dessert, Snack
American
Baking, Cinnamon Sourdough Bread, Homemade Bread, Sourdough Recipe

Italian Almond Cake

Slice of Italian Almond Cake topped with almonds and powdered sugar

If you are looking for a delightful dessert that brings a touch of Italy to your table, look no further than the Italian Almond Cake. This cake is known for its soft, moist texture and rich flavor, making it a delightful treat for any occasion. Almonds are the star ingredient, lending a beautiful nutty taste that pairs exceptionally well with a simple icing or a dusting of powdered sugar. This cake is not only a crowd-pleaser at gatherings but also makes for a comforting slice enjoyed with morning coffee or as an afternoon snack. It’s truly a recipe that you will love sharing with friends and family, and it might just become a new favorite in your home.

How to prepare Italian Almond Cake

To create this delightful cake, start by gathering your ingredients. You will need the following:

  • 1 cup of ground almonds (blanched)
  • 1 cup of sugar
  • 1/2 cup of butter, softened
  • 3 large eggs
  • 1/2 teaspoon of almond extract
  • 1/2 cup of all-purpose flour
  • 1/2 teaspoon of baking powder
  • A pinch of salt

Now let’s bake this delicious cake!

  1. Preheat your oven to 350°F (175°C) and grease an 8-inch round cake pan.
  2. In a mixing bowl, cream the softened butter and sugar together until light and fluffy.
  3. Add in the eggs one at a time, mixing well after each addition.
  4. Stir in the almond extract and ground almonds until well combined.
  5. In another bowl, whisk together the flour, baking powder, and salt.
  6. Gradually add the dry ingredients to the wet mixture, stirring until just combined.
  7. Pour the batter into the prepared cake pan and spread it out evenly.
  8. Bake in the preheated oven for about 25-30 minutes, or until a toothpick inserted in the center comes out clean.
  9. Allow the cake to cool in the pan for about 10 minutes before transferring it to a wire rack to cool completely.

Italian Almond Cake

Why You’ll Love Italian Almond Cake

This Italian Almond Cake is a wonderful combination of sweet and nutty flavors. The ground almonds create a rich texture, and the cake is moist without being overly heavy. It beautifully serves as a simple dessert or even a special occasion cake. And don’t forget the ear-to-ear smiles you’ll receive when serving it to your family and friends! It’s great on its own, or you can enhance its flavor by pairing it with a scoop of ice cream or a dollop of whipped cream.

Tips for success

To ensure your cake turns out perfectly, keep these tips in mind:

  • Make sure your butter is soft to allow for the best mixing.
  • Do not overmix the batter; mix just until combined to keep the cake light.
  • Check for doneness a few minutes before the timer goes off, as ovens can vary.

Serving Suggestions

Serve your Italian Almond Cake plain or dusted with powdered sugar for a simple yet elegant finish. You can also pair it with fresh berries or a light fruit compote for added flavor. For a delightful twist, you might even enjoy it alongside a slice of Italian Lemon Cream Cake, creating a delicious dessert spread perfect for any gathering.

FAQs

Can I use almond flour instead of ground almonds?

Yes, almond flour works perfectly as a substitute.

How should I store the cake?

Keep the cake covered at room temperature for up to three days. For longer storage, refrigerate it for up to a week.

Can I freeze the Italian Almond Cake?

Absolutely! Wrap it tightly in plastic wrap and foil before freezing. Thaw it in the refrigerator when you are ready to enjoy it.

This Italian Almond Cake is a treat that will surely enchant your taste buds and warm your heart. Enjoy baking!

Italian Almond Cake

A delightful dessert with a soft, moist texture and rich almond flavor, perfect for any occasion.

Main Ingredients

  • 1 cup ground almonds (blanched)
  • 1 cup sugar
  • 0.5 cup butter, softened (Make sure butter is soft for best mixing.)
  • 3 large eggs
  • 0.5 teaspoon almond extract
  • 0.5 cup all-purpose flour
  • 0.5 teaspoon baking powder
  • a pinch salt

Preparation

  1. Preheat your oven to 350°F (175°C) and grease an 8-inch round cake pan.
  2. In a mixing bowl, cream the softened butter and sugar together until light and fluffy.
  3. Add in the eggs one at a time, mixing well after each addition.
  4. Stir in the almond extract and ground almonds until well combined.
  5. In another bowl, whisk together the flour, baking powder, and salt.
  6. Gradually add the dry ingredients to the wet mixture, stirring until just combined.
  7. Pour the batter into the prepared cake pan and spread it out evenly.

Baking

  1. Bake in the preheated oven for about 25-30 minutes, or until a toothpick inserted in the center comes out clean.
  2. Allow the cake to cool in the pan for about 10 minutes before transferring it to a wire rack to cool completely.

To ensure your cake turns out perfectly, avoid overmixing the batter and check for doneness a few minutes before the timer goes off. Serve plain or dusted with powdered sugar, and pair with fresh berries or light fruit compote.

Dessert
Italian
Almond Cake, Baking, cake, Dessert, Italian Almond Cake

Mixed Berry Muffins

Freshly baked mixed berry muffins with a variety of berries on a wooden table

There’s something incredibly comforting about the smell of fresh muffins baking in the oven. Mixed Berry Muffins are a delightful treat that combines the sweetness of ripe berries with a soft, fluffy texture. These muffins are not only easy to make, but they are also a big hit with friends and family. Who can resist fluffy, buttery muffins bursting with juicy blueberries, raspberries, and strawberries? Whether enjoyed for breakfast or as a sweet snack, these muffins are sure to please. Get ready to whip up a batch to warm your kitchen and heart!

How to prepare Mixed Berry Muffins

To make these delicious muffins, gather the following ingredients:

Ingredients:

  • 2 cups all-purpose flour
  • 1 cup sugar
  • 1 tablespoon baking powder
  • 1/2 teaspoon salt
  • 1/2 cup unsalted butter, melted
  • 2/3 cup milk
  • 2 large eggs
  • 1 teaspoon vanilla extract
  • 1 cup mixed berries (fresh or frozen)

Directions:

  1. Preheat your oven to 375°F (190°C). Line a muffin tin with paper liners or grease it with butter.
  2. In a large bowl, mix together the flour, sugar, baking powder, and salt.
  3. In another bowl, whisk together the melted butter, milk, eggs, and vanilla extract.
  4. Pour the wet ingredients into the dry ingredients and stir until just combined. Do not overmix.
  5. Gently fold in the mixed berries until evenly distributed.
  6. Divide the batter into the prepared muffin tin, filling each cup about 2/3 full.
  7. Bake for 20-25 minutes, or until a toothpick inserted in the center comes out clean.
  8. Let the muffins cool in the pan for a few minutes before transferring them to a wire rack.

Bakery Style Mixed Berry Muffins

Why You’ll Love Mixed Berry Muffins

These muffins are a fantastic choice for any occasion! Their tender crumb makes them perfectly moist, while the sweet bursts of berries add a delightful flavor. They are incredibly versatile too. You can enjoy them on their own, or pair them with a cup of coffee or tea. These muffins also make for a great breakfast on busy mornings or as a sweet treat during the day. You’ll find yourself reaching for one just because they look and smell so good!

Tips for success

  • Use Fresh Ingredients: Using fresh berries will give your muffins an amazing flavor. If fresh berries are not available, frozen berries can work well too. Just make sure to toss them in a bit of flour to avoid sinking to the bottom.
  • Don’t Overmix: Be gentle while mixing the wet and dry ingredients. Overmixing can lead to dense muffins, which is not what we want!
  • Check for Doneness: Ovens can vary, so check your muffins a few minutes before the time is up. A toothpick inserted should come out clean or with a few crumbs attached.

Serving Suggestions

Mixed Berry Muffins are delicious on their own, but you can elevate them further by serving them with a smear of butter or a drizzle of honey. For special occasions, try serving them with whipped cream or a scoop of vanilla ice cream. Enjoy them warm for the best experience, or store them in an airtight container for later!

FAQs

Can I use different fruits?

Absolutely! You can mix and match whatever berries or fruits you have on hand, like blackberries or even diced apples.

Can I make these muffins gluten-free?

Yes, you can substitute all-purpose flour with a gluten-free flour blend. Just make sure to check that your baking powder is gluten-free too.

How do I store leftover muffins?

To keep your muffins fresh, store them in an airtight container at room temperature for up to 3 days. You can also freeze them for up to a month, perfect for a quick snack later!

Mixed Berry Muffins are not just a treat, but a lovely experience you can create right in your kitchen. Whip up a batch, smell the warm aromas, and enjoy the delightful taste that brings everyone together. For more tips and variations on baking with berries, check out this helpful guide on Bakery Style Mixed Berry Muffins | Frozen Berries – OwlbBaking.com! Happy baking!

Mixed Berry Muffins

These delightful Mixed Berry Muffins combine the sweetness of ripe berries with a soft, fluffy texture, making them a fantastic treat for any occasion.

Dry Ingredients

  • 2 cups all-purpose flour
  • 1 cup sugar
  • 1 tablespoon baking powder
  • 1/2 teaspoon salt

Wet Ingredients

  • 1/2 cup unsalted butter, melted
  • 2/3 cup milk
  • 2 large eggs
  • 1 teaspoon vanilla extract

Fruits

  • 1 cup mixed berries (fresh or frozen)

Preparation

  1. Preheat your oven to 375°F (190°C). Line a muffin tin with paper liners or grease it with butter.
  2. In a large bowl, mix together the flour, sugar, baking powder, and salt.
  3. In another bowl, whisk together the melted butter, milk, eggs, and vanilla extract.
  4. Pour the wet ingredients into the dry ingredients and stir until just combined. Do not overmix.
  5. Gently fold in the mixed berries until evenly distributed.
  6. Divide the batter into the prepared muffin tin, filling each cup about 2/3 full.

Baking

  1. Bake for 20-25 minutes, or until a toothpick inserted in the center comes out clean.
  2. Let the muffins cool in the pan for a few minutes before transferring them to a wire rack.

Use fresh berries for the best flavor. Tossing frozen berries in flour can help prevent them from sinking. Don’t overmix to avoid dense muffins.

Breakfast, Snack
American
Baking, Breakfast Muffins, Delicious Berries, Mixed Berry Muffins, Muffins

Butter Toffee Sugar Cookies

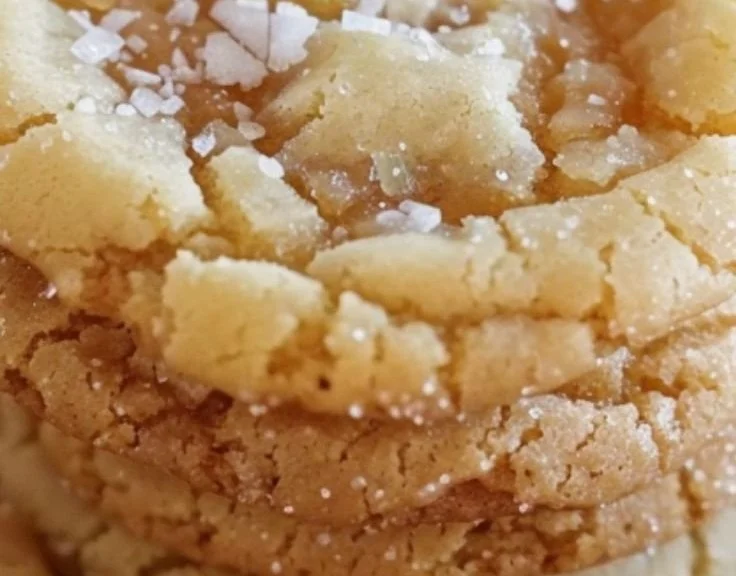
Delicious Butter Toffee Sugar Cookies topped with toffee pieces

Butter Toffee Sugar Cookies are truly a delightful treat that brightens any occasion. With a perfect balance of sweetness and a hint of buttery richness, these cookies are sure to impress your family and friends. The crunchy toffee bits add an unexpected and delightful texture, making each bite enjoyable. These cookies are not just delicious, but they’re also simple to make, which means you can whip up a batch in no time. So, if you’re looking for a crowd-pleaser that brings joy to your taste buds, let’s dive into the recipe for these scrumptious Butter Toffee Sugar Cookies.

How to prepare Butter Toffee Sugar Cookies

To make these delightful cookies, here’s what you’ll need:

Ingredients

  • 1 cup unsalted butter, softened
  • 1 cup granulated sugar
  • 1 cup brown sugar, packed
  • 2 large eggs
  • 1 teaspoon vanilla extract
  • 3 cups all-purpose flour
  • 1 teaspoon baking soda
  • 1 teaspoon salt
  • 1 cup toffee bits (or chopped toffee candy)

Directions

  1. Preheat your oven to 350°F (175°C). Line baking sheets with parchment paper.
  2. In a large bowl, cream together the softened butter, granulated sugar, and brown sugar until light and fluffy.
  3. Beat in the eggs, one at a time, followed by the vanilla extract.
  4. In another bowl, whisk together the flour, baking soda, and salt.
  5. Gradually mix the dry ingredients into the wet ingredients until just combined.
  6. Fold in the toffee bits gently.
  7. Drop rounded tablespoons of dough onto the prepared baking sheets, spacing them about 2 inches apart.
  8. Bake for 10-12 minutes, or until the edges are lightly golden. Let the cookies cool on the baking sheets for a few minutes before transferring them to wire racks to cool completely.

Butter Toffee Sugar Cookies

Why You’ll Love Butter Toffee Sugar Cookies

You will love Butter Toffee Sugar Cookies for so many reasons! They are soft, chewy, and filled with a delightful crunch from the toffee bits. The combination of buttery flavors with the sweetness of sugar creates a warm, comforting taste that everyone loves. These cookies are perfect for any occasion, whether it’s a cozy family gathering, a potluck, or just an afternoon snack. The best part is, they’ll make your kitchen smell heavenly as they bake!

Tips for success

To ensure your Butter Toffee Sugar Cookies turn out perfectly, keep these tips in mind:

  • Make sure your butter is softened but not melted, as this helps achieve the desired texture.
  • For extra flavor, consider adding a pinch of cinnamon or nutmeg to the cookie dough.
  • To keep cookies chewy, do not overbake them. They might seem a little soft when you take them out, but they will firm up as they cool.

Serving Suggestions

These Butter Toffee Sugar Cookies are delightful on their own, but you can elevate your serving game by pairing them with a scoop of ice cream or a glass of milk. They also make a wonderful addition to gift baskets or holiday cookie platters. Feel free to sprinkle some extra toffee bits on top before baking for a decorative touch!

FAQs

1. Can I use other types of chocolate in this recipe?

Yes, you can substitute toffee bits with chocolate chips or nuts for a different flavor and texture.

2. How should I store the cookies?

Store the cookies in an airtight container at room temperature for up to one week. You can also freeze them for longer freshness.

3. Can I make the dough ahead of time?

Absolutely! You can prepare the dough and refrigerate it for up to three days before baking.

Butter Toffee Sugar Cookies are not only a delicious treat, but they also bring joy to any gathering. They are easy to make and perfect for sharing. If you want to explore even more variations of these cookies, check out this delightful recipe for Crinkly Crackly Butter Toffee Sugar Cookies. Enjoy baking and indulging in these sweet delights!

Butter Toffee Sugar Cookies

Delightful cookies featuring a perfect balance of sweetness and buttery richness, topped with crunchy toffee bits.

For the cookie dough

  • 1 cup unsalted butter, softened (Make sure butter is softened but not melted.)
  • 1 cup granulated sugar
  • 1 cup brown sugar, packed
  • 2 large eggs
  • 1 teaspoon vanilla extract
  • 3 cups all-purpose flour
  • 1 teaspoon baking soda
  • 1 teaspoon salt
  • 1 cup toffee bits (or chopped toffee candy) (Can substitute with chocolate chips or nuts for variation.)

Preparation

  1. Preheat your oven to 350°F (175°C) and line baking sheets with parchment paper.
  2. In a large bowl, cream together the softened butter, granulated sugar, and brown sugar until light and fluffy.
  3. Beat in the eggs, one at a time, followed by the vanilla extract.
  4. In another bowl, whisk together the flour, baking soda, and salt.
  5. Gradually mix the dry ingredients into the wet ingredients until just combined.
  6. Fold in the toffee bits gently.
  7. Drop rounded tablespoons of dough onto the prepared baking sheets, spacing them about 2 inches apart.
  8. Bake for 10-12 minutes, or until the edges are lightly golden.
  9. Let the cookies cool on the baking sheets for a few minutes before transferring them to wire racks to cool completely.

To keep cookies chewy, do not overbake them. They might seem soft when you take them out, but they will firm up as they cool. Consider adding a pinch of cinnamon or nutmeg for extra flavor.

Dessert, Snack
American
Baking, Butter Toffee Sugar Cookies, Cookies, Dessert, toffee

Peach Bread

Freshly baked peach bread with slices and peaches on a rustic table

Peach Bread is a delightful treat that combines the sweetness of ripe peaches with the comforting texture of freshly baked bread. This recipe is not just a simple quick bread, it’s a crowd-pleaser that brings smiles to faces and warmth to hearts. Imagine biting into a slice filled with chunks of juicy peaches, which are perfectly complemented by hints of cinnamon and vanilla. It’s a wonderful way to use fresh summer peaches and a perfect breakfast or snack option that everyone in the family will enjoy. So grab your ingredients and let’s make some Peach Bread!

How to prepare Peach Bread

Preparing Peach Bread is a breeze! Here’s what you need to do to create this sweet and fruity loaf.

  1. Preheat your oven to 350°F (175°C).
  2. In a mixing bowl, combine the dry ingredients: flour, sugar, baking powder, and cinnamon.
  3. In another bowl, mix together the wet ingredients: mashed bananas, melted butter, eggs, and vanilla extract.
  4. Gently fold the wet mixture into the dry ingredients until just combined.
  5. Stir in diced peaches, ensuring they’re well distributed.
  6. Pour the batter into a greased loaf pan, smoothing the top.
  7. Bake for about 50-60 minutes or until a toothpick comes out clean.
  8. Allow it to cool in the pan for a few minutes before transferring to a wire rack to cool completely.

Peach Bread

Why You’ll Love Peach Bread

Peach Bread is great for so many reasons. It’s simple, scrumptious, and versatile! You can enjoy it for breakfast, as a snack during the day, or even as a dessert. The juicy peach pieces leave you feeling refreshed, making every bite a joy. Plus, with the added cinnamon flavor, it’s almost like enjoying a piece of summer in every slice!

Tips for success

To make sure your Peach Bread turns out perfect, keep these tips in mind:

  1. Use ripe peaches for the best sweetness and flavor.
  2. Don’t overmix the batter, it’s okay if there are a few lumps!
  3. Adjust the baking time according to your oven, as oven temperatures can vary.
  4. Let the bread cool completely before slicing to get cleaner cuts.

Serving Suggestions

This Peach Bread is delicious on its own, but you can also try spreading a little butter or cream cheese on top for an extra treat. Pair it with fresh fruit or a scoop of vanilla ice cream for a delightful dessert that will impress everyone.

Peach Bread

FAQs

1. Can I use frozen peaches for this recipe?

Yes, you can use frozen peaches! Just make sure to thaw and drain them before adding to the batter.

2. How do I store leftovers?

Store the Peach Bread in an airtight container at room temperature for up to three days. You can also freeze it for longer storage.

3. Can I add nuts or other fruits?

Absolutely! Feel free to mix in some chopped nuts or substitute other fruits like plums or apples for a twist on the original recipe.

Peach Bread is a wonderful way to savor the sweetness of summer peaches while enjoying a freshly baked loaf. For a more detailed recipe, you can check out this Peach Bread Recipe from Tastes of Lizzy T that offers easy steps to create this delicious treat. Enjoy every slice and share the joy with your friends and family!

Peach Bread

A delightful quick bread that combines the sweetness of ripe peaches with hints of cinnamon and vanilla, perfect for breakfast or snacks.

Dry Ingredients

  • 2 cups all-purpose flour
  • 1 cup granulated sugar
  • 2 teaspoons baking powder
  • 1 teaspoon ground cinnamon

Wet Ingredients

  • 2 medium ripe bananas, mashed
  • 1/2 cup unsalted butter, melted
  • 2 large eggs
  • 1 teaspoon vanilla extract

Add-ins

  • 2 cups fresh peaches, diced (Use ripe, fresh peaches for best flavor.)

Preparation

  1. Preheat your oven to 350°F (175°C).
  2. In a mixing bowl, combine the dry ingredients: flour, sugar, baking powder, and cinnamon.
  3. In a separate bowl, mix together the wet ingredients: mashed bananas, melted butter, eggs, and vanilla extract.
  4. Gently fold the wet mixture into the dry ingredients until just combined.
  5. Stir in diced peaches, ensuring they are well distributed.
  6. Pour the batter into a greased loaf pan, smoothing the top.
  7. Bake for about 50-60 minutes or until a toothpick comes out clean.
  8. Allow it to cool in the pan for a few minutes before transferring to a wire rack to cool completely.

For best results, use ripe peaches. Don’t overmix the batter; a few lumps are okay. Adjust baking time based on your oven.

Breakfast, Dessert, Snack
American
Peach Bread, Peach Dessert, Quick Bread, Summer Recipe