Easy Greek Yogurt Cookie Dough

If you’re looking for a delicious and guilt-free treat, Easy Greek Yogurt Cookie Dough is just the ticket. This crowd-pleaser is made with creamy Greek yogurt, which gives it a rich taste while keeping it healthier than traditional cookie dough. With just a few simple ingredients, this recipe is not only easy to whip up but also sure to impress your family and friends. Get ready to indulge your sweet tooth, as this cookie dough will have everyone asking for more!

How to prepare Easy Greek Yogurt Cookie Dough

To prepare this delightful cookie dough, you will need Greek yogurt, flour, sweetener, vanilla, and chocolate chips. Start by mixing the Greek yogurt and sweetener in a bowl. Gradually add the flour and vanilla essence, stirring until smooth. Finally, fold in your choice of chocolate chips for the perfect finish. It’s that simple!

Easy Greek Yogurt Cookie Dough

Why You’ll Love Easy Greek Yogurt Cookie Dough

One of the main reasons you’ll love this cookie dough recipe is its versatility. You can easily customize it to your taste, adding nuts or different flavored chips. Plus, the Greek yogurt makes it a healthier alternative, full of protein and less sugar than traditional cookie dough. Imagine satisfying your sweet cravings without the guilt! This makes it a great option for those late-night snacking sessions or dessert after dinner.

Tips for success

To ensure your Easy Greek Yogurt Cookie Dough turns out perfectly, here are a few simple tips. Make sure to measure your flour correctly, as too much can impact the texture. If you prefer a sweeter dough, feel free to adjust the amount of sweetener to your taste. A dash of salt can help enhance the flavors, too.

When you’re serving up this delightful treat, you might want to try pairing it with some fresh fruit or a scoop of your favorite ice cream for an extra layer of indulgence. You can also spread it on toast or use it as a dip for fresh apple slices – the possibilities are endless!

Easy Greek Yogurt Cookie Dough

Serving Suggestions

For an impressive presentation, consider serving your cookie dough in small bowls, drizzled with chocolate sauce, or topped with whipped cream. You can also add a sprinkle of sea salt on top for a gourmet touch. This recipe is perfect for parties, movie nights, or simply when craving something sweet.

FAQs

Can I store Easy Greek Yogurt Cookie Dough?

Yes, you can store it in an airtight container in the fridge for up to a week. Just give it a quick stir before enjoying it again.

Can I make this cookie dough vegan?

Absolutely! You can substitute Greek yogurt with a plant-based yogurt or a mixture of nut butter and applesauce for a delicious vegan option.

What can I use instead of chocolate chips?

Feel free to replace chocolate chips with dried fruit, nuts, or even colorful sprinkles to add some fun!

If you want to explore even more delectable alternatives, be sure to check out this Greek yogurt cookie dough recipe, which features other tasty variations!

Easy Greek Yogurt Cookie Dough

A delicious and guilt-free treat made with creamy Greek yogurt, perfect for satisfying your sweet tooth.

Main Ingredients

  • 1 cup Greek yogurt (Use plain, unsweetened Greek yogurt for best results.)
  • 1 cup flour (Measure your flour correctly to avoid affecting the texture.)
  • 1/3 cup sweetener (Adjust to taste for sweetness preference.)
  • 1 teaspoon vanilla extract (Enhances the flavor of the dough.)
  • 1/2 cup chocolate chips (Feel free to use nuts or different flavored chips as alternative mix-ins.)

Preparation

  1. In a bowl, mix Greek yogurt and sweetener until well combined.
  2. Gradually add the flour and vanilla extract, stirring until the mixture is smooth.
  3. Fold in your choice of chocolate chips gently.
  4. Serve immediately or store in an airtight container in the fridge.

Try pairing the cookie dough with fresh fruit or ice cream. Spread it on toast or use it as a dip for apple slices.
Dessert, Snack
American
cookie dough, Easy Recipe, Greek yogurt, Healthy Dessert, No-Bake Recipe

Beetroot Brownies with a Chocolate Avocado Frosting

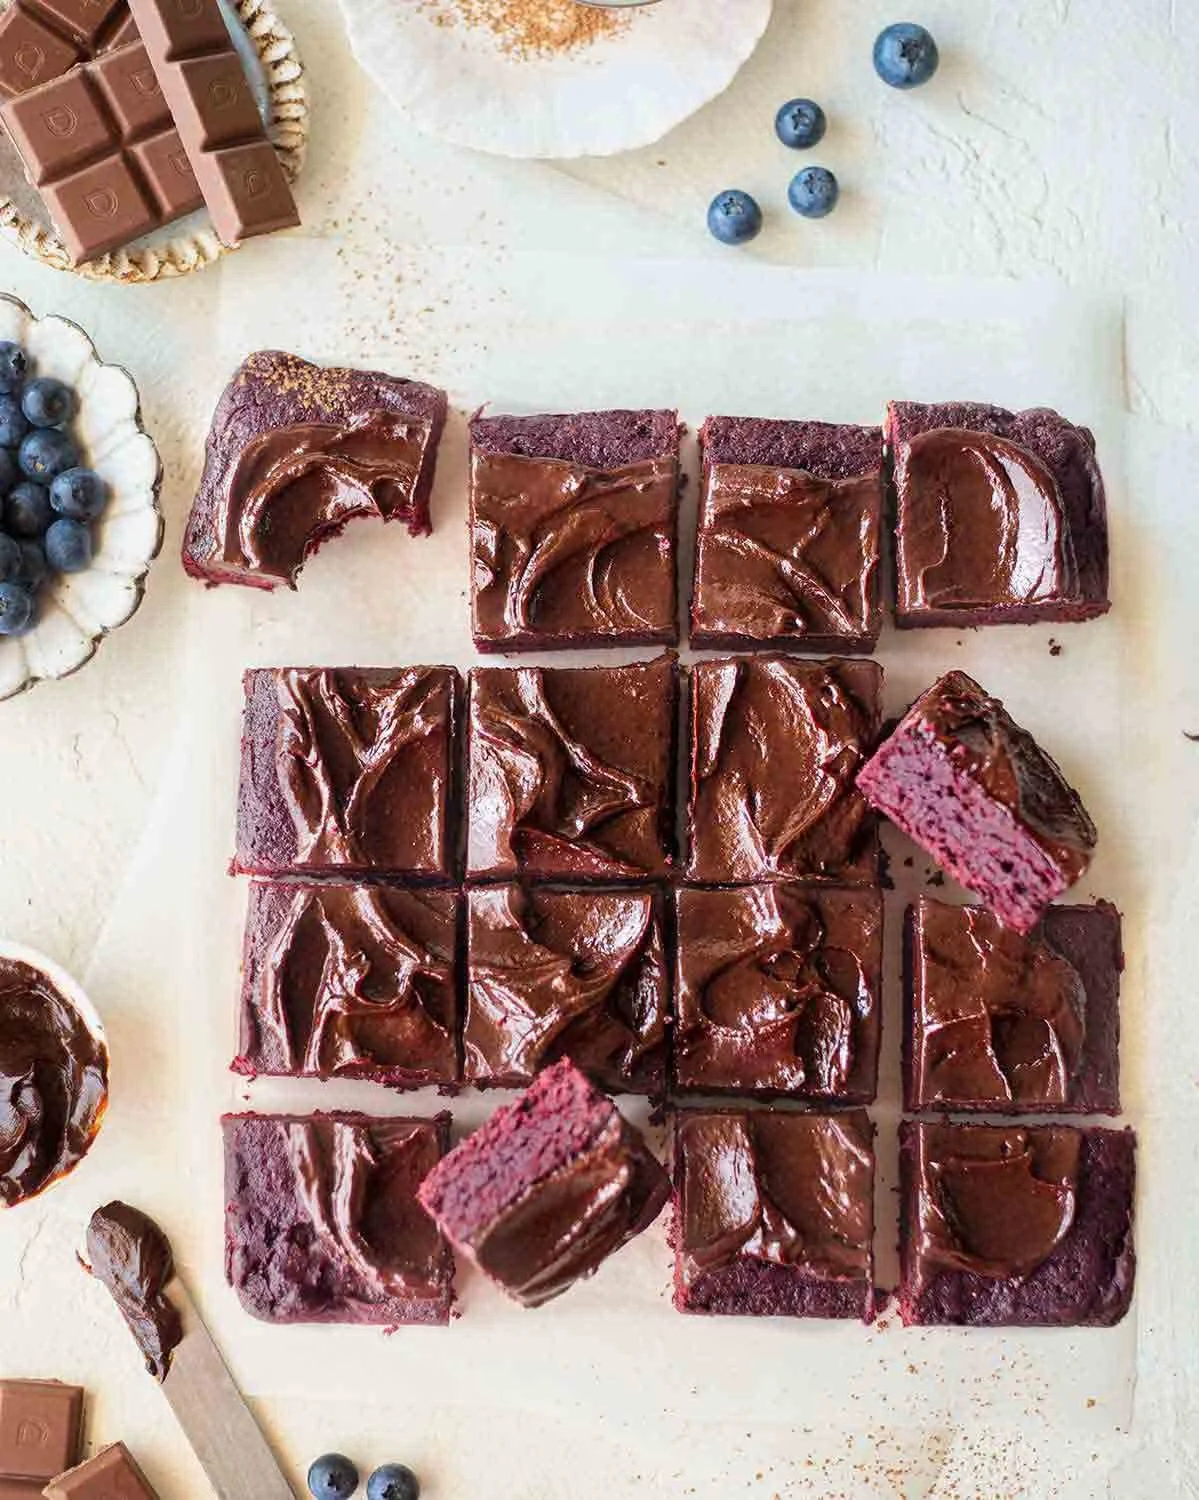
Delicious beetroot brownies with chocolate avocado frosting on a plate

Beetroot brownies are a tasty way to sneak in veggies and still enjoy a rich chocolate treat. These brownies use cooked beetroot for natural color and moisture, and a chocolate avocado frosting for a creamy, dairy-free finish. The result is fudgy, moist, and a bit earthy, with a deep chocolate taste that most people will love. If you like trying both sweet and healthy twists on dessert, you might also enjoy a bright salad like the creamy chickpea feta avocado salad for a light meal with these brownies. This recipe is a crowd-pleaser, simple to make, and fun to share, so get ready to bake and smile.

How to prepare Beetroot Brownies with a Chocolate Avocado Frosting

Ingredients:

  • 1 cup cooked beetroot, mashed (about 2 medium beets)
  • 1/2 cup coconut oil, melted or mild vegetable oil
  • 1 cup brown sugar or coconut sugar
  • 2 large eggs (or flax eggs for vegan)
  • 1 teaspoon vanilla extract
  • 3/4 cup all-purpose flour
  • 1/2 cup cocoa powder, unsweetened
  • 1/2 teaspoon baking powder
  • 1/4 teaspoon salt
  • 1/2 cup dark chocolate chips (optional)

Frosting:

  • 1 ripe avocado
  • 1/4 cup cocoa powder, unsweetened
  • 1/4 cup maple syrup or honey
  • 1 teaspoon vanilla extract
  • Pinch of salt

Directions:

  1. Preheat oven to 350°F (175°C). Line an 8×8 inch baking pan with parchment paper.
  2. Put cooked beetroot in a bowl and mash until smooth. A blender or food processor works well.
  3. In a large bowl, mix mashed beetroot, melted oil, sugar, eggs, and vanilla. Stir until even.
  4. In another bowl, whisk flour, cocoa powder, baking powder, and salt.
  5. Add dry mix to the wet mix and stir until just combined. Fold in chocolate chips if you like.
  6. Pour batter into the prepared pan and spread it smooth.
  7. Bake 25 to 30 minutes, or until a toothpick near the center comes out with a few moist crumbs. Do not overbake.
  8. Cool in the pan for 15 minutes, then move to a wire rack to cool completely before frosting.

Frosting steps:

  1. Scoop avocado flesh into a bowl. Add cocoa, maple syrup, vanilla, and salt.
  2. Blend or mash until very smooth and creamy.
  3. Spread frosting over cooled brownies. Chill for 20 minutes to set, then cut and serve.

Beetroot Brownies with a Chocolate Avocado Frosting

Why You’ll Love Beetroot Brownies with a Chocolate Avocado Frosting

These brownies are rich and fudgy, yet they use beetroot for natural moisture and color. The avocado frosting is smooth, creamy, and adds healthy fat without dairy. The taste is deep chocolate with a hint of earth from the beetroot, and most people will love the texture. They are great for parties, school snacks, or a cozy night in.

Tips for success

  • Use well-cooked beets, soft enough to mash smooth, to avoid lumps in the batter.
  • Measure flour with a spoon and level, to keep brownies moist.
  • Do not overmix the batter, mix until just combined.
  • Check baking time at 20 minutes, ovens vary, and pull when a few moist crumbs stick to a toothpick.
  • For vegan brownies, use flax eggs (1 tablespoon ground flax + 3 tablespoons water per egg) and maple syrup instead of honey.
  • Make the frosting just before serving to keep its bright color and fresh taste.

Serving Suggestions

  • Serve warm with a scoop of vanilla or coconut ice cream for a lovely contrast.
  • Pair with fresh berries or sliced oranges to cut the richness.
  • Offer small squares as a party bite, dusted lightly with cocoa powder.
  • Pack them for lunchboxes or picnics, they travel well when chilled.

Beetroot Brownies with a Chocolate Avocado Frosting

FAQs

Q: Do these brownies taste like beets?

A: You may notice a mild earthy note, but the chocolate is the main flavor. Most people taste chocolate first.

Q: Can I freeze these brownies?

A: Yes, freeze unfrosted brownies in an airtight container for up to 3 months. Thaw and add frosting after thawing.

Q: Can I use raw beets?

A: No, cook beets first by roasting or boiling until soft. Raw beets are too firm and will not mash well.

Q: Is the frosting really avocado? Will it taste like avocado?

A: The avocado gives creaminess, but with cocoa and sweetener the avocado flavor is very mild. It tastes mostly like chocolate.

Q: Can I make these nut-free and gluten-free?

A: For nut-free, avoid almond flour and stick to wheat or gluten-free flour. For gluten-free, use a 1-to-1 gluten-free flour blend.

Conclusion

If you want a tasty, slightly healthier chocolate treat that surprises and delights, try this Beetroot Brownies with a Chocolate Avocado Frosting recipe. For another take on beetroot brownies and tips from a trusted source, see Vegan Beetroot Brownies with Chocolate Avocado Frosting.

Beetroot Brownies with Chocolate Avocado Frosting

These fudgy beetroot brownies are rich in chocolate flavor and paired with a creamy chocolate avocado frosting for a delightful treat.

Brownie Ingredients

  • 1 cup cooked beetroot, mashed (about 2 medium beets) (Use well-cooked beets for better texture.)
  • 1/2 cup coconut oil, melted or mild vegetable oil (Can use vegetable oil as an alternative.)
  • 1 cup brown sugar or coconut sugar (Adjust based on sweetness preference.)
  • 2 large eggs (Use flax eggs for a vegan option.)
  • 1 teaspoon vanilla extract
  • 3/4 cup all-purpose flour (To keep brownies moist, measure correctly.)
  • 1/2 cup cocoa powder, unsweetened
  • 1/2 teaspoon baking powder
  • 1/4 teaspoon salt
  • 1/2 cup dark chocolate chips (optional) (Can add for extra richness.)

Frosting Ingredients

  • 1/4 cup cocoa powder, unsweetened
  • 1/4 cup maple syrup or honey (Use maple syrup for a vegan option.)
  • 1 teaspoon vanilla extract
  • pinch of salt

Brownie Preparation

  1. Preheat oven to 350°F (175°C). Line an 8×8 inch baking pan with parchment paper.
  2. Put cooked beetroot in a bowl and mash until smooth using a blender or food processor.
  3. In a large bowl, mix mashed beetroot, melted oil, sugar, eggs, and vanilla until even.
  4. In another bowl, whisk together flour, cocoa powder, baking powder, and salt.
  5. Add the dry mix to the wet mix and stir until just combined. Fold in chocolate chips if using.
  6. Pour batter into the prepared pan and spread it smooth.
  7. Bake for 25 to 30 minutes, or until a toothpick near the center comes out with a few moist crumbs. Do not overbake.
  8. Cool in the pan for 15 minutes, then transfer to a wire rack to cool completely before frosting.

Frosting Preparation

  1. Scoop avocado flesh into a bowl. Add cocoa, maple syrup, vanilla, and salt.
  2. Blend or mash until very smooth and creamy.
  3. Spread frosting over cooled brownies. Chill for 20 minutes to set.
  4. Cut and serve.

Great for parties, school snacks, or a cozy night. Adjust baking time based on your oven.

Dessert, Snack
American, Vegan
Beetroot Brownies, Chocolate Frosting, Fudgy Brownies, Healthy Dessert, Vegan Brownies

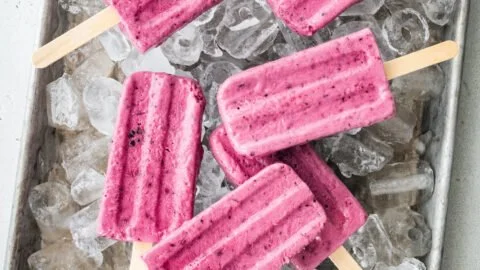
Greek Yogurt Popsicles

Colorful Greek yogurt popsicles with fresh fruits in a sunny setting

These Greek yogurt popsicles are an easy, healthy treat you can make at home. They feel like a cool snack on hot days, and they have real fruit and creamy yogurt, so they taste fresh and sweet. This recipe is a crowd-pleaser for kids and adults, and it keeps well in the freezer for quick snacks. You will love how simple they are, and how bright the fruit makes them look. Get your molds ready, because these popsicles are fun to make and fun to eat.

How to prepare Greek Yogurt Popsicles

Ingredients

  • 2 cups plain Greek yogurt
  • 1/4 cup honey or maple syrup, more to taste
  • 1 tsp vanilla extract
  • 1 to 1 1/2 cups fresh fruit, chopped or mashed (strawberries, blueberries, mango, or peaches work well)
  • Popsicle molds and sticks

Directions

  1. Taste the yogurt, add honey or maple syrup and vanilla, stir until smooth.
  2. If using soft fruit like berries or mango, mash or lightly blend some of it for color, leave some pieces for texture.
  3. You can swirl fruit into the yogurt or mix it all together for even flavor.
  4. Spoon the yogurt and fruit into popsicle molds, tap molds gently to remove air pockets.
  5. Insert sticks, cover, and freeze for at least 4 to 6 hours, until solid.
  6. To remove popsicles, run the mold under warm water for a few seconds, then pull gently.

Greek Yogurt Popsicles

Why You’ll Love Greek Yogurt Popsicles

  • They are creamy and tangy from the Greek yogurt, and sweet from the fruit and honey.
  • They use real fruit, so they taste fresh and natural, not like store popsicles.
  • They are a healthier frozen snack, with protein from the yogurt and vitamins from the fruit.
  • You can change fruits, add spices like cinnamon, or make them dairy-free with coconut yogurt, so they fit your taste.

Tips for success

  • Use thick Greek yogurt for a creamy texture, low-fat or full-fat both work.
  • Sweeten to your taste, remember fruit sweetness varies by season.
  • For layered popsicles, fill half the mold with fruit puree, freeze 30 minutes, then add yogurt.
  • Don’t overblend the fruit if you want chunks, pulse a few times instead.
  • If sticks slip, cover molds with foil and poke sticks through to hold them straight.
  • Freeze long enough, at least 4 hours, to get fully firm popsicles.

Serving Suggestions

  • Serve plain as a snack, or on a small plate with extra fresh berries.
  • Crumble granola on top right before serving for crunch.
  • Drizzle a little honey or chocolate sauce over a thawed popsicle for a treat.
  • Pack one in a cooler for a picnic or bring to a pool day, they travel well if kept cold.

Greek Yogurt Popsicles

FAQs

Q: Can I use frozen fruit?
A: Yes, thaw frozen fruit first and drain excess water, so the mixture is not too runny.

Q: How long do these keep in the freezer?
A: Store in an airtight container, they stay good for about 1 to 2 months, but eat within a month for best taste.

Q: Can I make them without sugar?
A: Yes, skip honey or maple syrup if your fruit is very sweet, or use a sugar substitute you like.

Q: Can I make dairy-free popsicles?
A: Use a thick dairy-free yogurt like coconut or almond Greek-style yogurt, the method is the same.

Q: How do I get smooth popsicles without ice crystals?
A: Use thick yogurt, don’t over-dilute with fruit juice, and freeze fully in a cold freezer.

Conclusion

If you want more flavor ideas and a similar simple recipe with fruit and Greek yogurt, check this version for inspiration, Fresh Fruit Greek Yogurt Popsicles – Amee’s Savory Dish: Fresh Fruit Greek Yogurt Popsicles – Amee’s Savory Dish.

Greek Yogurt Popsicles

These Greek yogurt popsicles are a creamy and refreshing treat made with real fruit and honey, perfect for hot days.

Main Ingredients

  • 2 cups plain Greek yogurt (Use thick Greek yogurt for a creamy texture.)
  • 1/4 cup honey or maple syrup (Sweeten to taste; honey or maple syrup can be adjusted based on fruit sweetness.)
  • 1 tsp vanilla extract
  • 1 to 1 1/2 cups fresh fruit, chopped or mashed (Strawberries, blueberries, mango, or peaches work well.)

Equipment

  • 1 popsicle molds
  • 6 sticks

Preparation

  1. Taste the yogurt, add honey or maple syrup and vanilla, stir until smooth.
  2. If using soft fruit like berries or mango, mash or lightly blend some of it for color, leaving some pieces for texture.
  3. You can swirl fruit into the yogurt or mix it all together for even flavor.
  4. Spoon the yogurt and fruit into popsicle molds, tapping molds gently to remove air pockets.

Freezing

  1. Insert sticks, cover, and freeze for at least 4 to 6 hours, until solid.
  2. To remove popsicles, run the mold under warm water for a few seconds, then pull gently.

These popsicles can be made dairy-free using coconut or almond yogurt. They keep well in the freezer for 1 to 2 months, but best consumed within a month for optimal flavor.

Dessert, Snack
Greek, Healthy
Frozen Treat, Fruit Popsicles, Greek Yogurt Popsicles, Healthy Snack, Summer Desserts

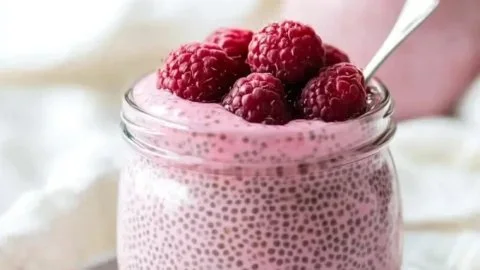
Raspberry Chia Pudding

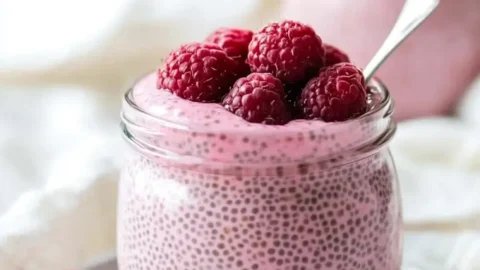
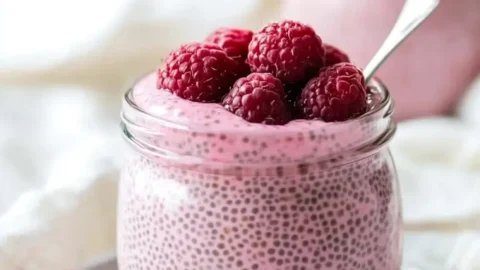
A bowl of Raspberry Chia Pudding topped with fresh raspberries and mint leaves

Raspberry chia pudding is a simple, fresh treat that feels like a small celebration in a bowl. It is light, creamy, and full of bright raspberry taste. This pudding fits breakfast, snack, or a light dessert. It mixes tiny chia seeds that swell and make a pudding texture, with raspberries that add a sweet and tart flavor. The recipe below is a real crowd-pleaser, easy to make, and leaves your kitchen smelling like fresh berries. Grab a spoon and get ready to enjoy a healthy, feel-good dish that is quick to make and fun to eat.

How to prepare Raspberry Chia Pudding

Ingredients

  • 1 cup milk, use almond, oat, or dairy milk for a vegan option
  • 1 cup fresh or frozen raspberries
  • 3 tablespoons chia seeds
  • 1 to 2 tablespoons maple syrup or honey, to taste
  • 1/2 teaspoon vanilla extract (optional)
  • Pinch of salt

Directions

  1. Put the raspberries and half the milk in a blender. Blend until smooth.
  2. Taste the raspberry mix, add maple syrup or honey if you want it sweeter.
  3. In a bowl or jar, mix the raspberry blend, the rest of the milk, vanilla, and a pinch of salt.
  4. Stir in the chia seeds well, so no seeds clump.
  5. Cover and put in the fridge for at least 2 hours, or overnight. The chia seeds will swell and make a thick pudding.
  6. Stir again before serving. If it is too thick, add a little milk and stir to loosen.
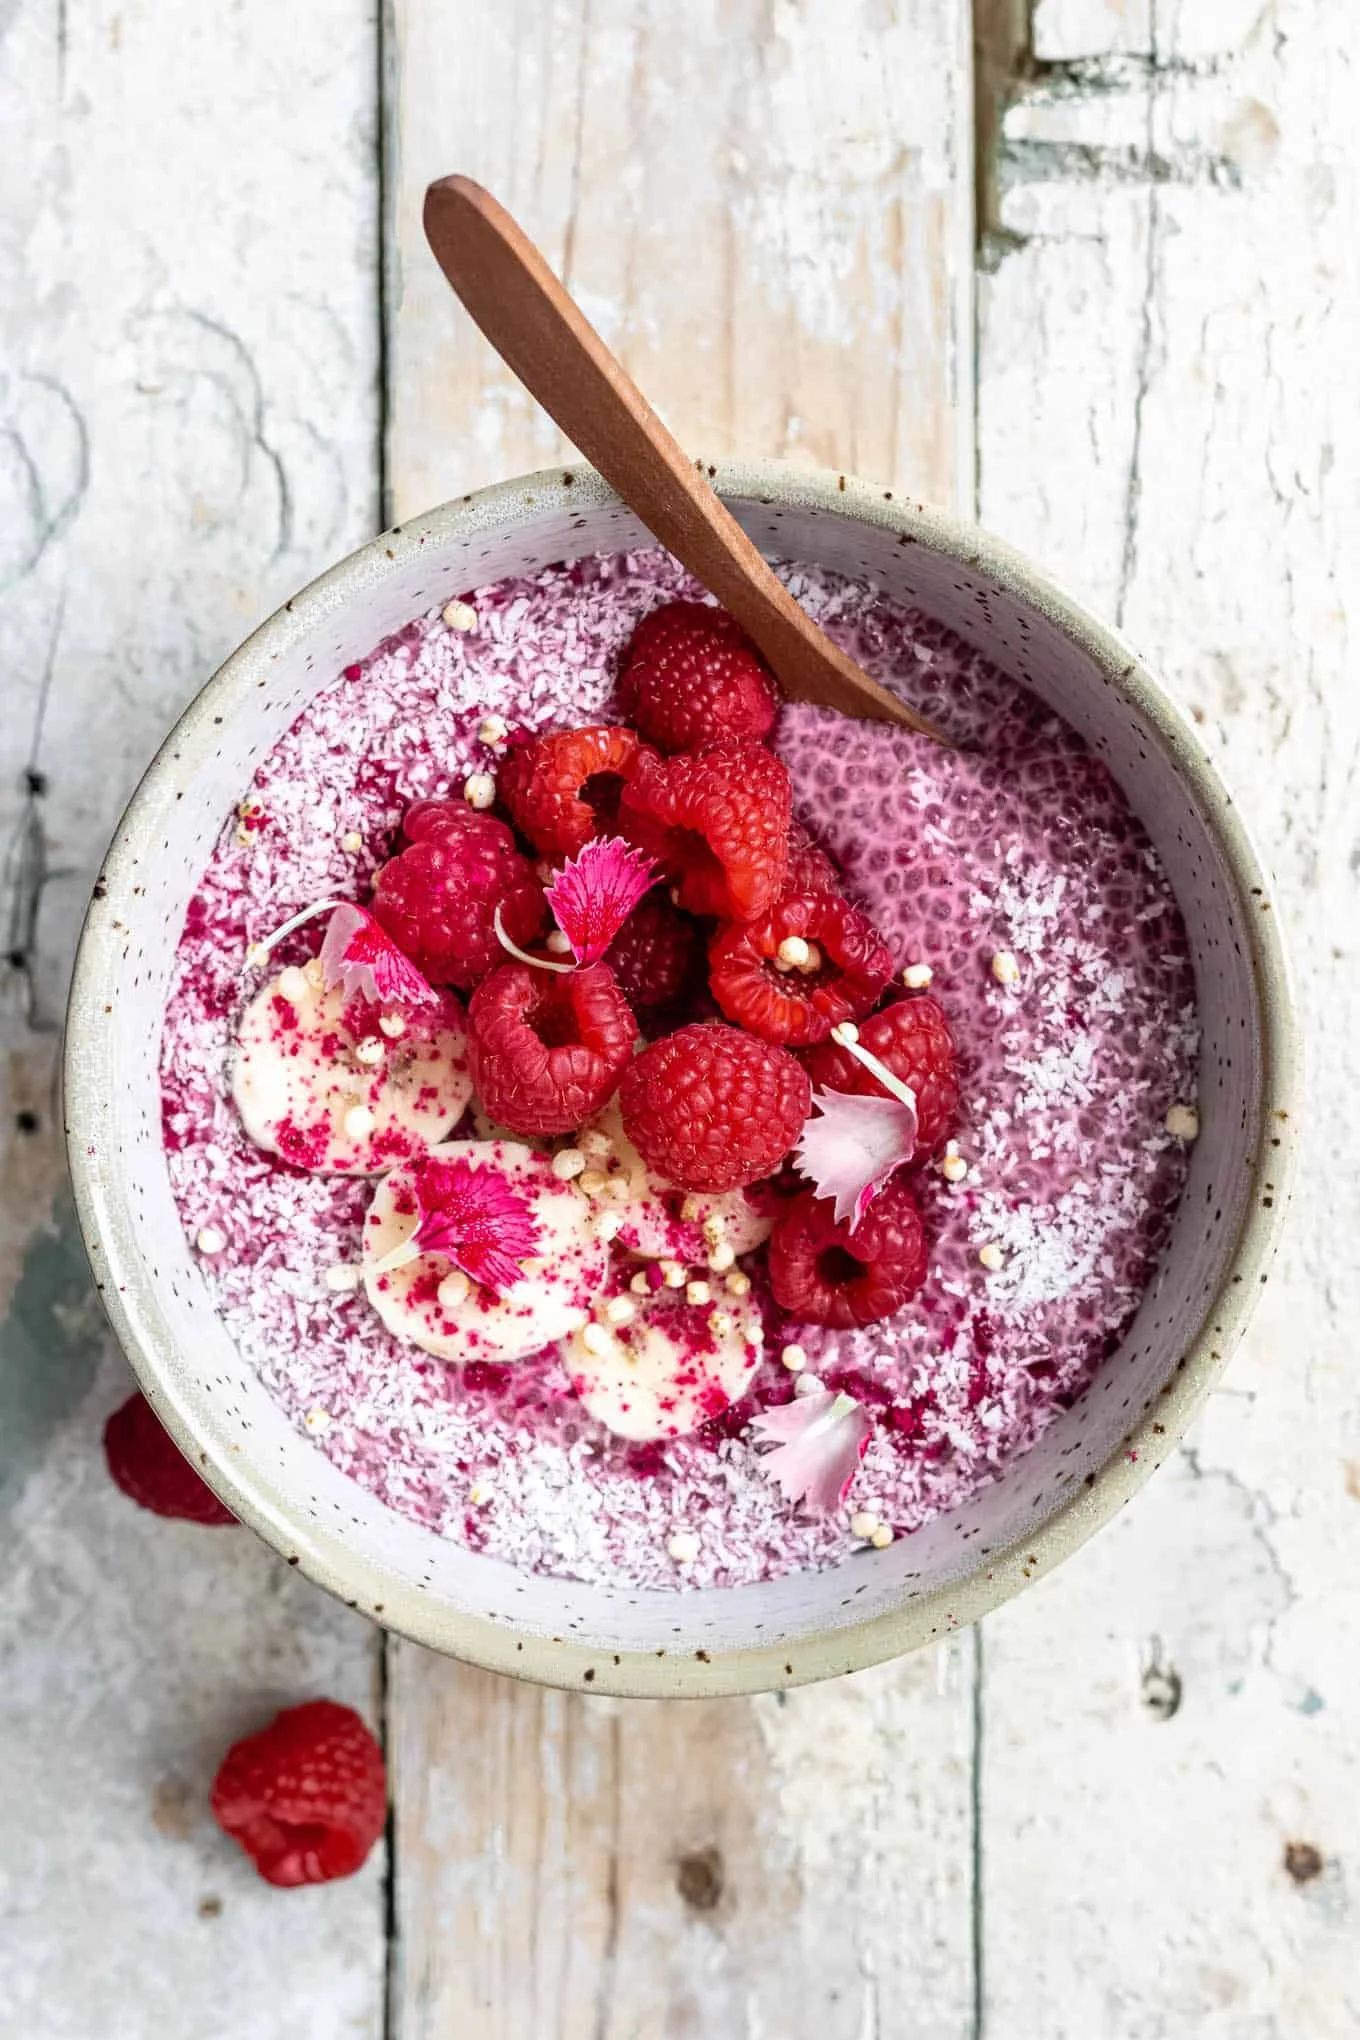
  7. Top with extra raspberries, nuts, or coconut if you like, then serve.

Raspberry Chia Pudding

Why You’ll Love Raspberry Chia Pudding

  • It is easy to make, no cooking needed.
  • It tastes fresh and fruity, with the bright flavor of raspberries.
  • It is healthy, full of fiber and omega-3 from chia seeds.
  • It can be vegan and dairy-free, just pick a plant milk.
  • You can make it ahead, great for busy mornings or meal prep.

Tips for success

  • Stir well after adding chia seeds, to avoid clumps.
  • Let it chill long enough, overnight gives the best texture.
  • Use frozen raspberries if fresh are not in season, they work fine.
  • Adjust sweetness little by little, raspberries can be tart.
  • For creamier pudding, use a thicker milk like canned coconut milk mixed with water.

Serving Suggestions

  • Top with fresh raspberries and a sprinkle of granola for crunch.
  • Add sliced banana and a few chopped almonds for extra protein.
  • Drizzle a little honey or extra maple syrup for dessert.
  • Serve in small jars for packed lunches or grab-and-go breakfasts.
  • Layer with yogurt for a parfait style treat.

Raspberry Chia Pudding

FAQs

Q: Can I make this ahead for the week?
A: Yes, make it and keep in the fridge for up to 4 days. Stir before you eat.

Q: Can I use frozen raspberries?
A: Yes, frozen raspberries work well. Thaw or blend them frozen, both are fine.

Q: Is chia pudding good for a meal?
A: Yes, it is filling. Add nuts or a spoon of nut butter for more protein.

Q: Can I use other berries?
A: Yes, blueberries or strawberries work great too. Mix berries for new flavors.

Q: How do I make it less thick?
A: Add a little more milk and stir, until you reach the texture you like.

Conclusion

If you want another simple, fruity version to try, see this well-loved Raspberry Chia Pudding recipe for more tips and ideas, Raspberry Chia Pudding | Gorgeous, healthy and super delicious ….

Raspberry Chia Pudding

A simple, fresh treat that combines creamy chia pudding with bright raspberry flavor, perfect for breakfast, a snack, or a light dessert.

Main ingredients

  • 1 cup milk, use almond, oat, or dairy milk for a vegan option (Choose your preferred type of milk.)
  • 1 cup fresh or frozen raspberries (Use frozen if fresh is not in season.)
  • 3 tablespoons chia seeds (Chia seeds swell to form pudding texture.)
  • 1-2 tablespoons maple syrup or honey, to taste (Adjust sweetness gradually.)
  • 1/2 teaspoon vanilla extract (optional) (Adds flavor to the pudding.)
  • pinch of salt

Preparation

  1. Put the raspberries and half the milk in a blender. Blend until smooth.
  2. Taste the raspberry mix, and add maple syrup or honey if you want it sweeter.
  3. In a bowl or jar, mix the raspberry blend with the rest of the milk, vanilla, and a pinch of salt.
  4. Stir in the chia seeds well, ensuring no seeds clump together.
  5. Cover and refrigerate for at least 2 hours, or overnight, until the pudding thickens.
  6. Stir the pudding again before serving. If it is too thick, add a little milk to loosen.
  7. Top with extra raspberries, nuts, or coconut if desired, then serve.

Stir well after adding chia seeds to avoid clumps. Overnight chilling gives the best texture. Adjust the fruit for different flavors.

Breakfast, Dessert, Snack
Healthy, Vegan
Chia Pudding, Healthy Dessert, No-Cook Recipe, Raspberry, Vegan Snack

Raspberry Chia Pudding Sweetened with Maple Syrup

Bowl of Raspberry Chia Pudding topped with fresh raspberries and maple syrup

This raspberry chia pudding sweetened with maple syrup is bright, simple, and full of flavor. It feels fresh from the first spoon, with tart raspberries and a soft, creamy chia texture. The gentle sweetness of maple syrup makes it taste like a treat, but it stays light and simple. This recipe works as a quick breakfast, a cool snack, or an easy dessert, and most people love it at first bite. You will find it a crowd-pleaser because it is fruity, not too sweet, and easy to make. Get ready to try it, and you might make it every week.

How to prepare Raspberry Chia Pudding Sweetened with Maple Syrup

Ingredients

  • 1 cup fresh or frozen raspberries
  • 1 1/2 cups milk of choice, almond or oat milk works well
  • 1/4 cup chia seeds
  • 2 tablespoons pure maple syrup, or to taste
  • 1/2 teaspoon vanilla extract
  • Pinch of salt
  • Optional, extra raspberries and a few nuts or granola for topping

Directions

  1. If you like a smooth texture, blend the raspberries with the milk and maple syrup until smooth. For a chunkier pudding, mash the raspberries with a fork and stir into the milk.
  2. In a bowl or jar, mix the milk and raspberry blend with chia seeds, vanilla, and salt.
  3. Stir well for 1 minute, this helps stop chia seeds from clumping.
  4. Let the mixture sit 10 minutes, then stir again to break any clumps.
  5. Cover and refrigerate at least 2 hours, or overnight for best texture.
  6. Before serving, stir and add extra raspberries, nuts, or granola if you like.

Raspberry Chia Pudding Sweetened with Maple Syrup

Why You’ll Love Raspberry Chia Pudding Sweetened with Maple Syrup

  • It is quick to make and needs little hands-on time.
  • The pudding is naturally gluten-free and dairy-free if you use plant milk.
  • Maple syrup gives a warm, natural sweet taste, not a sharp sugar edge.
  • Raspberries add bright color and a fresh tang that balances the creaminess.
  • You can make it ahead, store in the fridge, and grab it when busy.

Tips for success

  • Stir well after you mix chia seeds with liquid, this stops clumps.
  • Use cold milk straight from the fridge, not hot, so the seeds swell evenly.
  • Let it chill overnight for the best thick, pudding-like texture.
  • Taste before you chill and adjust maple syrup, raspberries, or vanilla.
  • If the pudding is too thick, stir in a splash more milk until you like the consistency.
  • For a silky texture, blend the mixture before chilling.

Serving Suggestions

  • Serve in small jars for a make-ahead breakfast on the go.
  • Top with fresh berries, sliced banana, or a sprinkle of granola for crunch.
  • Add a spoon of nut butter on top for extra protein and flavor.
  • Use it as a healthy dessert layer with crushed cookies or toasted oats.
  • For a richer treat, fold in a little coconut cream before serving.

Raspberry Chia Pudding Sweetened with Maple Syrup

FAQs

Q: Can I use frozen raspberries?

A: Yes, frozen raspberries work well. Thaw or blend them right into the milk.

Q: How long does chia pudding last in the fridge?

A: It keeps 3 to 4 days in a sealed container. Stir before serving.

Q: Is this pudding high in protein?

A: Chia seeds add some protein and fiber, but add nut butter or yogurt for more protein.

Q: Can I use honey instead of maple syrup?

A: Yes, use honey if you prefer, but the flavor will change a bit.

Q: Can I make this without chia seeds?

A: Chia is what gives the pudding texture. Without chia, it will be a smoothie, not a pudding.

Conclusion

This raspberry chia pudding sweetened with maple syrup is an easy, bright recipe you can make any day. It fits many diets, stores well, and tastes fresh and satisfying. For another simple version and ideas to vary the recipe, see Raspberry Chia Pudding Recipe (naturally sweetened!) – Flora & Vino. Enjoy making it, and have fun tweaking the flavors to your taste.

Raspberry Chia Pudding

This raspberry chia pudding sweetened with maple syrup is bright, simple, and full of flavor, making it a perfect quick breakfast, snack, or dessert.

Main Ingredients

  • 1 cup fresh or frozen raspberries (Thaw if using frozen.)
  • 1.5 cups milk of choice (Almond or oat milk works well.)
  • 1/4 cup chia seeds (These provide the pudding texture.)
  • 2 tablespoons pure maple syrup (Adjust to taste.)
  • 1/2 teaspoon vanilla extract (Optional, for flavor enhancement.)
  • 1 pinch salt (Brings out the flavors.)
  • Optional extra raspberries, nuts, or granola (For topping before serving.)

Preparation

  1. If you like a smooth texture, blend the raspberries with the milk and maple syrup until smooth. For a chunkier pudding, mash the raspberries with a fork and stir into the milk.
  2. In a bowl or jar, mix the milk and raspberry blend with chia seeds, vanilla, and salt.
  3. Stir well for 1 minute to help stop chia seeds from clumping.
  4. Let the mixture sit for 10 minutes, then stir again to break any clumps.
  5. Cover and refrigerate for at least 2 hours, or overnight for the best texture.
  6. Before serving, stir and add extra raspberries, nuts, or granola if desired.

Stir well after mixing chia seeds with liquid to prevent clumps. Use cold milk, and let it chill overnight for best results. Adjust maple syrup, raspberries, or vanilla to taste before chilling. If too thick, add a splash more milk.

Breakfast, Dessert, Snack
Gluten-Free, Vegan
Chia Pudding, easy dessert, Healthy Snack, Maple Syrup, Raspberry Pudding

Banana Oatmeal Cookies

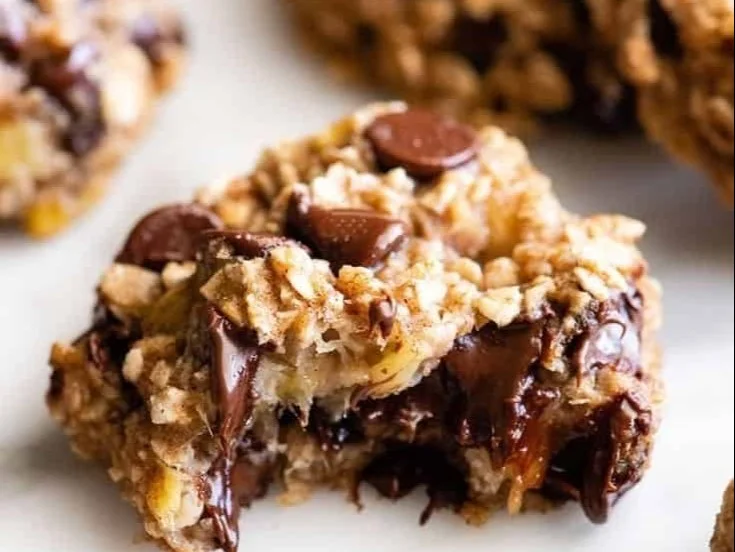
Freshly baked banana oatmeal cookies on a wooden table

Banana Oatmeal Cookies are warm, soft, and simple to make. They use ripe bananas and oats for a sweet, gentle flavor. These cookies are great for snacks, lunchboxes, or a quick treat after school. They feel homey and healthy at the same time, and people of all ages usually enjoy them.

This featured Banana Oatmeal Cookies recipe is a crowd-pleaser. It tastes like sweet banana with a chewy oat bite. The cookies are easy to make, low fuss, and perfect when you want a quick dessert or a healthy snack. Grab your ripe bananas and let’s make a batch that will vanish fast, you might need to hide a few for yourself!

How to prepare Banana Oatmeal Cookies

  1. Preheat the oven to 350°F (175°C). Line a baking sheet with parchment paper or lightly grease it.
  2. In a bowl, mash 2 very ripe bananas with a fork until smooth.
  3. Add 1 cup rolled oats to the mashed bananas. Stir until mixed.
  4. If you like, add a small pinch of salt, 1/2 teaspoon cinnamon, or a splash of vanilla for more flavor.
  5. Stir in optional mix-ins like 1/4 cup chocolate chips, chopped nuts, or dried fruit.
  6. Drop spoonfuls of the dough onto the baking sheet. Flatten each slightly with the back of the spoon.
  7. Bake for 10 to 15 minutes, until the edges are light golden.
  8. Let the cookies cool on the sheet for a few minutes, then move to a rack to cool fully.

Banana Oatmeal Cookies

Why You’ll Love Banana Oatmeal Cookies

  • They are quick and easy, using just a few simple ingredients like ripe bananas and oats.
  • The cookies are naturally sweet, so you can skip extra sugar if you want a healthier treat.
  • They are soft and chewy, with a warm banana taste that feels homemade.
  • You can change them with add-ins, like chocolate chips or nuts, to suit your taste.

Tips for success

  • Use very ripe bananas, the riper the sweeter and the better the texture.
  • Measure oats by cup, and use rolled oats for the best chew.
  • If the dough is too wet, add a little more oats, one tablespoon at a time.
  • If you want flatter cookies, press them gently before baking.
  • Watch the bake time, ovens vary, and cookies can go from golden to too brown fast.

Serving Suggestions

  • Serve warm with a glass of milk or a cup of tea.
  • Add a spoon of peanut butter on top for extra protein and flavor.
  • Pack them in lunchboxes for an easy snack.
  • Crumble them over yogurt for a quick breakfast boost.

Banana Oatmeal Cookies

FAQs

Q: Can I make these cookies without baking?

A: Yes, you can make no-bake banana oat bites by chilling spoonfuls in the fridge, but the texture will be softer and more like a firm snack.

Q: How long do the cookies keep?

A: Store them in an airtight container at room temperature for 2 days, or in the fridge for up to a week.

Q: Can I use instant oats or steel-cut oats?

A: Instant oats can work but may make cookies softer. Do not use steel-cut oats, they are too hard and will not soften well in this recipe.

Q: Are these cookies gluten-free?

A: They can be, if you use certified gluten-free oats. Check labels to be sure.

Q: Can I add eggs or flour for a firmer cookie?

A: Yes, adding an egg and a little flour will make the cookies firmer and more cookie-like if you prefer that texture.

Conclusion

For another simple, healthy take on banana oat cookies you can try this well-loved recipe online, see Healthy 3-Ingredient Banana Oatmeal Cookies – Skinnytaste.

Banana Oatmeal Cookies

Warm, soft, and simple to make, these Banana Oatmeal Cookies use ripe bananas and oats for a sweet, gentle flavor. A perfect treat for snacks, lunchboxes, or a quick dessert.

Main Ingredients

  • 2 pieces very ripe bananas (The riper, the sweeter and better the texture.)
  • 1 cup rolled oats (Use rolled oats for the best chew.)

Optional Flavorings

  • 1/2 teaspoon cinnamon (For added flavor.)
  • pinch salt (To enhance flavors.)
  • 1/4 cup chocolate chips or chopped nuts or dried fruit (Optional mix-ins to customize your cookies.)

Preparation

  1. Preheat the oven to 350°F (175°C). Line a baking sheet with parchment paper or lightly grease it.
  2. In a bowl, mash the very ripe bananas with a fork until smooth.
  3. Add the rolled oats to the mashed bananas and stir until mixed.
  4. If desired, add a small pinch of salt, cinnamon, and/or vanilla for more flavor.
  5. Stir in optional mix-ins like chocolate chips, chopped nuts, or dried fruit.
  6. Drop spoonfuls of the dough onto the baking sheet and flatten each slightly with the back of the spoon.

Baking

  1. Bake for 10 to 15 minutes, until the edges are light golden.
  2. Let the cookies cool on the sheet for a few minutes, then move to a rack to cool fully.

Use very ripe bananas for best sweetness and texture. Measure oats by cup. If the dough is too wet, add more oats one tablespoon at a time. For flatter cookies, press gently before baking. Watch the bake time as ovens vary.

Dessert, Snack
American
Banana Oatmeal Cookies, easy dessert, Healthy Cookies, Quick Snacks, Ripe Bananas

Ultimate Ninja Creami Protein Ice Cream

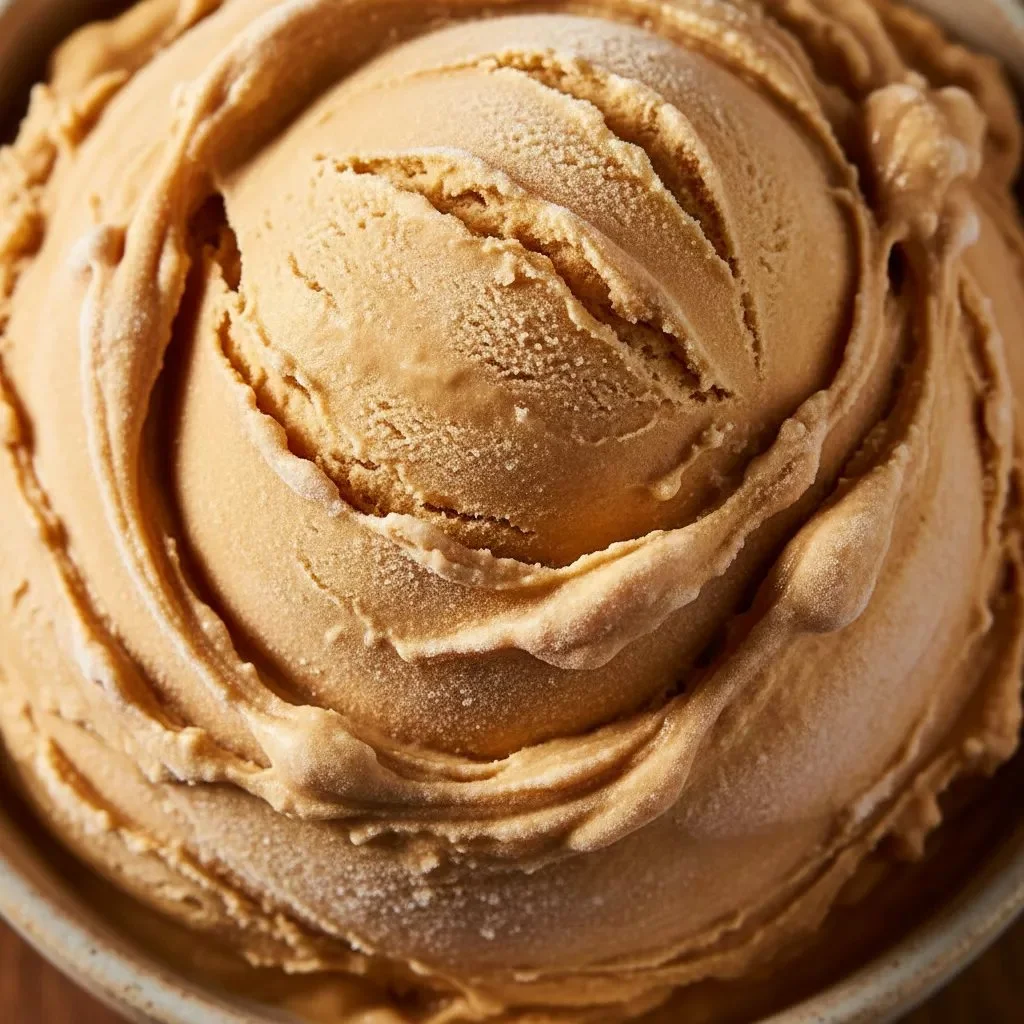
Ultimate Ninja Creami Protein Ice Cream dessert bowl with toppings

Have you ever made homemade protein ice cream that ended up chalky, icy, or just disappointing? You’re definitely not the only one. Perfecting Ninja Creami protein recipes in my kitchen took plenty of experimenting, but after many attempts, I finally found the method that works.

This recipe delivers a smooth, rich, and ultra-creamy texture every time. Instead of another dull “healthy” dessert, you get a truly indulgent Salted Mocha Fudge treat that feels decadent while still packing plenty of protein. It might just change the way you think about high-protein desserts

How to Prepare Ultimate Ninja Creami Protein Ice Cream

Making your own Ultimate Ninja Creami Protein Ice Cream is easier than you think! Here’s how to whip up this delicious treat that everyone will love:

Ingredients

  • 2 cups of your favorite Greek yogurt
  • 1 scoop of protein powder (vanilla or chocolate)
  • 1 cup of milk (any type)
  • 1/2 cup of natural sweetener (like honey or agave)
  • 1/2 cup of chocolate chips or fruit chunks (as desired)

Directions

  1. In a mixing bowl, combine Greek yogurt, protein powder, milk, and sweetener. Stir until smooth.
  2. Fold in chocolate chips or fruit chunks for extra flavor.
  3. Pour the mixture into the Ninja Creami ice cream maker.
  4. Follow the manufacturer’s instructions to churn until creamy.
  5. Serve immediately for a soft-serve texture or transfer to a container to freeze for a firmer consistency.

Ultimate Ninja Creami Protein Ice Cream

Why You’ll Love Ultimate Ninja Creami Protein Ice Cream

This ice cream isn’t just a tasty treat, it’s packed with protein to fuel your day! It’s creamy, rich, and satisfies your sweet tooth without guilt. Plus, you can customize it with different flavors and mix-ins, making it a fun treat for the whole family. Everyone will definitely want a scoop (or two) of this deliciously healthy ice cream!

Tips for Success

  1. Chill Your Ingredients: Make sure your ingredients are cold before mixing. This helps the ice cream come out creamier.
  2. Customize It: Feel free to play with flavors by adding ingredients like cocoa powder, vanilla extract, or even peanut butter for a personal touch.
  3. Don’t Overmix: When combining your ingredients, mix just enough to blend everything. Too much mixing can create a grainy texture.

Serving Suggestions

Serve your Ultimate Ninja Creami Protein Ice Cream in bowls or cones. Add toppings like fresh fruits, nuts, or drizzles of chocolate syrup. For an extra special treat, create sundae-style bowls and layer with more yogurt or a dollop of whipped cream!

FAQs

Can I use a different type of yogurt?

Yes, you can! Feel free to use regular yogurt or a dairy-free alternative if you prefer.

How long does it take to make?

Making this ice cream takes about 15-20 minutes, plus freezing time if you want it firmer.

How should I store leftovers?

Store any leftovers in an airtight container in the freezer. It’s best enjoyed within a week for the best texture and flavor!

Now that you know how to make Ultimate Ninja Creami Protein Ice Cream, it’s time to gather your ingredients and get churning! Can’t wait to see what flavors you create!

Ultimate Ninja Creami Protein Ice Cream

A smooth, rich, and ultra-creamy protein ice cream that feels decadent yet healthy, perfect for satisfying your sweet tooth.

For the Ice Cream Base

  • 2 cups Greek yogurt (Your favorite variety)
  • 1 scoop protein powder (Vanilla or chocolate)
  • 1 cup milk (Any type)
  • 1/2 cup natural sweetener (Like honey or agave)
  • 1/2 cup chocolate chips or fruit chunks (Optional for additional flavor)

Preparation

  1. In a mixing bowl, combine Greek yogurt, protein powder, milk, and sweetener. Stir until smooth.
  2. Fold in chocolate chips or fruit chunks for extra flavor.
  3. Pour the mixture into the Ninja Creami ice cream maker.
  4. Follow the manufacturer’s instructions to churn until creamy.
  5. Serve immediately for a soft-serve texture or transfer to a container to freeze for a firmer consistency.

Chill your ingredients to ensure a creamier texture. Customize flavors with ingredients like cocoa powder or peanut butter. Do not overmix to prevent a grainy texture.

Dessert, Snack
American
Frozen Dessert, Healthy Dessert, High-Protein Treat, Ninja Creami, Protein Ice Cream