Spinach Artichoke Wonton Cups

Spinach and Artichoke Wonton Cups are a delightful appetizer that everyone will love. The combination of creamy spinach and tender artichoke hearts nestled in crispy wonton cups creates a mouthwatering treat that is perfect for parties or casual gatherings. This recipe is not just delicious, but it’s also a fun way to enjoy a classic dip in a new form. Who wouldn’t want to pop these little bites of joy into their mouth at the next get-together?

How to prepare Spinach Artichoke Wonton Cups

To start making these tasty wonton cups, you’ll need some basic ingredients such as wonton wrappers, spinach, artichokes, cream cheese, and Parmesan cheese. First, preheat your oven and prepare the wonton wrappers in a muffin tin. Mix the sautéed spinach and artichokes with cream cheese and sprinkle with Parmesan. Fill the wonton wrappers and bake until golden.

Spinach and Artichoke Wonton Cups

Why You’ll Love Spinach Artichoke Wonton Cups

These wonton cups are a fantastic crowd-pleaser, serving as a unique twist on a classic dip. They are easy to make and even easier to eat, which makes them perfect for entertaining. Each bite is bursting with flavor, and the crispy texture of the wonton adds a great crunch. Plus, if you love recipes with spinach, you can also check out this creamy gnocchi with spinach and feta for another delightful option.

Tips for success

To make the best Spinach and Artichoke Wonton Cups, be sure to not overfill the wrappers. A heaping spoonful is plenty, ensuring they bake evenly and remain crisp. Also, using fresh spinach can elevate the taste, giving it a vibrant flavor. Ensure to bake them just until golden to achieve that perfect crunch without burning.

Spinach and Artichoke Wonton Cups

Serving Suggestions

These wonton cups are perfect on their own, but you can serve them with a drizzle of balsamic reduction or a side of marinara sauce for dipping. They also pair wonderfully with a light salad or a platter of assorted veggies.

FAQs

Can I use frozen spinach?

Yes, frozen spinach works well. Just be sure to thaw it and squeeze out any excess moisture before mixing with the other ingredients.

How do I store leftovers?

Store any leftovers in an airtight container in the fridge for up to three days. Reheat in the oven to retain their crispiness.

Can I make these ahead of time?

Absolutely! You can prepare the filling and wonton cups ahead. Just assemble and bake them right before serving for the best results.

Spinach and Artichoke Wonton Cups

A delightful appetizer featuring creamy spinach and artichoke hearts nestled in crispy wonton cups, perfect for gatherings.

For the Wonton Cups

  • 12 pieces wonton wrappers (Can use square or round wrappers.)

For the Filling

  • 2 cups fresh spinach, sautéed (Ensure to chop finely.)
  • 1 cup artichoke hearts, chopped (Canned or frozen works fine.)
  • 8 ounces cream cheese (Softened for easier mixing.)
  • 1/2 cup Parmesan cheese, grated (Freshly grated yields better flavor.)

Preparation

  1. Preheat the oven to 375°F (190°C).
  2. Prepare a muffin tin by greasing it lightly.
  3. Place wonton wrappers into the muffin tin, pressing them down to form cups.

Filling

  1. In a mixing bowl, combine sautéed spinach, chopped artichokes, cream cheese, and grated Parmesan.
  2. Mix until the ingredients are well combined.

Assembly and Baking

  1. Fill each wonton cup with a heaping spoonful of the spinach and artichoke mixture.
  2. Bake in the preheated oven for 15-20 minutes or until the wonton cups are golden brown.
  3. Remove from oven and allow to cool slightly before serving.

Do not overfill the wonton cups for even baking. Fresh spinach elevates flavor. Serve with balsamic reduction or marinara sauce for dipping.

Appetizer, Snack
American
Creamy Dip, Crowd-Pleaser, Party Appetizer, Spinach and Artichoke, Wonton Cups

Berry Watermelon Fruit Salad

Berry Watermelon Fruit Salad is a delightful treat that brings together the juicy sweetness of watermelon and the vibrant flavors of fresh berries. This cheerful, colorful dish makes for a stunning centerpiece at any summer gathering or barbecue, and it’s perfect for satisfying those warm-weather cravings. It’s a crowd-pleaser with its refreshing and light taste, ensuring it disappears from the table in no time. Once you try this fruit salad, you’ll understand why everyone is buzzing about it! You may also find Honey Lime Fruit Saladthe Best useful.

How to prepare Berry Watermelon Fruit Salad

Making this delicious fruit salad is easy and quick. Start by gathering your favorite berries such as strawberries, blueberries, and raspberries. You’ll also need ripe watermelon, lime juice, and a little honey for added sweetness.

Berry Watermelon Fruit Salad

  1. Begin by cutting the watermelon into bite-sized cubes.
  2. In a large bowl, mix together the watermelon cubes, halved strawberries, blueberries, and raspberries.
  3. Drizzle lime juice over the fruit mixture.
  4. If desired, add a bit of honey and gently toss to combine.

Be sure to serve it chilled for the best taste!

Berry Watermelon Fruit Salad

Why You’ll Love Berry Watermelon Fruit Salad

There are many reasons to love this salad! First, it’s bursting with flavor from the juicy watermelon and mixed berries. Each bite is refreshing, making it a perfect dish for hot days. Plus, it’s a healthy choice, packed with vitamins and antioxidants. To make your fruit experience even more delightful, consider pairing it with a light dessert like easy blueberry crisp.

Tips for success

To ensure your Berry Watermelon Fruit Salad steals the show, here are some handy tips:

  • Use ripe fruits for the best taste. Check that your watermelon is sweet and firm.
  • Experiment with different berries based on your preference or seasonal availability.
  • For extra flavor, consider adding fresh mint or basil.

Serving Suggestions

This vibrant fruit salad is great on its own, but you can also serve it alongside yogurt, as a topping for pancakes, or even with grilled chicken for a delightful summer meal. The options are endless!

FAQs

  1. Can I use frozen berries?
  2. Yes, you can, but be aware that they may release more juice, which can affect the texture of the salad.
  3. How long does the salad last in the fridge?
  4. For the best taste, enjoy it within 1-2 days of making, as the fruit can become mushy over time.
  5. Can I make this ahead of time?
  6. Yes, you can prepare the fruit salad a few hours in advance, but add the lime juice and honey close to serving time to maintain freshness.

Conclusion

Berry Watermelon Fruit Salad is a fantastic addition to your recipe collection. For more fruit-filled recipes, check out Berry Watermelon Fruit Salad – Fork Knife Swoon. Enjoy the freshness and flavor of summer!

Berry Watermelon Fruit Salad

A refreshing and colorful salad combining juicy watermelon and vibrant berries, perfect for summer gatherings.

Fruits

  • 4 cups ripe watermelon, cubed (Choose a sweet and firm watermelon.)
  • 1 cup strawberries, halved (Fresh strawberries are recommended.)
  • 1 cup blueberries (Use fresh blueberries, or frozen if necessary.)
  • 1 cup raspberries (Fresh raspberries work best.)

Dressing

  • 2 tablespoons lime juice (Freshly squeezed is preferred.)
  • 1 tablespoon honey (Adjust the amount to taste.)

Preparation

  1. Cut the watermelon into bite-sized cubes.
  2. In a large bowl, mix together the watermelon cubes, halved strawberries, blueberries, and raspberries.
  3. Drizzle lime juice over the fruit mixture.
  4. If desired, add honey and gently toss to combine.
  5. Serve chilled for the best taste.

Use ripe fruits for the best taste. Experiment with different berries based on preference. For added flavor, consider adding fresh mint or basil.

Salad, Side Dish
American, Healthy
Berry Watermelon Fruit Salad, Fruit Salad, Healthy Recipe, Refreshing Dessert, summer salad

Tangy Fermented Carrot Sticks

There’s something magical about a crunchy, tangy snack that wakes up your taste buds. If you’re looking for a fun and healthy treat, look no further than Tangy Fermented Carrot Sticks. These vibrant sticks are not only easy to make, but they also pack a flavorful punch that will have everyone reaching for more. They’re perfect as appetizers, snacks, or even as a colorful, zesty addition to your meals. The best part? The fermentation process gives them a delightful tang that adds depth to their natural sweetness. Plus, they’re packed with probiotics, making them great for your gut health!

Ready to make this crowd-pleaser? Let’s dive right into the recipe!

How to prepare Tangy Fermented Carrot Sticks

Ingredients

  • 4 large carrots, peeled and cut into sticks
  • 2 cups water
  • 1 tablespoon salt
  • 1 teaspoon dill seeds (optional)
  • 1 clove garlic, peeled and smashed (optional)
  • 1 bay leaf (optional)

Directions

  1. In a bowl, combine the water and salt, stirring until the salt dissolves.
  2. Place the carrot sticks in a clean, quart-sized jar. If using, add dill seeds, garlic, and bay leaf.
  3. Pour the saltwater mixture over the carrots, ensuring they are fully submerged. You can use a clean weight (like a smaller jar) to keep them down if needed.
  4. Cover the jar loosely with a lid or cloth to allow gases to escape.
  5. Leave the jar at room temperature for 3-7 days, checking daily for taste and ensuring the carrots remain submerged.
  6. Once they reach your desired tanginess, seal the jar tightly and store in the refrigerator.

Tangy Fermented Carrot Sticks

Why You’ll Love Tangy Fermented Carrot Sticks

These Tangy Fermented Carrot Sticks are not just good for you; they are also full of flavor! The crunchiness and the tangy zest make them a great alternative to chips or sweets. Whether you’re snacking alone or sharing with friends and family, they will certainly impress. Plus, who doesn’t love a recipe that’s as fun to make as it is to eat?

Tips for success

  • Make sure to use fresh, crisp carrots for the best texture.
  • Experiment with different spices or herbs to customize the flavor.
  • Keep an eye on the fermentation process, as warmer temperatures may speed it up.

Tangy Fermented Carrot Sticks

Serving Suggestions

Serve these Tangy Fermented Carrot Sticks as a refreshing snack on their own or as a side with sandwiches and wraps. They also make a great topping for salads or grain bowls, adding both crunch and a burst of flavor.

FAQs

How long do fermented carrot sticks last in the fridge?

Fermented carrot sticks can last for several weeks in the refrigerator, thanks to the pickling process.

Can I use different vegetables?

Absolutely! You can substitute carrots with cucumbers, radishes, or any crunchy vegetable you like.

Is it necessary to use dill seeds?

No, the dill seeds are optional. Feel free to experiment with or omit them based on your taste preference.

Now that you’ve got the scoop on Tangy Fermented Carrot Sticks, it’s time to gather your ingredients and have some fun in the kitchen! Enjoy the tangy goodness and the crunch!

Tangy Fermented Carrot Sticks

Crunchy and tangy fermented carrot sticks that make a fun and healthy snack, packed with probiotics and flavor.

Main Ingredients

  • 4 large large carrots, peeled and cut into sticks (Use fresh, crisp carrots for the best texture.)
  • 2 cups water
  • 1 tablespoon salt (Use non-iodized salt for best results.)
  • 1 teaspoon dill seeds (Optional, for additional flavor.)
  • 1 clove garlic, peeled and smashed (Optional, for additional flavor.)
  • 1 bay leaf bay leaf (Optional, for additional flavor.)

Preparation

  1. In a bowl, combine the water and salt, stirring until the salt dissolves.
  2. Place the carrot sticks in a clean, quart-sized jar. If using, add dill seeds, garlic, and bay leaf.
  3. Pour the saltwater mixture over the carrots, ensuring they are fully submerged. You can use a clean weight (like a smaller jar) to keep them down if needed.
  4. Cover the jar loosely with a lid or cloth to allow gases to escape.
  5. Leave the jar at room temperature for 3-7 days, checking daily for taste and ensuring the carrots remain submerged.
  6. Once they reach your desired tanginess, seal the jar tightly and store it in the refrigerator.

These Tangy Fermented Carrot Sticks are a great alternative to chips or sweets. Experiment with different spices or herbs to customize the flavor. Keep an eye on the fermentation process, as warmer temperatures may speed it up.

Appetizer, Snack
Fermented, Healthy
Fermented Carrots, Healthy Snack, Probiotics, Tangy Snack, Vegetable Fermentation

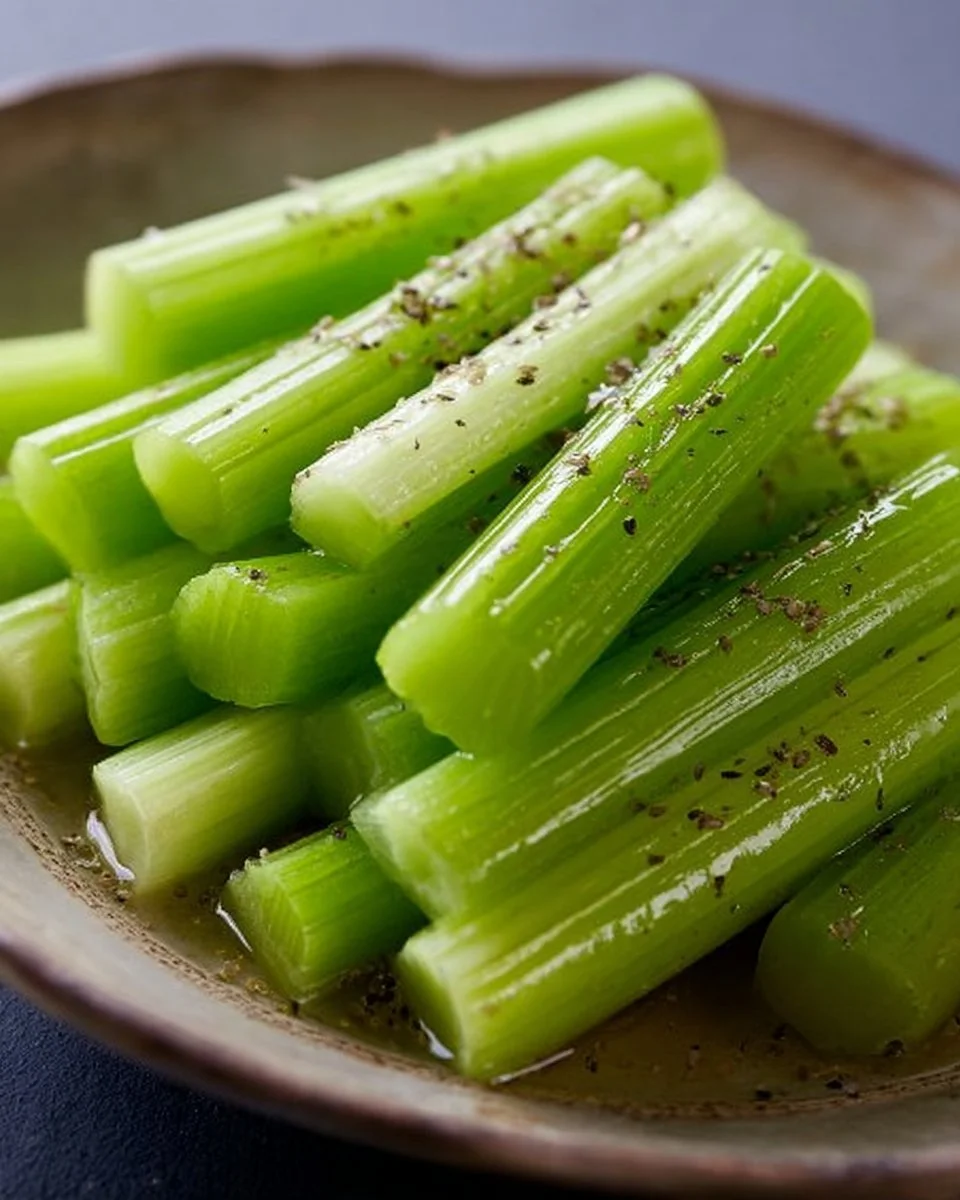
Easy Fermented Celery Sticks

Easy fermented celery sticks in a jar with spices and herbs

Fermented foods are a fantastic way to boost your gut health while enjoying delicious flavors. If you’re looking for a simple recipe that packs a punch, you’ll love these Easy Fermented Celery Sticks. This recipe is not just nutritious; it’s also a crowd-pleaser that combines the refreshing crunch of celery with a tangy twist. Their vibrant taste and satisfying crunch make them a perfect snack or a great side dish for meals. Trust me, once you try making these, you’ll wonder why you didn’t start earlier!

How to prepare Easy Fermented Celery Sticks

Making fermented celery sticks is straightforward and fun. Start by gathering your ingredients. You’ll need fresh celery, water, salt, and optional spices like garlic or dill for extra flavor.

  1. First, wash and cut the celery into sticks.
  2. Next, prepare a brine by mixing water and salt until the salt dissolves.
  3. Place the celery sticks in a clean jar, packing them tightly.
  4. Pour the brine over the celery, ensuring they are fully submerged.
  5. If you’re using spices, add them in before sealing the jar.
  6. Cover the jar with a lid or a cloth and let it sit at room temperature for about 5-7 days.
  7. Taste them after a few days to see if they are to your liking.
  8. Once fermented, store them in the fridge to enjoy later!

Easy Fermented Celery Sticks

Why You’ll Love Easy Fermented Celery Sticks

These fermented celery sticks are not only easy to make but also incredibly tasty. The lively crunch and zesty flavor elevate any snack time. Plus, you can customize them with various spices to fit your taste. They are perfect as a quick snack, delicious on a cheese platter, or even as a crunchy addition to salads. With benefits for your digestive health and an addictive taste, these little snacks will quickly become a staple in your kitchen!

Tips for success

  • Ensure your celery is fresh, as this will enhance the final flavor and texture.
  • Use filtered water if possible to promote better fermentation.
  • Don’t hesitate to experiment with different spices and herbs until you find your perfect combination.

Easy Fermented Celery Sticks

Serving Suggestions

Serve your Easy Fermented Celery Sticks as a healthy appetizer or alongside your favorite dips like hummus or ranch dressing. They can also be a delightful addition to sandwiches or salads, adding crunch and flavor. Enjoy them alone for a quick snack or share them with friends at your next gathering!

FAQs

How long do fermented celery sticks last?

Fermented celery sticks can last several weeks in the fridge as long as they are fully submerged in the brine.

Can I use other vegetables?

Absolutely! You can ferment a variety of vegetables like carrots, cucumbers, or radishes using the same method.

Is it necessary to ferment for a whole week?

Not necessarily, you can ferment for a shorter period, but letting them sit longer gives you a stronger flavor. Taste them every few days to find what you like best!

Easy Fermented Celery Sticks

A simple and delicious recipe to make tangy and crunchy fermented celery sticks, perfect as a snack or side dish.

Main Ingredients

  • 1 bunch Fresh celery (Ensure it’s fresh for the best flavor and texture.)
  • 4 cups Filtered water (Use filtered water for better fermentation.)
  • 2 tablespoons Salt (Non-iodized salt is preferred.)

Optional Spices

  • 2 cloves Garlic (Crushed or whole for added flavor.)
  • 1 tablespoon Dill (For a herby twist.)

Preparation

  1. Wash and cut the celery into sticks.
  2. Prepare a brine by mixing water and salt until the salt dissolves.
  3. Place the celery sticks in a clean jar, packing them tightly.
  4. Pour the brine over the celery, ensuring they are fully submerged.
  5. If using spices, add them in before sealing the jar.
  6. Cover the jar with a lid or a cloth and let it sit at room temperature for about 5-7 days.
  7. Taste them after a few days to see if they are to your liking.
  8. Once fermented, store them in the fridge to enjoy later.

Experiment with different spices and herbs until you find your perfect combination. Fermented celery sticks can last several weeks in the fridge if fully submerged in brine.

Appetizer, Snack
American
Celery Sticks, Easy Recipes, Fermented Foods, Gut Health, Healthy Snacks

Keto Cloud Bread

Fluffy and light Keto Cloud Bread served on a plate

Keto Cloud Bread is a delightful low-carb substitute for traditional bread, making it a favorite among those following the ketogenic diet. It’s light, fluffy, and offers a satisfying texture without the carbs. This bread is made from simple ingredients, primarily eggs and cream cheese, which combine beautifully to create a bread-like goodness that everyone can enjoy. Whether you’re using it for sandwiches, a side for soups, or just spreading some butter, Keto Cloud Bread is sure to please your taste buds.

Keto Cloud Bread

To prepare this easy and delicious recipe, gather the following ingredients:

Ingredients:

  • 3 large eggs
  • 3 oz cream cheese, softened
  • 1/4 tsp cream of tartar
  • A pinch of salt

Here’s how to make Keto Cloud Bread:

Keto Cloud Bread

  1. Preheat your oven to 300°F (150°C).
  2. In a bowl, beat the egg whites and cream of tartar together until stiff peaks form.
  3. In another bowl, mix the egg yolks, softened cream cheese, and salt until smooth.
  4. Gently fold the egg whites into the egg yolk mixture until well combined, taking care not to deflate the egg whites.
  5. Line a baking sheet with parchment paper and use a spoon to dollop the mixture onto the sheet in circular shapes (about 2-3 inches wide).
  6. Bake for 25-30 minutes or until the tops are golden brown.
  7. Allow them to cool before enjoying.

{image_2}

Why You’ll Love Keto Cloud Bread

You’re going to love Keto Cloud Bread for so many reasons! First, it’s incredibly low in carbs, making it perfect for anyone on a keto or low-carb diet. Secondly, it’s super easy to whip up, and you probably already have the ingredients in your kitchen. Each bite has a light and airy texture, making it a perfect vessel for all your favorite toppings. Plus, it’s versatile! Use it for breakfast, lunch, or dinner, and enjoy its delightful taste without the guilt.

Tips for success

To make sure your Keto Cloud Bread turns out perfectly every time, here are some handy tips:

  • Beat the egg whites until stiff peaks form to ensure maximum fluffiness.
  • Make sure the cream cheese is softened for easy mixing (you can microwave it for a few seconds).
  • Don’t overmix the egg whites with the yolk mixture; fold gently to keep the airiness.
  • For added flavor, consider adding spices or herbs to the mix before baking.

{image_1}

Serving Suggestions

Keto Cloud Bread can be enjoyed in many ways. Try it as a base for your favorite sandwich fillings, use it to scoop up delicious dips, or simply enjoy it warm with a spread of butter or cream cheese. You might even want to use it for mini pizzas topped with cheese and your favorite toppings. The possibilities are endless!

FAQs

Can I store leftover Keto Cloud Bread?

Yes, you can store Keto Cloud Bread in an airtight container in the fridge for up to a week. Just reheat before serving for the best texture.

Can I freeze Keto Cloud Bread?

Absolutely! You can freeze the cloud bread for up to a month. Just make sure to stack them with parchment paper between each layer to prevent sticking.

Can I use other types of cheese instead of cream cheese?

While cream cheese is the recommended option for the best flavor and texture, you can experiment with other soft cheeses, just keep in mind that it might change the flavor and texture slightly.

Keto Cloud Bread is not just a recipe, it’s an experience waiting to happen in your kitchen. So gather your ingredients, and get ready to bake something fluffy and delightful!

Keto Cloud Bread

A delightful low-carb substitute for traditional bread, Keto Cloud Bread is light, fluffy, and perfect for those on a ketogenic diet.

Main Ingredients

  • 3 large large eggs
  • 3 oz cream cheese, softened (Make sure it is softened for easy mixing.)
  • 1/4 tsp cream of tartar
  • a pinch salt

Preparation

  1. Preheat your oven to 300°F (150°C).
  2. In a bowl, beat the egg whites and cream of tartar together until stiff peaks form.
  3. In another bowl, mix the egg yolks, softened cream cheese, and salt until smooth.
  4. Gently fold the egg whites into the egg yolk mixture until well combined.
  5. Line a baking sheet with parchment paper and dollop the mixture onto the sheet in circular shapes (about 2-3 inches wide).
  6. Bake for 25-30 minutes or until the tops are golden brown.
  7. Allow them to cool before enjoying.

For maximum fluffiness, beat the egg whites until stiff peaks form. Avoid overmixing to keep the airiness. You can add spices or herbs for additional flavor.

Bread, Snack
Keto, Low-Carb
bread substitute, Cloud Bread, Keto Cloud Bread, Keto Recipes, low-carb bread

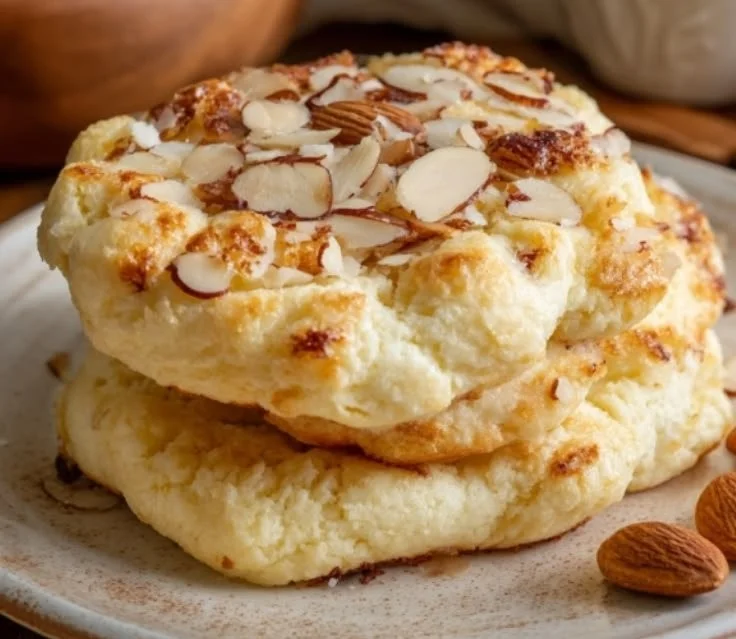
Fluffy Cottage Cheese Cloud Bread

Fluffy cottage cheese cloud bread recipe for low-carb diets

Fluffy Cottage Cheese Cloud Bread is a delightful twist on traditional bread, perfect for those looking for a light and fluffy alternative. This unique bread is made from simple ingredients and comes together surprisingly quickly. With its airy texture and subtle flavor, it’s no wonder that Fluffy Cottage Cheese Cloud Bread has become a favorite among families and friends alike. Whether you are enjoying it as a sandwich base or a side with your meal, this recipe is sure to impress. Who knew cloud-like bread could be so easy and delicious? Let’s dive into the recipe!

Fluffy Cottage Cheese Cloud Bread

How to prepare Fluffy Cottage Cheese Cloud Bread

To make Fluffy Cottage Cheese Cloud Bread, gather your ingredients and follow these easy steps:

  1. Preheat your oven to 300°F (150°C).
  2. In a mixing bowl, combine 1 cup of cottage cheese and 3 large eggs. Blend until smooth.
  3. Add ¼ cup of almond flour, ½ teaspoon of baking powder, and a pinch of salt. Stir until well combined.
  4. Whip the egg whites from another 3 large eggs in a separate bowl until stiff peaks form.
  5. Gently fold the whipped egg whites into the cottage cheese mixture, being careful not to deflate the mixture.
  6. Line a baking sheet with parchment paper and spoon the batter into cloud shapes, about the size of a hamburger patty.
  7. Bake for 25-30 minutes or until they are golden brown on top.
  8. Allow to cool slightly before serving.

{image_2}

Fluffy Cottage Cheese Cloud Bread

Why You’ll Love Fluffy Cottage Cheese Cloud Bread

One of the biggest reasons you’ll love Fluffy Cottage Cheese Cloud Bread is its incredible texture. The lightness makes it a perfect base for various toppings, from fresh avocado and tomato to lean meats and cheeses. Plus, it’s low in carbs, making it suitable for different diets. The protein from the cottage cheese keeps you satisfied without feeling heavy, and the simple ingredients ensure that it can be whipped up quickly. It’s not just a bread alternative; it’s a versatile food option for any meal.

Tips for success

To ensure that your Fluffy Cottage Cheese Cloud Bread turns out perfectly every time, keep these tips in mind:

  • Make sure to whip the egg whites until they reach stiff peaks, which helps create the fluffy texture you want.
  • Gently fold the egg whites into the batter to maintain the airy consistency; don’t stir too vigorously.
  • Experiment with seasonings; you can add herbs or spices to the batter to customize the flavor even more.
  • Avoid opening the oven door while the bread is baking, as this can cause them to deflate.

{image_1}

Serving Suggestions

Fluffy Cottage Cheese Cloud Bread can be enjoyed in many delightful ways. Try it as a sandwich with your favorite deli meats, or use it as a vehicle for spreads like hummus or cream cheese. It also works wonderfully as a side to soups or salads. Some even enjoy it topped with sweet ingredients like jam or nut butter for a delightful breakfast treat.

FAQs

1. Can I store leftover Cloud Bread?

Yes, you can store Fluffy Cottage Cheese Cloud Bread in an airtight container in the fridge for up to a week. You can also freeze them, wrapped individually, for longer storage.

2. Can I substitute ingredients?

Yes, you can try different types of cheese or flours. Just keep in mind that this may change the texture and flavor slightly.

3. Is this recipe gluten-free?

Yes, as long as you use gluten-free almond flour, Fluffy Cottage Cheese Cloud Bread is a gluten-free option that everyone can enjoy!

With its airy texture and delicious flavor, Fluffy Cottage Cheese Cloud Bread is a must-try. Get your ingredients ready and enjoy making this delightful bread yourself!

Fluffy Cottage Cheese Cloud Bread

A light and fluffy alternative to traditional bread, perfect for sandwiches or as a delightful side dish.

Main Ingredients

  • 1 cup cottage cheese (The base for the bread, providing protein and moisture.)
  • 6 large eggs (3 eggs mixed with cottage cheese; 3 egg whites whipped separately.)
  • ¼ cup almond flour (Adds structure and a subtle nutty flavor.)
  • ½ teaspoon baking powder (Helps the bread rise.)
  • 1 pinch salt (Enhances the flavor.)

Preparation

  1. Preheat your oven to 300°F (150°C).
  2. In a mixing bowl, combine 1 cup of cottage cheese and 3 large eggs. Blend until smooth.
  3. Add ¼ cup of almond flour, ½ teaspoon of baking powder, and a pinch of salt. Stir until well combined.
  4. Whip the egg whites from another 3 large eggs in a separate bowl until stiff peaks form.
  5. Gently fold the whipped egg whites into the cottage cheese mixture, being careful not to deflate the mixture.
  6. Line a baking sheet with parchment paper and spoon the batter into cloud shapes, about the size of a hamburger patty.
  7. Bake for 25-30 minutes or until they are golden brown on top.
  8. Allow to cool slightly before serving.

To ensure success, whip egg whites to stiff peaks, fold gently into the batter, experiment with seasonings, and avoid opening the oven door while baking.

Breakfast, Snack
American
Cloud Bread, Cottage Cheese Recipe, Easy Bread Recipe, Gluten-Free Bread, Low Carb Bread

Keto Crunchy Chips

Delicious and crunchy Keto Chips for a low-carb snack option.

If you’re looking for a delicious snack that fits perfectly into your keto lifestyle, these Keto Crunchy Chips are a must-try. They are crispy, flavorful, and satisfy that crunchy craving without the carbs. This recipe is great for parties, movie nights, or just when you’re in the mood for a tasty treat. The appeal of these chips lies not only in their satisfying crunch but also in how easy they are to prepare. You’ll find yourself reaching for these chips again and again, so let’s dive into making a batch yourself!

How to Prepare Keto Crunchy Chips

To make these Keto Crunchy Chips, you will need:

  • 1 cup shredded cheddar cheese
  • 1 cup shredded mozzarella cheese
  • 1 tablespoon garlic powder
  • 1 teaspoon onion powder
  • 1 teaspoon paprika
  • Salt and pepper to taste

Directions:

  1. Preheat your oven to 350°F (175°C).
  2. In a bowl, mix together the cheddar cheese, mozzarella cheese, garlic powder, onion powder, paprika, salt, and pepper.
  3. Line a baking sheet with parchment paper.
  4. Drop spoonfuls of the cheese mixture onto the baking sheet, spacing them about two inches apart.
  5. Flatten the spoonfuls slightly to form small circles.
  6. Bake for about 10-12 minutes or until they are golden brown and crispy.
  7. Let them cool on the baking sheet for a few minutes before transferring to a wire rack.

Keto Crunchy Chips

Why You’ll Love Keto Crunchy Chips

These Keto Crunchy Chips are not only low in carbs but also packed with flavors that everyone will love. The combination of cheddar and mozzarella creates a cheesy delight that pairs well with various dips or can be enjoyed on their own. Plus, they’re super easy to make, so you can whip up a batch anytime you want a snack. Whether you’re on a keto diet or just wanting a tasty treat, these chips won’t disappoint.

Tips for Success

  • Make sure the cheeses are freshly shredded for the best melting and crispy texture.
  • Keep an eye on the chips as they bake, since oven temperatures can vary.
  • Experiment with different spices or herbs to customize the flavor to your liking.

Keto Crunchy Chips

Serving Suggestions

These chips go wonderfully with guacamole, salsa, or your favorite keto-friendly dip. You can also serve them alongside a fresh salad for added crunch. They’re perfect for sharing with friends and family during gatherings, or just for your own late-night snack!

FAQs

Can I use different types of cheese?

Yes, feel free to experiment with other cheeses like provolone or pepper jack for a different flavor profile.

How long do these chips last?

Keto Crunchy Chips are best enjoyed fresh, but you can store any leftovers in an airtight container for a few days. Reheat them in the oven for a few minutes to regain their crunch.

Can I make these chips spicy?

Absolutely! Adding some cayenne pepper or crushed red pepper can give these chips an extra kick that spice lovers will enjoy.

These Keto Crunchy Chips are bound to become your new favorite snack, so gather your ingredients and get ready to enjoy this delightful treat!

Keto Crunchy Chips

These Keto Crunchy Chips are crispy, flavorful, and satisfy your crunchy cravings without the carbs, making them ideal for keto snacks and gatherings.

Cheese Mixture

  • 1 cup shredded cheddar cheese (Freshly shredded for best results)
  • 1 cup shredded mozzarella cheese (Freshly shredded for best results)

Spices

  • 1 tablespoon garlic powder
  • 1 teaspoon onion powder
  • 1 teaspoon paprika
  • Salt and pepper to taste

Preparation

  1. Preheat your oven to 350°F (175°C).
  2. In a bowl, mix together the cheddar cheese, mozzarella cheese, garlic powder, onion powder, paprika, salt, and pepper.
  3. Line a baking sheet with parchment paper.
  4. Drop spoonfuls of the cheese mixture onto the baking sheet, spacing them about two inches apart.
  5. Flatten the spoonfuls slightly to form small circles.

Baking

  1. Bake for about 10-12 minutes or until they are golden brown and crispy.
  2. Let them cool on the baking sheet for a few minutes before transferring to a wire rack.

These chips pair well with guacamole, salsa, or your favorite keto-friendly dip. Store any leftovers in an airtight container for a few days and reheat in the oven to regain crunch.

Appetizer, Snack
American, Keto
Cheese Chips, Crunchy Snack, Gluten-Free Snack, Keto Chips, Low Carb Snack

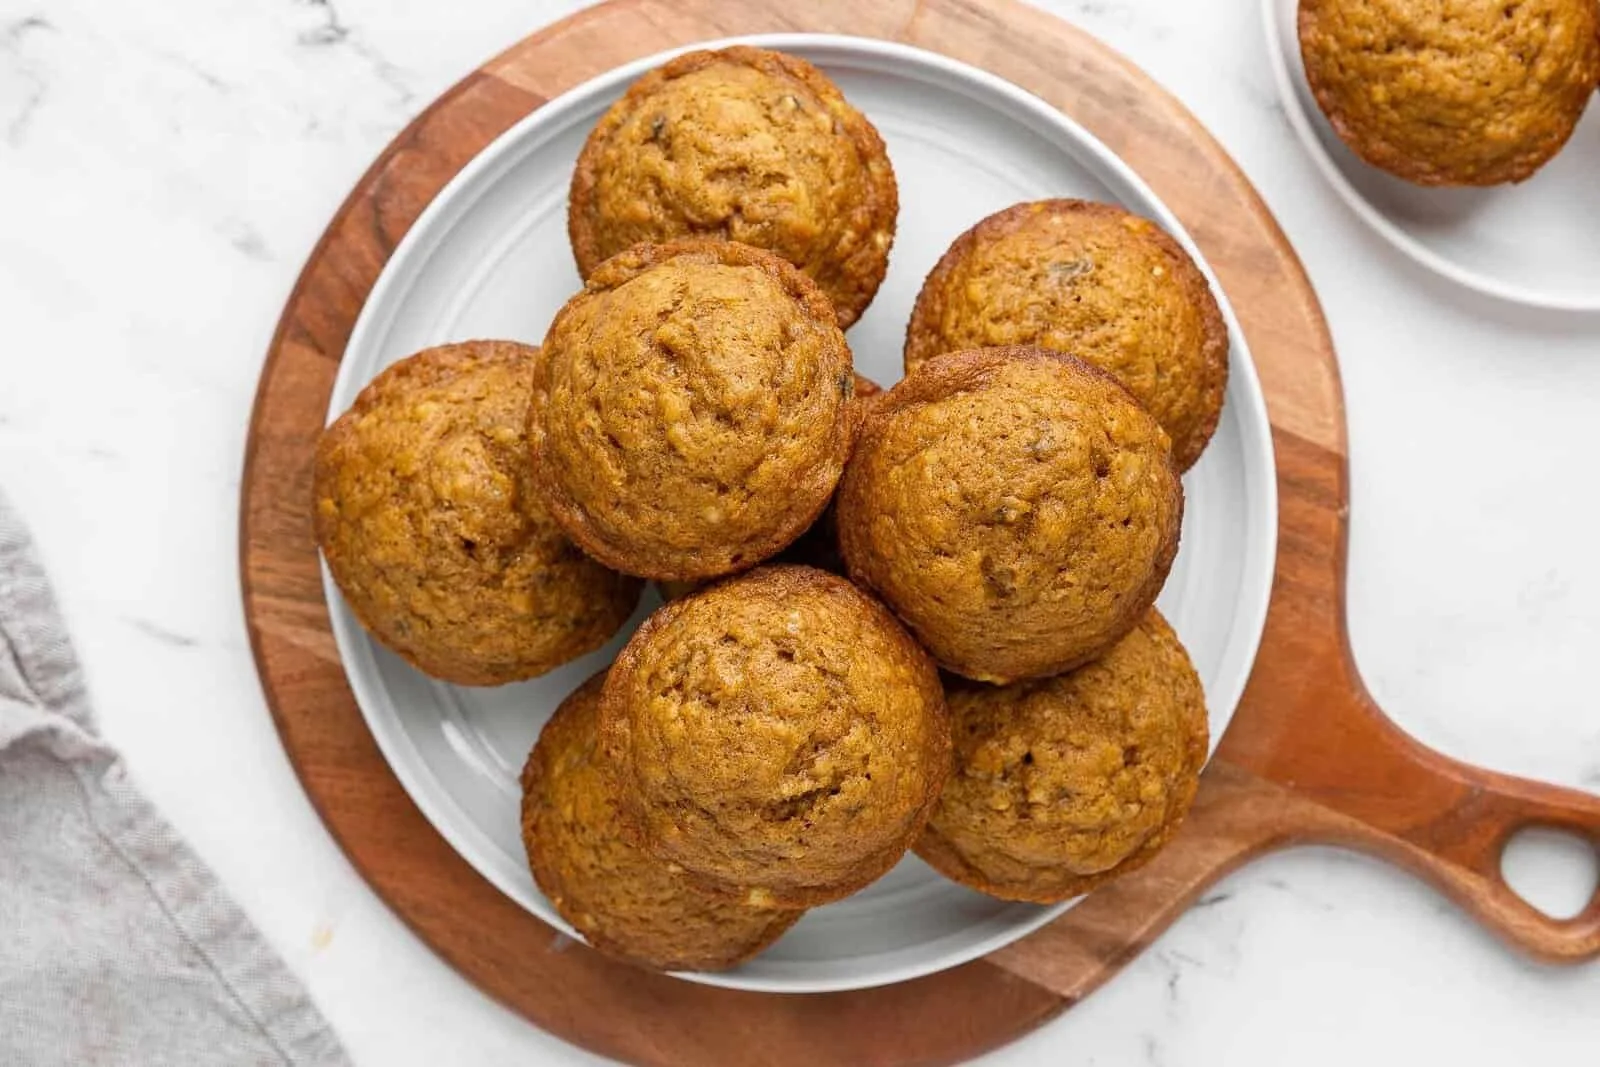
Pumpkin Banana Muffins

Freshly baked Pumpkin Banana Muffins on a wooden table

There’s something cozy about the smell of baked goods filling the kitchen, especially when it comes to Pumpkin Banana Muffins. These delightful muffins bring together the warm, familiar flavors of pumpkin and ripe bananas, creating a tasty treat perfect for breakfast or a snack. They are wonderfully soft, with a hint of sweetness and spices that make them irresistible. Whether you’re enjoying them with a cup of coffee in the morning or savoring one in the afternoon, these muffins are sure to please everyone.

So, get ready to whip up a batch of these delightful Pumpkin Banana Muffins that are not only delicious but also simple to make. You’ll be excited to share these with family and friends, or even keep them all to yourself!

How to prepare Pumpkin Banana Muffins

To start off, gather your ingredients:

Ingredients:

  • 1 cup mashed ripe bananas (about 2-3 bananas)
  • 1 cup pumpkin puree
  • 2 eggs
  • 1/3 cup melted butter
  • 1 cup brown sugar
  • 1 teaspoon vanilla extract
  • 2 cups all-purpose flour
  • 1 teaspoon baking soda
  • 1/2 teaspoon salt
  • 1 teaspoon cinnamon
  • 1/2 teaspoon nutmeg

Directions:

  1. Preheat your oven to 350°F (175°C) and prepare a muffin tin with muffin liners.
  2. In a large bowl, mix the mashed bananas, pumpkin puree, eggs, melted butter, brown sugar, and vanilla extract until combined.
  3. In another bowl, whisk together the flour, baking soda, salt, cinnamon, and nutmeg.
  4. Gradually add the dry ingredients to the wet ingredients, stirring until just combined. Be careful not to overmix.
  5. Spoon the batter into the muffin tins, filling each liner about 2/3 full.
  6. Bake for 20-25 minutes, or until a toothpick inserted in the center comes out clean.
  7. Allow the muffins to cool for a few minutes before transferring them to a wire rack to cool completely.

Pumpkin Banana Muffins

Why You’ll Love Pumpkin Banana Muffins

You’ll fall in love with these muffins from the first bite. The combination of pumpkin and banana gives them a unique flavor that is both moist and fluffy. Plus, they are packed with fiber and nutrients, making them a great choice for a quick breakfast or healthy snack. The warm spices like cinnamon and nutmeg give them a delightful aroma, filling your kitchen with a feeling of home. No wonder they are such a crowd-pleaser!

Tips for success

To ensure your Pumpkin Banana Muffins turn out perfectly every time, consider these helpful tips:

  • Use overripe bananas for extra sweetness and moisture.
  • Don’t overmix the batter, as this can lead to tough muffins.
  • Feel free to add in some nuts or chocolate chips for extra texture and flavor.
  • Store leftover muffins in an airtight container to keep them fresh.

Pumpkin Banana Muffins

Serving Suggestions

These muffins are perfect on their own, but you can also pair them with a spread of nut butter or cream cheese for added richness. They make a delightful addition to a brunch spread or a packed lunch. Serve them warm, with a sprinkle of powdered sugar on top for a touch of sweetness!

FAQs

Can I freeze Pumpkin Banana Muffins?

Yes, these muffins freeze well! Just place them in an airtight container or freezer bag and store them in the freezer. They’ll last for about 2-3 months.

How long do these muffins stay fresh?

Stored in an airtight container at room temperature, they can last about 3-5 days. For extended storage, consider freezing them.

Can I use whole wheat flour instead of all-purpose flour?

Absolutely! Whole wheat flour can be used for a healthier option, just keep in mind it may change the texture a bit.

For another delicious banana-based treat, take a look at these 3-ingredient banana oatmeal muffins! Happy baking.

Pumpkin Banana Muffins

Delightful muffins combining the warm flavors of pumpkin and ripe bananas, perfect for breakfast or a snack.

Wet Ingredients

  • 1 cup mashed ripe bananas (about 2-3 bananas) (Use overripe bananas for extra sweetness and moisture.)
  • 1 cup pumpkin puree
  • 2 pieces eggs
  • 1/3 cup melted butter
  • 1 cup brown sugar
  • 1 teaspoon vanilla extract

Dry Ingredients

  • 2 cups all-purpose flour (Can substitute with whole wheat flour.)
  • 1 teaspoon baking soda
  • 1/2 teaspoon salt
  • 1 teaspoon cinnamon
  • 1/2 teaspoon nutmeg

Preparation

  1. Preheat your oven to 350°F (175°C) and prepare a muffin tin with muffin liners.
  2. In a large bowl, mix the mashed bananas, pumpkin puree, eggs, melted butter, brown sugar, and vanilla extract until combined.
  3. In another bowl, whisk together the flour, baking soda, salt, cinnamon, and nutmeg.
  4. Gradually add the dry ingredients to the wet ingredients, stirring until just combined. Be careful not to overmix.
  5. Spoon the batter into the muffin tins, filling each liner about 2/3 full.

Baking

  1. Bake for 20-25 minutes, or until a toothpick inserted in the center comes out clean.
  2. Allow the muffins to cool for a few minutes before transferring them to a wire rack to cool completely.

These muffins are best enjoyed fresh but can be stored in an airtight container. They freeze well for up to 2-3 months. For extra texture and flavor, consider adding nuts or chocolate chips.

Breakfast, Snack
American
Baked Goods, Banana Muffins, fall recipes, Healthy Snacks, Pumpkin Muffins

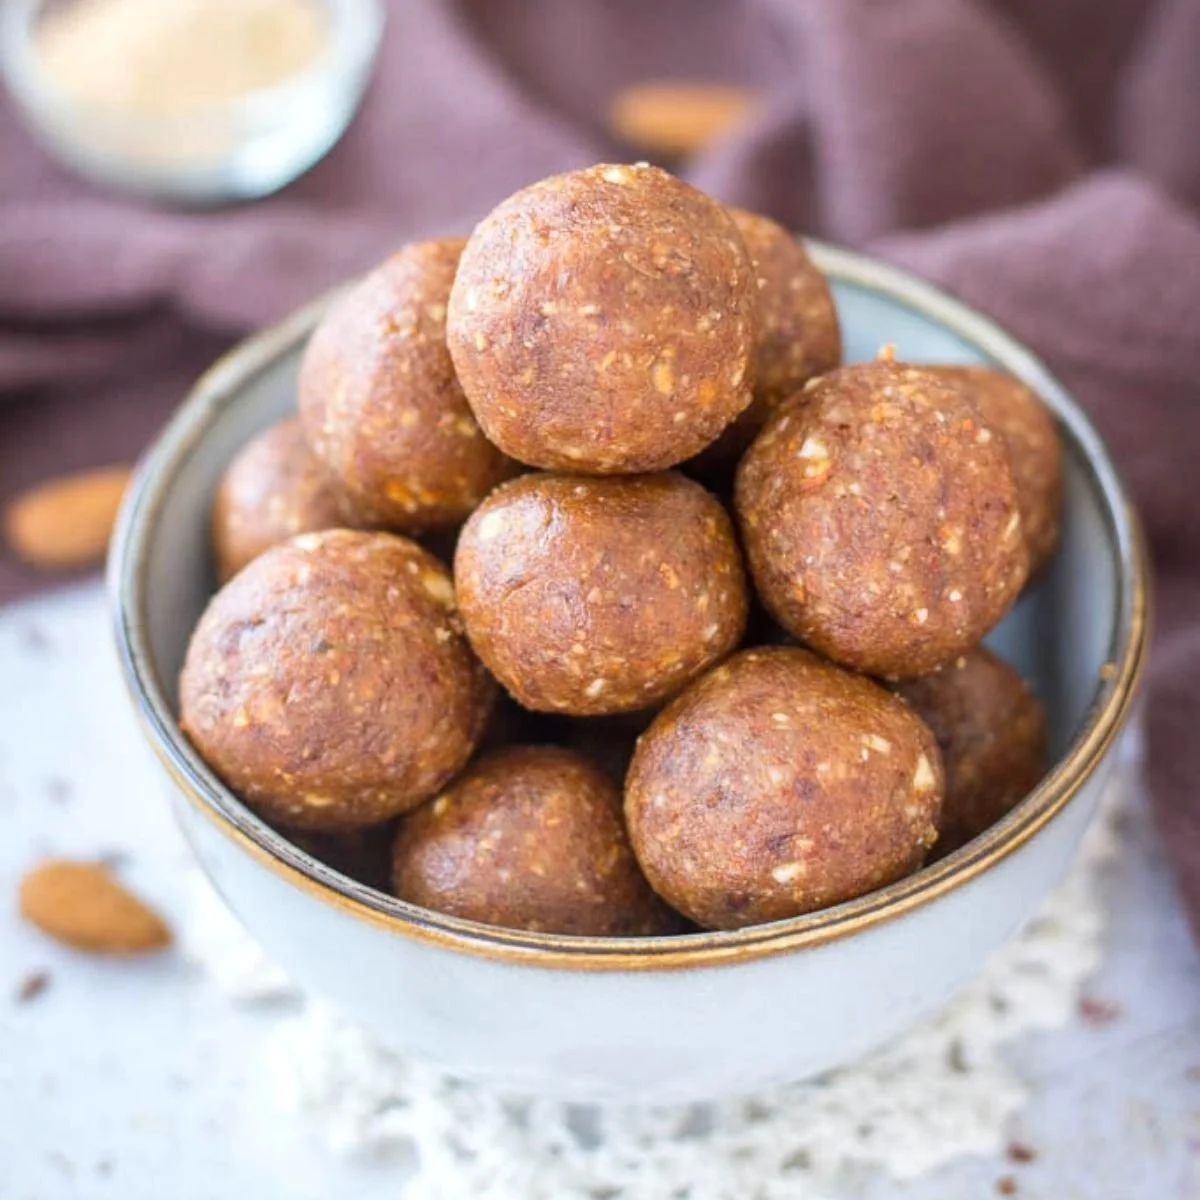
Almond Butter Energy Balls

Homemade almond butter energy balls arranged on a wooden platter.

Almond Butter Energy Balls are the perfect snack for anyone on the go. They are easy to make delicious, and packed with nutrients. These little bites are great for a post-workout snack or a midday pick-me-up. The sweet, nutty flavor of almond butter combined with oats and honey creates a delightful treat that is sure to satisfy your cravings. Plus, they are no-bake, making them super simple to whip up.

Ingredients

  • 1 cup almond butter
  • 1 cup rolled oats
  • 1/4 cup honey
  • 1/4 cup mini chocolate chips (optional)
  • 1/4 cup chopped nuts or seeds (optional)
  • 1 tsp vanilla extract
  • A pinch of salt

Directions

  1. In a large bowl, mix together almond butter, rolled oats, honey, and vanilla extract until well combined.
  2. If using, fold in chocolate chips and chopped nuts or seeds for added texture and taste.
  3. Once the mixture is evenly blended, use your hands to form small balls, about 1 inch in diameter.
  4. Place the energy balls on a baking sheet lined with parchment paper.
  5. Refrigerate for about 30 minutes to firm them up.
  6. Enjoy them as a snack throughout the week, storing any leftovers in an airtight container in the fridge.

Almond Butter Energy Balls

Why You’ll Love Almond Butter Energy Balls

These energy balls are a crowd-pleaser, thanks to their delightful taste and simple preparation. Everyone will love the velvety almond butter combined with the hearty oats, creating a satisfying snack option. They’re not just delicious, but also nutritious, packed with good fats and protein to keep your energy levels up. Perfect for any time of the day, these energy balls are your new go-to treat. Plus, they’re fun to make with family or friends, making it an enjoyable activity in the kitchen.

Tips for success

  • Measure your ingredients accurately for the best results.
  • Use natural almond butter without added sugars or oils for a healthier option.
  • Feel free to customize by adding your favorite mix-ins, such as dried fruits or seeds.
  • If the mixture is too dry, add a touch more almond butter or honey to achieve the right consistency.
  • Keep them stored in the fridge for a cool, refreshing snack anytime.

Serving Suggestions

Serve these energy balls in a bowl on your kitchen table for a quick snack or pack them in your bag for a hike or picnic. They also make a great addition to school lunches or can be served as after-school snacks for the kids. For a tasty dessert, try them alongside some fresh fruit or yogurt.

Almond Butter Energy Balls

FAQs

How long do almond butter energy balls last?

These energy balls will stay fresh in the fridge for about a week. Make sure to store them in an airtight container to maintain their texture and flavor.

Can I freeze almond butter energy balls?

Yes, you can freeze these energy balls! Just store them in a freezer-safe bag or container, and they will last for up to three months. Be sure to let them thaw for a few minutes before eating.

What if I don’t have almond butter?

If almond butter is not available, peanut butter can be a great substitute. The flavor will be different, but still delicious!

These Almond Butter Energy Balls are sure to become a favorite in your home. They’re tasty, healthy, and extremely easy to make, so what are you waiting for? Get started on this great recipe and enjoy a wholesome snack that everyone will love! For another tasty treat, check out the delightful Butterfinger Balls that are perfect for any occasion.

Almond Butter Energy Balls

Almond Butter Energy Balls are an easy, no-bake snack packed with nutrients, perfect for post-workout or a midday pick-me-up.

Main ingredients

  • 1 cup almond butter (Use natural almond butter without added sugars or oils.)
  • 1 cup rolled oats
  • 1/4 cup honey (Adjust based on desired sweetness.)
  • 1/4 cup mini chocolate chips (Optional for added sweetness.)
  • 1/4 cup chopped nuts or seeds (Optional for extra texture.)
  • 1 tsp vanilla extract
  • 1 pinch salt

Preparation

  1. In a large bowl, mix together almond butter, rolled oats, honey, and vanilla extract until well combined.
  2. If using, fold in chocolate chips and chopped nuts or seeds for added texture and taste.
  3. Once the mixture is evenly blended, use your hands to form small balls, about 1 inch in diameter.
  4. Place the energy balls on a baking sheet lined with parchment paper.
  5. Refrigerate for about 30 minutes to firm them up.

These energy balls can be customized with your favorite mix-ins such as dried fruits or seeds. Store leftovers in an airtight container in the fridge for up to a week.

Dessert, Snack
American
Almond Butter, Energy Balls, Healthy Snacks, No-Bake, quick recipes

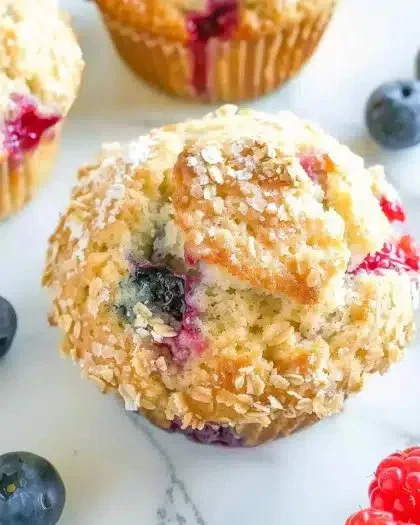
Mixed Berry Muffins

Freshly baked mixed berry muffins with a variety of berries on a wooden table

There’s something incredibly comforting about the smell of fresh muffins baking in the oven. Mixed Berry Muffins are a delightful treat that combines the sweetness of ripe berries with a soft, fluffy texture. These muffins are not only easy to make, but they are also a big hit with friends and family. Who can resist fluffy, buttery muffins bursting with juicy blueberries, raspberries, and strawberries? Whether enjoyed for breakfast or as a sweet snack, these muffins are sure to please. Get ready to whip up a batch to warm your kitchen and heart!

How to prepare Mixed Berry Muffins

To make these delicious muffins, gather the following ingredients:

Ingredients:

  • 2 cups all-purpose flour
  • 1 cup sugar
  • 1 tablespoon baking powder
  • 1/2 teaspoon salt
  • 1/2 cup unsalted butter, melted
  • 2/3 cup milk
  • 2 large eggs
  • 1 teaspoon vanilla extract
  • 1 cup mixed berries (fresh or frozen)

Directions:

  1. Preheat your oven to 375°F (190°C). Line a muffin tin with paper liners or grease it with butter.
  2. In a large bowl, mix together the flour, sugar, baking powder, and salt.
  3. In another bowl, whisk together the melted butter, milk, eggs, and vanilla extract.
  4. Pour the wet ingredients into the dry ingredients and stir until just combined. Do not overmix.
  5. Gently fold in the mixed berries until evenly distributed.
  6. Divide the batter into the prepared muffin tin, filling each cup about 2/3 full.
  7. Bake for 20-25 minutes, or until a toothpick inserted in the center comes out clean.
  8. Let the muffins cool in the pan for a few minutes before transferring them to a wire rack.

Bakery Style Mixed Berry Muffins

Why You’ll Love Mixed Berry Muffins

These muffins are a fantastic choice for any occasion! Their tender crumb makes them perfectly moist, while the sweet bursts of berries add a delightful flavor. They are incredibly versatile too. You can enjoy them on their own, or pair them with a cup of coffee or tea. These muffins also make for a great breakfast on busy mornings or as a sweet treat during the day. You’ll find yourself reaching for one just because they look and smell so good!

Tips for success

  • Use Fresh Ingredients: Using fresh berries will give your muffins an amazing flavor. If fresh berries are not available, frozen berries can work well too. Just make sure to toss them in a bit of flour to avoid sinking to the bottom.
  • Don’t Overmix: Be gentle while mixing the wet and dry ingredients. Overmixing can lead to dense muffins, which is not what we want!
  • Check for Doneness: Ovens can vary, so check your muffins a few minutes before the time is up. A toothpick inserted should come out clean or with a few crumbs attached.

Serving Suggestions

Mixed Berry Muffins are delicious on their own, but you can elevate them further by serving them with a smear of butter or a drizzle of honey. For special occasions, try serving them with whipped cream or a scoop of vanilla ice cream. Enjoy them warm for the best experience, or store them in an airtight container for later!

FAQs

Can I use different fruits?

Absolutely! You can mix and match whatever berries or fruits you have on hand, like blackberries or even diced apples.

Can I make these muffins gluten-free?

Yes, you can substitute all-purpose flour with a gluten-free flour blend. Just make sure to check that your baking powder is gluten-free too.

How do I store leftover muffins?

To keep your muffins fresh, store them in an airtight container at room temperature for up to 3 days. You can also freeze them for up to a month, perfect for a quick snack later!

Mixed Berry Muffins are not just a treat, but a lovely experience you can create right in your kitchen. Whip up a batch, smell the warm aromas, and enjoy the delightful taste that brings everyone together. For more tips and variations on baking with berries, check out this helpful guide on Bakery Style Mixed Berry Muffins | Frozen Berries – OwlbBaking.com! Happy baking!

Mixed Berry Muffins

These delightful Mixed Berry Muffins combine the sweetness of ripe berries with a soft, fluffy texture, making them a fantastic treat for any occasion.

Dry Ingredients

  • 2 cups all-purpose flour
  • 1 cup sugar
  • 1 tablespoon baking powder
  • 1/2 teaspoon salt

Wet Ingredients

  • 1/2 cup unsalted butter, melted
  • 2/3 cup milk
  • 2 large eggs
  • 1 teaspoon vanilla extract

Fruits

  • 1 cup mixed berries (fresh or frozen)

Preparation

  1. Preheat your oven to 375°F (190°C). Line a muffin tin with paper liners or grease it with butter.
  2. In a large bowl, mix together the flour, sugar, baking powder, and salt.
  3. In another bowl, whisk together the melted butter, milk, eggs, and vanilla extract.
  4. Pour the wet ingredients into the dry ingredients and stir until just combined. Do not overmix.
  5. Gently fold in the mixed berries until evenly distributed.
  6. Divide the batter into the prepared muffin tin, filling each cup about 2/3 full.

Baking

  1. Bake for 20-25 minutes, or until a toothpick inserted in the center comes out clean.
  2. Let the muffins cool in the pan for a few minutes before transferring them to a wire rack.

Use fresh berries for the best flavor. Tossing frozen berries in flour can help prevent them from sinking. Don’t overmix to avoid dense muffins.

Breakfast, Snack
American
Baking, Breakfast Muffins, Delicious Berries, Mixed Berry Muffins, Muffins