Artisan Sourdough Garlic Parmesan Bread (Roasted Garlic Twist)

Everyone loves a good loaf of bread, especially when it’s filled with flavors that make your taste buds dance. Artisan Sourdough Garlic Parmesan Bread, also known as Roasted Garlic Twist, fits this bill perfectly. With its crispy crust, soft interior, and delicious blend of roasted garlic and parmesan, it’s a true crowd-pleaser. Whether served alongside a warm bowl of soup, as a tasty snack, or as the main star at a gathering, this delightful bread is sure to impress. As you pull the warm loaf apart and breathe in that savory aroma, you’ll wonder why you waited so long to try it. So, grab your apron, and let’s make this bread a reality!

How to prepare Artisan Sourdough Garlic Parmesan Bread (Roasted Garlic Twist)

  1. Ingredients Needed:
  • 3 cups of all-purpose flour
  • 1 cup of active sourdough starter
  • 1 1/2 teaspoons of salt
  • 1 cup of warm water
  • 1 whole bulb of garlic (roasted)
  • 1/2 cup of freshly grated parmesan cheese
  • 1 tablespoon of olive oil
  • Optional: fresh herbs for extra flavor
  1. Directions:
  2. In a large mixing bowl, combine the flour and salt. Mix well.
  3. Add the sourdough starter and warm water to the flour mixture. Stir until you have a sticky dough.
  4. Fold in the roasted garlic and parmesan cheese, ensuring even distribution.
  5. Cover the dough with a kitchen towel and let it rest for 4-6 hours at room temperature, or until it has doubled in size.
  6. Once risen, turn the dough onto a floured surface and knead it gently for a few minutes.
  7. Shape the dough into a braid or twist and place it on a baking sheet lined with parchment paper.
  8. Let the dough rise again for about 1-2 hours.
  9. Preheat your oven to 450°F (230°C).
  10. Brush the top of the dough with olive oil and sprinkle some extra parmesan if desired.
  11. Bake for 25-30 minutes, or until the bread is golden brown and sounds hollow when tapped on the bottom.
  12. Let it cool slightly before slicing. Enjoy your delicious Artisan Sourdough Garlic Parmesan Bread!

Artisan Sourdough Garlic Parmesan Bread (Roasted Garlic Twist)

Why You’ll Love Artisan Sourdough Garlic Parmesan Bread (Roasted Garlic Twist)

This Artisan Sourdough Garlic Parmesan Bread is more than just a side dish; it’s a celebration of flavors. The perfect balance of crispy crust and soft garlic-infused interior makes every bite irresistible. Plus, using a sourdough starter adds a tangy depth that enhances the overall taste. The combination of roasted garlic and parmesan will have everyone coming back for seconds (or thirds!). It’s simple to make yet feels special, perfect for any occasion.

Tips for success

  • Make sure your sourdough starter is active for the best rise and flavor.
  • Feel free to experiment with additional herbs, like rosemary or thyme, for an extra flavor boost.
  • If you’re short on time, you can let the dough rise in the refrigerator overnight.
  • Don’t skip the brushing with olive oil before baking; it helps create that beautiful golden crust.

Artisan Sourdough Garlic Parmesan Bread (Roasted Garlic Twist)

Serving Suggestions

This delicious Artisan Sourdough Garlic Parmesan Bread pairs well with soups, salads, or can be enjoyed on its own with some butter. You can also slice it and make a fantastic sandwich filled with your favorite ingredients. For a tasty snack, serve it with a selection of cheeses and olives.

FAQs

  1. Can I use store-bought sourdough starter?
  2. Yes, you can use store-bought sourdough starter. Just ensure it’s active before use.
  3. What can I do if I don’t have roasted garlic?
  4. If you don’t have roasted garlic, you can sauté fresh garlic lightly in olive oil until soft and fragrant.
  5. How do I store the leftover bread?
  6. Store the cool bread in an airtight container or plastic bag at room temperature for up to three days. For longer storage, slice it and freeze.

Now that you have the recipe, there’s no reason not to dive into the world of homemade bread. Happy baking!

Artisan Sourdough Garlic Parmesan Bread

This delicious bread features a crispy crust and a soft, garlic-infused interior, making it a perfect accompaniment to meals or a delightful snack.

For the bread

  • 3 cups all-purpose flour
  • 1 cup active sourdough starter
  • 1.5 teaspoons salt
  • 1 cup warm water
  • 1 whole bulb garlic (roasted)
  • 0.5 cup freshly grated parmesan cheese
  • 1 tablespoon olive oil
  • to taste fresh herbs (optional) (For extra flavor.)

Preparation

  1. In a large mixing bowl, combine the flour and salt. Mix well.
  2. Add the sourdough starter and warm water to the flour mixture. Stir until you have a sticky dough.
  3. Fold in the roasted garlic and parmesan cheese, ensuring even distribution.
  4. Cover the dough with a kitchen towel and let it rest for 4-6 hours at room temperature, or until it has doubled in size.
  5. Once risen, turn the dough onto a floured surface and knead it gently for a few minutes.
  6. Shape the dough into a braid or twist and place it on a baking sheet lined with parchment paper.
  7. Let the dough rise again for about 1-2 hours.

Baking

  1. Preheat your oven to 450°F (230°C).
  2. Brush the top of the dough with olive oil and sprinkle some extra parmesan if desired.
  3. Bake for 25-30 minutes, or until the bread is golden brown and sounds hollow when tapped on the bottom.
  4. Let it cool slightly before slicing.

Make sure your sourdough starter is active for the best rise and flavor. Feel free to experiment with herbs like rosemary or thyme for added flavor. If short on time, the dough can rise in the refrigerator overnight. Brushing with olive oil is essential for a beautiful crust.
Baking, Side Dish
Italian
Artisan Bread, Garlic Bread, Homemade Bread, Parmesan Bread, Sourdough Bread

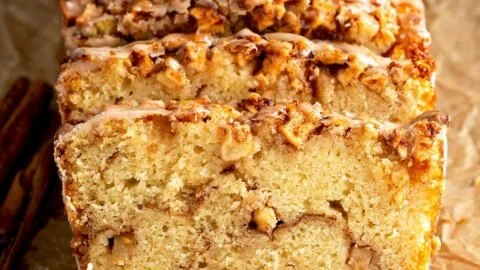
Cinnamon Sourdough Bread

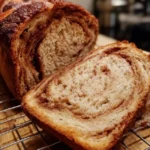
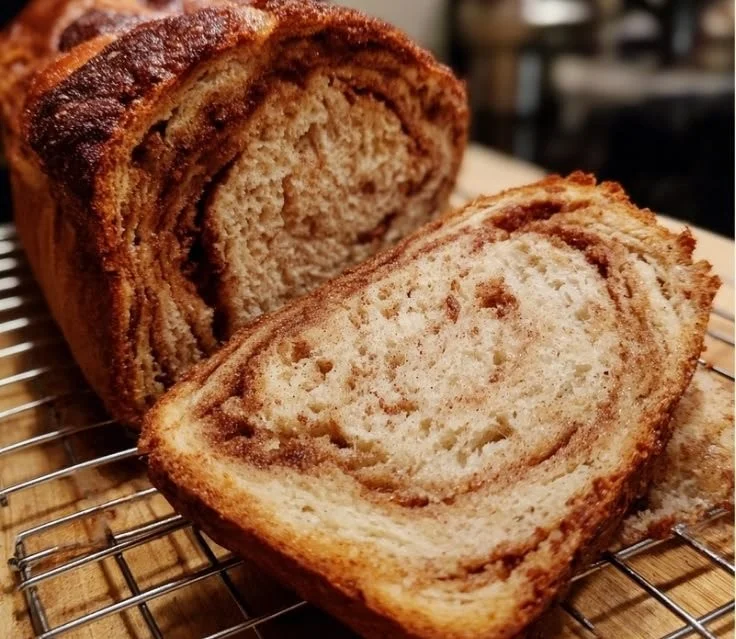
Loaf of freshly baked cinnamon sourdough bread with a golden crust

Cinnamon Sourdough Bread is a delightful combination of warm spices and tangy sourdough. Imagine a loaf that is both soft and crusty, with the sweet aroma of cinnamon filling your kitchen. This bread is perfect for breakfast, a snack, or even dessert. Its unique flavor makes it a true crowd-pleaser, inviting everyone to gather around and enjoy a slice. If you’re looking to impress family and friends or simply want to treat yourself, this recipe is sure to do the trick. Let’s dive into how to prepare this delicious bread that will have everyone coming back for more!

Cinnamon Sourdough Bread

Ingredients

  • 2 cups active sourdough starter
  • 1 cup warm water
  • 4 cups bread flour
  • 1/4 cup sugar
  • 1 tablespoon salt
  • 2 teaspoons ground cinnamon
  • 1/4 cup melted butter (for brushing and enriching the dough)

Directions

  1. In a large bowl, combine the active sourdough starter and warm water. Mix until well blended.
  2. Add bread flour, sugar, salt, and ground cinnamon to the mixture. Stir until the dough starts to come together.
  3. Knead the dough on a floured surface for about 10 minutes until it is smooth and elastic.
  4. Place the dough in a greased bowl, cover it with a damp cloth, and let it rise for about 4 hours or until doubled in size.
  5. Once the dough has risen, punch it down and roll it out into a rectangle.
  6. Brush the rolled dough with melted butter and sprinkle with cinnamon and sugar mixture (mix cinnamon and sugar together beforehand).
  7. Roll the dough tightly to form a loaf and tuck the ends under. Place it in a greased loaf pan.
  8. Cover the loaf with a cloth and let it rise again for about 2 hours, or until it doubles in size.
  9. Preheat your oven to 375°F (190°C). Bake the loaf for 30-35 minutes, or until it is golden brown and sounds hollow when tapped.
  10. Let the bread cool on a wire rack before slicing. Enjoy warm with butter or on its own!

{image_2}

Why You’ll Love Cinnamon Sourdough Bread

Cinnamon Sourdough Bread not only fills your home with a comforting aroma but also creates the kind of cozy atmosphere that invites conversations and togetherness. The delightful blend of sourdough’s tanginess with cinnamon’s sweetness creates a balance that is both satisfying and unique. This bread is incredibly versatile; serve it fresh out of the oven, toast it for breakfast, or even use leftovers for incredible French toast. With every bite, you’ll experience the joy of homemade bread that’s sure to bring a smile to everyone’s face.

Cinnamon Sourdough Bread

Tips for success

  • Make sure your sourdough starter is active and bubbly. Feed it a few hours before you start the recipe to ensure it’s ready to go.
  • Knead the dough well for a good texture. A smooth and elastic dough will give you that perfect crust.

  • Don’t rush the rising times. Allowing your dough enough time to rise will improve flavor and texture.
  • You can add more cinnamon or even nuts for extra flavor. Feel free to get creative!

{image_1}

Serving Suggestions

Cinnamon Sourdough Bread is delicious on its own but serving it with a pat of butter and a drizzle of honey can elevate it even more. For breakfast, enjoy it toasted alongside a cup of coffee or tea. Additionally, it makes for fantastic sandwiches, especially with cream cheese or your favorite spread. Pair it with maple syrup for a delightful twist, turning it into a perfect brunch dish.

FAQs

Can I use regular yeast instead of sourdough starter?

Yes, you can substitute the sourdough starter with active dry yeast. However, the flavor will differ, and it won’t have that signature sourdough tang.

How should I store the bread?

Keep the bread in an airtight bag at room temperature for up to 3 days. You can also freeze leftovers by wrapping them tightly in plastic wrap and placing them in a freezer bag.

Can I make this recipe in advance?

Absolutely! You can prepare the dough, shape it into a loaf, and let it rise in the refrigerator overnight. Just take it out to allow it to come to room temperature before baking.

Get ready to enjoy a slice of homemade goodness that warms the heart and the home!

Cinnamon Sourdough Bread

A delightful combination of warm spices and tangy sourdough, this bread is soft, crusty, and perfect for any occasion.

Dough Ingredients

  • 2 cups active sourdough starter (Ensure the starter is active and bubbly.)
  • 1 cup warm water (Water should be comfortably warm, not hot.)
  • 4 cups bread flour (Use a high-protein bread flour for best results.)
  • 1/4 cup sugar (Regular granulated sugar works well.)
  • 1 tablespoon salt (Use kosher or sea salt.)
  • 2 teaspoons ground cinnamon (Add more for a stronger flavor, if desired.)
  • 1/4 cup melted butter (For brushing and enriching the dough.)

Preparation

  1. In a large bowl, combine the active sourdough starter and warm water. Mix until well blended.
  2. Add bread flour, sugar, salt, and ground cinnamon to the mixture. Stir until the dough starts to come together.
  3. Knead the dough on a floured surface for about 10 minutes until it is smooth and elastic.
  4. Place the dough in a greased bowl, cover it with a damp cloth, and let it rise for about 4 hours or until doubled in size.

Shaping

  1. Once the dough has risen, punch it down and roll it out into a rectangle.
  2. Brush the rolled dough with melted butter and sprinkle with cinnamon and sugar mixture.
  3. Roll the dough tightly to form a loaf and tuck the ends under. Place it in a greased loaf pan.
  4. Cover the loaf with a cloth and let it rise again for about 2 hours, or until it doubles in size.

Baking

  1. Preheat your oven to 375°F (190°C).
  2. Bake the loaf for 30-35 minutes, or until it is golden brown and sounds hollow when tapped.
  3. Let the bread cool on a wire rack before slicing.

Serve warm with butter, or toast for breakfast. Can also be used for French toast. Store in an airtight bag at room temperature for up to 3 days.

Breakfast, Dessert, Snack
American
Baking, Cinnamon Sourdough Bread, Homemade Bread, Sourdough Recipe

Irresistible Rhubarb Bread

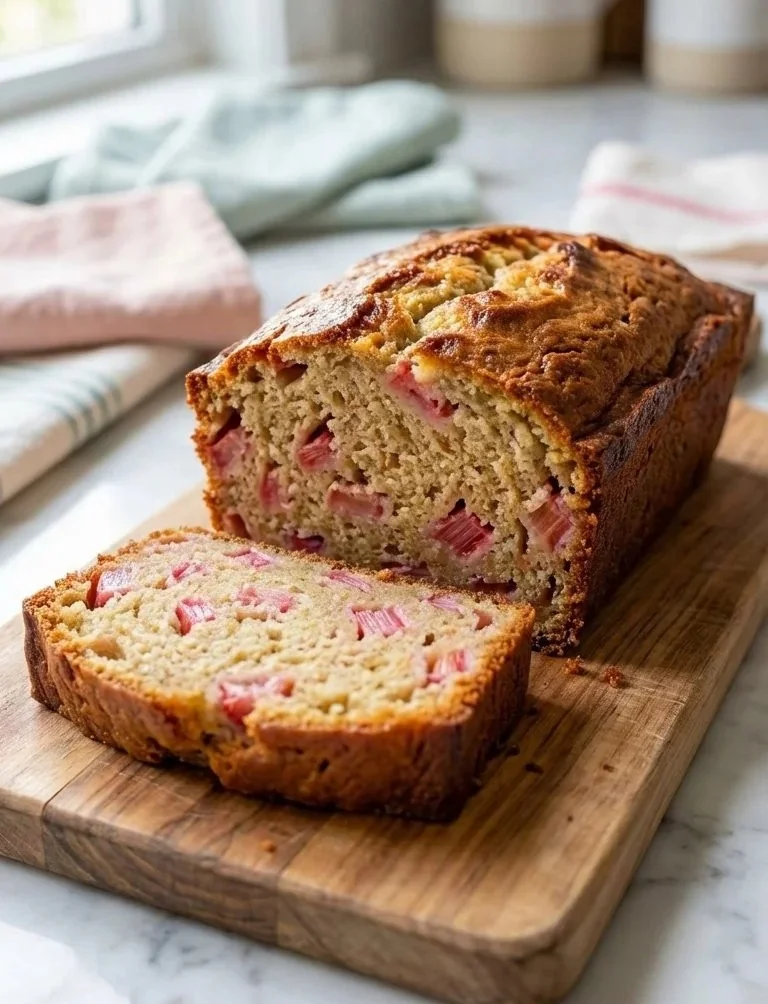
Irresistible rhubarb bread baked golden brown, garnished with fresh rhubarb.

Rhubarb is one of those unique ingredients that can add a delightful twist to your baking. The tartness of rhubarb blends beautifully with sweetness, creating a classic balance that many love. One such treat that captures this harmony perfectly is the Irresistible Rhubarb Bread. This bread is not just moist and tender, but it also carries a burst of fruity flavor in each bite. It’s perfect for breakfast, a snack, or even a dessert. Once you take a slice, you’ll find it hard to stop at just one! Let’s dive into this crowd-pleaser you’ll want to bake for friends and family.

How to prepare Irresistible Rhubarb Bread

To make this delicious bread, gather your ingredients and follow the simple steps below.

  1. Preheat your oven to 350°F (175°C).
  2. In a mixing bowl, combine sugar, eggs, and oil. Stir until well blended.
  3. Gradually add in flour, baking soda, and salt. Mix until just combined.
  4. Gently fold in chopped rhubarb and nuts if you are using them.
  5. Pour the mixture into a greased loaf pan.
  6. Bake for 50-60 minutes, or until a toothpick comes out clean.

Irresistible Rhubarb Bread

Why You’ll Love Irresistible Rhubarb Bread

There are so many reasons to love this bread! It is not only easy to make but also offers a lovely contrast between sweet and tart. The rhubarb gives it a refreshing zing, while the texture is soft and satisfying. It’s a wonderful way to enjoy rhubarb, especially if you are exploring how to use this versatile ingredient creatively. Plus, it makes your kitchen smell amazing as it bakes!

Tips for success

To ensure that your Irresistible Rhubarb Bread turns out perfectly, here are a few helpful tips:

  • Make sure to chop the rhubarb into small, even pieces to distribute the flavor well throughout the bread.
  • For added sweetness, you can sprinkle some sugar on top before baking.
  • Keep an eye on your baking time; every oven is different! Check for doneness a little early to avoid overbaking.
  • If you’d like to experiment with flavors, consider adding some cinnamon or lemon zest to the batter.

Irresistible Rhubarb Bread

Serving Suggestions

This bread can be enjoyed in many ways! Slice it and serve it plain, or spread a little butter on top for good measure. You can also pair it with a cup of tea or coffee for a delightful afternoon snack. For a creative twist, consider using it as a base for French toast. The options are endless!

FAQs

Can I use frozen rhubarb for this recipe?

Yes, you can absolutely use frozen rhubarb! Just make sure to thaw it and drain any excess moisture before adding it to the batter.

How should I store leftover bread?

Store your Irresistible Rhubarb Bread in an airtight container at room temperature for up to three days. If you want to keep it longer, wrap it well and freeze it.

Can I add other fruits to this recipe?

Definitely! Feel free to mix in some strawberries or blueberries along with the rhubarb for a fruity twist.

Now that you’re equipped with the recipe and tips, it’s time to grab that rhubarb and bake a loaf of this delicious bread. Trust us, you’ll be making it again and again! If you’re interested in trying out other easy baking ideas, check out this simple cottage cheese bread recipe. Happy baking!

Irresistible Rhubarb Bread

A delightful bread that combines the tartness of rhubarb with sweetness, perfect for breakfast, snacks, or dessert.

For the bread

  • 1 cup sugar
  • 2 large eggs
  • 1/2 cup oil (Can use vegetable or canola oil.)
  • 2 cups all-purpose flour
  • 1 teaspoon baking soda
  • 1/2 teaspoon salt
  • 2 cups chopped rhubarb (Chop into small, even pieces for best flavor distribution.)
  • 1/2 cup chopped nuts (Optional.)

Preparation

  1. Preheat your oven to 350°F (175°C).
  2. In a mixing bowl, combine sugar, eggs, and oil. Stir until well blended.
  3. Gradually add in flour, baking soda, and salt. Mix until just combined.
  4. Gently fold in chopped rhubarb and nuts if you are using them.
  5. Pour the mixture into a greased loaf pan.

Baking

  1. Bake for 50-60 minutes, or until a toothpick comes out clean.

For added sweetness, you can sprinkle some sugar on top before baking. Check for doneness a little early to avoid overbaking. Try adding cinnamon or lemon zest for extra flavor.

Breakfast, Dessert, Snack
American
Baking, Easy Recipes, Irresistible Bread, Quick Bread, Rhubarb Bread

Peach Bread

Freshly baked peach bread with slices and peaches on a rustic table

Peach Bread is a delightful treat that combines the sweetness of ripe peaches with the comforting texture of freshly baked bread. This recipe is not just a simple quick bread, it’s a crowd-pleaser that brings smiles to faces and warmth to hearts. Imagine biting into a slice filled with chunks of juicy peaches, which are perfectly complemented by hints of cinnamon and vanilla. It’s a wonderful way to use fresh summer peaches and a perfect breakfast or snack option that everyone in the family will enjoy. So grab your ingredients and let’s make some Peach Bread!

How to prepare Peach Bread

Preparing Peach Bread is a breeze! Here’s what you need to do to create this sweet and fruity loaf.

  1. Preheat your oven to 350°F (175°C).
  2. In a mixing bowl, combine the dry ingredients: flour, sugar, baking powder, and cinnamon.
  3. In another bowl, mix together the wet ingredients: mashed bananas, melted butter, eggs, and vanilla extract.
  4. Gently fold the wet mixture into the dry ingredients until just combined.
  5. Stir in diced peaches, ensuring they’re well distributed.
  6. Pour the batter into a greased loaf pan, smoothing the top.
  7. Bake for about 50-60 minutes or until a toothpick comes out clean.
  8. Allow it to cool in the pan for a few minutes before transferring to a wire rack to cool completely.

Peach Bread

Why You’ll Love Peach Bread

Peach Bread is great for so many reasons. It’s simple, scrumptious, and versatile! You can enjoy it for breakfast, as a snack during the day, or even as a dessert. The juicy peach pieces leave you feeling refreshed, making every bite a joy. Plus, with the added cinnamon flavor, it’s almost like enjoying a piece of summer in every slice!

Tips for success

To make sure your Peach Bread turns out perfect, keep these tips in mind:

  1. Use ripe peaches for the best sweetness and flavor.
  2. Don’t overmix the batter, it’s okay if there are a few lumps!
  3. Adjust the baking time according to your oven, as oven temperatures can vary.
  4. Let the bread cool completely before slicing to get cleaner cuts.

Serving Suggestions

This Peach Bread is delicious on its own, but you can also try spreading a little butter or cream cheese on top for an extra treat. Pair it with fresh fruit or a scoop of vanilla ice cream for a delightful dessert that will impress everyone.

Peach Bread

FAQs

1. Can I use frozen peaches for this recipe?

Yes, you can use frozen peaches! Just make sure to thaw and drain them before adding to the batter.

2. How do I store leftovers?

Store the Peach Bread in an airtight container at room temperature for up to three days. You can also freeze it for longer storage.

3. Can I add nuts or other fruits?

Absolutely! Feel free to mix in some chopped nuts or substitute other fruits like plums or apples for a twist on the original recipe.

Peach Bread is a wonderful way to savor the sweetness of summer peaches while enjoying a freshly baked loaf. For a more detailed recipe, you can check out this Peach Bread Recipe from Tastes of Lizzy T that offers easy steps to create this delicious treat. Enjoy every slice and share the joy with your friends and family!

Peach Bread

A delightful quick bread that combines the sweetness of ripe peaches with hints of cinnamon and vanilla, perfect for breakfast or snacks.

Dry Ingredients

  • 2 cups all-purpose flour
  • 1 cup granulated sugar
  • 2 teaspoons baking powder
  • 1 teaspoon ground cinnamon

Wet Ingredients

  • 2 medium ripe bananas, mashed
  • 1/2 cup unsalted butter, melted
  • 2 large eggs
  • 1 teaspoon vanilla extract

Add-ins

  • 2 cups fresh peaches, diced (Use ripe, fresh peaches for best flavor.)

Preparation

  1. Preheat your oven to 350°F (175°C).
  2. In a mixing bowl, combine the dry ingredients: flour, sugar, baking powder, and cinnamon.
  3. In a separate bowl, mix together the wet ingredients: mashed bananas, melted butter, eggs, and vanilla extract.
  4. Gently fold the wet mixture into the dry ingredients until just combined.
  5. Stir in diced peaches, ensuring they are well distributed.
  6. Pour the batter into a greased loaf pan, smoothing the top.
  7. Bake for about 50-60 minutes or until a toothpick comes out clean.
  8. Allow it to cool in the pan for a few minutes before transferring to a wire rack to cool completely.

For best results, use ripe peaches. Don’t overmix the batter; a few lumps are okay. Adjust baking time based on your oven.

Breakfast, Dessert, Snack
American
Peach Bread, Peach Dessert, Quick Bread, Summer Recipe

No Knead Salt Bread

Loaf of no knead salt bread fresh out of the oven, golden crust and soft interior.

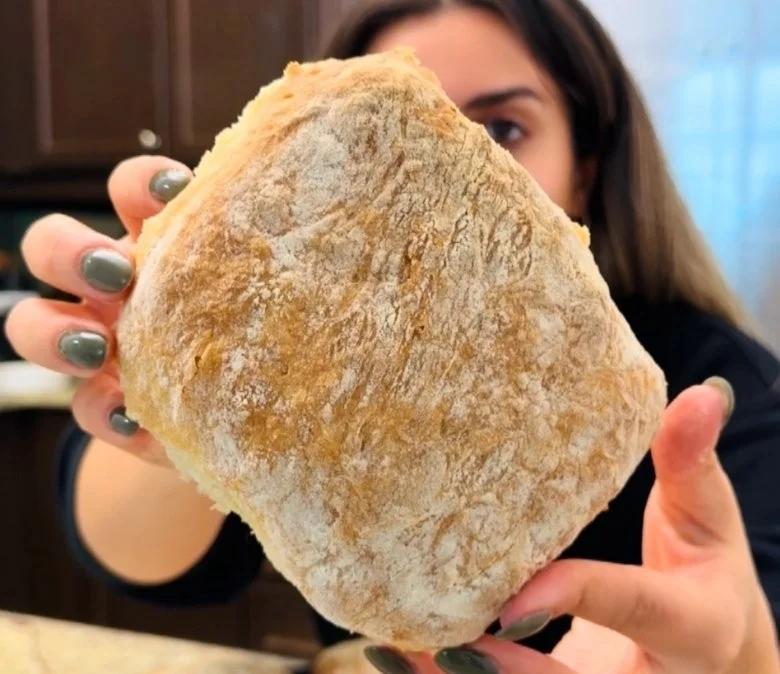
No Knead Salt Bread is a simple, rustic bread that uses time instead of elbow work. You mix flour, water, yeast, and salt, let the dough rest for hours, then bake it in a hot covered pot or on a tray. The long rest builds flavor, the hot container makes a great crust, and you get a loaf that looks and tastes like artisan bread.

This featured recipe is a crowd-pleaser, its crust is crisp, the inside is tender, and the salty edge makes it a great match for butter, soups, and salads. It is also forgiving, so even new bakers can do well. Get your hands ready, because this bread is fun to make and even better to eat.

I love bread that feels like it came from a bakery, but that I made at home with little fuss. No Knead Salt Bread fits that wish, it gives a crunchy crust, a soft center, and a bright, clean salt taste. It is simple to make, needs only a few ingredients, and it makes a warm house feel even cozier. If you like easy breads, you might also enjoy a sweeter treat like Amish apple fritter bread for another simple baking day.

How to prepare No Knead Salt Bread

  1. In a large bowl, stir together 3 cups all-purpose flour, 1 teaspoon instant yeast, and 1 teaspoon salt.
  2. Add 1 1/2 cups warm water, stir with a spoon until a sticky shaggy dough forms.
  3. Cover the bowl with plastic wrap or a clean towel, leave it at room temperature for 12 to 18 hours, the dough will rise and look bubbly.
  4. Dust your work surface with flour, turn the dough out gently, shape it into a round by folding the edges under.
  5. Place the shaped dough on a piece of parchment paper, cover and let rest 30 to 60 minutes.
  6. Preheat your oven to 450 F, place a heavy pot with lid, like a Dutch oven, inside the oven to heat for 30 minutes.
  7. Carefully lift the dough with the parchment into the hot pot, cover with the lid, and bake 30 minutes.
  8. Remove the lid and bake another 10 to 15 minutes until the crust is deep golden.
  9. Lift the loaf out with the parchment, cool on a rack at least 20 minutes before slicing.


No Knead Salt Bread

Why You’ll Love No Knead Salt Bread

  • It needs very little active time, you mostly wait while the dough rests.
  • The crust turns out crisp and the inside stays soft, a nice contrast.
  • It uses common pantry ingredients, no special flour needed.
  • It pairs well with many foods, from soups to spreads, and works for plain toast or fancy meals.

tips for success

  • Use warm water, not hot, to help the yeast wake up.
  • Do not add too much flour when shaping, the dough should stay a bit sticky for good crumb.
  • Let the dough rest long enough, the slow rise builds flavor.
  • Heat the pot well before you bake, the hot pot gives the best crust.
  • Cool the bread before slicing, cutting too soon can make the crumb gummy.

Serving Suggestions

  • Slice and serve with butter and a sprinkle of sea salt.
  • Use for sandwiches, it holds up to fillings without getting soggy.
  • Serve with soup or stew for a simple, filling meal.
  • Make garlic toast from slices, or use it to soak up olive oil and herbs.


No Knead Salt Bread

FAQs

Q: How long can I keep No Knead Salt Bread? A: Store at room temperature in a bread bag for 2 to 3 days, or freeze slices for up to 1 month.

Q: Can I make this bread without a Dutch oven? A: Yes, bake on a hot baking stone or a heavy tray, and add a small pan of water to the oven to make steam for a better crust.

Q: Can I add seeds or herbs to the dough? A: Yes, fold in a handful of seeds or chopped herbs during shaping, they add flavor and texture.

Q: Do I need to use instant yeast? A: Instant yeast works well, but you can use active dry yeast if you let it sit in warm water for a few minutes first.

Conclusion

This No Knead Salt Bread is a simple way to get fresh, crusty bread at home with little work and big reward. For another take on easy home baking and a different flavor profile, see this helpful resource on a similar simple loaf, No Knead Salt Bread – Okonomi Kitchen.

No Knead Salt Bread

A simple, rustic bread that uses time instead of elbow work, resulting in a crunchy crust and tender inside that’s perfect for various pairings.

Main ingredients

  • 3 cups all-purpose flour (Use high-quality flour for better results.)
  • 1 teaspoon instant yeast (Instant yeast works best but you can use active dry yeast.)
  • 1 teaspoon salt (Adjust according to taste.)
  • 1.5 cups warm water (Not hot, to properly activate the yeast.)

Preparation

  1. In a large bowl, stir together flour, yeast, and salt.
  2. Add warm water and stir with a spoon until a sticky shaggy dough forms.
  3. Cover the bowl with plastic wrap or a clean towel and leave at room temperature for 12 to 18 hours until dough rises and looks bubbly.
  4. Dust your work surface with flour, turn the dough out gently, and shape it into a round by folding the edges under.
  5. Place the shaped dough on parchment paper, cover, and let rest for 30 to 60 minutes.
  6. Preheat your oven to 450°F (232°C) and place a heavy pot with lid inside to heat for 30 minutes.

Baking

  1. Carefully lift the dough with the parchment into the hot pot, cover with the lid, and bake for 30 minutes.
  2. Remove the lid and bake for an additional 10 to 15 minutes until the crust is deep golden.
  3. Lift the loaf out with the parchment and cool on a rack for at least 20 minutes before slicing.

Use warm water to help the yeast wake up, avoid adding too much flour when shaping, and heat the pot well for best crust.

Bread, Snack
American
Artisan Bread, Easy Bread Recipe, Homemade Bread, No Knead Bread, Rustic Bread

Savory Caprese Bread: A Fresh Italian Bread

Freshly baked Savory Caprese Bread with tomatoes and basil

I love simple dishes that feel special, and Savory Caprese Bread is one of those. It mixes fresh tomatoes, basil, and melting mozzarella right into the bread, so every bite tastes like a small Italian snack. This recipe is a crowd-pleaser, easy to make, and perfect for family nights or potlucks. If you enjoy fresh salad and bread combos, you might also like the bright flavors of a Cape Cod salad. Give this Caprese bread a try, and you will find it hard not to eat the whole loaf, warm and cheesy.

How to prepare Savory Caprese Bread

This simple Caprese bread brings classic tomato, basil, and mozzarella flavors into a loaf. Here is an easy way to prepare it.

Ingredients

  • 1 ready-made loaf of Italian or sourdough bread, sliced but not all the way through
  • 2 large ripe tomatoes, thinly sliced
  • 8 ounces fresh mozzarella, thinly sliced
  • A handful of fresh basil leaves
  • 2 tablespoons olive oil
  • Salt and black pepper to taste
  • Optional, balsamic glaze for drizzling

Directions

  1. Preheat your oven to 350°F, about 175°C.
  2. Make slices across the loaf, about 1 inch apart, do not cut all the way through.
  3. Drizzle some olive oil into each cut and lightly season with salt and pepper.
  4. Insert a tomato slice and a mozzarella slice into each cut, tuck a small basil leaf with each.
  5. Wrap the loaf in foil and bake for 15 to 20 minutes, until the cheese melts.
  6. Unwrap and bake 3 to 5 more minutes to crisp the top slightly, watch so it does not burn.
  7. Drizzle with balsamic glaze if you like, slice and serve warm.


Savory Caprese Bread: A Fresh Italian Bread

Why You’ll Love Savory Caprese Bread

  • Fresh flavors, ripe tomatoes and basil bring bright taste.
  • Melting mozzarella adds creamy, gooey texture.
  • It looks special, but it comes together fast.
  • Works as appetizer, snack, or side for dinner.
  • Uses simple ingredients you likely have on hand.

tips for success

  • Use ripe but firm tomatoes, so slices hold shape.
  • Slice the cheese thin, so it melts evenly.
  • Do not cut the loaf all the way through, keep it intact for easy serving.
  • Wrap in foil first, to melt the cheese, then open foil to crisp the top.
  • Add a light drizzle of olive oil inside each slice for flavor and moisture.
  • Warm the bread before serving, it tastes best hot.

Serving Suggestions

  • Serve with a simple green salad for a light meal.
  • Offer extra basil and a small bowl of balsamic glaze for dipping.
  • Pair with a bowl of tomato soup or a charcuterie board.
  • Cut into slices and serve as an appetizer at parties.

FAQs


Savory Caprese Bread: A Fresh Italian Bread

Q: Can I make this ahead of time?

A: Yes, you can assemble the loaf and keep it wrapped in the fridge for a few hours, then bake when ready.

Q: What bread is best for this recipe?

A: A sturdy Italian or sourdough loaf works well, it holds the fillings and toasts nicely.

Q: Can I use other cheeses?

A: Yes, try provolone or fontina for a different melt and flavor, but fresh mozzarella is the classic choice.

Q: Is this recipe good for vegetarians?

A: Yes, it is vegetarian friendly, it uses no meat.

Q: How do I store leftovers?

A: Keep leftovers in the fridge, wrapped or in a container, and reheat in the oven to keep it crisp.

Conclusion

This Savory Caprese Bread is simple, fresh, and always welcome at the table. If you want to see another take on Caprese bread, try this Caprese Quick Bread on Will Cook For Smiles for a quick version with similar bright, savory flavors.

Savory Caprese Bread

A delightful blend of fresh tomatoes, basil, and melting mozzarella baked into a loaf of Italian or sourdough bread, making it a perfect warm appetizer or snack.

Main Ingredients

  • 1 loaf ready-made loaf of Italian or sourdough bread, sliced but not all the way through (Choose a sturdy loaf for best results.)
  • 2 large ripe tomatoes, thinly sliced (Use ripe but firm tomatoes for best texture.)
  • 8 ounces fresh mozzarella, thinly sliced (Slice thinly for even melting.)
  • 1 handful fresh basil leaves (Fresh basil enhances the flavor.)
  • 2 tablespoons olive oil (Drizzle inside each cut.)
  • to taste Salt (Used to season cuts.)
  • to taste black pepper (Used to season cuts.)
  • optional balsamic glaze for drizzling (Adds a nice touch if desired.)

Preparation

  1. Preheat your oven to 350°F (175°C).
  2. Make slices across the loaf, about 1 inch apart, and do not cut all the way through.
  3. Drizzle some olive oil into each cut and lightly season with salt and pepper.
  4. Insert a tomato slice and a mozzarella slice into each cut, tucking in a small basil leaf with each.

Baking

  1. Wrap the loaf in foil and bake for 15 to 20 minutes, until the cheese melts.
  2. Unwrap and bake for an additional 3 to 5 minutes to crisp the top slightly, watching it closely to prevent burning.
  3. Drizzle with balsamic glaze if desired, then slice and serve warm.

Serve with a simple green salad. Warm bread tastes best and pairs well with tomato soup or a charcuterie board.

Appetizer, Side, Snack
Italian
Appetizer, Caprese Bread, Cheesy Bread, Easy Recipe, Italian Dish

Cinnamon Apple Bread

Freshly baked Cinnamon Apple Bread with a fragrant cinnamon glaze

Cinnamon apple bread warms the kitchen and fills the room with a sweet, spicy smell. It is soft, slightly dense, and full of tender apple pieces and warm cinnamon. This bread is easy to bake, and people often ask for seconds. It works for breakfast, snacks, or a simple dessert.

If you like similar quick breads, you might enjoy the flavor of Amish apple fritter bread, which has a similar apple and spice feel. The recipe below is a crowd-pleaser, with a crusty top, soft inside, and just enough cinnamon sugar to feel special. Get ready to bake something cozy and tasty, and have fun sharing it with family or friends.

how to prepare Cinnamon Apple Bread

Ingredients

  • 2 cups all-purpose flour
  • 1 cup granulated sugar
  • 1 tsp baking powder
  • 1/2 tsp baking soda
  • 1 tsp ground cinnamon
  • 1/2 tsp salt
  • 2 large eggs
  • 1/2 cup vegetable oil (or melted butter)
  • 1/2 cup milk
  • 1 tsp vanilla extract
  • 1 1/2 cups peeled and chopped apples (about 2 medium apples)
  • 1/4 cup brown sugar (for topping, optional)
  • 1 tsp extra cinnamon (for topping, optional)

Directions

  1. Preheat the oven to 350°F (175°C). Grease a 9×5 inch loaf pan or line it with parchment paper.
  2. In a large bowl, whisk together the flour, sugar, baking powder, baking soda, cinnamon, and salt.
  3. In another bowl, beat the eggs lightly. Add the oil, milk, and vanilla, stir to mix.
  4. Pour the wet mix into the dry mix. Stir just until combined, do not overmix. Fold in the chopped apples.
  5. Pour the batter into the prepared pan and smooth the top. If you like, mix the brown sugar and extra cinnamon and sprinkle on top for a sweet crust.
  6. Bake for 50 to 60 minutes, or until a toothpick comes out clean or with a few moist crumbs. If the top browns too fast, cover loosely with foil.
  7. Let the bread cool in the pan for 10 minutes, then remove and cool on a rack. Slice and serve warm or at room temperature.


Cinnamon Apple Bread

Why You’ll Love Cinnamon Apple Bread

  • It fills your home with a warm, sweet smell, great for fall or any cozy day.
  • The apples keep the bread moist and tender.
  • It is easy to make with simple ingredients you likely have at home.
  • You can serve it for breakfast, snack, or dessert, and it travels well.

tips for success

  • Use firm apples, like Fuji or Honeycrisp, so the pieces hold shape while baking.
  • Chop apples in even pieces so they bake evenly.
  • Do not overmix the batter, mix just until flour disappears. Overmixing gives a tougher bread.
  • If the loaf browns too fast, tent it with foil for the last 15 minutes.
  • Let the bread cool a bit before slicing, it holds together better once slightly set.

Serving Suggestions

  • Serve warm with a pat of butter or a light drizzle of honey.
  • Top slices with cream cheese or a simple powdered sugar glaze.
  • Pair a slice with coffee, tea, or a warm milk for a cozy treat.
  • Cut into small pieces for a brunch buffet or pack slices for a picnic.


Cinnamon Apple Bread

FAQs

Q: Can I use applesauce instead of chopped apples?

A: You can, but applesauce will change the texture and make the bread moister and denser. Reduce the liquid slightly if you use applesauce.

Q: Can I make this as muffins instead of a loaf?

A: Yes, bake in muffin tins at 350°F (175°C) for about 18 to 22 minutes. Check with a toothpick for doneness.

Q: How long does the bread stay fresh?

A: At room temperature, wrapped or in a container, it stays fresh for 2 to 3 days. In the fridge, it lasts up to a week. You can freeze slices for up to 2 months.

Q: Can I add nuts or raisins?

A: Yes, fold in 1/2 to 3/4 cup chopped nuts or raisins with the apples for extra texture and flavor.

Conclusion

I hope you enjoy baking this cinnamon apple bread and sharing it with people you love. For another take on apple quick breads and a similar recipe idea, see this detailed Homemade Apple Cinnamon Bread Recipe – Erhardts Eat.

Cinnamon Apple Bread

Cinnamon apple bread warms the kitchen with its sweet and spicy aroma, offering a moist and tender loaf enriched with apple pieces and cinnamon, perfect for any meal.

Main Ingredients

  • 2 cups all-purpose flour
  • 1 cup granulated sugar
  • 1 tsp baking powder
  • 1/2 tsp baking soda
  • 1 tsp ground cinnamon
  • 1/2 tsp salt
  • 2 large eggs
  • 1/2 cup vegetable oil (or melted butter)
  • 1/2 cup milk
  • 1 tsp vanilla extract
  • 1 1/2 cups peeled and chopped apples (about 2 medium apples)

Topping (Optional)

  • 1/4 cup brown sugar (for topping)
  • 1 tsp extra cinnamon (for topping)

Preparation

  1. Preheat the oven to 350°F (175°C) and grease a 9×5 inch loaf pan or line it with parchment paper.
  2. In a large bowl, whisk together the flour, sugar, baking powder, baking soda, cinnamon, and salt.
  3. In another bowl, beat the eggs lightly. Add the oil, milk, and vanilla, and stir to mix.
  4. Pour the wet mix into the dry mix. Stir just until combined, avoiding overmixing. Fold in the chopped apples.
  5. Pour the batter into the prepared pan and smooth the top. If desired, mix the brown sugar and extra cinnamon, and sprinkle on top for a sweet crust.

Baking

  1. Bake for 50 to 60 minutes, or until a toothpick comes out clean or with a few moist crumbs. If the top browns too quickly, cover loosely with foil.

Cooling

  1. Let the bread cool in the pan for 10 minutes, then remove and cool on a rack. Slice and serve warm or at room temperature.

Use firm apples like Fuji or Honeycrisp for best texture. Chop apples evenly for consistent baking. Do not overmix batter to keep the bread tender. Allow cooling before slicing for better structure. Can be made into muffins; bake at 350°F for 18-22 minutes.

Breakfast, Dessert, Snack
American
Baking, Cinnamon Apple Bread, Comfort Food, Fall Recipe, Quick Bread

5-Ingredient Crusty Panini Bread

Homemade crusty panini bread made with only 5 ingredients

This simple no-knead bread feels like a small kitchen win. It uses only five everyday ingredients and asks for patience, not hard work. You wake up to a tangy, crusty loaf that makes perfect panini and warm sandwiches.

The featured recipe, 5-Ingredient Crusty Panini Bread (No Knead), is a crowd-pleaser. It has a crisp crust, a soft inside, and a mild flavor that matches any filling. Kids and guests love it, and it makes store-bought bread seem heavy. Give it time, and you get a great loaf with little effort.

Try it once, and you will want to make panini every week.

How to prepare 5-Ingredient Crusty Panini Bread (No Knead)

Ingredients:

  • 3 cups all-purpose flour
  • 1 teaspoon salt
  • 1 teaspoon instant yeast
  • 1 1/2 cups warm water
  • 1 tablespoon olive oil

Directions:

  1. In a large bowl, mix flour, salt, and yeast. Stir well.
  2. Add warm water and olive oil. Mix until you have a shaggy dough.
  3. Cover the bowl with plastic wrap or a towel. Let the dough rest at room temperature for 12 to 18 hours, until bubbly.
  4. Dust a work surface with flour. Gently shape the dough into a round loaf by folding the edges under. Do not knead hard.
  5. Place the dough on a parchment paper-lined baking sheet or in a Dutch oven. Cover and let rise for 1 to 2 hours.
  6. Preheat your oven to 450°F (230°C). If using a Dutch oven, heat it empty while the oven preheats.
  7. If using a Dutch oven, place the dough inside it on the parchment, cover, and bake 30 minutes. Remove the lid and bake 10 to 15 more minutes, until golden and crusty. If baking on a sheet, bake 35 to 40 minutes until crusty and brown.
  8. Cool on a rack for at least 20 minutes before slicing. Slice thin for panini or thicker for sandwiches.


5-Ingredient Crusty Panini Bread (No Knead)

Why You’ll Love 5-Ingredient Crusty Panini Bread (No Knead)

  • Easy, no-knead method, great for busy cooks.
  • Uses only five common ingredients, cheap and simple.
  • Crispy outside, soft inside, perfect for panini and sandwiches.
  • Makes a rustic, bakery-style loaf at home without fancy tools.

tips for success

  • Use warm, not hot, water to wake the yeast, about 100°F (38°C).
  • Let the dough rest long enough, the slow rise builds flavor.
  • Do not over-handle the dough, gentle folds keep air pockets.
  • If your kitchen is cool, let it rise in a slightly warm spot, like an oven with just the light on.
  • Use a Dutch oven for the best crust, it traps steam and makes the bread crisp.
  • Cool the loaf before slicing, this keeps the crumb from getting squished.

Serving Suggestions

  • Make classic panini with mozzarella, tomato, and basil.
  • Use it for grilled cheese, sliced thin and buttered.
  • Turn it into a hearty sandwich with turkey, pesto, and roasted peppers.
  • Toast slices and serve with soup or salad for a simple meal.


5-Ingredient Crusty Panini Bread (No Knead)

FAQs

Q: Can I use whole wheat flour? A: Yes, you can replace up to half the flour with whole wheat. The bread will be denser. Add a bit more water if the dough feels dry.

Q: How long can I store this bread? A: Store at room temperature in a bread bag or wrapped for 2 to 3 days. For longer storage, slice and freeze.

Q: Do I have to use a Dutch oven? A: No, you can bake on a baking sheet. A Dutch oven gives a better crust, but a hot tray and a pan of water in the oven can help too.

Q: Can I make smaller loaves? A: Yes, divide the dough into two and bake each smaller. Adjust the bake time down by about 10 to 15 minutes.

Q: What if my dough is sticky after rising? A: Lightly flour your hands and work surface. The dough should be soft and slightly sticky, not sloppy.

Conclusion

If you want another simple no-knead idea for sandwich bread, check this No-Knead Sandwich Bread – Emma Fontanella recipe for more tips and a close variation.

5-Ingredient Crusty Panini Bread (No Knead)

A simple no-knead bread with a crisp crust and soft inside, perfect for panini and warm sandwiches.

Main Ingredients

  • 3 cups all-purpose flour
  • 1 teaspoon salt
  • 1 teaspoon instant yeast
  • 1.5 cups warm water (Around 100°F (38°C))
  • 1 tablespoon olive oil

Preparation

  1. In a large bowl, mix flour, salt, and yeast. Stir well.
  2. Add warm water and olive oil. Mix until you have a shaggy dough.
  3. Cover the bowl with plastic wrap or a towel. Let the dough rest at room temperature for 12 to 18 hours, until bubbly.

Shaping and Rising

  1. Dust a work surface with flour. Gently shape the dough into a round loaf by folding the edges under. Do not knead hard.
  2. Place the dough on a parchment paper-lined baking sheet or in a Dutch oven. Cover and let rise for 1 to 2 hours.

Baking

  1. Preheat your oven to 450°F (230°C). If using a Dutch oven, heat it empty while the oven preheats.
  2. If using a Dutch oven, place the dough inside it on the parchment, cover, and bake for 30 minutes. Remove the lid and bake for 10 to 15 more minutes, until golden and crusty.
  3. If baking on a sheet, bake for 35 to 40 minutes until crusty and brown.
  4. Cool on a rack for at least 20 minutes before slicing. Slice thin for panini or thicker for sandwiches.

Use a Dutch oven for the best crust; it traps steam and makes the bread crisp. Cool the loaf before slicing to keep the crumb from getting squished.

Bread, Snack
American
Easy Bread Recipe, Homemade Bread, No Knead Bread, Panini Bread, Quick Bread

Amish White Bread Recipe

Freshly baked Amish white bread loaf on a wooden table

Amish White Bread is a simple, homemade loaf that many families enjoy. It has a soft crust, tender crumb, and a mild, buttery taste. This recipe is a crowd-pleaser, easy to make, and fits well with everyday meals or Sunday dinners. If you like simple breads, you might also enjoy trying a sweet twist like the Amish apple fritter bread for dessert. Get ready to bake a loaf that will disappear fast, and have fun making it yourself.

how to prepare Amish White Bread Recipe

Ingredients

  • 2 cups warm water (about 110°F)
  • 1/3 cup sugar
  • 1 tablespoon active dry yeast
  • 1/4 cup melted butter or oil
  • 1 tablespoon salt
  • 6 to 7 cups all-purpose flour

Directions

  1. In a large bowl, stir the warm water and sugar until the sugar dissolves. Sprinkle the yeast on top, wait 5 minutes until foamy.
  2. Add melted butter, salt, and 3 cups of flour. Stir to combine.
  3. Add remaining flour, a cup at a time, until dough is soft and slightly sticky.
  4. Turn dough onto a floured surface and knead for 8 to 10 minutes until smooth and elastic.
  5. Place dough in a lightly greased bowl, cover with a clean towel, and let it rise in a warm place until doubled, about 1 hour.
  6. Punch down the dough and divide it into two loaves. Shape each into a loaf and place in greased 9×5-inch pans.
  7. Cover and let rise again until doubled, about 30 to 45 minutes.
  8. Preheat oven to 375°F. Bake 25 to 30 minutes until the tops are golden and the loaves sound hollow when tapped.
  9. Remove from pans and cool on a rack before slicing.


Amish White Bread Recipe

Why You’ll Love Amish White Bread Recipe

  • Simple ingredients you likely already have, this is an easy bread recipe.
  • Soft crust and tender crumb make it perfect for sandwiches and toast.
  • Works well as a side for soups, stews, or family dinners.
  • The mild flavor appeals to picky eaters and children.

tips for success

  • Use water that is warm, not hot, to avoid killing the yeast.
  • Measure flour by spooning it into the cup and leveling, avoid packing it down.
  • If dough seems too sticky, add a little flour, a tablespoon at a time.
  • Let the dough rise in a warm, draft-free place for best results.
  • Test for doneness by tapping the bottom of the loaf, it should sound hollow.

Serving Suggestions

  • Slice for sandwiches, grilled cheese, or PB&J.
  • Toast with butter and jam for breakfast.
  • Serve warm with soup or a salad for a simple meal.
  • Make french toast with slightly stale slices for a tasty breakfast treat.


Amish White Bread Recipe

FAQs

Q: Can I use bread flour instead of all-purpose flour? A: Yes, bread flour will give a slightly chewier texture and good rise.

Q: How long will this bread stay fresh? A: Store at room temperature in a bread box or plastic bag for 2 to 3 days, or freeze slices for longer storage.

Q: Can I make this in a bread machine? A: Yes, add ingredients to the machine in the order recommended by your machine and use the basic white bread setting.

Q: Can I make one large loaf instead of two smaller loaves? A: Yes, you can bake one large loaf but watch the baking time, it may need a bit longer in the oven.

Conclusion

If you want another easy version to compare, you can check this classic Amish White Bread Recipe – Allrecipes for tips and variations.

Amish White Bread

A simple, homemade loaf with a soft crust and mild, buttery taste, perfect for sandwiches and everyday meals.

Dough Ingredients

  • 2 cups warm water (about 110°F) (Make sure the water is warm, not hot.)
  • 1/3 cup sugar
  • 1 tablespoon active dry yeast
  • 1/4 cup melted butter or oil
  • 1 tablespoon salt
  • 6 to 7 cups all-purpose flour (Use spooned flour to avoid packing.)

Preparation

  1. In a large bowl, stir the warm water and sugar until the sugar dissolves. Sprinkle the yeast on top and wait 5 minutes until foamy.
  2. Add melted butter, salt, and 3 cups of flour to the mixture. Stir to combine.
  3. Gradually add the remaining flour, a cup at a time, until the dough is soft and slightly sticky.
  4. Turn the dough onto a floured surface and knead for 8 to 10 minutes until smooth and elastic.
  5. Place the dough in a lightly greased bowl, cover with a clean towel, and let it rise in a warm place until doubled, about 1 hour.
  6. Punch down the dough and divide it into two loaves. Shape each into a loaf and place in greased 9×5-inch pans.
  7. Cover and let rise again until doubled, about 30 to 45 minutes.

Baking

  1. Preheat oven to 375°F.
  2. Bake for 25 to 30 minutes until the tops are golden and the loaves sound hollow when tapped.
  3. Remove from pans and cool on a rack before slicing.

For best results, let the dough rise in a warm, draft-free place. Measure flour carefully and use water at the right temperature.

Bread, Side Dish
American
Amish White Bread, Classic Bread, Easy Bread Recipe, Homemade Bread

Irresistibly Easy Cheddar Cheese Quick Bread

Easy cheddar cheese quick bread fresh out of the oven

This cheddar cheese quick bread feels like a warm hug from the oven. It smells of toast and melted cheese, and it is simple to make. This loaf has a golden crust, soft crumb, and a strong cheddar taste that makes it a crowd-pleaser at weekday dinners and holiday tables.

I am sharing the Irresistibly Easy Cheddar Cheese Quick Bread, a recipe that mixes quick bread ease with bold, savory flavor. It bakes fast, needs no yeast, and pairs well with soup, salads, or a simple pasta night. If you enjoy quick, cheesy bakes, you might also like this banana bread cookies recipe for another easy treat.

Get ready to warm the kitchen and impress friends, even if you call yourself a busy baker.

how to prepare Irresistibly Easy Cheddar Cheese Quick Bread

Ingredients,

  • 2 cups all purpose flour
  • 1 tablespoon baking powder
  • 1 teaspoon salt
  • 1/4 teaspoon baking soda
  • 1/2 teaspoon black pepper, optional
  • 1 cup sharp cheddar cheese, grated
  • 1/2 cup butter, melted and cooled, or 1/2 cup oil
  • 1 cup milk or buttermilk
  • 2 large eggs
  • 1 to 2 tablespoons chopped fresh chives or green onion, optional

Directions,

  1. Preheat the oven to 350°F (175°C). Grease a 9×5 inch loaf pan.
  2. In a bowl, mix flour, baking powder, salt, baking soda, and pepper.
  3. Stir in the grated cheddar, tossing it in the dry mix so the cheese does not sink.
  4. In another bowl, beat the eggs, then add milk and melted butter. Mix until smooth.
  5. Pour the wet mix into the dry mix and stir just until you see no dry flour. Do not overmix.
  6. Fold in chives if you use them. Spoon the batter into the prepared loaf pan and smooth the top.
  7. Bake 45 to 55 minutes, until a toothpick in the center comes out clean and the top is golden.
  8. Let the loaf cool 10 minutes in the pan, then turn it out onto a rack to cool more. Slice and serve warm or at room temp.

Irresistibly Easy Cheddar Cheese Quick Bread

Why You’ll Love Irresistibly Easy Cheddar Cheese Quick Bread

  • Fast and simple, it rises without yeast, so you can make it any day.
  • Cheddar gives a rich, tangy flavor that works with many meals.
  • The crumb is moist and holds up to butter, jam, or a slice of ham.
  • You can change the cheese type, add herbs, or mix in cooked bacon for variety.
  • It is great warm from the oven, and it keeps well for a day or two.

tips for success

  • Grate the cheese fresh for better melt and flavor.
  • Do not overmix the batter, or the bread can turn dense. Mix until the flour disappears.
  • If you use pre-shredded cheese, expect a tiny change in texture because of anti clump agents.
  • Use buttermilk for extra tang and a tender crumb.
  • Check the loaf at 45 minutes, ovens vary, and test with a toothpick.

Serving Suggestions

  • Serve warm with butter or a smear of cream cheese.
  • Pair with tomato soup, chili, or a green salad for an easy meal.
  • Make halves into sandwiches with sliced turkey or ham.
  • Offer as a side at brunch with scrambled eggs and fruit.

Irresistibly Easy Cheddar Cheese Quick Bread

FAQs

Q: Can I make this bread ahead of time,

A: Yes, bake and cool fully, then wrap in foil. It stays good at room temp for one day, or in the fridge for three days. Warm it before serving.

Q: Can I freeze the bread,

A: Yes, wrap slices or the whole loaf tight in plastic and foil, freeze up to three months. Thaw in the fridge or at room temp and reheat.

Q: Can I add mix ins like bacon or jalapeno,

A: Yes, cooked bacon, diced jalapeno, or cooked onion work well. Fold them in gently so the batter stays light.

Q: Can I make muffins instead of a loaf,

A: Yes, divide batter into a greased muffin tin and bake 18 to 22 minutes until a toothpick is clean.

Conclusion

This Irresistibly Easy Cheddar Cheese Quick Bread is a simple, savory loaf that lifts any meal with cheddar flavor and quick bread ease. For another savory twist that uses bacon and dried fruit, see the Bacon-Cheddar Quick Bread with Dried Pears recipe for inspiration and a delicious variation.

Cheddar Cheese Quick Bread

This cheddar cheese quick bread bakes fast and features a golden crust, soft crumb, and a bold cheddar flavor, making it a perfect side for any meal.

Dry Ingredients

  • 2 cups all purpose flour
  • 1 tablespoon baking powder
  • 1 teaspoon salt
  • 1/4 teaspoon baking soda
  • 1/2 teaspoon black pepper (optional)
  • 1 cup sharp cheddar cheese, grated (freshly grated for better melt and flavor)

Wet Ingredients

  • 1/2 cup butter, melted and cooled (or 1/2 cup oil)
  • 1 cup milk or buttermilk (buttermilk adds extra tang)
  • 2 large eggs
  • 1 to 2 tablespoons chopped fresh chives or green onion (optional)

Preparation

  1. Preheat the oven to 350°F (175°C). Grease a 9×5 inch loaf pan.
  2. In a bowl, mix flour, baking powder, salt, baking soda, and pepper.
  3. Stir in the grated cheddar, tossing it in the dry mix so the cheese does not sink.
  4. In another bowl, beat the eggs, then add milk and melted butter. Mix until smooth.
  5. Pour the wet mix into the dry mix and stir just until you see no dry flour. Do not overmix.
  6. Fold in chives if using. Spoon the batter into the prepared loaf pan and smooth the top.

Baking

  1. Bake for 45 to 55 minutes, until a toothpick in the center comes out clean and the top is golden.
  2. Let the loaf cool for 10 minutes in the pan, then turn it out onto a rack to cool more.
  3. Slice and serve warm or at room temperature.

Grate the cheese fresh for better melt and flavor. Do not overmix the batter, or the bread can turn dense. If using pre-shredded cheese, expect a slight change in texture due to anti-clump agents. Can be served warm with butter or as a sandwich with turkey or ham.

Bread, Side Dish
American
Cheddar Cheese Bread, Comfort Food, Easy Bread, Quick Bread, Savory Bread