Coconut Chicken Rice Bowl

If you’re looking for a meal that’s both delicious and quick to prepare, the Coconut Chicken Rice Bowl is the perfect solution. This recipe not only brings a delightful tropical flavor to your dining table but is also a favorite for families and gatherings. With its creamy coconut sauce and tender chicken, it’s sure to please even the pickiest eaters. Plus, who wouldn’t want to enjoy a virtual vacation in their kitchen? Get ready to whip up this crowd-pleaser in just 20 minutes!

How to prepare Coconut Chicken Rice Bowl

To make the Coconut Chicken Rice Bowl, you will need the following ingredients: chicken breast, coconut milk, jasmine rice, bell peppers, onion, garlic, and your favorite seasonings. Start by cooking the rice according to the package instructions. While the rice is cooking, sauté the onion and garlic in a pan, then add the chicken pieces until they are golden brown. Pour in the coconut milk and let it simmer with bell peppers until everything is cooked through and creamy.

Coconut Chicken Rice Bowl: A Tropical Twist in 20 Minutes

This dish comes together so quickly, you’ll be amazed at how such simple ingredients can create such vibrant flavors.

Coconut Chicken Rice Bowl: A Tropical Twist in 20 Minutes

Why You’ll Love Coconut Chicken Rice Bowl

The Coconut Chicken Rice Bowl is full of flavors that transport you straight to a tropical paradise. The combination of creamy coconut milk and tender chicken makes it comforting yet exciting. Each bite is a delightful balance of sweetness and savory goodness, which keeps everyone coming back for more. It’s perfect for busy weeknights or when you’re entertaining guests. You’ll definitely want to add this recipe to your weekly meal rotation and explore further recipes like the Bang Bang Chicken Rice Bowl for a variety of tastes!

Tips for success

  1. Ensure your pan is hot before adding the chicken, as this helps to create a nice sear and lock in the juices.
  2. Feel free to customize your veggies; sugar snap peas, broccoli, or snap peas would work beautifully.
  3. Adjust the coconut milk amount to manage the creaminess to your liking, adding more if you want it richer.

Serving Suggestions

Serve your Coconut Chicken Rice Bowl topped with fresh cilantro, a squeeze of lime, or sliced chilies for an extra kick. Pair it with a side of grilled pineapple to enhance the tropical vibe. This dish is versatile, so you can even serve it as a meal prep option throughout the week!

FAQs

Can I use other types of protein?

Yes, shrimp or tofu can be wonderful substitutes for chicken, making this dish adaptable to your preferences.

How can I store leftovers?

Once cooled, store leftovers in an airtight container in the refrigerator for up to three days. Reheat in the microwave or stovetop with a splash of water to keep it moist.

Is this recipe suitable for meal prep?

Absolutely! This Coconut Chicken Rice Bowl is perfect for meal prepping, as it holds up well in the fridge, and you can enjoy it throughout the week.

Now you’re ready to enjoy this flavorful Coconut Chicken Rice Bowl that’s bursting with tropical goodness! Happy cooking!

Coconut Chicken Rice Bowl

A quick and delicious meal featuring tender chicken in a creamy coconut sauce over jasmine rice, perfect for families and gatherings.

Main Ingredients

  • 1 lb chicken breast (Cut into bite-sized pieces)
  • 1 can coconut milk (Adjust amount for creaminess)
  • 1 cup jasmine rice (Cook according to package instructions)
  • 1 medium onion (Chopped)
  • 2 cloves garlic (Minced)
  • 1 medium bell pepper (Sliced)

Seasonings

  • to taste Your favorite seasonings (e.g., salt, pepper, or curry powder)

Preparation

  1. Cook the jasmine rice according to the package instructions.
  2. While the rice is cooking, heat a pan over medium-high heat.
  3. Sauté the chopped onion and minced garlic in the hot pan until fragrant.
  4. Add the chicken pieces and cook until golden brown.

Cooking

  1. Pour in the coconut milk and bring to a simmer.
  2. Add the sliced bell pepper and let everything cook until the chicken is cooked through and the sauce is creamy.

Serving

  1. Serve the Coconut Chicken Rice Bowl hot, topped with fresh cilantro, a squeeze of lime, or sliced chilies.
  2. Pair with grilled pineapple for added tropical flavor.

Ensure your pan is hot before adding the chicken for better searing and juiciness. Customize vegetables with sugar snap peas or broccoli for variety. This recipe is also suitable for meal prepping and can be stored in an airtight container for up to three days.

Dinner, Main Course
Asian, Tropical
Coconut Chicken Rice Bowl, Family Friendly, Healthy Recipe, Meal Prep, Quick Dinner

Healthy Sesame Chicken

Healthy Sesame Chicken is a delightful dish that combines tender chicken with a savory sauce that’s rich in flavor and nutrition. This recipe is a perfect crowd-pleaser, suitable for family dinners or casual gatherings. With its irresistible taste, you’ll find that everyone at the table will ask for seconds. Plus, it’s simple to make, meaning you can enjoy a tasty meal without spending hours in the kitchen. This dish might just become your new favorite go-to recipe, bringing smiles and satisfaction to all who share it.

How to prepare Healthy Sesame Chicken

To prepare Healthy Sesame Chicken, you’ll need the following ingredients: chicken breasts, soy sauce, sesame oil, honey, garlic, and sesame seeds. Begin by marinating the chicken in a mixture of soy sauce, sesame oil, and honey for about 30 minutes. Then, sauté the marinated chicken with minced garlic until it’s cooked through.

Healthy Sesame Chicken

After cooking the chicken, sprinkle toasted sesame seeds on top for added texture and flavor, creating a deliciously healthy meal in no time.

Why You’ll Love Healthy Sesame Chicken

There are plenty of reasons to love Healthy Sesame Chicken. The first being its simple preparation; with just a handful of ingredients, anyone can make this dish. Secondly, the balance of sweet and savory flavors appeals to both adults and children, making it perfect for family meals. Finally, it’s a great dish to pair with sides like steamed veggies or brown rice, allowing for a well-rounded dinner.

If you’re looking for another healthy chicken option that’s easy to whip up, you might want to try this Greek yogurt chicken salad with dill and lemon zest.

Tips for success

To ensure your Healthy Sesame Chicken turns out perfectly, remember a few key tips. First, marinate the chicken for at least 30 minutes, as this helps infuse the flavors deeply and keeps the meat tender. Additionally, be careful not to overcook the chicken to retain its juiciness. Lastly, consider garnishing the dish with green onions or additional sesame seeds for an appealing presentation.

Healthy Sesame Chicken

Serving Suggestions

Healthy Sesame Chicken pairs wonderfully with a variety of sides. Serve it with steamed brown rice or quinoa for a hearty meal. A colorful side of stir-fried vegetables, such as bell peppers and broccoli, complements the dish beautifully. You could also serve it with a simple green salad to balance out the meal.

FAQs

Can I use another type of meat instead of chicken?

Yes, you can easily substitute chicken with tofu or shrimp for a different twist on this recipe.

Is this dish suitable for meal prep?

Absolutely! Healthy Sesame Chicken stores well in the fridge for a few days and makes for an easy reheating option during the week.

Can I make this dish gluten-free?

Yes, you can use tamari instead of soy sauce for a gluten-free option that tastes just as delicious.

Healthy Sesame Chicken

A delightful dish that combines tender chicken with a savory sauce rich in flavor and nutrition, perfect for family dinners.

For the Chicken

  • 1 pound chicken breasts
  • 1/4 cup soy sauce (Or tamari for gluten-free option)
  • 2 tablespoons sesame oil
  • 2 tablespoons honey
  • 2 cloves garlic (Minced)
  • 1 tablespoon sesame seeds (Toasted, for garnish)

Preparation

  1. Begin by marinating the chicken in a mixture of soy sauce, sesame oil, and honey for about 30 minutes.

Cooking

  1. Sauté the marinated chicken with minced garlic until it’s cooked through.
  2. After cooking, sprinkle toasted sesame seeds on top for added texture and flavor.

Marinate the chicken for at least 30 minutes to infuse flavors and keep the meat tender. Be careful not to overcook the chicken to retain its juiciness. Consider garnishing with green onions or additional sesame seeds for presentation.

Dinner, Main Course
Asian, Healthy
Chicken Recipe, Easy Dinner, Family Meal, Healthy Sesame Chicken, Savory Chicken

Melt In Your Mouth Chicken Breast

If you’re searching for a dish that will bring everyone to the table, look no further than Melt In Your Mouth Chicken Breast. This delightful recipe is not just a meal; it’s an experience filled with tender chicken and rich flavors that melt in your mouth. Each bite is a perfect balance of seasoning and juiciness that gives comfort and satisfaction. The best part? It’s easy to make! You’ll find yourself wanting to whip it up time and again, with delicious results every time.

How to prepare Melt In Your Mouth Chicken Breast

Creating this dish is simple and fun! Start by gathering your ingredients, which include chicken breasts, garlic, butter, and a blend of spices. You will first season the chicken, then sear it in a hot pan until it’s golden brown. Next, add in garlic and butter, allowing the flavors to infuse the chicken as it cooks. It’s a straightforward process that leads to a wonderfully tender chicken dish.

Melt In Your Mouth Chicken Breast

Why You’ll Love Melt In Your Mouth Chicken Breast

This chicken breast recipe is a true crowd-pleaser, making it perfect for family dinners or special occasions. The secret behind its melt-in-your-mouth texture is the method of cooking, which involves sealing in the moisture and flavors. It pairs wonderfully with sides like rice, vegetables, or even a fresh salad. Plus, you can have it on the table in less than an hour!

If you’re interested in more delicious cooking methods, check out this recipe for hibachi chicken.

Tips for success

  • Make sure to properly season your chicken breast on both sides for the best flavor.
  • Allow the chicken to rest for a few minutes after cooking; this helps the juices redistribute, keeping it tender.
  • Consider using a meat thermometer to ensure the chicken reaches an internal temperature of 165°F for safety.

Melt In Your Mouth Chicken Breast

Serving Suggestions

Once your Melt In Your Mouth Chicken Breast is ready, serve it alongside some roasted vegetables or creamy mashed potatoes for a complete meal. You can also slice the chicken and add it to salads or wraps for a delightful lunch option.

FAQs

Can I use frozen chicken breasts?

Yes, but be sure to thaw them completely before cooking to ensure even cooking.

What can I substitute for garlic?

If you prefer not to use garlic, you can substitute it with a little bit of garlic powder or omit it altogether for a different flavor.

How do I store leftovers?

Store any leftover chicken in an airtight container in the refrigerator for up to 3 days. You can reheat it gently to enjoy it again later.

Melt In Your Mouth Chicken Breast

A tender and flavorful chicken breast dish that’s easy to prepare, perfect for family dinners or special occasions.

Main Ingredients

  • 4 pieces chicken breasts (Make sure they are thawed if frozen.)
  • 2 cloves garlic (Mince or crush as preferred.)
  • 2 tablespoons butter (Use unsalted for better control of seasoning.)
  • 1 teaspoon spice blend (Your choice of herbs and spices.)

Preparation

  1. Gather all the ingredients: chicken breasts, garlic, butter, and a blend of spices.
  2. Season the chicken breasts on both sides with the spice blend.

Cooking

  1. Heat a pan over medium-high heat and add a bit of oil if desired.
  2. Sear the seasoned chicken breasts in the hot pan until golden brown, about 6-7 minutes on each side.
  3. Reduce heat and add minced garlic and butter to the pan.
  4. Continue to cook, allowing the flavors to infuse the chicken, until it reaches an internal temperature of 165°F.

Finishing

  1. Remove the chicken from the pan and let it rest for a few minutes before slicing.

This recipe is versatile; serve with roasted vegetables, mashed potatoes, or slice for salads and wraps. Proper seasoning and resting are key to success.

Dinner, Main Course
American
Chicken Breast, Comfort Food, Easy Dinner, Family Meal, Melt In Your Mouth

Chinese Chicken and Broccoli

Chinese Chicken and Broccoli is a delightful dish that combines tender chicken pieces with fresh broccoli in a tasty sauce. This recipe is a true crowd-pleaser, perfect for family dinners or a fun night with friends. The flavors blend beautifully, and each bite offers a satisfying crunch from the broccoli alongside the savory chicken. If you love a quick meal that can be on the table in no time, this recipe is just what you need to try.

If you’re looking for more delicious meals, you might enjoy this chicken sausage and broccoli orzo, which is another fantastic option for dinner tables.

How to prepare Chinese Chicken and Broccoli

To make this hearty dish, start by gathering all your ingredients. You will need chicken breasts, fresh broccoli, soy sauce, garlic, and some simple seasonings. First, cut the chicken into bite-sized pieces and marinate them for a few minutes. Next, stir-fry the chicken until it is cooked through, then add the broccoli and cook until it’s bright green and tender. Finally, mix in the sauce and let everything simmer together for just a few moments.

Chinese Chicken and Broccoli

Why You’ll Love Chinese Chicken and Broccoli

This dish is loved for its balance of flavors and textures. The tender chicken pairs well with the crispy broccoli, and the sauce brings it all together. It’s not only delicious but also healthy, making it a great choice for anyone who cares about their diet. Plus, it cooks quickly, so you won’t spend hours in the kitchen. Don’t forget that you can whip up this dish while also trying out air fryer chicken and potatoes, perfect for a busy weeknight meal.

Tips for success

Make sure to prepare all your ingredients beforehand to ensure a smooth cooking process. Using fresh broccoli instead of frozen will give you a better texture, and be cautious not to overcook it. A quick sauté keeps the broccoli crisp yet tender. Lastly, adjust the sauce to your taste; if you prefer it sweeter or spicier, feel free to add more sugar or chili flakes.

Serving Suggestions

Once the dish is ready, serve it hot over a bed of steaming rice or noodles. For a more wholesome meal, you can add some steamed dumplings or egg rolls on the side. A sprinkle of sesame seeds on top also adds a nice touch.

Chinese Chicken and Broccoli

FAQs

1. Can I use frozen broccoli instead of fresh?

While fresh broccoli is recommended for the best texture, frozen can be used in a pinch. Just reduce the cooking time to avoid mushiness.

2. How do I store leftovers?

Store any leftovers in an airtight container in the refrigerator for up to three days. Reheat gently in a pan or microwave.

3. Is this dish gluten-free?

To make this dish gluten-free, use gluten-free soy sauce or tamari instead of regular soy sauce, and check for gluten in any other sauces you might use.

Chinese Chicken and Broccoli

A delightful dish combining tender chicken pieces with fresh broccoli in a tasty sauce, perfect for family dinners or fun nights with friends.

Main ingredients

  • 1 lb chicken breasts (Cut into bite-sized pieces)
  • 2 cups fresh broccoli (Use fresh for better texture)

Sauce ingredients

  • 1/4 cup soy sauce (Use gluten-free if needed)
  • 2 cloves garlic (Minced)

Seasonings

  • 1 tbsp sugar (Adjust to taste)
  • 1 tbsp chili flakes (Optional, for spiciness)

Preparation

  1. Gather all your ingredients.
  2. Cut the chicken into bite-sized pieces and marinate for a few minutes.

Cooking

  1. Stir-fry the chicken until cooked through.
  2. Add the broccoli and cook until bright green and tender.
  3. Mix in the sauce and let everything simmer together for a few moments.

For serving, enjoy over rice or noodles, and consider adding steamed dumplings or egg rolls. A sprinkle of sesame seeds enhances the dish.

Dinner, Main Course
Chinese
Chicken Recipe, Chinese Chicken and Broccoli, Healthy Meal, Quick Dinner

Ultimate Homemade Shrimp Fried Rice

Delicious homemade shrimp fried rice served in a bowl with fresh vegetables

Making Ultimate Homemade Shrimp Fried Rice at home is easier than you might think. Start by gathering your ingredients: fresh shrimp, cooked rice, eggs, garlic, peas, carrots, and soy sauce. You’ll also want some green onions for garnish, if you like.

Ultimate Homemade Shrimp Fried Rice

Begin by sautéing the shrimp in a pan until they’re pink and cooked through. Then, push them to one side and scramble the eggs in the same pan. Add the garlic, peas, and carrots next, and stir until they’re heated through. Finally, mix in the rice and soy sauce, stirring everything together. Garnish with chopped green onions, and you’re all set!

{image_2}

Ultimate Homemade Shrimp Fried Rice

Why You’ll Love Ultimate Homemade Shrimp Fried Rice

Ultimate Homemade Shrimp Fried Rice is a dish that pleases everyone at the dinner table. It is quick to make, yet it delivers flavors that feel gourmet. Each bite of shrimp blends perfectly with the seasoned rice, while the vegetables add a nice crunch. This dish is versatile, too, allowing you to tweak it according to your taste preferences and pantry items.

The joy of homemade fried rice lies in its comforting familiarity. It’s perfect for a busy weeknight or a casual weekend gathering. Plus, with the shrimp being the star ingredient, it’s a great way to impress family and friends!

Tips for success

To make your fried rice perfect every time, there are a few tips you should keep in mind. First, use day-old rice if possible; it’s drier and will fry better. Second, make sure your pan is hot before adding the ingredients, as this provides the great fry and keeps everything from sticking. Lastly, don’t rush the cooking process, allowing each ingredient to get the attention it deserves.

{image_1}

Serving Suggestions

Ultimate Homemade Shrimp Fried Rice is a complete meal on its own, but you can enhance it with some delicious side dishes. Consider pairing it with a light salad or some crispy spring rolls. For an extra kick, serve it with your favorite Asian dipping sauce or chili sauce.

FAQs

Can I use frozen shrimp for this recipe?

Yes, frozen shrimp is perfectly fine. Just make sure to thaw them properly before cooking, so they cook evenly.

Can I add other vegetables?

Absolutely! Feel free to add bell peppers, broccoli, or any of your favorite veggies.

What if I don’t have cooked rice?

No worries, you can quickly cook some rice while you prepare the other ingredients. Just make sure to let it cool before you add it to the pan!

Ultimate Homemade Shrimp Fried Rice

A quick and delicious homemade shrimp fried rice that combines fresh shrimp, vegetables, and seasoned rice for a gourmet flavor. Perfect for weeknight dinners or casual gatherings.

Main Ingredients

  • 1 lb fresh shrimp (Peeled and deveined)
  • 4 cups cooked rice (Best if day-old)
  • 2 large eggs (Beaten)
  • 2 cloves garlic (Minced)
  • 1 cup peas (Frozen or fresh)
  • 1 cup carrots (Diced)
  • 4 tbsp soy sauce (Adjust to taste)
  • 2 green onions for garnish (Chopped, optional)

Cooking

  1. In a pan, sauté the shrimp until they are pink and fully cooked.
  2. Push the shrimp to one side of the pan and scramble the eggs on the other side.
  3. Add the minced garlic, peas, and diced carrots to the pan, stirring until heated through.
  4. Mix in the cooked rice and soy sauce, stirring everything together until well combined.
  5. Garnish with chopped green onions and serve.

Use day-old rice for better texture. Ensure the pan is hot before adding ingredients for optimal frying.

Dinner, Main Course
Asian, Chinese
Easy Dinner, fried rice, Homemade Fried Rice, Shrimp Fried Rice, Shrimp Recipes

Cilantro-Lime Black Bean Rice

Bowl of cilantro-lime black bean rice garnished with fresh cilantro and lime

Cilantro-Lime Black Bean Rice is the perfect dish to brighten up your meals. With its vibrant colors and refreshing flavors, it’s a recipe that not only tastes good but is also simple to make. This dish is a wonderful blend of zesty lime, fresh cilantro, and hearty black beans, creating a side that everyone will adore. Known for being a crowd-pleaser, it can easily steal the show at your next gathering or family dinner. Once you make this delightful rice dish, you will find yourself craving its refreshing flavor, so let’s dive into how to prepare it!

How to Prepare Cilantro-Lime Black Bean Rice

Cilantro-Lime Black Bean Rice

  1. Start by cooking rice according to package instructions.
  2. In a large bowl, combine the cooked rice with drained and rinsed black beans.
  3. Add chopped cilantro, lime juice, salt, and pepper to taste, mixing well to combine all the ingredients.
  4. If you like, add chopped red onion or diced tomatoes for extra flavor and color.
  5. Serve warm and enjoy!
  6. Cilantro-Lime Black Bean Rice

Why You’ll Love Cilantro-Lime Black Bean Rice

This recipe stands out for so many reasons. First, it is packed with nutrients from the black beans, making it not only tasty but also healthy. The cilantro and lime add a fresh kick, which balances perfectly with the richness of the beans. Whether served as a side dish or a main meal topped with proteins, this dish can fit any occasion. Plus, it’s quick to prepare, ensuring you spend more time enjoying your meal and less time in the kitchen.

If you want to learn even more ways to enjoy black beans and rice together, check out this article on 5 comforting ways to savor it.

Tips for Success

To make your Cilantro-Lime Black Bean Rice even better, here are a few tips:

  • Use fresh lime juice instead of bottled for a more vibrant flavor.
  • Experiment with different herbs like parsley or green onions to change the flavor profile.
  • Consider adding diced avocado on top for extra creaminess.

Serving Suggestions

This recipe pairs wonderfully with grilled chicken, tacos, or even as a filling for burritos. You can also serve it alongside a fresh salad or guacamole for a complete meal. Don’t hesitate to make it a part of your next BBQ or picnic—it is sure to impress!

FAQs

Q: Can I make this dish ahead of time?

A: Yes! You can prepare Cilantro-Lime Black Bean Rice in advance and store it in the fridge for a day or two. Just give it a good stir before serving.

Q: Is it okay to use quinoa instead of rice?

A: Absolutely! You can substitute rice with quinoa for a different texture and nutritional value.

Q: Can I make this dish vegan?

A: Yes! This recipe is naturally vegan-friendly since it contains no animal products.

Cilantro-Lime Black Bean Rice is more than just a dish; it’s an experience packed with flavor and freshness. So, gather your ingredients and let the cooking adventure begin!

Cilantro-Lime Black Bean Rice

A vibrant and refreshing dish featuring zesty lime, fresh cilantro, and hearty black beans, perfect as a side or main meal.

Main Ingredients

  • 1 cup rice (Cooked according to package instructions)
  • 1 can black beans (Drained and rinsed)
  • 1/4 cup fresh cilantro (Chopped)
  • 2 tablespoons lime juice (Use fresh for best flavor)
  • to taste salt
  • to taste pepper

Optional Add-Ins

  • 1/2 cup red onion (Chopped, optional)
  • 1/2 cup diced tomatoes (Optional for extra flavor and color)

Preparation

  1. Start by cooking rice according to package instructions.
  2. In a large bowl, combine the cooked rice with drained and rinsed black beans.
  3. Add chopped cilantro, lime juice, salt, and pepper to taste, mixing well to combine all the ingredients.
  4. If desired, add chopped red onion or diced tomatoes for extra flavor and color.
  5. Serve warm and enjoy!

Use fresh lime juice for a more vibrant flavor. Experiment with different herbs like parsley or green onions to change the flavor profile. Consider adding diced avocado on top for extra creaminess. This dish can be prepared ahead of time and stored in the fridge for a day or two, just give it a good stir before serving.

Side Dish
Mexican, Vegan
Black Bean Rice, Cilantro-Lime Rice, Healthy Side Dish, quick recipe, Refreshing Rice

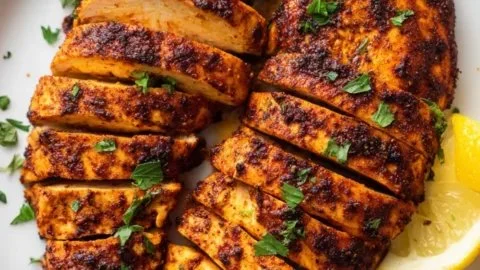
Air Fryer Cajun Chicken

Delicious Air Fryer Cajun Chicken served with a side of vegetables.

This Air Fryer Cajun Chicken Recipe is simple, bold, and ready in minutes. The chicken gets a spicy, smoky crust and stays juicy inside, so it makes a great weeknight dinner or a party snack. If you like easy air fryer chicken ideas, you might also enjoy this air fryer honey butter garlic chicken tenders recipe for a sweeter change. This recipe is a crowd-pleaser, full of flavor and low fuss, you will want to make it again and again.

How to prepare Air Fryer Cajun Chicken Recipe

Ingredients

  • 4 boneless, skinless chicken breasts, about 1 pound
  • 2 tablespoons olive oil
  • 2 tablespoons Cajun seasoning
  • 1 teaspoon garlic powder
  • 1/2 teaspoon paprika
  • 1/2 teaspoon salt, or to taste
  • 1/4 teaspoon black pepper
  • Lemon wedges, for serving

Directions

  1. Pat the chicken dry with paper towels. This helps the spice mix stick and the outside get crispy.
  2. In a bowl, mix the olive oil, Cajun seasoning, garlic powder, paprika, salt, and pepper.
  3. Rub the spice mix over each chicken breast, coating all sides. Let sit 5 to 10 minutes, or refrigerate up to 2 hours for more flavor.
  4. Preheat the air fryer to 380°F (190°C) for 3 minutes if your model needs preheating.
  5. Place the chicken in the air fryer basket in a single layer. Do not crowd the basket.
  6. Cook at 380°F (190°C) for 10 minutes. Flip the chicken and cook another 6 to 8 minutes, until the internal temperature reaches 165°F (74°C).
  7. Let the chicken rest 5 minutes before slicing. Serve with lemon wedges.

Air Fryer Cajun Chicken Recipe

Why You’ll Love Air Fryer Cajun Chicken Recipe

  • Fast cooking, ready in about 25 minutes from start to finish.
  • Crispy outside, juicy inside, thanks to the air fryer.
  • Bold Cajun spice without a lot of work.
  • Low cleanup, no frying oil needed.
  • Great for meal prep, salads, sandwiches, and wraps.

Tips for success

  • Dry the chicken well before seasoning, this gives a better crust.
  • Do not overcrowd the air fryer, cook in batches if needed.
  • Use a meat thermometer to check for 165°F, this keeps chicken safe and juicy.
  • If your chicken pieces are very thick, pound them to even thickness for even cooking.
  • Adjust Cajun seasoning to your heat preference, add more for extra spice or less for mild taste.

Serving Suggestions

  • Slice and add to a salad with greens, tomatoes, and avocado.
  • Serve over rice or quinoa with steamed vegetables.
  • Make sandwiches or wraps with lettuce, mayo, and pickles.
  • Pair with roasted potatoes or air fryer fries for a fuller meal.

Air Fryer Cajun Chicken Recipe

FAQs

Q: Can I use chicken thighs instead of breasts?

A: Yes, boneless thighs work well. Cook times may be a few minutes longer, check for 165°F internal temp.

Q: Is this recipe very spicy?

A: Cajun seasoning brings heat, but you can reduce the amount or use a mild Cajun blend for less spice.

Q: Can I cook frozen chicken in the air fryer?

A: You can, but thawed chicken gives the best texture and even seasoning. If you must cook frozen, add extra time and check the temperature.

Q: How do I store leftovers?

A: Keep leftover chicken in an airtight container in the fridge for up to 4 days. Reheat in the air fryer at 350°F for a few minutes to keep it crisp.

Q: Can I double the recipe?

A: Yes, but cook in batches so the air can circulate and the chicken gets crispy on all sides.

Conclusion

This Air Fryer Cajun Chicken Recipe is a simple way to get big flavor fast, perfect for busy nights or casual gatherings. For another tasty take on air fryer chicken you can try a different flavor profile with the Air Fryer Cajun Chicken (An Easy Recipe Loaded with Flavor!).

Air Fryer Cajun Chicken

A simple and bold Air Fryer Cajun Chicken recipe that features a spicy, smoky crust and juicy interior, perfect for weeknight dinners or as a party snack.

Main ingredients

  • 4 pieces boneless, skinless chicken breasts, about 1 pound
  • 2 tablespoons olive oil
  • 2 tablespoons Cajun seasoning
  • 1 teaspoon garlic powder
  • 1/2 teaspoon paprika
  • 1/2 teaspoon salt, or to taste
  • 1/4 teaspoon black pepper
  • Lemon wedges, for serving

Preparation

  1. Pat the chicken dry with paper towels to help the spice mix stick and achieve a crispy outer layer.
  2. In a bowl, mix the olive oil, Cajun seasoning, garlic powder, paprika, salt, and pepper.
  3. Rub the spice mix over each chicken breast, coating all sides. Let sit for 5 to 10 minutes, or refrigerate for up to 2 hours for more flavor.
  4. Preheat the air fryer to 380°F (190°C) for 3 minutes if your model requires preheating.

Cooking

  1. Place the chicken in the air fryer basket in a single layer, avoiding crowding.
  2. Cook at 380°F (190°C) for 10 minutes. Flip the chicken and continue to cook for another 6 to 8 minutes, until the internal temperature reaches 165°F (74°C).

Serving

  1. Let the chicken rest for 5 minutes before slicing. Serve with lemon wedges.

For best results, dry the chicken well before seasoning. Cook in batches if necessary to avoid overcrowding. Adjust the Cajun seasoning according to your spice preference.

Dinner, Main Course
American, Cajun
Air Fryer Chicken, Cajun Chicken, easy chicken recipe, Healthy Dinner, Quick Meal

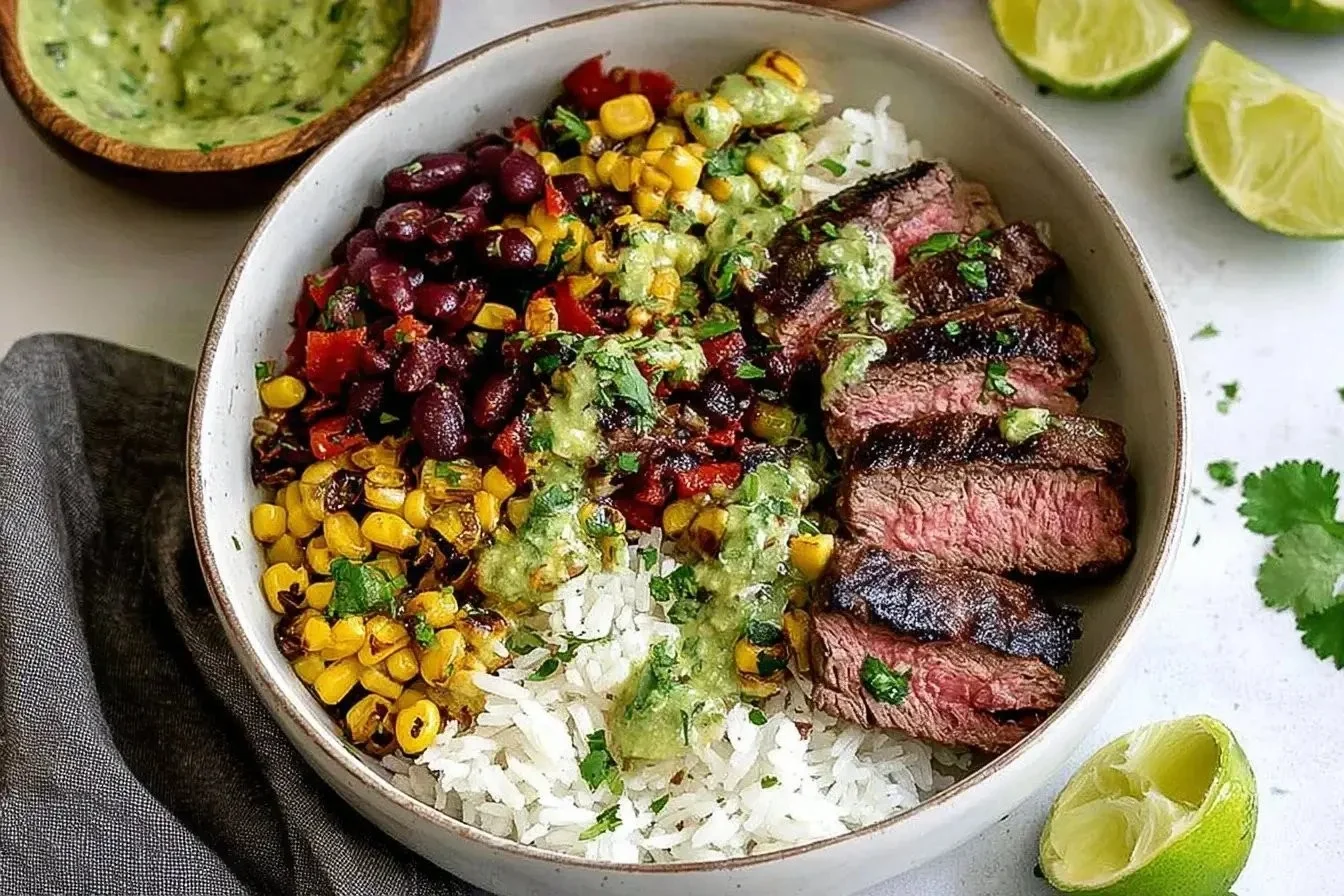
Cilantro Lime Steak Bowls

Cilantro lime steak bowls with fresh ingredients and vibrant colors

Cilantro Lime Steak Bowls are a delicious and healthy meal option that packs a punch of flavor. Fresh ingredients and bold spices create a dish that is both satisfying and nutritious. The combination of juicy steak, zesty lime, and fresh cilantro will tantalize your taste buds. This recipe is easy to prepare and perfect for lunch or dinner.

Making Cilantro Lime Steak Bowls at home allows you to control the ingredients and flavors. You can adjust the spices to your taste and add or omit ingredients based on your preferences. These bowls are also versatile; you can serve them with rice, quinoa, or salad greens.

Another reason to make this recipe is that it is perfect for meal prep. You can cook a large batch of steak and vegetables, then assemble your bowls throughout the week. Not only will you save time, but you’ll also have a delicious and healthy meal ready whenever hunger strikes.

Lastly, this recipe is crowd-pleaser. Whether you are cooking for your family or hosting friends, everyone will enjoy the vibrant flavors of this dish. With simple preparation and easy-to-find ingredients, Cilantro Lime Steak Bowls are a great option for anyone looking for a quick and tasty meal.

How to Make Cilantro Lime Steak Bowls

To make Cilantro Lime Steak Bowls, start with the ingredients. You will need steak, lime juice, garlic, olive oil, salt, pepper, fresh cilantro, and your choice of base such as rice or quinoa.

Begin by marinating the steak. In a bowl, mix lime juice, minced garlic, olive oil, salt, and pepper. Place the steak in the bowl and let it marinate for at least 30 minutes to absorb the flavors. After marinating, heat a grill or skillet over medium-high heat. Cook the steak for about 4-5 minutes on each side for medium-rare, depending on the thickness. Once cooked, let the steak rest for a few minutes before slicing it into thin strips.

Next, prepare your base. If using rice, cook according to the package instructions. If using quinoa, rinse it and cook it with water in a pot until fluffy.

Finally, assemble your bowls. Add a portion of your chosen base, top it with sliced steak, and garnish with fresh chopped cilantro over the top for added flavor. You can also add extra toppings like avocado, salsa, or corn if desired.

How to Serve Cilantro Lime Steak Bowls

Serving Cilantro Lime Steak Bowls is all about presentation and personal preference. Begin by placing a generous scoop of your chosen base, such as rice or quinoa, at the bottom of a bowl. Then, layer the sliced steak on top of the base to make it the star of the dish.

Consider adding some fresh vegetables for color and crunch. Diced tomatoes, bell peppers, or corn add freshness and texture. You can also add sliced avocado for creaminess and extra flavor.

For a zesty finish, drizzle some extra lime juice over the top or add a dollop of sour cream or yogurt. Fresh cilantro should be sprinkled on top to enhance the dish’s flavors and presentation.

These bowls are great for both casual and formal settings. Serve them as a hearty lunch option or as a light dinner. You can also set up a build-your-own bowl station for gatherings, allowing guests to customize their bowls based on their favorite toppings.

How to Store Cilantro Lime Steak Bowls

To store leftover Cilantro Lime Steak Bowls, first, let the ingredients cool to room temperature. You want to prevent condensation from forming inside the storage container.

Use airtight containers to keep the ingredients fresh. Each component—steak, base, and toppings—can be stored separately. This helps maintain the texture and flavor of each item. Store the steak in one container, the base in another, and any veggies or sauces in separate containers.

Refrigerate the food and consume it within 3-4 days for the best flavor and safety. If you want to keep these bowls for longer, consider freezing the cooked steak. Wrap the steak tightly in plastic wrap or aluminum foil and place it in a freezer-safe bag. It can be frozen for up to 3 months. When ready to eat, just thaw in the refrigerator overnight and reheat.

Tips to Make Cilantro Lime Steak Bowls

Here are some helpful tips to ensure your Cilantro Lime Steak Bowls turn out delicious. First, choose the right cut of steak. Cuts like flank steak or skirt steak are ideal as they are flavorful and tender when marinated properly.

Make sure to marinate the steak for at least 30 minutes, but allowing it to sit in the marinade for a few hours can enhance the flavor even further. If you’re short on time, you can also make a quick marinade and grill the steak immediately, although the flavor may not be as strong.

For a meal prep option, cook extra steak so that you have leftovers for the week. You can use the extra steak in sandwiches, salads, or tacos as well. Also, feel free to gather seasonal vegetables for toppings; this adds variety and nutrients to your bowls.

Use fresh cilantro for garnish as it enhances the freshness of the dish. If you don’t like cilantro, parsley can be a good substitute. Lastly, always taste and adjust the seasoning before serving to ensure that your flavors shine.

Variation

Cilantro Lime Steak Bowls can easily be adapted to suit different diets or tastes. For a vegetarian version, replace the steak with grilled tofu or tempeh, which can be marinated similarly. You can also use grilled chicken or shrimp if you prefer seafood.

Feel free to experiment with different grains or bases as well, such as cauliflower rice or whole wheat couscous. Adding beans like black beans or chickpeas can also boost the protein and fiber content. Customize your toppings to include your favorites, like pickled jalapeños or diced red onion for extra flavor.

FAQs

1. Can I use a different type of meat?
Yes! You can substitute steak with chicken, shrimp, or even tofu for a vegetarian option.

2. How long can I keep leftovers?
Leftovers can be stored in the refrigerator for 3-4 days. For longer storage, freeze the cooked steak.

3. What can I serve with these bowls?
These bowls are delicious on their own, but you can also serve them with tortilla chips, salsa, or a side salad for a fuller meal.

Cilantro Lime Steak Bowls

Delicious and healthy meal options packed with juicy steak, zesty lime, and fresh cilantro. Perfect for lunch or dinner, these bowls are versatile and ideal for meal prep.

For the Marinate

  • 1 lb steak (Flank or skirt steak recommended)
  • 1/4 cup lime juice (Freshly squeezed for best flavor)
  • 3 cloves garlic, minced
  • 2 tbsp olive oil
  • 1 tsp salt
  • 1/2 tsp pepper

For Serving

  • 2 cups cooked rice or quinoa (Cook according to package instructions)
  • 1/4 cup fresh cilantro, chopped (Optional for garnish)
  • 1 avocado sliced (Optional for topping)
  • 1/2 cup salsa (Optional for topping)
  • 1/2 cup corn (Optional for topping)
  • 1 cup diced tomatoes or bell peppers (Optional for added freshness)

Preparation

  1. In a bowl, mix lime juice, minced garlic, olive oil, salt, and pepper.
  2. Place the steak in the marinade and let it marinate for at least 30 minutes.

Cooking

  1. Heat a grill or skillet over medium-high heat.
  2. Cook the marinated steak for about 4-5 minutes on each side for medium-rare.
  3. Let the steak rest for a few minutes before slicing into thin strips.

Assembly

  1. Add a portion of cooked rice or quinoa to a bowl.
  2. Top with sliced steak and garnish with fresh chopped cilantro.
  3. Add any additional toppings like avocado, salsa, or corn.

For meal prep, store each component separately in airtight containers. Use fresh cilantro for garnish, and consider parsley as a substitute if needed. Taste and adjust seasoning as necessary before serving.

Dinner, lunch
Healthy, Mexican
Cilantro Lime Steak Bowls, Healthy Dinner, Meal Prep, quick recipe, Steak Bowls


Cilantro Lime Steak Bowls

Delicious and healthy meal options packed with juicy steak, zesty lime, and fresh cilantro. Perfect for lunch or dinner, these bowls are versatile and ideal for meal prep.

For the Marinade

  • 1 lb steak (Flank or skirt steak recommended)
  • 1/4 cup lime juice (Freshly squeezed for best flavor)
  • 3 cloves garlic, minced
  • 2 tbsp olive oil
  • 1 tsp salt
  • 1/2 tsp pepper

For Serving

  • 2 cups cooked rice or quinoa (Cook according to package instructions)
  • 1/4 cup fresh cilantro, chopped (Optional for garnish)
  • 1 each avocado, sliced (Optional for topping)
  • 1/2 cup salsa (Optional for topping)
  • 1/2 cup corn (Optional for topping)
  • 1 cup diced tomatoes or bell peppers (Optional for added freshness)

Preparation

  1. In a bowl, mix lime juice, minced garlic, olive oil, salt, and pepper.
  2. Place the steak in the marinade and let it marinate for at least 30 minutes.

Cooking

  1. Heat a grill or skillet over medium-high heat.
  2. Cook the marinated steak for about 4-5 minutes on each side for medium-rare.
  3. Let the steak rest for a few minutes before slicing into thin strips.

Assembly

  1. Add a portion of cooked rice or quinoa to a bowl.
  2. Top with sliced steak and garnish with fresh chopped cilantro.
  3. Add any additional toppings like avocado, salsa, or corn.

For meal prep, store each component separately in airtight containers. Use fresh cilantro for garnish, and consider parsley as a substitute if needed. Taste and adjust seasoning as necessary before serving.

Dinner, lunch
Healthy, Mexican
Cilantro Lime Steak Bowls, Healthy Recipes, Meal Prep, Quick Dinner, Steak Bowls

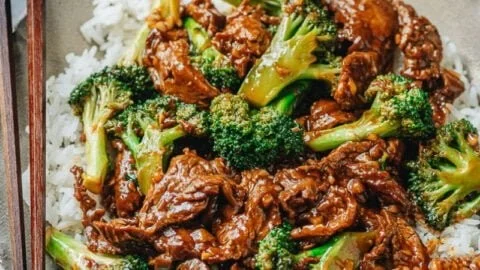
Easy Beef and Broccoli

Delicious Chinese Beef and Broccoli dish served in a bowl

Beef and Broccoli is a beloved dish that brings the taste of restaurant-quality  cooking right into your home. There are many reasons to try this recipe. First, it is simple to make, requiring just a few ingredients and a quick cooking time. Busy weeknights can be stressful, and this dish provides a delicious meal in about 30 minutes!

Another great reason to make this dish is its balanced flavor. The tender beef pairs perfectly with crunchy broccoli, creating a delightful contrast. The sauce, typically made from soy sauce, garlic, and ginger, adds a savory taste that pleases many palates.

Additionally, cooking at home allows you to control the ingredients. You can use high-quality beef, fresh vegetables, and avoid unwanted additives. Plus, it’s a great way to incorporate more veggies into your diet. The combination of protein and fiber in this dish makes it satisfying and filling.

Lastly, preparing food like this can be a fun and rewarding experience. By following the recipe, you can impress family or friends with your cooking skills. It’s a perfect dish for gatherings or family dinners, making it a winner in many households. Enjoying a hearty meal, made with love, always feels good!

How to Make Beef and Broccoli

Making Beef and Broccoli is easy and straightforward. Start by gathering your ingredients: thinly sliced beef (like flank steak), fresh broccoli florets, soy sauce, garlic, ginger, and a bit of cornstarch.

Begin by marinating the beef. In a bowl, mix a tablespoon of soy sauce with a teaspoon of cornstarch, garlic, and ginger. Toss the beef in this mixture and let it sit for about 15 minutes. While the beef is marinating, prepare the broccoli. Steam it lightly until it is bright green and slightly tender, but still crisp.

Next, heat a large pan or wok over medium-high heat. Add a bit of oil and let it heat up. Once hot, add the marinated beef. Stir-fry it until it begins to brown and is cooked through, which should take about 3 to 4 minutes. Then, add the steamed broccoli to the pan. Pour in a bit more soy sauce to add flavor and continue cooking for another 2 to 3 minutes.

Stir everything well to combine the flavors, making sure the beef and broccoli are well coated in the sauce. Once everything is heated through, it’s ready to serve. You can enjoy this dish with rice or noodles for a complete meal.

How to Serve Beef and Broccoli

Serving Beef and Broccoli is simple and enjoyable. It’s best to serve the dish hot and fresh from the pan. You can place it directly on a large serving platter for everyone to help themselves, or serve it on individual plates.

One of the most common sides for this dish is steamed white rice. The rice absorbs the delicious sauce, which enhances the overall flavor. You can also use fried rice for a nice twist. If you’re looking for something lighter, consider offering a side of quinoa.

You can garnish the dish with some sesame seeds or chopped green onions to add a touch of color and extra flavor. If you have some chili flakes, a sprinkle can add a nice kick for those who enjoy spicier food.

This dish is versatile, and you can serve it alongside other dishes for a full meal experience. Consider pairing it with spring rolls or hot and sour soup for a delightful dinner that’s sure to impress everyone at the table.

How to Store Beef and Broccoli

If you have leftovers of Beef and Broccoli, storing it correctly is important to maintain its flavor. Allow the dish to cool completely at room temperature. Once cooled, transfer the leftovers into an airtight container.

You can store the dish in the fridge for up to three days. When you’re ready to eat again, simply reheat the dish on the stovetop or in the microwave. If reheating in a pan, add a splash of water or broth to keep the beef and broccoli moist.

For longer storage, consider freezing the dish. Place the cooled meal in a freezer-safe container. It can last for about two to three months in the freezer. When you want to eat it, thaw it overnight in the fridge before reheating.

Take note that the texture of broccoli may change slightly after freezing and reheating, but it will still be tasty! Enjoy your leftovers as a quick meal on busy days.

Tips to Make Beef and Broccoli

Here are some helpful tips to ensure your Beef and Broccoli turns out great each time. First, choose the right cut of beef. Flank steak or sirloin works best, as they are tender and cook quickly. Make sure to slice the beef thinly against the grain for better texture.

Second, do not overcook the broccoli. Aim for that perfect crunch by steaming it just until it turns bright green. This keeps the nutrients intact and maintains the vibrant color.

Third, use high-quality soy sauce. The flavor greatly impacts the dish, so opt for low-sodium soy sauce if you want to reduce salt intake. You can also add oyster sauce for an extra depth of flavor!

Fourth, don’t hesitate to experiment. You can add other vegetables like bell peppers, carrots, or snap peas to enhance the dish.

Lastly, always taste and adjust the seasoning to your preference. Everyone’s palate is different, so using your own taste buds to guide you can create a dish that you will love. Happy cooking!

Variation

You can customize Beef and Broccoli in a few ways. One popular variation is to add different proteins. Chicken or tofu can be excellent substitutes if you prefer. You can also try adding more spices, such as black pepper or crushed red pepper, for added heat. For a sweeter flavor, include some sugar or honey in the marinade.

Another variation includes changing the vegetables. Instead of just broccoli, try using bok choy, snow peas, or bell peppers. This will create a colorful and varied dish! Cooking methods can also vary; grilling the beef for a smoky taste or using a slow cooker for a deeply flavored result can be great adaptations. Experimenting is part of the fun!

FAQs

1. Can I make this dish gluten-free?
Yes! Use gluten-free soy sauce or tamari to keep the dish gluten-free while still enjoying that savory flavor.

2. How do I make it vegan or vegetarian?
You can replace the beef with tofu or seitan and use vegetable broth or soy sauce for the sauce. It will still be delicious!

3. Can I use frozen broccoli instead of fresh?
Yes, you can use frozen broccoli. Just make sure to thaw it beforehand and drain any excess water to prevent the dish from becoming too watery.

[tasty-recipe id=”4689″]

Beef and Broccoli

A simple yet delicious dish that brings the flavors of restaurant-quality beef and broccoli to your home in about 30 minutes.

For the Marinade

  • 1 tablespoon soy sauce (Use low-sodium soy sauce if desired)
  • 1 teaspoon cornstarch (Helps to tenderize the beef)
  • 3 cloves garlic, minced (Adds flavor)
  • 1 teaspoon ginger, minced (Adds a savory taste to the marinade)

Main Ingredients

  • 1 pound flank steak, thinly sliced (A tender cut ideal for quick cooking)
  • 4 cups broccoli florets (Fresh florets preferred for best texture)
  • 2 tablespoons oil (For stir-frying)
  • 2 tablespoons soy sauce, to taste (For additional flavor when cooking)

Preparation

  1. In a bowl, mix the soy sauce, cornstarch, garlic, and ginger.
  2. Toss the sliced beef in the mixture and let it marinate for about 15 minutes.
  3. While the beef is marinating, steam the broccoli until bright green and slightly tender.

Cooking

  1. Heat a large pan or wok over medium-high heat and add oil.
  2. Once hot, add the marinated beef and stir-fry until browned and cooked through (about 3 to 4 minutes).
  3. Add the steamed broccoli to the pan and pour in additional soy sauce.
  4. Continue cooking for another 2 to 3 minutes, stirring well to combine.

Serving

  1. Serve the Beef and Broccoli hot with rice, noodles, or quinoa.
  2. Garnish with sesame seeds or chopped green onions if desired.

For variations, consider adding other vegetables like bell peppers or using chicken or tofu as protein. Adjust seasoning to personal taste.

Dinner, Main Course
Asian, Chinese
Beef and Broccoli, Easy Recipe, Healthy Meal, Quick Dinner, Stir-Fry

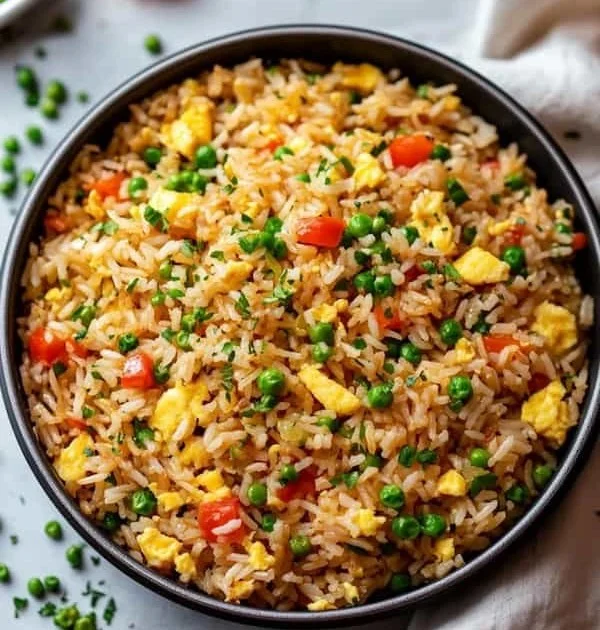
Egg Fried Rice

Plate of flavorful Egg Fried Rice garnished with vegetables and egg

Egg Fried Rice is a delicious dish that feels like home. It mixes soft eggs, savory soy sauce, and fluffy rice for a quick meal that most people love. This featured recipe is a true crowd-pleaser, easy to make for a weeknight dinner or a fast lunch. It tastes bright from green onions and rich from sesame oil, and it works well with many leftovers. If you like quick rice bowls, you might enjoy trying a similar idea, like the spicy ground beef stir fry bowl for more meal ideas. Give this egg fried rice a try and watch it disappear, one spoonful at a time.

How to prepare Egg Fried Rice

Ingredients

  • 3 cups cold cooked rice, day-old is best
  • 2 large eggs
  • 2 tablespoons vegetable oil
  • 1 small onion, chopped
  • 2 cloves garlic, minced
  • 2 green onions, sliced
  • 2 tablespoons soy sauce
  • 1 teaspoon sesame oil, optional
  • Salt and pepper to taste
  • Frozen peas or diced carrots, optional, 1/2 cup

Directions

  1. Break up the cold rice with your hands or a fork so it is loose and not in big clumps.
  2. Heat 1 tablespoon oil in a large pan or wok over medium-high heat. Scramble the eggs until just set, then move them to the side and break them up.
  3. Add the other tablespoon of oil. Stir in the chopped onion and cook 1 to 2 minutes until soft. Add garlic and cook 20 to 30 seconds.
  4. If you use peas or carrots, add them now and cook until heated.
  5. Add the rice to the pan and spread it out. Stir and toss the rice so it heats and gets a little color.
  6. Push rice to the side, add the eggs back in and mix. Stir in soy sauce and sesame oil, if using. Add salt and pepper to taste.
  7. Stir in sliced green onions and serve hot.

Egg Fried Rice

Why You’ll Love Egg Fried Rice

  • Fast to make, ready in about 15 to 20 minutes.
  • Uses simple ingredients you likely have at home.
  • Flexible, you can add veggies or meat for more flavor.
  • Great use for leftover rice, it keeps the rice from getting soggy.

Tips for success

  • Use cold, day-old rice, it fries better and stays separate.
  • Work on high heat, and keep the rice moving in the pan.
  • Don’t overcrowd the pan, cook in batches if needed.
  • Season at the end so you control the salt level.
  • Taste as you go, add more soy sauce or pepper if needed.

Serving Suggestions

  • Serve with a side of steamed vegetables or a simple salad.
  • Top with extra sliced green onions or a drizzle of sesame oil.
  • Add cooked shrimp, chicken, or tofu for protein.
  • Offer chili sauce or soy sauce at the table for extra flavor.

Egg Fried Rice

FAQs

Q: Can I use fresh rice?

A: You can, but fresh hot rice can be sticky. Cool it on a tray first so it dries a little.

Q: Can I make this without oil?

A: Oil helps fry and add flavor, but you can use a nonstick pan and a small spray of oil if you want less fat.

Q: How do I store leftovers?

A: Cool quickly and keep in an airtight container. Use within 2 days and reheat on the stove or in a microwave.

Q: Can I add more vegetables?

A: Yes, bell peppers, peas, carrots, and corn work well. Cook harder veggies first.

Conclusion

For a quick and tasty guide to a very similar recipe, see this simple version, The Easiest Egg Fried Rice (20 Minutes) | Healthy Nibbles by Lisa Lin, for more tips and a fast method to try.

Egg Fried Rice

A quick and delicious dish that mixes soft eggs, savory soy sauce, and fluffy rice, perfect for a crowd-pleasing meal any night of the week.

Main Ingredients

  • 3 cups cold cooked rice (day-old is best)
  • 2 large eggs
  • 2 tablespoons vegetable oil
  • 1 small onion, chopped
  • 2 cloves garlic, minced
  • 2 tablespoons soy sauce
  • 1 teaspoon sesame oil (optional)
  • 1/2 cup frozen peas or diced carrots (optional)
  • Salt and pepper (to taste)

Preparation

  1. Break up the cold rice with your hands or a fork so it is loose and not in big clumps.
  2. Heat 1 tablespoon oil in a large pan or wok over medium-high heat. Scramble the eggs until just set, then move them to the side and break them up.
  3. Add the other tablespoon of oil. Stir in the chopped onion and cook for 1 to 2 minutes until soft. Add garlic and cook for 20 to 30 seconds.
  4. If using peas or carrots, add them now and cook until heated.
  5. Add the rice to the pan and spread it out. Stir and toss the rice so it heats and gets a little color.
  6. Push rice to the side, add the eggs back in and mix. Stir in soy sauce and sesame oil, if using. Add salt and pepper to taste.
  7. Stir in sliced green onions and serve hot.

Use cold, day-old rice for the best texture. Work on high heat to keep the rice moving in the pan, and avoid overcrowding. Taste and adjust seasoning as needed.

Dinner, lunch, Main Course
Asian, Chinese
Egg Fried Rice, Fried Rice Recipe, Leftover Rice, Quick Meal, Vegetable Fried Rice