Chicken Caesar Wraps

Delicious Chicken Caesar Wraps with crisp lettuce and grilled chicken

Chicken Caesar Wraps are simple, fresh, and full of flavor. Warm grilled chicken meets crisp romaine lettuce and creamy Caesar dressing, all wrapped in a soft tortilla. This recipe is a real crowd pleaser, good for a quick lunch, a picnic, or an easy weeknight dinner. It tastes like a classic Caesar salad, but you can eat it with your hands, which makes it even more fun. Give it a try, and get ready to make it again and again.

How to prepare Chicken Caesar Wraps

  1. Cook the chicken, season with salt and pepper, then slice or chop. Use grilled or pan seared chicken for extra flavor.
  2. Toss chopped romaine lettuce with Caesar dressing, a little lemon juice, and grated Parmesan cheese. Add freshly ground black pepper if you like.
  3. Warm the tortilla for a few seconds in a pan or microwave so it folds easily.
  4. Place some dressed lettuce in the center of the tortilla, add the sliced chicken, and sprinkle with extra Parmesan and croutons for crunch.
  5. Fold the sides over, then roll the wrap tightly from one end to the other. Cut in half if you want.
  6. Serve right away, or wrap in foil to take on the go.

Chicken Caesar Wraps

Why You’ll Love Chicken Caesar Wraps

  • They are quick to make, great for an easy lunch or fast dinner.
  • The flavors are familiar and comforting, with tangy Caesar dressing and savory grilled chicken.
  • They are easy to change, use leftover chicken, rotisserie chicken, or make a lighter version with Greek yogurt.
  • Wraps are portable, so they are perfect for work lunches, school, or a packed picnic.

tips for success

  • Use good quality Caesar dressing, or make a small batch at home for better taste.
  • Dry the lettuce well, so the tortilla does not get soggy.
  • Warm the tortilla before rolling, it will fold without cracking.
  • Add crunch with croutons or toasted breadcrumbs right before serving.
  • If you plan to store the wraps, wrap each one in parchment or foil, and keep the dressing separate if you want extra crispness.

Serving Suggestions

  • Serve with a side of kettle chips, sweet potato fries, or a light soup.
  • Pair with a simple fruit salad for a fresh contrast.
  • Offer lemon wedges for a bright squeeze of juice.
  • Try adding roasted red peppers, bacon, or sliced avocado for variety.

Chicken Caesar Wraps

FAQs

Q: Can I use rotisserie chicken for these wraps?

A: Yes, rotisserie chicken works great, it saves time and adds good flavor.

Q: How long can I store Chicken Caesar Wraps?

A: Store in the fridge for up to 24 hours. For best texture, keep dressing or croutons separate until ready to eat.

Q: Can I make the dressing lighter?

A: Yes, swap half the mayonnaise for plain Greek yogurt to cut calories and keep creaminess.

Q: Are these wraps good warm or cold?

A: Both work well. Warm chicken makes them cozy, cold makes them crisp and refreshing.

Q: Can I make them gluten free?

A: Yes, use a gluten free tortilla and gluten free croutons or omit the croutons.

Conclusion

If you want another clear recipe idea and step by step photos for Chicken Caesar Wraps, see Chicken Caesar Wrap – Tastes Better From Scratch for more tips and a photo guide.

Chicken Caesar Wraps

Chicken Caesar Wraps are simple, fresh, and full of flavor. This recipe combines warm grilled chicken with crisp romaine lettuce and creamy Caesar dressing, all wrapped in a soft tortilla, making it a perfect quick lunch or easy weeknight dinner.

Main Ingredients

  • 2 pieces chicken breasts (Use grilled or pan-seared for extra flavor.)
  • 4 cups romaine lettuce, chopped (Dry the lettuce well to prevent sogginess.)
  • 1/2 cup Caesar dressing (Use good quality or homemade dressing.)
  • 1 tablespoon lemon juice (Add a bright flavor.)
  • 1/4 cup grated Parmesan cheese (Add more for topping if desired.)
  • 8 pieces tortillas (Warm before rolling.)
  • 1/2 cup croutons (For added crunch.)

Preparation

  1. Cook the chicken, season with salt and pepper, then slice or chop.
  2. Toss chopped romaine lettuce with Caesar dressing, lemon juice, and grated Parmesan cheese. Add freshly ground black pepper if desired.
  3. Warm the tortilla in a pan or microwave for a few seconds so it folds easily.

Assembly

  1. Place some dressed lettuce in the center of the tortilla.
  2. Add the sliced chicken and sprinkle with extra Parmesan and croutons.
  3. Fold the sides over, then roll the wrap tightly from one end to the other.
  4. Cut in half if desired, and serve immediately or wrap in foil to take on the go.

Store in the fridge for up to 24 hours. For best texture, keep dressing or croutons separate until ready to eat. You can use rotisserie chicken for convenience, try adding roasted red peppers, bacon, or sliced avocado for variation.
Dinner, lunch
American
Chicken Caesar Wrap, Easy Lunch, Healthy Wrap, Quick Dinner, Tortilla Wrap

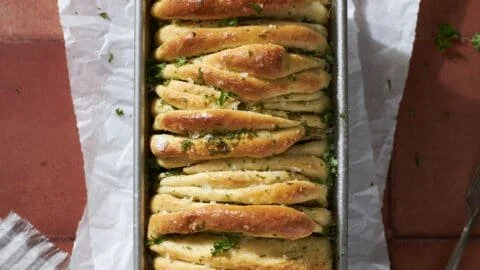
Sourdough Discard Garlic Pull Apart Bread

Fresh sourdough discard garlic pull apart bread on a wooden cutting board.

This warm, pull-apart garlic bread uses sourdough discard to make soft, tasty rolls that everyone will love. It feels cozy, smells like garlic and butter, and works great as a snack or side. The bread pulls apart in soft, buttery pieces, and it is a simple way to use your leftover starter. If you like soft pull-apart rolls, try the similar recipe for fluffy honey butter pull-apart rolls with browned butter glaze for another crowd favorite. This Sourdough Discard Garlic Pull Apart Bread is a real crowd-pleaser, and you will smile when you pull those warm pieces apart.

how to prepare Sourdough Discard Garlic Pull Apart Bread

  1. Mix the dough, use sourdough discard, flour, salt, a little sugar, oil or melted butter, and yeast if you want faster rise. Stir until it forms a soft dough.
  2. Let the dough rise until it doubles, this can take a few hours at room temp or less with warm water and yeast.
  3. Divide the dough into small balls. Press each ball flat a little, then brush with garlic butter, add a bit of chopped parsley or cheese if you like.
  4. Stack or place the balls close in a pan so they will bake into a pull-apart loaf. Cover and let rise again for 30–60 minutes.
  5. Bake at a medium-high oven temperature until the top is golden brown and the inside is cooked, about 20–30 minutes depending on size.
  6. Brush more garlic butter when the bread is hot from the oven, then let it cool a little before pulling apart and serving.

Sourdough Discard Garlic Pull Apart Bread

Why You’ll Love Sourdough Discard Garlic Pull Apart Bread

  • It uses sourdough discard, so you waste less and get great flavor.
  • The bread is soft and moist, with a crisp, garlicky top.
  • Pull-apart shape makes it fun to share at the table.
  • You can add cheese, herbs, or spices to change the taste easily.
  • It works for snacks, dinners, or party food, and fills the house with a great smell.

tips for success

  • Use room temperature discard so the dough mixes easily.
  • If you want a quick bake, add a small pinch of instant yeast to speed the rise.
  • Do not overfill the pan, leave room for the dough to rise and spread.
  • Brush with plenty of garlic butter so every pull has flavor.
  • Check the center with a skewer, it should come out clean when done.
  • Let the bread rest a few minutes after baking to set, then pull apart gently.
  • To make it dairy-free, use olive oil or a plant butter instead of regular butter.

Serving Suggestions

  • Serve with marinara or warm cheese dip for a tasty snack.
  • Pair with soup, like tomato soup, to soak up extra garlic butter.
  • Add to a pasta night, it goes great with simple red or white sauces.
  • Offer a small bowl of herb butter or olive oil with herbs for dipping.
  • Top with grated Parmesan and fresh parsley for a nicer look and more taste.

Sourdough Discard Garlic Pull Apart Bread

FAQs

Q: What is sourdough discard,

A: Sourdough discard is the extra starter you remove when you feed your starter. It still has flavor and works well in quick breads and baked goods.

Q: Can I use active starter instead of discard,

A: Yes, you can use active starter, but active starter may make the dough rise faster. Watch the rise time and adjust if needed.

Q: Can I freeze the baked bread,

A: Yes, cool the bread, wrap it well, and freeze. Thaw and warm in the oven before serving for best taste.

Q: Can I make this dairy-free or vegan,

A: Yes, swap butter for olive oil or a plant-based butter, and use your favorite vegan cheese if you like cheese on top.

Conclusion

This Sourdough Discard Garlic Pull Apart Bread is easy, cozy, and perfect for sharing. It turns extra starter into a tasty, garlicky loaf that people will love. For another way to use discard in a garlic pull-apart style, check this idea for Sourdough Discard Garlic Knots – Vegan Yack Attack. Give the recipe a try, enjoy the warm scent, and have fun pulling it apart with friends or family.

Sourdough Discard Garlic Pull Apart Bread

A cozy and flavorful pull-apart bread that utilizes sourdough discard for a soft, buttery experience, perfect for snacks or as a side dish.

For the dough

  • 1 cup sourdough discard (Use room temperature for easier mixing)
  • 3 cups all-purpose flour (Adjust as necessary for dough consistency)
  • 1 teaspoon salt
  • 1 tablespoon sugar (Optional for slight sweetness)
  • 2 tablespoons oil or melted butter (Use olive oil for a dairy-free option)
  • 1 teaspoon instant yeast (Optional for faster rise)

For the garlic butter

  • 4 tablespoons butter, melted (Brush on the dough)
  • 4 cloves garlic, minced (Adjust based on preference)
  • 2 tablespoons parsley, chopped (Optional for flavor and garnish)

Preparation

  1. Mix the dough by combining sourdough discard, flour, salt, sugar, oil or melted butter, and instant yeast (if using). Stir until it forms a soft dough.
  2. Let the dough rise until it doubles in size, which can take a few hours at room temperature or less with warm water and yeast.
  3. Divide the dough into small balls and flatten each slightly. Brush with garlic butter and add chopped parsley or cheese if desired.
  4. Stack or place the balls closely in a baking pan, cover, and let rise again for 30-60 minutes.

Baking

  1. Preheat the oven to a medium-high temperature. Bake the bread until the top is golden brown and the inside is cooked, about 20-30 minutes depending on size.
  2. Brush with additional garlic butter immediately after the bread comes out of the oven, then let cool slightly before pulling apart to serve.

Use room temperature sourdough discard for best results. For a dairy-free option, replace butter with olive oil or plant-based butter. Can serve with marinara or warm cheese dip.

Side Dish, Snack
American
Easy Bread Recipe, Garlic Bread, pull apart bread, sourdough, sourdough discard

Sheet Pan Lemon Herb Chicken and Vegetables

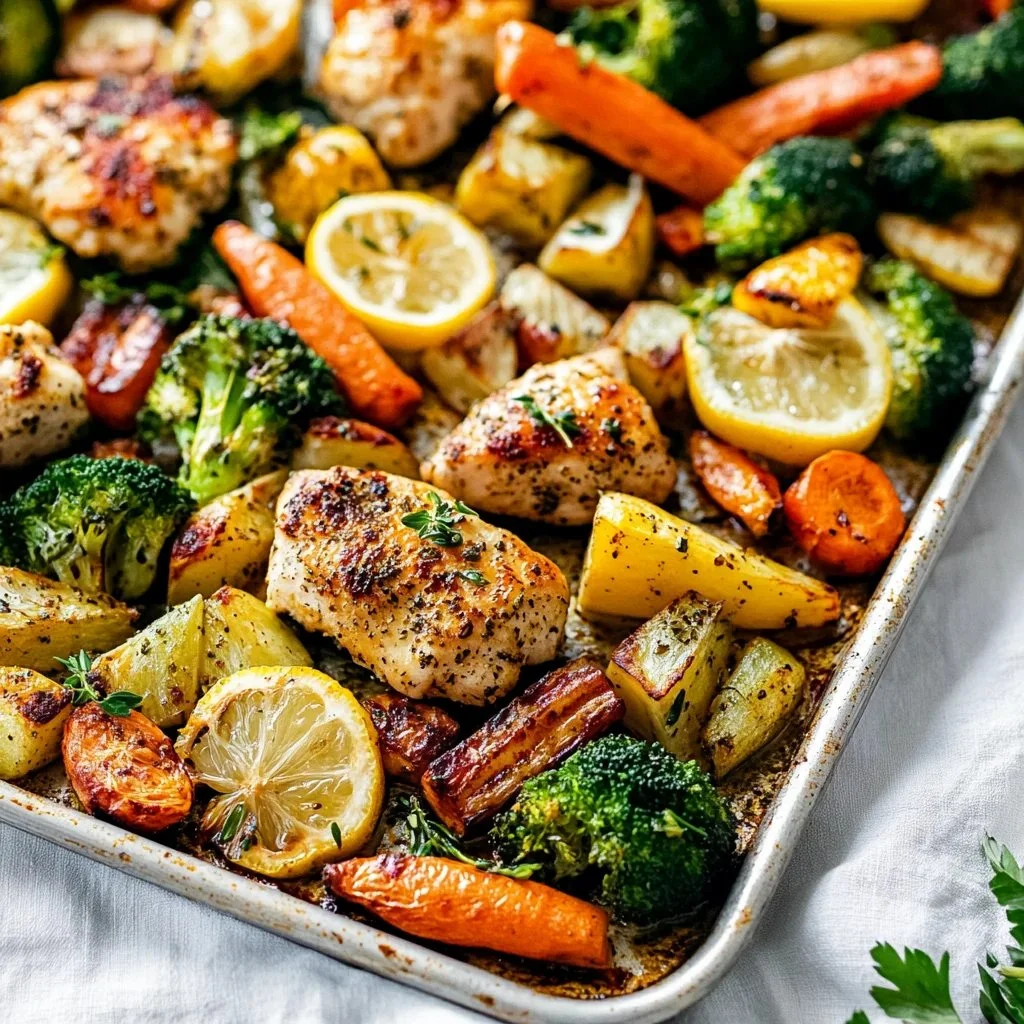
Sheet Pan Lemon Herb Chicken with fresh vegetables

This is a warm, easy talk about Sheet Pan Lemon Herb Chicken and Vegetables. It is a friendly meal for busy nights when you want good food without a lot of steps. The lemon gives a fresh, bright taste, and the herbs add a homey, savory note. Roasted veggies and chicken cook together so flavors mix, and the pan stays simple to clean.

The featured recipe is a true crowd-pleaser. It tastes fresh and cozy at the same time. People like it because it feels special but takes little time. It makes your kitchen smell like home, and it looks colorful on the plate.

You will want to make it again and again, and you might smile when you see how easy it is to get a tasty dinner on the table.

How to prepare Sheet Pan Lemon Herb Chicken and Vegetables

This simple sheet pan meal cooks the chicken and vegetables together for an easy, tasty dinner. Here is an easy way to make it, step by step.

Ingredients

  • 4 boneless, skinless chicken thighs or breasts
  • 1 pound small potatoes, halved
  • 2 carrots, cut into sticks
  • 1 red bell pepper, cut into pieces
  • 1 small red onion, cut into wedges
  • 2 zucchini, sliced
  • 3 tablespoons olive oil
  • 2 tablespoons lemon juice, plus extra lemon wedges to serve
  • 3 cloves garlic, minced
  • 1 teaspoon dried thyme or 1 tablespoon fresh
  • 1 teaspoon dried rosemary or 1 tablespoon fresh, chopped
  • Salt and black pepper to taste
  • Fresh parsley, chopped, for garnish (optional)

Directions

  1. Preheat the oven to 425°F (220°C). Line a large sheet pan with foil or parchment for easy clean up.
  2. In a large bowl, mix the olive oil, lemon juice, garlic, thyme, rosemary, salt, and pepper.
  3. Add the chicken to the bowl and turn to coat well in the lemon herb mix. Let sit for 5 minutes if you can.
  4. Put the potatoes, carrots, bell pepper, and onion on the sheet pan. Toss them with a little salt, pepper, and a bit of the oil mix.
  5. Push the vegetables to the sides and place the chicken pieces in the center. Add the zucchini around the chicken in the last 10 minutes of cooking so it does not get too soft.
  6. Roast for 25 to 35 minutes, until the chicken reaches 165°F (74°C) and the vegetables are tender. If you like a bit of color, broil for 2–3 minutes at the end.
  7. Let the chicken rest for 5 minutes. Squeeze fresh lemon over everything and sprinkle with chopped parsley.

Serve warm. This one-pan roast makes clean up easy and gives you a bright lemon herb taste with roasted vegetables.

Sheet Pan Lemon Herb Chicken and Vegetables

Why You’ll Love Sheet Pan Lemon Herb Chicken and Vegetables

You will love this sheet pan meal because it is quick, bright, and full of flavor. The lemon and herbs lift the chicken, and the roasted vegetables add a sweet, caramelized taste. It is a great weeknight dinner, a low fuss one-pan meal, and a crowd-pleaser for simple family meals. The recipe gives soft potatoes, tender chicken, and crisp edges on the vegetables, all in one pan.

tips for success

  • Use similar size pieces for the vegetables, so they cook evenly.
  • Pat the chicken dry before you toss in the oil mix, this helps the outside brown.
  • If you use chicken breasts, check early to avoid drying them out.
  • Add zucchini and delicate veg later in the bake time, they cook fast.
  • Taste and add a little more lemon or salt at the end to brighten the dish.
  • Use a meat thermometer to check chicken for safe doneness, 165°F (74°C).

Serving Suggestions

  • Serve with lemon wedges and extra chopped parsley for a fresh look.
  • Add a simple green salad or steamed green beans for more veg.
  • Spoon warm quinoa, rice, or couscous beside the chicken for a fuller meal.
  • Leftovers work well in wraps or over a bed of greens for lunch.

Sheet Pan Lemon Herb Chicken and Vegetables

FAQs

Q: Can I use bone-in chicken for this recipe? A: Yes, bone-in chicken works. It may need more time to cook. Check the thickest part for 165°F, and allow 5 to 10 more minutes if needed.

Q: What vegetables work best for a sheet pan dinner? A: Root vegetables like potatoes, carrots, and beets hold up well. Peppers, onions, and zucchini also work, add tender veg later so they do not overcook.

Q: Can I make this gluten free? A: Yes, this recipe is naturally gluten free. Just check any store bought seasonings or marinades to be sure they are labeled gluten free.

Q: How long can I store leftovers? A: Keep leftovers in an airtight container in the fridge for 3 to 4 days. Reheat in the oven or a hot skillet to keep the veggies from getting too soft.

Q: Can I freeze this dish? A: You can freeze cooked chicken and vegetables for up to 2 months. Thaw in the fridge overnight before reheating.

Conclusion

For a full, bright take on this easy weeknight meal, you can read more tips and a similar recipe at Lemon Herb Chicken Sheet Pan – Something Nutritious.

Sheet Pan Lemon Herb Chicken and Vegetables

A simple and flavorful sheet pan meal featuring roasted chicken and colorful vegetables, all seasoned with fresh lemon and herbs. Perfect for busy weeknights!

Main Ingredients

  • 4 pieces boneless, skinless chicken thighs or breasts
  • 1 pound small potatoes, halved
  • 2 pieces carrots, cut into sticks
  • 1 piece red bell pepper, cut into pieces
  • 1 small red onion, cut into wedges
  • 2 pieces zucchini, sliced

Seasoning and Oil

  • 3 tablespoons olive oil
  • 2 tablespoons lemon juice, plus extra lemon wedges to serve
  • 3 cloves garlic, minced
  • 1 teaspoon dried thyme or 1 tablespoon fresh
  • 1 teaspoon dried rosemary or 1 tablespoon fresh, chopped
  • to taste salt and black pepper

Garnish

  • to taste fresh parsley, chopped ((optional))

Preparation

  1. Preheat the oven to 425°F (220°C). Line a large sheet pan with foil or parchment for easy clean up.
  2. In a large bowl, mix the olive oil, lemon juice, garlic, thyme, rosemary, salt, and pepper.
  3. Add the chicken to the bowl and turn to coat well in the lemon herb mix. Let sit for 5 minutes if you can.
  4. Put the potatoes, carrots, bell pepper, and onion on the sheet pan. Toss them with a little salt, pepper, and a bit of the oil mix.
  5. Push the vegetables to the sides and place the chicken pieces in the center. Add the zucchini around the chicken in the last 10 minutes of cooking so it does not get too soft.

Cooking

  1. Roast for 25 to 35 minutes, until the chicken reaches 165°F (74°C) and the vegetables are tender. If you like a bit of color, broil for 2–3 minutes at the end.
  2. Let the chicken rest for 5 minutes. Squeeze fresh lemon over everything and sprinkle with chopped parsley.

Use vegetables of similar size to ensure even cooking. Pat the chicken dry before tossing in the oil mix to enhance browning. Adjust seasoning to taste, adding more lemon or salt at the end if desired.

Dinner, Main Course
American
Easy Dinner, Lemon Herb Chicken, One Pan Meal, Roasted Vegetables, Sheet Pan Chicken


Sheet Pan Lemon Herb Chicken and Vegetables

A simple and flavorful sheet pan meal featuring roasted chicken and colorful vegetables, all seasoned with fresh lemon and herbs. Perfect for busy weeknights!

Main Ingredients

  • 4 pieces boneless, skinless chicken thighs or breasts
  • 1 pound small potatoes, halved
  • 2 pieces carrots, cut into sticks
  • 1 piece red bell pepper, cut into pieces
  • 1 small red onion, cut into wedges
  • 2 pieces zucchini, sliced (Add in the last 10 minutes of cooking)

Seasoning and Oil

  • 3 tablespoons olive oil
  • 2 tablespoons lemon juice, plus extra lemon wedges to serve
  • 3 cloves garlic, minced
  • 1 teaspoon dried thyme or 1 tablespoon fresh
  • 1 teaspoon dried rosemary or 1 tablespoon fresh, chopped
  • to taste salt and black pepper

Garnish

  • to taste fresh parsley, chopped (optional)

Preparation

  1. Preheat the oven to 425°F (220°C). Line a large sheet pan with foil or parchment for easy clean up.
  2. In a large bowl, mix the olive oil, lemon juice, garlic, thyme, rosemary, salt, and pepper.
  3. Add the chicken to the bowl and turn to coat well in the lemon herb mix. Let sit for 5 minutes if you can.
  4. Put the potatoes, carrots, bell pepper, and onion on the sheet pan. Toss them with a little salt, pepper, and a bit of the oil mix.
  5. Push the vegetables to the sides and place the chicken pieces in the center.
  6. Add the zucchini around the chicken in the last 10 minutes of cooking so it does not get too soft.

Cooking

  1. Roast for 25 to 35 minutes, until the chicken reaches 165°F (74°C) and the vegetables are tender. If you like a bit of color, broil for 2–3 minutes at the end.
  2. Let the chicken rest for 5 minutes. Squeeze fresh lemon over everything and sprinkle with chopped parsley.

Use vegetables of similar size to ensure even cooking. Pat the chicken dry before tossing in the oil mix to enhance browning. Adjust seasoning to taste, adding more lemon or salt at the end if desired.

Classic French Baguette

Freshly baked classic French baguette resting on a wooden table.

I love the simple joy of a warm, crusty baguette. A Classic French Baguette has a crisp outside and a soft, chewy inside, it smells like a little bit of Paris, and it makes any meal feel special. This recipe is a crowd-pleaser, easy to follow, and gives you that thin, crackly crust and open crumb people love. If you enjoy other French treats, you might also like the savory option of a best French meat pie. Get your hands a little floury, and you will be excited to try this at home.

how to prepare Classic French Baguette

Ingredients you need, simple and few

  • 500 g (about 4 cups) strong bread flour
  • 325 ml (1 1/3 cups) warm water
  • 2 tsp salt
  • 1 tsp active dry yeast

Directions, easy steps

  1. Mix the flour and salt in a big bowl. In a small cup, mix the yeast with a little warm water and let it sit for 5 minutes until it foams.
  2. Add the yeast water and the rest of the warm water to the flour. Stir with a spoon until it comes together.
  3. Turn the dough onto a floured surface and knead for 8 to 10 minutes until smooth and elastic.
  4. Put the dough in a clean bowl, cover with a damp cloth, and let it rise for 1 to 1 1/2 hours, until it doubles.
  5. Gently deflate the dough and divide it into 2 or 3 equal pieces. Shape each piece into a long baguette, about 12 to 16 inches long.
  6. Place the loaves on a floured couche or a baking tray lined with parchment, cover, and let them rise 45 to 60 minutes until puffy.
  7. Preheat your oven to 475°F (245°C). Put a metal tray on the bottom rack to make steam.
  8. When the loaves are ready, make 3 to 4 diagonal slashes on each baguette with a sharp knife.
  9. Pour a cup of hot water into the tray at the bottom to create steam and quickly close the oven. Bake the loaves for 20 to 25 minutes until deep golden and crisp.
  10. Let the baguettes cool on a rack a little before you cut them.

Classic French Baguette

Why You’ll Love Classic French Baguette

  • It uses few, simple ingredients, no fancy tools needed.
  • You get a crunchy crust and a soft inside, great for sandwiches or just butter.
  • It fills your home with a warm, fresh bread smell that makes dinner better.
  • It’s great for beginners who want to learn basic artisan bread skills.

tips for success

  • Use good bread flour for better gluten and a chewier crumb.
  • Keep water warm, not hot, to help yeast wake up without killing it.
  • Don’t over-knead by machine, the dough should feel smooth and a bit elastic.
  • Let the dough rise in a warm, draft-free spot. A cool room will slow the rise.
  • For a thin, crisp crust, bake with steam for the first 10 minutes. Use a hot pan and pour water in, or spritz the oven with water.
  • Score the loaves just before baking, a sharp blade makes clean cuts and good oven spring.
  • Cool the baguette a bit before slicing, cutting too soon can make it gummy inside.

Serving Suggestions

  • Slice and spread with butter and jam for breakfast.
  • Make a simple ham and cheese sandwich, or use strong cheeses like Gruyere.
  • Serve with soup, stew, or a big salad for a simple, tasty meal.
  • Tear pieces and dip in olive oil with herbs, or use for bruschetta.

Classic French Baguette

FAQs

Q: Can I use regular all-purpose flour instead of bread flour?

A: Yes, you can. The crumb will be a little less chewy, but the bread will still taste good.

Q: Do I need a baking stone?

A: No, a baking stone helps, but a heavy baking tray works fine. Just preheat the tray well.

Q: How do I know when the baguette is done?

A: The crust should be deep golden and sound hollow when you tap the bottom.

Q: Can I make the dough ahead and bake later?

A: Yes, you can refrigerate the shaped loaves for up to 12 hours. Let them warm and finish rising before baking.

Q: Can I freeze the dough or baked baguette?

A: You can freeze baked baguettes for a month. Wrap well and thaw at room temperature, then reheat in the oven.

Conclusion

If you want more details or another take on the classic method, this Authentic French Baguette Recipe gives helpful tips and background to make a very authentic loaf. Enjoy baking, and have fun making your own crusty French bread at home.

Classic French Baguette

A Classic French Baguette has a crisp outside and a soft, chewy inside that smells like a little bit of Paris. This recipe is easy to follow and yields that thin, crackly crust and open crumb everyone loves.

Dough Ingredients

  • 500 g strong bread flour (Use good bread flour for better gluten and a chewier crumb.)
  • 325 ml warm water (Keep water warm, not hot, to help yeast wake up without killing it.)
  • 2 tsp salt
  • 1 tsp active dry yeast

Preparation

  1. Mix the flour and salt in a big bowl.
  2. In a small cup, mix the yeast with a little warm water and let it sit for 5 minutes until it foams.
  3. Add the yeast water and the rest of the warm water to the flour. Stir with a spoon until it comes together.
  4. Turn the dough onto a floured surface and knead for 8 to 10 minutes until smooth and elastic.
  5. Put the dough in a clean bowl, cover with a damp cloth, and let it rise for 1 to 1 1/2 hours, until it doubles.

Shaping and Rising

  1. Gently deflate the dough and divide it into 2 or 3 equal pieces. Shape each piece into a long baguette, about 12 to 16 inches long.
  2. Place the loaves on a floured couche or a baking tray lined with parchment, cover, and let them rise 45 to 60 minutes until puffy.

Baking

  1. Preheat your oven to 475°F (245°C). Put a metal tray on the bottom rack to make steam.
  2. When the loaves are ready, make 3 to 4 diagonal slashes on each baguette with a sharp knife.
  3. Pour a cup of hot water into the tray at the bottom to create steam and quickly close the oven.
  4. Bake the loaves for 20 to 25 minutes until deep golden and crisp.
  5. Let the baguettes cool on a rack a little before you cut them.

For a thin, crisp crust, bake with steam for the first 10 minutes. Score the loaves just before baking, and allow cooling before slicing.

Bread, Side
French
Artisan Bread, Baking, Easy Recipes, French Baguette, Homemade Bread

Cinnamon Swirl Bread

Homemade cinnamon swirl bread with a golden crust and rich, spiced filling.

This cinnamon swirl bread feels like a warm hug. It fills your kitchen with a sweet, spicy smell, and the soft loaf has a sticky cinnamon ribbon inside. The recipe, Cinnamon Swirl Bread [120 Minutes] – Chasety, is a crowd pleaser for breakfast, brunch, or a snack. If you like sweet quick loaves, you might also enjoy a similar cozy loaf at Amish apple fritter bread. Get ready to bake, and have fun pulling warm slices apart.how to prepare Cinnamon Swirl Bread

This simple plan shows the main steps to make a soft cinnamon swirl bread. Use your favorite bread dough recipe or follow a basic enriched dough with milk, butter, sugar, yeast, flour, salt, and eggs. Roll the dough thin, spread the cinnamon sugar, then roll and shape into a loaf. Bake until golden and cool before slicing.

  1. Mix warm milk, yeast, sugar, and a bit of flour. Let it sit until foamy, about 5 to 10 minutes.
  2. Add eggs, melted butter, salt, and the rest of the flour. Mix until a soft dough forms.
  3. Knead by hand or in a mixer until smooth, about 8 to 10 minutes.
  4. Let the dough rise in a warm spot until doubled, about 60 minutes.
  5. Punch down the dough and roll it into a rectangle on a floured surface.
  6. Mix brown sugar and ground cinnamon, spread it over the dough, leave a small border.
  7. Roll the dough tightly from the long side, pinch the seam to seal.
  8. Place the roll seam side down, shape as a loaf or braid, and put it into a greased loaf pan.
  9. Let it rise again until it puffs, about 30 to 45 minutes.
  10. Bake at 350°F (175°C) for 30 to 40 minutes, until the top is golden and an inserted skewer comes out clean.
  11. Cool on a rack, then slice and serve.

Cinnamon Swirl Bread [120 Minutes] - Chasety

Why You’ll Love Cinnamon Swirl Bread [120 Minutes] – Chasety

  • It tastes warm and sweet, with real cinnamon flavor in every bite.
  • The bread is soft inside, with a pretty cinnamon swirl that looks made for sharing.
  • It works for breakfast, tea, or a simple dessert.
  • You can make it from basic pantry items, so it feels easy and homey.
  • The smell while baking makes the whole house feel cozy.

tips for success

  • Use room temperature ingredients, they mix and rise better.
  • Don’t add too much flour, dough should stay slightly tacky.
  • Roll the dough tight, this gives a clear cinnamon swirl.
  • If the top browns too fast, cover with foil and finish baking.
  • Let the bread cool a bit before slicing, it cuts cleaner when not very hot.

Serving Suggestions

  • Serve warm with butter, cream cheese, or a simple glaze.
  • Pair a slice with coffee or milk for a cozy breakfast.
  • Add fruit on the side, like sliced apples or berries, for a fresh note.
  • Turn slices into French toast for a sweet brunch treat.

Cinnamon Swirl Bread [120 Minutes] - Chasety

FAQs

Q: Can I use instant yeast instead of active dry yeast?

A: Yes, you can. Use a bit less instant yeast and mix it with the dry flour, then add warm liquid. Follow the same rise times.

Q: Can I make this bread the night before?

A: Yes, you can do the first rise, then chill the dough in the fridge overnight. Shape and bake the next day. Let the dough warm a little before the final rise.

Q: How do I keep the swirl from leaking sugar while baking?

A: Press the cinnamon sugar into the dough and roll tightly. Pinch the seam well and place seam side down in the pan.

Q: Can I add nuts or raisins?

A: Yes, you can sprinkle chopped nuts or raisins on the cinnamon sugar before rolling for extra texture.

Q: How long does this bread keep?

A: Store in a sealed bag at room temperature for 2 to 3 days, or freeze slices for longer storage.

Conclusion

This Cinnamon Swirl Bread [120 Minutes] – Chasety recipe makes a soft, sweet loaf with a lovely cinnamon ribbon. It works for a simple family breakfast or a friendly gathering. For the original recipe details and full directions, see the main post on Cinnamon Swirl Bread [120 Minutes] – Chasety.

Cinnamon Swirl Bread

This delicious Cinnamon Swirl Bread features a soft loaf with a sweet cinnamon ribbon inside, perfect for breakfast or snacks, filling your kitchen with a cozy aroma.

Dough Ingredients

  • 1 cup Warm milk (For activating the yeast)
  • 2 teaspoons Active dry yeast
  • 2 tablespoons Sugar (For sweetness and activating yeast)
  • 3 cups All-purpose flour (Plus extra for dusting)
  • 2 large Eggs (At room temperature)
  • 4 tablespoons Melted butter (For richness)
  • 1 teaspoon Salt (For flavor)

Cinnamon Sugar Mixture

  • 1 cup Brown sugar (For the filling)
  • 1 tablespoon Ground cinnamon (For flavor)

Preparation

  1. Mix warm milk, yeast, sugar, and a bit of flour. Let it sit until foamy for about 5 to 10 minutes.
  2. Add eggs, melted butter, salt, and the rest of the flour. Mix until a soft dough forms.
  3. Knead by hand or in a mixer until smooth, for about 8 to 10 minutes.
  4. Let the dough rise in a warm spot until doubled, which takes about 60 minutes.

Forming the Loaf

  1. Punch down the dough and roll it into a rectangle on a floured surface.
  2. Mix brown sugar and ground cinnamon, spread over the dough, leaving a small border.
  3. Roll the dough tightly from the long side, and pinch the seam to seal.
  4. Place the roll seam side down, shape as a loaf or braid, and put it into a greased loaf pan.
  5. Let it rise again until it puffs, about 30 to 45 minutes.

Baking

  1. Bake at 350°F (175°C) for 30 to 40 minutes, until the top is golden and an inserted skewer comes out clean.
  2. Cool on a rack before slicing and serving.

Use room temperature ingredients for better mixing. The dough should stay slightly tacky, do not add too much flour. Roll the dough tightly for a clear cinnamon swirl. If the top browns too fast, cover with foil. Let the bread cool a bit before slicing for cleaner cuts.

Breakfast, Brunch, Snack
American
Baking, Breakfast Bread, Cinnamon Swirl Bread, Homemade Bread, Sweet Bread

Chickpea Feta Avocado Salad

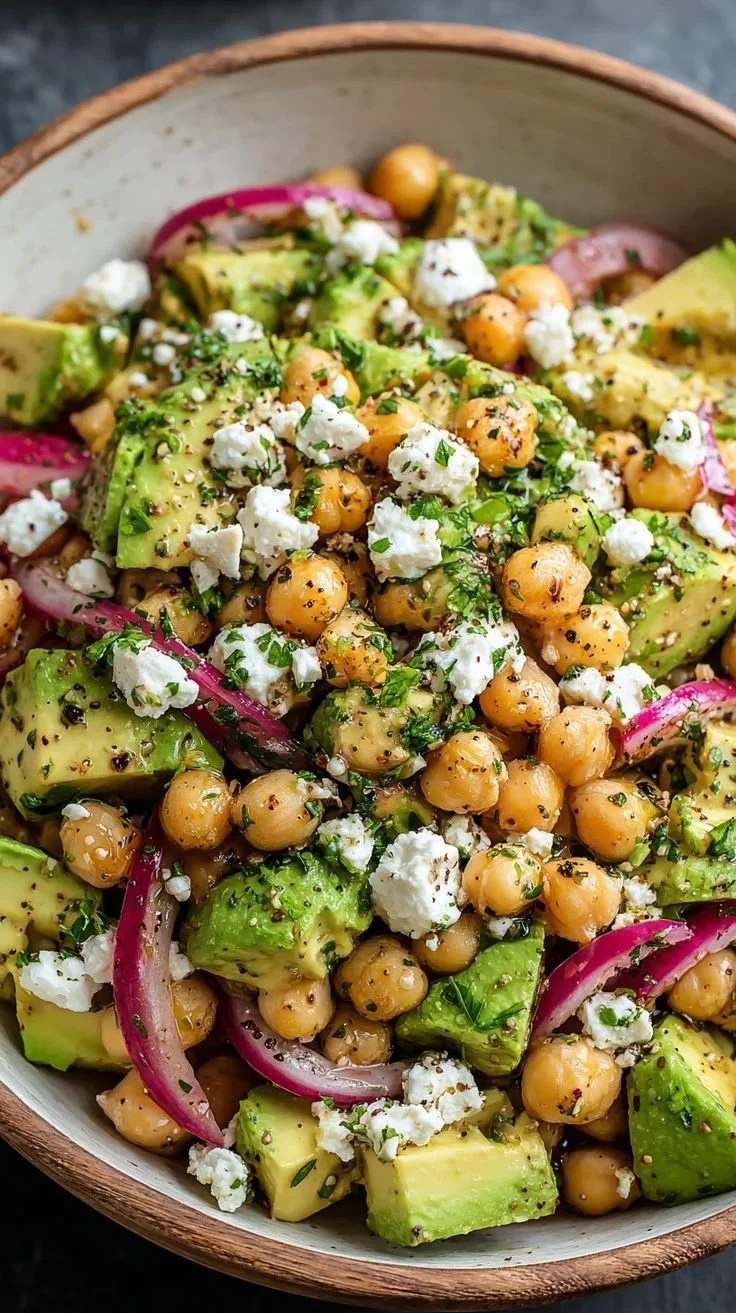
Chickpea Feta Avocado Salad in a bowl with fresh vegetables

This Chickpea Feta Avocado Salad feels like sunshine in a bowl. It mixes creamy avocado, salty feta, and tender chickpeas for a simple, healthy meal. The salad tastes fresh, light, and a little tangy from lemon and olive oil. It makes a great lunch, potluck dish, or side for a warm night.

This featured recipe is a crowd-pleaser, easy to toss together, and fills you up without feeling heavy. The mix of textures, from soft avocado to crumbly feta and firm chickpeas, keeps every bite interesting. Give it a try and you might find yourself making it again and again, maybe even twice in one week.

how to prepare Chickpea Feta Avocado Salad

Ingredients

  • 1 can (15 oz) chickpeas, drained and rinsed
  • 1 large ripe avocado, diced
  • 1 cup cherry tomatoes, halved
  • 1/2 small red onion, finely chopped
  • 1/2 cucumber, diced
  • 1/3 cup crumbled feta cheese
  • 2 tablespoons chopped fresh parsley or cilantro
  • 2 tablespoons olive oil
  • 1 tablespoon lemon juice, or to taste
  • Salt and black pepper to taste

Directions

  1. Rinse and drain the chickpeas, then place them in a large bowl.
  2. Chop the avocado, tomatoes, onion, and cucumber into bite-size pieces. Add to the bowl with chickpeas.
  3. Add the crumbled feta and chopped herbs.
  4. In a small cup, whisk olive oil, lemon juice, salt, and pepper.
  5. Pour the dressing over the salad and toss gently, so the avocado does not mash.
  6. Taste and add more lemon, salt, or pepper if needed. Serve right away or chill for 15 minutes for cooler flavor.

Chickpea Feta Avocado Salad

Why You’ll Love Chickpea Feta Avocado Salad

  • It’s quick to make, under 15 minutes.
  • It combines protein from chickpeas with healthy fats from avocado.
  • The feta adds a salty, tangy note that brightens the whole salad.
  • It works as a filling lunch, a healthy side, or a light dinner.
  • The salad holds up well for a few hours, so it is great for picnics and meal prep.

tips for success

  • Use a ripe but firm avocado, so it holds shape when tossed.
  • Don’t overdress, start with less lemon and oil then add more if needed.
  • Rinse canned chickpeas well to cut sodium and improve flavor.
  • Chop ingredients to similar size for even bites.
  • Add herbs like parsley, cilantro, or basil for fresh taste.
  • If making ahead, add avocado just before serving to avoid browning.

Serving Suggestions

  • Serve on a bed of mixed greens for extra crunch.
  • Spoon onto toast for a quick open-faced sandwich.
  • Pair with grilled chicken or fish for a fuller meal.
  • Serve with pita bread or crackers for a picnic.
  • Add a spoonful of Greek yogurt or a dollop of hummus for more creaminess.

Chickpea Feta Avocado Salad

FAQs

Q: Can I use dried chickpeas instead of canned? A: Yes, cook dried chickpeas until tender, then cool before using. Canned is faster.

Q: How long will the salad keep in the fridge? A: It keeps 1 to 2 days. Add avocado right before serving to keep it fresh.

Q: Can I make this salad vegan? A: Yes, skip the feta or use a vegan feta alternative.

Q: What other add-ins work well? A: Olives, roasted red pepper, or cooked corn add good flavor and color.

Q: Is this salad gluten free? A: Yes, the recipe is naturally gluten free.

Conclusion

For a tested, easy version of this salad idea, you can see a similar recipe at Chickpea, Avocado, & Feta Salad – Two Peas & Their Pod, which offers more tips and variations to try.

Chickpea Feta Avocado Salad

This Chickpea Feta Avocado Salad mixes creamy avocado, salty feta, and tender chickpeas for a simple, healthy meal.

Main Ingredients

  • 1 can (15 oz) chickpeas, drained and rinsed
  • 1 large ripe avocado, diced (Use a ripe but firm avocado.)
  • 1 cup cherry tomatoes, halved
  • 1/2 small red onion, finely chopped
  • 1/2 cucumber, diced
  • 1/3 cup crumbled feta cheese (Can use vegan feta for a vegan option.)
  • 2 tablespoons chopped fresh parsley or cilantro

Dressing

  • 2 tablespoons olive oil
  • 1 tablespoon lemon juice, or to taste (Add more lemon to taste.)
  • Salt and black pepper to taste (Adjust to preference.)

Preparation

  1. Rinse and drain the chickpeas, then place them in a large bowl.
  2. Chop the avocado, tomatoes, onion, and cucumber into bite-size pieces. Add to the bowl with chickpeas.
  3. Add the crumbled feta and chopped herbs.
  4. In a small cup, whisk olive oil, lemon juice, salt, and pepper.
  5. Pour the dressing over the salad and toss gently, so the avocado does not mash.
  6. Taste and add more lemon, salt, or pepper if needed. Serve right away or chill for 15 minutes for cooler flavor.

Chop ingredients to similar size for even bites. Add herbs like parsley, cilantro, or basil for fresh taste. If making ahead, add avocado just before serving to avoid browning.

lunch, Salad, Side Dish
Healthy, Mediterranean
Avocado Salad, Chickpea Salad, Feta Salad, Healthy Recipe, Quick Meal

One-Pan Honey Garlic Kielbasa & Veggies: Easy Family Delight

One-Pan Honey Garlic Kielbasa and Veggies served on a plate

This One-Pan Honey Garlic Kielbasa & Veggies is a simple sheet pan dinner that gives big flavor with little work. The kielbasa gets a nice brown edge, the veggies roast sweet and soft, and the honey garlic sauce brings it all together. It is great for busy nights, small families, or when you want a meal that cleans up fast. Give it a try, and enjoy a warm, filling dinner that feels like a hug on a plate.

A warm, homey meal is only a sheet pan away, and this One-Pan Honey Garlic Kielbasa & Veggies: Easy Family Delight is just that. It cooks fast, uses simple ingredients, and fills the kitchen with a sweet, garlicky smell that makes everyone ask, what is for dinner. This crowd-pleaser mixes savory kielbasa with roasted potatoes and bright veggies, all coated in a sticky honey garlic sauce that kids and grown ups love. Trust me, this one-pan meal will make weeknight dinner easy and tasty, and you might even find yourself making it twice in one week.

how to prepare One-Pan Honey Garlic Kielbasa & Veggies: Easy Family Delight

  1. Preheat oven to 400°F (200°C). Line a baking sheet with foil or parchment for easy clean up.
  2. Cut 1 pound kielbasa into 1/2 inch slices. Wash and chop 1 pound small potatoes into halves, 1 red bell pepper into chunks, and 1 medium red onion into wedges. Mince 3 cloves garlic.
  3. In a bowl, mix 3 tablespoons olive oil, 2 tablespoons honey, 1 tablespoon soy sauce, the minced garlic, 1/2 teaspoon salt, and 1/4 teaspoon black pepper. Stir to combine.
  4. Put the kielbasa and veggies on the baking sheet in a single layer. Pour the sauce over everything, and toss with your hands or tongs until well coated. Spread in one even layer for even roasting.
  5. Roast in the oven for 20 to 25 minutes, stirring once halfway through, until the potatoes are tender and the kielbasa is browned. If you like more caramel color, broil 1 to 2 minutes at the end, watching closely.
  6. Remove from oven, sprinkle with chopped fresh parsley or green onion, and serve warm.

One-Pan Honey Garlic Kielbasa & Veggies: Easy Family Delight

Why You’ll Love One-Pan Honey Garlic Kielbasa & Veggies: Easy Family Delight

  • One pan, less mess, and fast cleanup.
  • Sweet and savory honey garlic flavor that pleases kids and adults.
  • Flexible recipe, use different veggies or smoked sausage to suit taste.
  • Perfect for weeknight dinners and quick family meals.
  • Uses simple pantry staples, no fancy ingredients needed.

tips for success

  • Cut vegetables to similar sizes so they cook evenly.
  • Don’t crowd the pan, give pieces space to brown.
  • If potatoes take longer to cook, parboil them 5 minutes first.
  • Use a rimmed baking sheet to keep sauce from spilling.
  • Taste the sauce before baking, adjust honey or soy to your liking.

Serving Suggestions

  • Serve over steamed rice or buttered egg noodles for a heartier meal.
  • Pair with a crisp green salad or steamed green beans for a fresh side.
  • Offer crusty bread to soak up extra sauce.
  • Top with a squeeze of lemon or a sprinkle of red pepper flakes for a little brightness or heat.

One-Pan Honey Garlic Kielbasa & Veggies: Easy Family Delight

FAQs

Q: Can I use other sausage instead of kielbasa?

A: Yes, use smoked sausage, chicken apple sausage, or any favorite sausage. Cook time is about the same.

Q: Can I make this in the air fryer?

A: Yes, cook at 400°F in batches for 10 to 15 minutes, shaking once, until veggies are tender and sausage is browned.

Q: How do I store leftovers?

A: Cool, then store in an airtight container in the fridge for up to 3 days. Reheat in the oven or microwave.

Q: Is this recipe gluten free?

A: It can be, if you use gluten free soy sauce or tamari and check the sausage label for additives.

Conclusion

If you like easy sheet pan meals, you may also enjoy other simple sausage and veggie ideas, for example Easy Chicken Apple Sausage Sheet Pan Meal Recipe – Lemon8. Try a few versions, and you will have a go to one-pan dinner the whole family asks for again.

One-Pan Honey Garlic Kielbasa & Veggies

A simple yet flavorful sheet pan dinner featuring kielbasa and roasted veggies coated in a sweet honey garlic sauce.

Main Ingredients

  • 1 pound kielbasa (Cut into 1/2 inch slices)
  • 1 pound small potatoes (Washed and chopped into halves)
  • 1 each red bell pepper (Cut into chunks)
  • 1 medium red onion (Cut into wedges)
  • 3 cloves garlic (Mince finely)

Honey Garlic Sauce

  • 3 tablespoons olive oil
  • 2 tablespoons honey
  • 1 tablespoon soy sauce
  • 1/2 teaspoon salt
  • 1/4 teaspoon black pepper

Preparation

  1. Preheat the oven to 400°F (200°C) and line a baking sheet with foil or parchment for easy cleanup.
  2. Cut the kielbasa into 1/2 inch slices. Wash and chop the potatoes into halves, red bell pepper into chunks, and the red onion into wedges. Mince the garlic.

Mixing Sauce and Assembling

  1. In a bowl, mix together the olive oil, honey, soy sauce, minced garlic, salt, and black pepper.
  2. Put the kielbasa and veggies on the baking sheet in a single layer. Pour the sauce over everything, and toss until well coated. Spread in an even layer.

Cooking

  1. Roast in the oven for 20 to 25 minutes, stirring once halfway through, until the potatoes are tender and the kielbasa is browned.
  2. For additional caramelization, broil for 1 to 2 minutes at the end, watching closely.

Serving

  1. Remove from oven, sprinkle with chopped fresh parsley or green onion, and serve warm.

Cut vegetables to similar sizes for even cooking. Avoid crowding the pan to allow pieces to brown. If potatoes are slow to cook, parboil them for 5 minutes first. Use a rimmed baking sheet to prevent sauce from spilling. Adjust honey or soy sauce to taste.

Dinner, Main Course
American
Easy Dinner, Family Meal, Honey Garlic, Kielbasa, Sheet Pan Dinner

Lemon Chicken Asparagus Stir-Fry

Lemon Chicken Stir-Fry with asparagus in a vibrant stir-fry dish

This Lemon Chicken Asparagus Stir-Fry is bright, simple, and full of fresh flavor. It mixes juicy, tender chicken with crisp asparagus and a lemon sauce that wakes up every bite. The dish cooks fast, cleans up fast, and feeds a hungry family or a small crowd with little fuss. It is a true crowd-pleaser, with a tangy lemon taste, a touch of garlic, and a bit of sweetness that many people love. Get ready to make a tasty, healthy meal that feels special, but comes together like a weeknight classic, and have fun cooking it tonight.

how to prepare Lemon Chicken Asparagus Stir-Fry

  1. Cut 1 pound of boneless chicken into thin strips, pat dry, and season with salt and pepper.
  2. Trim and cut 1 bunch of asparagus into 2 inch pieces. Prepare 2 cloves garlic, minced, and 1 teaspoon lemon zest.
  3. Mix the sauce in a bowl, use 3 tablespoons lemon juice, 2 tablespoons soy sauce, 1 tablespoon honey or sugar, and 1 teaspoon cornstarch, stir until smooth.
  4. Heat 1 to 2 tablespoons oil in a large pan over medium-high heat. Add chicken in a single layer, cook 3 to 4 minutes until lightly browned and cooked through, then remove from pan.
  5. In the same pan, add a little more oil if needed, cook asparagus 2 to 3 minutes until bright green and just tender. Add garlic and cook 30 seconds until fragrant.
  6. Return chicken to the pan, pour in the lemon sauce, stir and cook 1 to 2 minutes until sauce thickens and coats the chicken and asparagus. Taste and adjust salt or lemon if needed.
  7. Turn off heat, sprinkle lemon zest and chopped green onions if you like, serve hot over rice or noodles.

Lemon Chicken Asparagus Stir-Fry

Why You’ll Love Lemon Chicken Asparagus Stir-Fry

  • Quick to make, it works well for busy weeknights.
  • Bright lemon flavor lifts the whole dish, it tastes fresh and light.
  • The asparagus stays crisp and adds a nice texture, while the chicken stays tender.
  • One pan, simple sauce, and easy clean up, perfect for a fast, healthy dinner.
  • The recipe is flexible, you can swap vegetables or use thighs or breasts with good results.

tips for success

  • Cut chicken thin and even, it cooks fast and cooks evenly.
  • Use a hot pan and do not crowd the chicken, brown it in one layer.
  • Cook asparagus until bright green, avoid overcooking to keep a nice crunch.
  • Use fresh lemon juice and a little zest for the best citrus taste.
  • Mix cornstarch with cold water first, then add to sauce to avoid lumps.
  • Taste the sauce before serving, add a pinch of sugar if it needs balance.
  • Make extra sauce if you like a saucier stir-fry.

Serving Suggestions

  • Serve over steamed white rice, brown rice, or quick-cooking noodles.
  • Try it with quinoa for a healthy, gluten-free side.
  • Add sesame seeds or sliced green onions on top for extra flavor.
  • Serve with lemon wedges on the side for extra brightness.
  • Pair with a simple green salad for a full, light meal.

Lemon Chicken Asparagus Stir-Fry

FAQs

Q: Can I use chicken thighs instead of chicken breast?

A: Yes, chicken thighs work well, they stay juicy and add a bit more flavor. Cut them into thin pieces and cook until done.

Q: How long will leftovers keep?

A: Store in an airtight container in the fridge for 3 to 4 days. Reheat gently in a pan or microwave, add a splash of water to keep it moist.

Q: Can I make this gluten-free?

A: Yes, use gluten-free soy sauce or tamari and make sure any other sauces you use are gluten-free.

Q: What can I use instead of asparagus?

A: Broccoli, snap peas, green beans, or bell peppers are good swaps and cook quickly in the pan.

Q: Can I prepare this ahead of time?

A: You can cut the chicken and vegetables ahead, and mix the sauce. Cook fresh for best texture, but you can reheat leftovers.

Conclusion

If you want another simple take or a quick reference for a similar lemon chicken and asparagus recipe, check this easy version at Lemon Chicken and Asparagus Stir Fry {20 Min Meal} | Lil’ Luna, it can give you a helpful step by step and ideas to try.

Lemon Chicken Asparagus Stir-Fry

This Lemon Chicken Asparagus Stir-Fry is quick, bright, and full of fresh flavor, mixing juicy chicken with crisp asparagus and a tangy lemon sauce.

Main Ingredients

  • 1 pound boneless chicken, cut into thin strips (Pat dry and season with salt and pepper.)
  • 1 bunch asparagus, trimmed and cut into 2-inch pieces
  • 2 cloves garlic, minced
  • 1 teaspoon lemon zest (For garnishing.)

Sauce Ingredients

  • 3 tablespoons lemon juice (Freshly squeezed for best flavor.)
  • 2 tablespoons soy sauce (Use gluten-free if needed.)
  • 1 tablespoon honey or sugar (For a touch of sweetness.)
  • 1 teaspoon cornstarch (Mix with cold water before adding to avoid lumps.)

For Cooking

  • 1-2 tablespoons oil (For frying; use as needed.)

Preparation

  1. Cut the chicken into thin strips, pat dry, and season with salt and pepper.
  2. Trim and cut the asparagus into 2-inch pieces.
  3. Prepare the garlic by mincing it and zest the lemon.
  4. Mix the sauce in a bowl: combine lemon juice, soy sauce, honey or sugar, and cornstarch. Stir until smooth.

Cooking

  1. Heat oil in a large pan over medium-high heat.
  2. Add chicken in a single layer and cook for 3 to 4 minutes until lightly browned and cooked through, then remove from pan.
  3. In the same pan, add a little more oil if needed. Cook asparagus for 2 to 3 minutes until bright green and just tender.
  4. Add garlic and cook for 30 seconds until fragrant.
  5. Return chicken to the pan, pour in lemon sauce, stir and cook for 1 to 2 minutes until the sauce thickens and coats the chicken and asparagus.
  6. Taste and adjust salt or lemon as needed.
  7. Turn off heat and sprinkle with lemon zest and chopped green onions if desired.
  8. Serve hot over rice or noodles.

Cut chicken thin and evenly for fast cooking. Use fresh lemon juice for the best flavor. Taste the sauce before serving and add a pinch of sugar if it needs balance.

Dinner, Main Course
Asian, Healthy
Asparagus, Healthy Meal, Lemon Chicken, Quick Dinner, Stir-Fry

Pesto Chicken Tortellini and Veggies

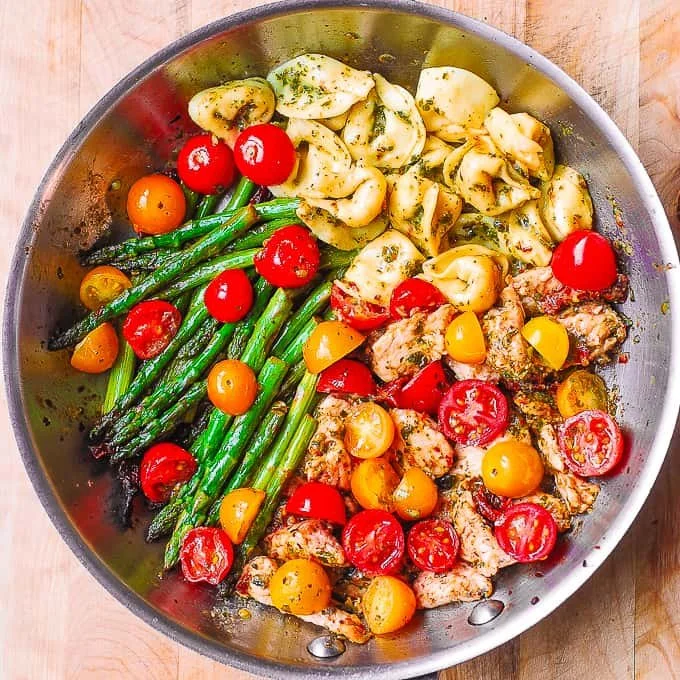
Pesto Chicken Tortellini garnished with fresh vegetables

I love meals that come together fast, taste fresh, and make people smile, and this Pesto Chicken Tortellini and Veggies does just that. It mixes tender chicken, cheesy tortellini, bright basil pesto, and colorful vegetables for a warm, satisfying dish. The flavors feel fresh, the pesto gives a lovely herbal lift, and the veggies add crunch and color, so it looks as good as it tastes. This is a great weeknight dinner, a simple potluck dish, or a quick family meal that gets eaten fast, so get ready to enjoy something cozy and bright.

How to prepare Pesto Chicken Tortellini and Veggies

  1. Cook the tortellini according to package directions, drain, and set aside. Use fresh or frozen cheese tortellini for best texture.
  2. While the pasta cooks, cut chicken into bite size pieces. Season with salt and pepper.
  3. Heat a little oil in a large skillet over medium heat. Add the chicken and cook until browned and cooked through, about 5 to 7 minutes. Remove chicken and set aside.
  4. In the same skillet, add a bit more oil if needed. Sauté chopped onion and minced garlic until soft and fragrant, about 2 minutes.
  5. Add chopped veggies, such as bell peppers, cherry tomatoes, and zucchini. Cook until just tender, about 4 to 5 minutes.
  6. Return the chicken to the skillet. Add the cooked tortellini and a few big spoonfuls of pesto. Toss gently to coat everything. If you like a creamy sauce, stir in a splash of cream or a spoon of cream cheese, and warm through.
  7. Taste and adjust salt, pepper, or more pesto as needed. Garnish with extra basil or a sprinkle of Parmesan cheese. Serve warm.

Pesto Chicken Tortellini and Veggies

Why You’ll Love Pesto Chicken Tortellini and Veggies

  • It is quick to make, perfect for busy weeknights.
  • The pesto adds fresh basil flavor, with garlic and cheese notes that pair well with chicken and pasta.
  • The dish is flexible, so you can use whatever vegetables you have.
  • It is colorful and looks great on the table, so it is a crowd pleaser.

tips for success

  • Use good quality store bought pesto or homemade pesto for best flavor.
  • Do not overcook the tortellini, cook until al dente so it holds shape when tossed.
  • Cut vegetables in similar sizes so they cook evenly.
  • If the sauce seems thick, add a splash of pasta water or cream to loosen it.
  • Keep flavors bright by adding a squeeze of lemon at the end if you want more freshness.

Serving Suggestions

  • Serve with a side salad, like arugula with lemon vinaigrette, to add a peppery contrast.
  • Offer warm crusty bread or garlic bread to soak up extra pesto sauce.
  • Top with extra grated Parmesan and fresh basil for color and taste.
  • For a lighter option, skip the cream and add more veggies for a veggie heavy meal.

Pesto Chicken Tortellini and Veggies

FAQs

Q, Can I use frozen tortellini?

A, Yes, frozen tortellini works great. Cook it directly from frozen according to package instructions.

Q, Can I make this vegetarian?

A, Yes, leave out the chicken and add more vegetables or use cooked chickpeas for protein.

Q, How long does leftovers keep?

A, Store in an airtight container in the fridge for 3 to 4 days. Reheat gently on the stove with a splash of water or cream.

Q, Can I use jarred pesto?

A, Yes, good quality jarred pesto saves time and still gives great flavor.

Q, Is this dish freezer friendly?

A, Cooked tortellini can get soft after freezing, so it is best to freeze only the chicken and vegetables in pesto, then boil fresh tortellini when ready to eat.

Conclusion

If you want a tested, tasty idea for dinner that mixes pasta, pesto, chicken, and veggies, check this version for more tips and a full recipe at Pesto Chicken Tortellini – Chelsea’s Messy Apron. Enjoy making this simple, flavorful meal.

Pesto Chicken Tortellini and Veggies

A quick and vibrant dish combining tender chicken, cheesy tortellini, and colorful vegetables, all tossed in fresh basil pesto for a delightful weeknight meal.

For the Tortellini

  • 12 ounces cheese tortellini (Use fresh or frozen for best texture.)

For the Chicken

  • 1 pound chicken breast (Cut into bite-sized pieces.)
  • 1 teaspoon salt (For seasoning.)
  • 1 teaspoon black pepper (For seasoning.)

For the Vegetables

  • 1 medium onion (Chopped.)
  • 2 cloves garlic (Minced.)
  • 1 cup bell pepper (Chopped.)
  • 1 cup cherry tomatoes (Halved.)
  • 1 medium zucchini (Chopped.)

For the Sauce

  • 1 cup basil pesto (Store-bought or homemade.)
  • 1 splash heavy cream (Optional for a creamier sauce.)
  • 1 tablespoon olive oil (For cooking.)
  • 1 tablespoon lemon juice (Optional for brightness.)
  • 1/2 cup Parmesan cheese (Grated, for garnish.)

Preparation

  1. Cook the tortellini according to package directions, drain, and set aside.
  2. Cut chicken into bite-size pieces and season with salt and pepper.

Cooking

  1. Heat a little oil in a large skillet over medium heat. Add the chicken and cook until browned and cooked through, about 5 to 7 minutes. Remove chicken and set aside.
  2. In the same skillet, add a bit more oil if needed. Sauté chopped onion and minced garlic until soft and fragrant, about 2 minutes.
  3. Add chopped veggies and cook until just tender, about 4 to 5 minutes.
  4. Return the chicken to the skillet. Add the cooked tortellini and pesto. Toss gently to coat. Stir in cream or cream cheese if desired, and warm through.
  5. Taste and adjust salt, pepper, or more pesto as needed. Garnish with extra basil or Parmesan cheese.

Serve with a side salad or warm bread. For a vegetarian option, omit chicken and add more veggies.

Dinner, Main Course
Italian
Comfort Food, One-Pan Dinner, Pesto Chicken Tortellini, Quick Dinner, Weeknight Meal

Easy Turtle Cake

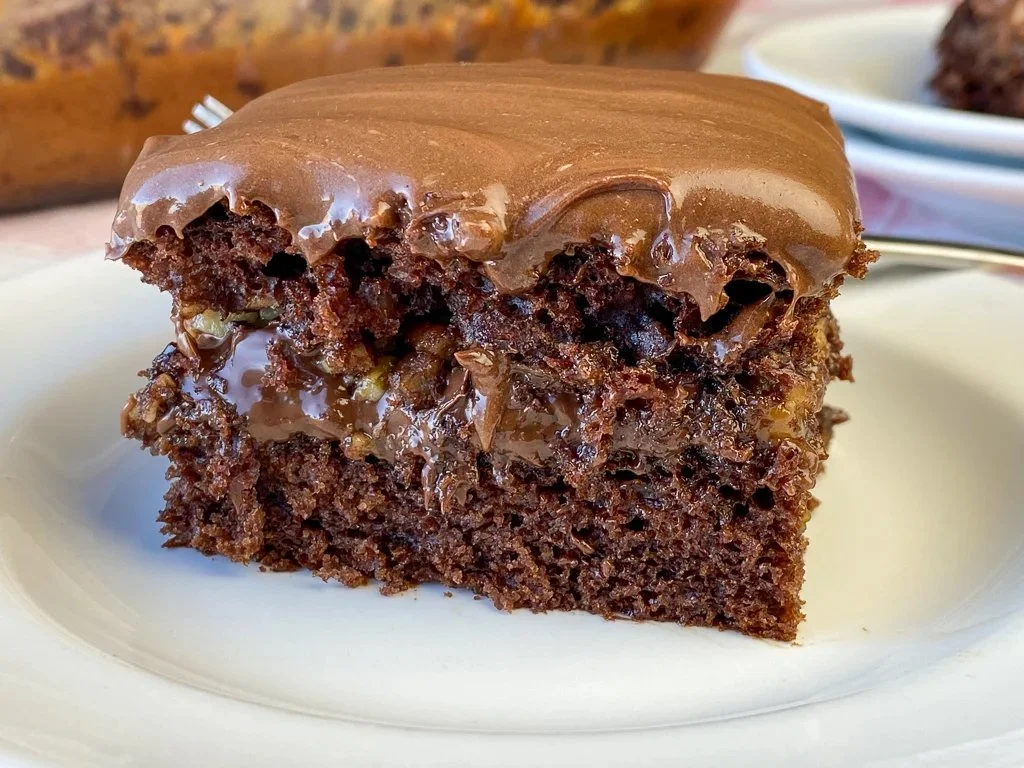
Delicious easy turtle cake with chocolate, caramel, and pecans

This easy Turtle Cake brings a rich mix of chocolate, caramel, and pecans into one easy dessert. It feels fancy, yet you make it fast with a store bought cake mix, so it is perfect for busy cooks and last minute guests. The cake is moist, sweet, and has a nice crunchy bite from the pecans. People love the warm caramel and chocolate together, it tastes like a classic turtle candy, but in cake form. It is a crowd-pleaser for potlucks and family dinners, and it always gets asked for again, so get ready to share or hide a slice for yourself.

how to prepare easy Turtle Cake

  1. Preheat your oven to the temperature on the cake mix box. Grease a 9×13 pan, or line it with parchment.
  2. Make the cake batter following the box directions, use the ingredients the box calls for, such as eggs, oil, and water. Mix until smooth, do not overmix.
  3. Stir in about 1 cup chopped pecans into the batter for crunch, if you like nuts.
  4. Pour the batter into the prepared pan and bake as the box says. Check for doneness with a toothpick, it should come out clean or with a few crumbs.
  5. Let the cake cool in the pan for 10 minutes, then poke small holes all over the top with a fork or skewer.
  6. Warm a jar of caramel sauce slightly, then pour it over the warm cake so it soaks into the holes. Spread it gently with a spatula.
  7. Melt chocolate chips with a little butter or cream to make a simple chocolate glaze. Drizzle or spread the glaze over the caramel layer.
  8. Sprinkle extra chopped pecans on top while the glaze is still soft. Let the cake cool fully before slicing, so layers set.

Box Mix Turtle Cake

Why You’ll Love easy Turtle Cake

  • Fast to make, you use a box mix as the base, so it saves time.
  • Tastes rich, the mix of chocolate, caramel, and pecans feels indulgent.
  • Easy to change up, you can add extra nuts, salted caramel, or chocolate chips.
  • Great for any event, it works for birthdays, potlucks, and simple weeknight treats.
  • The texture is moist and a little gooey from the caramel, many people find it irresistible.

tips for success

  • Use room temperature eggs and oil for a smoother batter.
  • Don’t overmix the cake batter, mix just until combined to keep it tender.
  • Warm the caramel so it spreads and sinks into the cake holes easily.
  • Toast pecans in a dry pan for a few minutes for extra flavor, watch them so they don’t burn.
  • Let the cake cool enough before cutting, the layers hold up better once set.

Serving Suggestions

  • Serve warm with a scoop of vanilla ice cream for a classic pairing.
  • Top slices with whipped cream and extra chopped pecans for a nicer presentation.
  • Offer coffee or milk to balance the sweetness, coffee brings out the chocolate flavor.
  • Cut into small squares for a party tray, people will snack and go back for more.

Box Mix Turtle Cake

FAQs

Q: Can I use any flavor of box cake mix? A: Yes, chocolate mix works best to match the turtle flavors, but you can try devil’s food or even yellow cake for a different taste.

Q: How do I store Box Mix Turtle Cake? A: Keep it covered at room temperature for 2 days, or refrigerate up to 5 days. Bring to room temperature before serving, or warm slices briefly.

Q: Can I make this ahead for a party? A: Yes, make the cake a day ahead and add the caramel and glaze the same day, or make fully and store in the fridge, then warm slightly before serving.

Q: Can I use homemade caramel? A: Yes, homemade caramel works well, just let it cool a bit so it is pourable but not too hot on the cake.

Q: Is this recipe nut free if I skip pecans? A: Yes, skip the pecans for a nut free version, but tell guests so any nut allergy is clear.

Conclusion

If you want a clear step by step recipe and extra tips for this easy turtle cake from a blog, see Easy Turtle Cake – Plowing Through Life.

Turtle Cake

This easy Turtle Cake features a delicious combination of chocolate, caramel, and pecans, perfect for busy cooks seeking a crowd-pleasing dessert.

Cake Ingredients

  • 1 box chocolate cake mix (Use your favorite brand)
  • 3 large eggs (Use room temperature for better mixing)
  • 1/2 cup vegetable oil (Use room temperature for smoother batter)
  • 1 cup water (As directed on the box)
  • 1 cup chopped pecans (Optional, for added crunch)

Toppings

  • 1 jar caramel sauce (Warm slightly for better spreading)
  • 1 cup chocolate chips (Melt for glaze)
  • 2 tablespoons butter or cream (Added to melt chocolate chips)
  • 1/2 cup extra chopped pecans (For garnish)

Preparation

  1. Preheat your oven to the temperature indicated on the cake mix box and grease a 9×13 pan or line it with parchment.
  2. Make the cake batter by following the box directions, adding the required ingredients like eggs, oil, and water. Mix until smooth, but do not overmix.
  3. Stir in about 1 cup of chopped pecans into the batter for added crunch, if desired.
  4. Pour the batter into the prepared pan and bake according to the box instructions. Check for doneness with a toothpick; it should come out clean or with a few crumbs.

Assembly

  1. Let the cake cool in the pan for 10 minutes, then poke small holes over the top using a fork or skewer.
  2. Warm the caramel sauce slightly and pour it over the warm cake, allowing it to soak into the holes. Use a spatula to spread gently.
  3. Melt the chocolate chips with butter or cream to create a glaze. Drizzle or spread the glaze over the caramel layer.
  4. While the glaze is still soft, sprinkle extra chopped pecans on top. Let the cake cool completely before slicing.

Let the cake cool before cutting to ensure the layers hold up better. Optional: Serve warm with vanilla ice cream or whipped cream on top.

Dessert
American
Caramel Cake, chocolate cake, easy dessert, Potluck Recipe, Turtle Cake