Coconut Chicken Rice Bowl

If you’re looking for a meal that’s both delicious and quick to prepare, the Coconut Chicken Rice Bowl is the perfect solution. This recipe not only brings a delightful tropical flavor to your dining table but is also a favorite for families and gatherings. With its creamy coconut sauce and tender chicken, it’s sure to please even the pickiest eaters. Plus, who wouldn’t want to enjoy a virtual vacation in their kitchen? Get ready to whip up this crowd-pleaser in just 20 minutes!

How to prepare Coconut Chicken Rice Bowl

To make the Coconut Chicken Rice Bowl, you will need the following ingredients: chicken breast, coconut milk, jasmine rice, bell peppers, onion, garlic, and your favorite seasonings. Start by cooking the rice according to the package instructions. While the rice is cooking, sauté the onion and garlic in a pan, then add the chicken pieces until they are golden brown. Pour in the coconut milk and let it simmer with bell peppers until everything is cooked through and creamy.

Coconut Chicken Rice Bowl: A Tropical Twist in 20 Minutes

This dish comes together so quickly, you’ll be amazed at how such simple ingredients can create such vibrant flavors.

Coconut Chicken Rice Bowl: A Tropical Twist in 20 Minutes

Why You’ll Love Coconut Chicken Rice Bowl

The Coconut Chicken Rice Bowl is full of flavors that transport you straight to a tropical paradise. The combination of creamy coconut milk and tender chicken makes it comforting yet exciting. Each bite is a delightful balance of sweetness and savory goodness, which keeps everyone coming back for more. It’s perfect for busy weeknights or when you’re entertaining guests. You’ll definitely want to add this recipe to your weekly meal rotation and explore further recipes like the Bang Bang Chicken Rice Bowl for a variety of tastes!

Tips for success

  1. Ensure your pan is hot before adding the chicken, as this helps to create a nice sear and lock in the juices.
  2. Feel free to customize your veggies; sugar snap peas, broccoli, or snap peas would work beautifully.
  3. Adjust the coconut milk amount to manage the creaminess to your liking, adding more if you want it richer.

Serving Suggestions

Serve your Coconut Chicken Rice Bowl topped with fresh cilantro, a squeeze of lime, or sliced chilies for an extra kick. Pair it with a side of grilled pineapple to enhance the tropical vibe. This dish is versatile, so you can even serve it as a meal prep option throughout the week!

FAQs

Can I use other types of protein?

Yes, shrimp or tofu can be wonderful substitutes for chicken, making this dish adaptable to your preferences.

How can I store leftovers?

Once cooled, store leftovers in an airtight container in the refrigerator for up to three days. Reheat in the microwave or stovetop with a splash of water to keep it moist.

Is this recipe suitable for meal prep?

Absolutely! This Coconut Chicken Rice Bowl is perfect for meal prepping, as it holds up well in the fridge, and you can enjoy it throughout the week.

Now you’re ready to enjoy this flavorful Coconut Chicken Rice Bowl that’s bursting with tropical goodness! Happy cooking!

Coconut Chicken Rice Bowl

A quick and delicious meal featuring tender chicken in a creamy coconut sauce over jasmine rice, perfect for families and gatherings.

Main Ingredients

  • 1 lb chicken breast (Cut into bite-sized pieces)
  • 1 can coconut milk (Adjust amount for creaminess)
  • 1 cup jasmine rice (Cook according to package instructions)
  • 1 medium onion (Chopped)
  • 2 cloves garlic (Minced)
  • 1 medium bell pepper (Sliced)

Seasonings

  • to taste Your favorite seasonings (e.g., salt, pepper, or curry powder)

Preparation

  1. Cook the jasmine rice according to the package instructions.
  2. While the rice is cooking, heat a pan over medium-high heat.
  3. Sauté the chopped onion and minced garlic in the hot pan until fragrant.
  4. Add the chicken pieces and cook until golden brown.

Cooking

  1. Pour in the coconut milk and bring to a simmer.
  2. Add the sliced bell pepper and let everything cook until the chicken is cooked through and the sauce is creamy.

Serving

  1. Serve the Coconut Chicken Rice Bowl hot, topped with fresh cilantro, a squeeze of lime, or sliced chilies.
  2. Pair with grilled pineapple for added tropical flavor.

Ensure your pan is hot before adding the chicken for better searing and juiciness. Customize vegetables with sugar snap peas or broccoli for variety. This recipe is also suitable for meal prepping and can be stored in an airtight container for up to three days.

Dinner, Main Course
Asian, Tropical
Coconut Chicken Rice Bowl, Family Friendly, Healthy Recipe, Meal Prep, Quick Dinner

Healthy Sesame Chicken

Healthy Sesame Chicken is a delightful dish that combines tender chicken with a savory sauce that’s rich in flavor and nutrition. This recipe is a perfect crowd-pleaser, suitable for family dinners or casual gatherings. With its irresistible taste, you’ll find that everyone at the table will ask for seconds. Plus, it’s simple to make, meaning you can enjoy a tasty meal without spending hours in the kitchen. This dish might just become your new favorite go-to recipe, bringing smiles and satisfaction to all who share it.

How to prepare Healthy Sesame Chicken

To prepare Healthy Sesame Chicken, you’ll need the following ingredients: chicken breasts, soy sauce, sesame oil, honey, garlic, and sesame seeds. Begin by marinating the chicken in a mixture of soy sauce, sesame oil, and honey for about 30 minutes. Then, sauté the marinated chicken with minced garlic until it’s cooked through.

Healthy Sesame Chicken

After cooking the chicken, sprinkle toasted sesame seeds on top for added texture and flavor, creating a deliciously healthy meal in no time.

Why You’ll Love Healthy Sesame Chicken

There are plenty of reasons to love Healthy Sesame Chicken. The first being its simple preparation; with just a handful of ingredients, anyone can make this dish. Secondly, the balance of sweet and savory flavors appeals to both adults and children, making it perfect for family meals. Finally, it’s a great dish to pair with sides like steamed veggies or brown rice, allowing for a well-rounded dinner.

If you’re looking for another healthy chicken option that’s easy to whip up, you might want to try this Greek yogurt chicken salad with dill and lemon zest.

Tips for success

To ensure your Healthy Sesame Chicken turns out perfectly, remember a few key tips. First, marinate the chicken for at least 30 minutes, as this helps infuse the flavors deeply and keeps the meat tender. Additionally, be careful not to overcook the chicken to retain its juiciness. Lastly, consider garnishing the dish with green onions or additional sesame seeds for an appealing presentation.

Healthy Sesame Chicken

Serving Suggestions

Healthy Sesame Chicken pairs wonderfully with a variety of sides. Serve it with steamed brown rice or quinoa for a hearty meal. A colorful side of stir-fried vegetables, such as bell peppers and broccoli, complements the dish beautifully. You could also serve it with a simple green salad to balance out the meal.

FAQs

Can I use another type of meat instead of chicken?

Yes, you can easily substitute chicken with tofu or shrimp for a different twist on this recipe.

Is this dish suitable for meal prep?

Absolutely! Healthy Sesame Chicken stores well in the fridge for a few days and makes for an easy reheating option during the week.

Can I make this dish gluten-free?

Yes, you can use tamari instead of soy sauce for a gluten-free option that tastes just as delicious.

Healthy Sesame Chicken

A delightful dish that combines tender chicken with a savory sauce rich in flavor and nutrition, perfect for family dinners.

For the Chicken

  • 1 pound chicken breasts
  • 1/4 cup soy sauce (Or tamari for gluten-free option)
  • 2 tablespoons sesame oil
  • 2 tablespoons honey
  • 2 cloves garlic (Minced)
  • 1 tablespoon sesame seeds (Toasted, for garnish)

Preparation

  1. Begin by marinating the chicken in a mixture of soy sauce, sesame oil, and honey for about 30 minutes.

Cooking

  1. Sauté the marinated chicken with minced garlic until it’s cooked through.
  2. After cooking, sprinkle toasted sesame seeds on top for added texture and flavor.

Marinate the chicken for at least 30 minutes to infuse flavors and keep the meat tender. Be careful not to overcook the chicken to retain its juiciness. Consider garnishing with green onions or additional sesame seeds for presentation.

Dinner, Main Course
Asian, Healthy
Chicken Recipe, Easy Dinner, Family Meal, Healthy Sesame Chicken, Savory Chicken

Protein Burrito Casserole

Looking for a dish that’s not only delicious but also packed with protein? The Protein Burrito Casserole is your answer! This recipe combines all the comforting flavors of a classic burrito into a hearty casserole that appeals to everyone at the dinner table. With layers of seasoned ground meat, beans, rice, and a melty cheese topping, it’s a meal that satisfies without being overly complicated. Plus, the vibrant colors and enticing aromas will have everyone excited to dig in. It’s the kind of dish that brings people together, perfect for family dinners or casual gatherings with friends.

How to Prepare Protein Burrito Casserole

Making a Protein Burrito Casserole is simple and fun. Here’s how you can whip it up:

  1. Cook the Meat: Start by sautéing your choice of ground meat in a skillet. Add taco seasoning for flavor.
  2. Layer the Ingredients: In a baking dish, layer cooked rice, beans, the seasoned meat, and your favorite vegetables.
  3. Add the Cheese: Top it all off with shredded cheese for that gooey goodness.
  4. Bake: Place the casserole in the oven and bake until everything is hot and the cheese is bubbly.

Protein Burrito Casserole

Why You’ll Love Protein Burrito Casserole

This dish is not just another casserole; it’s a protein-packed powerhouse that keeps you feeling full and satisfied! The blend of spices gives it a robust flavor, while the layers create a wonderful texture in every bite. If you love easy cleanup, you’ll appreciate that this recipe can be made in one dish, leaving you with less mess to worry about. Also, it’s incredibly versatile, allowing you to customize ingredients based on what you have on hand or your personal preferences. For those who love ground turkey, you might also enjoy a high protein ground turkey casserole variation!

Tips for Success

  • Use Fresh Ingredients: Fresh vegetables and good quality meat will enhance the flavor of your casserole.
  • Don’t Overcook: Ensure everything is cooked, but avoid overcooking to keep the textures just right.
  • Allow It to Rest: Let the casserole sit for a few minutes after baking before serving. This helps the layers set and makes serving easier.

Protein Burrito Casserole

Serving Suggestions

Protein Burrito Casserole pairs wonderfully with a simple green salad or a side of guacamole and salsa for dipping. You can also add some sour cream or Greek yogurt on top for an extra creamy touch. Enjoy it with friends and family as a filling weeknight dinner or at a potluck!

FAQs

Can I freeze Protein Burrito Casserole?

Yes, this casserole freezes well. Just cover it tightly and store it in the freezer. Reheat thoroughly when ready to serve.

What types of meat can I use?

You can use ground beef, turkey, chicken, or even vegetarian protein sources like lentils or tofu for a meat-free option.

How long will leftovers last?

Leftovers can be stored in the refrigerator for up to four days, making it a great option for meal prep!

Protein Burrito Casserole

A hearty and protein-packed casserole that combines the comforting flavors of burritos, perfect for family dinners or gatherings with friends.

For the Casserole

  • 1 pound ground meat (beef, turkey, or chicken) (Sautéed with taco seasoning)
  • 2 cups cooked rice (Use your choice of long-grain or brown rice)
  • 1 can beans (black or pinto) (Drained and rinsed)
  • 1 cup shredded cheese (Choose a cheese that melts well)
  • 1 cup vegetables (bell peppers, onions, etc.) (Your favorite fresh vegetables)

Cooking and Assembling

  1. Start by sautéing your choice of ground meat in a skillet with taco seasoning until cooked through.
  2. In a baking dish, layer the cooked rice, beans, the seasoned meat, and your favorite vegetables.
  3. Top it all off with shredded cheese for that gooey goodness.
  4. Place the casserole in the oven and bake until everything is hot and the cheese is bubbly.

Use fresh ingredients for the best flavor. Allow the casserole to rest for a few minutes after baking before serving. It can be frozen for later use, and leftovers can be stored in the refrigerator for up to four days.

Dinner, Main Course
Mexican
Casserole, Dinner, Easy Recipe, Family Meal, Protein Burrito Casserole

Healthy Cabbage Salad

This Healthy Cabbage Salad is the perfect dish to bring to your next gathering, as it pleases both the eye and the palate. With its crunchy texture and vibrant colors, this salad not only looks great on the table but also packs a flavorful punch. The combination of crisp cabbage, fresh veggies, and a zesty dressing makes it a refreshing option year-round. Plus, it’s super easy to whip up, so you can enjoy a delicious, healthy meal without spending hours in the kitchen. Why not indulge in this crowd-pleaser and impress your friends and family with your culinary skills?

How to prepare Healthy Cabbage Salad

To prepare this delightful salad, start by gathering your ingredients. You’ll need finely shredded cabbage, diced carrots, chopped bell peppers, and a tangy dressing made of olive oil, vinegar, and a dash of seasoning. Mix everything together in a large bowl until combined, and let it chill in the fridge for about 30 minutes. This allows the flavors to meld beautifully.

Healthy Cabbage Salad

You can also try different ingredients based on your preferences. For added protein, consider adding some grilled chicken or chickpeas. It’s versatile enough to suit any taste!

Healthy Cabbage Salad

Why You’ll Love Healthy Cabbage Salad

You’ll love this Healthy Cabbage Salad because of its crunchy texture and fresh flavors. The vibrant colors of the veggies add not just taste but also nutrients to your plate. It’s a great source of vitamins and can be a light meal on its own or a tasty side dish. You can also serve it alongside other meals, making it an excellent addition to your cooking repertoire. For a more filling option, why not pair it with tasty proteins like grilled chicken? You can even explore something like this Greek yogurt chicken salad to complete your meal!

Tips for success

To ensure your Healthy Cabbage Salad turns out great every time, remember these tips:

  1. Fresh Ingredients: Always use fresh, crisp vegetables for the best flavor and texture.
  2. Chill Time: Letting the salad sit in the fridge allows the flavors to blend together beautifully.
  3. Customizable: Don’t hesitate to add your favorite toppings, such as seeds, nuts, or other veggies. This makes the salad uniquely yours!

Healthy Cabbage Salad

Serving Suggestions

This Healthy Cabbage Salad is delicious served right after preparation, but it shines even more when you pair it with another dish. Consider serving it alongside grilled chicken, tacos, or as a side with seafood. You can even try it with hearty vegetarian options like lentil dishes or quinoa bowls.

FAQs

Can I make this salad ahead of time?

Yes, you can prepare it a few hours in advance. Just give it a good toss before serving to redistribute the dressing.

Is it okay to use different kinds of cabbage?

Absolutely! Feel free to mix green, purple, or savoy cabbage depending on your taste and what you have on hand.

How do I store leftovers?

Store the salad in an airtight container in the refrigerator. It’s best enjoyed within 2-3 days for optimal freshness.

Healthy Cabbage Salad

A vibrant and crunchy salad made with fresh veggies and a zesty dressing, perfect for any gathering.

Salad Ingredients

  • 4 cups finely shredded cabbage (Use fresh cabbage for the best flavor.)
  • 1 cup diced carrots (Add more for extra crunch.)
  • 1 cup chopped bell peppers (Use a mix of colors for a vibrant look.)

Dressing Ingredients

  • 3 tablespoons olive oil
  • 2 tablespoons vinegar (Adjust to taste.)
  • to taste seasoning (Add salt and pepper as desired.)

Preparation

  1. Gather all your ingredients.
  2. In a large bowl, mix together the cabbage, diced carrots, and chopped bell peppers.
  3. In a separate bowl, whisk together the olive oil, vinegar, and seasoning.
  4. Pour the dressing over the salad and mix until everything is well combined.
  5. Let the salad chill in the fridge for about 30 minutes to allow the flavors to meld.

Feel free to customize with toppings like seeds, nuts, or other veggies. For added protein, consider adding grilled chicken or chickpeas.

Salad, Side Dish
Healthy
Cabbage Salad, Easy Salad, Fresh Veggies, Healthy Salad, Vegetarian Salad

Greek Turkey Meatball Bowls: The Ultimate Mediterranean Dinner

Greek Turkey Meatball Bowls are a delightful way to enjoy the rich flavors of Mediterranean cuisine in a comforting and nutritious dish. These bowls are packed with tender turkey meatballs, fresh vegetables, and a zesty yogurt sauce, making them a hit with everyone at the table. Whether you’re looking for a weeknight dinner option or a dish to impress your guests, this recipe has got you covered.

Greek Turkey Meatball Bowls: The Ultimate Mediterranean Dinner

Imagine biting into juicy meatballs flavored with herbs and spices, complemented by a refreshing salad and all drizzled with tangy sauce. Doesn’t that sound heavenly? Let’s dive into this crowd-pleaser that is sure to become a regular favorite in your home.

How to prepare Greek Turkey Meatball Bowls

To create these delicious bowls, you will need the following ingredients:

Greek Turkey Meatball Bowls: The Ultimate Mediterranean Dinner

Ingredients

  • 1 pound ground turkey
  • 1/4 cup breadcrumbs
  • 1/4 cup feta cheese, crumbled
  • 1/4 cup fresh parsley, chopped
  • 1 teaspoon dried oregano
  • 1 teaspoon garlic powder
  • Salt and pepper to taste
  • 1 cup cooked quinoa or brown rice
  • 1 cup cherry tomatoes, halved
  • 1 cucumber, chopped
  • 1/2 red onion, diced
  • 1 cup plain Greek yogurt
  • 2 tablespoons lemon juice
  • 1 tablespoon olive oil

Now, let’s get things cooking!

  1. Preheat your oven to 400°F (200°C).
  2. In a bowl, combine the ground turkey, breadcrumbs, feta cheese, parsley, oregano, garlic powder, salt, and pepper. Mix well and form into small meatballs.
  3. Place the meatballs on a baking sheet lined with parchment paper and bake for 20-25 minutes, until cooked through and golden brown.
  4. In another bowl, mix the cooked quinoa or brown rice with cherry tomatoes, cucumber, and red onion.
  5. For the sauce, whisk together the Greek yogurt, lemon juice, olive oil, salt, and pepper in a small bowl.
  6. Assemble your bowls by placing the quinoa mixture at the bottom, adding meatballs on top, and finishing with a generous drizzle of the yogurt sauce.

Why You’ll Love Greek Turkey Meatball Bowls

These bowls are not just delicious, but also healthy! They offer lean protein from the turkey, fresh veggies for vitamins, and whole grains like quinoa or brown rice for fiber. Plus, the combination of flavors is simply irresistible. For anyone seeking a nutritious dinner that doesn’t skimp on taste, this recipe checks all the boxes. It’s an excellent way to enjoy a Mediterranean-inspired meal at home without any fuss.

Tips for success

  1. Use fresh ingredients: Fresh herbs and vegetables will enhance the flavors and make your meatballs even tastier.
  2. Control the spices: Feel free to adjust the spices to your liking. Add more garlic powder or a pinch of red pepper flakes for extra heat.
  3. Make ahead: You can prepare the meatballs in advance and store them in the fridge or freezer. Just reheat before serving!

Serving Suggestions

These Greek Turkey Meatball Bowls can be served with pita bread, a side of hummus, or a simple green salad for an even more varied meal. You could also sprinkle some extra feta cheese on top for added flavor. The combinations are endless!

FAQs

Can I use ground chicken instead of turkey?

Yes, ground chicken will work just as well and offer a similar texture and flavor in your meatballs.

How do I store leftovers?

Store any leftovers in an airtight container in the fridge for up to three days. Reheat in the microwave before enjoying.
Can I make this recipe gluten-free?

Absolutely! Simply use gluten-free breadcrumbs or another suitable binder instead of regular breadcrumbs.

With Greek Turkey Meatball Bowls in your recipe arsenal, you are set for many tasty dinners ahead! Don’t wait too long, gather your ingredients and get ready to bring a taste of the Mediterranean right to your dinner table.

Greek Turkey Meatball Bowls

Enjoy the rich flavors of Mediterranean cuisine with these delightful bowls featuring tender turkey meatballs, fresh vegetables, and a zesty yogurt sauce, perfect for any dinner occasion.

For the meatballs

  • 1 pound ground turkey
  • 1/4 cup breadcrumbs
  • 1/4 cup feta cheese, crumbled
  • 1/4 cup fresh parsley, chopped
  • 1 teaspoon dried oregano
  • 1 teaspoon garlic powder
  • to taste Salt and pepper

For the bowls

  • 1 cup cooked quinoa or brown rice
  • 1 cup cherry tomatoes, halved
  • 1 cup cucumber, chopped
  • 1/2 medium red onion, diced

For the sauce

  • 1 cup plain Greek yogurt
  • 2 tablespoons lemon juice
  • 1 tablespoon olive oil
  • to taste Salt and pepper

Preparation

  1. Preheat your oven to 400°F (200°C).
  2. In a bowl, combine the ground turkey, breadcrumbs, feta cheese, parsley, oregano, garlic powder, salt, and pepper. Mix well and form into small meatballs.
  3. Place the meatballs on a baking sheet lined with parchment paper and bake for 20-25 minutes, until cooked through and golden brown.

Salad Preparation

  1. In another bowl, mix the cooked quinoa or brown rice with cherry tomatoes, cucumber, and red onion.

Sauce Preparation

  1. For the sauce, whisk together the Greek yogurt, lemon juice, olive oil, salt, and pepper in a small bowl.

Assembly

  1. Assemble your bowls by placing the quinoa mixture at the bottom, adding meatballs on top, and finishing with a generous drizzle of the yogurt sauce.

Use fresh ingredients for enhanced flavors. Feel free to adjust the spices to your liking. Make ahead by preparing the meatballs in advance and storing them.

Dinner, Main Course
Mediterranean
Comfort Food, Greek Turkey Meatball Bowls, Healthy Dinner, Mediterranean Meatballs, Turkey Meatballs

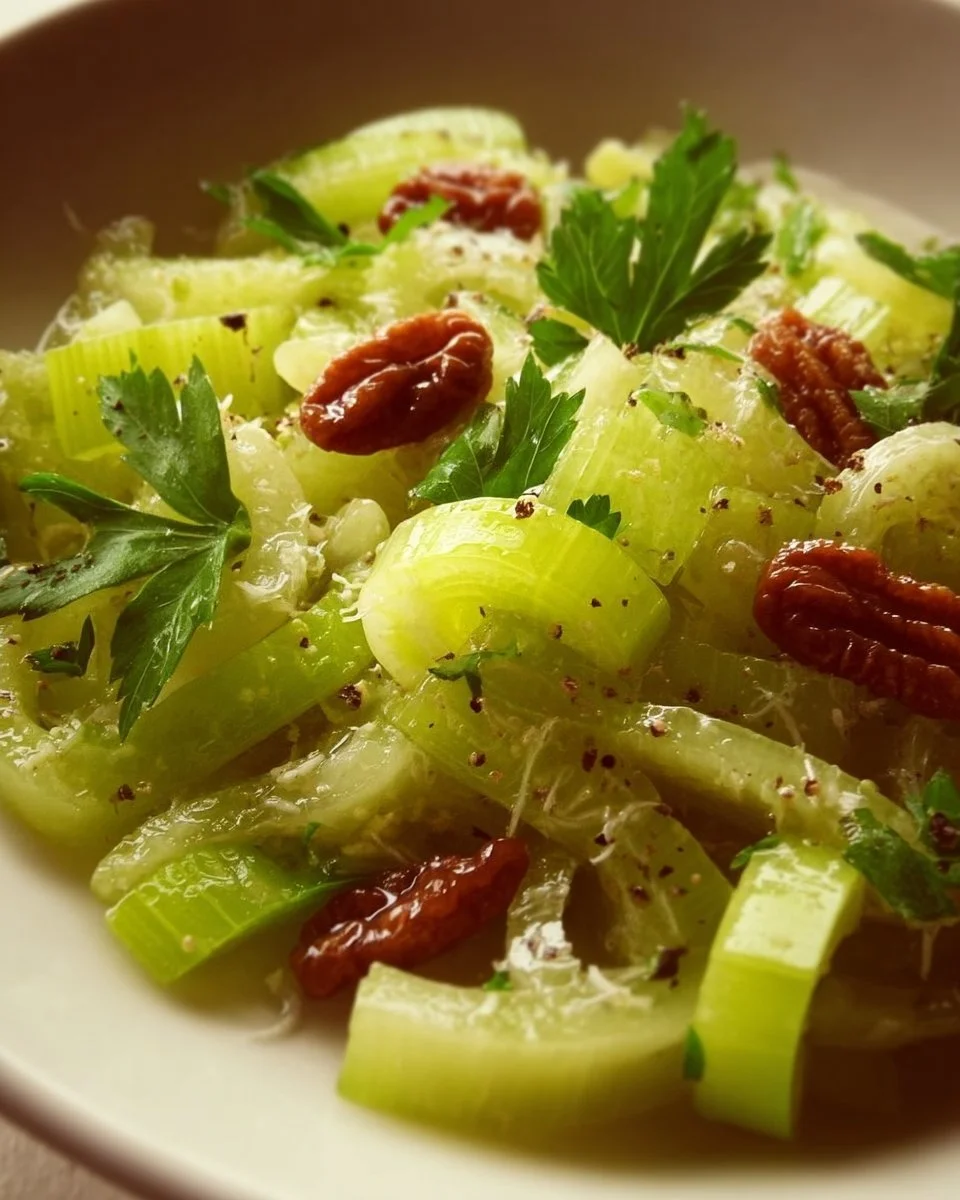
Simple Celery Salad recipe

Simple Celery Salad with fresh ingredients and dressing

When you think of salads, you might picture a bowl full of greens and veggies, but let’s take a moment to appreciate the crisp and refreshing taste of celery salad. This dish brings together the crunchy texture of celery with flavorful ingredients, making it a perfect side dish for any meal. It’s not just healthy, but also incredibly tasty and easy to whip up. Whether you’re hosting a gathering or just craving something light and fresh, this celery salad will surely impress your family and friends.

This featured recipe for celery salad is a crowd-pleaser that combines the crunch of celery with zesty dressing, making it a delightful addition to any table. The combination of flavors enchants your taste buds while providing a satisfying crunch with every bite. Plus, it’s a breeze to prepare, so even the busiest cook can get it done in no time! Get ready to toss together a salad that’s sure to win hearts and tummies alike.

How to prepare Celery Salad

To make this delicious celery salad, you’ll need the following ingredients:

Ingredients:

  • 4 cups of fresh celery, chopped
  • 1 cup of diced apples
  • ½ cup of walnuts, chopped
  • ½ cup of raisins
  • ½ cup of plain yogurt or mayonnaise
  • 1 tablespoon of lemon juice
  • Salt and pepper to taste

Now, let’s dive into the directions:

  1. In a large bowl, combine the chopped celery, diced apples, walnuts, and raisins.
  2. In a separate bowl, mix together the yogurt (or mayonnaise), lemon juice, salt, and pepper.
  3. Pour the dressing over the celery mixture and toss until everything is well coated.
  4. Chill in the refrigerator for at least 30 minutes before serving.

Celery Salad

Why You’ll Love Celery Salad

This salad is not just about good taste, it’s also packed with nutrients. Celery is low in calories and high in fiber, making it a guilt-free option. Plus, the apples add a touch of sweetness, while the walnuts give a satisfying crunch that you won’t be able to resist. It’s an excellent dish for any season, and it pairs well with grilled chicken or fish. It’s also great for picnics and potlucks, as it holds up well and tastes even better when chilled.

Tips for success

  • Choose crisp and fresh celery for the best crunch.
  • Feel free to customize the salad by adding other ingredients like carrots, cranberries, or even a sprinkle of feta cheese for a unique twist.
  • If using mayonnaise, consider a lighter version for a healthier option.

Celery Salad

Serving Suggestions

Celery salad can shine as a side dish alongside grilled meats, sandwiches, or wraps. It also works beautifully as a light lunch with some crusty bread. For an appetizer, serve it in small cups or lettuce wraps for a fun presentation.

FAQs

1. Can I make celery salad ahead of time?

Yes, you can prepare the salad a day in advance. Just keep it covered in the refrigerator and enjoy it chilled!

2. Is celery salad gluten-free?

Absolutely! All the ingredients in this salad are gluten-free, making it suitable for those with gluten sensitivity.

3. How long will the salad last in the fridge?

If stored in an airtight container, celery salad will stay fresh for about 3 days. Just give it a good stir before enjoying it again!

With all these tips and ideas, it’s time to bring out your chopping board and create this delightful celery salad yourself. Happy cooking!

Celery Salad

A crisp and refreshing celery salad with a zesty dressing, perfect as a side dish or light lunch.

Salad Ingredients

  • 4 cups fresh celery, chopped (Choose crisp and fresh celery for the best crunch.)
  • 1 cup diced apples (Apples add sweetness.)
  • ½ cup walnuts, chopped (Gives a satisfying crunch.)
  • ½ cup raisins (Adds sweetness.)

Dressing

  • ½ cup plain yogurt or mayonnaise (Consider a lighter version for a healthier option.)
  • 1 tablespoon lemon juice (Adds zest.)
  • to taste Salt and pepper (Adjust according to preference.)

Preparation

  1. In a large bowl, combine the chopped celery, diced apples, walnuts, and raisins.
  2. In a separate bowl, mix together the yogurt (or mayonnaise), lemon juice, salt, and pepper.
  3. Pour the dressing over the celery mixture and toss until everything is well coated.
  4. Chill in the refrigerator for at least 30 minutes before serving.

This salad pairs well with grilled chicken or fish. It’s great for picnics and potlucks as it holds up well and tastes better when chilled. Feel free to customize with other ingredients like carrots or cranberries.

Salad, Side Dish
American
Celery Salad, Healthy Salad, Quick Salad, Refreshing Salad, Vegetable Salad

Lemon Ginger Water

Glass of lemon ginger water with lemon slices and ginger root

Lemon ginger water is a wonderful drink that brightens up your day with its zesty combination of flavors. This drink has been adored by many for its refreshing qualities and health benefits. It’s not only a thirst-quencher, but it also offers a hint of spice from the ginger and a tangy kick from the lemon. With its crisp taste and healing properties, this drink is great for any occasion. Whether you’re looking for a morning boost or something delightful to sip during a summer gathering, lemon ginger water is sure to win over your friends and family. Plus, it’s super simple to make, so let’s dive into the recipe and start exploring this invigorating drink!

How to prepare Lemon Ginger Water

To make the perfect lemon ginger water, you’ll need the following ingredients:

Ingredients

  • 1 lemon
  • 1-inch piece of fresh ginger
  • 4 cups of water
  • Honey (optional)

Here’s how you can make it in just a few steps:

  1. Start by heating the water in a pot, but don’t let it boil.
  2. While the water is warming, squeeze the juice from the lemon into a cup.
  3. Peel the ginger and slice it thinly.
  4. Once the water is warm, add the lemon juice and ginger slices.
  5. Let the mixture steep for about 10 minutes.
  6. If you like it sweet, stir in some honey to taste.
  7. Pour into a glass, and enjoy your refreshing lemon ginger water!

Lemon Ginger Water

Why You’ll Love Lemon Ginger Water

You’ll find many reasons to love lemon ginger water! First off, it’s incredibly refreshing, especially on a hot day. The bright and zesty flavors awaken your taste buds and leave you feeling revitalized. Besides, ginger adds a mild spiciness that makes every sip a little exciting. This drink not only hydrates, but it also promotes digestion and boosts your immune system. It’s truly a win-win!

Tips for success

  1. Use fresh ingredients: Fresh lemons and ginger give the best flavor, so try to avoid bottled lemon juice and dried ginger.
  2. Adjust to your taste: Feel free to use more or less ginger and lemon, according to what you prefer.
  3. Make it ahead: You can prepare a larger batch and store it in the fridge for a couple of days, but drinking it fresh is always best.

Serving Suggestions

Lemon Ginger Water

You can serve lemon ginger water in a tall glass with ice for a cool summer drink. Garnish with lemon slices or a sprig of mint for an extra touch. It also pairs perfectly with breakfast or as a refreshing afternoon drink.

FAQs

Can I drink lemon ginger water every day?

Yes, drinking lemon ginger water every day can be beneficial. Just listen to your body and adjust if you feel any discomfort.

What are the health benefits of lemon ginger water?

Lemon ginger water is known for aiding digestion, boosting the immune system, and providing antioxidants that help detoxify the body.

Can I add other fruits or herbs?

Absolutely! You can experiment with adding mint, cucumber slices, or berries to give your drink different flavors while keeping it refreshing.

Now that you know how easy it is to whip up this delightful drink, grab your ingredients and start making lemon ginger water today! Cheers to delicious hydration!

Lemon Ginger Water

A refreshing drink that combines the tangy taste of lemon with the spicy kick of ginger, perfect for hydration and health benefits.

Main ingredients

  • 1 whole lemon (Fresh lemon is preferred for best flavor.)
  • 1 inch piece of fresh ginger (Use fresh ginger for optimal flavor.)
  • 4 cups water (Heat water but do not boil.)
  • to taste optional Honey (Optional for sweetness.)

Preparation

  1. Start by heating the water in a pot, but don’t let it boil.
  2. While the water is warming, squeeze the juice from the lemon into a cup.
  3. Peel the ginger and slice it thinly.
  4. Once the water is warm, add the lemon juice and ginger slices.
  5. Let the mixture steep for about 10 minutes.
  6. If you like it sweet, stir in some honey to taste.
  7. Pour into a glass and enjoy your refreshing lemon ginger water!

Use fresh ingredients for the best flavor. Adjust ginger and lemon amounts according to taste. Make a larger batch and store it in the fridge, but fresh is always best.

Drink, Refreshment
American, Healthy
Detox Drink, Healthy Drink, Hydration, Lemon Ginger Water, Refreshing Drink

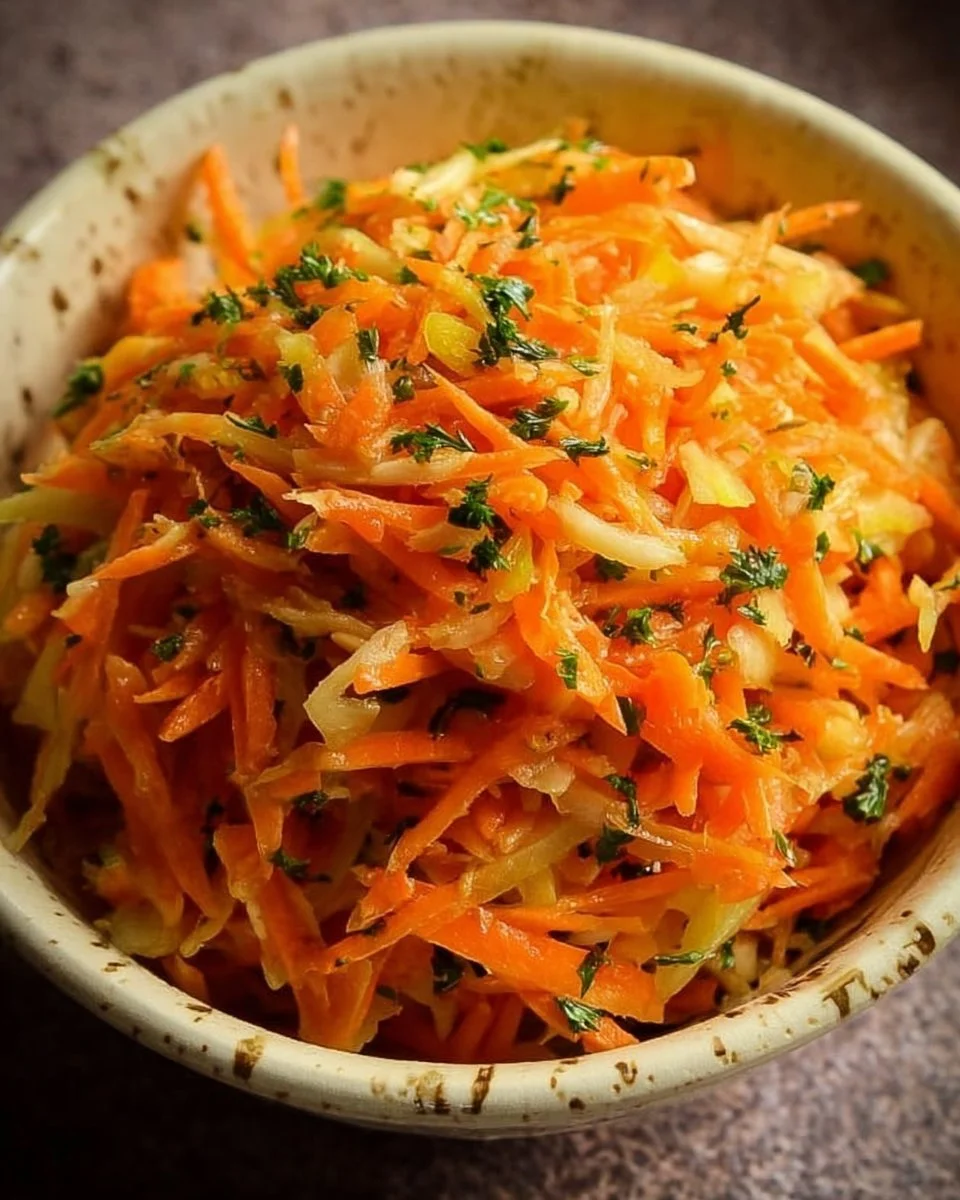
Fermented Ginger Carrot Slaw

Bowl of fermented ginger carrot slaw with vibrant colors and fresh ingredients.

Fermented Ginger Carrot Slaw is one of those delightful dishes that never fails to impress. With its bright colors and zesty flavors, it’s not just a side dish, but a downright experience. The crunch of the carrots combined with the kick of ginger creates a refreshing, tangy taste that compliments any meal. Plus, it brings a nutritious twist to your plate. This slaw is popular among friends and family gatherings, making it a perfect crowd-pleaser. If you’re looking for something wholesome yet exciting to serve, this is the recipe you need to try—trust me, you won’t be able to get enough!

How to prepare Fermented Ginger Carrot Slaw

To make this vibrant slaw, gather your ingredients which include fresh carrots, ginger, salt, and a few other flavorful additions to bring everything together. Start by grating the carrots and ginger, then mix them with salt and let them sit. This process allows the veggies to release their natural juices, creating the perfect brine for fermentation. After that, pack everything into a jar and let it sit for several days. The result is a tangy, crispy slaw that tastes fantastic right out of the jar or as a side dish!

Fermented Ginger Carrot Slaw

Why You’ll Love Fermented Ginger Carrot Slaw

There are many reasons to adore this recipe. First, it’s simple to prepare, requiring minimal cooking and just a bit of patience while it ferments. Second, the flavors are absolutely incredible. The crunchy carrots paired with spicy ginger make for a perfect match, bringing a little zing to your taste buds. Additionally, this slaw is packed with probiotics thanks to the fermentation process, making it great for gut health. It’s not just a salad, it’s a healthy, tasty addition to your meals!

Tips for success

  1. Use Fresh Ingredients: Always opt for fresh, organic carrots and ginger for the best flavor and nutrition.
  2. Mind the Salt: Don’t skimp on the salt! It’s essential for the fermentation process.
  3. Keep It Clean: Make sure all your utensils and jars are clean to prevent unwanted bacteria during fermentation.
  4. Taste Test: After a few days, taste your slaw. If you prefer a stronger flavor, let it ferment a bit longer.

Fermented Ginger Carrot Slaw

Serving Suggestions

Fermented Ginger Carrot Slaw is incredibly versatile. Serve it alongside grilled meats for a refreshing crunch, or add it to sandwiches and wraps for an extra layer of flavor. You can also mix it into rice bowls or tacos. The possibilities are endless, and it’s a fantastic way to brighten up your meals!

FAQs

How long does it take to ferment the slaw?

Typically, it takes about 5 to 7 days at room temperature for your slaw to ferment properly.

Can I use other vegetables in the slaw?

Absolutely! Feel free to mix in other crunchy veggies like radishes or cabbage for added flavor and texture.

How long can I store fermented ginger carrot slaw?

Once fermented, you can store your slaw in the fridge for about 4 to 6 weeks. The flavor may continue to develop, making it even tastier over time!

So why wait? Dive in and start making your own Fermented Ginger Carrot Slaw today! You’ll love the refreshing taste and the health benefits it brings to your table. Happy cooking!

Fermented Ginger Carrot Slaw

A vibrant and tangy slaw made with fresh carrots, ginger, and probiotic benefits from fermentation, perfect for any meal.

Main Ingredients

  • 4 cups shredded fresh carrots (Use organic carrots for best flavor.)
  • 1 tbsp grated fresh ginger (Adjust the amount to taste.)
  • 1 tbsp salt (Essential for fermentation.)

Preparation

  1. Grate the fresh carrots and ginger.
  2. In a large bowl, mix the grated carrots, ginger, and salt thoroughly.
  3. Let the mixture sit for about 15 minutes to release natural juices.
  4. Pack the mixture tightly into a clean jar, ensuring the liquid covers the solids.
  5. Seal the jar and let it sit at room temperature for 5 to 7 days to ferment.

Serving

  1. After fermentation, taste the slaw. If preferred, let it ferment longer for a stronger flavor.
  2. Store in the fridge for 4 to 6 weeks, and serve as a refreshing side dish or topping.

Use fresh and organic vegetables for the best taste, and keep all utensils clean to prevent unwanted bacteria during fermentation. Feel free to experiment by adding other crunchy vegetables like radishes or cabbage!

Salad, Side Dish
Healthy, Vegetarian
Fermented Slaw, Ginger Carrot Slaw, Healthy Side Dish, Probiotics, Simple Recipe

Green Chilaquiles

Plate of Green Chilaquiles topped with avocado and cilantro

Green Chilaquiles is a delicious dish that brings a burst of flavors to your breakfast or brunch table. This vibrant Mexican dish features crispy tortilla chips smothered in a rich green salsa, making it a perfect crowd-pleaser for family gatherings or weekend feasts. Topped with creamy avocado, crumbled cheese, and a sprinkle of cilantro, Green Chilaquiles is not only tasty but visually appealing too. Whether you’re serving it at a Sunday brunch or enjoying a quiet morning at home, this dish is sure to bring smiles and satisfaction. Get ready to dive into this delightful recipe and enjoy every bite!

Green Chilaquiles

How to prepare Green Chilaquiles

To make Green Chilaquiles at home, you’ll need a handful of simple ingredients and a little bit of your time. Gather these ingredients:

  • Corn tortillas
  • Green salsa (store-bought or homemade)
  • Olive oil
  • Avocado
  • Crumbled queso fresco or feta cheese
  • Fresh cilantro
  • Sour cream (optional)

Here’s how to bring it all together:

Green Chilaquiles

  1. Cut the corn tortillas into triangles and fry them in olive oil until they are golden and crispy.
  2. In a large pan, heat the green salsa over medium heat.
  3. Once the salsa is bubbling, add the fried tortilla chips to the pan and stir until they are well coated.
  4. Remove from heat and let it sit for a couple of minutes.
  5. Serve your chilaquiles warm, topped with avocado slices, crumbled cheese, cilantro, and a dollop of sour cream if desired.

{image_2}

Why You’ll Love Green Chilaquiles

There are many reasons to fall in love with Green Chilaquiles. First, it’s versatile, allowing you to customize the toppings based on your preferences. You can add eggs for extra protein, top it with your favorite hot sauce, or throw in some beans for heartiness. This dish is also perfect for using up leftover tortillas or salsa, making it a clever choice for busy mornings. Plus, with its vibrant colors and fresh flavors, it’s a feast for the eyes as well as the stomach.

Tips for success

  1. Use Fresh Ingredients: Opt for fresh corn tortillas for the best flavor and texture.
  2. Make Your Own Salsa: If you have the time, making homemade green salsa can elevate the dish with personalized flavors.
  3. Don’t Overcook the Tortillas: Fry the tortilla chips until they are just golden; they should remain crispy when coated with salsa.

{image_1}

Serving Suggestions

Green Chilaquiles can be served as a standalone dish or accompanied by sides like black beans, scrambled eggs, or a fresh fruit salad. For a complete meal, consider serving it with a refreshing drink, such as iced coffee or a zesty limeade.

FAQs

Can I make Green Chilaquiles in advance?

Yes, you can prepare the salsa and fry the tortillas in advance. Just assemble when ready to serve, but keep in mind that they are best served immediately to maintain their crunch.

Can I use store-bought salsa?

Absolutely! Store-bought green salsa works perfectly for a quick meal.

Can I make it vegan?

Yes, just skip the cheese and sour cream, or use vegan alternatives to keep it plant-based.

Now that you know how to make Green Chilaquiles, get ready to whip them up in your kitchen and amaze your family and friends with this delightful dish!

Green Chilaquiles

Green Chilaquiles is a delicious Mexican dish featuring crispy tortilla chips smothered in a rich green salsa, topped with avocado, crumbled cheese, and cilantro. Perfect for breakfast or brunch!

Main ingredients

  • 8 pieces Corn tortillas (Cut into triangles)
  • 1 cup Green salsa (Store-bought or homemade)
  • 2 tablespoons Olive oil (For frying)
  • 1 medium Avocado (Sliced for topping)
  • 1 cup Crumbled queso fresco or feta cheese (For topping)
  • 1/4 cup Fresh cilantro (Chopped for garnish)
  • 1/2 cup Sour cream (Optional for serving)

Preparation

  1. Cut the corn tortillas into triangles and fry them in olive oil until they are golden and crispy.
  2. In a large pan, heat the green salsa over medium heat.
  3. Once the salsa is bubbling, add the fried tortilla chips to the pan and stir until they are well coated.
  4. Remove from heat and let it sit for a couple of minutes.
  5. Serve your chilaquiles warm, topped with avocado slices, crumbled cheese, cilantro, and a dollop of sour cream if desired.

Use fresh ingredients for best flavor, and consider making your own salsa for personalized flavors. Fry the tortillas until just golden so they remain crispy.

Breakfast, Brunch
Mexican
Chilaquiles, Easy Brunch, Healthy Breakfast, Mexican Breakfast, Salsa

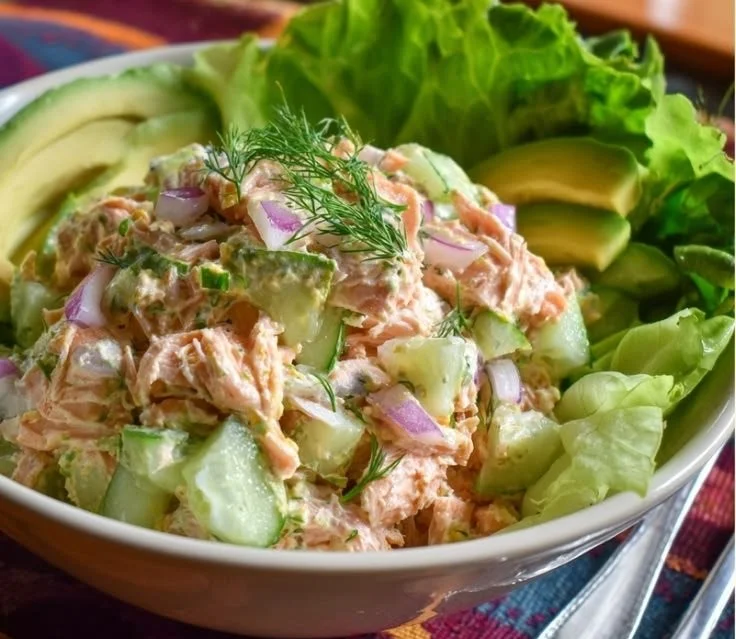
Healthy Salmon Salad with Cucumber

Healthy salmon salad with cucumber and vegetables on a plate.

Preparing a Healthy Salmon Salad with Cucumber is quite simple. Start by gathering your ingredients, which include fresh salmon, crunchy cucumber, leafy greens, and a few other tasty items. This salad not only looks vibrant but also tastes fantastic. Follow the steps below to make your own delicious salmon salad.

Healthy Salmon Salad with Cucumber

  1. Begin by cooking the salmon fillets, either by grilling or baking them until they are fully cooked.
  2. While the salmon cooks, chop up the cucumber into bite-sized pieces and prepare your leafy greens.
  3. Once the salmon is ready, flake it into chunks and mix it with the greens and cucumber in a large bowl.
  4. Drizzle your favorite dressing over the top, stir gently, and let the flavors mingle for a few minutes.
  5. Serve chilled or at room temperature for a refreshing meal.

{image_2}

Why You’ll Love Healthy Salmon Salad with Cucumber

You will fall in love with this Healthy Salmon Salad with Cucumber for several reasons. First, it’s packed with nutrients, so you can enjoy a guilt-free meal that supports your health goals. The combination of tender salmon and crunchy cucumber creates an exciting texture that keeps every bite interesting. Also, it’s perfect for lunch, a light dinner, or even a picnic, making it versatile and easy to enjoy. Plus, who doesn’t love a meal that comes together quickly and tastes amazing?

Healthy Salmon Salad with Cucumber

Tips for success

To make the most of your Healthy Salmon Salad with Cucumber, consider these tips:

  • Use fresh, high-quality salmon for the best flavor.
  • Adjust the dressing to your personal preference, whether you like it creamy or vinaigrette-style.
  • Add other vegetables like cherry tomatoes or bell peppers for extra color and nutrition.
  • If you’re making this salad ahead of time, keep the dressing separate until you’re ready to serve to maintain crunchiness.

{image_1}

Serving Suggestions

This Healthy Salmon Salad pairs beautifully with whole grain bread or crackers for a satisfying meal. You could also serve it alongside a bowl of soup for a cozy dinner option. For a more filling salad, consider adding avocado or a side of quinoa.

FAQs

Can I use canned salmon instead of fresh?

Yes, canned salmon works great in this recipe. Just make sure to drain it and check for bones.

What kind of dressing goes well with this salad?

A lemon vinaigrette or a light yogurt-based dressing complements the flavors nicely.

Can I add other ingredients to the salad?

Absolutely! Feel free to experiment with different veggies like radishes, spinach, or even fruits like mango for a sweet twist.

Healthy Salmon Salad with Cucumber

A vibrant and nutritious salad featuring tender salmon and crunchy cucumber, perfect for lunch or dinner.

Salad Ingredients

  • 2 fillets fresh salmon fillets (Use high-quality salmon for best flavor.)
  • 1 cup crunchy cucumber (Chopped into bite-sized pieces.)
  • 2 cups leafy greens (Any salad mix or fresh spinach works.)

Dressing

  • 2 tablespoons dressing of choice (Adjust to personal preference (creamy or vinaigrette).)

Cooking the Salmon

  1. Cook the salmon fillets by grilling or baking them until fully cooked.

Preparing the Salad

  1. While the salmon is cooking, chop up the cucumber into bite-sized pieces and prepare the leafy greens.
  2. Once the salmon is ready, flake it into chunks and combine it with the greens and cucumber in a large bowl.
  3. Drizzle your favorite dressing over the top, stir gently, and let the flavors mingle for a few minutes.
  4. Serve chilled or at room temperature.

For best results, keep the dressing separate until ready to serve if making ahead of time. Feel free to add other vegetables or fruits for extra flavor.

Dinner, lunch, Salad
American
Cucumber Salad, Healthy Recipe, Nutritious, Quick Meal, Salmon Salad