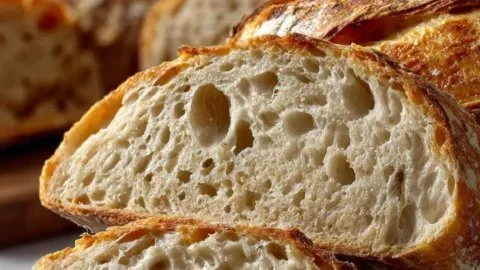
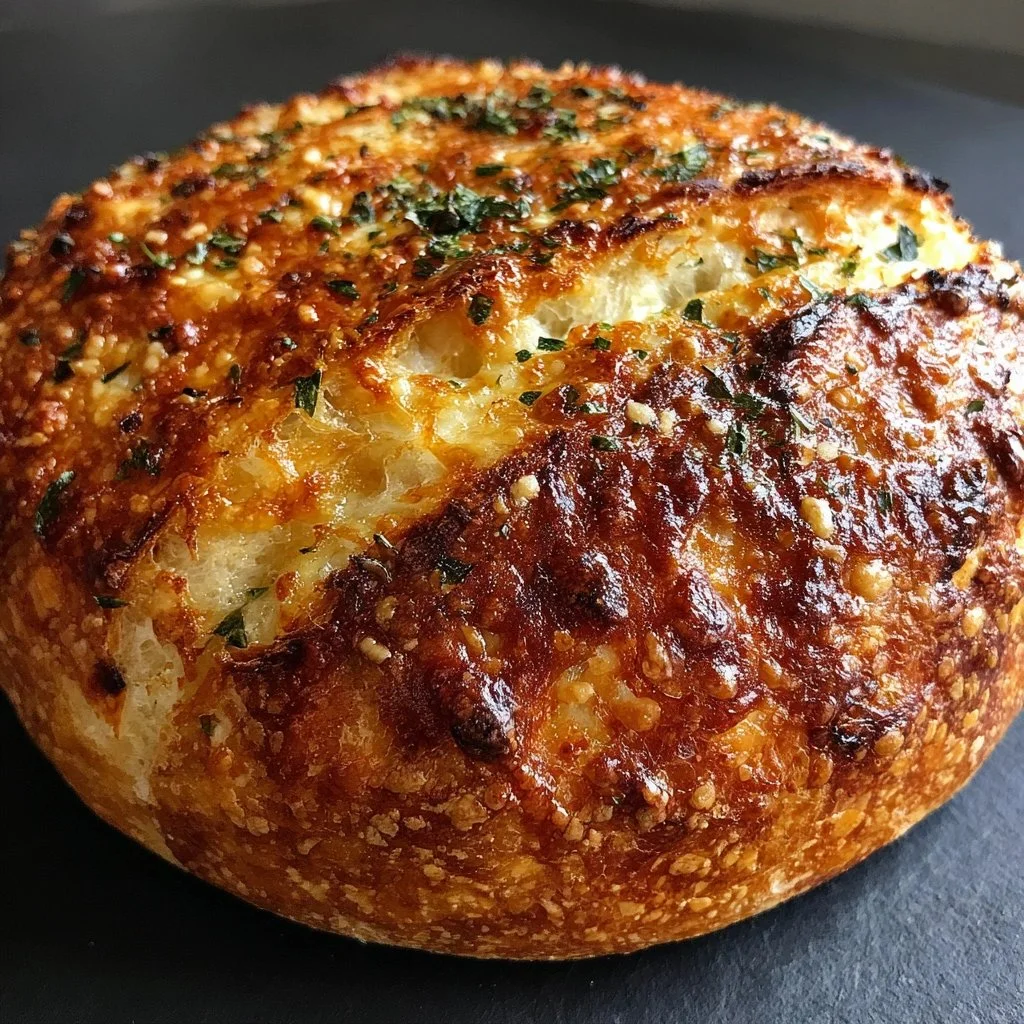
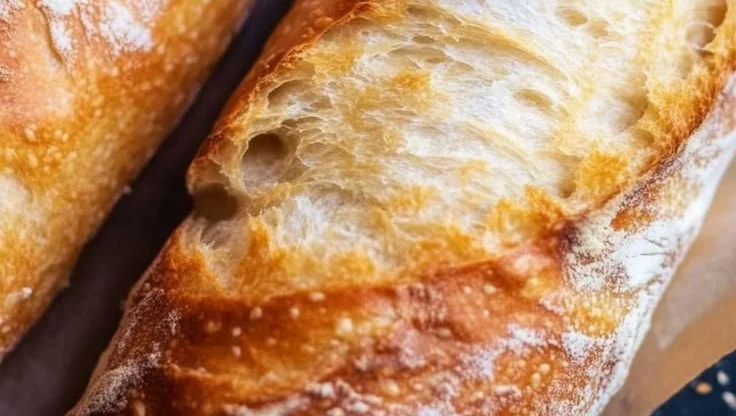
Olive Cheese Bread

Nothing brings people together quite like the warm and inviting scent of freshly baked bread. Olive Cheese Bread is one such delight that truly shines at gatherings. This recipe combines the savory flavors of olives with the rich, creamy taste of cheese, resulting in a luscious loaf that is both easy to make and absolutely delicious. Your family and friends will rave about this tasty treat, making it a must-try for your next meal. Who wouldn’t want to whip up something so delectable?

How to prepare Olive Cheese Bread

To start, you will need the following ingredients for the Olive Cheese Bread:

  • 2 cups all-purpose flour
  • 1 tablespoon baking powder
  • 1 teaspoon salt
  • 1 cup shredded cheese (like cheddar or mozzarella)
  • 1 cup chopped olives (black or green)
  • 1 cup milk
  • 1/4 cup olive oil
  • 2 eggs

Directions

  1. Preheat your oven to 350°F (175°C). Grease a loaf pan.
  2. In a large bowl, mix together the flour, baking powder, and salt.
  3. Stir in the cheese and olives until well combined.
  4. In another bowl, whisk together the milk, olive oil, and eggs.
  5. Pour the wet ingredients into the dry mixture, stirring gently until just combined.
  6. Transfer the batter to the prepared loaf pan.
  7. Bake for 50-60 minutes or until a toothpick comes out clean.
  8. Allow to cool for a few minutes before serving.

Olive Cheese Bread

Why You’ll Love Olive Cheese Bread

This Olive Cheese Bread is packed with flavor, offering a delightful combination of savory olives and gooey cheese. It’s perfect as a snack, side dish, or even as a unique breakfast option. The light and fluffy texture makes it a hit with both kids and adults. If you’re looking for something that pairs wonderfully with soups or salads, this will not disappoint. For more bread inspiration, check out this simple recipe for 2-ingredient cottage cheese bread.

Tips for success

To ensure your Olive Cheese Bread turns out perfectly, make sure to measure your ingredients accurately. Fresh ingredients will make a big difference, especially with the olives and cheese. Additionally, letting the bread cool completely before slicing helps retain moisture and flavor.

Olive Cheese Bread

Serving Suggestions

Serve your Olive Cheese Bread warm, alongside a bowl of soup or a crisp salad. It also makes for a great toast base for various toppings like bruschetta or hummus. Feel free to get creative with the cheese and olive varieties, inviting exciting flavors to your table.

FAQs

Can I use different types of cheese?

Absolutely! Feel free to experiment with different cheeses like feta or gouda for varied flavors.

How should I store leftover bread?

Wrap the bread in plastic wrap or place it in an airtight container, and it will last for about 3-4 days at room temperature.

Can I freeze Olive Cheese Bread?

Yes, this bread freezes well! Wrap it tightly in foil or plastic wrap before placing it in a freezer bag. Just thaw and reheat when you’re ready to enjoy it again.

Olive Cheese Bread

A delightful and savory bread combining olives and cheese, perfect for gatherings and pairings with soups or salads.

Dry Ingredients

  • 2 cups all-purpose flour (For the base of the bread.)
  • 1 tablespoon baking powder (Leavening agent.)
  • 1 teaspoon salt (Enhances flavor.)

Wet Ingredients

  • 1 cup milk (Can use any type of milk.)
  • 1/4 cup olive oil (For richness.)
  • 2 large eggs (Binds the ingredients.)

Fillings

  • 1 cup shredded cheese (like cheddar or mozzarella) (Cheese of choice.)
  • 1 cup chopped olives (black or green) (Add variety according to preference.)

Preparation

  1. Preheat your oven to 350°F (175°C). Grease a loaf pan.
  2. In a large bowl, mix together the flour, baking powder, and salt.
  3. Stir in the cheese and olives until well combined.
  4. In another bowl, whisk together the milk, olive oil, and eggs.
  5. Pour the wet ingredients into the dry mixture, stirring gently until just combined.
  6. Transfer the batter to the prepared loaf pan.

Baking

  1. Bake for 50-60 minutes or until a toothpick comes out clean.
  2. Allow to cool for a few minutes before serving.

Tips for success: Ensure to measure ingredients accurately and allow the bread to cool completely before slicing to retain moisture and flavor.
Breakfast, Side Dish, Snack
American
Homemade Bread, Olive Cheese Bread, Quick Bread, Savory Bread

Olive Garden Breadsticks

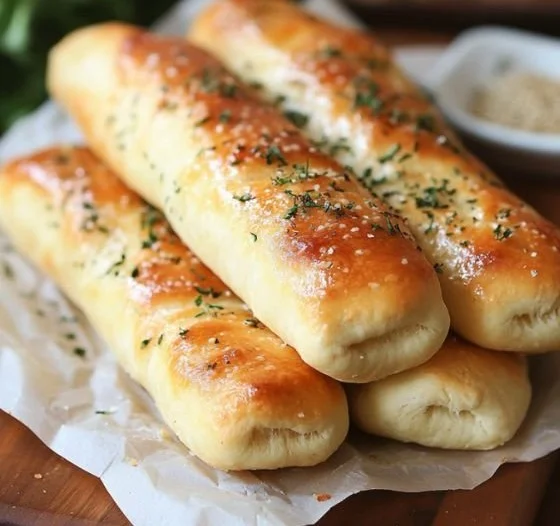
Delicious Olive Garden breadsticks served warm with garlic and herbs

These Olive Garden Breadsticks are warm, soft, and full of garlic butter. They remind many people of a fun meal out, but you can make them at home in a simple way. This recipe is a real crowd-pleaser, with a light inside, a soft crust, and a bright garlic flavor. It pairs well with pasta, soup, or a fresh salad, and it works for weeknights or parties. If you enjoy Olive Garden style food, you might also like the Olive Garden pasta salad for a full meal. Get ready to bake, and have fun pulling these warm sticks from the pan.

how to prepare Olive Garden Breadsticks

Ingredients

  • 1 cup warm water, about 110°F to 115°F
  • 2 1/4 teaspoons active dry yeast (1 packet)
  • 2 tablespoons sugar
  • 3 cups all-purpose flour, plus more for dusting
  • 2 tablespoons olive oil, plus more for pan
  • 1 teaspoon salt
  • 4 tablespoons unsalted butter
  • 1 teaspoon garlic powder
  • 1 teaspoon dried parsley
  • Pinch of salt, for topping

Directions

  1. In a small bowl, mix warm water, yeast, and sugar. Let sit 5 to 10 minutes, until foamy.
  2. In a large bowl, combine flour and salt. Add the yeast mix and 2 tablespoons olive oil. Stir until a dough forms.
  3. Turn dough onto a floured surface. Knead 5 to 7 minutes, until smooth and elastic.
  4. Place dough in an oiled bowl, cover with a clean towel. Let rise in a warm spot about 1 hour, until doubled.
  5. Punch down dough. Divide into 12 to 16 equal pieces. Roll each piece into a 6 to 7 inch stick.
  6. Place sticks on a greased baking sheet, spaced apart. Cover and let rise 20 to 30 minutes.
  7. Preheat oven to 400°F (200°C).
  8. Bake breadsticks 12 to 15 minutes, until light golden on top.
  9. Meanwhile, melt butter and stir in garlic powder, dried parsley, and a pinch of salt.
  10. Brush hot breadsticks with the garlic butter right after they come from the oven.
  11. Serve warm.

Olive Garden Breadsticks

Why You’ll Love Olive Garden Breadsticks

  • Soft and light, just like the ones from the restaurant.
  • Simple ingredients you likely have at home.
  • Fast to make, and great for feeding a group.
  • The garlic butter on top adds big, familiar flavor.

tips for success

  • Use warm water, not hot, to wake the yeast.
  • Knead until the dough feels smooth, this helps a soft crumb.
  • Let the dough rise in a warm, draft-free spot for best volume.
  • Brush with garlic butter right away, so the flavor soaks in.
  • For extra chew, let the dough rest a bit longer before shaping.

Serving Suggestions

  • Serve with marinara sauce or melted cheese for dipping.
  • Pair with a simple green salad and pasta for a full meal.
  • Add a sprinkle of grated Parmesan after brushing with butter.
  • Wrap leftover breadsticks in foil and warm them in the oven before serving again.

Olive Garden Breadsticks

FAQs

Q: Can I make the dough ahead of time?
A: Yes, place the dough in the fridge after the first rise. Let it rest overnight, then shape and bake the next day.

Q: Can I use active dry yeast or instant yeast?
A: Both work. If you use instant yeast, you can mix it with the flour directly and skip the first proof step with water.

Q: How do I get the breadsticks soft, not crusty?
A: Do not overbake them. Brush with butter right after they come out of the oven to keep them soft.

Q: Can I freeze the dough or baked breadsticks?
A: You can freeze shaped sticks before the second rise, or freeze baked sticks in a sealed bag. Thaw and reheat in the oven.

Conclusion

For another tested copycat version, see this helpful recipe on Handle the Heat for tips and a full method, it can guide you if you want an exact match: copycat Olive Garden breadsticks recipe on Handle the Heat.

Olive Garden Breadsticks

These warm, soft breadsticks are full of garlic butter and reminiscent of Olive Garden’s famous recipe. Perfect for pairing with pasta, soup, or salad.

Dough Ingredients

  • 1 cup warm water, about 110°F to 115°F (Use warm water, not hot, to wake the yeast.)
  • 2 1/4 teaspoons active dry yeast (1 packet) (Alternatively, you can use instant yeast.)
  • 2 tablespoons sugar
  • 3 cups all-purpose flour, plus more for dusting (Knead until smooth for best texture.)
  • 2 tablespoons olive oil, plus more for pan
  • 1 teaspoon salt

Topping

  • 4 tablespoons unsalted butter (Melted and mixed with seasonings.)
  • 1 teaspoon garlic powder
  • 1 teaspoon dried parsley
  • 1 pinch salt, for topping

Preparation

  1. In a small bowl, mix warm water, yeast, and sugar. Let sit 5 to 10 minutes, until foamy.
  2. In a large bowl, combine flour and salt. Add the yeast mix and 2 tablespoons olive oil. Stir until a dough forms.
  3. Turn dough onto a floured surface. Knead 5 to 7 minutes, until smooth and elastic.
  4. Place dough in an oiled bowl, cover with a clean towel. Let rise in a warm spot about 1 hour, until doubled.
  5. Punch down dough. Divide into 12 to 16 equal pieces. Roll each piece into a 6 to 7 inch stick.

Baking

  1. Place sticks on a greased baking sheet, spaced apart. Cover and let rise 20 to 30 minutes.
  2. Preheat oven to 400°F (200°C).
  3. Bake breadsticks 12 to 15 minutes, until light golden on top.

Finishing Touch

  1. Meanwhile, melt butter and stir in garlic powder, dried parsley, and a pinch of salt.
  2. Brush hot breadsticks with the garlic butter right after they come from the oven.
  3. Serve warm.

For extra chew, let the dough rest a bit longer before shaping. Serve with marinara sauce or melted cheese for dipping. Wrap leftover breadsticks in foil and warm them in the oven before serving again.

Appetizer, Side Dish
Italian
breadsticks, Garlic Butter, homemade breadsticks, Olive Garden, soft breadsticks

Sourdough Bread

Freshly baked sourdough bread with a crispy crust and fluffy interior

Sourdough bread is warm, tangy, and full of life. It feels old fashioned, but making it is simple if you take it slow. The bread gets a crisp crust, soft inside, and a bright sour note from the starter. This Sourdough Bread recipe is a crowd-pleaser, perfect for toast, soup, or sandwiches. If you like rustic home bread, you may also enjoy this Amish apple fritter bread recipe. Try it once, and you will want to bake it again.

How to prepare Sourdough Bread

Ingredients

  • 500 g strong bread flour
  • 350 g water, room temp
  • 100 g active sourdough starter, bubbly
  • 10 g salt

Directions

  1. Feed your starter 6 to 12 hours before, so it is active and bubbly.
  2. In a big bowl, mix the flour and water until no dry flour shows, rest 30 minutes.
  3. Add the starter and salt, mix until combined.
  4. Do a set of gentle folds every 30 minutes for 2 hours, this builds gluten.
  5. Let the dough rise, covered, at room temp for 3 to 5 hours, until it grows by about 50%.
  6. Turn the dough onto a floured surface, shape into a round loaf. Let rest 20 minutes, then shape tight.
  7. Place the shaped loaf in a proofing basket or bowl, cover, and refrigerate overnight or proof at room temp for 2 to 4 hours.
  8. Heat your oven to 475°F (245°C) with a Dutch oven inside for 30 minutes.
  9. Carefully transfer the loaf into the hot Dutch oven, score the top with a sharp blade.
  10. Bake covered for 20 minutes, then uncover and bake 20 to 25 more minutes, until deep brown.
  11. Cool on a rack at least 1 hour before slicing, so the crumb sets and the flavor opens.


Sourdough Bread

Why You’ll Love Sourdough Bread

  • Natural flavor, from the starter, not from fast yeast.
  • Long shelf life, it stays fresh and tasty for days.
  • Crunchy crust and chewy crumb, a great texture mix.
  • Good for simple meals, it lifts even plain butter.

tips for success

  • Use an active starter, bubbly and at its peak. Feed it before you start.
  • Measure by weight for steady results, scales give best repeatability.
  • Be patient with fermentation, slow rise gives better taste.
  • Use folds not hard kneads, folding makes a strong dough without effort.
  • Score the dough just before baking to control the oven rise.
  • Let the loaf cool fully, hot bread slices can be gummy.

Serving Suggestions

  • Slice and toast with butter and jam for breakfast.
  • Make hearty sandwiches with roasted veggies and cheese.
  • Serve with soup or stew, it soaks up broth nicely.
  • Turn stale slices into croutons or breadcrumbs.


Sourdough Bread

FAQs

Q: How do I know my starter is ready? A: A ready starter is bubbly and doubles in size within 4 to 8 hours after feeding. It should smell fresh and slightly tangy.

Q: Can I use whole wheat flour? A: Yes, but start with 20 to 30% whole wheat. Whole grain soaks more water and can make the dough heavier.

Q: Do I need a Dutch oven? A: A Dutch oven helps make a great crust, but you can bake on a hot baking stone with steam from a pan of water.

Q: How long can I keep the dough in the fridge? A: You can retard the shaped dough 12 to 24 hours, sometimes up to 48 hours. Longer proofing deepens flavor but watch for overfermentation.

Q: Why is my crumb dense? A: Dense crumb can come from underproofing, weak starter, or not enough folding. Give more rise time and strengthen the dough with folds.

Conclusion

If you want a clear beginner guide with photos and extra tips, check this Sourdough Bread: A Beginner’s Guide – The Clever Carrot. It pairs well with this simple recipe and gives more detail on starter care and shaping.

Sourdough Bread

This Sourdough Bread recipe is a crowd-pleaser, perfect for toast, soup, or sandwiches, featuring a crisp crust and a soft inside with a bright sour note from the starter.

Main Ingredients

  • 500 g strong bread flour
  • 350 g water, room temp
  • 100 g active sourdough starter, bubbly (Feed your starter 6 to 12 hours before use.)
  • 10 g salt

Preparation

  1. Feed your starter 6 to 12 hours before, so it is active and bubbly.
  2. In a big bowl, mix the flour and water until no dry flour shows, then rest for 30 minutes.
  3. Add the starter and salt, then mix until combined.
  4. Do a set of gentle folds every 30 minutes for 2 hours.
  5. Let the dough rise, covered, at room temp for 3 to 5 hours, until it grows by about 50%.
  6. Turn the dough onto a floured surface and shape into a round loaf. Let rest for 20 minutes, then shape tightly.
  7. Place the shaped loaf in a proofing basket or bowl, cover, and refrigerate overnight or proof at room temp for 2 to 4 hours.

Baking

  1. Heat your oven to 475°F (245°C) with a Dutch oven inside for 30 minutes.
  2. Carefully transfer the loaf into the hot Dutch oven and score the top with a sharp blade.
  3. Bake covered for 20 minutes, then uncover and bake for an additional 20 to 25 minutes, until deep brown.
  4. Cool on a rack for at least 1 hour before slicing to let the crumb set and the flavor open.

Use an active starter for the best results. Be patient with fermentation for improved flavor. Let the loaf cool fully to avoid gummy slices.

Bread, Snack
American, European
Artisan Bread, Baking, Homemade Bread, Rustic Bread, Sourdough Bread

5-Ingredient Crusty Panini Bread

Homemade crusty panini bread made with only 5 ingredients

This simple no-knead bread feels like a small kitchen win. It uses only five everyday ingredients and asks for patience, not hard work. You wake up to a tangy, crusty loaf that makes perfect panini and warm sandwiches.

The featured recipe, 5-Ingredient Crusty Panini Bread (No Knead), is a crowd-pleaser. It has a crisp crust, a soft inside, and a mild flavor that matches any filling. Kids and guests love it, and it makes store-bought bread seem heavy. Give it time, and you get a great loaf with little effort.

Try it once, and you will want to make panini every week.

How to prepare 5-Ingredient Crusty Panini Bread (No Knead)

Ingredients:

  • 3 cups all-purpose flour
  • 1 teaspoon salt
  • 1 teaspoon instant yeast
  • 1 1/2 cups warm water
  • 1 tablespoon olive oil

Directions:

  1. In a large bowl, mix flour, salt, and yeast. Stir well.
  2. Add warm water and olive oil. Mix until you have a shaggy dough.
  3. Cover the bowl with plastic wrap or a towel. Let the dough rest at room temperature for 12 to 18 hours, until bubbly.
  4. Dust a work surface with flour. Gently shape the dough into a round loaf by folding the edges under. Do not knead hard.
  5. Place the dough on a parchment paper-lined baking sheet or in a Dutch oven. Cover and let rise for 1 to 2 hours.
  6. Preheat your oven to 450°F (230°C). If using a Dutch oven, heat it empty while the oven preheats.
  7. If using a Dutch oven, place the dough inside it on the parchment, cover, and bake 30 minutes. Remove the lid and bake 10 to 15 more minutes, until golden and crusty. If baking on a sheet, bake 35 to 40 minutes until crusty and brown.
  8. Cool on a rack for at least 20 minutes before slicing. Slice thin for panini or thicker for sandwiches.


5-Ingredient Crusty Panini Bread (No Knead)

Why You’ll Love 5-Ingredient Crusty Panini Bread (No Knead)

  • Easy, no-knead method, great for busy cooks.
  • Uses only five common ingredients, cheap and simple.
  • Crispy outside, soft inside, perfect for panini and sandwiches.
  • Makes a rustic, bakery-style loaf at home without fancy tools.

tips for success

  • Use warm, not hot, water to wake the yeast, about 100°F (38°C).
  • Let the dough rest long enough, the slow rise builds flavor.
  • Do not over-handle the dough, gentle folds keep air pockets.
  • If your kitchen is cool, let it rise in a slightly warm spot, like an oven with just the light on.
  • Use a Dutch oven for the best crust, it traps steam and makes the bread crisp.
  • Cool the loaf before slicing, this keeps the crumb from getting squished.

Serving Suggestions

  • Make classic panini with mozzarella, tomato, and basil.
  • Use it for grilled cheese, sliced thin and buttered.
  • Turn it into a hearty sandwich with turkey, pesto, and roasted peppers.
  • Toast slices and serve with soup or salad for a simple meal.


5-Ingredient Crusty Panini Bread (No Knead)

FAQs

Q: Can I use whole wheat flour? A: Yes, you can replace up to half the flour with whole wheat. The bread will be denser. Add a bit more water if the dough feels dry.

Q: How long can I store this bread? A: Store at room temperature in a bread bag or wrapped for 2 to 3 days. For longer storage, slice and freeze.

Q: Do I have to use a Dutch oven? A: No, you can bake on a baking sheet. A Dutch oven gives a better crust, but a hot tray and a pan of water in the oven can help too.

Q: Can I make smaller loaves? A: Yes, divide the dough into two and bake each smaller. Adjust the bake time down by about 10 to 15 minutes.

Q: What if my dough is sticky after rising? A: Lightly flour your hands and work surface. The dough should be soft and slightly sticky, not sloppy.

Conclusion

If you want another simple no-knead idea for sandwich bread, check this No-Knead Sandwich Bread – Emma Fontanella recipe for more tips and a close variation.

5-Ingredient Crusty Panini Bread (No Knead)

A simple no-knead bread with a crisp crust and soft inside, perfect for panini and warm sandwiches.

Main Ingredients

  • 3 cups all-purpose flour
  • 1 teaspoon salt
  • 1 teaspoon instant yeast
  • 1.5 cups warm water (Around 100°F (38°C))
  • 1 tablespoon olive oil

Preparation

  1. In a large bowl, mix flour, salt, and yeast. Stir well.
  2. Add warm water and olive oil. Mix until you have a shaggy dough.
  3. Cover the bowl with plastic wrap or a towel. Let the dough rest at room temperature for 12 to 18 hours, until bubbly.

Shaping and Rising

  1. Dust a work surface with flour. Gently shape the dough into a round loaf by folding the edges under. Do not knead hard.
  2. Place the dough on a parchment paper-lined baking sheet or in a Dutch oven. Cover and let rise for 1 to 2 hours.

Baking

  1. Preheat your oven to 450°F (230°C). If using a Dutch oven, heat it empty while the oven preheats.
  2. If using a Dutch oven, place the dough inside it on the parchment, cover, and bake for 30 minutes. Remove the lid and bake for 10 to 15 more minutes, until golden and crusty.
  3. If baking on a sheet, bake for 35 to 40 minutes until crusty and brown.
  4. Cool on a rack for at least 20 minutes before slicing. Slice thin for panini or thicker for sandwiches.

Use a Dutch oven for the best crust; it traps steam and makes the bread crisp. Cool the loaf before slicing to keep the crumb from getting squished.

Bread, Snack
American
Easy Bread Recipe, Homemade Bread, No Knead Bread, Panini Bread, Quick Bread

Italian Herbs and Cheese Bread

Freshly baked Italian Herbs Cheese Bread with aromatic herbs and cheese.

I love how this bread fills the kitchen with a cozy, herby smell. The crust gets golden and the cheese bubbles, and everyone asks for a slice. If you like easy, tasty bread that pairs with many meals, you will enjoy this Italian Herbs and Cheese Bread. For another cheesy party bite, try the baked beef and cheese sliders for a fun side or snack idea.

Why You’ll Love Italian Herbs and Cheese Bread

This bread mixes soft dough, Italian seasoning, and melted cheese for a warm, tasty loaf. It smells like garlic and herbs, and it makes any meal feel special. It is simple to make, and many people love the crunchy top and soft inside. This recipe is a real crowd pleaser for snacks, soup nights, or a quick side.

how to prepare Italian Herbs and Cheese Bread

  1. Mix warm water, sugar, and yeast in a bowl. Let sit until it bubbles, about 5 minutes.
  2. Stir in oil, salt, and some Italian seasoning. Add flour a little at a time and mix until a soft dough forms.
  3. Knead the dough on a floured surface for 5 to 8 minutes, until smooth and elastic.
  4. Place dough in a greased bowl, cover, and let rise in a warm place until doubled, about 1 hour.
  5. Punch down the dough and shape it into a loaf or divide for rolls. Put on a baking sheet or in a loaf pan.
  6. Brush the top with garlic butter or olive oil, then sprinkle chopped herbs and grated cheese on top.
  7. Let the shaped dough rest for 15 minutes, then bake in a preheated 375°F oven for 20 to 30 minutes, until golden and the cheese is melted.
  8. Cool a few minutes, slice, and serve warm.

Italian Herbs and Cheese Bread

tips for success

  • Use fresh yeast or check the date on active dry yeast, so the dough rises well.
  • Warm the water, not hot, about 105°F to 115°F, to wake the yeast, not kill it.
  • Measure flour by spooning it into the cup and leveling, do not pack it down.
  • Let the bread cool a little before cutting, this keeps the cheese from sliding off.
  • Add extra herbs or garlic to the butter for more flavor on top.

Serving Suggestions

  • Serve warm with soup, like tomato or minestrone.
  • Make a garlic bread side for pasta, it pairs great with red sauce.
  • Use slices for sandwiches, the cheesy crust adds a nice crunch.
  • Offer for a party with dips like marinara or herbed olive oil.

Italian Herbs and Cheese Bread

FAQs

Q: Can I use instant yeast instead of active dry yeast?

A: Yes, use a little less instant yeast and mix it with the flour, it works fine.

Q: Can I make this bread ahead and freeze it?

A: Yes, bake and cool fully, then wrap tight and freeze. Thaw and warm in the oven before serving.

Q: What cheese works best on top?

A: Mozzarella and Parmesan mix well, use shredded cheese you like for a good melt and flavor.

Q: Can I add garlic inside the dough?

A: Yes, you can add minced garlic or garlic powder to the dough for more flavor.

Q: How do I get a crispier crust?

A: Brush with olive oil and bake at a slightly higher temp for a few extra minutes, watch so it does not burn.

Conclusion

This Italian Herbs and Cheese Bread is easy and full of flavor, it makes any meal better and people will ask for seconds. For another take on herby, cheesy bread inspired recipes, see this detailed copycat option, Subway Bread Recipe (Italian Herb and Cheese Copycat).

Italian Herbs and Cheese Bread

A warm, tasty loaf combining soft dough, Italian herbs, and melted cheese, perfect for any meal or gathering.

For the dough

  • 1 cup warm water (105°F to 115°F to activate yeast)
  • 1 tbsp sugar (to feed the yeast)
  • 2 tsp active dry yeast (or instant yeast)
  • 2 tbsp olive oil (for flavor)
  • 1 tsp salt (to enhance flavor)
  • 3 cups all-purpose flour (spooned into the cup and leveled)

For the topping

  • 2 tbsp garlic butter (or olive oil for brushing)
  • 1 cup grated cheese (mozzarella and Parmesan recommended, or any preferred shredded cheese)
  • 2 tbsp chopped herbs (like parsley or Italian seasoning for extra flavor)

Preparation

  1. Mix warm water, sugar, and yeast in a bowl. Let sit until it bubbles, about 5 minutes.
  2. Stir in olive oil, salt, and some Italian seasoning. Add flour gradually and mix until a soft dough forms.
  3. Knead the dough on a floured surface for 5 to 8 minutes, until smooth and elastic.
  4. Place dough in a greased bowl, cover, and let rise in a warm place until doubled, about 1 hour.
  5. Punch down the dough and shape it into a loaf or divide for rolls. Put on a baking sheet or in a loaf pan.
  6. Brush the top with garlic butter or olive oil, then sprinkle chopped herbs and grated cheese on top.
  7. Let the shaped dough rest for 15 minutes.
  8. Bake in a preheated 375°F oven for 20 to 30 minutes, until golden and the cheese is melted.
  9. Cool for a few minutes, slice, and serve warm.

Use fresh yeast for best results. Measure flour accurately and let bread cool slightly before cutting to prevent cheese from sliding off. Add garlic or herbs to butter for more flavor.

Bread, Side Dish, Snack
Italian
Cheesy Bread, Easy Bread Recipe, Homemade Bread, Italian Herbs and Cheese Bread, snack ideas

Classic French Baguette

Freshly baked classic French baguette resting on a wooden table.

I love the simple joy of a warm, crusty baguette. A Classic French Baguette has a crisp outside and a soft, chewy inside, it smells like a little bit of Paris, and it makes any meal feel special. This recipe is a crowd-pleaser, easy to follow, and gives you that thin, crackly crust and open crumb people love. If you enjoy other French treats, you might also like the savory option of a best French meat pie. Get your hands a little floury, and you will be excited to try this at home.

how to prepare Classic French Baguette

Ingredients you need, simple and few

  • 500 g (about 4 cups) strong bread flour
  • 325 ml (1 1/3 cups) warm water
  • 2 tsp salt
  • 1 tsp active dry yeast

Directions, easy steps

  1. Mix the flour and salt in a big bowl. In a small cup, mix the yeast with a little warm water and let it sit for 5 minutes until it foams.
  2. Add the yeast water and the rest of the warm water to the flour. Stir with a spoon until it comes together.
  3. Turn the dough onto a floured surface and knead for 8 to 10 minutes until smooth and elastic.
  4. Put the dough in a clean bowl, cover with a damp cloth, and let it rise for 1 to 1 1/2 hours, until it doubles.
  5. Gently deflate the dough and divide it into 2 or 3 equal pieces. Shape each piece into a long baguette, about 12 to 16 inches long.
  6. Place the loaves on a floured couche or a baking tray lined with parchment, cover, and let them rise 45 to 60 minutes until puffy.
  7. Preheat your oven to 475°F (245°C). Put a metal tray on the bottom rack to make steam.
  8. When the loaves are ready, make 3 to 4 diagonal slashes on each baguette with a sharp knife.
  9. Pour a cup of hot water into the tray at the bottom to create steam and quickly close the oven. Bake the loaves for 20 to 25 minutes until deep golden and crisp.
  10. Let the baguettes cool on a rack a little before you cut them.

Classic French Baguette

Why You’ll Love Classic French Baguette

  • It uses few, simple ingredients, no fancy tools needed.
  • You get a crunchy crust and a soft inside, great for sandwiches or just butter.
  • It fills your home with a warm, fresh bread smell that makes dinner better.
  • It’s great for beginners who want to learn basic artisan bread skills.

tips for success

  • Use good bread flour for better gluten and a chewier crumb.
  • Keep water warm, not hot, to help yeast wake up without killing it.
  • Don’t over-knead by machine, the dough should feel smooth and a bit elastic.
  • Let the dough rise in a warm, draft-free spot. A cool room will slow the rise.
  • For a thin, crisp crust, bake with steam for the first 10 minutes. Use a hot pan and pour water in, or spritz the oven with water.
  • Score the loaves just before baking, a sharp blade makes clean cuts and good oven spring.
  • Cool the baguette a bit before slicing, cutting too soon can make it gummy inside.

Serving Suggestions

  • Slice and spread with butter and jam for breakfast.
  • Make a simple ham and cheese sandwich, or use strong cheeses like Gruyere.
  • Serve with soup, stew, or a big salad for a simple, tasty meal.
  • Tear pieces and dip in olive oil with herbs, or use for bruschetta.

Classic French Baguette

FAQs

Q: Can I use regular all-purpose flour instead of bread flour?

A: Yes, you can. The crumb will be a little less chewy, but the bread will still taste good.

Q: Do I need a baking stone?

A: No, a baking stone helps, but a heavy baking tray works fine. Just preheat the tray well.

Q: How do I know when the baguette is done?

A: The crust should be deep golden and sound hollow when you tap the bottom.

Q: Can I make the dough ahead and bake later?

A: Yes, you can refrigerate the shaped loaves for up to 12 hours. Let them warm and finish rising before baking.

Q: Can I freeze the dough or baked baguette?

A: You can freeze baked baguettes for a month. Wrap well and thaw at room temperature, then reheat in the oven.

Conclusion

If you want more details or another take on the classic method, this Authentic French Baguette Recipe gives helpful tips and background to make a very authentic loaf. Enjoy baking, and have fun making your own crusty French bread at home.

Classic French Baguette

A Classic French Baguette has a crisp outside and a soft, chewy inside that smells like a little bit of Paris. This recipe is easy to follow and yields that thin, crackly crust and open crumb everyone loves.

Dough Ingredients

  • 500 g strong bread flour (Use good bread flour for better gluten and a chewier crumb.)
  • 325 ml warm water (Keep water warm, not hot, to help yeast wake up without killing it.)
  • 2 tsp salt
  • 1 tsp active dry yeast

Preparation

  1. Mix the flour and salt in a big bowl.
  2. In a small cup, mix the yeast with a little warm water and let it sit for 5 minutes until it foams.
  3. Add the yeast water and the rest of the warm water to the flour. Stir with a spoon until it comes together.
  4. Turn the dough onto a floured surface and knead for 8 to 10 minutes until smooth and elastic.
  5. Put the dough in a clean bowl, cover with a damp cloth, and let it rise for 1 to 1 1/2 hours, until it doubles.

Shaping and Rising

  1. Gently deflate the dough and divide it into 2 or 3 equal pieces. Shape each piece into a long baguette, about 12 to 16 inches long.
  2. Place the loaves on a floured couche or a baking tray lined with parchment, cover, and let them rise 45 to 60 minutes until puffy.

Baking

  1. Preheat your oven to 475°F (245°C). Put a metal tray on the bottom rack to make steam.
  2. When the loaves are ready, make 3 to 4 diagonal slashes on each baguette with a sharp knife.
  3. Pour a cup of hot water into the tray at the bottom to create steam and quickly close the oven.
  4. Bake the loaves for 20 to 25 minutes until deep golden and crisp.
  5. Let the baguettes cool on a rack a little before you cut them.

For a thin, crisp crust, bake with steam for the first 10 minutes. Score the loaves just before baking, and allow cooling before slicing.

Bread, Side
French
Artisan Bread, Baking, Easy Recipes, French Baguette, Homemade Bread