Classic Cheeseburger Sliders

Delicious classic cheeseburger sliders served on a platter

Prepare to treat everyone to these irresistible Cheeseburger Sliders! Packed with juicy beef, melted cheese, and classic burger flavor, they’re the perfect bite-sized option for game days, parties, or a relaxed family dinner. These mini burgers deliver big flavor in every bite. Even better, they’re quick and simple to make, so you can have a delicious crowd-pleasing dish ready with minimal effort. Once you try them, you’ll see just how easy and satisfying these tasty sliders are to prepare.

how to prepare Classic Cheeseburger Sliders

Making Classic Cheeseburger Sliders is easy and fun. Here’s how to prepare these delicious bites:

Ingredients

  • 1 pound ground beef
  • 1 teaspoon garlic powder
  • 1 teaspoon onion powder
  • Salt and pepper, to taste
  • 8 small hamburger buns
  • 8 slices of cheddar cheese
  • Optional toppings: lettuce, tomato, pickles, mustard, and ketchup

Directions

  1. Preheat your oven to 350°F (175°C).
  2. In a bowl, mix the ground beef with garlic powder, onion powder, salt, and pepper. Shape the mixture into small patties, about the size of the buns.
  3. Place the patties on a baking sheet. Bake in the preheated oven for about 15 minutes or until cooked through.
  4. During the last 2 minutes of baking, place a slice of cheddar cheese on each patty to melt.
  5. Assemble the sliders by placing each patty on a bun. Add your favorite toppings and serve warm.

Classic Cheeseburger Sliders

Why You’ll Love Classic Cheeseburger Sliders

Classic Cheeseburger Sliders are a fantastic choice for any gathering. They are juicy, cheesy, and full of flavor, making them perfect for parties, game days, or family dinners. These sliders bring the classic cheeseburger taste in a bite-sized form, which everyone loves! Plus, they are super easy to customize. You can add your favorite toppings and sauces to please every palate. Who wouldn’t love sinking their teeth into a warm, cheesy slider?

tips for success

  • Don’t overmix the beef: When forming patties, mix just enough to combine the seasonings; this keeps them tender.
  • Use your favorite cheese: While cheddar is classic, feel free to experiment with other cheeses like American or Swiss.
  • Toast the buns: Lightly toasting the buns can add another layer of flavor and keep them from getting soggy.

Serving Suggestions

Serve Classic Cheeseburger Sliders with some crispy French fries or a fresh salad for a complete meal. You can also offer a variety of dips, like ranch or garlic sauce, to make them even more delightful. If you’re hosting a gathering, adding a tray of sliders next to snacks and drinks will surely be a hit!

FAQs

How many sliders does this recipe make?

This recipe makes 8 Classic Cheeseburger Sliders, perfect for sharing!

Can I make the patties ahead of time?

Yes, you can shape the patties ahead of time and refrigerate them until you’re ready to cook.

What if I don’t like beef?

You can easily substitute ground turkey or chicken for a lighter option or use plant-based meat for a vegetarian choice.

These Classic Cheeseburger Sliders are sure to impress at your next meal. So why wait? Gather your ingredients and get cooking!

Classic Cheeseburger Sliders

Irresistible bite-sized cheeseburgers packed with juicy beef, melted cheese, and classic flavor, perfect for any occasion.

For the patties

  • 1 pound ground beef
  • 1 teaspoon garlic powder
  • 1 teaspoon onion powder
  • Salt and pepper, to taste

For the sliders

  • 8 pieces small hamburger buns (Can be toasted for extra flavor.)
  • 8 slices cheddar cheese (Feel free to use other cheese types.)
  • Optional toppings: lettuce, tomato, pickles, mustard, and ketchup (Customize to your preference.)

Preparation

  1. Preheat your oven to 350°F (175°C).
  2. In a bowl, mix the ground beef with garlic powder, onion powder, salt, and pepper. Shape the mixture into small patties, about the size of the buns.

Cooking

  1. Place the patties on a baking sheet. Bake in the preheated oven for about 15 minutes or until cooked through.
  2. During the last 2 minutes of baking, place a slice of cheddar cheese on each patty to melt.

Assembly

  1. Assemble the sliders by placing each patty on a bun. Add your favorite toppings and serve warm.

Don’t overmix the beef to keep patties tender. Toasting the buns can prevent sogginess and enhance flavor.
Appetizer, Main Course
American
Cheeseburger Sliders, Easy Recipes, Game Day Snacks, Mini Burgers, Party Food

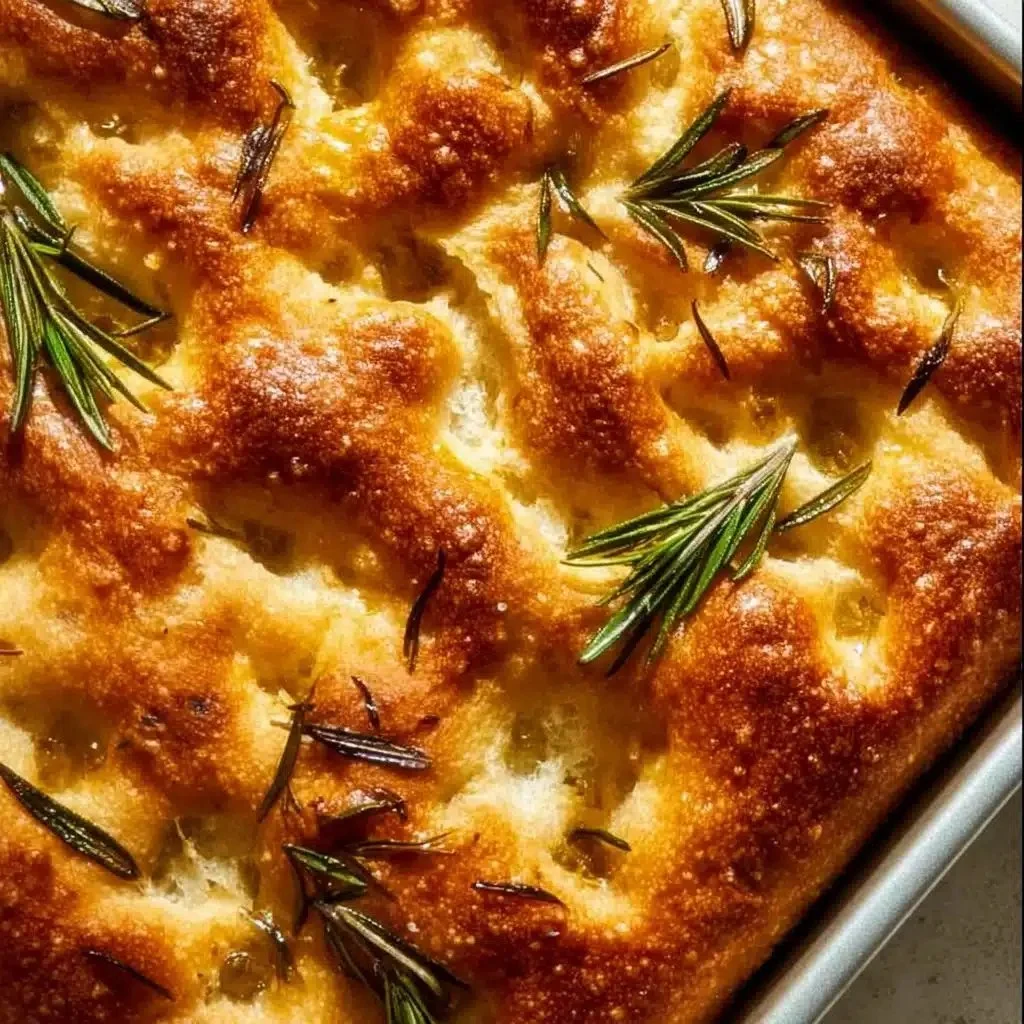
Sourdough Focaccia Bread

Freshly baked sourdough focaccia bread topped with herbs and sea salt.

This Same Day Sourdough Focaccia Bread is a simple, happy loaf. It gives you a crisp top, soft inside, and a bright sourdough taste without waiting all day. The bread soaks up olive oil, holds herbs and salt, and pleases a crowd at any table. It works great for a snack, a meal side, or a sandwich base. You will love how easy it feels to make something that looks and tastes special, and you might find yourself baking it again next week.

how to prepare Sourdough Focaccia Bread

  1. Mix starter, water, and flour in a bowl until you have a shaggy dough. Cover and rest 20 minutes.
  2. Add salt and a little olive oil, fold the dough until it feels smoother.
  3. Move dough to an oiled pan, spread gently with wet hands to fill the pan.
  4. Let the dough rise in a warm spot about 1 to 2 hours, until puffed and light.
  5. Press dimples into the dough with your fingertips, drizzle more olive oil, and sprinkle salt and herbs.
  6. Bake in a hot oven about 20 to 30 minutes, until the top is golden and crisp.
  7. Cool a little, cut, and serve warm.

Same Day Sourdough Focaccia Bread

Why You’ll Love Sourdough Focaccia Bread

  • You get real sourdough flavor the same day, no long wait.
  • The crust turns crisp while the inside stays soft and airy.
  • Olive oil and salt make each bite rich and simple.
  • It fits quick weeknight meals and also shines at a party.

tips for success

  • Use an active starter that bubbles well.
  • Keep your hands wet when you spread the dough, it will not stick.
  • Let the dough get puffy, but don’t overproof it.
  • Heat the oven well before you bake, a hot oven gives a better crust.
  • Use good olive oil and coarse salt for the best flavor.

Serving Suggestions

  • Serve warm with extra olive oil and balsamic for dipping.
  • Top with roasted garlic, sliced tomatoes, or olives for a simple meal.
  • Use slices to make sandwiches with greens and cheese.
  • Cut into small pieces for a party board with cheese and charcuterie.

Same Day Sourdough Focaccia Bread

FAQs

Q: Can I make this without a sourdough starter? A: You can use commercial yeast, but the flavor will change. Sourdough gives a tangy taste you will miss.

Q: How long does focaccia keep? A: Store at room temperature up to 2 days in a covered container. Reheat in the oven to refresh the crust.

Q: Can I add toppings before baking? A: Yes, add toppings like herbs, olives, or tomatoes after you dimple the dough and before baking.

Q: Do I need a lot of kneading? A: No, simple folding and a few stretches are enough for this wet dough style.

Conclusion

If you want a clear recipe and step by step help to make this bread today, check this detailed same day sourdough guide, Same Day Sourdough Focaccia Recipe.

Sourdough Focaccia Bread

This Same Day Sourdough Focaccia Bread is a simple and delicious loaf with a crisp top and soft inside, perfect for snacks, side dishes, or sandwiches.

Dough Ingredients

  • 200 grams Active sourdough starter (Use a bubbly starter for best results.)
  • 250 ml Water (Room temperature.)
  • 400 grams All-purpose flour
  • 10 grams Salt (Coarse salt recommended.)
  • 50 ml Olive oil (Use good quality for flavor.)

Topping Ingredients

  • Salt to taste Coarse salt
  • Herbs to taste Fresh herbs (e.g., rosemary) (Optional, for added flavor.)

Dough Preparation

  1. In a bowl, mix sourdough starter, water, and flour until you have a shaggy dough.
  2. Cover and let rest for 20 minutes.
  3. Add salt and a little olive oil; fold the dough until smooth.
  4. Transfer the dough to an oiled pan and gently spread it with wet hands to fill the pan.
  5. Allow the dough to rise in a warm place for about 1 to 2 hours until it is puffed and light.

Toppings and Baking

  1. Press dimples into the dough with your fingertips.
  2. Drizzle additional olive oil over the dough and sprinkle with salt and herbs.
  3. Bake in a preheated oven for about 20 to 30 minutes or until the top is golden and crisp.
  4. Cool slightly, cut, and serve warm.

Use an active starter for best results; wet hands when spreading the dough to prevent sticking. Don’t overproof the dough and preheat the oven well for a better crust.

Appetizer, Side Dish, Snack
Italian
Baking, Easy Bread, Homemade Bread, Quick Bread, Sourdough Focaccia

Banana Bread Brownies

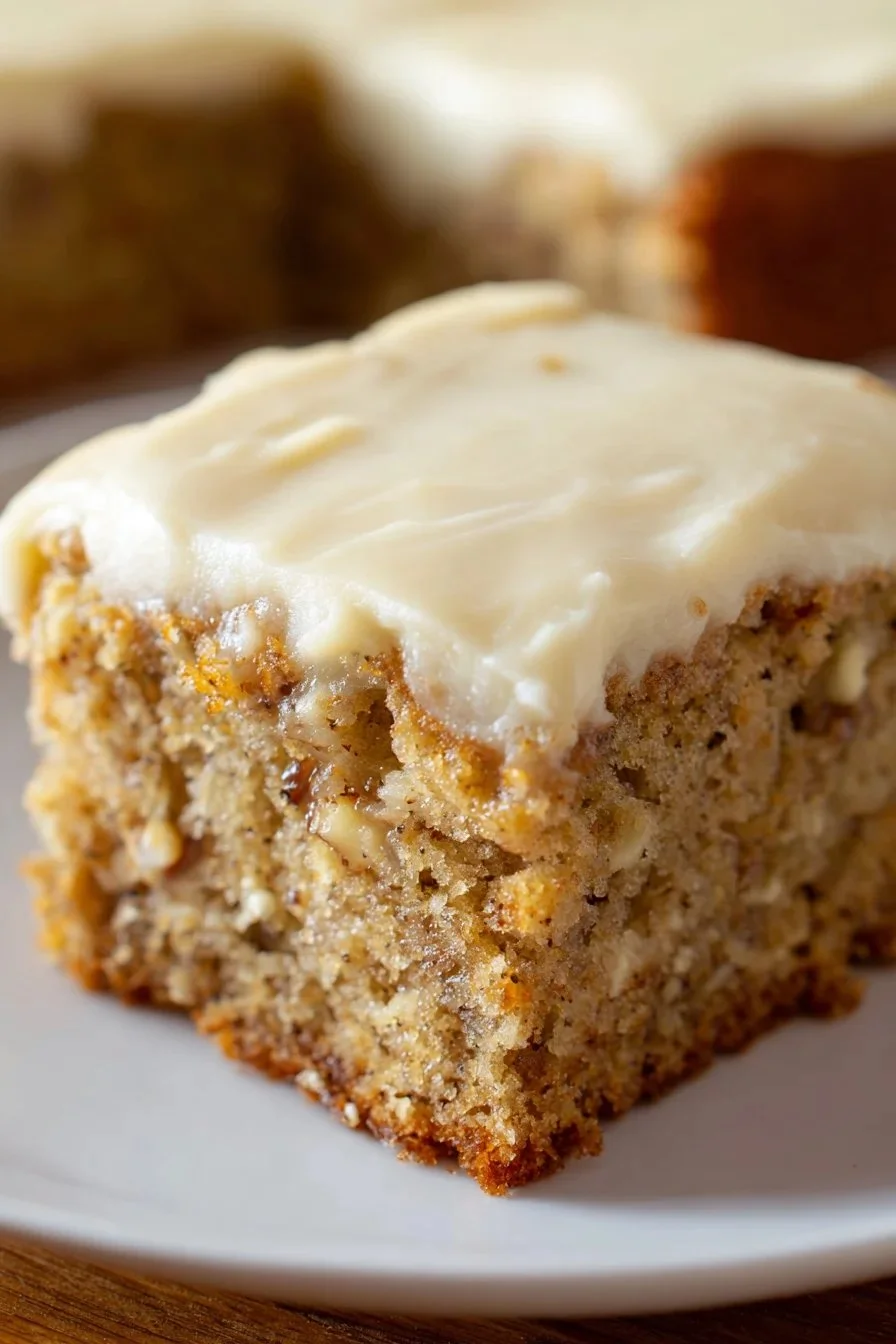
Delicious homemade banana bread brownies served on a wooden table

Banana Bread Brownies bring the best of two treats together, banana bread and fudgy brownies. They are warm, soft, and have a gentle banana taste with chocolate notes. People love them because they feel like a cozy snack, and they work for breakfast, dessert, or a sweet bite with coffee.

This recipe is a crowd-pleaser, easy to make, and perfect when you have ripe bananas to use up. The texture is moist and dense, like a brownie with banana flavor, and the top can be slightly crackly or soft, based on how you bake them. You will smile when you smell the kitchen, and you will want to make them again.

how to prepare Banana Bread Brownies

  1. Preheat the oven to 350°F, and grease an 8×8 inch pan or line it with parchment paper.
  2. Mash 2 to 3 ripe bananas in a bowl until smooth.
  3. In a separate bowl, melt 1/2 cup butter, then stir in 1 cup sugar and 2 eggs, one at a time, until mixed. Add 1 teaspoon vanilla.
  4. Stir the mashed bananas into the butter mixture.
  5. In another bowl, mix 1 cup flour, 1/3 cup cocoa powder, 1 teaspoon baking soda, and a pinch of salt.
  6. Fold the dry mix into the wet mix until just combined, do not overmix. If you like, add 1/2 cup chocolate chips or chopped nuts for texture.
  7. Pour the batter into the prepared pan, spread it evenly, and tap the pan gently on the counter to remove air bubbles.
  8. Bake for 25 to 35 minutes, check at 25 minutes with a toothpick, it should come out with a few moist crumbs for fudgy texture.
  9. Let the brownies cool in the pan for 10 to 15 minutes, then lift them out to a rack to cool more, or cut and serve warm.

Banana Bread Brownies

Why You’ll Love Banana Bread Brownies

  • They use ripe bananas, so you waste less food, and get great banana flavor.
  • The texture is rich and moist, like banana bread and brownie in one, great for banana lovers.
  • They are easy to make with simple pantry items, no fancy tools needed.
  • You can change them, add chocolate chips, nuts, or a glaze, and make banana bread bars or banana brownies your way.

tips for success

  • Use very ripe bananas for the best banana taste, brown spots are good.
  • Do not overmix the batter, mix until dry bits disappear, that keeps them tender.
  • Check baking time early, ovens vary, start at 25 minutes for an 8×8 pan.
  • Let them cool a bit before cutting, warm brownies hold together better if slightly cooled.
  • If you want more banana flavor, add a little banana extract, a few drops will help.

Serving Suggestions

  • Serve warm with a scoop of vanilla ice cream, or plain with a cup of coffee.
  • Dust with powdered sugar, or drizzle a simple chocolate or caramel glaze.
  • Cut into bars for a lunchbox treat, or small squares for a party plate.
  • Pair with fresh fruit, such as berries, to balance the sweetness.

FAQs

Banana Bread Brownies

Q: Can I use less sugar, will they still be good?

A: Yes, you can reduce sugar by 1/4 cup to 1/3 cup, they will be less sweet but still tasty, the banana helps keep them moist.

Q: Can I freeze Banana Bread Brownies?

A: Yes, wrap pieces in plastic wrap and put them in a freezer bag, they keep well for up to 3 months. Thaw at room temperature or warm in the oven for a few minutes.

Q: Can I make these in a larger pan or muffin tins?

A: Yes, for a 9×13 pan increase bake time to 30 to 40 minutes, for muffins bake 15 to 20 minutes, check with a toothpick.

Q: Do I need to use cocoa, can I make plain banana bread brownies?

A: You can skip the cocoa and make a banana bread bar if you prefer, the texture will be closer to banana bread, not brownie.

Conclusion

If you want a tested variation or a glaze idea, see a full take on banana bread bars that blends banana and brownie ideas naturally at The BEST Banana Bread Brownies – Tastes Better from Scratch, it has extra tips and a glaze you can try.

Banana Bread Brownies

Deliciously combines banana bread and fudgy brownies, perfect for snacks, breakfast, or dessert.

Wet Ingredients

  • 2-3 bananas Ripe bananas (Use very ripe bananas for the best flavor.)
  • 1/2 cup Butter (Melted.)
  • 1 cup Sugar (Can reduce by 1/4 to 1/3 cup for less sweetness.)
  • 2 large Eggs (Add one at a time.)
  • 1 teaspoon Vanilla extract

Dry Ingredients

  • 1 cup Flour
  • 1/3 cup Cocoa powder (Optional for chocolate flavor.)
  • 1 teaspoon Baking soda
  • a pinch salt Salt

Add-ins

  • 1/2 cup Chocolate chips or chopped nuts (Optional, for added texture.)

Preparation

  1. Preheat the oven to 350°F (175°C) and grease an 8×8 inch pan or line it with parchment paper.
  2. Mash 2 to 3 ripe bananas in a bowl until smooth.
  3. In a separate bowl, melt 1/2 cup butter, then stir in 1 cup sugar and 2 eggs, one at a time, until mixed. Add 1 teaspoon vanilla.
  4. Stir the mashed bananas into the butter mixture.
  5. In another bowl, mix 1 cup flour, 1/3 cup cocoa powder, 1 teaspoon baking soda, and a pinch of salt.
  6. Fold the dry mix into the wet mix until just combined, do not overmix.
  7. If you like, add 1/2 cup chocolate chips or chopped nuts for texture.

Baking

  1. Pour the batter into the prepared pan, spread it evenly, and tap the pan gently on the counter to remove air bubbles.
  2. Bake for 25 to 35 minutes, checking at 25 minutes with a toothpick; it should come out with a few moist crumbs for a fudgy texture.
  3. Let the brownies cool in the pan for 10 to 15 minutes, then lift them out to a rack to cool more, or cut and serve warm.

Serve warm with a scoop of vanilla ice cream or plain with coffee. Dust with powdered sugar or drizzle with chocolate or caramel glaze. For variations, add chocolate chips, nuts, or follow adjustments for achieving desired flavors.

Dessert, Snack
American
Banana Bread Brownies, Banana Dessert, Brownie Recipes, Easy Baking, Fudgy Brownies

The Ultimate Homemade German Chocolate Cake Recipe

Slice of homemade German chocolate cake with coconut pecan frosting

Who doesn’t love a rich and decadent slice of cake? The Ultimate Homemade German Chocolate Cake Recipe is here to capture your heart and tantalize your taste buds. This delightful cake, layered with sweet chocolate, pecans, and coconut frosting, is perfect for any occasion. Whether it’s a birthday, celebration, or just a cozy night in, this cake is sure to please a crowd. Its rich flavors and moist texture make it a favorite among chocolate lovers. So, grab your apron and let’s dive into this delightful baking adventure!

How to Prepare The Ultimate Homemade German Chocolate Cake Recipe

Before we get started, gather your ingredients, and prepare to enjoy a kitchen full of delicious aromas. Here’s a straightforward guide to crafting this beautiful cake.

Ingredients

  • 1 cup of boiling water
  • 4 oz of German chocolate, chopped
  • 1 cup of sugar
  • 1 cup of brown sugar
  • 1 cup of butter, softened
  • 4 large eggs, separated
  • 1 teaspoon of vanilla extract
  • 2 3/4 cups of all-purpose flour
  • 1 teaspoon of baking soda
  • 1/2 teaspoon of salt
  • 1 cup of buttermilk

Directions

  1. Preheat your oven to 350°F (175°C) and grease your cake pans.
  2. In a bowl, pour boiling water over the chopped chocolate. Stir until smooth and let it cool.
  3. In another bowl, cream together the butter, sugar, and brown sugar until light and fluffy.
  4. Add the egg yolks one at a time, mixing well after each addition. Stir in the vanilla.
  5. Mix in the flour, baking soda, and salt alternately with the buttermilk.
  6. Fold in the melted chocolate mixture.
  7. In a clean bowl, whisk the egg whites until soft peaks form. Gently fold them into the chocolate batter.
  8. Divide the batter evenly among the prepared pans and bake for 30-35 minutes, or until a toothpick comes out clean.
  9. Let the cakes cool completely before frosting.

For the frosting:

  1. In a saucepan, combine 1 cup of sugar, 1/2 cup of evaporated milk, and 1/2 cup of butter. Cook while stirring until thickened.
  2. Remove from heat and stir in 1 teaspoon of vanilla, 1 cup of shredded coconut, and 1 cup of chopped pecans.
  3. Let it cool before spreading on the cake layers.

Your Ultimate Homemade German Chocolate Cake is now ready to be served!

The Ultimate Homemade German Chocolate Cake Recipe

Why You’ll Love The Ultimate Homemade German Chocolate Cake Recipe

This recipe is a true delight. The blend of flavors from the chocolate, coconut, and pecans brings a wonderful depth to each bite. The moistness from the cake layers and the sweet, chewy frosting creates an unforgettable combination. Each slice is not just dessert, it’s a slice of happiness that everyone will adore.

Tips for Success

  • Make sure your butter is softened to room temperature for the best mixing results.
  • Don’t skip the cooling time for the cakes; this helps the flavors settle.
  • If the frosting is too runny, let it cool longer before spreading.

Serving Suggestions

Serve this delightful cake at room temperature for the ultimate taste experience. Pair it with a scoop of vanilla ice cream or a drizzle of chocolate sauce for an extra treat. It’s great with a cup of coffee or tea as well, making it an excellent choice for brunch or dessert.

FAQs

Can I use regular chocolate instead of German chocolate?

Yes, you can use semi-sweet chocolate if you can’t find German chocolate. Just add a little extra sugar to make up for the less sweetness.

How can I store leftovers?

Store any leftover cake in an airtight container at room temperature for up to 3 days or in the refrigerator for up to a week.

Can I freeze this cake?

Absolutely! Wrap the cake layers tightly in plastic wrap and foil, and freeze for up to 2 months. Frosting can also be frozen separately.

Now that you have this delicious recipe, it’s time to bake your very own Ultimate Homemade German Chocolate Cake! Enjoy the process, the aroma, and most of all, the delightful taste! Happy baking!

Ultimate Homemade German Chocolate Cake

A rich and decadent German chocolate cake layered with sweet chocolate, pecans, and coconut frosting, perfect for any celebration.

For the cake

  • 1 cup boiling water
  • 4 oz German chocolate, chopped
  • 1 cup sugar
  • 1 cup brown sugar
  • 1 cup butter, softened (Make sure butter is at room temperature.)
  • 4 large eggs, separated
  • 1 teaspoon vanilla extract
  • 2 3/4 cups all-purpose flour
  • 1 teaspoon baking soda
  • 1/2 teaspoon salt
  • 1 cup buttermilk

For the frosting

  • 1 cup sugar
  • 1/2 cup evaporated milk
  • 1/2 cup butter
  • 1 teaspoon vanilla
  • 1 cup shredded coconut
  • 1 cup chopped pecans

Preparation

  1. Preheat your oven to 350°F (175°C) and grease your cake pans.
  2. In a bowl, pour boiling water over the chopped chocolate. Stir until smooth and let it cool.
  3. In another bowl, cream together the butter, sugar, and brown sugar until light and fluffy.
  4. Add the egg yolks one at a time, mixing well after each addition. Stir in the vanilla.
  5. Mix in the flour, baking soda, and salt alternately with the buttermilk.
  6. Fold in the melted chocolate mixture.
  7. In a clean bowl, whisk the egg whites until soft peaks form. Gently fold them into the chocolate batter.
  8. Divide the batter evenly among the prepared pans and bake for 30-35 minutes, or until a toothpick comes out clean.
  9. Let the cakes cool completely before frosting.

Frosting

  1. In a saucepan, combine 1 cup of sugar, 1/2 cup of evaporated milk, and 1/2 cup of butter. Cook while stirring until thickened.
  2. Remove from heat and stir in 1 teaspoon of vanilla, 1 cup of shredded coconut, and 1 cup of chopped pecans.
  3. Let it cool before spreading on the cake layers.

Make sure to let the cakes cool fully for the best flavor and texture. Serve at room temperature, and pair with ice cream or chocolate sauce.

Baking, Dessert
American, German
cake, chocolate cake, Dessert, German chocolate cake, sweet

Authentic Peruvian Grilled Chicken (Pollo a la Brasa) Recipe

Plate of authentic Pollo a la Brasa, Peruvian grilled chicken served with sides.

Authentic Peruvian Grilled Chicken, known as Pollo a la Brasa, is a dish loved by many for its juicy texture and rich flavor. This recipe hails from Peru and has become a favorite around the world. The chicken is marinated in a mix of spices and herbs, then grilled until perfectly crispy on the outside and tender on the inside. It’s a true crowd-pleaser, perfect for gatherings, family dinners, or even a simple weekend meal. Once you taste the smoky and savory notes of Pollo a la Brasa, you’ll understand why it holds a special place in the hearts of food lovers everywhere. Get ready to fire up your grill and impress your friends and family with this irresistible dish!
How to Prepare Authentic Peruvian Grilled Chicken (Pollo a la Brasa)

To make this fantastic chicken, begin by marinating it overnight to let the flavors soak in. The marinade is a mix of delicious spices, including cumin, paprika, and garlic. Once marinated, the chicken is grilled to achieve that perfect char. Follow this simple recipe for a mouthwatering experience that transports you to Peru!

Authentic Peruvian Grilled Chicken (Pollo a la Brasa) Recipe

Why You’ll Love Authentic Peruvian Grilled Chicken (Pollo a la Brasa)

There’s so much to love about Pollo a la Brasa! First, the combination of spices creates an explosion of flavor that’s hard to resist. Second, it’s incredibly easy to prepare, making it great for both novice and experienced cooks. Lastly, the dish can easily feed a crowd, making it perfect for parties or family gatherings. You’ll find yourself reaching for seconds, and maybe even thirds!

Tips for Success

  1. Marinate Overnight: For the best flavor, allow the chicken to marinate for at least 12 hours. This helps the spices penetrate the meat thoroughly.
  2. Preheat Your Grill: Make sure your grill is hot before placing the chicken on it. This will help achieve that coveted crispy skin.
  3. Cook with Indirect Heat: To ensure the chicken cooks evenly without burning, start on high heat and then move to indirect heat for the remainder of the cooking process.
  4. Let It Rest: Allow your chicken to rest for about 10 minutes after grilling. This keeps the juices locked in and results in tender meat.

Serving Suggestions

Pollo a la Brasa pairs wonderfully with several side dishes. Consider serving it with a fresh salad, roasted potatoes, or traditional Peruvian sides like rice and beans. A tangy dipping sauce, such as aji verde, adds an extra kick that’s delightful. For beverages, a chilled Peruvian beer complements the meal perfectly!

FAQs

  1. Can I use a different type of chicken?
    Yes, you can use chicken thighs or drumsticks if you prefer. Just adjust the cooking time as needed.

  2. What can I use if I don’t have a grill?
    If you don’t have an outdoor grill, you can use an oven or indoor grill pan. Just follow the same marinating and cooking instructions.

  3. How do I store leftovers?
    Store any leftovers in an airtight container in the refrigerator for up to 3 days. You can also reheat them on the grill or in the oven to keep them crispy.

Get ready to dive into the flavors of Peru with this easy and delightful Pollo a la Brasa recipe!

Pollo a la Brasa

A juicy and flavorful Peruvian grilled chicken, marinated in spices and grilled to perfection.

For the Marinade

  • 2 lbs whole chicken (Can use chicken thighs or drumsticks as an alternative)
  • 2 tbsp cumin
  • 2 tbsp paprika
  • 4 cloves garlic, minced
  • 1 tbsp salt (Adjust to taste)
  • 1 tbsp black pepper (Adjust to taste)
  • 2 tbsp olive oil

Preparation

  1. In a large bowl, mix together the cumin, paprika, minced garlic, salt, pepper, and olive oil.
  2. Rub the marinade all over the chicken, ensuring it is thoroughly coated.
  3. Cover the bowl and marinate the chicken in the refrigerator for at least 12 hours, preferably overnight.

Cooking

  1. Preheat your grill to high heat.
  2. Once the grill is hot, place the chicken on the grill to sear for 5-10 minutes on each side.
  3. Move the chicken to indirect heat, close the lid, and cook for an additional 40-50 minutes, or until fully cooked.
  4. Allow the chicken to rest for about 10 minutes before serving.

Pollo a la Brasa pairs wonderfully with fresh salad, roasted potatoes, or traditional Peruvian sides like rice and beans. Serve with aji verde dipping sauce for extra flavor.

Dinner, Main Course
Latin American, Peruvian
easy chicken recipe, grilled chicken, marinated chicken, Peruvian recipe, Pollo a la Brasa

Cajun Shrimp and Salmon with Garlic Cream sauce

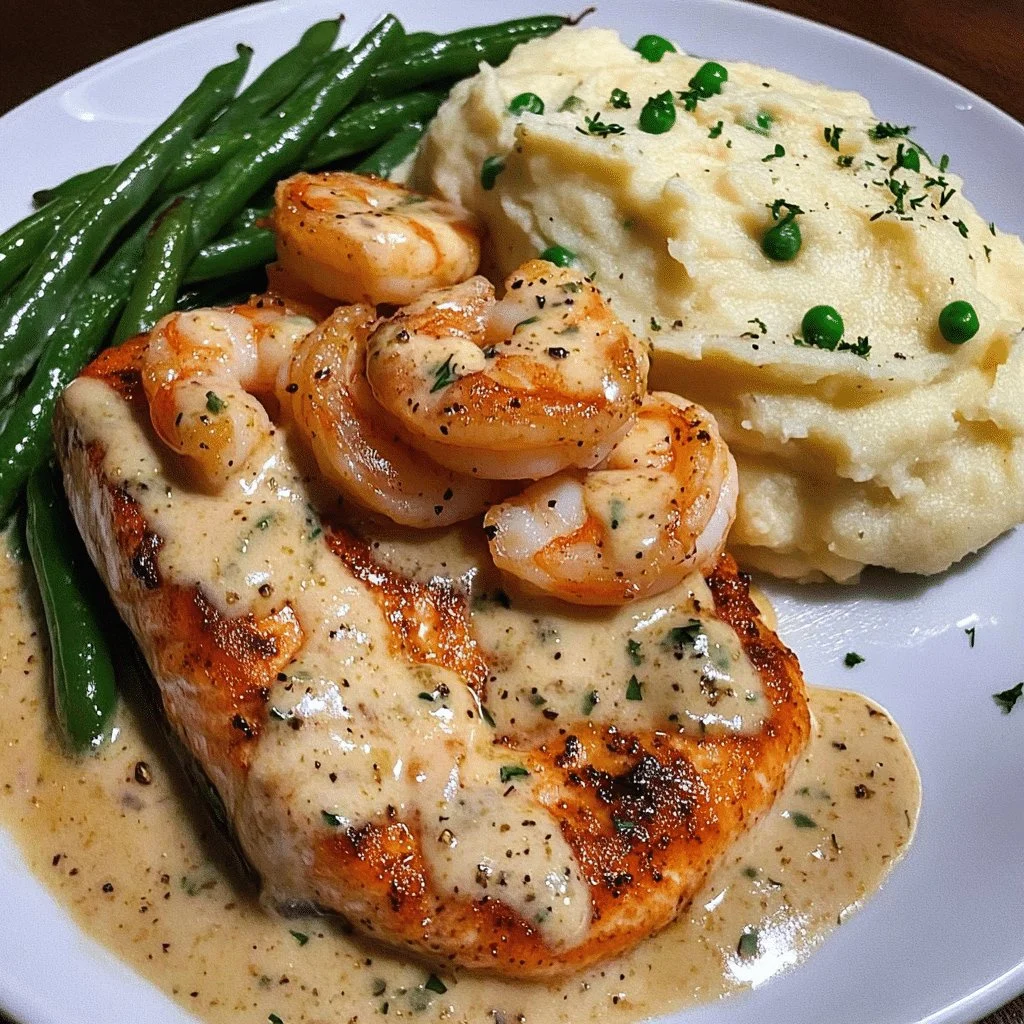
Cajun shrimp and salmon served with garlic cream sauce on a plate

Cajun Shrimp and Salmon with Garlic Cream Sauce, Mashed Potatoes, and Green Beans is more than just a meal, it’s an experience. The bold flavors of Cajun spices combined with tender shrimp and salmon create a dish that feels both fancy and comforting. The creamy garlic sauce adds richness, perfectly balancing the spices and enhancing the flavors of the seafood. With fluffy mashed potatoes and vibrant green beans on the side, this dinner is a delightful treat that will impress family and friends alike. Whether you’re hosting a nice dinner or just want to savor a delicious meal at home, this dish is sure to be a hit. Get ready to elevate your dinner game and satisfy your taste buds with this flavor-packed recipe!

How to prepare Cajun Shrimp and Salmon with Garlic Cream Sauce, Mashed Potatoes, and Green Beans

Cajun Shrimp and Salmon with Garlic Cream Sauce, Mashed Potatoes, and Green Beans: A Flavor-Packed Dinner to Impress

Ingredients:

  • 1 pound shrimp, peeled and deveined
  • 1 pound salmon fillet
  • 2 tablespoons Cajun seasoning
  • 2 tablespoons olive oil
  • 4 cloves garlic, minced
  • 1 cup heavy cream
  • Salt and pepper to taste
  • 1 pound potatoes, peeled and cubed
  • 4 tablespoons butter
  • ½ cup milk
  • 1 pound green beans, trimmed

Directions:

  1. Start by seasoning the shrimp and salmon with Cajun seasoning, salt, and pepper.
  2. In a large skillet, heat olive oil over medium heat. Add the seasoned shrimp and cook until they turn pink, about 3 minutes per side. Remove and set aside.
  3. In the same skillet, add the salmon fillet, cooking for about 4-5 minutes per side, or until it flakes easily with a fork. Remove and keep warm.
  4. For the garlic cream sauce, add minced garlic to the skillet and sauté for 1 minute. Then, pour in the heavy cream and stir for about 2-3 minutes until slightly thickened.
  5. Boil the potatoes in salted water until tender, about 15 minutes. Drain and mash with butter and milk until smooth. Season with salt and pepper.
  6. In another pot, steam the green beans until tender, around 5-7 minutes.
  7. Serve the shrimp and salmon drizzled with garlic cream sauce alongside the creamy mashed potatoes and crisp green beans.

Cajun Shrimp and Salmon with Garlic Cream Sauce, Mashed Potatoes, and Green Beans: A Flavor-Packed Dinner to Impress

Tips for Success

  • Be sure to use fresh shrimp and salmon for the best flavor.
  • Adjust the level of Cajun seasoning to your taste. If you like it spicier, don’t be shy!
  • For a creamier sauce, let it simmer a bit longer. Just be careful not to boil it too hard.

Serving Suggestions

Pair this dish with a fresh green salad and a glass of white wine for a complete dining experience. You can also add some crusty bread to get every drop of that delicious garlic cream sauce!

FAQs

What can I serve with Cajun Shrimp and Salmon? You can serve it with fluffy rice, a fresh salad, or crusty bread to soak up the yummy garlic cream sauce.

Can I use frozen shrimp and salmon? Yes, frozen seafood will work, just ensure it’s fully thawed before cooking to ensure even cooking throughout.

How can I make the dish healthier? You can use low-fat milk instead of heavy cream and add more vegetables like spinach or zucchini to the meal.

Dive into this scrumptious recipe, and enjoy a flavorful dinner that will keep everyone coming back for more! Happy cooking!

Cajun Shrimp and Salmon

A delightful dish of seasoned shrimp and salmon served with creamy garlic sauce, fluffy mashed potatoes, and vibrant green beans.

Seafood

  • 1 pound shrimp, peeled and deveined (Use fresh shrimp for best flavor.)
  • 1 pound salmon fillet (Use fresh salmon for best flavor.)
  • 2 tablespoons Cajun seasoning (Adjust to taste for spiciness.)

For the sauce

  • 2 tablespoons olive oil
  • 4 cloves garlic, minced
  • 1 cup heavy cream (Let simmer longer for a creamier sauce.)

Mashed Potatoes

  • 1 pound potatoes, peeled and cubed
  • 4 tablespoons butter
  • ½ cup milk (Can substitute with low-fat milk for a healthier option.)

Green Beans

  • 1 pound green beans, trimmed

Preparation

  1. Season the shrimp and salmon with Cajun seasoning, salt, and pepper.
  2. Boil the potatoes in salted water until tender, about 15 minutes. Drain and mash with butter and milk until smooth. Season with salt and pepper.
  3. Trim and steam the green beans until tender, around 5-7 minutes.

Cooking

  1. In a large skillet, heat olive oil over medium heat. Add the seasoned shrimp and cook until they turn pink, about 3 minutes per side. Remove and set aside.
  2. In the same skillet, add the salmon fillet, cooking for about 4-5 minutes per side, or until it flakes easily with a fork. Remove and keep warm.
  3. For the garlic cream sauce, add minced garlic to the skillet and sauté for 1 minute. Then, pour in the heavy cream and stir for about 2-3 minutes until slightly thickened.

Serving

  1. Serve the shrimp and salmon drizzled with garlic cream sauce alongside the creamy mashed potatoes and crisp green beans.

Be sure to use fresh shrimp and salmon for the best flavor. Adjust the level of Cajun seasoning to your taste. Pair this dish with a fresh green salad and a glass of white wine.

Dinner, Main Course
Cajun, Seafood
Cajun Shrimp, Dinner Recipe, Garlic Cream Sauce, Mashed Potatoes, Salmon

One Skillet Salmon with Lemon Orzo

One Skillet Salmon served with Lemon Orzo in a pan

There’s something truly special about a meal that comes together in one skillet, especially when it features delicious salmon and zesty lemon orzo. This relaxed yet vibrant dish is perfect for weeknight dinners, impressing guests, or simply enjoying a cozy evening at home. One Skillet Salmon with Lemon Orzo combines the rich flavors of salmon with the bright notes of lemon-infused orzo, creating a meal that feels gourmet but is quick and easy to prepare. So, if you’re looking for the perfect recipe to make hearts sing and stomachs happy, this is it. Let’s dive into making this easy and delightful dish!

How to Prepare One Skillet Salmon with Lemon Orzo

To start, gather your ingredients for this delicious meal. You will need:

  • Salmon fillets
  • Orzo pasta
  • Fresh lemon juice and zest
  • Olive oil
  • Garlic
  • Chicken broth
  • Spinach
  • Salt and pepper
  • Fresh parsley for garnish

Now, let’s get cooking!

  1. Begin by heating olive oil in a large skillet over medium heat.
  2. Season the salmon fillets with salt and pepper. Place the salmon skin-side down in the skillet. Cook for about 4-5 minutes until the salmon is golden. Flip and cook for another 3-4 minutes, then remove the salmon from the skillet and set aside.
  3. In the same skillet, add the minced garlic and cook for about 1 minute until fragrant.
  4. Next, add the orzo, chicken broth, lemon juice, and lemon zest. Bring to a simmer and cook for about 10-12 minutes or until the orzo is tender and most of the liquid has been absorbed.
  5. Stir in the fresh spinach until wilted.
  6. Return the salmon to the skillet, spooning some of the orzo over the fillets, and cook just until the salmon is heated through.
  7. Garnish with fresh parsley and serve.

One Skillet Salmon with Lemon Orzo

Why You’ll Love One Skillet Salmon with Lemon Orzo

One Skillet Salmon with Lemon Orzo is more than just a meal, it’s a celebration of flavors. The combination of flaky salmon, luscious orzo, and the bright notes of lemon creates a symphony on your palate. This dish is not only delicious but nutritious, making it a perfect choice for health-conscious eaters. Plus, the convenience of cooking everything in one skillet means less cleanup, so you can spend more time savoring your meal and less time washing dishes.

Tips for Success

  1. Use Fresh Ingredients: Fresh salmon and spinach make a noticeable difference in taste. Look for bright, vibrant ingredients.
  2. Don’t Overcook the Salmon: Keep an eye on the salmon while cooking. It’s best when it’s still slightly pink in the center.
  3. Adjust Lemon Flavor: Depending on your taste, you can add more or less lemon juice and zest to customize the dish to your preference.

Serving Suggestions

To truly elevate your dining experience with this dish, consider pairing it with a simple side salad or crusty bread. A glass of white wine, like Sauvignon Blanc, will complement the flavors beautifully. For a more filling meal, serve with roasted asparagus or grilled vegetables.

FAQs

1. Can I use pasta other than orzo?

Yes, you can use other small pasta shapes like couscous or ditalini. Just adjust the cooking time based on the pasta type.

2. How do I store leftovers?

Store any leftovers in an airtight container in the fridge for up to 2 days. Reheat gently on the stove with a splash of broth or water.

3. Can I make this recipe with other fish?

Absolutely! This recipe works well with trout, tilapia, or even shrimp, depending on your preference.

One Skillet Salmon with Lemon Orzo

One Skillet Salmon with Lemon Orzo

A vibrant and easy one-skillet dish featuring salmon and lemon-infused orzo, perfect for weeknight dinners or impressing guests.

Main Ingredients

  • 4 pieces Salmon fillets
  • 1 cup Orzo pasta
  • 2 tablespoons Fresh lemon juice
  • 1 tablespoon Lemon zest
  • 2 tablespoons Olive oil
  • 3 cloves Garlic (Minced)
  • 4 cups Chicken broth
  • 4 cups Fresh spinach
  • to taste Salt
  • to taste Pepper
  • to garnish Fresh parsley (For garnish)

Cooking Salmon

  1. Heat olive oil in a large skillet over medium heat.
  2. Season the salmon fillets with salt and pepper. Place the salmon skin-side down in the skillet. Cook for about 4-5 minutes until golden.
  3. Flip the salmon and cook for another 3-4 minutes, then remove from the skillet and set aside.

Cooking Orzo

  1. In the same skillet, add minced garlic and cook for about 1 minute until fragrant.
  2. Add orzo, chicken broth, lemon juice, and lemon zest. Bring to a simmer and cook for about 10-12 minutes or until the orzo is tender and most of the liquid is absorbed.
  3. Stir in fresh spinach until wilted.

Assembling the Dish

  1. Return the salmon to the skillet, spooning some of the orzo over the fillets, and cook just until the salmon is heated through.
  2. Garnish with fresh parsley and serve.

Use fresh ingredients for the best taste. Adjust lemon flavor to preference. Store leftovers in an airtight container in the fridge for up to 2 days.

Dinner, Main Course
American
Easy Recipes, Healthy Dinner, Lemon Orzo, One Skillet Meal, Salmon

Bang Bang Salmon Bites

Delicious Bang Bang Salmon Bites served as an appetizer.

Warm and crispy, Bang Bang Salmon Bites offer a delightful twist on seafood that will make your taste buds dance. These little morsels are not only packed with flavor, but they’re also perfect for sharing, making them a great addition to any gathering. With a crunchy outside and tender salmon inside, they are sure to become a favorite among your friends and family. Plus, the creamy and spicy sauce adds an extra kick that’s simply irresistible. Let’s dive into this recipe and create your own batch of these crowd-pleasing bites!

How to Prepare Bang Bang Salmon Bites

To get started, you’ll need some fresh salmon, breadcrumbs, and a few key spices. The steps are simple, which makes this recipe even more appealing. Here’s how you can prepare these delicious bites:

  1. Begin by preheating your oven to 400°F (200°C).
  2. Cut fresh salmon into bite-sized pieces.
  3. In one bowl, combine breadcrumbs with salt, pepper, and your favorite seasoning.
  4. In another bowl, whisk an egg to help the breadcrumbs stick.
  5. Dip each salmon piece into the egg, then coat it in the breadcrumb mixture.
  6. Place the salmon bites on a baking sheet and bake for about 15-20 minutes or until golden and cooked through.
  7. While the salmon is baking, mix mayonnaise, sweet chili sauce, and sriracha in a small bowl to create the bang bang sauce.
  8. Serve the salmon bites warm with the sauce for dipping.

Bang Bang Salmon Bites

Why You’ll Love Bang Bang Salmon Bites

These Bang Bang Salmon Bites are scrumptious, crispy, and versatile. Whether you’re looking for a quick snack or a more formal appetizer for your next party, these bites fit the bill perfectly. The flavor combination of salmon and the bang bang sauce is simply fantastic. They are easy to make and sure to impress everyone at your table.

Tips for Success

  • Make sure to use fresh salmon for the best flavor.
  • Experiment with different spices in the breadcrumb mixture to enhance the taste.
  • For a healthier alternative, you can pan-fry the bites instead of baking them.
  • Don’t skip the sauce; it truly brings everything together!

Serving Suggestions

Serve your Bang Bang Salmon Bites with a fresh side salad or some light, crispy veggies. They also pair well with rice or quinoa for a more complete meal. You can even turn these bites into a sandwich or wrap for a tasty lunch option!

FAQs

Can I use frozen salmon for this recipe?

Yes, but make sure to fully thaw and drain it before using to avoid excess moisture.

What can I substitute for breadcrumbs?

You can use crushed crackers or panko for a different texture.

How long will the salmon bites last in the fridge?

They can be stored in an airtight container for up to two days, so don’t hesitate to save any leftovers!

Now that you know how to make these Bang Bang Salmon Bites, it’s your turn to impress everyone with this delightful dish. Happy cooking!

Bang Bang Salmon Bites

Bang Bang Salmon Bites

Warm and crispy bang bang salmon bites are packed with flavor and perfect for sharing, featuring a crunchy outside and tender salmon inside, complemented by a creamy and spicy bang bang sauce.

For the Salmon Bites

  • 1 lb Fresh salmon (Cut into bite-sized pieces)
  • 1 cup Breadcrumbs (Can use crushed crackers or panko for a different texture)
  • 1 teaspoon Salt
  • 1 teaspoon Pepper
  • various Favorite seasoning (Experiment with different spices)
  • 1 large Egg (Whisked for coating)

For the Bang Bang Sauce

  • 1/2 cup Mayonnaise
  • 1/4 cup Sweet chili sauce
  • 1 tablespoon Sriracha (Adjust to taste for spiciness)

Preparation

  1. Preheat your oven to 400°F (200°C).
  2. Cut fresh salmon into bite-sized pieces.
  3. In one bowl, combine breadcrumbs with salt, pepper, and your favorite seasoning.
  4. In another bowl, whisk an egg to help the breadcrumbs stick.
  5. Dip each salmon piece into the egg, then coat it in the breadcrumb mixture.

Cooking

  1. Place the salmon bites on a baking sheet and bake for about 15-20 minutes or until golden and cooked through.
  2. While the salmon is baking, mix mayonnaise, sweet chili sauce, and sriracha in a small bowl to create the bang bang sauce.
  3. Serve the salmon bites warm with the sauce for dipping.

Make sure to use fresh salmon for the best flavor. For a healthier alternative, you can pan-fry the bites instead of baking them. Don’t skip the sauce; it truly brings everything together!

Appetizer, Snack
American
Bang Bang Salmon Bites, Crispy Salmon, Party Food, Salmon Recipe, Seafood Appetizer

Texas Roadhouse Salmon Recipe

Delicious Texas Roadhouse-style salmon recipe served on a plate

If you’ve ever ordered salmon at Texas Roadhouse, you know it’s simple, juicy, and incredibly flavorful. The secret is a bold seasoning blend, perfectly grilled salmon, and a rich lemon butter finish that enhances the natural flavor of the fish.

How to Prepare Texas Roadhouse Salmon Recipe

Texas Roadhouse Salmon Recipe

The Texas Roadhouse Salmon recipe is not just any salmon dish, it’s a delightful combination of flavors that captures the essence of a great day out at a Texas Roadhouse. The salmon is grilled to perfection with a zesty seasoning that makes every bite burst with taste. It’s a dish that feels both comforting and fancy, perfect for special occasions or a cozy dinner at home. If you love seafood and enjoy the inviting atmosphere of a Texas Roadhouse, this recipe is sure to become a favorite. Get your apron on, and let’s dive into making this mouthwatering dish!

Why You’ll Love Texas Roadhouse Salmon Recipe

This recipe is all about simple, fresh ingredients that create a fantastic meal. The salmon is rich in flavor and packed with nutrients, making it a healthy choice. The seasoning gives it a slightly smoky and tangy taste, which pairs beautifully with the flaky texture of the fish. Plus, it’s easy to prepare, so even if you’re not a kitchen whiz, you’ll find success with this dish.

Tips for Success

  • Always choose fresh salmon for the best flavor.
  • Marinate the salmon for at least 30 minutes to enhance the taste.
  • Don’t overcook the salmon; it should be flaky but still moist inside.
  • Garnish with lemon wedges and fresh herbs for a bright finish.

Serving Suggestions

Serve the Texas Roadhouse Salmon with a side of garlic mashed potatoes or a refreshing salad. You can also pair it with grilled vegetables for a colorful and nutritious meal. A glass of white wine or iced tea can complement the flavors nicely.

FAQs

1. Can I use frozen salmon for this recipe?

Yes, just make sure to thaw it properly before cooking to ensure even cooking.

2. What can I substitute for salmon?

You can use other types of fish like trout or tilapia, but cooking times may vary.

3. Can I make this recipe in the oven?

Absolutely! You can bake the salmon at 400°F for about 15-20 minutes, depending on thickness.

Texas Roadhouse Salmon Recipe

Texas Roadhouse Salmon

A delightful grilled salmon dish with a zesty seasoning and a rich lemon butter finish, capturing the essence of dining at Texas Roadhouse.

For the Salmon

  • 2 fillets salmon fillets (Choose fresh salmon for best flavor.)
  • 1 tablespoon olive oil (For grilling.)
  • 1 teaspoon zesty seasoning (Can include salt, pepper, and paprika.)
  • 2 tablespoons lemon butter (For finishing the dish.)

Preparation

  1. Preheat the grill to medium-high heat.
  2. Marinate the salmon fillets in olive oil and zesty seasoning for at least 30 minutes.

Cooking

  1. Place the marinated salmon fillets on the grill.
  2. Grill for about 15-20 minutes, flipping halfway through, until salmon is flaky but moist.
  3. Baste with lemon butter during the last few minutes of grilling.

Garnish with lemon wedges and fresh herbs for a bright finish. Serve with garlic mashed potatoes or a refreshing salad.

Dinner, Main Course
American, Seafood
easy salmon recipe, grilled salmon, seafood dish, Texas Roadhouse Salmon

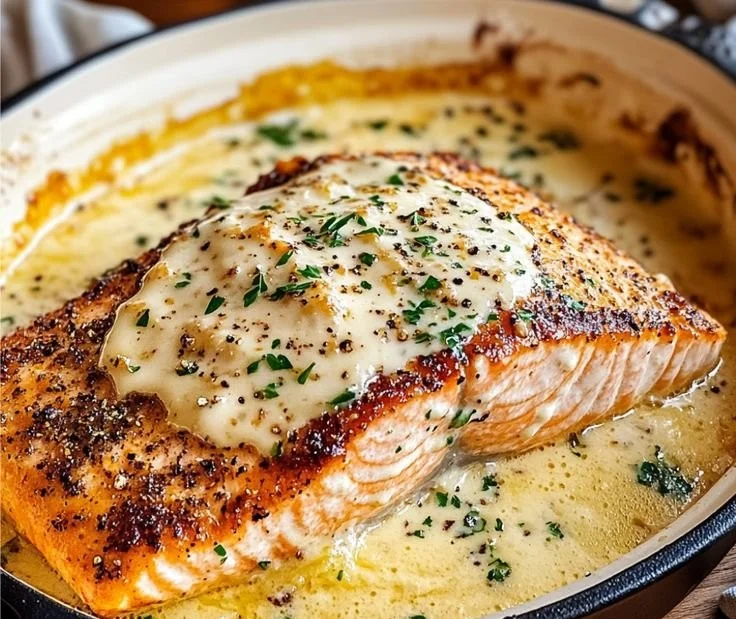
Baked Boursin Salmon

Delicious Baked Boursin Salmon dish served on a plate with herbs

Baked Boursin Salmon is a delightful dish that combines the rich flavor of salmon with the creamy goodness of Boursin cheese. Imagine a perfectly cooked salmon fillet topped with herby, garlicky cheese, creating a dish that is both comforting and elegant. This recipe is sure to impress your family and friends, making it a superb choice for dinner parties or family meals. With its vibrant flavors and easy preparation, it’s a crowd-pleaser that anyone can make. You’ll definitely want to add this delightful recipe to your dinner rotation!

How to prepare Baked Boursin Salmon

To prepare Baked Boursin Salmon, you will need the following ingredients:

Ingredients

  • 2 salmon fillets
  • 4 oz Boursin cheese
  • Fresh chives, chopped
  • Lemon wedges, for serving
  • Salt and pepper, to taste
  • Olive oil

Directions

  1. Preheat your oven to 375°F (190°C).
  2. Line a baking sheet with parchment paper.
  3. Place the salmon fillets on the prepared baking sheet.
  4. Drizzle olive oil over the salmon, and season with salt and pepper.
  5. Spread a generous amount of Boursin cheese over each salmon fillet.
  6. Sprinkle chopped chives on top of the cheese.
  7. Bake in the oven for about 15-20 minutes, or until the salmon is cooked through and flakes easily with a fork.
  8. Serve with lemon wedges for a zesty finish.

Baked Boursin Salmon

Why You’ll Love Baked Boursin Salmon

Baked Boursin Salmon is not just simple to make, it is also packed with flavor. The creamy Boursin cheese brings a rich texture that enhances the salmon’s natural taste. This dish is perfect for both casual family dinners and more formal gatherings, bringing elegance to the table without the stress. Plus, the beauty of this recipe is that it can be prepared in under 30 minutes, making it a go-to favorite for weeknight meals or last-minute entertaining.

Tips for Success

  • Make sure to pat the salmon dry before adding any seasoning, this will help create a nice crust.
  • Feel free to experiment with other herbs or spices, like dill or parsley, to match your taste.
  • For extra flavor, you can add some sliced tomatoes or asparagus to the baking sheet.

Serving Suggestions

Baked Boursin Salmon pairs wonderfully with a fresh salad or roasted vegetables. Consider serving it with garlic mashed potatoes or quinoa for a hearty meal. Add a glass of white wine, like Sauvignon Blanc or Chardonnay, to elevate your dining experience!

FAQs

Can I use a different type of cheese?

Yes, you can substitute Boursin cheese with other soft cheeses like cream cheese or goat cheese for different flavors.

How do I know when the salmon is done?

The salmon is done cooking when it flakes easily with a fork and has an internal temperature of 145°F (63°C).

Can I make this recipe ahead of time?

Yes, you can prepare the salmon and add the cheese mixture in advance, then bake it fresh when you are ready to serve.

Baked Boursin Salmon

Baked Boursin Salmon

A delightful dish combining rich salmon with creamy Boursin cheese, perfect for any meal.

Main Ingredients

  • 2 fillets salmon fillets (Fresh, skinless salmon fillets recommended.)
  • 4 oz Boursin cheese (Can substitute with other soft cheeses if desired.)
  • to taste Fresh chives, chopped (Add according to preference.)
  • as needed Lemon wedges (For serving.)
  • to taste Salt and pepper (For seasoning.)
  • as needed tbsp Olive oil (Use extra virgin for better flavor.)

Preparation

  1. Preheat your oven to 375°F (190°C).
  2. Line a baking sheet with parchment paper.
  3. Place the salmon fillets on the prepared baking sheet.
  4. Drizzle olive oil over the salmon, and season with salt and pepper.
  5. Spread a generous amount of Boursin cheese over each salmon fillet.
  6. Sprinkle chopped chives on top of the cheese.
  7. Bake in the oven for about 15-20 minutes, or until the salmon is cooked through and flakes easily with a fork.
  8. Serve with lemon wedges for a zesty finish.

Pat the salmon dry before seasoning for a better crust. Feel free to experiment with other herbs like dill or parsley. Adding sliced tomatoes or asparagus can enhance the dish.

Dinner, Main Course
American, Elegant
Baked Salmon, Boursin Cheese, Comfort Food, Dinner Party, Easy Recipes