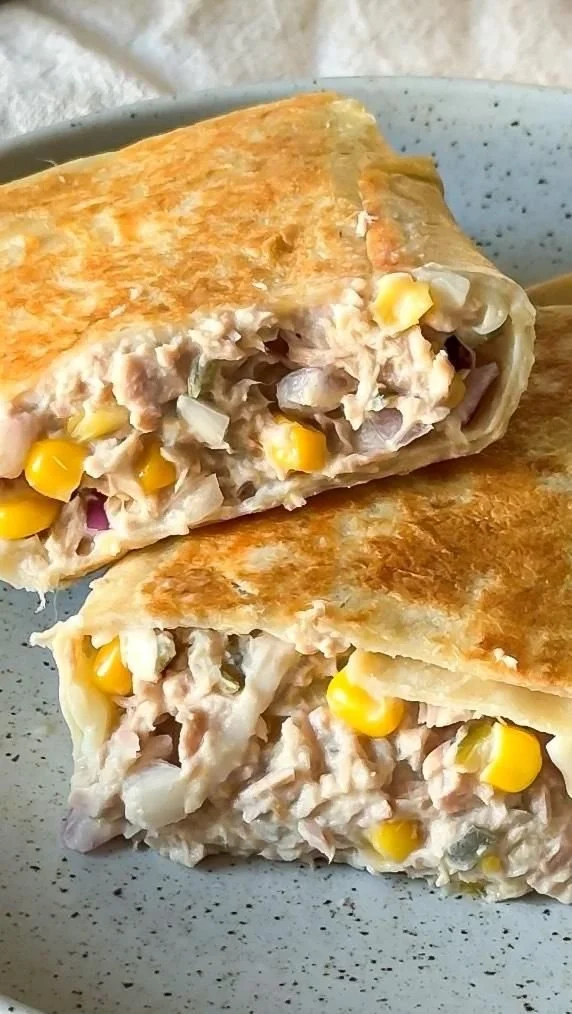
Tuna Melt Wrap

Delicious Tuna Melt Wrap with melted cheese and savory tuna filling

This tuna melt wrap is warm, simple, and full of flavor. It mixes tuna salad with melty cheese, crisp veggies, and a soft tortilla. People love it for lunch, a quick dinner, or a packed picnic. The recipe is a crowd-pleaser, with creamy tuna, gooey cheese, and a little crunch in every bite. You will enjoy how fast it comes together, and how good it tastes. Give it a try, you might make it again this week.

How to prepare Tuna Melt Wrap

Ingredients

  • 1 can (5 oz) tuna, drained
  • 2 tbsp mayonnaise, or yogurt for a lighter option
  • 1 tsp mustard
  • Salt and pepper, to taste
  • 1/4 cup red onion, finely chopped
  • 1/4 cup celery, chopped
  • 1 tbsp lemon juice
  • 2 large flour tortillas, or whole wheat wraps
  • 1 cup shredded cheddar or mozzarella cheese
  • 1 small tomato, sliced
  • 1 cup baby spinach or lettuce
  • Butter or oil, for the pan

Directions

  1. In a bowl, mix tuna, mayonnaise, mustard, lemon juice, onion, celery, salt, and pepper. Taste and adjust seasoning. This is your tuna salad.
  2. Lay a tortilla flat. Put half the tuna salad in the middle. Top with some cheese, tomato slices, and spinach.
  3. Fold the sides of the tortilla, then roll it up tight into a wrap. Repeat with the second tortilla.
  4. Heat a skillet over medium heat. Add a little butter or oil.
  5. Place the wraps seam side down in the hot pan. Cook 2 to 3 minutes on each side, press lightly with a spatula, until the tortilla is golden and the cheese melts.
  6. Remove from the pan. Let the wrap sit one minute, then slice in half and serve warm.

Tuna Melt Wrap

Why You’ll Love Tuna Melt Wrap

  • Quick to make, ready in about 10 to 15 minutes.
  • Comforting, because the cheese melts around the tuna.
  • Flexible, you can swap vegetables or cheese you have on hand.
  • Good for packing, it stays tasty when wrapped up for lunch.
  • Uses common pantry items, tuna and tortillas, for an easy meal.

Tips for success

  • Drain the tuna well, this keeps the wrap from getting soggy.
  • Use cheese that melts easily, like cheddar or mozzarella.
  • Heat the pan first, then cook the wrap, for a nice, golden crust.
  • Add a touch of lemon or pickle juice for brightness.
  • If you like spice, mix in a little hot sauce or chopped jalapeño.

Serving Suggestions

  • Serve with potato chips or a simple green salad.
  • Pair with pickles, carrot sticks, or a cup of soup.
  • Add a side of fruit for a lighter meal.
  • Cut the wrap in halves for an easy share plate.

Tuna Melt Wrap

FAQs

Q: Can I use canned tuna in water or oil?
A: Yes, both work. Tuna in water is lighter, tuna in oil gives more flavor. Just drain well.

Q: How do I make this lower in calories?
A: Use plain yogurt instead of mayonnaise, choose a whole wheat wrap, and add more veggies.

Q: Can I make these ahead and reheat?
A: Yes, you can assemble and wrap in foil, then reheat in a pan or oven. For best texture, cook fresh if possible.

Q: Can I use a salad instead of cooking the wrap?
A: Yes, turn the tuna salad into a tuna melt salad by adding cheese and serving over greens, no pan needed.

Conclusion

If you want a simple, tasty wrap idea, this tuna melt wrap is a great choice for quick lunch or easy dinner. For another clear version of the recipe and extra tips, see Easy Tuna Melt Wrap – The Modern Nonna.

Tuna Melt Wrap
This tuna melt wrap is warm, simple, and full of flavor. A delicious mix of tuna salad, melty cheese, and fresh veggies wrapped in a soft tortilla.

Tuna Salad

  • 1 can (5 oz) tuna, drained (Use tuna in either water or oil.)
  • 2 tbsp mayonnaise, or yogurt for a lighter option
  • 1 tsp mustard
  • to taste Salt and pepper
  • 1/4 cup red onion, finely chopped
  • 1/4 cup celery, chopped
  • 1 tbsp lemon juice

Wrap Assembly

  • 2 large flour tortillas, or whole wheat wraps
  • 1 cup shredded cheddar or mozzarella cheese (Choose cheese that melts easily.)
  • 1 small tomato, sliced
  • 1 cup baby spinach or lettuce
  • to taste Butter or oil, for the pan

Preparation

  1. In a bowl, mix tuna, mayonnaise, mustard, lemon juice, onion, celery, salt, and pepper. Taste and adjust seasoning.
  2. Lay a tortilla flat. Put half the tuna salad in the middle. Top with some cheese, tomato slices, and spinach.
  3. Fold the sides of the tortilla, then roll it up tight into a wrap. Repeat with the second tortilla.

Cooking

  1. Heat a skillet over medium heat. Add a little butter or oil.
  2. Place the wraps seam side down in the hot pan. Cook 2 to 3 minutes on each side, pressing lightly with a spatula until the tortilla is golden and the cheese melts.
  3. Remove from the pan, let the wrap sit one minute, then slice in half and serve warm.

Tips for success: Drain the tuna well to keep the wrap from getting soggy. Use cheese that melts easily. Heat the pan first for a nice, golden crust. Add a touch of lemon or pickle juice for brightness. For spice, mix in hot sauce or chopped jalapeño.

Dinner, lunch, Snack
American
Easy Lunch, Quick Dinner, Tuna Melt, Tuna Salad, Wrap Recipe

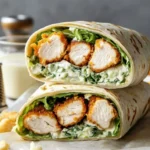
Chicken Caesar Wraps

Delicious Chicken Caesar Wraps with crisp lettuce and grilled chicken

Chicken Caesar Wraps are simple, fresh, and full of flavor. Warm grilled chicken meets crisp romaine lettuce and creamy Caesar dressing, all wrapped in a soft tortilla. This recipe is a real crowd pleaser, good for a quick lunch, a picnic, or an easy weeknight dinner. It tastes like a classic Caesar salad, but you can eat it with your hands, which makes it even more fun. Give it a try, and get ready to make it again and again.

How to prepare Chicken Caesar Wraps

  1. Cook the chicken, season with salt and pepper, then slice or chop. Use grilled or pan seared chicken for extra flavor.
  2. Toss chopped romaine lettuce with Caesar dressing, a little lemon juice, and grated Parmesan cheese. Add freshly ground black pepper if you like.
  3. Warm the tortilla for a few seconds in a pan or microwave so it folds easily.
  4. Place some dressed lettuce in the center of the tortilla, add the sliced chicken, and sprinkle with extra Parmesan and croutons for crunch.
  5. Fold the sides over, then roll the wrap tightly from one end to the other. Cut in half if you want.
  6. Serve right away, or wrap in foil to take on the go.

Chicken Caesar Wraps

Why You’ll Love Chicken Caesar Wraps

  • They are quick to make, great for an easy lunch or fast dinner.
  • The flavors are familiar and comforting, with tangy Caesar dressing and savory grilled chicken.
  • They are easy to change, use leftover chicken, rotisserie chicken, or make a lighter version with Greek yogurt.
  • Wraps are portable, so they are perfect for work lunches, school, or a packed picnic.

tips for success

  • Use good quality Caesar dressing, or make a small batch at home for better taste.
  • Dry the lettuce well, so the tortilla does not get soggy.
  • Warm the tortilla before rolling, it will fold without cracking.
  • Add crunch with croutons or toasted breadcrumbs right before serving.
  • If you plan to store the wraps, wrap each one in parchment or foil, and keep the dressing separate if you want extra crispness.

Serving Suggestions

  • Serve with a side of kettle chips, sweet potato fries, or a light soup.
  • Pair with a simple fruit salad for a fresh contrast.
  • Offer lemon wedges for a bright squeeze of juice.
  • Try adding roasted red peppers, bacon, or sliced avocado for variety.

Chicken Caesar Wraps

FAQs

Q: Can I use rotisserie chicken for these wraps?

A: Yes, rotisserie chicken works great, it saves time and adds good flavor.

Q: How long can I store Chicken Caesar Wraps?

A: Store in the fridge for up to 24 hours. For best texture, keep dressing or croutons separate until ready to eat.

Q: Can I make the dressing lighter?

A: Yes, swap half the mayonnaise for plain Greek yogurt to cut calories and keep creaminess.

Q: Are these wraps good warm or cold?

A: Both work well. Warm chicken makes them cozy, cold makes them crisp and refreshing.

Q: Can I make them gluten free?

A: Yes, use a gluten free tortilla and gluten free croutons or omit the croutons.

Conclusion

If you want another clear recipe idea and step by step photos for Chicken Caesar Wraps, see Chicken Caesar Wrap – Tastes Better From Scratch for more tips and a photo guide.

Chicken Caesar Wraps

Chicken Caesar Wraps are simple, fresh, and full of flavor. This recipe combines warm grilled chicken with crisp romaine lettuce and creamy Caesar dressing, all wrapped in a soft tortilla, making it a perfect quick lunch or easy weeknight dinner.

Main Ingredients

  • 2 pieces chicken breasts (Use grilled or pan-seared for extra flavor.)
  • 4 cups romaine lettuce, chopped (Dry the lettuce well to prevent sogginess.)
  • 1/2 cup Caesar dressing (Use good quality or homemade dressing.)
  • 1 tablespoon lemon juice (Add a bright flavor.)
  • 1/4 cup grated Parmesan cheese (Add more for topping if desired.)
  • 8 pieces tortillas (Warm before rolling.)
  • 1/2 cup croutons (For added crunch.)

Preparation

  1. Cook the chicken, season with salt and pepper, then slice or chop.
  2. Toss chopped romaine lettuce with Caesar dressing, lemon juice, and grated Parmesan cheese. Add freshly ground black pepper if desired.
  3. Warm the tortilla in a pan or microwave for a few seconds so it folds easily.

Assembly

  1. Place some dressed lettuce in the center of the tortilla.
  2. Add the sliced chicken and sprinkle with extra Parmesan and croutons.
  3. Fold the sides over, then roll the wrap tightly from one end to the other.
  4. Cut in half if desired, and serve immediately or wrap in foil to take on the go.

Store in the fridge for up to 24 hours. For best texture, keep dressing or croutons separate until ready to eat. You can use rotisserie chicken for convenience, try adding roasted red peppers, bacon, or sliced avocado for variation.

Dinner, lunch
American
Chicken Caesar Wrap, Easy Lunch, Healthy Wrap, Quick Dinner, Tortilla Wrap