Lemon Orzo Pasta Salad

Delicious Lemon Orzo Pasta Salad served in a bowl with fresh ingredients

Lemon Orzo Pasta Salad is a bright and refreshing dish that will add a burst of flavor to any meal. This delightful salad combines the lightness of orzo pasta with the zesty taste of lemon, fresh vegetables, and a hint of herbs. It’s a dish that feels both hearty and refreshing, making it perfect for warm days, picnics, or family gatherings. Imagine serving this colorful salad to your friends and hearing their delighted reactions, it’s sure to become a crowd-pleaser. You’ll find that its combination of tangy lemon, vibrant vegetables, and tender orzo creates a charming dish that everyone will enjoy. So, roll up your sleeves, grab some ingredients, and let’s whip up this tasty Lemon Orzo Pasta Salad!

How to prepare Lemon Orzo Pasta Salad

To prepare this delightful Lemon Orzo Pasta Salad, follow these simple steps:

  1. Cook the Orzo: Start by boiling a pot of salted water. Once it’s boiling, add the orzo pasta and cook it according to the package instructions until it’s al dente. Drain the pasta and set it aside to cool.
  2. Prepare the Vegetables: While the orzo cools, chop your vegetables. Dice the cucumbers, bell peppers, and cherry tomatoes. Thinly slice the red onion and place all the vegetables in a large bowl.
  3. Make the Lemon Dressing: In a small bowl, whisk together olive oil, lemon juice, salt, and pepper. You can add some chopped fresh herbs, like parsley or basil, for extra flavor.
  4. Combine: Once the orzo has cooled, add it to the bowl with the vegetables. Drizzle the lemon dressing over everything and toss gently until well combined.
  5. Serve: Let the salad sit for at least 15 minutes to allow the flavors to meld together. This salad can be served chilled or at room temperature.

Lemon Orzo Pasta Salad

Why You’ll Love Lemon Orzo Pasta Salad

You will love this Lemon Orzo Pasta Salad for many reasons. First, it’s so easy to make, which means you can whip it up quickly for last-minute gatherings. Second, the freshness of the ingredients brings a vibrant taste to your plate, making it perfect for summer barbecues or any occasion. Plus, it’s packed with healthy vegetables, so you can feel great about serving it to your family and friends. Best of all, it’s a versatile dish – feel free to add your favorite veggies, proteins, or even nuts to tailor it to your taste!

Tips for success

  1. Cook the Orzo Perfectly: Make sure not to overcook the orzo. It should be tender but still firm to the bite, known as al dente.
  2. Let It Chill: Allowing the salad to sit for a bit helps the flavors blend beautifully. If you have time, chill it in the fridge before serving.
  3. Add Fresh Herbs: Fresh herbs can elevate the flavor, so don’t hesitate to include parsley, basil, or even dill!

Serving Suggestions

Lemon Orzo Pasta Salad is a fantastic side dish for grilled chicken or fish, adding a fresh touch to your meal. It also works well as a light lunch by tossing in cooked shrimp or grilled veggies. For a complete meal, pair it with a loaf of hearty bread and a refreshing drink.

FAQs

Can I make Lemon Orzo Pasta Salad a day ahead?

Yes, you can make it a day in advance. Store it in the refrigerator and let it sit at room temperature for about 15 minutes before serving.

What other ingredients can I add?

Feel free to add ingredients like feta cheese, olives, or even avocado for a creamier texture.

How long does the salad last in the fridge?

The salad can last up to 3 days in the refrigerator. Just be aware that the vegetables may lose some crunch over time.

Lemon Orzo Pasta Salad

Lemon Orzo Pasta Salad

A bright and refreshing salad that combines the lightness of orzo pasta with zesty lemon, fresh vegetables, and herbs, perfect for warm days and gatherings.

For the Salad

  • 8 oz orzo pasta (Cook according to package instructions.)
  • 1 cup cucumbers, diced (Fresh and crunchy.)
  • 1 cup bell peppers, diced (Any color you prefer.)
  • 1 cup cherry tomatoes, halved (Adds sweetness.)
  • 1/2 small red onion, thinly sliced (For flavor.)

For the Lemon Dressing

  • 1/4 cup olive oil (Use extra virgin for best flavor.)
  • 2 tbsp lemon juice (Freshly squeezed for brightness.)
  • 1/2 tsp salt (To taste.)
  • 1/4 tsp pepper (To taste.)
  • 1 tbsp fresh herbs (parsley or basil), chopped (Optional for added flavor.)

Preparation

  1. Boil a pot of salted water and cook the orzo pasta until al dente. Drain and set aside to cool.
  2. Meanwhile, chop the cucumbers, bell peppers, cherry tomatoes, and slice the red onion. Place the vegetables in a large bowl.
  3. In a small bowl, whisk together olive oil, lemon juice, salt, and pepper. Add chopped fresh herbs if desired.

Combining

  1. Once the orzo has cooled, add it to the bowl with the vegetables.
  2. Drizzle the lemon dressing over everything and toss gently until well combined.

Serving

  1. Let the salad sit for at least 15 minutes to allow the flavors to meld. Serve chilled or at room temperature.

For best results, do not overcook the orzo. Let the salad sit to blend flavors, and consider chilling it in the fridge. Add fresh herbs for extra flavor.

Salad, Side Dish
American, Mediterranean
Easy Recipes, Lemon Orzo Pasta Salad, pasta salad, Refreshing Salad, Vegetable Salad

Lemon Parm Kale Salad

Fresh Lemon Parm Kale Salad topped with Parmesan cheese and lemon dressing

Lemon Parm Kale Salad feels bright and friendly, like sunshine in a bowl. The leaves have a nice chew, the lemon brings a fresh zip, and the Parmesan adds a salty, rich bite. It is easy to make and works for weeknight meals, packed lunches, or a simple side at a small party. If you want a protein-packed side to go with it, try Greek Yogurt Chicken Salad with Dill and Lemon Zest, it pairs well and keeps the meal light. This Lemon Parm Kale Salad is a crowd-pleaser, full of simple flavors that make people smile, so get ready to toss some kale and feel proud.

How to prepare Lemon Parm Kale Salad

  1. Wash the kale well, then dry it. Trim out the thick stems and chop or tear the leaves into bite size pieces.
  2. Put the kale in a large bowl. Add a pinch of salt and 1 to 2 tablespoons olive oil, then massage the leaves with your hands for 1 to 2 minutes until they soften and turn a bit darker.
  3. Make the dressing in a small bowl, mix 3 tablespoons fresh lemon juice, 3 tablespoons olive oil, 1 teaspoon honey or maple syrup, a small clove of garlic finely minced, salt and pepper to taste.
  4. Add 1/3 to 1/2 cup freshly grated Parmesan to the kale. Pour the dressing over the kale and toss well, making sure the leaves get coated.
  5. Let the salad sit for 5 to 15 minutes so the flavors mellow and the kale softens more. Taste and add more lemon, salt, or Parmesan if you like.
  6. Serve with a little extra shaved Parmesan and a twist of black pepper.

Lemon Parm Kale Salad

Why You’ll Love Lemon Parm Kale Salad

  • Bright lemon flavor wakes up the kale, it feels fresh, not heavy.
  • Parmesan adds a savory, nutty note that makes the salad satisfying.
  • The massaging step makes kale soft and easy to eat, even for people who do not like raw greens.
  • It is quick to make with simple pantry items, so it is an easy healthy choice.

Tips for success

  • Massage the kale well, it breaks down the bite and makes the salad gentler.
  • Use fresh lemon juice for the best bright flavor, not bottled juice.
  • Grate Parmesan fresh, it melts into the leaves better than pre-shredded cheese.
  • If you like a creamier dressing, stir in a spoon of Greek yogurt or a little mayonnaise.
  • Taste as you go, add more lemon or salt slowly until it feels right.

Serving Suggestions

  • Top with roasted chickpeas or grilled chicken for protein.
  • Add toasted nuts, like almonds or pine nuts, for crunch.
  • Serve with crusty bread or grilled fish for a full meal.
  • Mix in thinly sliced apple or pear for a sweet contrast.

Lemon Parm Kale Salad

FAQs

Q: How long will this salad keep in the fridge? A: Keep it in an airtight container, and it will stay good for 2 to 3 days. It is best on day 1 or 2, the leaves soften more over time.

Q: Can I use any type of kale? A: Yes, curly kale or lacinato (dinosaur) kale both work. Lacinato is a little softer, but massage either kind well.

Q: Can I make the salad ahead of time? A: Yes, you can chop and wash the kale a day ahead. Keep the dressing separate and toss just before serving, or dress it early if you want very soft leaves.

Q: Is there a good way to add protein? A: Add cooked chicken, chickpeas, white beans, or a soft boiled egg for a full meal.

Conclusion

If you want another take on this bright salad or extra tips for a lemony kale dish, check out this trusted recipe on the web, Lemon Parmesan Kale Salad – Peas and Crayons Blog. Enjoy making the salad, and have fun tasting and adjusting it to your own liking.

Lemon Parm Kale Salad

A bright and fresh salad featuring massaged kale, zesty lemon dressing, and rich Parmesan.

For the salad

  • 1 bunch Kale (Thick stems removed and chopped or torn into bite-sized pieces)
  • 1-2 tablespoons Olive oil (For massaging the kale)
  • 1/3-1/2 cup Freshly grated Parmesan (For mixing in and topping)

For the dressing

  • 3 tablespoons Fresh lemon juice (Fresh juice for best flavor)
  • 3 tablespoons Olive oil
  • 1 teaspoon Honey or maple syrup (Optional sweetener)
  • 1 small clove Garlic, finely minced
  • to taste Salt
  • to taste Pepper

Preparation

  1. Wash the kale well, then dry it. Trim out the thick stems and chop or tear the leaves into bite size pieces.
  2. Put the kale in a large bowl. Add a pinch of salt and 1 to 2 tablespoons olive oil, then massage the leaves with your hands for 1 to 2 minutes until they soften and turn a bit darker.
  3. Make the dressing in a small bowl by mixing fresh lemon juice, olive oil, honey (or maple syrup), minced garlic, and salt and pepper to taste.
  4. Add freshly grated Parmesan to the kale. Pour the dressing over the kale and toss well, ensuring the leaves are coated.
  5. Let the salad sit for 5 to 15 minutes to allow the flavors to meld and the kale to soften further.
  6. Taste and add more lemon juice, salt, or Parmesan if desired.

Serving

  1. Serve with a little extra shaved Parmesan and a twist of black pepper.

Massage the kale well for a gentler flavor, and use fresh lemon juice and grated Parmesan for best results. For a creamier dressing, stir in Greek yogurt or mayonnaise. Taste as you go to achieve desired flavor.

Salad, Side Dish
American
Healthy Salad, Kale Salad, Lemon Salad, Parmesan Salad, Simple Salad

Healthy Oats Khichdi Weight Loss Khichdi Recipe

Healthy Oats Khichdi bowl garnished with vegetables and herbs

I love simple, warm meals that make you feel good, and oats khichdi is one of those. This healthy weight loss khichdi uses oats instead of rice, so it cooks fast, fills you up, and keeps the meal light. It tastes mild, a little nutty from the oats, and well spiced with cumin and turmeric. It is a great crowd-pleaser, easy to make any day of the week, and kind to your stomach. Ready to try a new comfort food that helps your weight goals? Let’s make it together and enjoy a cozy bowl.

How to prepare Oats Khichdi Recipe | Healthy Weight Loss Khichdi Recipe

Ingredients (simple list)

  • 1 cup rolled oats
  • 1/4 cup moong dal, washed (optional, for protein)
  • 1 small carrot, chopped
  • 1 small potato, chopped (optional)
  • 1 small tomato, chopped
  • 1/2 cup peas or mixed vegetables
  • 1 tsp cumin seeds
  • 1/4 tsp turmeric powder
  • 1/2 tsp ginger, grated
  • 1 green chili, slit (optional)
  • 1 tbsp oil or ghee
  • Salt to taste
  • 3 cups water
  • Fresh coriander for garnish
    Directions
  1. Heat oil or ghee in a pan. Add cumin seeds and let them crackle.
  2. Add grated ginger and green chili, sauté for a few seconds.
  3. Add chopped vegetables, and sauté for 2 to 3 minutes.
  4. Add washed moong dal, turmeric, and salt. Mix well.
  5. Pour in water and bring to a gentle boil.
  6. Lower the heat, add oats, and stir. Cook for 4 to 6 minutes until oats and dal are soft. Stir often to avoid sticking.
  7. Turn off heat. Let it sit for a minute, then garnish with fresh coriander.
  8. Serve hot, with a drizzle of ghee if you like.

Oats Khichdi Recipe | Healthy Weight Loss Khichdi Recipe

Why You’ll Love Oats Khichdi Recipe | Healthy Weight Loss Khichdi Recipe

  • Simple and quick to cook, perfect for busy days.
  • Light on the stomach, yet filling, so it helps with weight control.
  • Uses oats, which add fiber and a nutty taste.
  • Mild spices make it friendly for kids and adults.
  • Easy to change with any vegetables you have, so it never gets boring.

Tips for success

  • Use rolled oats, not instant flavored oats, for best texture.
  • Rinse the dal well if using, and soak for 15 minutes to cut cooking time.
  • Keep the water ratio right, about 3 cups water for 1 cup oats and dal, adjust for your preferred thickness.
  • Stir while cooking to prevent the oats from sticking to the bottom.
  • Add lemon or a spoon of ghee at the end for extra flavor, if you want.

Serving Suggestions

  • Serve hot in a bowl, with plain yogurt or a small salad on the side.
  • Top with roasted nuts or a spoon of ghee for extra taste.
  • Pair with a light pickle or steamed vegetables for a fuller meal.
  • Great as a breakfast, lunch, or easy dinner for weight loss plans.

Oats Khichdi Recipe | Healthy Weight Loss Khichdi Recipe

FAQs

Q: Can I make oats khichdi without dal?
A: Yes, you can make it only with oats and vegetables, it will still be filling and light.

Q: Can I use instant oats?
A: Instant oats get mushy fast, they work but the texture will be softer. Rolled oats give a better bite.

Q: How long does it keep in the fridge?
A: Store in an airtight container for up to 2 days. Reheat with a splash of water.

Q: Is this good for weight loss?
A: Yes, it is low in calories, high in fiber, and keeps you full, which helps control hunger.

Conclusion

If you want a tested recipe and more tips for making this healthy dish, check this Oats Khichdi Recipe, it has a clear method and variations you can try. Enjoy your warm, healthy bowl and have fun cooking.

Oats Khichdi

A comforting and nutritious dish made with rolled oats, vegetables, and mild spices, perfect for weight loss.

Main Ingredients

  • 1 cup rolled oats (Use rolled oats for best texture.)
  • 1/4 cup moong dal, washed (Optional, for added protein.)
  • 1 small carrot, chopped
  • 1 small potato, chopped (Optional.)
  • 1 small tomato, chopped
  • 1/2 cup peas or mixed vegetables
  • 1 tsp cumin seeds
  • 1/4 tsp turmeric powder
  • 1/2 tsp ginger, grated
  • 1 unit green chili, slit (Optional.)
  • 1 tbsp oil or ghee
  • to taste unit Salt
  • 3 cups water
  • to garnish unit Fresh coriander

Cooking Instructions

  1. Heat oil or ghee in a pan. Add cumin seeds and let them crackle.
  2. Add grated ginger and green chili, sauté for a few seconds.
  3. Add chopped vegetables, and sauté for 2 to 3 minutes.
  4. Add washed moong dal, turmeric, and salt. Mix well.
  5. Pour in water and bring to a gentle boil.
  6. Lower the heat, add oats, and stir. Cook for 4 to 6 minutes until oats and dal are soft. Stir often to avoid sticking.
  7. Turn off heat. Let it sit for a minute, then garnish with fresh coriander.
  8. Serve hot, with a drizzle of ghee if you like.

Use rolled oats, not instant flavored oats, for best texture. Rinse the dal well if using, and soak for 15 minutes to cut cooking time. Keep the water ratio right, about 3 cups water for 1 cup oats and dal, adjust for your preferred thickness. Stir while cooking to prevent the oats from sticking to the bottom. Add lemon or a spoon of ghee at the end for extra flavor, if desired. Serve hot in a bowl, with plain yogurt or a small salad on the side. Top with roasted nuts or a spoon of ghee for extra taste. Pair with a light pickle or steamed vegetables for a fuller meal. Great as a breakfast, lunch, or easy dinner for weight loss plans.

Dinner, lunch, Main Course
Indian
Healthy Recipe, Oats Khichdi, Weight Loss

Red Lentil Pancake

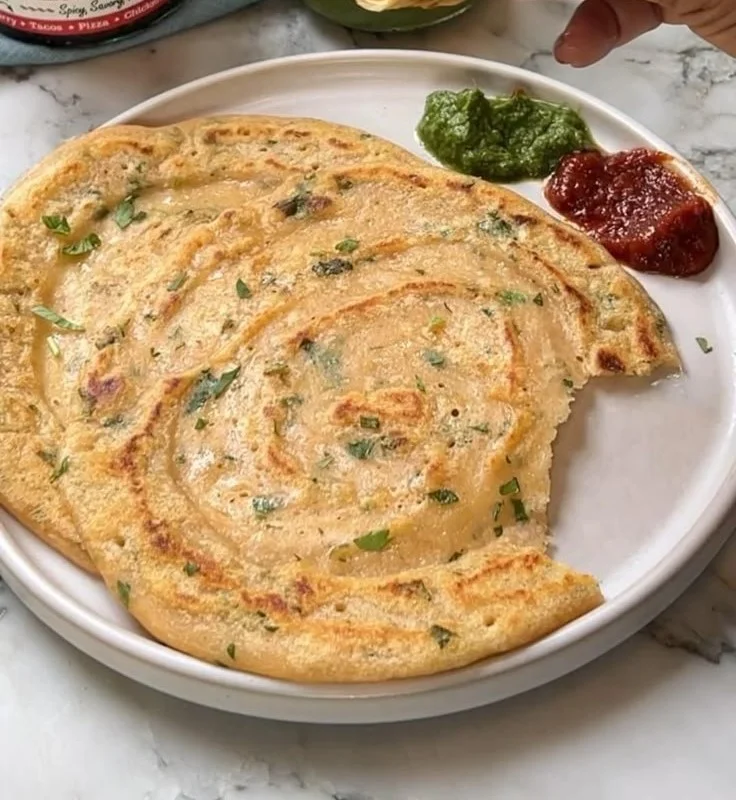
Delicious red lentil pancake served with toppings

Red Lentil Pancake is a warm, tasty dish that feels simple and bright. It uses red lentils, a few spices, and fresh herbs to make a thin, savory pancake. This recipe is easy to make, healthy, and works for breakfast, lunch, or a light dinner. It is a crowd-pleaser because it is crispy at the edges, soft inside, and full of good flavor. Think of it as a red lentil crepe, a masoor dal chilla, or a protein-rich vegan pancake that everyone can enjoy. Get ready to make something comfy and fun, you will want to make this again and again!

How to prepare Red Lentil Pancake

Ingredients

  • 1 cup red lentils (masoor dal), rinsed
  • 1 small onion, finely chopped
  • 1 small tomato, finely chopped
  • 1 green chili, finely chopped, optional
  • 1/4 cup fresh cilantro, chopped
  • 1/2 tsp cumin seeds or ground cumin
  • 1/2 tsp salt, or to taste
  • 1/4 tsp turmeric, optional
  • 1/2 tsp baking soda or a pinch of baking powder (for lightness)
  • 1 to 1 1/4 cups water, to blend
  • Oil for cooking

Directions

  1. Soak the red lentils for 20 to 30 minutes if you have time, then drain. You can skip soaking for very soft lentils, but soaking makes a smoother batter.
  2. Put the lentils in a blender with 1 cup water. Blend to a smooth, pourable batter, like pancake batter. Add more water if needed.
  3. Pour the batter into a bowl. Mix in onion, tomato, green chili, cilantro, cumin, salt, turmeric, and baking soda. Stir well.
  4. Heat a nonstick pan over medium heat. Add a little oil and spread it.
  5. Pour a ladle of batter on the pan and spread lightly to a thin circle, like a crepe. Cook 2 to 3 minutes until the bottom is golden and crisp.
  6. Flip and cook the other side 1 to 2 minutes. Press gently with a spatula for even cooking.
  7. Remove and keep warm. Repeat with the rest of the batter. Serve hot.

Red Lentil Pancake

Why You’ll Love Red Lentil Pancake

  • High in plant protein, it keeps you full and satisfied.
  • Gluten-free if you use only lentils, great for many diets.
  • Fast to make, and the batter stores in the fridge for a day.
  • Versatile, you can change spices, add veggies, or make it plain.
  • Crispy outside and soft inside, it has a lovely texture that people enjoy.

Tips for success

  • Blend to a smooth batter for even cooking and good texture.
  • If batter is too thick, add small amounts of water until it pours easily.
  • Use a hot pan and a bit of oil for a crisp edge.
  • Do not overcook, lower the heat if the pancake browns too fast.
  • Add baking soda right before cooking, it helps make the pancake light.
  • For more flavor, add a pinch of garam masala or finely grated ginger.

Serving Suggestions

  • Serve with plain yogurt or a yogurt-mint sauce for a cool contrast.
  • Pair with a simple chutney, like mint or tamarind, for brightness.
  • Top with fresh salad, avocado slices, or a squeeze of lemon.
  • Make a savory roll, fill the pancake with spiced potatoes or greens.
  • Serve as part of a brunch spread with roasted vegetables and tea.

Red Lentil Pancake

FAQs

Q: Can I make this gluten-free? A: Yes, red lentils are naturally gluten-free. Avoid cross-contamination if you need strict gluten-free.

Q: How do I store leftover batter and pancakes? A: Store batter in a sealed container in the fridge for up to 24 hours. Cooked pancakes keep in the fridge 2 to 3 days, reheat in a pan for best texture.

Q: Can I make these ahead for a party? A: Yes, cook them ahead and keep warm in a low oven. Re-crisp in a hot pan before serving.

Q: Can I swap red lentils for other lentils? A: Red lentils cook fast and give a smooth batter. Other lentils need longer soaking and may not blend as smoothly, but you can try yellow split peas with care.

Q: Are these pancakes vegan? A: Yes, this recipe is vegan when you use oil and no dairy. Serve with vegan sides to keep it plant-based.

Conclusion

For a clear, classic version of this idea, check a related Masoor Dal Chilla recipe for extra tips and variations, like simple spice mixes and frying methods, at Masoor Dal Chilla recipe on Ministry of Curry.

Red Lentil Pancake

A warm, tasty dish featuring red lentils, spices, and fresh herbs, perfect for breakfast, lunch, or dinner. Crispy at the edges and soft inside, these pancakes are a protein-rich vegan delight.

For the Pancake Batter

  • 1 cup red lentils (masoor dal), rinsed
  • 1 small onion, finely chopped
  • 1 small tomato, finely chopped
  • 1 piece green chili, finely chopped (optional) (For added heat)
  • 1/4 cup fresh cilantro, chopped
  • 1/2 tsp cumin seeds or ground cumin
  • 1/2 tsp salt, or to taste
  • 1/4 tsp turmeric (optional)
  • 1/2 tsp baking soda or a pinch of baking powder (for lightness)
  • 1 to 1 1/4 cups water, to blend
  • as needed for cooking oil (For cooking the pancakes)

Preparation

  1. Soak the red lentils for 20 to 30 minutes if you have time, then drain.
  2. Put the lentils in a blender with 1 cup of water. Blend to a smooth, pourable batter, adding more water if needed.
  3. Pour the batter into a bowl and mix in onion, tomato, green chili, cilantro, cumin, salt, turmeric, and baking soda. Stir well.

Cooking

  1. Heat a nonstick pan over medium heat and add a little oil.
  2. Pour a ladle of batter on the pan and spread lightly to form a thin circle. Cook for 2 to 3 minutes until the bottom is golden and crisp.
  3. Flip and cook the other side for 1 to 2 minutes. Press gently with a spatula for even cooking.
  4. Remove and keep warm. Repeat with the rest of the batter. Serve hot.

For a crisp pancake, blend to a smooth batter. Adjust the water if the batter is too thick. Add baking soda right before cooking for a lighter texture. Serve with yogurt or chutney for added flavor.

Breakfast, Dinner, lunch
Indian, Vegan
Gluten-Free, Healthy Breakfast, Lentil Pancake, Red Lentil, Vegan Recipe

Spring Vegetable Pasta

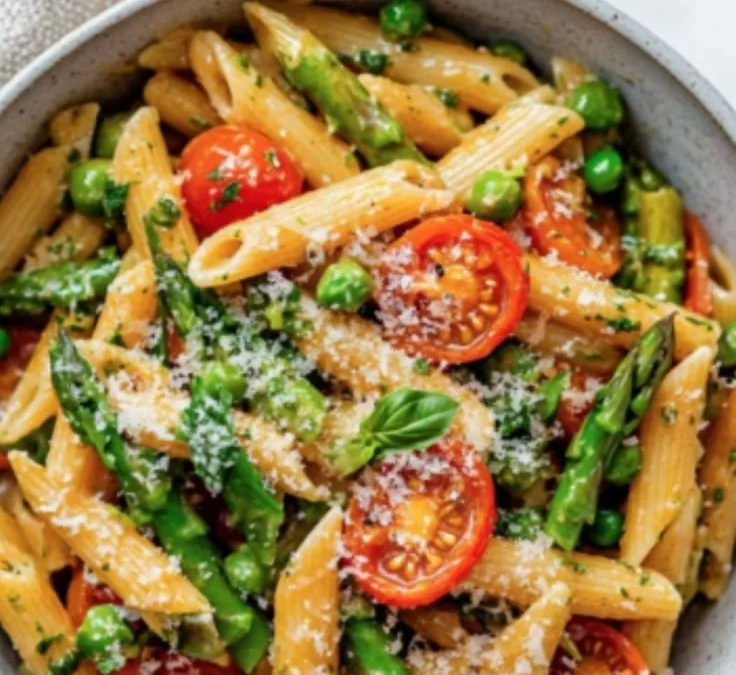
Spring vegetable pasta dish with fresh seasonal vegetables and herbs

I love spring vegetable pasta because it tastes like the season, clean and bright. This recipe mixes tender pasta with crisp asparagus, sweet peas, garlic, and a touch of lemon. It feels fresh, not heavy, and most people enjoy it, even picky eaters.

The featured Spring Vegetable Pasta is a crowd-pleaser. It blends fresh vegetables, simple herbs, and a light sauce that coats every bite. The flavor is fresh, slightly tangy from lemon, and a little buttery or creamy, if you like. It looks colorful on the plate, and it smells great while you cook it.

You will feel proud serving this dish, and you may even hear, I need that recipe, from friends. Now go wash the veggies and get ready, this one is fun to make.

How to prepare Spring Vegetable Pasta

Ingredients (simple list you can use)

  • 12 ounces pasta, like penne or farfalle
  • 1 bunch asparagus, trimmed and cut into 1-inch pieces
  • 1 cup fresh or frozen peas
  • 2 tablespoons olive oil
  • 2 cloves garlic, minced
  • 1 lemon, zested and juiced
  • 1/4 cup grated Parmesan, plus more to serve
  • 2 tablespoons butter or 1/4 cup cream, optional
  • Salt and black pepper to taste
  • Fresh basil or parsley to finish

Steps

  1. Bring a large pot of salted water to a boil and cook the pasta until al dente, follow package time. Save about 1 cup of pasta cooking water, then drain pasta.
  2. While pasta cooks, heat olive oil in a large skillet over medium heat. Add garlic and cook 30 to 60 seconds, until fragrant.
  3. Add asparagus pieces and cook 3 to 5 minutes, until bright green and just tender. Add peas and stir 1 to 2 minutes to heat through.
  4. Add the drained pasta to the skillet. Toss with lemon zest, lemon juice, Parmesan, and butter or cream if you use it. Add a splash of the saved pasta water to make a light sauce, toss to coat.
  5. Taste and season with salt and pepper. Add fresh herbs and extra Parmesan to serve.


Spring Vegetable Pasta

Why You’ll Love Spring Vegetable Pasta

  • It uses fresh seasonal vegetables, so it tastes bright and clean.
  • The dish is quick, ready in about 25 to 30 minutes.
  • It works as a simple weeknight meal or a pretty dish for guests.
  • You can make it vegetarian, or add chicken or shrimp if you want more protein.
  • It pairs well with lemon and herbs, giving a fresh spring flavor.

tips for success

  • Cook pasta one minute less than package time for the best texture, it will finish in the pan.
  • Save pasta water, it helps make a smooth sauce without cream.
  • Use fresh lemon zest for bright flavor, not bottled lemon.
  • Don’t overcook asparagus, keep it slightly firm for good texture.
  • Taste and adjust salt and lemon at the end, small changes lift the whole dish.

Serving Suggestions

  • Serve with extra grated Parmesan and a drizzle of olive oil.
  • Add a simple green salad and crusty bread for a full meal.
  • Top with toasted pine nuts for crunch, or add fresh peas and mint for a spring twist.
  • Pair with a light white wine, like Pinot Grigio or Sauvignon Blanc.


Spring Vegetable Pasta

FAQs

Q: Can I use frozen vegetables?

A: Yes, frozen peas work well. For frozen asparagus, thaw and pat dry before cooking, or cook a little longer.

Q: Can I make this ahead?

A: You can cook the pasta and vegetables a few hours ahead. Toss them together just before serving, add a little pasta water if the sauce is dry.

Q: How do I make it dairy free?

A: Skip the butter and Parmesan, use olive oil and a bit more lemon or nutritional yeast for a cheesy note.

Q: Can I add protein?

A: Yes, cooked chicken, shrimp, or white beans fit well and make the dish more filling.

Q: What pasta shape is best?

A: Short shapes like penne, farfalle, or rotini hold the sauce and bits of vegetables well.

Conclusion

For another bright, creamy take on spring vegetable pasta ideas, see this tasty recipe, Creamy Lemon Spring Vegetable Pasta – Two Peas & Their Pod, it has a lovely lemon cream twist you may enjoy.

Spring Vegetable Pasta

A light and fresh pasta dish featuring spring vegetables like asparagus and peas, with a hint of lemon and Parmesan.

Pasta and Vegetables

  • 12 ounces pasta, like penne or farfalle
  • 1 bunch asparagus, trimmed and cut into 1-inch pieces
  • 1 cup fresh or frozen peas

Sauce and Seasoning

  • 2 tablespoons olive oil
  • 2 cloves garlic, minced
  • 1 each lemon, zested and juiced
  • 1/4 cup grated Parmesan, plus more to serve
  • 2 tablespoons butter or 1/4 cup cream, optional (Use butter or cream to enhance creaminess.)
  • Salt and black pepper to taste

Garnish

  • Fresh basil or parsley to finish

Cooking the Pasta

  1. Bring a large pot of salted water to a boil and cook the pasta until al dente, following package time. Save about 1 cup of pasta cooking water, then drain pasta.

Preparing the Vegetables

  1. While pasta cooks, heat olive oil in a large skillet over medium heat. Add garlic and cook for 30 to 60 seconds, until fragrant.
  2. Add asparagus pieces and cook for 3 to 5 minutes, until bright green and just tender. Then add peas and stir for 1 to 2 minutes to heat through.

Combining Ingredients

  1. Add the drained pasta to the skillet. Toss with lemon zest, lemon juice, Parmesan, and butter or cream if using. Add a splash of the saved pasta water to make a light sauce, and toss to coat.
  2. Taste and season with salt and pepper. Add fresh herbs and extra Parmesan to serve.

Tips for success: Cook pasta one minute less than package time for the best texture, keep asparagus slightly firm for good texture, and adjust seasoning at the end for optimal flavor.

Dinner, Main Course
Italian, Mediterranean
Fresh Vegetables, Healthy Dinner, Lemon Pasta, Pasta, Spring Vegetable Pasta

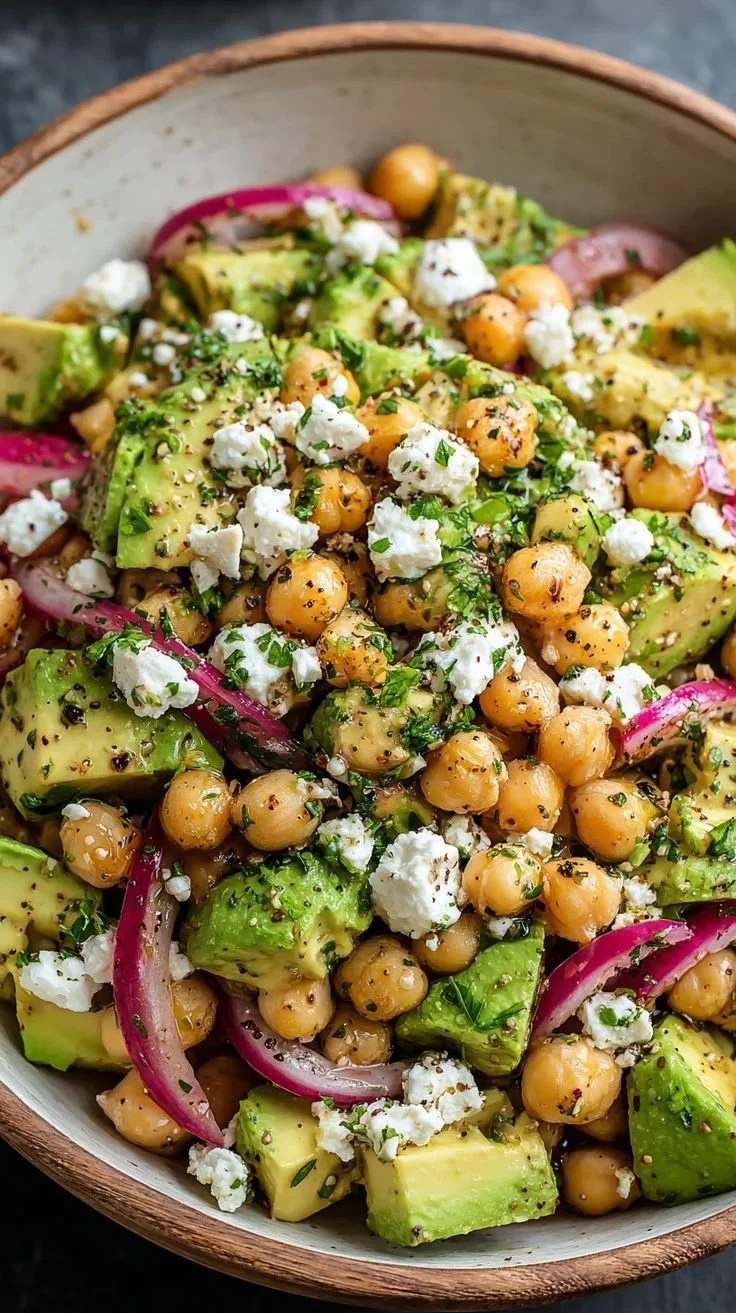
Chickpea Feta Avocado Salad

Chickpea Feta Avocado Salad in a bowl with fresh vegetables

This Chickpea Feta Avocado Salad feels like sunshine in a bowl. It mixes creamy avocado, salty feta, and tender chickpeas for a simple, healthy meal. The salad tastes fresh, light, and a little tangy from lemon and olive oil. It makes a great lunch, potluck dish, or side for a warm night.

This featured recipe is a crowd-pleaser, easy to toss together, and fills you up without feeling heavy. The mix of textures, from soft avocado to crumbly feta and firm chickpeas, keeps every bite interesting. Give it a try and you might find yourself making it again and again, maybe even twice in one week.

how to prepare Chickpea Feta Avocado Salad

Ingredients

  • 1 can (15 oz) chickpeas, drained and rinsed
  • 1 large ripe avocado, diced
  • 1 cup cherry tomatoes, halved
  • 1/2 small red onion, finely chopped
  • 1/2 cucumber, diced
  • 1/3 cup crumbled feta cheese
  • 2 tablespoons chopped fresh parsley or cilantro
  • 2 tablespoons olive oil
  • 1 tablespoon lemon juice, or to taste
  • Salt and black pepper to taste

Directions

  1. Rinse and drain the chickpeas, then place them in a large bowl.
  2. Chop the avocado, tomatoes, onion, and cucumber into bite-size pieces. Add to the bowl with chickpeas.
  3. Add the crumbled feta and chopped herbs.
  4. In a small cup, whisk olive oil, lemon juice, salt, and pepper.
  5. Pour the dressing over the salad and toss gently, so the avocado does not mash.
  6. Taste and add more lemon, salt, or pepper if needed. Serve right away or chill for 15 minutes for cooler flavor.

Chickpea Feta Avocado Salad

Why You’ll Love Chickpea Feta Avocado Salad

  • It’s quick to make, under 15 minutes.
  • It combines protein from chickpeas with healthy fats from avocado.
  • The feta adds a salty, tangy note that brightens the whole salad.
  • It works as a filling lunch, a healthy side, or a light dinner.
  • The salad holds up well for a few hours, so it is great for picnics and meal prep.

tips for success

  • Use a ripe but firm avocado, so it holds shape when tossed.
  • Don’t overdress, start with less lemon and oil then add more if needed.
  • Rinse canned chickpeas well to cut sodium and improve flavor.
  • Chop ingredients to similar size for even bites.
  • Add herbs like parsley, cilantro, or basil for fresh taste.
  • If making ahead, add avocado just before serving to avoid browning.

Serving Suggestions

  • Serve on a bed of mixed greens for extra crunch.
  • Spoon onto toast for a quick open-faced sandwich.
  • Pair with grilled chicken or fish for a fuller meal.
  • Serve with pita bread or crackers for a picnic.
  • Add a spoonful of Greek yogurt or a dollop of hummus for more creaminess.

Chickpea Feta Avocado Salad

FAQs

Q: Can I use dried chickpeas instead of canned? A: Yes, cook dried chickpeas until tender, then cool before using. Canned is faster.

Q: How long will the salad keep in the fridge? A: It keeps 1 to 2 days. Add avocado right before serving to keep it fresh.

Q: Can I make this salad vegan? A: Yes, skip the feta or use a vegan feta alternative.

Q: What other add-ins work well? A: Olives, roasted red pepper, or cooked corn add good flavor and color.

Q: Is this salad gluten free? A: Yes, the recipe is naturally gluten free.

Conclusion

For a tested, easy version of this salad idea, you can see a similar recipe at Chickpea, Avocado, & Feta Salad – Two Peas & Their Pod, which offers more tips and variations to try.

Chickpea Feta Avocado Salad

This Chickpea Feta Avocado Salad mixes creamy avocado, salty feta, and tender chickpeas for a simple, healthy meal.

Main Ingredients

  • 1 can (15 oz) chickpeas, drained and rinsed
  • 1 large ripe avocado, diced (Use a ripe but firm avocado.)
  • 1 cup cherry tomatoes, halved
  • 1/2 small red onion, finely chopped
  • 1/2 cucumber, diced
  • 1/3 cup crumbled feta cheese (Can use vegan feta for a vegan option.)
  • 2 tablespoons chopped fresh parsley or cilantro

Dressing

  • 2 tablespoons olive oil
  • 1 tablespoon lemon juice, or to taste (Add more lemon to taste.)
  • Salt and black pepper to taste (Adjust to preference.)

Preparation

  1. Rinse and drain the chickpeas, then place them in a large bowl.
  2. Chop the avocado, tomatoes, onion, and cucumber into bite-size pieces. Add to the bowl with chickpeas.
  3. Add the crumbled feta and chopped herbs.
  4. In a small cup, whisk olive oil, lemon juice, salt, and pepper.
  5. Pour the dressing over the salad and toss gently, so the avocado does not mash.
  6. Taste and add more lemon, salt, or pepper if needed. Serve right away or chill for 15 minutes for cooler flavor.

Chop ingredients to similar size for even bites. Add herbs like parsley, cilantro, or basil for fresh taste. If making ahead, add avocado just before serving to avoid browning.

lunch, Salad, Side Dish
Healthy, Mediterranean
Avocado Salad, Chickpea Salad, Feta Salad, Healthy Recipe, Quick Meal