Bacon Brussels Sprouts

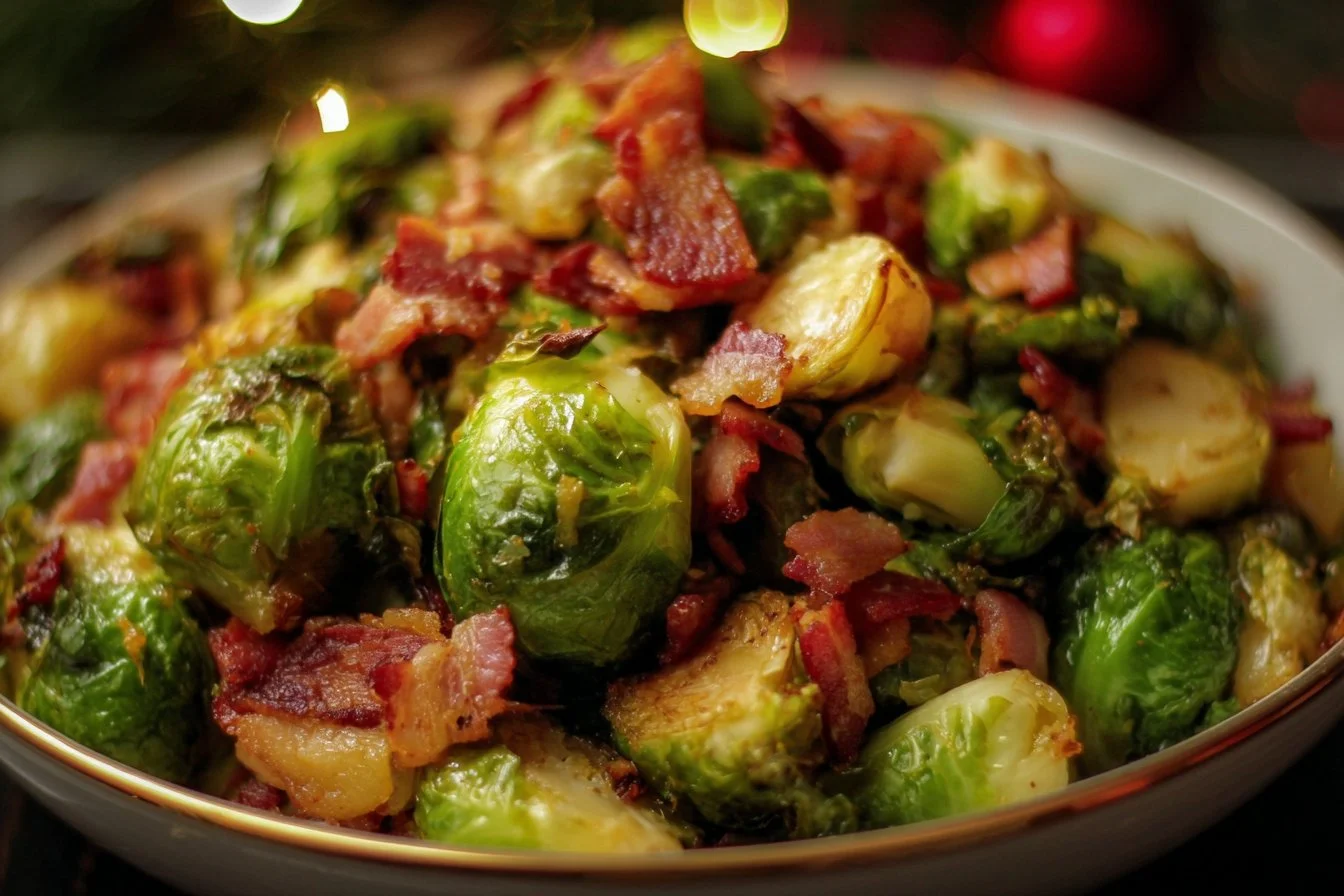
Crispy Bacon Brussels Sprouts served in a bowl, garnished and ready to enjoy.

Bacon Brussels Sprouts are a delightful blend of savory and smoky flavors that can turn any meal into a special occasion. Picture crispy, golden Brussels sprouts tossed with crunchy bacon, creating a dish that’s both comforting and impressive. This recipe has become a favorite among families and friends, making it the perfect side dish for gatherings or even a fancy dinner. The taste is simply irresistible, with a satisfying crunch and a rich buttery flavor. Once you try this recipe, you’ll find it hard to believe that healthy vegetables can taste this good! So grab your apron and let’s dive into making this crowd-pleaser that will have everyone asking for seconds.

How to Prepare Bacon Brussels Sprouts

To prepare Bacon Brussels Sprouts, start by gathering the ingredients. You will need Brussels sprouts, bacon, olive oil, salt, and pepper. First, preheat your oven to 400°F (200°C). Wash and trim the Brussels sprouts, cutting them in half lengthwise for even cooking. In a large bowl, toss the Brussels sprouts with a drizzle of olive oil, salt, and pepper. Then, chop the bacon into small pieces and add it to the bowl, mixing everything together so the flavors combine. Spread the mixture onto a large baking sheet in a single layer. Roast in the oven for 20-25 minutes, until the bacon is crispy and the Brussels sprouts are golden brown. Make sure to stir halfway through to ensure even cooking. Once done, remove from the oven and serve warm for a delicious treat that everyone will love.

Why You’ll Love Bacon Brussels Sprouts

Bacon Brussels Sprouts are a dish that has it all: flavor, texture, and convenience. The rich taste of the crispy bacon perfectly complements the earthy notes of the Brussels sprouts. This makes for a well-balanced and satisfying side dish that pairs well with just about anything. It’s also an easy recipe to whip up in no time. Whether you’re cooking for a holiday feast or a regular weeknight dinner, these Brussels sprouts are sure to impress. Plus, they’re a fun way to sneak in some veggies while still keeping it delicious. Your taste buds will thank you for trying this delightful recipe!

Tips for Success

To create the best Bacon Brussels Sprouts, keep a few tips in mind. First, choose fresh Brussels sprouts that are bright green and firm for the best flavor. When cutting them, try to keep the pieces uniform in size to ensure even cooking. Don’t be afraid to get a little extra crispy with the bacon, as it adds more flavor! Make sure to spread the Brussels sprouts out on the baking sheet without overcrowding them. This allows them to roast properly and get that nice crunch. Finally, feel free to add some garlic or a splash of balsamic vinegar to elevate the flavor even more. These simple tips will help you achieve the perfect Bacon Brussels Sprouts every time.

Serving Suggestions

Bacon Brussels Sprouts can be served in a variety of ways. They make a fantastic side dish for roasted meats like chicken, pork, or even beef. You can also present them alongside other vegetables for a colorful and vibrant veggie platter. Want to make it a festive dish? Try topping with some grated Parmesan cheese or a sprinkle of crushed red pepper for an extra kick. They’re also great for potlucks or family gatherings, as they warm up nicely and taste amazing even after being reheated. Whatever you choose, these Brussels sprouts are sure to be a hit on any table.

FAQs

Can I use frozen Brussels sprouts for this recipe?

Yes, you can use frozen Brussels sprouts, but be sure to thaw and dry them well before roasting to avoid sogginess.

How can I store leftovers?

Store any leftovers in an airtight container in the fridge for up to three days. Reheat in the oven for the best texture.

Can I make this dish ahead of time?

Yes, you can prepare the Brussels sprouts and bacon ahead of time and roast them when you’re ready to serve. Just toss them back in the oven until heated through and crispy!

Bacon Brussels Sprouts

A delicious side dish featuring the incredible flavors of crispy bacon and tender Brussels sprouts, perfect for any gathering.

Main Ingredients

  • 1 lb Brussels sprouts (Trimmed and halved if large)
  • 4 oz bacon (Chopped)
  • 2 tbsp olive oil
  • 1 tsp salt
  • 1 tsp pepper

Preparation

  1. Preheat your oven to 400°F (200°C).
  2. Wash and trim the Brussels sprouts, cutting them in half if they are large.
  3. In a large bowl, mix the Brussels sprouts with olive oil, salt, and pepper.
  4. Add chopped bacon, and toss everything together until the sprouts are well coated.
  5. Spread the mixture on a baking sheet in a single layer.

Cooking

  1. Roast in the oven for about 25-30 minutes, until the Brussels sprouts are golden and the bacon is crispy.
  2. Stir halfway through to ensure even cooking.
  3. Remove from the oven and let them cool slightly before serving.

Tips for success: Make sure to cut the Brussels sprouts evenly for even cooking. Don’t overcrowd the pan as it helps them get crispy. Consider adding garlic or balsamic vinegar for more flavor.
Side Dish
American
Bacon Brussels Sprouts, Brussels Sprouts, Crispy Bacon, side dish, Vegetable Side

Garlic Butter Green Beans

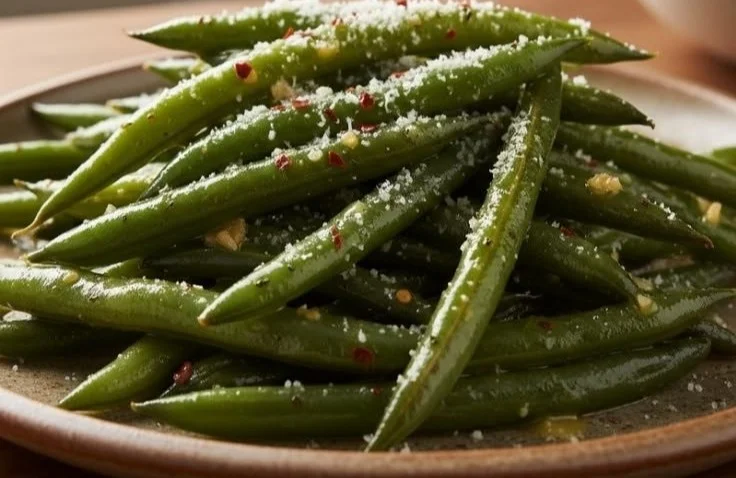
Sauteed garlic butter green beans garnished with fresh herbs

This Garlic Butter Green Beans recipe is a warm, simple side dish that fits dinner on busy nights, holiday meals, and weeknight plates. The beans stay crisp and get a soft garlic butter coat that most people love. If you enjoy rich garlic flavors, you might also like the garlic butter steak bites with parmesan cream sauce, they share a similar buttery garlic taste. This green bean dish is easy to make, quick to cook, and a real crowd pleaser, so get ready to enjoy a small, tasty side that will disappear fast.

how to prepare Garlic Butter Green Beans

Ingredients

  • 1 pound fresh green beans, trimmed
  • 2 tablespoons butter
  • 2 garlic cloves, minced
  • 1 tablespoon olive oil
  • Salt, to taste
  • Black pepper, to taste
  • Optional, a squeeze of lemon or a pinch of red pepper flakes

Directions

  1. Rinse and trim the green beans, dry them well.
  2. Heat a large pan over medium heat. Add the olive oil and 1 tablespoon of butter.
  3. Add the green beans and cook, stirring, for 4 to 6 minutes, until they start to get tender and bright green.
  4. Push the beans to one side of the pan. Add the remaining butter and the minced garlic. Cook the garlic for about 30 seconds, do not burn it.
  5. Mix the garlic and butter with the green beans. Cook 1 to 2 more minutes, until the beans are cooked but still crisp.
  6. Season with salt and black pepper. Add a squeeze of lemon or a pinch of red pepper flakes if you like.
  7. Serve hot.

Garlic Butter Green Beans

Why You’ll Love Garlic Butter Green Beans

  • Quick, they take about 10 minutes to cook.
  • Fresh taste, the green beans stay bright and crisp.
  • Rich garlic butter flavor, that most people find comforting.
  • Versatile, they pair with chicken, beef, fish, or a simple grain.
  • Easy to scale up for a crowd or make small for one or two people.

tips for success

  • Dry the beans well after rinsing, wet beans will steam not sauté.
  • Use a hot pan, the beans will get a nice color and keep a slight crunch.
  • Do not burn the garlic, add it near the end and watch it for 30 seconds.
  • Taste and season at the end, salt and pepper make the flavors pop.
  • If you want softer beans, cover the pan for a minute, then remove the lid to let the butter brown.

Serving Suggestions

  • Serve with roasted chicken or grilled fish for a simple weeknight meal.
  • Add to a holiday plate with mashed potatoes and roast turkey.
  • Toss with toasted almonds or grated parmesan for extra texture and flavor.
  • Serve over rice or with a slice of lemon for a bright finish.

Garlic Butter Green Beans

FAQs

Q: Can I use frozen green beans for this recipe? A: Yes, you can. Thaw and pat them dry first, then cook a little longer until they are hot through.

Q: How long can I store leftovers? A: Keep leftovers in an airtight container in the fridge for up to 3 days. Reheat gently in a pan.

Q: Can I make this without butter? A: Yes, use more olive oil if you need a dairy free option. The flavor will be a bit different but still good.

Q: Can I add other herbs or spices? A: Yes, try thyme, parsley, or a pinch of red pepper flakes for heat.

Q: How do I keep the beans crisp? A: Do not overcook, cook until bright and just tender. Shock in cold water if you want to stop the cooking fast.

Conclusion

For a quick and tasty side that goes with many meals, try this Garlic Butter Green Beans. If you want another version and a fast 15 minute idea, see Foolproof Living’s 15-minute Garlic Butter Green Beans recipe for more tips and a ready plan.

Garlic Butter Green Beans

A warm, simple side dish featuring crisp green beans coated in rich garlic butter. Perfect for busy nights and holiday meals.

Main Ingredients

  • 1 pound fresh green beans, trimmed (Use fresh beans for the best texture.)
  • 2 tablespoons butter (Divided: 1 tablespoon for cooking, 1 tablespoon for flavor.)
  • 2 cloves garlic, minced (Add near the end to avoid burning.)
  • 1 tablespoon olive oil (For sautéing the beans.)
  • Salt, to taste (Enhances flavor.)
  • Black pepper, to taste (Enhances flavor.)
  • Optional: squeeze of lemon or pinch of red pepper flakes (For added flavor.)

Preparation

  1. Rinse and trim the green beans, then dry them well.
  2. Heat a large pan over medium heat and add the olive oil and 1 tablespoon of butter.
  3. Add the green beans, cooking and stirring for 4 to 6 minutes, until they are tender and bright green.

Cooking

  1. Push the beans to one side of the pan and add the remaining butter and minced garlic.
  2. Cook the garlic for about 30 seconds, ensuring it doesn’t burn.
  3. Mix the garlic and butter with the green beans and cook for 1 to 2 more minutes until the beans are cooked but still crisp.
  4. Season with salt and black pepper, and add a squeeze of lemon or a pinch of red pepper flakes if desired.
  5. Serve hot.

For best results, dry the beans thoroughly before sautéing. Use a hot pan to get nice color and keep crunch. If you desire softer beans, cover the pan for a minute and then uncover to let the butter brown.

Side Dish
American
Garlic Butter Green Beans, green beans, quick recipe, side dish, vegetable recipe

Pesto Chicken Tortellini and Veggies

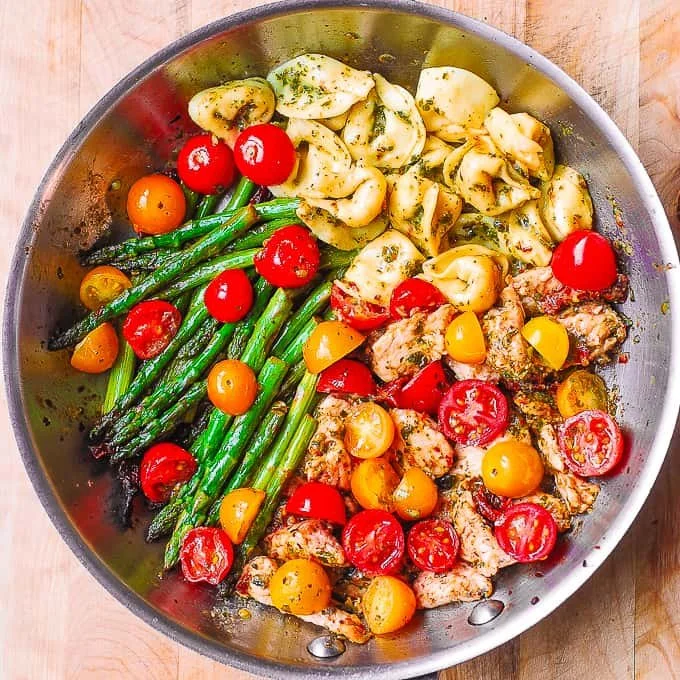
Pesto Chicken Tortellini garnished with fresh vegetables

I love meals that come together fast, taste fresh, and make people smile, and this Pesto Chicken Tortellini and Veggies does just that. It mixes tender chicken, cheesy tortellini, bright basil pesto, and colorful vegetables for a warm, satisfying dish. The flavors feel fresh, the pesto gives a lovely herbal lift, and the veggies add crunch and color, so it looks as good as it tastes. This is a great weeknight dinner, a simple potluck dish, or a quick family meal that gets eaten fast, so get ready to enjoy something cozy and bright.

How to prepare Pesto Chicken Tortellini and Veggies

  1. Cook the tortellini according to package directions, drain, and set aside. Use fresh or frozen cheese tortellini for best texture.
  2. While the pasta cooks, cut chicken into bite size pieces. Season with salt and pepper.
  3. Heat a little oil in a large skillet over medium heat. Add the chicken and cook until browned and cooked through, about 5 to 7 minutes. Remove chicken and set aside.
  4. In the same skillet, add a bit more oil if needed. Sauté chopped onion and minced garlic until soft and fragrant, about 2 minutes.
  5. Add chopped veggies, such as bell peppers, cherry tomatoes, and zucchini. Cook until just tender, about 4 to 5 minutes.
  6. Return the chicken to the skillet. Add the cooked tortellini and a few big spoonfuls of pesto. Toss gently to coat everything. If you like a creamy sauce, stir in a splash of cream or a spoon of cream cheese, and warm through.
  7. Taste and adjust salt, pepper, or more pesto as needed. Garnish with extra basil or a sprinkle of Parmesan cheese. Serve warm.

Pesto Chicken Tortellini and Veggies

Why You’ll Love Pesto Chicken Tortellini and Veggies

  • It is quick to make, perfect for busy weeknights.
  • The pesto adds fresh basil flavor, with garlic and cheese notes that pair well with chicken and pasta.
  • The dish is flexible, so you can use whatever vegetables you have.
  • It is colorful and looks great on the table, so it is a crowd pleaser.

tips for success

  • Use good quality store bought pesto or homemade pesto for best flavor.
  • Do not overcook the tortellini, cook until al dente so it holds shape when tossed.
  • Cut vegetables in similar sizes so they cook evenly.
  • If the sauce seems thick, add a splash of pasta water or cream to loosen it.
  • Keep flavors bright by adding a squeeze of lemon at the end if you want more freshness.

Serving Suggestions

  • Serve with a side salad, like arugula with lemon vinaigrette, to add a peppery contrast.
  • Offer warm crusty bread or garlic bread to soak up extra pesto sauce.
  • Top with extra grated Parmesan and fresh basil for color and taste.
  • For a lighter option, skip the cream and add more veggies for a veggie heavy meal.

Pesto Chicken Tortellini and Veggies

FAQs

Q, Can I use frozen tortellini?

A, Yes, frozen tortellini works great. Cook it directly from frozen according to package instructions.

Q, Can I make this vegetarian?

A, Yes, leave out the chicken and add more vegetables or use cooked chickpeas for protein.

Q, How long does leftovers keep?

A, Store in an airtight container in the fridge for 3 to 4 days. Reheat gently on the stove with a splash of water or cream.

Q, Can I use jarred pesto?

A, Yes, good quality jarred pesto saves time and still gives great flavor.

Q, Is this dish freezer friendly?

A, Cooked tortellini can get soft after freezing, so it is best to freeze only the chicken and vegetables in pesto, then boil fresh tortellini when ready to eat.

Conclusion

If you want a tested, tasty idea for dinner that mixes pasta, pesto, chicken, and veggies, check this version for more tips and a full recipe at Pesto Chicken Tortellini – Chelsea’s Messy Apron. Enjoy making this simple, flavorful meal.

Pesto Chicken Tortellini and Veggies

A quick and vibrant dish combining tender chicken, cheesy tortellini, and colorful vegetables, all tossed in fresh basil pesto for a delightful weeknight meal.

For the Tortellini

  • 12 ounces cheese tortellini (Use fresh or frozen for best texture.)

For the Chicken

  • 1 pound chicken breast (Cut into bite-sized pieces.)
  • 1 teaspoon salt (For seasoning.)
  • 1 teaspoon black pepper (For seasoning.)

For the Vegetables

  • 1 medium onion (Chopped.)
  • 2 cloves garlic (Minced.)
  • 1 cup bell pepper (Chopped.)
  • 1 cup cherry tomatoes (Halved.)
  • 1 medium zucchini (Chopped.)

For the Sauce

  • 1 cup basil pesto (Store-bought or homemade.)
  • 1 splash heavy cream (Optional for a creamier sauce.)
  • 1 tablespoon olive oil (For cooking.)
  • 1 tablespoon lemon juice (Optional for brightness.)
  • 1/2 cup Parmesan cheese (Grated, for garnish.)

Preparation

  1. Cook the tortellini according to package directions, drain, and set aside.
  2. Cut chicken into bite-size pieces and season with salt and pepper.

Cooking

  1. Heat a little oil in a large skillet over medium heat. Add the chicken and cook until browned and cooked through, about 5 to 7 minutes. Remove chicken and set aside.
  2. In the same skillet, add a bit more oil if needed. Sauté chopped onion and minced garlic until soft and fragrant, about 2 minutes.
  3. Add chopped veggies and cook until just tender, about 4 to 5 minutes.
  4. Return the chicken to the skillet. Add the cooked tortellini and pesto. Toss gently to coat. Stir in cream or cream cheese if desired, and warm through.
  5. Taste and adjust salt, pepper, or more pesto as needed. Garnish with extra basil or Parmesan cheese.

Serve with a side salad or warm bread. For a vegetarian option, omit chicken and add more veggies.

Dinner, Main Course
Italian
Comfort Food, One-Pan Dinner, Pesto Chicken Tortellini, Quick Dinner, Weeknight Meal