Honey Garlic Ground Turkey Recipe

Prepare your taste buds for a delightful treat with this Sweet and Savory Honey Garlic Ground Turkey recipe. It combines succulent ground turkey with a luscious honey garlic sauce, creating a mouth-watering dish that is sure to impress. Whether you’re cooking for family or friends, this easy recipe is a crowd-pleaser that balances sweet and savory flavors perfectly. Plus, with just 25 minutes of cooking time, you’ll have a delicious meal ready in no time, leaving everyone wanting more!

How to prepare Honey Garlic Ground Turkey

To make this dish, you’ll need some basic ingredients that you likely already have in your kitchen. The main star is ground turkey, which is lean and versatile. The honey and garlic come together to form a delightful sauce that brings the whole dish to life.

Sweet and Savory Honey Garlic Ground Turkey Recipe in 25 Minutes

Why You’ll Love Sweet and Savory Honey Garlic Ground Turkey

One of the best things about this Sweet and Savory Honey Garlic Ground Turkey recipe is how quick it is to make. In just 25 minutes, you can whip up a flavorful meal that is not only delicious but also healthy. This dish is perfect for weeknight dinners when you don’t have much time to spare. Additionally, the combination of honey and garlic creates a wonderful aroma that fills your kitchen, making it an appealing meal for everyone.

Tips for success

  • Always season your turkey well before cooking to enhance its natural flavor.
  • For extra texture, consider adding some vegetables like bell peppers or broccoli to the dish.
  • If you have leftover turkey, it can easily be stored in the fridge for a quick lunch the next day.

Sweet and Savory Honey Garlic Ground Turkey Recipe in 25 Minutes

Serving Suggestions

Serve the Sweet and Savory Honey Garlic Ground Turkey over a bed of fluffy rice or alongside steamed vegetables. You could also wrap it in lettuce leaves for a fresh and healthy option. For an added twist, try pairing it with crispy air fryer honey garlic salmon bites to elevate your meal even further.

FAQs

Q: Can I use chicken or beef instead of turkey?

A: Yes, you can substitute ground chicken or beef for turkey. Just keep in mind that cooking times may vary slightly.

Q: How can I store leftovers?

A: Store any leftovers in an airtight container in the refrigerator for up to three days.

Q: Is this recipe suitable for meal prep?

A: Absolutely! This dish is great for meal prepping because it holds up well and reheats nicely.

With these tips and suggestions, you’re all set to make the Sweet and Savory Honey Garlic Ground Turkey a new favorite in your home. Enjoy the delightful flavors and the compliments that come your way!

Sweet and Savory Honey Garlic Ground Turkey

A quick and delicious recipe combining ground turkey with a sweet and savory honey garlic sauce, perfect for busy weeknight dinners.

Main Ingredients

  • 1 lb ground turkey (Lean and versatile meat.)
  • 1/3 cup honey (Provides sweetness.)
  • 3 cloves garlic, minced (Adds flavor to the sauce.)

Optional Ingredients

  • 1 bell pepper, diced bell pepper, diced (For added texture.)
  • 1 cup broccoli florets (For added nutrition.)

Preparation

  1. In a skillet over medium heat, cook the ground turkey, breaking it apart until browned and cooked through.
  2. Add minced garlic and continue to cook for 1-2 minutes until fragrant.
  3. Stir in honey and mix well to coat the turkey.
  4. If using, add diced bell pepper and broccoli, cooking until they are tender.

Serving

  1. Serve over a bed of rice, alongside steamed vegetables, or in lettuce wraps.

For extra flavor, season the turkey well before cooking. Leftovers can be stored in an airtight container in the fridge for up to three days.

Dinner, Main Course
American
Easy Dinner, Ground Turkey, Healthy Recipe, Honey Garlic, Quick Meal

Creamy Garlic Chicken Recipe

Making Creamy Garlic Chicken is as easy as it is delicious. Start by gathering your ingredients: chicken, garlic, cream, and some seasonings. You will marinate the chicken to ensure it’s packed with flavor, then sauté it until golden brown. The magic happens when you add in the garlic and creamy sauce to create a dish that’s both comforting and satisfying.

Creamy Garlic Chicken Recipe | Simple Home Edit

Why You’ll Love Creamy Garlic Chicken

This dish is a crowd-pleaser for sure! The creamy garlic sauce pairs beautifully with tender chicken, creating a rich flavor that everyone will love. It’s perfect for family dinners or a date night at home. Plus, the aromas wafting through your kitchen as it cooks will have everyone asking for seconds. It’s that good! You’ll feel like a gourmet chef, even if you’re just starting out.

Tips for success

  1. Use Fresh Garlic: Fresh garlic delivers a delicious flavor that’s hard to beat.
  2. Don’t Overcook the Chicken: Keep an eye on the chicken to prevent it from drying out.
  3. Adjust Seasoning to Taste: Everyone’s taste is different, so feel free to add more salt or pepper as you cook.

Creamy Garlic Chicken Recipe | Simple Home Edit

Serving Suggestions

This Creamy Garlic Chicken pairs wonderfully with fluffy rice or buttery mashed potatoes. You can also serve it alongside steamed vegetables for a complete meal. A side salad topped with light vinaigrette helps balance out the richness of the dish, making it even more delightful.

FAQs

  1. Can I use chicken thighs instead of breasts? Yes, chicken thighs work great and they’re often juicier too.
  2. What if I can’t find heavy cream? You can substitute with half-and-half or a combination of milk and butter for a lighter version.
  3. Can I make this recipe in advance? Absolutely, just reheat it gently on the stovetop or in the microwave, adding a splash of milk if needed.

Gather your ingredients and get ready to make a dish that not only warms your heart but also fills your home with its delightful scent. Enjoy the process, and happy cooking!

Creamy Garlic Chicken

A comforting dish of tender chicken in a rich creamy garlic sauce that’s perfect for family dinners or date nights.

Main Ingredients

  • 4 pieces chicken breasts (Can substitute with chicken thighs for juiciness.)
  • 4 cloves garlic (Use fresh garlic for the best flavor.)
  • 1 cup heavy cream (Can substitute with half-and-half or a combination of milk and butter.)
  • to taste salt (Adjust seasoning as needed.)
  • to taste black pepper (Adjust seasoning as needed.)

Preparation

  1. Marinate the chicken breasts with salt, pepper, and minced garlic for at least 15 minutes.

Cooking

  1. In a skillet, sauté the marinated chicken over medium heat until golden brown on both sides.
  2. Reduce the heat and add heavy cream, stirring to combine. Allow to simmer.
  3. Cook until the sauce has thickened and the chicken is cooked through.

This dish pairs well with rice, mashed potatoes, or steamed vegetables. Serve with a side salad for a complete meal.

Dinner, Main Course
American
Chicken Recipe, Comfort Food, Creamy Garlic Chicken, Dinner Recipe, easy chicken dish

Balsamic Baked Chicken Breast with Mozzarella Cheese

If you’re looking for a delicious, easy-to-make meal, Balsamic Baked Chicken Breast with Mozzarella Cheese is sure to impress your family or guests. This dish combines tender chicken and rich mozzarella with the tangy goodness of balsamic vinegar, creating a flavor that’s hard to resist. Perfect for both busy weeknights and special occasions, it’s a crowd-pleaser that will leave everyone wanting more. Plus, don’t be surprised if people start asking you for the recipe!

How to prepare Balsamic Baked Chicken Breast with Mozzarella Cheese.

To prepare this delightful dish, start by preheating your oven. Next, season the chicken breasts with salt and pepper, then place them in a baking dish. Drizzle balsamic vinegar over the chicken, allowing it to soak in for a few minutes. Top each breast with sliced mozzarella cheese and sprinkle with fresh basil for added flavor. Bake until the chicken is cooked through and the cheese is melted and bubbly.

Balsamic Baked Chicken Breast with Mozzarella Cheese

Why You’ll Love Balsamic Baked Chicken Breast with Mozzarella Cheese

One reason you’ll love this dish is its simplicity. It takes just a few ingredients and minimal prep time, making it perfect for anyone, whether you’re a novice in the kitchen or a seasoned cook. The delicious combination of flavors from the balsamic vinegar and melty cheese ensures you won’t be left with leftovers, as this dish tends to disappear quickly. If you’re also looking for a quick chicken recipe, you might enjoy making air fryer chicken breasts, which are equally delightful and easy!

Tips for success

To ensure that your chicken turns out perfectly every time, consider a few tips. First, make sure to pound the chicken breasts to an even thickness, which helps them cook more uniformly. Second, marinate the chicken in the balsamic vinegar for a while before cooking, if you have the time—this allows the flavors to really soak into the meat. Lastly, keep an eye on your chicken in the oven; overcooking it can lead to dry meat, so use a meat thermometer for the best results.

Balsamic Baked Chicken Breast with Mozzarella Cheese

Serving Suggestions

This Balsamic Baked Chicken Breast pairs wonderfully with a side of roasted vegetables or a fresh salad. You can also serve it over a bed of seasoned rice or pasta to soak up the delicious balsamic sauce. For a complete experience, consider pairing it with a glass of white wine.

FAQs

  1. Can I use chicken thighs instead of breasts?
  2. Absolutely! Chicken thighs can add extra flavor and juiciness to the dish.
  3. How can I store leftovers?
  4. Store any leftovers in an airtight container in the refrigerator for up to three days. Reheat before serving.
  5. What can I serve with this chicken?
  6. It goes well with mashed potatoes, steamed vegetables, or a light pasta dish. Don’t forget to check out our recipe for Pineapple BBQ Baked Chicken Breast for another tasty option!

Balsamic Baked Chicken Breast with Mozzarella Cheese

This easy-to-make Balsamic Baked Chicken Breast with Mozzarella Cheese combines tender chicken, rich mozzarella, and tangy balsamic vinegar for a delicious crowd-pleaser.

Main Ingredients

  • 4 pieces chicken breasts (Pound to an even thickness for uniform cooking.)
  • 1 cup balsamic vinegar (Marinate the chicken for added flavor, if time allows.)
  • 8 slices mozzarella cheese (Fresh mozzarella is preferred for a rich flavor.)
  • to taste salt (Season chicken according to your preference.)
  • to taste black pepper (Freshly ground black pepper enhances flavor.)
  • to taste fresh basil (Use as a topping for added freshness.)

Preparation

  1. Preheat your oven to 375°F (190°C).
  2. Season the chicken breasts with salt and pepper.
  3. Place the seasoned chicken breasts in a baking dish.
  4. Drizzle balsamic vinegar over the chicken and let it soak in for a few minutes.
  5. Top each chicken breast with sliced mozzarella cheese and sprinkle with fresh basil.

Cooking

  1. Bake in the preheated oven until the chicken is cooked through and the cheese is melted and bubbly, about 25 minutes.

Serve with roasted vegetables, salad, over rice or pasta, and pair with white wine. For best results, use a meat thermometer to avoid overcooking.

Dinner, Main Course
Italian
Baked Chicken Breast, Balsamic Chicken, easy chicken recipe, Mozzarella Chicken, Quick Dinner

Honey Garlic Turkey Meatballs

There’s something about the combination of sweet and savory that makes taste buds dance, and that’s exactly what you’ll find in these tasty Honey Garlic Turkey Meatballs. They are juicy, tender, and packed with flavor, making them a hit at family dinners, potlucks, or even just a cozy night at home. It’s hard to resist the sticky, sweet glaze that coats each meatball, and they pair wonderfully with rice, noodles, or even on their own as a snack. Gather your ingredients, because this crowd-pleaser is about to become your new favorite recipe!

Honey Garlic Turkey Meatballs

How to prepare Honey Garlic Turkey Meatballs

To make these delicious meatballs, start by mixing ground turkey with breadcrumbs, garlic, onion, salt, and pepper in a large bowl. Form the mixture into small balls and place them on a baking sheet. Bake them in a preheated oven until they are cooked through and golden brown. While the meatballs are baking, whip up a sweet and tangy glaze made from honey, soy sauce, and garlic, then pour it over the warm meatballs to enhance their flavor.

Honey Garlic Turkey Meatballs

Why You’ll Love Honey Garlic Turkey Meatballs

These Honey Garlic Turkey Meatballs are super easy to prepare and can be served in many ways. Whether you want to have them as an appetizer, toss them in a salad, or serve them over rice, the options are endless. Plus, with the delicious combination of honey and garlic, every bite will have you coming back for more. They are also a great way to use lean turkey meat, making your meal a bit healthier while still satisfying your cravings for something tasty.

Tips for success

To ensure your Honey Garlic Turkey Meatballs turn out perfectly, here are a few simple tips:

  • Use fresh garlic for the best flavor.
  • Don’t overmix the meat when incorporating the ingredients, as this can lead to tough meatballs.
  • Always check that the meatballs are cooked through by using a meat thermometer; they should reach an internal temperature of 165°F.
  • Feel free to adjust the sweetness of the glaze to your preference; add more honey if you like it sweeter, or more soy sauce for a saltier taste.

Serving Suggestions

These meatballs are versatile and can be served in numerous ways. You can enjoy them over a bed of fluffy rice, toss them with noodles, or even use them to make a hearty sub sandwich. They also make a great party appetizer served with toothpicks! If you need more ideas, consider trying them with a side of steamed vegetables for a healthy touch.

FAQs

1. Can I make Honey Garlic Turkey Meatballs ahead of time?

Yes, you can prepare the meatballs in advance and store them in the refrigerator until you’re ready to bake them. Just remember to add the glaze once they are cooked.

2. Are these meatballs freezable?

Absolutely! You can freeze the raw meatballs or the cooked ones. Just make sure to store them in airtight containers.

3. Can I use ground chicken instead of turkey?

Yes, ground chicken works well as a substitute and will result in delicious meatballs too.

So, gather your ingredients and get ready to whip up a batch of these delightful Honey Garlic Turkey Meatballs. They are not just easy to make, but also perfect for sharing… or not! Enjoy your cooking adventure!

Honey Garlic Turkey Meatballs

Juicy and tender meatballs coated in a sweet and tangy honey-garlic glaze, perfect for family dinners or as a versatile snack.

Meatball Mixture

  • 1 lb ground turkey (Can substitute with ground chicken)
  • 1/2 cup breadcrumbs (Use fresh or dried)
  • 2 cloves garlic, minced (Use fresh for best flavor)
  • 1/4 cup onion, finely chopped
  • 1 tsp salt
  • 1/2 tsp black pepper

Glaze

  • 1/3 cup honey (Adjust to preferred sweetness)
  • 1/4 cup soy sauce (Use low-sodium for a healthier option)
  • 2 cloves garlic, minced

Preparation

  1. Preheat your oven to 400°F (200°C).
  2. In a large bowl, mix together ground turkey, breadcrumbs, minced garlic, chopped onion, salt, and black pepper until just combined.
  3. Form the mixture into small meatballs and place them on a baking sheet.

Baking

  1. Bake the meatballs in the preheated oven for about 25 minutes or until cooked through and golden brown.

Glazing

  1. While the meatballs are baking, prepare the glaze by mixing honey, soy sauce, and minced garlic in a bowl.
  2. Once the meatballs are done, pour the warm glaze over them to coat.

To ensure perfect meatballs, do not overmix the meat and check for doneness with a meat thermometer (internal temperature of 165°F).

Appetizer, Main Course
American
Appetizer Recipes, Family Dinner, Honey Garlic Turkey Meatballs, meatballs, Turkey Recipes

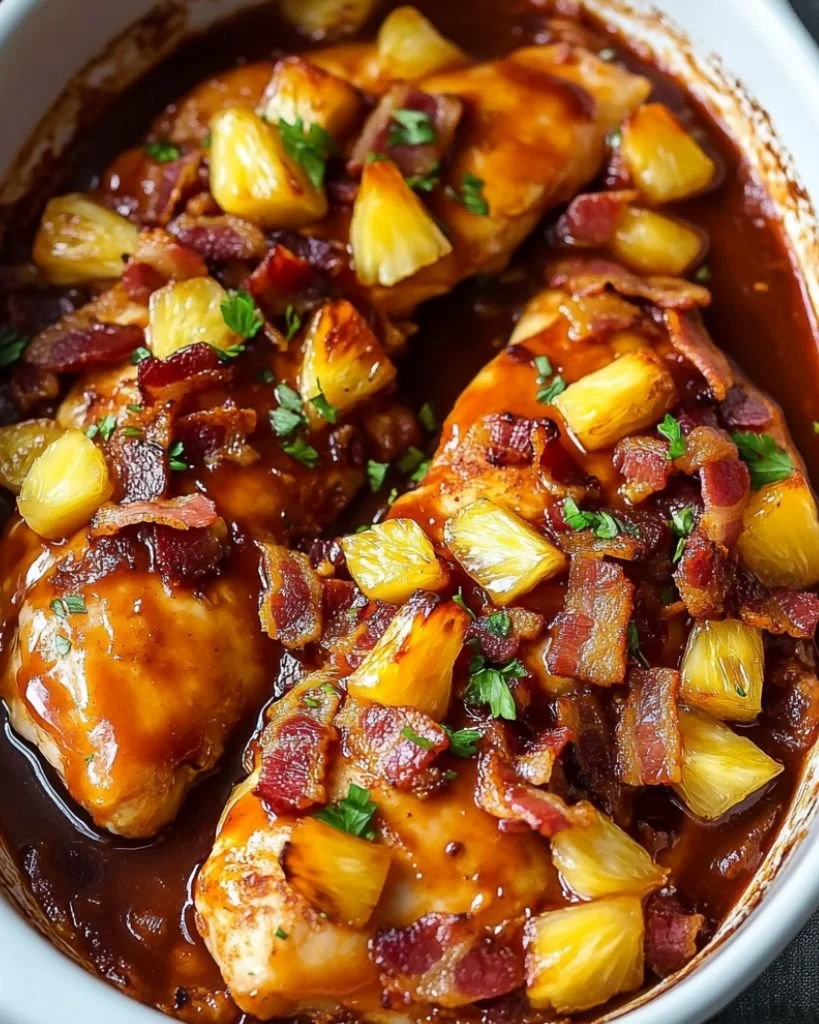
Pineapple BBQ Baked Chicken Breast

Pineapple BBQ Baked Chicken Breast on a plate with pineapple slices

Pineapple BBQ Baked Chicken Breast is a delightful dish that bursts with flavor, balancing the sweetness of pineapple with the smokiness of barbecue sauce. It’s an effortless recipe that you can whip up for a family dinner or serve at gatherings, and it’s sure to impress everyone. The juicy chicken breasts cook perfectly, absorbing all the delicious marinade. Imagine the aroma wafting through your kitchen as it bakes in the oven – it’s simply mouthwatering! This dish not only tastes amazing but also looks vibrant on the plate. Let’s dive into this crowd-pleaser recipe that will have everyone asking for seconds!

Pineapple BBQ Baked Chicken Breast

Why You’ll Love Pineapple BBQ Baked Chicken Breast

You’ll find several reasons to love this dish. First, it’s incredibly easy to make, with minimal ingredients and preparation time. Second, the combination of pineapple and barbecue sauce creates a sweet and tangy flavor that makes your taste buds dance with joy. Plus, it’s a great way to enjoy lean protein while still indulging in something tasty. Whether you’re feeding picky eaters or adventurous palates, this recipe is a fantastic option for everyone. And don’t forget how convenient it is; just pop it in the oven and let it cook while you prepare your favorite sides!

Tips for success

For perfect Pineapple BBQ Baked Chicken Breast, start with fresh, boneless chicken breasts to ensure they stay juicy while baking. Marinating is key, so let the chicken soak in the pineapple BBQ sauce for at least an hour, or overnight if you have time. This step enhances the flavor, making every bite succulent. Additionally, avoid overcooking by using a meat thermometer, ensuring your chicken reaches an internal temperature of 165°F. Lastly, serve it with some grilled vegetables or rice for a complete meal!

Pineapple BBQ Baked Chicken Breast

Serving Suggestions

Serve your Pineapple BBQ Baked Chicken Breast with fragrant rice or a hearty quinoa salad. You can also pair it with steamed vegetables like broccoli or green beans for a healthy touch. For a more casual meal, consider making a tropical coleslaw to contrast the savory chicken, or even create delicious sandwiches using the leftovers! The versatility of this dish makes it a wonderful addition to any meal plan.

FAQs

What is the best way to store leftovers?

Store leftovers in an airtight container in the refrigerator. They will stay fresh for up to three days.

Can I use chicken thighs instead of breasts?

Yes, chicken thighs work well too! They may need a little extra time to cook, so keep an eye on them.

What dips or sauces go well with this dish?

A refreshing yogurt dressing or ranch dip can complement the flavors beautifully. If you want more BBQ goodness, consider adding some extra barbecue sauce on the side!

Don’t wait too long; gather your ingredients and start creating this delightful Pineapple BBQ Baked Chicken Breast today!

Pineapple BBQ Baked Chicken Breast

A delightful dish that balances the sweetness of pineapple with the smokiness of barbecue sauce, perfect for family dinners or gatherings.

For the Chicken

  • 4 pieces boneless chicken breasts (Use fresh chicken for best results.)

For the Marinade

  • 1 cup pineapple BBQ sauce (Ensure it’s a quality sauce for the best flavor.)

Preparation

  1. Preheat your oven to 375°F (190°C).
  2. In a bowl, combine the boneless chicken breasts with the pineapple BBQ sauce, ensuring they are fully coated.
  3. Allow the chicken to marinate for at least 1 hour, or overnight for more flavor.

Cooking

  1. Place the marinated chicken breasts in a baking dish.
  2. Bake for 35-45 minutes, or until the internal temperature reaches 165°F (74°C).

Serving

  1. Let the chicken rest for a few minutes before slicing.
  2. Serve with fragrant rice, quinoa salad, or steamed vegetables.

For best results, avoid overcooking the chicken by using a meat thermometer. Leftovers can be stored in an airtight container in the refrigerator for up to three days.

Dinner, Main Course
American
Baked Chicken, easy chicken recipe, Family Dinner, marinated chicken, Pineapple BBQ Chicken

Sheet Pan Chicken Pitas

Sheet Pan Chicken Pitas with fresh vegetables and sauce

Who doesn’t love a meal that comes together quickly and satisfies everyone at the table? Sheet Pan Chicken Pitas are just that kind of dish. This delightful recipe features juicy chicken, vibrant veggies, and warm pita bread. If you are hosting friends or enjoying a cozy dinner at home, you will find this recipe pleases the taste buds of both adults and kids.

Imagine the aroma of herbs and spices wafting through your kitchen, as tender chicken roasts alongside colorful bell peppers and onions. Each bite, wrapped in soft pita bread, brings a burst of flavor that’s simply irresistible. If you’re looking for a tasty and fulfilling meal, this crowd-pleaser might just become a family favorite.

How to prepare Sheet Pan Chicken Pitas

First, gather your ingredients:

  • 1 pound of chicken breast, cut into strips
  • 1 bell pepper, sliced
  • 1 onion, sliced
  • 2 tablespoons of olive oil
  • 2 teaspoons of paprika
  • 1 teaspoon of garlic powder
  • Salt and pepper to taste
  • Pita bread for serving
  • Optional toppings: lettuce, tomatoes, tzatziki sauce, or feta cheese

Begin by preheating your oven to 400°F (200°C). On a large sheet pan, toss the chicken, bell peppers, and onions with olive oil, paprika, garlic powder, salt, and pepper. Spread everything out in an even layer and roast for about 20 minutes, until the chicken is cooked through and the veggies are tender.

Once done, transfer the mixture into warm pita bread, and add any additional toppings you prefer for an even tastier experience. Serve immediately, and enjoy every delicious bite!

Sheet Pan Chicken Pitas

Why You’ll Love Sheet Pan Chicken Pitas

This recipe shines for many reasons. First, it’s incredibly easy to prepare, making it a perfect choice for busy weeknights. The one-pan aspect means less cleanup, which is always a bonus. Plus, you can customize the veggies and toppings according to what you have on hand or what you prefer. Need a little crunch? Add some fresh lettuce. Want more flavor? Try some tzatziki sauce.

Everyone loves a meal that is both good for the taste buds and the belly. By using lean protein and fresh vegetables, you are also ensuring a healthy meal option.

A fun fact: Sheet Pan Chicken Pitas are not only delicious but also ideal for meal prep. If you’re planning ahead, simply store the chicken and veggies in the fridge, and fill the pitas just before serving.

Tips for success

  1. Even Cooking: Cut the chicken and veggies into similar sizes, so they cook evenly.
  2. Marinate if Possible: For enhanced flavor, let the chicken marinate in the spices and olive oil for an hour before cooking.
  3. Adjust Seasonings: Feel free to play with the spices according to your taste preferences. Add cayenne for heat or lemon juice for brightness.

Serving Suggestions

Serve your Sheet Pan Chicken Pitas with a side of Greek salad for a refreshing crunch. You can also add some homemade fries or roasted potatoes for a filling meal. If you love dipping, consider having some hummus or tzatziki sauce as a tasty side.

FAQs

  1. Can I use other meats for this recipe? Yes, you can easily substitute chicken with turkey or even tofu for a vegetarian option.
  2. How long can leftovers be stored? Leftover chicken and veggies can be stored in an airtight container in the fridge for up to three days.
  3. Can I freeze these pitas? You can freeze the cooked chicken and veggies, and then reheat them when ready to serve. Fill the fresh pitas before eating for the best taste.

Ready to make this quick and delicious meal for yourself? Try out the Sheet Pan Chicken Pitas recipe and enjoy every moment in the kitchen!

Sheet Pan Chicken Pitas

A quick and satisfying meal featuring juicy chicken, vibrant veggies, and warm pita bread, perfect for every dinner table.

Main Ingredients

  • 1 pound chicken breast, cut into strips (Lean protein for a healthy meal)
  • 1 medium bell pepper, sliced (Adds color and flavor)
  • 1 medium onion, sliced (Enhances sweetness when roasted)
  • 2 tablespoons olive oil (For roasting)
  • 2 teaspoons paprika (Adds a smoky flavor)
  • 1 teaspoon garlic powder (For added depth of flavor)
  • to taste Salt and pepper (Season to preference)
  • 4 pieces Pita bread for serving (Serve warm)
  • optional toppings: lettuce, tomatoes, tzatziki sauce, or feta cheese (Customize to your liking)

Preparation

  1. Preheat your oven to 400°F (200°C).
  2. On a large sheet pan, toss the chicken, bell peppers, and onions with olive oil, paprika, garlic powder, salt, and pepper.
  3. Spread everything out in an even layer.

Cooking

  1. Roast for about 20 minutes, until the chicken is cooked through and the veggies are tender.
  2. Transfer the mixture into warm pita bread.
  3. Add any additional toppings you prefer and serve immediately.

For best results, cut the chicken and veggies into similar sizes for even cooking. Consider marinating the chicken in the spices and olive oil for enhanced flavor.

Dinner, Main Course
Mediterranean
Chicken Pitas, Family Friendly, Healthy Dinner, Quick Meal, Sheet Pan Dinner

Mexican White Trash Casserole

Delicious Mexican White Trash Casserole topped with cheese and spices.

Mexican White Trash Casserole is a delightful dish that brings together the fun and excitement of a potluck with the flavors of Mexican cuisine. This casserole is perfect for gatherings or family dinners, as it is easy to prepare and sure to please even the pickiest of eaters. With creamy textures and savory spices, this recipe is a true comfort food that warms the soul. Once you try it, you’ll understand why it’s become a favorite for many. Grab your ingredients and let’s make some magic happen in the kitchen!

How to prepare Mexican White Trash Casserole

  1. Ingredients:
  • 1 lb ground beef
  • 1 can (15 oz) black beans, drained and rinsed
  • 1 can (15 oz) corn, drained
  • 1 can (10 oz) diced tomatoes with green chilies
  • 1 packet taco seasoning
  • 2 cups cooked rice
  • 1 cup shredded cheese (like cheddar or Mexican blend)
  • 1 cup sour cream
  • 1 can (10 oz) cream of mushroom soup
  • Tortilla chips, for topping
  1. Directions:
  2. Preheat your oven to 350°F (175°C).
  3. In a large skillet, cook the ground beef over medium heat until it’s browned. Drain excess fat.
  4. Stir in the taco seasoning, black beans, corn, diced tomatoes, and cooked rice. Mix well.
  5. In a separate bowl, combine the sour cream and cream of mushroom soup until smooth.
  6. In a greased 9×13 inch baking dish, spread half of the beef mixture on the bottom.
  7. Layer with half of the sour cream mixture and sprinkle with half of the shredded cheese.
  8. Add the remaining beef mixture, followed by the rest of the sour cream mixture and cheese.
  9. Top with crumbled tortilla chips for a crunchy finish.
  10. Bake for 25-30 minutes, until hot and bubbly. Enjoy!

Mexican White Trash Casserole

Why You’ll Love Mexican White Trash Casserole

This casserole has it all—delicious flavors, satisfying textures, and it is super simple to put together. The combination of creamy and crispy elements makes each bite enjoyable. It is perfect for family gatherings or even a cozy night in. Plus, it can easily feed a crowd, making it a great potluck dish. Each ingredient works together to create a savory delight that will leave everyone asking for seconds.

Tips for success

  • Use leftover rice to save time; it adds flavor and helps the casserole come together quickly.
  • Feel free to customize the recipe with your favorite ingredients, like extra veggies or different meats.
  • For added heat, toss in some jalapeños or use a spicier taco seasoning.

Serving Suggestions

Mexican White Trash Casserole goes well with a fresh salad or can be paired with some homemade guacamole and salsa. Serve with warm tortillas for scooping, and don’t forget a dollop of sour cream on top for extra creaminess. This dish is also fantastic for leftovers, making it great for meal prep throughout the week!

Mexican White Trash Casserole

FAQs

Can I make this casserole ahead of time?

Yes, you can prepare the layers a day in advance and store them in the fridge. Just pop it in the oven when you’re ready to cook.

Can I freeze leftovers?

Absolutely! Just make sure to store them in an airtight container. Reheat in the oven or microwave when you are ready to enjoy them again.

What can I substitute for cream of mushroom soup?

You can use a homemade version of cream of mushroom soup or substitute it with cream of chicken soup if you prefer a different flavor.

Mexican White Trash Casserole is not just a meal, it’s a celebration of flavors and a nod to good times with family and friends. With its ease of preparation and comforting taste, this recipe will quickly become a staple in your home. If you want to explore more variations or tips, check out this Mexican White Trash Casserole Recipe for additional inspiration! Happy cooking!

Mexican White Trash Casserole

A delightful and easy-to-make casserole combining the flavors of Mexican cuisine, perfect for gatherings and family dinners.

Main ingredients

  • 1 lb ground beef (Use lean ground beef for less grease.)
  • 1 can (15 oz) black beans, drained and rinsed (Canned beans save time.)
  • 1 can (15 oz) corn, drained (Sweet corn adds flavor.)
  • 1 can (10 oz) diced tomatoes with green chilies (Adds zest and moisture.)
  • 1 packet taco seasoning (Can adjust amount for spice preference.)
  • 2 cups cooked rice (Leftover rice works well.)
  • 1 cup shredded cheese (like cheddar or Mexican blend) (Choose your favorite cheese blend.)
  • 1 cup sour cream (For creaminess.)
  • 1 can (10 oz) cream of mushroom soup (Can substitute with cream of chicken soup.)
  • to taste Tortilla chips, for topping (Provides a crunchy finish.)

Preparation

  1. Preheat your oven to 350°F (175°C).
  2. In a large skillet, cook the ground beef over medium heat until it’s browned. Drain excess fat.
  3. Stir in the taco seasoning, black beans, corn, diced tomatoes, and cooked rice. Mix well.
  4. In a separate bowl, combine the sour cream and cream of mushroom soup until smooth.

Layering

  1. In a greased 9×13 inch baking dish, spread half of the beef mixture on the bottom.
  2. Layer with half of the sour cream mixture and sprinkle with half of the shredded cheese.
  3. Add the remaining beef mixture, followed by the rest of the sour cream mixture and cheese.
  4. Top with crumbled tortilla chips for a crunchy finish.

Baking

  1. Bake for 25-30 minutes, until hot and bubbly.
  2. Enjoy!

Use leftover rice to save time. Customize with your favorite ingredients. For added heat, toss in jalapeños or use spicier taco seasoning. Serve with fresh salad, guacamole, and salsa.

Casserole, Main Course
Mexican
Casserole, Comfort Food, Easy Dinner, Mexican White Trash Casserole, Potluck Recipe

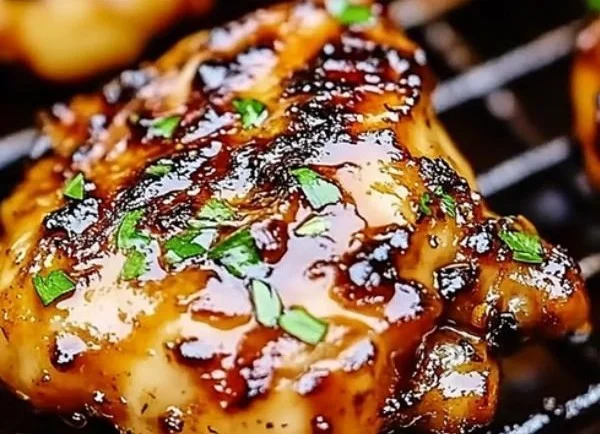
Honey Garlic Chicken Thighs

Honey Garlic Chicken Thighs glazed with savory honey and garlic sauce

Warm, golden chicken thighs glazed in a sweet, garlicky sauce feel like a hug on a plate. Honey Garlic Chicken Thighs are simple to make, full of flavor, and perfect for busy weeknights or a cozy weekend meal. The skin gets a little crisp, the sauce turns sticky, and every bite tastes rich and comforting. If you like a faster, air-fryer version, try the air fryer honey butter garlic chicken tenders for a similar sweet, garlicky bite.

How to prepare Honey Garlic Chicken Thighs

  1. Preheat oven to 400°F, pat chicken thighs dry, and season with salt and pepper.
  2. In a bowl, mix 1/3 cup honey, 3 tablespoons soy sauce, 3 cloves minced garlic, 1 tablespoon rice vinegar or lemon juice, 1 tablespoon olive oil, and a pinch of red pepper flakes.
  3. Heat a skillet over medium-high heat, add a little oil, and brown the thighs skin-side down 3 to 4 minutes until golden. Flip and brown the other side 2 minutes.
  4. Pour the honey garlic sauce over the thighs. Let it bubble for 1 minute, then transfer skillet to oven, or move thighs and sauce to a baking dish.
  5. Bake 20 to 25 minutes, spooning the sauce over the chicken once or twice, until the thighs reach 165°F and the sauce is sticky.
  6. If the sauce needs thickening, pour out a little, simmer on the stove until syrupy, and spoon back over the chicken. Rest 5 minutes before serving.

Honey Garlic Chicken Thighs

Why You’ll Love Honey Garlic Chicken Thighs

  • The sauce is sweet and garlicky, and it sticks to the chicken for big flavor in every bite.
  • Thighs stay moist and forgiving, so they work well for cooks of any skill level.
  • It makes a quick, tasty weeknight dinner, but it is nice enough for guests.
  • You can bake, pan-sear then roast, or cook in an air fryer for a crisp finish.

Tips for success

  • Pat the chicken dry so the skin browns well, do not skip this.
  • Use bone-in, skin-on thighs for best taste and juiciness.
  • Taste the sauce before you bake, add a bit more soy or vinegar if it needs balance.
  • Watch the oven in the last minutes to avoid burning the honey.
  • Let the chicken rest a few minutes so juices settle and the sauce sticks.

Serving Suggestions

  • Serve with steamed rice or mashed potatoes to soak up the sauce.
  • Add steamed broccoli, green beans, or a simple salad on the side for color.
  • Garnish with chopped green onions and sesame seeds for a bright finish.
  • Leftovers make great sandwiches or salads the next day.

Honey Garlic Chicken Thighs

FAQs

Q: Can I use chicken breasts instead of thighs?

A: Yes, but bake a little less time and watch for dryness. Thighs stay juicier.

Q: How do I make the sauce less sweet?

A: Add more soy sauce or a splash of vinegar, and taste as you go.

Q: Can I make this ahead and reheat?

A: You can cook ahead, cool, and store in the fridge. Reheat gently in the oven or on the stove, and spoon fresh sauce over it.

Q: Is there a gluten-free option?

A: Use tamari or a gluten-free soy sauce to keep the flavor but avoid gluten.

Conclusion

If you want another trusted version of this classic, check the detailed Honey Garlic Chicken Thighs Recipe – Allrecipes for tips and variations.

Honey Garlic Chicken Thighs

Warm, golden chicken thighs glazed in a sweet, garlicky sauce are a comforting dish that’s perfect for busy weeknights or cozy weekend meals.

Chicken Thighs

  • 4 pieces bone-in, skin-on chicken thighs (For best taste and juiciness.)

Honey Garlic Sauce

  • 1/3 cup honey (Sweet base for the sauce.)
  • 3 tablespoons soy sauce (Can substitute with tamari for gluten-free.)
  • 3 cloves minced garlic
  • 1 tablespoon rice vinegar or lemon juice
  • 1 tablespoon olive oil (For browning the chicken.)
  • a pinch red pepper flakes (For a little heat.)

Serving Suggestions

  • Steamed rice or mashed potatoes (To soak up the sauce.)
  • Steamed broccoli or green beans (For color and nutrition.)
  • Chopped green onions and sesame seeds (For garnish.)

Preparation

  1. Preheat oven to 400°F (200°C).
  2. Pat chicken thighs dry, and season with salt and pepper.
  3. In a bowl, mix honey, soy sauce, minced garlic, rice vinegar or lemon juice, olive oil, and red pepper flakes.

Cooking

  1. Heat a skillet over medium-high heat, add a little oil, and brown the thighs skin-side down for 3 to 4 minutes until golden.
  2. Flip and brown the other side for 2 minutes.
  3. Pour the honey garlic sauce over the thighs, let it bubble for 1 minute.
  4. Transfer skillet to oven or move thighs and sauce to a baking dish.
  5. Bake for 20 to 25 minutes, spooning the sauce over the chicken once or twice, until thighs reach 165°F (74°C) and the sauce is sticky.
  6. If sauce needs thickening, pour out a little, simmer on the stove until syrupy, and spoon back over the chicken.
  7. Rest for 5 minutes before serving.

Pat the chicken dry to ensure crispy skin. Taste the sauce before baking to adjust the flavor balance. Watch the oven last minutes to avoid burning the honey. Let chicken rest for juices to settle.

Dinner, Main Course
American
Baked Chicken Thighs, Chicken Thigh Recipe, Comfort Food, Easy Weeknight Dinner, Honey Garlic Chicken

Lazy Lasagna (Cheesy Baked Ravioli)

Lazy Lasagna with cheesy baked ravioli topped with marinara sauce and melted cheese

This Lazy Baked Frozen Ravioli Lasagna is a simple, no-fuss dinner that’s perfect for busy nights. Made with frozen cheese ravioli, pasta sauce, and mozzarella, it comes together quickly and turns into a tasty meal everyone at the table will enjoy, good for busy weeknights or when you want cozy food without long prep. If you like simple baked dishes, you might also enjoy a baked apple fritters recipe that is just as easy to make. Get ready to bake, eat, and smile, you will want to make this again and again.

How to prepare Lazy Lasagna Cheesy Baked Ravioli

Ingredients

  • 1 pound frozen cheese ravioli, not cooked
  • 3 cups marinara sauce, store bought or homemade
  • 2 cups shredded mozzarella cheese
  • 1/2 cup grated Parmesan cheese
  • 1 teaspoon dried Italian seasoning or a mix of oregano and basil
  • Salt and pepper to taste
  • Fresh basil or parsley, optional for garnish

Directions

  1. Preheat your oven to 375°F, and grease a 9×13 inch baking dish with a little oil or nonstick spray.
  2. Spread 1 cup of marinara sauce on the bottom of the dish to stop the ravioli from sticking.
  3. Place a single layer of frozen ravioli on the sauce. Try to keep them in one even layer so they cook the same.
  4. Spoon another cup of sauce over the ravioli, spread a third of the mozzarella on top, and sprinkle a little Parmesan and some Italian seasoning.
  5. Add a second layer of ravioli, pour the remaining sauce over them, and top with the rest of the mozzarella and Parmesan.
  6. Cover the dish tightly with foil and bake for 30 minutes. Then remove the foil and bake 10 to 15 more minutes, until the cheese is bubbly and slightly golden.
  7. Let the dish rest for 5 minutes before serving, then garnish with fresh basil or parsley if you like.

Lazy Lasagna (Cheesy Baked Ravioli)

Why You’ll Love Lazy Lasagna Cheesy Baked Ravioli

  • It is fast, you skip boiling noodles and layering ricotta, so you save time.
  • It is cheesy and comforting, with a crisp top and soft ravioli inside.
  • It uses simple ingredients you likely have at home, so it is easy to pull together.
  • It feeds a crowd and reheats well, so it is great for leftovers.

Tips for success

  • Use a good marinara sauce for better flavor, or add a splash of red wine to your sauce for depth.
  • If your ravioli are large or extra thick, add 5 to 10 minutes to covered bake time.
  • Do not skip the rest time, it helps the sauce settle and makes serving cleaner.
  • For a richer bake, stir 1 cup ricotta with an egg and dollop between layers.
  • If you like more herbs, add fresh chopped basil into the sauce before baking.

Serving Suggestions

  • Serve with a simple green salad and a light vinaigrette for balance.
  • Offer garlic bread or crusty rolls to mop up the sauce.
  • Add a side of steamed vegetables, like broccoli or green beans, for color and nutrients.
  • Finish with a small scoop of lemon sorbet or a simple fruit salad for dessert.

Lazy Lasagna (Cheesy Baked Ravioli)

FAQs

Q, Can I use fresh ravioli instead of frozen? A, Yes, fresh ravioli will cook faster. Check after 15 to 20 minutes covered, then finish uncovered until cheese is bubbly.

Q, Can I make this ahead and bake later? A, Yes, assemble the dish, cover, and refrigerate for up to 24 hours. Add 10 to 15 minutes to the baking time if cold from the fridge.

Q, Is it okay to use a different cheese? A, Yes, you can swap part of the mozzarella for provolone, fontina, or a bit of smoked cheese for flavor.

Q, How do I make the top extra crispy? A, Remove the foil for the last 10 to 15 minutes and turn the oven to 400°F if you want extra browning, watching closely so it does not burn.

Q, Can I add meat or vegetables? A, Yes, browned ground beef, Italian sausage, or sautéed vegetables like spinach, mushrooms, or zucchini work well between layers.

Conclusion

Lazy Lasagna (Cheesy Baked Ravioli) is a simple, tasty meal that brings comfort without long work. For a similar three ingredient, no-fuss baked ravioli idea, see Lazy Lasagna (Easy 3 Ingredient Dinner) – Instrupix, it gives another quick way to enjoy this cozy dish.

Lazy Lasagna Cheesy Baked Ravioli

A simple and comforting baked dish made with frozen cheese ravioli, marinara sauce, and melted mozzarella cheese, perfect for busy weeknights.

Main Ingredients

  • 1 pound frozen cheese ravioli, not cooked
  • 3 cups marinara sauce, store bought or homemade (Use a good marinara sauce for better flavor.)
  • 2 cups shredded mozzarella cheese
  • 1/2 cup grated Parmesan cheese
  • 1 teaspoon dried Italian seasoning or a mix of oregano and basil
  • Salt and pepper to taste
  • Fresh basil or parsley, optional for garnish

Preparation

  1. Preheat your oven to 375°F, and grease a 9×13 inch baking dish with a little oil or nonstick spray.
  2. Spread 1 cup of marinara sauce on the bottom of the dish to stop the ravioli from sticking.
  3. Place a single layer of frozen ravioli on the sauce. Keep them in one even layer.
  4. Spoon another cup of sauce over the ravioli, spread a third of the mozzarella on top, and sprinkle a little Parmesan and some Italian seasoning.
  5. Add a second layer of ravioli, pour the remaining sauce over them, and top with the rest of the mozzarella and Parmesan.

Baking

  1. Cover the dish tightly with foil and bake for 30 minutes.
  2. Remove the foil and bake for an additional 10 to 15 minutes, until the cheese is bubbly and slightly golden.
  3. Let the dish rest for 5 minutes before serving, then garnish with fresh basil or parsley if desired.

For a richer bake, stir 1 cup ricotta with an egg and dollop between layers. If you like more herbs, add fresh chopped basil into the sauce before baking.

Dinner, Main Course
Italian
Baked Ravioli, Cheesy Pasta, Comfort Food, Easy Dinner, Ravioli Lasagna

Cheesy Beef and Bacon Bake

Cheesy Beef and Bacon Bake served on a plate, garnished with herbs

This Cheesy Beef and Bacon Bake is a warm, tasty dish that makes people smile. It mixes browned beef, crispy bacon, melty cheese, and simple spices. The dish feels like home food, it is filling, and it cooks in one pan, so it is easy to make for family nights or a potluck. This recipe is a real crowd-pleaser, rich in cheese, smoky from bacon, and full of beefy flavor. Get ready to enjoy gooey cheese and crisp bacon in every bite, you will want to make it again and again.

How to prepare Cheesy Beef and Bacon Bake

Ingredients

  • 1 pound ground beef
  • 6 to 8 slices bacon, chopped
  • 1 small onion, chopped
  • 2 cloves garlic, minced
  • 1 cup frozen corn or 1 cup chopped bell pepper (optional)
  • 1 can (14 oz) diced tomatoes, drained
  • 1 cup shredded cheddar cheese
  • 1/2 cup shredded mozzarella (optional)
  • 1/2 cup sour cream or plain yogurt
  • 1 teaspoon salt
  • 1/2 teaspoon black pepper
  • 1 teaspoon dried oregano or Italian seasoning
  • 1 tablespoon olive oil

Directions

  1. Preheat oven to 375°F (190°C).
  2. In a large skillet, cook chopped bacon over medium heat until crisp. Remove bacon and set aside, leave about 1 tablespoon of bacon fat in the pan.
  3. Add olive oil if needed, then cook chopped onion in the skillet until soft, about 3 minutes. Add garlic and cook 30 seconds.
  4. Add ground beef, salt, pepper, and oregano. Cook and stir until beef is browned and cooked through. Drain excess fat if needed.
  5. Stir in drained diced tomatoes and corn or bell pepper if using. Cook 2 minutes to warm.
  6. Turn off heat. Stir in sour cream and half of the cheddar and mozzarella. Mix well.
  7. Pour the beef mix into a baking dish. Sprinkle the reserved crispy bacon on top and then add the rest of the cheddar and mozzarella.
  8. Bake in the oven for 15 to 20 minutes, until cheese is bubbly and golden.
  9. Let rest 5 minutes before serving.

Cheesy Beef and Bacon Bake

Why You’ll Love Cheesy Beef and Bacon Bake

  • It is simple to make, one pan for the stove work and a short bake.
  • The mix of beef, bacon, and cheese gives strong, comforting flavor.
  • You can change it, add vegetables, or use different cheeses.
  • It makes great leftovers, and it warms up well for quick meals.

Tips for success

  • Cook the bacon until crisp, this adds a nice texture on top.
  • Drain excess fat from the beef so the dish does not get greasy.
  • Use a mix of cheeses for best melt and flavor, cheddar and mozzarella work well.
  • Let it rest after baking, the cheese will set and slice better.
  • If you want less salt, skip added salt and use low-sodium bacon or cheese.

Serving Suggestions

  • Serve with a simple green salad and a light dressing.
  • Spoon over rice, mashed potatoes, or pasta for a fuller meal.
  • Offer pickles or a fresh tomato salad on the side to cut the richness.
  • Top with chopped fresh parsley or green onions for color and a fresh bite.

Cheesy Beef and Bacon Bake

FAQs

Q: Can I make this ahead of time?

A: Yes, cook the beef mix and store it in the baking dish covered, then add cheese and bake when ready. Heat time may be a bit longer from cold.

Q: Can I freeze the bake?

A: Yes, freeze before baking. Thaw in the fridge overnight and bake a bit longer until hot and bubbly.

Q: Can I use turkey or chicken instead of beef?

A: Yes, ground turkey or chicken work well. You may want to add a bit more seasoning for flavor.

Q: How long does it keep in the fridge?

A: Store in an airtight container for 3 to 4 days. Reheat in the oven or microwave until hot.

Q: Can I make it low carb?

A: Yes, skip the corn and serve with cauliflower rice or a salad to lower carbs.

Conclusion

If you want a tasty, simple dinner that fills the table and pleases a crowd, this Cheesy Beef and Bacon Bake is a great pick. For another similar idea with a low-carb twist, check this recipe, Low-Carb Bacon Cheeseburger Casserole Recipe – Allrecipes.

Cheesy Beef and Bacon Bake

A warm, tasty dish mixing browned beef, crispy bacon, and melty cheese, perfect for family nights or potlucks.

Main ingredients

  • 1 pound ground beef
  • 6 to 8 slices bacon, chopped
  • 1 small onion, chopped
  • 2 cloves garlic, minced
  • 1 cup frozen corn or 1 cup chopped bell pepper (optional) (Choose one or the other, optional)
  • 1 can (14 oz) diced tomatoes, drained
  • 1 cup shredded cheddar cheese
  • 1/2 cup shredded mozzarella (optional) (Optional for extra cheesiness)
  • 1/2 cup sour cream or plain yogurt
  • 1 teaspoon salt (Adjust to taste)
  • 1/2 teaspoon black pepper
  • 1 teaspoon dried oregano or Italian seasoning
  • 1 tablespoon olive oil

Preparation

  1. Preheat oven to 375°F (190°C).
  2. In a large skillet, cook chopped bacon over medium heat until crisp. Remove bacon and set aside, leaving about 1 tablespoon of bacon fat in the pan.
  3. Add olive oil if needed, then cook chopped onion in the skillet until soft, about 3 minutes. Add garlic and cook for 30 seconds.
  4. Add ground beef, salt, pepper, and oregano. Cook and stir until beef is browned and cooked through. Drain excess fat if needed.
  5. Stir in drained diced tomatoes and corn or bell pepper if using. Cook for 2 minutes to warm.
  6. Turn off the heat. Stir in sour cream and half of the cheddar and mozzarella. Mix well.
  7. Pour the beef mix into a baking dish. Sprinkle the reserved crispy bacon on top and then add the rest of the cheddar and mozzarella.
  8. Bake in the oven for 15 to 20 minutes, until cheese is bubbly and golden.
  9. Let rest for 5 minutes before serving.

Cook bacon until crisp for nice texture; drain excess fat from beef to prevent greasiness. Mix cheeses for best melt and flavor; let dish rest after baking for easier slicing. For lower salt content, skip added salt and use low-sodium bacon or cheese. Great leftovers that warm up well.

Dinner, Main Course
American
Bacon, Casserole, Cheesy Beef and Bacon Bake, Comfort Food, Ground Beef