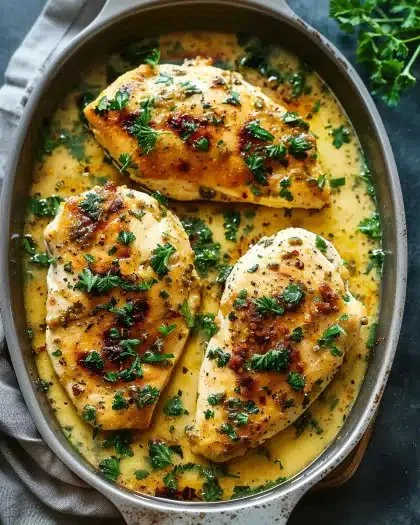
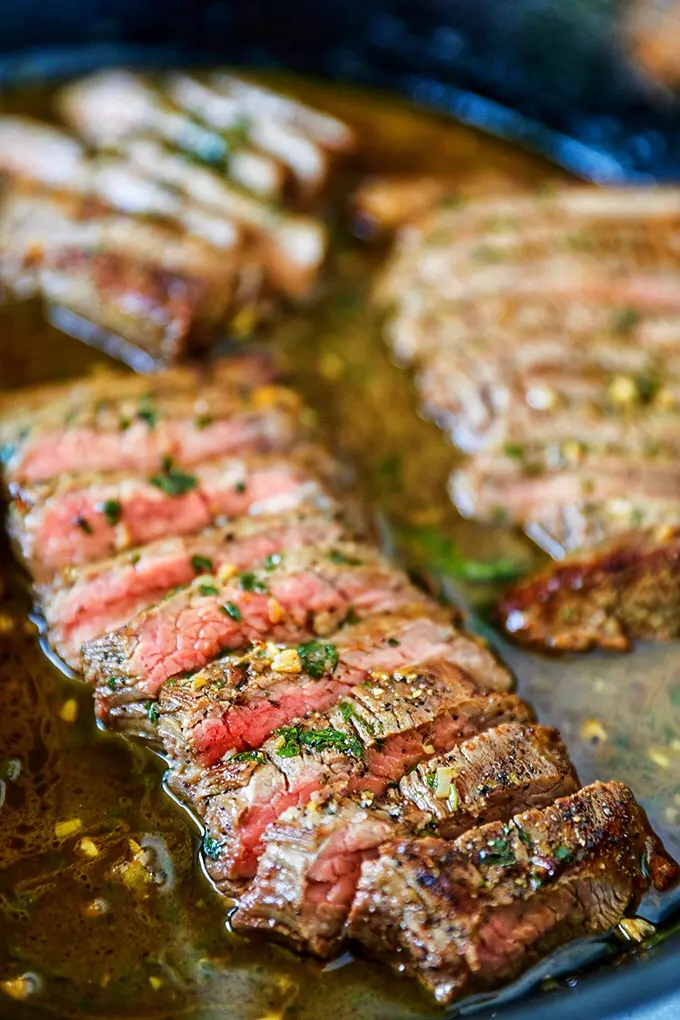
High Protein One Pan Shrimp Stir Fry with Noodles

You’re in for a treat with the High-Protein One-Pan Shrimp Stir Fry with Noodles. This dish is not only delicious and satisfying but also quick to prepare, making it perfect for busy weeknights. The combination of tender shrimp, colorful veggies, and flavorful noodles creates a delightful meal that appeals to both adults and kids alike. Plus, with the added protein, you’ll feel good about serving it to your loved ones. Let’s dive into this tasty recipe that’s sure to get everyone excited to eat!

How to prepare One Pan Shrimp Stir Fry with Noodles

  1. Begin by gathering your ingredients: shrimp, noodles, bell peppers, broccoli, carrots, and your favorite stir-fry sauce.
  2. Cook the noodles according to the package directions, then set them aside.
  3. In a large pan over medium heat, add a splash of oil and sauté the shrimp until they turn pink.
  4. Add the chopped vegetables to the pan and stir-fry until they are tender yet crisp.
  5. Mix in the cooked noodles and sauce, stirring everything together until well combined.
  6. Serve hot and enjoy!

High-Protein One-Pan Shrimp Stir Fry with Noodles

Why You’ll Love One Pan Shrimp Stir Fry with Noodles

This stir fry is a fan favorite because of its simplicity and versatility. You can customize it easily by adding different vegetables or proteins based on what you have on hand. It’s also quick to make, allowing you to enjoy a delightful homemade meal in less than 30 minutes. The freshness of the shrimp paired with the crunch of the vegetables creates a harmony of flavors that will have everyone coming back for seconds. If you’re looking for another hearty stir fry, you might want to check out this spicy ground beef stir fry bowl.

Tips for success

  • Use fresh shrimp for the best flavor, but frozen shrimp can work too as long as they’re thawed properly.
  • Make sure not to overcook the shrimp; they should just turn pink and opaque.
  • Feel free to add any other preferred vegetables, such as snap peas or zucchini, for extra variety.

High-Protein One-Pan Shrimp Stir Fry with Noodles

Serving Suggestions

This dish is fantastic on its own, but you can serve it with a side of spring rolls or a fresh salad to complete your meal. It also pairs wonderfully with a light sprinkle of sesame seeds on top for added crunch and aesthetics.

FAQs

Can I use another type of protein instead of shrimp?

Absolutely! Chicken, beef, or tofu would all work well in this stir fry.

How can I make this dish gluten-free?

To make it gluten-free, choose rice noodles or gluten-free stir-fry sauce.

How do I store leftovers?

Store leftover stir fry in an airtight container in the fridge for up to three days. Reheat in the microwave or on the stovetop.

Enjoy preparing this vibrant and protein-packed dish that’s sure to impress everyone at your table!

One-Pan Shrimp Stir Fry with Noodles

A delicious, high-protein stir fry featuring tender shrimp, colorful veggies, and flavorful noodles, perfect for busy weeknights.

Main Ingredients

  • 1 pound shrimp, peeled and deveined (Use fresh shrimp for best flavor.)
  • 8 ounces noodles (Cook according to package directions.)
  • 1 bell pepper bell peppers, chopped (Any color bell pepper can be used.)
  • 1 cup broccoli florets (Fresh or frozen can be used.)
  • 1 cup carrots, sliced (Add other preferred vegetables if desired.)
  • 1/3 cup stir-fry sauce (Use favorite brand.)

Preparation

  1. Gather all your ingredients: shrimp, noodles, bell peppers, broccoli, carrots, and stir-fry sauce.
  2. Cook the noodles according to the package directions, then set them aside.

Cooking

  1. In a large pan over medium heat, add a splash of oil and sauté the shrimp until they turn pink.
  2. Add the chopped vegetables to the pan and stir-fry until they are tender yet crisp.
  3. Mix in the cooked noodles and sauce, stirring everything together until well combined.
  4. Serve hot and enjoy!

For added crunch, top with sesame seeds. You can substitute shrimp with chicken, beef, or tofu if preferred.

Dinner, Main Course
Asian, Stir Fry
Easy Recipe, High-Protein, One-Pan Meal, Quick Dinner, Shrimp Stir Fry

Honey Lime Chicken & Avocado Rice Bowl – High Protein Healthy Dinner Idea

If you’re looking for a meal that is both nutritious and utterly delicious, then the Honey Lime Chicken & Avocado Rice Bowl is your next must-try dish. This incredible recipe harmonizes tender chicken, creamy avocado, and zesty lime, making it a pleasing option for family dinners. Not only is it packed with protein, but it’s also bursting with flavor, making it a real crowd-pleaser. You’ll be excited to whip this up in your kitchen, and your family will love every bite!

How to prepare Honey Lime Chicken and Avocado Rice Bowl

Preparing this delightful dish is straightforward and fun. Start by marinating your chicken in a mixture of honey, lime juice, garlic, and a touch of soy sauce. This marinade infuses the chicken with vibrant flavor and ensures each bite is juicy. While the chicken marinates, you can cook your rice, which provides a hearty base for the dish. Once everything is ready, grill or sauté the chicken before assembling your bowl with sliced avocado and fresh veggies. It’s that simple to create a plate that looks as good as it tastes!

Honey Lime Chicken & Avocado Rice Bowl – High Protein Healthy Dinner Idea

Why You’ll Love Honey Lime Chicken and Avocado Rice Bowl

One taste of this Honey Lime Chicken & Avocado Rice Bowl and you’ll understand why it’s such a beloved recipe. The tangy lime and sweet honey combo creates an unforgettable taste, while the protein-rich chicken ensures you feel full and satisfied. Plus, it’s versatile; feel free to add your favorite toppings, such as cilantro, cherry tomatoes, or a sprinkle of cheese. This dish is not just a meal, it’s a wholesome experience that can transport you to a sunny beachside getaway with its fresh flavors.

Tips for success

  • Marinate Longer: If you can, let the chicken marinate for a few hours or even overnight to develop deeper flavors.
  • Use Fresh Ingredients: Fresh lime juice and ripe avocados will enhance the dish’s overall taste and quality.
  • Experiment with Grains: While rice is an excellent base, consider using quinoa or farro for a different texture and taste.

Honey Lime Chicken & Avocado Rice Bowl – High Protein Healthy Dinner Idea

Serving Suggestions

This bowl is perfect as is, but you can enhance it with a side of mixed greens or a light salad to add crunch and variety. If you’re feeling adventurous, try pairing it with a refreshing mango salsa for a fruity twist. You could also serve it alongside tortilla chips for a casual dinner vibe with friends.

FAQs

Can I use a different protein?

Absolutely! This recipe works great with shrimp, beef, or even tofu if you’re looking for a vegetarian option.

How do I store leftovers?

You can store leftovers in an airtight container in the refrigerator for up to three days. Just reheat the chicken and rice before enjoying.

Is there a way to make this recipe ahead of time?

Yes, you can prepare the chicken and rice ahead of time. Store them separately until you’re ready to assemble your bowls for fresh flavors.

For more delicious inspiration, check out this Honey Lime Chicken Stack Recipe that offers a creative twist on this favorite!

Honey Lime Chicken & Avocado Rice Bowl

A nutritious and delicious meal featuring marinated chicken, creamy avocado, and zesty lime, making it a perfect dish for family dinners.

For the Marinade

  • 1 cup honey (For sweetness and flavor.)
  • 1/4 cup lime juice (Freshly squeezed for best taste.)
  • 2 cloves garlic (Minced.)
  • 2 tablespoons soy sauce (For seasoning.)

For the Bowl

  • 2 cups cooked rice (Base of the bowl.)
  • 2 large avocados (Sliced.)
  • 1 cup fresh veggies (Choose your favorites.)

Preparation

  1. In a bowl, combine honey, lime juice, minced garlic, and soy sauce to create a marinade.
  2. Add the chicken to the marinade and let it sit for at least 20 minutes, or refrigerate for a few hours for deeper flavors.
  3. While the chicken is marinating, cook your rice according to package instructions.

Cooking

  1. Once the chicken is marinated, grill or sauté the chicken until fully cooked.

Assembly

  1. In a bowl, layer the cooked rice, sliced avocado, and any additional fresh veggies.
  2. Top with the grilled chicken slices.
  3. Serve immediately.

For best results, marinate the chicken longer, use fresh ingredients, and consider experimenting with different grains like quinoa or farro.

Dinner, Main Course
American, Tex-Mex
Avocado Rice Bowl, Easy Recipe, Family Meal, Healthy Dinner, Honey Lime Chicken

Greek Chicken Bowls: An Amazing Ultimate Recipe You Must Try

Greek Chicken Bowls are a delightful dish that brings a taste of the Mediterranean right to your kitchen. This recipe is not just about satisfying your hunger; it’s a feast for the senses with its vibrant colors, fresh ingredients, and a burst of flavors. The marinated chicken is juicy and tender, complemented by crisp vegetables and aromatic herbs. It’s a standout crowd-pleaser that’s perfect for gatherings, family dinners, or a simple weeknight meal. If you’re looking for a dish that’s both delicious and easy to prepare, these bowls are a must-try, and I guarantee you’ll want to make them again and again.

How to prepare Greek Chicken Bowls

To prepare Greek Chicken Bowls, start by marinating your chicken in a mixture of olive oil, lemon juice, garlic, dried oregano, salt, and pepper. Allow the chicken to marinate for at least 30 minutes, but for optimal flavor, let it sit in the refrigerator for a few hours.

Next, grill or pan-sear the chicken until it’s cooked through and has beautiful char marks. Once done, slice the chicken into bite-sized pieces.

Prepare a base of cooked rice or quinoa, and top it with diced tomatoes, cucumbers, red onion, olives, and crumbled feta cheese for that classic Greek charm.

Finally, drizzle with a homemade tzatziki sauce made from yogurt, cucumber, garlic, and dill.

Greek Chicken Bowls: An Amazing Ultimate Recipe You Must Try

Why You’ll Love Greek Chicken Bowls

You’ll love these Greek Chicken Bowls for several reasons! First, they’re packed with protein and wholesome ingredients, making them a healthy choice. The freshness of the veggies combined with the savory chicken makes every bite a tasty adventure. Additionally, this dish is highly customizable; you can add any of your favorite toppings or ingredients. Want to spice things up? Consider adding some roasted red peppers or a sprinkle of za’atar. If you’re in the mood for something sweet for dessert, you might also enjoy trying an amazing dessert like apple cider pecan bread pudding!

Tips for success

  • For best results, marinate the chicken longer to enhance the flavors.
  • Don’t skip the tzatziki sauce; it adds a refreshing taste that ties the dish together.
  • Use fresh herbs when possible; they make a significant difference in flavor.
  • Prepare all your ingredients ahead of time, so assembly is quick and easy.

Greek Chicken Bowls: An Amazing Ultimate Recipe You Must Try

Serving Suggestions

Serve your Greek Chicken Bowls with warm pita bread on the side for a perfect touch. You can also offer additional toppings like hummus, tabbouleh, or roasted vegetables to enhance the meal experience. For a complete feast, consider a fruity salad or a light soup as a starter.

FAQs

1. Can I use different proteins for this recipe?

Absolutely! You can substitute the chicken with tofu, shrimp, or beef if preferred.

2. Is this recipe suitable for meal prepping?

Yes, Greek Chicken Bowls are great for meal prep. Just store the components separately to keep everything fresh.

3. Can I make the tzatziki sauce in advance?

Certainly! Tzatziki can be made ahead of time and stored in the fridge for up to three days.

This Greek Chicken Bowls recipe is a perfect way to enjoy a delicious and satisfying meal, bursting with flavors that are sure to please everyone. Enjoy cooking.

Greek Chicken Bowls

Greek Chicken Bowls are a delightful dish that brings a taste of the Mediterranean to your kitchen, featuring marinated chicken, fresh vegetables, and homemade tzatziki sauce.

For the chicken marinade

  • 1 pound chicken breast (boneless, skinless)
  • 3 tablespoons olive oil
  • 2 tablespoons lemon juice (freshly squeezed)
  • 3 cloves garlic (minced)
  • 1 teaspoon dried oregano
  • 1 teaspoon salt
  • 1/2 teaspoon black pepper

For the bowl assembly

  • 2 cups cooked rice or quinoa (as base)
  • 1 cup diced tomatoes
  • 1 cup diced cucumbers
  • 1/2 cup diced red onion
  • 1/2 cup olives (sliced)
  • 1/2 cup crumbled feta cheese

For the tzatziki sauce

  • 1 cup yogurt (Greek-style preferred)
  • 1/2 cup grated cucumber (squeeze out excess water)
  • 1 clove garlic (minced)
  • 1 tablespoon dill (fresh or dried)

Preparation

  1. Marinate the chicken in olive oil, lemon juice, garlic, dried oregano, salt, and pepper for at least 30 minutes in the refrigerator.
  2. Grill or pan-sear the marinated chicken until cooked through and charred, about 7-8 minutes per side.
  3. Once done, slice the chicken into bite-sized pieces.
  4. Prepare a base of cooked rice or quinoa in serving bowls.

Assembly

  1. Top the rice or quinoa with diced tomatoes, cucumbers, red onion, olives, and crumbled feta cheese.
  2. Drizzle the bowls with the homemade tzatziki sauce made from yogurt, grated cucumber, minced garlic, and dill.

For best results, marinate the chicken longer. Don’t skip the tzatziki sauce as it enhances the dish. Use fresh herbs whenever possible. Prepare ingredients ahead for quick assembly.

Dinner, Main Course
Greek, Mediterranean
Chicken Recipe, Greek Chicken Bowls, Healthy Dinner, Mediterranean food, tzatziki sauce

Sweet Hawaiian Crock Pot Chicken

Get ready to fall in love with a dish that brings sweet flavors and tender chicken straight to your dinner table. Sweet Hawaiian Crock Pot Chicken is a delightful blend of sweet and savory that will not only satisfy your taste buds but also impress your friends and family. It’s a perfect meal for busy days since it cooks effortlessly in your crock pot, allowing you to enjoy more time with your loved ones. Trust me, once you try this recipe, it will quickly become a favorite! You may also find Delicious Crock Pot Sweet Garlic Chicken useful.

How to prepare Sweet Hawaiian Crock Pot Chicken

Preparing Sweet Hawaiian Crock Pot Chicken is as easy as it gets. Start by gathering your ingredients and placing them into the crock pot. The chicken, pineapple, and delicious sauce will meld together beautifully as it cooks. You won’t believe how simple it is to create such a flavorful dish that everyone will adore.

Sweet Hawaiian Crock Pot Chicken

Why You’ll Love Sweet Hawaiian Crock Pot Chicken

There are many reasons to love this recipe. First, it’s incredibly easy to make; simply toss everything into the crock pot and let it do the work. The combination of tangy pineapple and savory chicken creates a sweet and scrumptious meal that pairs well with rice or noodles. If you’re looking for more delicious chicken recipes, check out this crock pot chicken and gravy, which has received great reviews.

Tips for success

To ensure your Sweet Hawaiian Crock Pot Chicken turns out perfectly, here are some helpful tips:

  • Use fresh ingredients when possible, as they enhance the flavor.
  • Avoid overcooking by checking the internal temperature of the chicken; it should reach 165°F.
  • For added flavor, feel free to experiment with different spices or herbs to complement the dish.

Sweet Hawaiian Crock Pot Chicken

Serving Suggestions

Sweet Hawaiian Crock Pot Chicken is fantastic on its own, but you can elevate your dining experience with a few serving suggestions. Consider serving it over steamed rice or noodles to soak up all that delicious sauce. You can also add a side of fresh greens or a colorful salad to balance the meal. It’s perfect for family dinners or casual gatherings!

FAQs

Can I use frozen chicken for this recipe?

Yes, you can use frozen chicken, but make sure it cooks for a longer time to ensure it reaches the appropriate temperature.

How long does it take to cook in the crock pot?

On low, it usually takes about 4 to 6 hours, and on high, approximately 2 to 3 hours.

Can I make this dish ahead of time?

Absolutely! This dish can be prepared in advance and reheated before serving, making it a convenient option for busy weeknights.

Try making Sweet Hawaiian Crock Pot Chicken tonight, and you’ll see just how easy it is to bring warmth and joy to your dinner table! Enjoy the delights of this crowd-pleaser and make it your own!

Sweet Hawaiian Crock Pot Chicken

A delightful blend of sweet pineapple and savory chicken cooked effortlessly in a crock pot, perfect for busy days and family gatherings.

Main Ingredients

  • 2 pounds boneless, skinless chicken breasts (Fresh or frozen chicken can be used.)
  • 1 can pineapple chunks in juice (Drain the juice before adding to the crock pot.)
  • 1 cup sweet and sour sauce

Preparation

  1. Gather all ingredients and place them into the crock pot.
  2. Add the chicken, pineapple, and sweet and sour sauce to the crock pot.

Cooking

  1. Cover and cook on low for 4 to 6 hours or on high for 2 to 3 hours.

Serving

  1. Serve over steamed rice or noodles, and add a side of fresh greens or salad.

Use fresh ingredients when possible for enhanced flavor. Avoid overcooking by checking the internal temperature of the chicken; it should reach 165°F. Feel free to experiment with different spices or herbs.

Dinner, Main Course
American, Hawaiian
Crock Pot Chicken, Easy Dinner, Family Meal, Slow Cooker Recipe, sweet chicken

Spinach Stuffed Chicken Breasts

Spinach Stuffed Chicken Breasts are a delightful dish that can impress anyone at your dinner table. With a savory filling of spinach, cheese, and herbs, this recipe makes for a perfect weeknight meal or a special occasion feast. The juicy chicken breasts offer a flavorful and tender bite that unexpectedly bursts with goodness from the stuffing inside. Trust me, once you serve this beautiful dish, your family and friends will be asking for seconds. So, roll up your sleeves and get ready to whip up something amazing in your kitchen! You may also find Mediterranean Chicken Stuffed Bell Peppers useful.

How to prepare Spinach Stuffed Chicken Breasts

  1. Preheat your oven to 375°F (190°C).
  2. In a bowl, mix together fresh spinach, cream cheese, mozzarella cheese, garlic powder, salt, and pepper.
  3. Take each chicken breast and carefully slice a pocket into the side. Stuff each pocket generously with the spinach mixture.
  4. Use toothpicks to seal the openings of the chicken breasts to keep the stuffing from spilling out.
  5. Season the outside of the chicken breasts with olive oil, garlic powder, salt, and pepper.
  6. Place the chicken in a baking dish and bake for 25-30 minutes, or until cooked through.
  7. Remove from the oven and let it rest for a few minutes before serving.

Spinach Stuffed Chicken Breasts

Why You’ll Love Spinach Stuffed Chicken Breasts

This dish isn’t just delicious; it’s also packed with nutrients from the spinach. Not only does it look impressive, but it’s also simple to make. If you’re looking for a healthier alternative to traditional stuffed chicken, this dish is the way to go. And if you’re a fan of chicken recipes, you might want to check out air fryer chicken breasts for another tasty option.

Tips for success

  • Make sure to really pack the stuffing into the chicken pockets so that every bite is full of flavor.
  • Let the stuffed chicken rest after cooking. This helps keep it juicy and tender.
  • Pair your meal with a light salad or roasted vegetables for a complete dinner.

Spinach Stuffed Chicken Breasts

Serving Suggestions

Serve your Spinach Stuffed Chicken Breasts with a side of garlic mashed potatoes or some crusty bread to soak up the delicious juices. A glass of white wine can elevate the dining experience even more!

FAQs

Can I use frozen spinach?

Yes, you can use frozen spinach, but make sure to thaw and drain it well before using.

What can I substitute for cream cheese?

You could use ricotta cheese or cottage cheese as alternatives for a different texture and flavor.

Can I grill these chicken breasts instead?

Absolutely! Just be cautious while grilling to ensure the stuffing remains intact, and adjust the cooking time as needed.

With this easy-to-follow recipe and helpful tips, you’re set to create Spinach Stuffed Chicken Breasts that will surely impress. Dive into this savory dish and enjoy every bite!

Spinach Stuffed Chicken Breasts

A delightful dish featuring juicy chicken breasts stuffed with a savory filling of spinach, cheese, and herbs, perfect for both weeknight meals and special occasions.

Stuffing Ingredients

  • 2 cups fresh spinach
  • 4 oz cream cheese
  • 1 cup mozzarella cheese (shredded)
  • 1 tsp garlic powder
  • 1 tsp salt
  • 1/2 tsp pepper

Chicken Ingredients

  • 4 pieces chicken breasts (boneless)
  • 2 tbsp olive oil (for seasoning)

Preparation

  1. Preheat your oven to 375°F (190°C).
  2. In a bowl, mix together fresh spinach, cream cheese, mozzarella cheese, garlic powder, salt, and pepper.
  3. Take each chicken breast and carefully slice a pocket into the side. Stuff each pocket generously with the spinach mixture.
  4. Use toothpicks to seal the openings of the chicken breasts to keep the stuffing from spilling out.
  5. Season the outside of the chicken breasts with olive oil, garlic powder, salt, and pepper.

Cooking

  1. Place the chicken in a baking dish and bake for 25-30 minutes, or until cooked through.
  2. Remove from the oven and let it rest for a few minutes before serving.

Make sure to really pack the stuffing into the chicken pockets for full flavor. Let the stuffed chicken rest after cooking to keep it juicy and tender. Pair with a light salad or roasted vegetables.

Dinner, Main Course
American, Mediterranean
Chicken Recipes, Healthy Dinner, Savory Dishes, Spinach Stuffed Chicken, Stuffed Chicken Breasts

Mozzarella Chicken in Basil Cream Sauce

If you’re looking for a delicious and hearty dish that’s sure to impress, then look no further than Mozzarella Chicken in Basil Cream Sauce. This recipe combines tender chicken with a creamy, flavorful basil sauce and gooey mozzarella cheese that will tickle your taste buds just right. It’s a crowd-pleaser, perfect for family dinners, romantic evenings at home, or whenever you want to indulge in a comforting meal. Imagine the delightful aroma filling your kitchen as you prepare this exciting dish—it’s a culinary experience from start to finish!

How to prepare Mozzarella Chicken in Basil Cream Sauce.

To start, gather your ingredients: boneless chicken breasts, fresh basil, garlic, heavy cream, mozzarella cheese, and a few spices. Begin by seasoning the chicken and searing it until golden brown. After that, you’ll add minced garlic and heavy cream to create a luxurious sauce, and finish it off with melted mozzarella and fresh basil.

Mozzarella Chicken in Basil Cream Sauce

Why You’ll Love Mozzarella Chicken in Basil Cream Sauce

This dish is not only rich in flavor but also incredibly simple to prepare. The combination of creamy basil sauce and melted mozzarella elevates the chicken to new heights. Plus, it pairs wonderfully with a variety of sides like pasta or steamed vegetables. For a unique twist, you might also want to try it alongside some keto turkey meatballs in creamy sauce, making your meal even more enticing.

Tips for success

  • Always ensure that your chicken is cooked through but not overcooked. This will keep it juicy and tender.
  • Fresh basil makes a big difference, so try to use it instead of dried for the best flavor.
  • If you want to add more depth to your sauce, consider sautéing some onions or adding a splash of white wine while cooking the garlic.

Mozzarella Chicken in Basil Cream Sauce

Serving Suggestions

Mozzarella Chicken in Basil Cream Sauce pairs beautifully with a fresh side salad or pasta. You can also serve it with crusty bread to soak up the delicious sauce. Additionally, for a satisfying side, consider making a creamy tortellini dish like cheesesteak tortellini in creamy provolone sauce.

FAQs

  1. Can I use another type of cheese instead of mozzarella? Yes, other melty cheeses like provolone or gouda can work well too!
  2. How can I store leftovers? You can store any leftovers in an airtight container in the fridge for up to three days.
  3. Can I make this dish ahead of time? Yes, you can prepare the chicken and sauce in advance, then reheat it gently before serving!

Mozzarella Chicken in Basil Cream Sauce

A delicious dish combining tender chicken with a creamy basil sauce and gooey mozzarella cheese, perfect for family dinners or romantic evenings.

Main Ingredients

  • 4 pieces boneless chicken breasts (Use skinless for a healthier option.)
  • 1 cup heavy cream (For a lighter version, replace with half and half.)
  • 1 cup mozzarella cheese (Shredded or sliced, depending on preference.)
  • 1 cup fresh basil (Fresh is preferred for maximum flavor.)
  • 3 cloves garlic (Minced.)
  • to taste salt and pepper (For seasoning the chicken.)

Preparation

  1. Season the boneless chicken breasts with salt and pepper.
  2. Heat a skillet over medium-high heat and sear the chicken until golden brown, about 5-7 minutes on each side.
  3. Remove the chicken from the skillet and set aside.

Making the Sauce

  1. In the same skillet, add minced garlic and sauté for 1-2 minutes.
  2. Pour in the heavy cream and bring to a simmer.
  3. Stir in the fresh basil and simmer for another 2-3 minutes.
  4. Add the seared chicken back to the skillet and top with mozzarella cheese.
  5. Cover the skillet and let the cheese melt for a few minutes.

Always ensure that your chicken is cooked through but not overcooked. For a unique twist, try sautéing some onions or adding a splash of white wine while cooking the garlic.

Dinner, Main Course
Italian
Basil Cream Sauce, Comfort Food, Easy Recipe, Family Dinner, Mozzarella Chicken

Melt In Your Mouth Chicken Breast

If you’re searching for a dish that will bring everyone to the table, look no further than Melt In Your Mouth Chicken Breast. This delightful recipe is not just a meal; it’s an experience filled with tender chicken and rich flavors that melt in your mouth. Each bite is a perfect balance of seasoning and juiciness that gives comfort and satisfaction. The best part? It’s easy to make! You’ll find yourself wanting to whip it up time and again, with delicious results every time.

How to prepare Melt In Your Mouth Chicken Breast

Creating this dish is simple and fun! Start by gathering your ingredients, which include chicken breasts, garlic, butter, and a blend of spices. You will first season the chicken, then sear it in a hot pan until it’s golden brown. Next, add in garlic and butter, allowing the flavors to infuse the chicken as it cooks. It’s a straightforward process that leads to a wonderfully tender chicken dish.

Melt In Your Mouth Chicken Breast

Why You’ll Love Melt In Your Mouth Chicken Breast

This chicken breast recipe is a true crowd-pleaser, making it perfect for family dinners or special occasions. The secret behind its melt-in-your-mouth texture is the method of cooking, which involves sealing in the moisture and flavors. It pairs wonderfully with sides like rice, vegetables, or even a fresh salad. Plus, you can have it on the table in less than an hour!

If you’re interested in more delicious cooking methods, check out this recipe for hibachi chicken.

Tips for success

  • Make sure to properly season your chicken breast on both sides for the best flavor.
  • Allow the chicken to rest for a few minutes after cooking; this helps the juices redistribute, keeping it tender.
  • Consider using a meat thermometer to ensure the chicken reaches an internal temperature of 165°F for safety.

Melt In Your Mouth Chicken Breast

Serving Suggestions

Once your Melt In Your Mouth Chicken Breast is ready, serve it alongside some roasted vegetables or creamy mashed potatoes for a complete meal. You can also slice the chicken and add it to salads or wraps for a delightful lunch option.

FAQs

Can I use frozen chicken breasts?

Yes, but be sure to thaw them completely before cooking to ensure even cooking.

What can I substitute for garlic?

If you prefer not to use garlic, you can substitute it with a little bit of garlic powder or omit it altogether for a different flavor.

How do I store leftovers?

Store any leftover chicken in an airtight container in the refrigerator for up to 3 days. You can reheat it gently to enjoy it again later.

Melt In Your Mouth Chicken Breast

A tender and flavorful chicken breast dish that’s easy to prepare, perfect for family dinners or special occasions.

Main Ingredients

  • 4 pieces chicken breasts (Make sure they are thawed if frozen.)
  • 2 cloves garlic (Mince or crush as preferred.)
  • 2 tablespoons butter (Use unsalted for better control of seasoning.)
  • 1 teaspoon spice blend (Your choice of herbs and spices.)

Preparation

  1. Gather all the ingredients: chicken breasts, garlic, butter, and a blend of spices.
  2. Season the chicken breasts on both sides with the spice blend.

Cooking

  1. Heat a pan over medium-high heat and add a bit of oil if desired.
  2. Sear the seasoned chicken breasts in the hot pan until golden brown, about 6-7 minutes on each side.
  3. Reduce heat and add minced garlic and butter to the pan.
  4. Continue to cook, allowing the flavors to infuse the chicken, until it reaches an internal temperature of 165°F.

Finishing

  1. Remove the chicken from the pan and let it rest for a few minutes before slicing.

This recipe is versatile; serve with roasted vegetables, mashed potatoes, or slice for salads and wraps. Proper seasoning and resting are key to success.

Dinner, Main Course
American
Chicken Breast, Comfort Food, Easy Dinner, Family Meal, Melt In Your Mouth

Garlic Butter Baked Chicken Breast

Garlic Butter Baked Chicken Breast served on a plate with herbs

Garlic Butter Baked Chicken Breast is one of those dishes that make everyone in the family happy. It combines the rich, savory flavor of garlic butter with tender, juicy chicken, creating a meal that’s both simple and delicious. When you take that first bite, you’ll notice how the melted garlic butter seeps into the chicken, bringing a burst of flavor that’s hard to resist. This dish is not just perfect for weeknight dinners but also a favorite for gatherings with friends. If you love flavorful chicken that is easy to prepare, you’ll want to get started on this delightful recipe right away!

How to prepare Garlic Butter Baked Chicken Breast

  1. Preheat your oven to 400°F (200°C).
  2. In a small bowl, mix melted butter, minced garlic, salt, and pepper.
  3. Place the chicken breasts in a baking dish and pour the garlic butter mixture over them.
  4. Sprinkle with fresh herbs for added flavor.
  5. Bake for 25-30 minutes, until the chicken is cooked through and no longer pink in the center.

Garlic Butter Baked Chicken Breast

Why You’ll Love Garlic Butter Baked Chicken Breast

This dish is packed with flavor and is incredibly easy to make. The garlic butter adds richness, while the herbs complement the chicken perfectly. It’s a versatile meal that pairs well with a variety of sides, such as roasted vegetables or mashed potatoes. Plus, the aroma that fills your kitchen while it bakes will make everyone wonder what’s cooking. You’ll definitely want to keep this recipe in your weekly rotation!

Tips for Success

To make sure your Garlic Butter Baked Chicken Breast is a hit every time, follow these tips:

  • Use fresh garlic for the best flavor.
  • Don’t overcook the chicken, as it can become dry. Check the internal temperature; it should reach 165°F (75°C).
  • Let the chicken rest for a few minutes before slicing to keep it juicy.

Serving Suggestions

Garlic Butter Baked Chicken Breast can be served in many ways. Pair it with a fresh garden salad for a light meal, or go for creamy mashed potatoes for something heartier. It also goes great with pasta or rice, making it a complete dish that everyone will love. Don’t forget to drizzle some of that delicious garlic butter sauce over your sides for extra flavor!

FAQs

1. Can I use frozen chicken breasts? Yes, but make sure to thaw them first for even cooking.

2. How can I store leftovers? Store leftovers in an airtight container in the fridge for up to three days.

3. Can I add vegetables? Absolutely! You can add vegetables to the baking dish for a complete meal. Just make sure they are cut small enough to cook through in the same time as the chicken.

Conclusion

Garlic Butter Baked Chicken Breast is an easy and flavorful recipe that brings comfort to the table. It’s perfect for busy nights or when you want to impress guests with something delicious. For more details and tips on preparing this tasty dish, check out this wonderful resource: Garlic Butter Baked Chicken Breast – Primavera Kitchen. Enjoy your cooking adventure!

Garlic Butter Baked Chicken Breast

A simple yet delicious dish that combines tender chicken breasts with rich, savory garlic butter, perfect for weeknight dinners or gatherings.

Main Ingredients

  • 4 pieces chicken breasts (Use fresh or thawed chicken.)
  • 1/2 cup butter, melted (For best flavor, use unsalted butter.)
  • 4 cloves garlic, minced (Fresh garlic is recommended.)
  • 1 tsp salt
  • 1/2 tsp black pepper
  • to taste fresh herbs (Such as parsley or thyme, for garnishing.)

Preparation

  1. Preheat your oven to 400°F (200°C).
  2. In a small bowl, mix melted butter, minced garlic, salt, and pepper.
  3. Place the chicken breasts in a baking dish and pour the garlic butter mixture over them.
  4. Sprinkle with fresh herbs for added flavor.

Baking

  1. Bake for 25-30 minutes, until the chicken is cooked through and no longer pink in the center.

Let the chicken rest for a few minutes before slicing to keep it juicy. Serve with sides such as roasted vegetables or mashed potatoes. Drizzle the garlic butter sauce over your sides for extra flavor.

Dinner, Main Course
American
Baked Chicken, Comfort Food, easy chicken recipe, Flavorful Chicken, Garlic Butter Chicken

Irresistible Flank Steak Recipe

flat steak

Have you ever wondered why some steaks are tender and juicy while others seem tough and chewy? The secret often lies in understanding the cut you’re working with. Flank steak is one of those cuts that can either be your best friend in the kitchen or your biggest frustration, depending on how you handle it.

Think of flank steak as the hardworking athlete of the beef world. It’s lean, it’s strong, and it’s got incredible flavor potential, but just like training an athlete, you need to know the right techniques to bring out its best qualities.

Why Make This Recipe

Flank steak is a fantastic choice for family dinners and gatherings with friends. It’s affordable, easy to prepare, and packs a lot of flavor when cooked correctly. This Irresistible Flank Steak recipe takes simple ingredients and transforms them into a delicious meal that’s sure to impress. The marinade tenderizes the meat and adds a depth of flavor that will make you want to make it again and again.

How to Make Irresistible Flank Steak

Ingredients:

  • 1 1/2 – 2 pounds flank steak
  • 1/2 cup olive oil
  • 1/3 cup low sodium soy sauce
  • 1/4 cup balsamic vinegar
  • 2 tablespoons fresh lemon juice
  • 2 tablespoons brown sugar
  • 1 1/2 tablespoons Worcestershire sauce
  • 1 tablespoon Dijon mustard
  • 1 tablespoon each, onion powder and garlic powder
  • 1 teaspoon each, paprika, black pepper, red pepper flakes, and dried dill weed
  • 1/2 teaspoon each, dried oregano, dried rosemary, and ground coriander

Directions:

  1. In a medium-sized bowl, whisk together olive oil, soy sauce, balsamic vinegar, lemon juice, and Worcestershire sauce. Add the brown sugar, Dijon mustard, and all the seasonings—from onion powder to ground coriander. Stir until the sugar dissolves completely, enhancing the depth of flavor.
  2. Place your flank steak in a shallow dish or resealable plastic bag. Pour in the marinade, ensuring it fully covers the steak. For best results, let it marinate in the refrigerator for at least 2 hours or up to 12. The marinade will infuse the meat with a rich, tangy aroma while tenderizing it for a succulent bite.
  3. Heat your grill to medium-high. If you’re using a grill pan, preheat it on high on your stovetop. A properly heated grill ensures that beautiful, caramelized char on the outside while keeping the inside juicy.
  4. Remove the steak from the marinade, allowing the excess to drip off. Place it on the hot grill and cook for about 4-5 minutes per side for medium-rare, depending on the thickness. Aim for a deep brown sear on the outside, with visible grill marks for both visual and flavorful appeal.
  5. Let the flank steak rest on a cutting board for at least 5 minutes. This resting period allows juices to redistribute within the meat, resulting in every bite being tender and juicy.
  6. Slice and serve your beautifully grilled flank steak. Thinly slice the steak against the grain at a diagonal angle. Doing so ensures the tenderest texture. Serve immediately to enjoy the full flavor profile that each marinated layer offers.

Selecting the Perfect Flank Steak: A Buyer’s Guide

Walking into a butcher shop or grocery store can feel overwhelming when you’re faced with dozens of meat options. How do you choose the best flank steak? The good news is that with a few key indicators, you can consistently select high-quality cuts.

What to Look for at the Butcher Shop

First, examine the color. Fresh flank steak should display a bright, cherry-red color without any brown or gray spots. The surface should look moist but not slimy, and there shouldn’t be any off-putting odors.

Look for meat that feels firm to the touch. Avoid cuts that seem mushy or leave indentations when pressed. The grain should be clearly visible and run consistently in one direction across the surface.

Check the packaging date if you’re shopping at a grocery store. Flank steak is best used within 2-3 days of packaging when stored in the refrigerator, so choose the freshest option available.

Fresh vs. Frozen: Making the Right Choice

Fresh flank steak offers the best texture and flavor when cooked properly. However, frozen options can work well if you’re planning ahead or find a good deal. If choosing frozen, look for packages without ice crystals or freezer burn, which indicate the meat has been stored too long or at inconsistent temperatures.

When thawing frozen flank steak, plan ahead and use the refrigerator method. This slow thawing process maintains the meat’s texture better than quick-thaw methods.

How to Serve Irresistible Flank Steak
flat steak

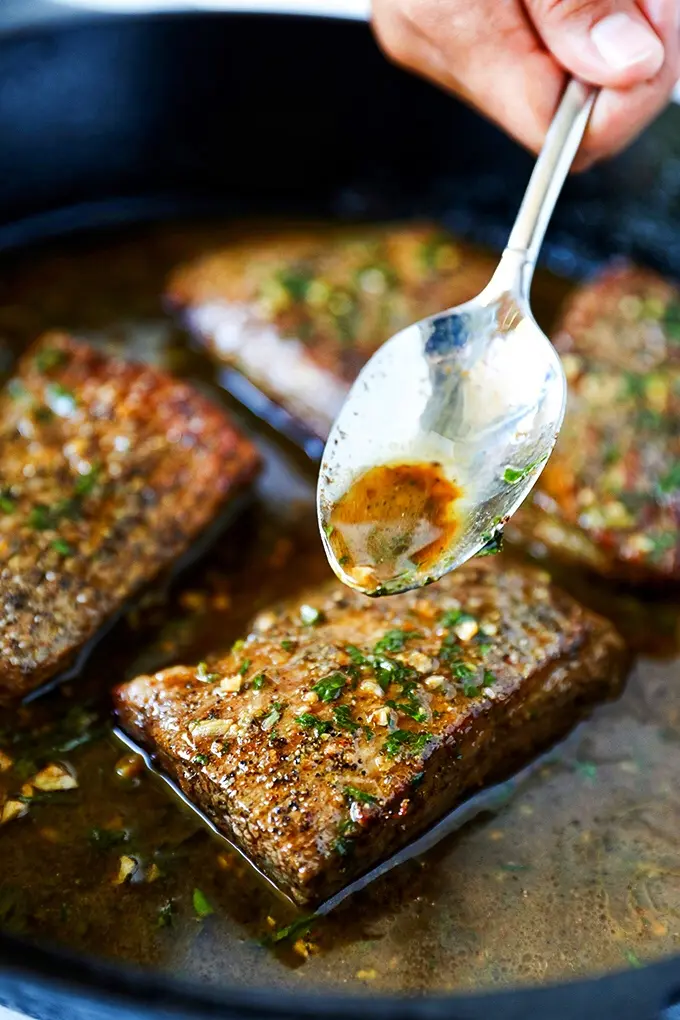
Flank steak is versatile and can be served in many ways. You can enjoy it on its own, or pair it with side dishes like grilled vegetables, mashed potatoes, or a fresh salad. It’s also great for sandwiches, tacos, or stir-fries.

How to Store Irresistible Flank Steak

If you have leftovers, let the meat cool down to room temperature. Wrap it tightly in plastic wrap or aluminum foil, or store it in an airtight container. It can be stored in the refrigerator for up to 3 days. You can also freeze it for longer storage, up to 3 months. To reheat, simply warm it up in the oven or on the grill.

Tips to Make Irresistible Flank Steak

  • Don’t skip the marinating process; it’s crucial for flavor and tenderness.
  • Make sure your grill is hot before adding the steak for a good sear.
  • Resting the steak after grilling is essential for juicy meat.
  • Slice against the grain for the best texture.

Variation

You can customize the marinade to suit your taste. Try adding herbs like fresh rosemary or thyme, or switch up the vinegar with apple cider vinegar for a different flavor profile.

FAQs

Can I use a different cut of meat?
Yes, you can use other cuts like skirt steak or sirloin, but cooking times may vary.

What if I don’t have a grill?
You can cook the flank steak in a grill pan on your stovetop or in the oven under the broiler.

How do I know when the steak is cooked?
Use a meat thermometer to check for doneness: 130°F for medium-rare, 140°F for medium.

[tasty-recipe id=”4381″]

Irresistible Flank Steak
Learn how to prepare juicy and flavorful flank steak with this easy marinade recipe, perfect for family dinners and gatherings.

For the Marinade

  • 1/2 cup olive oil
  • 1/3 cup low sodium soy sauce
  • 1/4 cup balsamic vinegar
  • 2 tablespoons fresh lemon juice
  • 2 tablespoons brown sugar
  • 1 1/2 tablespoons Worcestershire sauce
  • 1 tablespoon Dijon mustard
  • 1 tablespoon onion powder
  • 1 tablespoon garlic powder
  • 1 teaspoon paprika
  • 1 teaspoon black pepper
  • 1 teaspoon red pepper flakes
  • 1 teaspoon dried dill weed
  • 1/2 teaspoon dried oregano
  • 1/2 teaspoon dried rosemary
  • 1/2 teaspoon ground coriander

For the Steak

  • 1 1/2 – 2 pounds flank steak

Preparation

  1. In a medium-sized bowl, whisk together olive oil, soy sauce, balsamic vinegar, lemon juice, and Worcestershire sauce.
  2. Add the brown sugar, Dijon mustard, and all the seasonings—from onion powder to ground coriander. Stir until the sugar dissolves completely.
  3. Place the flank steak in a shallow dish or resealable plastic bag. Pour the marinade over the steak, ensuring it is fully covered.
  4. Let it marinate in the refrigerator for at least 2 hours or up to 12 hours.

Cooking

  1. Heat your grill to medium-high or preheat a grill pan on high on your stovetop.
  2. Remove the steak from the marinade, allowing the excess to drip off. Place it on the hot grill.
  3. Cook for about 4-5 minutes per side for medium-rare, depending on thickness.
  4. Let the flank steak rest on a cutting board for at least 5 minutes before slicing.
  5. Thinly slice the steak against the grain at a diagonal angle and serve immediately.

Don’t skip the marinating process; it’s crucial for flavor and tenderness. Make sure your grill is hot before adding the steak for a good sear. Resting the steak after grilling is essential for juicy meat. Slice against the grain for the best texture.

Dinner, Main Course
American, Grill
Easy Recipe, Family Dinner, Flank Steak, Grilled Steak, Marinade

Low Carb Cheesy Garlic Chicken Wraps

Low Carb Cheesy Garlic Chicken Wraps served on a plate with fresh herbs

This Low Carb Cheesy Garlic Chicken Wraps recipe feels like a warm hug on a plate. It mixes tender garlic chicken, melty cheese, and bright herbs inside a low carb wrap or big lettuce leaf. The dish makes people smile, and it fills you up without heavy carbs. It works for family dinners, quick lunches, or when you want a simple keto friendly meal, and it tastes rich and comforting. Try it once, and you will want to make it again, trust me, you will be excited to take a bite.

How to prepare Low Carb Cheesy Garlic Chicken Wraps

Ingredients

  • Cooked chicken, shredded or sliced (about 2 cups)
  • Garlic, 2 cloves, minced
  • Olive oil or butter, 1 tablespoon
  • Cream cheese or sour cream, 2 tablespoons (optional, for creaminess)
  • Shredded cheese, 1 cup (cheddar, mozzarella, or a mix)
  • Low carb tortillas or large lettuce leaves, 4
  • Salt and pepper, to taste
  • Fresh parsley or basil, chopped, 2 tablespoons
  • Optional add-ins, sliced avocado, sliced tomatoes, or hot sauce

Directions

  1. Heat oil or butter in a skillet over medium heat. Add garlic and cook 30 seconds until it smells good.
  2. Add the chicken, salt, and pepper. Stir and warm the chicken, about 2 to 3 minutes.
  3. Add cream cheese or sour cream if you use it. Stir until the chicken looks creamy and mixed.
  4. Sprinkle in the shredded cheese. Stir until the cheese melts and coats the chicken.
  5. Take the pan off the heat. Fold in chopped herbs.
  6. Warm the low carb tortillas in a dry pan or microwave for a few seconds. If you use lettuce, wash and dry the leaves.
  7. Spoon the cheesy garlic chicken onto each wrap or leaf. Add avocado or tomato if you like.
  8. Fold or roll the wrap, serve warm.

Low Carb Cheesy Garlic Chicken Wraps

Why You’ll Love Low Carb Cheesy Garlic Chicken Wraps

  • Low carb and filling, great for keto or low carb diets.
  • Cheesy garlic flavor is rich, but the meal stays light.
  • Quick to make, good for busy weeknights or meal prep.
  • Easy to change, use different cheese, herbs, or add veggies.
  • Works as a simple lunch, dinner, or party finger food.

Tips for success

  • Use warm chicken, it heats faster and stays juicy.
  • Don’t overcook garlic, it can turn bitter fast.
  • Warm the wraps before filling, they fold without cracking.
  • For a gluten free option, use large lettuce leaves or low carb tortillas labeled gluten free.
  • Add fresh herbs at the end for bright flavor.
  • If you want more sauce, add a spoon of sour cream or plain Greek yogurt.

Serving Suggestions

  • Serve with a simple green salad and a lemon vinaigrette.
  • Try cauliflower rice or roasted vegetables on the side.
  • Offer sliced avocado, pickles, or a small bowl of keto salsa for topping.
  • Cut wraps in halves and serve as appetizers for a party.
  • Pair with a light soup for a cozy meal.

Low Carb Cheesy Garlic Chicken Wraps

FAQs

Q: Are these wraps keto friendly?
A: Yes, if you use low carb tortillas or lettuce leaves, they work well for a keto plan.

Q: Can I make these ahead?
A: You can make the chicken filling ahead and store it in the fridge for 2 to 3 days. Fill and warm the wraps just before serving.

Q: Can I freeze the filling?
A: Yes, freeze the chicken filling in an airtight container for up to 2 months. Thaw in the fridge and reheat on the stove.

Q: What can I use instead of tortillas?
A: Use large romaine leaves, butter lettuce, or low carb flatbreads for a different texture.

Q: How do I keep the wraps from getting soggy?
A: Add wet ingredients like tomatoes or sauce right before eating. Keep filling and wraps separate for meal prep.

Conclusion

For another version and a printable recipe card, check this helpful guide at Cheesy Garlic Chicken Wraps – Cooked & Loved.

Low Carb Cheesy Garlic Chicken Wraps

This Low Carb Cheesy Garlic Chicken Wraps recipe mixes tender garlic chicken, melty cheese, and bright herbs inside a low carb wrap or large lettuce leaf for a rich yet light meal.

Main ingredients

  • 2 cups Cooked chicken, shredded or sliced
  • 2 cloves Garlic, minced
  • 1 tablespoon Olive oil or butter
  • 2 tablespoons Cream cheese or sour cream (optional) (For added creaminess)
  • 1 cup Shredded cheese (cheddar, mozzarella, or a mix)
  • 4 Low carb tortillas or large lettuce leaves
  • Salt and pepper, to taste
  • 2 tablespoons Fresh parsley or basil, chopped

Optional add-ins

  • Sliced avocado
  • Sliced tomatoes
  • Hot sauce

Preparation

  1. Heat oil or butter in a skillet over medium heat. Add garlic and cook for 30 seconds until fragrant.
  2. Add the chicken, salt, and pepper. Stir and warm the chicken for about 2 to 3 minutes.
  3. Add cream cheese or sour cream, if using. Stir until the chicken mixture is creamy and well combined.
  4. Sprinkle in the shredded cheese. Stir until melted and coats the chicken.
  5. Remove from heat and fold in the chopped herbs.
  6. Warm the low carb tortillas in a dry pan or microwave for a few seconds. If using lettuce, wash and dry the leaves.
  7. Spoon the cheesy garlic chicken mixture onto each wrap or lettuce leaf. Optionally add avocado or tomato.
  8. Fold or roll the wrap and serve warm.

For best results, use warm chicken to heat it faster and maintain juiciness. Avoid overcooking garlic to prevent bitterness. Warm the wraps before filling to prevent cracking. Use gluten-free labeled tortillas for a gluten-free option. Add fresh herbs at the end for added flavor.

Dinner, lunch, Main Course, Quick Meals
American, Keto, Low Carb
Cheesy Garlic Chicken, Easy Dinner, Healthy Wraps, Keto Recipes, Low Carb Chicken Wraps