Low Carb Cheesy Garlic Chicken Wraps

Low Carb Cheesy Garlic Chicken Wraps served on a plate with fresh herbs

This Low Carb Cheesy Garlic Chicken Wraps recipe feels like a warm hug on a plate. It mixes tender garlic chicken, melty cheese, and bright herbs inside a low carb wrap or big lettuce leaf. The dish makes people smile, and it fills you up without heavy carbs. It works for family dinners, quick lunches, or when you want a simple keto friendly meal, and it tastes rich and comforting. Try it once, and you will want to make it again, trust me, you will be excited to take a bite.

How to prepare Low Carb Cheesy Garlic Chicken Wraps

Ingredients

  • Cooked chicken, shredded or sliced (about 2 cups)
  • Garlic, 2 cloves, minced
  • Olive oil or butter, 1 tablespoon
  • Cream cheese or sour cream, 2 tablespoons (optional, for creaminess)
  • Shredded cheese, 1 cup (cheddar, mozzarella, or a mix)
  • Low carb tortillas or large lettuce leaves, 4
  • Salt and pepper, to taste
  • Fresh parsley or basil, chopped, 2 tablespoons
  • Optional add-ins, sliced avocado, sliced tomatoes, or hot sauce

Directions

  1. Heat oil or butter in a skillet over medium heat. Add garlic and cook 30 seconds until it smells good.
  2. Add the chicken, salt, and pepper. Stir and warm the chicken, about 2 to 3 minutes.
  3. Add cream cheese or sour cream if you use it. Stir until the chicken looks creamy and mixed.
  4. Sprinkle in the shredded cheese. Stir until the cheese melts and coats the chicken.
  5. Take the pan off the heat. Fold in chopped herbs.
  6. Warm the low carb tortillas in a dry pan or microwave for a few seconds. If you use lettuce, wash and dry the leaves.
  7. Spoon the cheesy garlic chicken onto each wrap or leaf. Add avocado or tomato if you like.
  8. Fold or roll the wrap, serve warm.

Low Carb Cheesy Garlic Chicken Wraps

Why You’ll Love Low Carb Cheesy Garlic Chicken Wraps

  • Low carb and filling, great for keto or low carb diets.
  • Cheesy garlic flavor is rich, but the meal stays light.
  • Quick to make, good for busy weeknights or meal prep.
  • Easy to change, use different cheese, herbs, or add veggies.
  • Works as a simple lunch, dinner, or party finger food.

Tips for success

  • Use warm chicken, it heats faster and stays juicy.
  • Don’t overcook garlic, it can turn bitter fast.
  • Warm the wraps before filling, they fold without cracking.
  • For a gluten free option, use large lettuce leaves or low carb tortillas labeled gluten free.
  • Add fresh herbs at the end for bright flavor.
  • If you want more sauce, add a spoon of sour cream or plain Greek yogurt.

Serving Suggestions

  • Serve with a simple green salad and a lemon vinaigrette.
  • Try cauliflower rice or roasted vegetables on the side.
  • Offer sliced avocado, pickles, or a small bowl of keto salsa for topping.
  • Cut wraps in halves and serve as appetizers for a party.
  • Pair with a light soup for a cozy meal.

Low Carb Cheesy Garlic Chicken Wraps

FAQs

Q: Are these wraps keto friendly?
A: Yes, if you use low carb tortillas or lettuce leaves, they work well for a keto plan.

Q: Can I make these ahead?
A: You can make the chicken filling ahead and store it in the fridge for 2 to 3 days. Fill and warm the wraps just before serving.

Q: Can I freeze the filling?
A: Yes, freeze the chicken filling in an airtight container for up to 2 months. Thaw in the fridge and reheat on the stove.

Q: What can I use instead of tortillas?
A: Use large romaine leaves, butter lettuce, or low carb flatbreads for a different texture.

Q: How do I keep the wraps from getting soggy?
A: Add wet ingredients like tomatoes or sauce right before eating. Keep filling and wraps separate for meal prep.

Conclusion

For another version and a printable recipe card, check this helpful guide at Cheesy Garlic Chicken Wraps – Cooked & Loved.

Low Carb Cheesy Garlic Chicken Wraps

This Low Carb Cheesy Garlic Chicken Wraps recipe mixes tender garlic chicken, melty cheese, and bright herbs inside a low carb wrap or large lettuce leaf for a rich yet light meal.

Main ingredients

  • 2 cups Cooked chicken, shredded or sliced
  • 2 cloves Garlic, minced
  • 1 tablespoon Olive oil or butter
  • 2 tablespoons Cream cheese or sour cream (optional) (For added creaminess)
  • 1 cup Shredded cheese (cheddar, mozzarella, or a mix)
  • 4 Low carb tortillas or large lettuce leaves
  • Salt and pepper, to taste
  • 2 tablespoons Fresh parsley or basil, chopped

Optional add-ins

  • Sliced avocado
  • Sliced tomatoes
  • Hot sauce

Preparation

  1. Heat oil or butter in a skillet over medium heat. Add garlic and cook for 30 seconds until fragrant.
  2. Add the chicken, salt, and pepper. Stir and warm the chicken for about 2 to 3 minutes.
  3. Add cream cheese or sour cream, if using. Stir until the chicken mixture is creamy and well combined.
  4. Sprinkle in the shredded cheese. Stir until melted and coats the chicken.
  5. Remove from heat and fold in the chopped herbs.
  6. Warm the low carb tortillas in a dry pan or microwave for a few seconds. If using lettuce, wash and dry the leaves.
  7. Spoon the cheesy garlic chicken mixture onto each wrap or lettuce leaf. Optionally add avocado or tomato.
  8. Fold or roll the wrap and serve warm.

For best results, use warm chicken to heat it faster and maintain juiciness. Avoid overcooking garlic to prevent bitterness. Warm the wraps before filling to prevent cracking. Use gluten-free labeled tortillas for a gluten-free option. Add fresh herbs at the end for added flavor.
Dinner, lunch, Main Course, Quick Meals
American, Keto, Low Carb
Cheesy Garlic Chicken, Easy Dinner, Healthy Wraps, Keto Recipes, Low Carb Chicken Wraps

Cheesy Beef and Bacon Bake

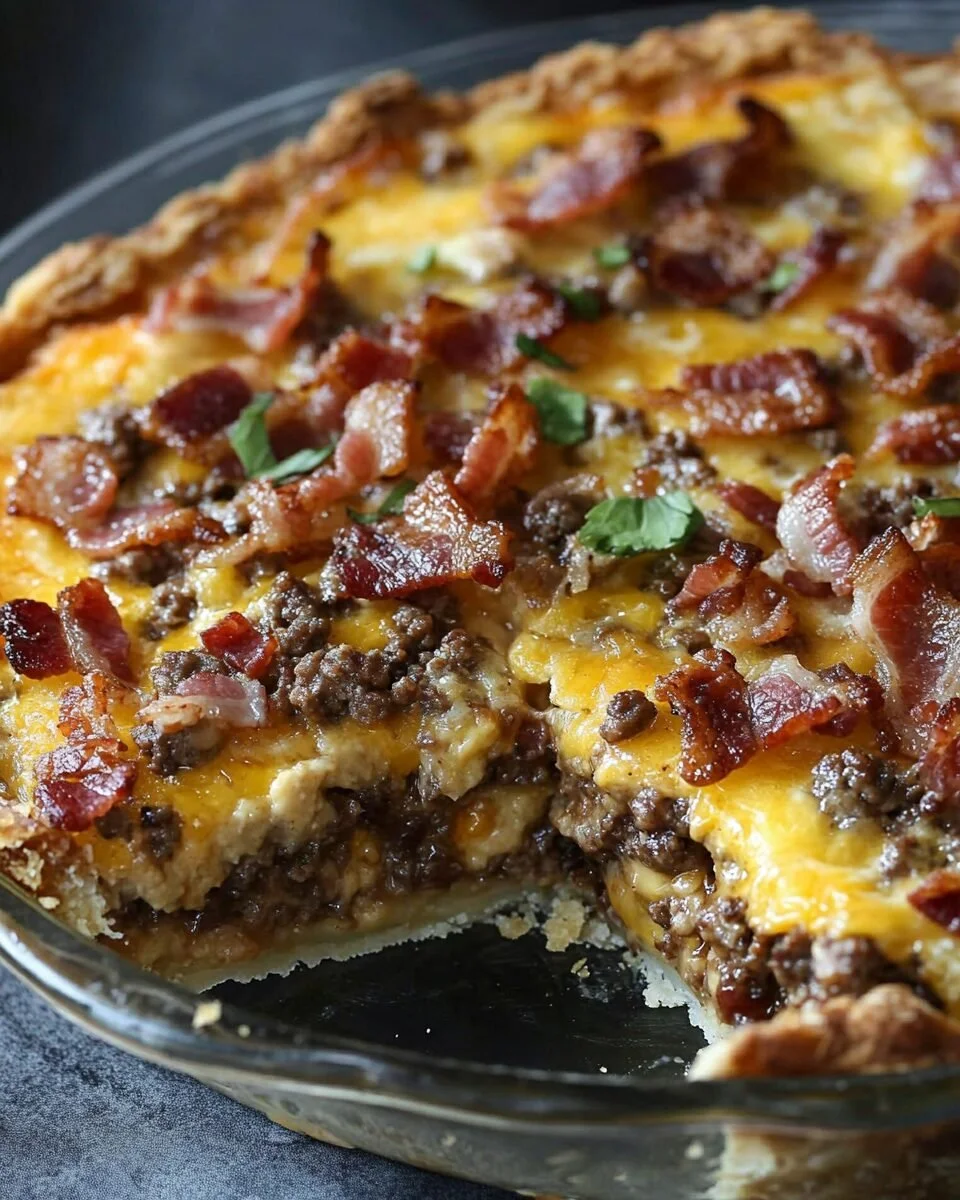
Cheesy Beef and Bacon Bake served on a plate, garnished with herbs

This Cheesy Beef and Bacon Bake is a warm, tasty dish that makes people smile. It mixes browned beef, crispy bacon, melty cheese, and simple spices. The dish feels like home food, it is filling, and it cooks in one pan, so it is easy to make for family nights or a potluck. This recipe is a real crowd-pleaser, rich in cheese, smoky from bacon, and full of beefy flavor. Get ready to enjoy gooey cheese and crisp bacon in every bite, you will want to make it again and again.
How to prepare Cheesy Beef and Bacon Bake

Ingredients

  • 1 pound ground beef
  • 6 to 8 slices bacon, chopped
  • 1 small onion, chopped
  • 2 cloves garlic, minced
  • 1 cup frozen corn or 1 cup chopped bell pepper (optional)
  • 1 can (14 oz) diced tomatoes, drained
  • 1 cup shredded cheddar cheese
  • 1/2 cup shredded mozzarella (optional)
  • 1/2 cup sour cream or plain yogurt
  • 1 teaspoon salt
  • 1/2 teaspoon black pepper
  • 1 teaspoon dried oregano or Italian seasoning
  • 1 tablespoon olive oil

Directions

  1. Preheat oven to 375°F (190°C).
  2. In a large skillet, cook chopped bacon over medium heat until crisp. Remove bacon and set aside, leave about 1 tablespoon of bacon fat in the pan.
  3. Add olive oil if needed, then cook chopped onion in the skillet until soft, about 3 minutes. Add garlic and cook 30 seconds.
  4. Add ground beef, salt, pepper, and oregano. Cook and stir until beef is browned and cooked through. Drain excess fat if needed.
  5. Stir in drained diced tomatoes and corn or bell pepper if using. Cook 2 minutes to warm.
  6. Turn off heat. Stir in sour cream and half of the cheddar and mozzarella. Mix well.
  7. Pour the beef mix into a baking dish. Sprinkle the reserved crispy bacon on top and then add the rest of the cheddar and mozzarella.
  8. Bake in the oven for 15 to 20 minutes, until cheese is bubbly and golden.
  9. Let rest 5 minutes before serving.

Cheesy Beef and Bacon Bake

Why You’ll Love Cheesy Beef and Bacon Bake

  • It is simple to make, one pan for the stove work and a short bake.
  • The mix of beef, bacon, and cheese gives strong, comforting flavor.
  • You can change it, add vegetables, or use different cheeses.
  • It makes great leftovers, and it warms up well for quick meals.

Tips for success

  • Cook the bacon until crisp, this adds a nice texture on top.
  • Drain excess fat from the beef so the dish does not get greasy.
  • Use a mix of cheeses for best melt and flavor, cheddar and mozzarella work well.
  • Let it rest after baking, the cheese will set and slice better.
  • If you want less salt, skip added salt and use low-sodium bacon or cheese.

Serving Suggestions

  • Serve with a simple green salad and a light dressing.
  • Spoon over rice, mashed potatoes, or pasta for a fuller meal.
  • Offer pickles or a fresh tomato salad on the side to cut the richness.
  • Top with chopped fresh parsley or green onions for color and a fresh bite.

Cheesy Beef and Bacon Bake

FAQs

Q: Can I make this ahead of time?

A: Yes, cook the beef mix and store it in the baking dish covered, then add cheese and bake when ready. Heat time may be a bit longer from cold.

Q: Can I freeze the bake?

A: Yes, freeze before baking. Thaw in the fridge overnight and bake a bit longer until hot and bubbly.

Q: Can I use turkey or chicken instead of beef?

A: Yes, ground turkey or chicken work well. You may want to add a bit more seasoning for flavor.

Q: How long does it keep in the fridge?

A: Store in an airtight container for 3 to 4 days. Reheat in the oven or microwave until hot.

Q: Can I make it low carb?

A: Yes, skip the corn and serve with cauliflower rice or a salad to lower carbs.

Conclusion

If you want a tasty, simple dinner that fills the table and pleases a crowd, this Cheesy Beef and Bacon Bake is a great pick. For another similar idea with a low-carb twist, check this recipe, Low-Carb Bacon Cheeseburger Casserole Recipe – Allrecipes.

Cheesy Beef and Bacon Bake

A warm, tasty dish mixing browned beef, crispy bacon, and melty cheese, perfect for family nights or potlucks.

Main ingredients

  • 1 pound ground beef
  • 6 to 8 slices bacon, chopped
  • 1 small onion, chopped
  • 2 cloves garlic, minced
  • 1 cup frozen corn or 1 cup chopped bell pepper (optional) (Choose one or the other, optional)
  • 1 can (14 oz) diced tomatoes, drained
  • 1 cup shredded cheddar cheese
  • 1/2 cup shredded mozzarella (optional) (Optional for extra cheesiness)
  • 1/2 cup sour cream or plain yogurt
  • 1 teaspoon salt (Adjust to taste)
  • 1/2 teaspoon black pepper
  • 1 teaspoon dried oregano or Italian seasoning
  • 1 tablespoon olive oil

Preparation

  1. Preheat oven to 375°F (190°C).
  2. In a large skillet, cook chopped bacon over medium heat until crisp. Remove bacon and set aside, leaving about 1 tablespoon of bacon fat in the pan.
  3. Add olive oil if needed, then cook chopped onion in the skillet until soft, about 3 minutes. Add garlic and cook for 30 seconds.
  4. Add ground beef, salt, pepper, and oregano. Cook and stir until beef is browned and cooked through. Drain excess fat if needed.
  5. Stir in drained diced tomatoes and corn or bell pepper if using. Cook for 2 minutes to warm.
  6. Turn off the heat. Stir in sour cream and half of the cheddar and mozzarella. Mix well.
  7. Pour the beef mix into a baking dish. Sprinkle the reserved crispy bacon on top and then add the rest of the cheddar and mozzarella.
  8. Bake in the oven for 15 to 20 minutes, until cheese is bubbly and golden.
  9. Let rest for 5 minutes before serving.

Cook bacon until crisp for nice texture; drain excess fat from beef to prevent greasiness. Mix cheeses for best melt and flavor; let dish rest after baking for easier slicing. For lower salt content, skip added salt and use low-sodium bacon or cheese. Great leftovers that warm up well.

Dinner, Main Course
American
Bacon, Casserole, Cheesy Beef and Bacon Bake, Comfort Food, Ground Beef

Healthy Oats Khichdi Weight Loss Khichdi Recipe

Healthy Oats Khichdi bowl garnished with vegetables and herbs

I love simple, warm meals that make you feel good, and oats khichdi is one of those. This healthy weight loss khichdi uses oats instead of rice, so it cooks fast, fills you up, and keeps the meal light. It tastes mild, a little nutty from the oats, and well spiced with cumin and turmeric. It is a great crowd-pleaser, easy to make any day of the week, and kind to your stomach. Ready to try a new comfort food that helps your weight goals? Let’s make it together and enjoy a cozy bowl.

How to prepare Oats Khichdi Recipe | Healthy Weight Loss Khichdi Recipe

Ingredients (simple list)

  • 1 cup rolled oats
  • 1/4 cup moong dal, washed (optional, for protein)
  • 1 small carrot, chopped
  • 1 small potato, chopped (optional)
  • 1 small tomato, chopped
  • 1/2 cup peas or mixed vegetables
  • 1 tsp cumin seeds
  • 1/4 tsp turmeric powder
  • 1/2 tsp ginger, grated
  • 1 green chili, slit (optional)
  • 1 tbsp oil or ghee
  • Salt to taste
  • 3 cups water
  • Fresh coriander for garnish
    Directions
  1. Heat oil or ghee in a pan. Add cumin seeds and let them crackle.
  2. Add grated ginger and green chili, sauté for a few seconds.
  3. Add chopped vegetables, and sauté for 2 to 3 minutes.
  4. Add washed moong dal, turmeric, and salt. Mix well.
  5. Pour in water and bring to a gentle boil.
  6. Lower the heat, add oats, and stir. Cook for 4 to 6 minutes until oats and dal are soft. Stir often to avoid sticking.
  7. Turn off heat. Let it sit for a minute, then garnish with fresh coriander.
  8. Serve hot, with a drizzle of ghee if you like.

Oats Khichdi Recipe | Healthy Weight Loss Khichdi Recipe

Why You’ll Love Oats Khichdi Recipe | Healthy Weight Loss Khichdi Recipe

  • Simple and quick to cook, perfect for busy days.
  • Light on the stomach, yet filling, so it helps with weight control.
  • Uses oats, which add fiber and a nutty taste.
  • Mild spices make it friendly for kids and adults.
  • Easy to change with any vegetables you have, so it never gets boring.

Tips for success

  • Use rolled oats, not instant flavored oats, for best texture.
  • Rinse the dal well if using, and soak for 15 minutes to cut cooking time.
  • Keep the water ratio right, about 3 cups water for 1 cup oats and dal, adjust for your preferred thickness.
  • Stir while cooking to prevent the oats from sticking to the bottom.
  • Add lemon or a spoon of ghee at the end for extra flavor, if you want.

Serving Suggestions

  • Serve hot in a bowl, with plain yogurt or a small salad on the side.
  • Top with roasted nuts or a spoon of ghee for extra taste.
  • Pair with a light pickle or steamed vegetables for a fuller meal.
  • Great as a breakfast, lunch, or easy dinner for weight loss plans.

Oats Khichdi Recipe | Healthy Weight Loss Khichdi Recipe

FAQs

Q: Can I make oats khichdi without dal?
A: Yes, you can make it only with oats and vegetables, it will still be filling and light.

Q: Can I use instant oats?
A: Instant oats get mushy fast, they work but the texture will be softer. Rolled oats give a better bite.

Q: How long does it keep in the fridge?
A: Store in an airtight container for up to 2 days. Reheat with a splash of water.

Q: Is this good for weight loss?
A: Yes, it is low in calories, high in fiber, and keeps you full, which helps control hunger.

Conclusion

If you want a tested recipe and more tips for making this healthy dish, check this Oats Khichdi Recipe, it has a clear method and variations you can try. Enjoy your warm, healthy bowl and have fun cooking.

Oats Khichdi

A comforting and nutritious dish made with rolled oats, vegetables, and mild spices, perfect for weight loss.

Main Ingredients

  • 1 cup rolled oats (Use rolled oats for best texture.)
  • 1/4 cup moong dal, washed (Optional, for added protein.)
  • 1 small carrot, chopped
  • 1 small potato, chopped (Optional.)
  • 1 small tomato, chopped
  • 1/2 cup peas or mixed vegetables
  • 1 tsp cumin seeds
  • 1/4 tsp turmeric powder
  • 1/2 tsp ginger, grated
  • 1 unit green chili, slit (Optional.)
  • 1 tbsp oil or ghee
  • to taste unit Salt
  • 3 cups water
  • to garnish unit Fresh coriander

Cooking Instructions

  1. Heat oil or ghee in a pan. Add cumin seeds and let them crackle.
  2. Add grated ginger and green chili, sauté for a few seconds.
  3. Add chopped vegetables, and sauté for 2 to 3 minutes.
  4. Add washed moong dal, turmeric, and salt. Mix well.
  5. Pour in water and bring to a gentle boil.
  6. Lower the heat, add oats, and stir. Cook for 4 to 6 minutes until oats and dal are soft. Stir often to avoid sticking.
  7. Turn off heat. Let it sit for a minute, then garnish with fresh coriander.
  8. Serve hot, with a drizzle of ghee if you like.

Use rolled oats, not instant flavored oats, for best texture. Rinse the dal well if using, and soak for 15 minutes to cut cooking time. Keep the water ratio right, about 3 cups water for 1 cup oats and dal, adjust for your preferred thickness. Stir while cooking to prevent the oats from sticking to the bottom. Add lemon or a spoon of ghee at the end for extra flavor, if desired. Serve hot in a bowl, with plain yogurt or a small salad on the side. Top with roasted nuts or a spoon of ghee for extra taste. Pair with a light pickle or steamed vegetables for a fuller meal. Great as a breakfast, lunch, or easy dinner for weight loss plans.

Dinner, lunch, Main Course
Indian
Healthy Recipe, Oats Khichdi, Weight Loss

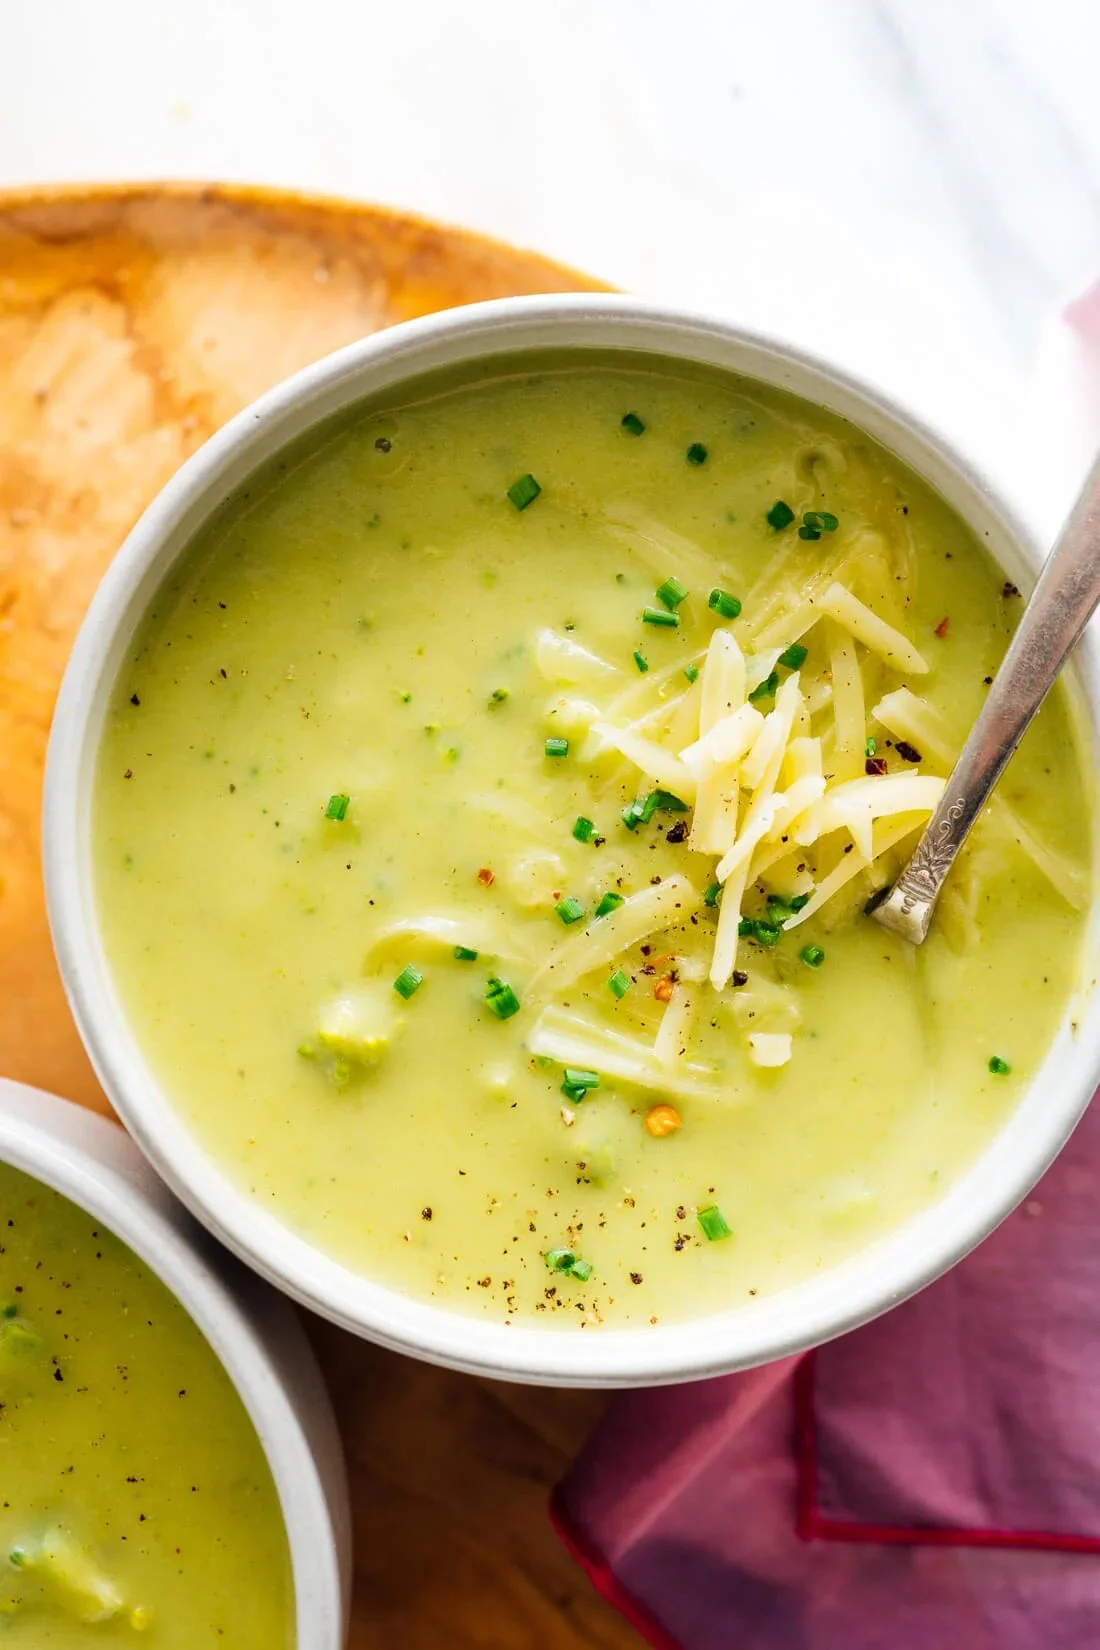
Broccoli Cheese Soup

A bowl of creamy Broccoli Cheese Soup garnished with fresh broccoli and cheese

This warm broccoli cheese soup feels like a hug in a bowl. It is creamy, cheesy, and full of tender broccoli. People love it on cold days and at simple family dinners. The featured recipe is a classic, easy broccoli cheese soup that cooks fast and pleases most tastes. It has a rich cheddar flavor, a smooth texture, and a homey feel that makes it a crowd pleaser, whether you make it for lunch or a cozy dinner. Get ready to make a pot that fills the house with a happy smell, and makes everyone ask for seconds.

How to prepare Broccoli Cheese Soup

Ingredients

  • 4 cups broccoli florets, chopped small
  • 1 small onion, diced
  • 2 cloves garlic, minced
  • 3 tablespoons butter
  • 3 tablespoons all purpose flour
  • 3 cups chicken or vegetable broth
  • 1 cup milk or half and half
  • 2 cups shredded cheddar cheese
  • Salt and pepper to taste
  • Optional, grated carrot or a pinch of mustard powder for extra flavor

Directions

  1. Melt butter in a large pot over medium heat. Add onion and cook until soft, about 5 minutes. Add garlic and cook 1 minute.
  2. Stir in flour, cook 1 minute to make a light roux.
  3. Slowly add broth while stirring, so the soup stays smooth.
  4. Add broccoli, bring to a simmer, cover and cook until broccoli is tender, about 10 minutes.
  5. Use an immersion blender for a smooth soup, or mash some broccoli with a spoon for a chunkier texture.
  6. Stir in milk, then lower heat. Add cheese a little at a time, stirring until melted and smooth. Do not boil after cheese is added.
  7. Taste and add salt and pepper. If the soup is too thick, add a splash of milk or broth.
  8. Serve hot, with extra cheese on top if you like.

Broccoli Cheese Soup

Why You’ll Love Broccoli Cheese Soup

  • Simple to make with common kitchen ingredients.
  • Comforting, creamy texture that kids and adults enjoy.
  • Flexible, you can make it thick or thin, smooth or chunky.
  • Good use of fresh or frozen broccoli, so it works any time.
  • A great base to add bacon, potatoes, or extra veggies.

Tips for success

  • Chop broccoli small so it cooks fast and blends well.
  • Add cheese off the heat or on very low heat, to keep it smooth.
  • Use sharp cheddar for more flavor, mild cheddar for a softer taste.
  • If the soup is grainy after adding cheese, stir in a little milk and heat gently to smooth it.
  • For a richer soup, use half and half or add a splash of cream.
  • Taste and season at the end, cheese can add salt.

Serving Suggestions

  • Serve with crusty bread or garlic toast for dipping.
  • Top with extra shredded cheddar, croutons, or crispy bacon bits.
  • Offer a side salad to make a light meal.
  • Spoon into bread bowls for a fun serving idea.
  • Pair with a sandwich, like a grilled cheese, for a classic combo.

Broccoli Cheese Soup

FAQs

Q, Can I use frozen broccoli?

A, Yes, frozen broccoli works well, add it a little longer if needed.

Q, How do I make the soup thicker?

A, Cook less broth, or mash some broccoli into the broth, or add a little more cheese.

Q, Can I make it ahead of time?

A, Yes, make it ahead and reheat gently. If it gets too thick, thin with a splash of milk or broth.

Q, Is this soup good for kids?

A, Yes, many kids like creamy broccoli cheese soup, and you can blend it smooth for picky eaters.

Q, Can I use a different cheese?

A, Yes, try Monterey Jack, Colby, or a mix with cheddar for different flavors.

Conclusion

If you want another version or step by step photos, check this helpful Broccoli Cheese Soup recipe for more ideas, Broccoli Cheese Soup – Tastes Better from Scratch.

Broccoli Cheese Soup

This warm broccoli cheese soup is creamy, cheesy, and full of tender broccoli, making it a comforting dish for cold days and family dinners.

Main Ingredients

  • 4 cups broccoli florets, chopped small (Chop broccoli small so it cooks fast and blends well.)
  • 1 small onion, diced
  • 2 cloves garlic, minced
  • 3 tablespoons butter
  • 3 tablespoons all purpose flour
  • 3 cups chicken or vegetable broth
  • 1 cup milk or half and half (For a richer soup, use half and half or add a splash of cream.)
  • 2 cups shredded cheddar cheese (Use sharp cheddar for more flavor, mild cheddar for a softer taste.)
  • to taste salt and pepper (Taste and season at the end, cheese can add salt.)
  • optional grated carrot or a pinch of mustard powder (Optional for extra flavor.)

Preparation

  1. Melt butter in a large pot over medium heat. Add onion and cook until soft, about 5 minutes.
  2. Add garlic and cook for 1 minute.
  3. Stir in flour, cook for 1 minute to make a light roux.

Cooking

  1. Slowly add broth while stirring, so the soup stays smooth.
  2. Add broccoli, bring to a simmer, cover and cook until broccoli is tender, about 10 minutes.
  3. Use an immersion blender for a smooth soup, or mash some broccoli with a spoon for a chunkier texture.
  4. Stir in milk, then lower heat. Add cheese a little at a time, stirring until melted and smooth. Do not boil after cheese is added.
  5. Taste and add salt and pepper. If the soup is too thick, add a splash of milk or broth.

Serving

  1. Serve hot, with extra cheese on top if you like.

Serve with crusty bread or garlic toast for dipping. Top with extra shredded cheddar, croutons, or crispy bacon bits. Offer a side salad to make a light meal. Spoon into bread bowls for a fun serving idea. Pair with a sandwich, like a grilled cheese, for a classic combo.

Dinner, lunch, Soup
American
Broccoli Cheese Soup, Cheesy Soup, Comfort Food, Easy Soup, Vegetarian Soup

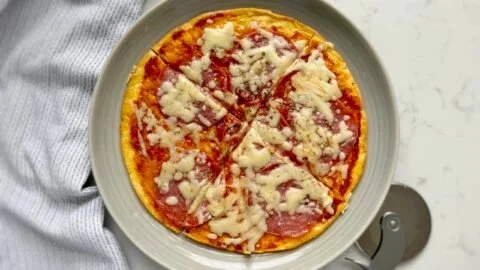
Pizza Eggs

Delicious Pizza Eggs with toppings and cheese, perfect for breakfast or brunch.

I love simple food that tastes like a treat, and Pizza Eggs are exactly that. They mix the bold taste of pizza with the comfort of eggs. You get gooey cheese, savory pepperoni or sausage, bright tomato flavor, and eggs all in one pan. It is quick, fun, and great for breakfast, brunch, or a light dinner. This recipe is a real crowd-pleaser, and it looks and smells like a little pizza right on your plate. Get ready to make something tasty that everyone will ask for again.

How to prepare Pizza Eggs

  1. Gather ingredients, like eggs, pizza sauce or crushed tomatoes, shredded mozzarella, pepperoni or cooked sausage, olive oil, salt, and pepper. You can add chopped onion, bell pepper, or fresh basil if you like.
  2. Heat a small skillet over medium heat, add a little olive oil.
  3. If you use onion or bell pepper, cook them for 2 to 3 minutes until soft.
  4. Add pepperoni or cooked sausage, cook one minute to warm and release flavor.
  5. Spoon a few tablespoons of pizza sauce into the pan and spread a thin layer.
  6. Crack eggs into the pan over the sauce, or beat eggs and pour them in for a scrambled style.
  7. Season with a little salt and pepper. Turn heat to low, cover the pan, and cook until the egg whites set but yolks stay soft, about 4 to 6 minutes. For firmer yolks, cook a bit longer.
  8. Sprinkle shredded mozzarella over the eggs, cover again until the cheese melts, about one minute.
  9. Finish with chopped basil, oregano, or a pinch of red pepper flakes if you like. Serve hot with toast or a side salad.

Pizza Eggs

Why You’ll Love Pizza Eggs

  • They taste like pizza, but they cook faster than a slice.
  • You can use what you have, like leftover meats or any cheese.
  • They fit many diets, you can make them low carb or keto by skipping bread.
  • They work for any meal, breakfast, lunch, or a quick dinner.
  • They are simple to make and still feel special.

Tips for success

  • Use a nonstick skillet or a well-seasoned pan to keep eggs from sticking.
  • Cook pepperoni or sausage first to add more flavor to the sauce.
  • Keep heat low when you add eggs, this helps them cook gently and stay tender.
  • If you like runny yolks, watch the pan closely and remove when whites look set.
  • Try beaten eggs for a soft, creamy scramble that mixes with the sauce and cheese.
  • Use fresh basil at the end for a bright lift, dried oregano while cooking for classic pizza flavor.

Serving Suggestions

  • Serve with toasted bread or a warm English muffin for a full meal.
  • Make it low carb by serving over a bed of spinach or with sliced avocado.
  • Add a side salad with a simple lemon dressing for a fresh contrast.
  • For kids, serve with cut pepperoni on top, they love the pizza look.
  • Pair with coffee or a light iced tea for a relaxed brunch.

Pizza Eggs

FAQs

Q: Can I make Pizza Eggs ahead of time?
A: You can cook the parts ahead, like sauce and meat, but eggs are best fresh. Reheat gently in a pan so they stay soft.

Q: Can I use egg whites only, or a vegan egg?
A: Yes, you can use egg whites or a plant based egg substitute, but texture and cook time will change a little.

Q: What cheeses work best?
A: Mozzarella is classic, but provolone, cheddar, or a mix work fine. Choose a cheese that melts well.

Q: How do I make it spicy?
A: Add crushed red pepper flakes, spicy sausage, or a drizzle of hot sauce after cooking.

Q: Is this recipe low carb or keto friendly?
A: Yes, Pizza Eggs can be low carb or keto if you skip bread and use low sugar sauce, or see a keto-style version for tips.

Conclusion

If you want a tested low carb take or more pictures and exact measurements, check the keto version for ideas, like the one at Keto Pizza Eggs – Peace Love and Low Carb. Enjoy making Pizza Eggs, they are simple, fast, and full of flavor.

Pizza Eggs

A delicious blend of pizza flavors combined with eggs, perfect for breakfast or a light dinner.

Main Ingredients

  • 4 large large eggs
  • 1/4 cup pizza sauce or crushed tomatoes (You can also use leftover pizza sauce)
  • 1 cup shredded mozzarella (Mozzarella is traditional but feel free to mix cheeses)
  • 1/2 cup pepperoni or cooked sausage (Can use any leftover meats)
  • 1 tablespoon olive oil
  • 1 teaspoon salt (Adjust to taste)
  • 1 teaspoon pepper (Adjust to taste)

Optional Add-ins

  • 1/4 cup chopped onion (For added flavor)
  • 1/4 cup chopped bell pepper (For added flavor)
  • 1/4 cup fresh basil (For garnishing)

Preparation

  1. Gather all ingredients including eggs, pizza sauce, mozzarella, pepperoni, olive oil, salt, and pepper.
  2. Optional: If using, chop onion and bell pepper.

Cooking

  1. Heat a small skillet over medium heat and add olive oil.
  2. If using onion or bell pepper, cook them for 2 to 3 minutes until soft.
  3. Add pepperoni or cooked sausage and cook for 1 minute to warm and release flavor.
  4. Spread a few tablespoons of pizza sauce in the pan.
  5. Crack eggs into the pan over the sauce or beat them and pour in for scrambled style.
  6. Season with salt and pepper, reduce heat to low, cover, and cook until egg whites are set and yolks are soft, about 4 to 6 minutes.
  7. For firmer yolks, cook a bit longer.
  8. Sprinkle shredded mozzarella over the eggs, cover, and let cheese melt for about 1 minute.

Serving

  1. Finish with chopped basil, oregano, or red pepper flakes if desired.
  2. Serve hot with toast or a side salad.

Tips for success: Use a nonstick skillet, keep heat low for gentle egg cooking, and try to serve fresh for best texture.

Breakfast, Brunch, Dinner
American
Breakfast Recipe, Eggs, Keto Friendly, Pizza Eggs, Quick Meal

Cheese Chicken Bake

Delicious Cheese Chicken Bake topped with melted cheese and herbs

Cheese Chicken Bake is warm, simple, and full of melty cheese. This dish feels like a hug on a plate. It is great for busy weeknights, family dinners, and for anyone who loves tasty, easy comfort food. The cheese makes the chicken juicy and rich, and the bake fills the kitchen with a nice smell. This featured recipe is a crowd-pleaser, with tender chicken under a golden, cheesy crust. It tastes creamy, savory, and a little crunchy on top, so people always ask for seconds. Grab your baking dish and get ready to make a dish that everyone will love, and maybe lick their plate a little.

How to prepare Cheese Chicken Bake

Ingredients

  • 4 boneless, skinless chicken breasts
  • 1 teaspoon salt
  • 1/2 teaspoon black pepper
  • 1 teaspoon garlic powder
  • 1 teaspoon paprika
  • 2 tablespoons olive oil
  • 1 cup sour cream or plain Greek yogurt
  • 1/2 cup mayonnaise or 1 can cream of chicken soup
  • 1 cup shredded cheddar cheese
  • 1 cup shredded mozzarella cheese
  • 1/2 cup breadcrumbs, optional for crunch
  • 2 tablespoons chopped fresh parsley or dried parsley

Directions

  1. Preheat oven to 400°F (200°C).
  2. Pat chicken dry, then season both sides with salt, pepper, garlic powder, and paprika.
  3. Heat olive oil in a skillet over medium heat, sear chicken 2 minutes per side, just to brown, then remove.
  4. In a bowl, mix sour cream, mayonnaise or cream soup, half the cheddar, half the mozzarella, and parsley.
  5. Place seared chicken in a baking dish. Spread the cheese sauce over each piece, covering the top.
  6. Sprinkle the remaining cheeses and breadcrumbs on top for a golden crust.
  7. Bake 20 to 25 minutes, until chicken reaches 165°F (74°C) and cheese bubbles.
  8. If you want extra brown on top, broil 2 to 3 minutes, watching closely.
  9. Let rest 5 minutes before serving, this keeps the chicken juicy.

Cheese Chicken Bake

Why You’ll Love Cheese Chicken Bake

This cheesy chicken bake is simple, quick, and full of flavor. It uses everyday ingredients, so you do not need a long shopping list. The cheese keeps the chicken moist, and the top gets a nice golden color. It makes a great easy chicken bake for weeknights or a small party. Kids and adults like it, so it is a real family dinner winner.

Tips for success

  • Pound the chicken to even thickness, it cooks more evenly.
  • Use a meat thermometer to reach 165°F, do not overcook.
  • If you like more sauce, add a little milk or chicken broth to the mix.
  • For extra flavor, add chopped onions or cooked mushrooms to the sauce.
  • Use a mix of cheeses for a richer taste, try cheddar and Monterey Jack.
  • If you use frozen chicken, thaw fully before baking.

Serving Suggestions

  • Serve over rice or pasta to soak up the sauce.
  • Pair with a green salad for a lighter meal.
  • Add roasted vegetables like broccoli, carrots, or green beans.
  • Serve with crusty bread or garlic bread to mop up the cheese.
  • For a low-carb option, serve over cauliflower rice or with steamed veggies.

Cheese Chicken Bake

FAQs

Q, Can I use chicken thighs instead of breasts? A, Yes, bone-in or boneless thighs work well. Thighs may need a few extra minutes to cook.

Q, Can I make this ahead of time? A, Yes, you can assemble in the dish, cover, and refrigerate up to 24 hours. Bake when ready, add a few extra minutes if cold.

Q, How do I store leftovers? A, Cool, then store in an airtight container in the fridge for 3 to 4 days. Reheat in the oven at 350°F (175°C) until warm.

Q, Can I freeze it? A, Yes, freeze the baked dish in a freezer-safe container for up to 2 months. Thaw in the fridge before reheating.

Q, How can I make it crispier on top? A, Add breadcrumbs or broil for 1 to 3 minutes at the end. Watch closely so it does not burn.

Conclusion

If you want a simple, cheesy, and comforting meal, this Cheese Chicken Bake is a great choice for family dinner or an easy weeknight meal. For another tasty one-dish idea with a similar easy dinner feel, try One Dish Queso Chicken Bake {Easy Dinner Recipe}.

Cheese Chicken Bake

This warm and simple Cheese Chicken Bake is full of melty cheese and makes a comforting dish that everyone loves. It features tender chicken under a golden, cheesy crust, perfect for busy weeknights and family dinners.

Chicken and Seasoning

  • 4 pieces boneless, skinless chicken breasts (Pound to even thickness for even cooking)
  • 1 teaspoons salt
  • 1/2 teaspoons black pepper
  • 1 teaspoons garlic powder
  • 1 teaspoons paprika
  • 2 tablespoons olive oil (For searing the chicken)

Cheese and Sauce

  • 1 cup sour cream or plain Greek yogurt
  • 1/2 cup mayonnaise or 1 can cream of chicken soup
  • 1 cup shredded cheddar cheese (Divided use)
  • 1 cup shredded mozzarella cheese (Divided use)
  • 2 tablespoons chopped fresh parsley or dried parsley (For added flavor)

Topping

  • 1/2 cup breadcrumbs (Optional for crunch)

Preparation

  1. Preheat oven to 400°F (200°C).
  2. Pat chicken dry, then season both sides with salt, pepper, garlic powder, and paprika.
  3. Heat olive oil in a skillet over medium heat, sear chicken for 2 minutes per side to brown, then remove.
  4. In a bowl, mix sour cream, mayonnaise or cream soup, half the cheddar, half the mozzarella, and parsley.

Assembly

  1. Place seared chicken in a baking dish. Spread the cheese sauce over each piece, covering the top.
  2. Sprinkle the remaining cheeses and breadcrumbs on top for a golden crust.

Baking

  1. Bake for 20 to 25 minutes, until chicken reaches 165°F (74°C) and cheese bubbles.
  2. If desired, broil for 2 to 3 minutes for extra brown, watching closely.

Serving

  1. Let rest for 5 minutes before serving to keep the chicken juicy.

For extra flavor, add chopped onions or cooked mushrooms to the sauce. For a low-carb option, serve over cauliflower rice or with steamed veggies. Leftovers can be stored in an airtight container for 3 to 4 days.

Dinner, Main Course
American
Cheese Chicken Bake, chicken bake, Comfort Food, Easy Dinner, Family Meal

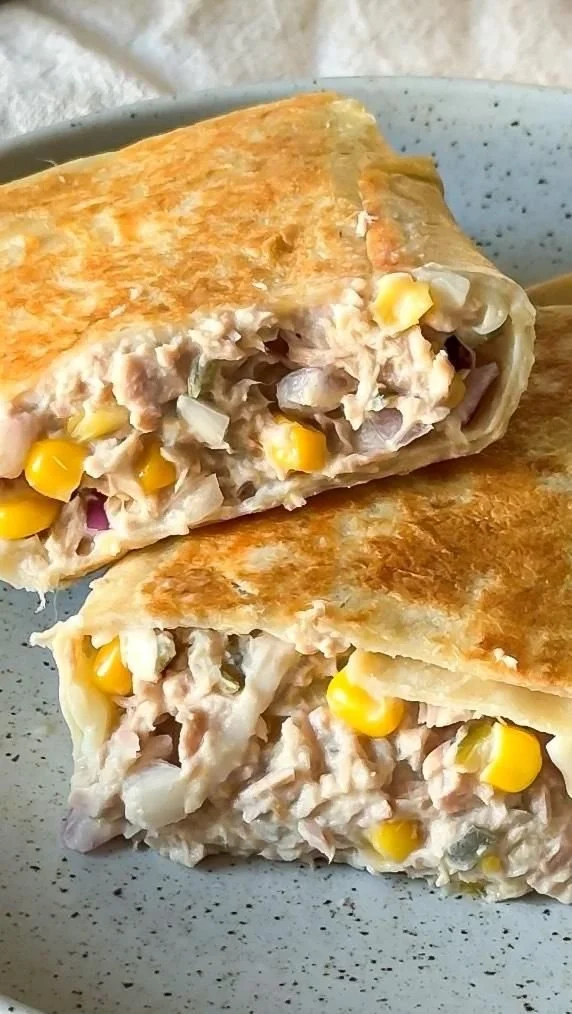
Tuna Melt Wrap

Delicious Tuna Melt Wrap with melted cheese and savory tuna filling

This tuna melt wrap is warm, simple, and full of flavor. It mixes tuna salad with melty cheese, crisp veggies, and a soft tortilla. People love it for lunch, a quick dinner, or a packed picnic. The recipe is a crowd-pleaser, with creamy tuna, gooey cheese, and a little crunch in every bite. You will enjoy how fast it comes together, and how good it tastes. Give it a try, you might make it again this week.

How to prepare Tuna Melt Wrap

Ingredients

  • 1 can (5 oz) tuna, drained
  • 2 tbsp mayonnaise, or yogurt for a lighter option
  • 1 tsp mustard
  • Salt and pepper, to taste
  • 1/4 cup red onion, finely chopped
  • 1/4 cup celery, chopped
  • 1 tbsp lemon juice
  • 2 large flour tortillas, or whole wheat wraps
  • 1 cup shredded cheddar or mozzarella cheese
  • 1 small tomato, sliced
  • 1 cup baby spinach or lettuce
  • Butter or oil, for the pan

Directions

  1. In a bowl, mix tuna, mayonnaise, mustard, lemon juice, onion, celery, salt, and pepper. Taste and adjust seasoning. This is your tuna salad.
  2. Lay a tortilla flat. Put half the tuna salad in the middle. Top with some cheese, tomato slices, and spinach.
  3. Fold the sides of the tortilla, then roll it up tight into a wrap. Repeat with the second tortilla.
  4. Heat a skillet over medium heat. Add a little butter or oil.
  5. Place the wraps seam side down in the hot pan. Cook 2 to 3 minutes on each side, press lightly with a spatula, until the tortilla is golden and the cheese melts.
  6. Remove from the pan. Let the wrap sit one minute, then slice in half and serve warm.

Tuna Melt Wrap

Why You’ll Love Tuna Melt Wrap

  • Quick to make, ready in about 10 to 15 minutes.
  • Comforting, because the cheese melts around the tuna.
  • Flexible, you can swap vegetables or cheese you have on hand.
  • Good for packing, it stays tasty when wrapped up for lunch.
  • Uses common pantry items, tuna and tortillas, for an easy meal.

Tips for success

  • Drain the tuna well, this keeps the wrap from getting soggy.
  • Use cheese that melts easily, like cheddar or mozzarella.
  • Heat the pan first, then cook the wrap, for a nice, golden crust.
  • Add a touch of lemon or pickle juice for brightness.
  • If you like spice, mix in a little hot sauce or chopped jalapeño.

Serving Suggestions

  • Serve with potato chips or a simple green salad.
  • Pair with pickles, carrot sticks, or a cup of soup.
  • Add a side of fruit for a lighter meal.
  • Cut the wrap in halves for an easy share plate.

Tuna Melt Wrap

FAQs

Q: Can I use canned tuna in water or oil?
A: Yes, both work. Tuna in water is lighter, tuna in oil gives more flavor. Just drain well.

Q: How do I make this lower in calories?
A: Use plain yogurt instead of mayonnaise, choose a whole wheat wrap, and add more veggies.

Q: Can I make these ahead and reheat?
A: Yes, you can assemble and wrap in foil, then reheat in a pan or oven. For best texture, cook fresh if possible.

Q: Can I use a salad instead of cooking the wrap?
A: Yes, turn the tuna salad into a tuna melt salad by adding cheese and serving over greens, no pan needed.

Conclusion

If you want a simple, tasty wrap idea, this tuna melt wrap is a great choice for quick lunch or easy dinner. For another clear version of the recipe and extra tips, see Easy Tuna Melt Wrap – The Modern Nonna.

Tuna Melt Wrap

This tuna melt wrap is warm, simple, and full of flavor. A delicious mix of tuna salad, melty cheese, and fresh veggies wrapped in a soft tortilla.

Tuna Salad

  • 1 can (5 oz) tuna, drained (Use tuna in either water or oil.)
  • 2 tbsp mayonnaise, or yogurt for a lighter option
  • 1 tsp mustard
  • to taste Salt and pepper
  • 1/4 cup red onion, finely chopped
  • 1/4 cup celery, chopped
  • 1 tbsp lemon juice

Wrap Assembly

  • 2 large flour tortillas, or whole wheat wraps
  • 1 cup shredded cheddar or mozzarella cheese (Choose cheese that melts easily.)
  • 1 small tomato, sliced
  • 1 cup baby spinach or lettuce
  • to taste Butter or oil, for the pan

Preparation

  1. In a bowl, mix tuna, mayonnaise, mustard, lemon juice, onion, celery, salt, and pepper. Taste and adjust seasoning.
  2. Lay a tortilla flat. Put half the tuna salad in the middle. Top with some cheese, tomato slices, and spinach.
  3. Fold the sides of the tortilla, then roll it up tight into a wrap. Repeat with the second tortilla.

Cooking

  1. Heat a skillet over medium heat. Add a little butter or oil.
  2. Place the wraps seam side down in the hot pan. Cook 2 to 3 minutes on each side, pressing lightly with a spatula until the tortilla is golden and the cheese melts.
  3. Remove from the pan, let the wrap sit one minute, then slice in half and serve warm.

Tips for success: Drain the tuna well to keep the wrap from getting soggy. Use cheese that melts easily. Heat the pan first for a nice, golden crust. Add a touch of lemon or pickle juice for brightness. For spice, mix in hot sauce or chopped jalapeño.

Dinner, lunch, Snack
American
Easy Lunch, Quick Dinner, Tuna Melt, Tuna Salad, Wrap Recipe

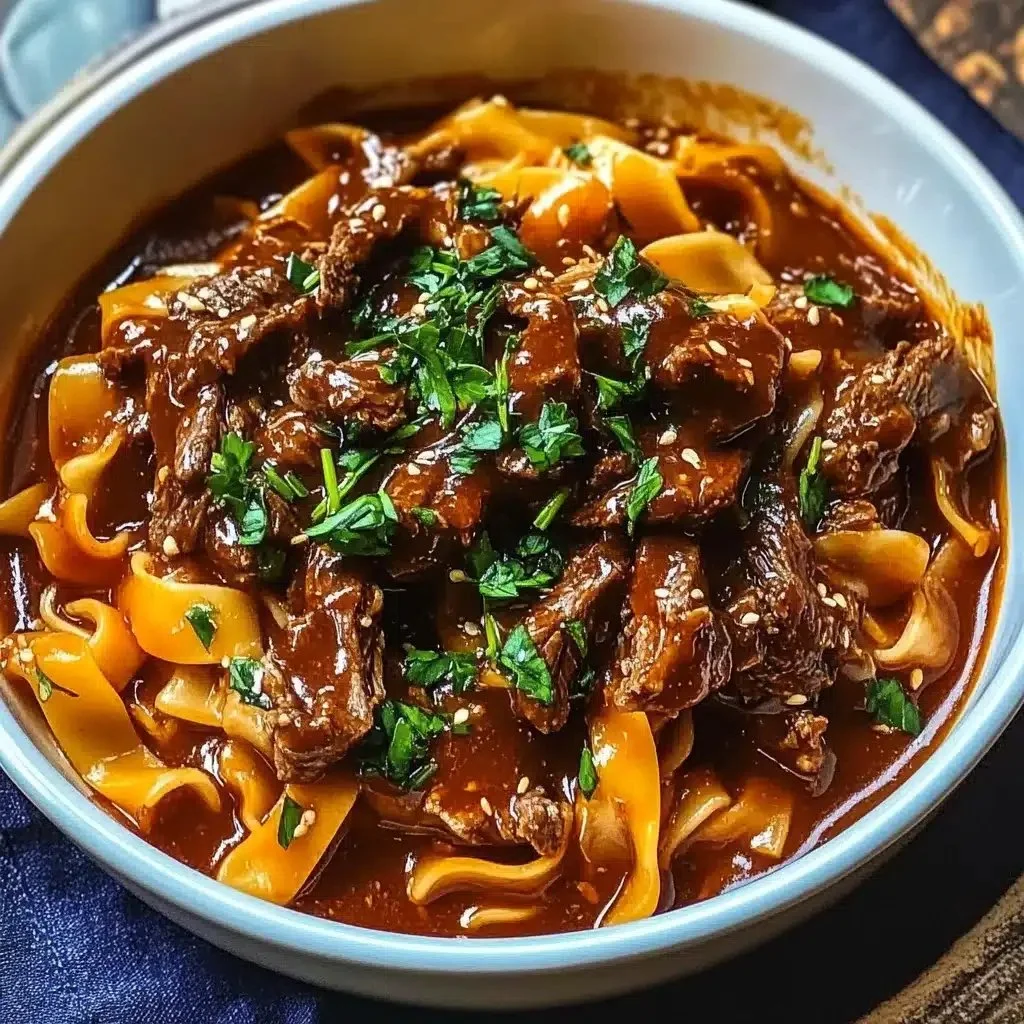
Korean Beef Noodles

Delicious bowl of Korean beef noodles garnished with green onions and sesame seeds

I love a warm bowl that feels like a hug, and Korean Beef Noodles do just that. This dish blends savory beef, bright soy, nutty sesame, and a touch of spice for a rich, tasty noodle bowl. It’s easy to make, fills the house with good smells, and usually makes everyone ask for seconds. The recipe below is a simple crowd-pleaser, full of bold flavor and comfort. Get ready to cook a bowl that will make weeknights feel special, and maybe sneak a taste before serving.

How to prepare Korean Beef Noodles

Ingredients you will need, keep words simple

  • 1 pound ground beef
  • 8 ounces noodles, ramen, udon, or any noodle you like
  • 3 tablespoons soy sauce
  • 1 tablespoon sesame oil
  • 1 tablespoon gochujang or chili paste, optional for spice
  • 1 tablespoon sugar or honey
  • 3 cloves garlic, minced
  • 1 small onion, sliced
  • 1 carrot, thin sliced or matchstick
  • 2 green onions, sliced
  • 1 tablespoon sesame seeds, optional
  • 1 tablespoon vegetable oil
  • 1 cup beef broth or water

Steps, follow each step in order, use simple words

  1. Cook the noodles in a pot of boiling water until they are just soft, drain and set aside.
  2. Heat a large pan over medium heat, add vegetable oil.
  3. Add the ground beef, break it up with a spoon, cook until brown.
  4. Push the beef to one side, add the onion and garlic, cook 1 to 2 minutes until soft.
  5. Stir in the carrot and cook 2 minutes more.
  6. Add soy sauce, sesame oil, gochujang, sugar, and beef broth, stir well.
  7. Let the sauce simmer 2 to 3 minutes so flavors mix and sauce thickens a little.
  8. Add the cooked noodles to the pan, toss everything so the sauce coats the noodles.
  9. Taste and add more soy or a little salt if you need.
  10. Turn off the heat, top with green onions and sesame seeds before serving.

Korean Beef Noodles

Why You’ll Love Korean Beef Noodles

  • Rich, savory beef flavor that mixes well with noodles, simple and bold.
  • Fast to make on busy nights, ready in about 20 to 30 minutes.
  • Flexible recipe, you can add more vegetables or make it spicy with gochujang.
  • Great for leftovers, the noodles soak up flavor and taste even better the next day.
  • A good mix of protein, carbs, and a little spice, it fills you up and feels homey.

Tips for success

  • Cook noodles just until soft, do not overcook, they should hold up when tossed with sauce.
  • Brown the beef well, a little crisp adds nice flavor.
  • Taste the sauce before you add noodles, adjust soy or sugar to balance salty and sweet.
  • If you like more sauce, add a splash more beef broth or water.
  • For a lighter dish, use lean ground beef or replace some beef with mushrooms.

Serving Suggestions

  • Serve with a side of steamed greens like bok choy or spinach.
  • Top with a soft boiled egg for extra richness.
  • Add kimchi on the side for a bright, tangy contrast.
  • Garnish with extra sliced green onion and toasted sesame seeds.
  • Pair with a cold drink or a simple cucumber salad to freshen the meal.

Korean Beef Noodles

FAQs

Q: Can I use other meats instead of ground beef? A: Yes, you can use ground pork, chicken, or thin sliced beef. Cook time may change a little, but the flavor works well.

Q: Is gochujang required for the taste? A: No, gochujang adds a spicy, sweet kick. You can skip it or use a small amount of chili paste or chili flakes instead.

Q: How do I make this gluten free? A: Use gluten free soy sauce and gluten free noodles. Make sure any chili paste you use is also gluten free.

Q: Can I make this ahead of time? A: Yes, cook the noodles and sauce, store them separate in the fridge. Reheat and toss together before serving to keep the noodles from getting too soft.

Q: How spicy is this dish? A: You control the spice. Add little or no gochujang for mild, or more for a medium to hot bowl.

Conclusion

If you want a quick, tasty bowl with bold Korean flavors, this recipe is a great pick. For a different take that still uses simple steps and big flavor, try this version of 20 Minute Korean Beef Sesame Noodles from Half Baked Harvest, it has a nice twist and cooks fast.

Korean Beef Noodles

A warm bowl of Korean Beef Noodles with savory beef, bright soy, nutty sesame, and a touch of spice.

Main ingredients

  • 1 pound ground beef (Use lean ground beef for a lighter option.)
  • 8 ounces noodles, ramen, udon, or any noodle you like (Cook as per package instructions.)
  • 3 tablespoons soy sauce (Add more if needed for taste.)
  • 1 tablespoon sesame oil (For a nutty flavor.)
  • 1 tablespoon gochujang or chili paste (Optional for spice.)
  • 1 tablespoon sugar or honey (Adjust according to sweetness preference.)
  • 3 cloves garlic, minced (For flavor.)
  • 1 small onion, sliced (Yellow or white onion works well.)
  • 1 medium carrot, thin sliced or matchstick (Adds crunch and sweetness.)
  • 2 green onions sliced (For garnish and added flavor.)
  • 1 tablespoon sesame seeds (Optional for garnish.)
  • 1 tablespoon vegetable oil (For cooking the beef.)
  • 1 cup beef broth or water (Can be substituted with water.)

Preparation

  1. Cook the noodles in a pot of boiling water until they are just soft, drain and set aside.
  2. Heat a large pan over medium heat, add vegetable oil.
  3. Add the ground beef, break it up with a spoon, and cook until brown.

Cooking

  1. Push the beef to one side, add the onion and garlic, and cook for 1 to 2 minutes until soft.
  2. Stir in the carrot and cook for 2 minutes more.
  3. Add soy sauce, sesame oil, gochujang, sugar, and beef broth, then stir well.
  4. Let the sauce simmer for 2 to 3 minutes so flavors mix and sauce thickens a little.
  5. Add the cooked noodles to the pan, toss everything so the sauce coats the noodles.
  6. Taste and add more soy or a little salt if needed.
  7. Turn off the heat, and top with green onions and sesame seeds before serving.

Cook noodles just until soft, do not overcook. For a lighter dish, use lean ground beef or replace some beef with mushrooms.

Dinner, Main Course
Korean
Comfort Food, Korean Beef Noodles, Quick Dinner, Savory Noodles

High-Protein Honey Garlic Shrimp

Delicious high-protein honey garlic shrimp served on a plate with vegetables

High-Protein Honey Garlic Shrimp is a simple dish that feels like a treat. Bright garlic and sweet honey meet juicy shrimp, and the sauce coats each bite. This high protein shrimp recipe is great for busy weeknights, meal prep, or a fast dinner that still feels special. It’s a crowd-pleaser because it is tasty, quick to make, and pairs well with many sides. Get ready to make a meal that tastes like you spent hours, even when you did not.

How to prepare High-Protein Honey Garlic Shrimp

Ingredients (simple, basic)

  • 1 lb (450 g) shrimp, peeled and deveined
  • 2 tbsp olive oil or avocado oil
  • 4 garlic cloves, minced
  • 3 tbsp honey
  • 3 tbsp low-sodium soy sauce or tamari
  • 1 tbsp rice vinegar or lemon juice
  • 1 tsp cornstarch mixed with 1 tbsp water (optional, for thicker sauce)
  • Salt and pepper to taste
  • Chopped green onion or parsley for garnish

Directions

  1. Pat the shrimp dry and season with a little salt and pepper.
  2. Mix honey, soy sauce, garlic, and vinegar in a small bowl.
  3. Heat oil in a large pan over medium-high heat. Add shrimp in a single layer. Cook 1 to 2 minutes per side, until pink and cooked through. Remove shrimp to a plate.
  4. Lower the heat to medium. Add the honey garlic mix to the pan. Let it bubble for 30 seconds, then add the cornstarch slurry if you like a thicker sauce. Stir until the sauce thickens, about 1 minute.
  5. Return the shrimp to the pan and toss to coat in the sauce. Cook another 30 seconds so flavors combine.
  6. Serve hot, garnish with green onion or parsley. Enjoy with rice, salad, or vegetables.

High-Protein Honey Garlic Shrimp

Why You’ll Love High-Protein Honey Garlic Shrimp

  • It is high in protein, thanks to the shrimp, so you feel full longer.
  • The flavor is bold but simple, sweet honey and savory garlic work well together.
  • It cooks in minutes, so it is perfect for fast dinners or when you want an easy healthy shrimp recipe.
  • It fits many diets, low carb if you skip the starch, and high protein for muscle fuel.

Tips for success

  • Use fresh or fully thawed shrimp so they cook evenly.
  • Don’t overcook the shrimp, they go from perfect to rubbery fast.
  • Taste the sauce before adding shrimp back, adjust honey or soy sauce to your liking.
  • If you want more protein, serve over quinoa, edamame, or a bed of greens.
  • For a bit of heat, add red pepper flakes or a dash of sriracha to the sauce.

Serving Suggestions

  • Serve over steamed rice or quinoa for a filling meal.
  • Toss with zucchini noodles or whole grain pasta for a lighter option.
  • Add steamed broccoli or snap peas on the side for color and crunch.
  • Make bowls with mixed greens, avocado, and a squeeze of lemon for a fresh, high-protein lunch.

High-Protein Honey Garlic Shrimp

FAQs

Q: How long does shrimp take to cook?
A: Shrimp cooks fast, usually 1 to 2 minutes per side depending on size. When it turns pink and opaque, it is done.

Q: Can I make this ahead and reheat it?
A: Yes, you can make it ahead. Store in the fridge for up to 2 days. Reheat gently in a pan so shrimp does not overcook.

Q: Is this recipe low carb?
A: Yes, it can be low carb if you skip the cornstarch and serve over greens or low-carb sides.

Q: Can I use frozen shrimp?
A: Yes, just thaw fully and pat dry before cooking for best results.

Q: What can I use instead of soy sauce?
A: Use tamari for gluten-free, or coconut aminos for a milder, slightly sweet flavor.

Conclusion

If you want another simple take on this flavor combo, check this recipe for ideas and notes on honey garlic shrimp: Honey Garlic Shrimp – Wholesome Yum.

High-Protein Honey Garlic Shrimp

This High-Protein Honey Garlic Shrimp is a quick and simple dish that combines bright garlic and sweet honey with juicy shrimp, perfect for busy weeknights or a fast dinner.

Main ingredients

  • 1 lb shrimp, peeled and deveined (Use fresh or fully thawed for best results.)
  • 2 tbsp olive oil or avocado oil
  • 4 cloves garlic, minced
  • 3 tbsp honey
  • 3 tbsp low-sodium soy sauce or tamari (Use tamari for gluten-free option.)
  • 1 tbsp rice vinegar or lemon juice
  • 1 tsp cornstarch mixed with 1 tbsp water (Optional, for thicker sauce.)
  • to taste Salt and pepper
  • garnish Chopped green onion or parsley

Preparation

  1. Pat the shrimp dry and season with a little salt and pepper.

Making the sauce

  1. Mix honey, soy sauce, garlic, and vinegar in a small bowl.

Cooking the shrimp

  1. Heat oil in a large pan over medium-high heat. Add shrimp in a single layer. Cook 1 to 2 minutes per side, until pink and cooked through. Remove shrimp to a plate.

Finishing the dish

  1. Lower the heat to medium. Add the honey garlic mix to the pan. Let it bubble for 30 seconds, then add the cornstarch slurry if you like a thicker sauce. Stir until the sauce thickens, about 1 minute.
  2. Return the shrimp to the pan and toss to coat in the sauce. Cook another 30 seconds so flavors combine.
  3. Serve hot, garnish with green onion or parsley. Enjoy with rice, salad, or vegetables.

Use fresh or fully thawed shrimp for even cooking. Don’t overcook the shrimp to avoid a rubbery texture. Adjust honey or soy sauce in the sauce to your liking. For added protein, serve over quinoa or greens, and for heat, add red pepper flakes or sriracha.

Dinner, Main Course
Asian
Easy Shrimp Recipe, Healthy Recipe, High-Protein Shrimp, Honey Garlic Shrimp, Quick Dinner

Gourmet Cosmic Brownies Recipe

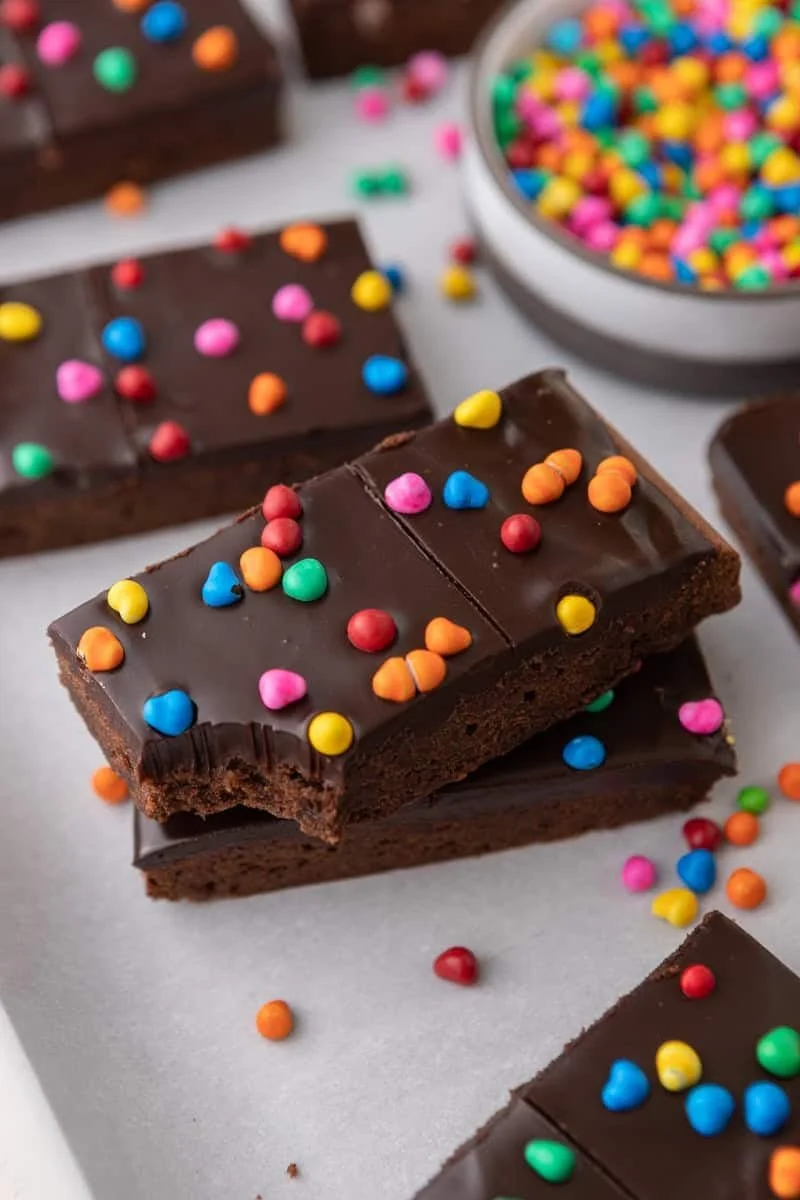
Decadent gourmet Cosmic Brownies with colorful sprinkles and rich chocolate frosting

These Gourmet Cosmic Brownies bring a fun twist to a classic chocolate treat. They are rich, fudgy, and have a glossy chocolate top with bright candy pieces that make each square look happy and tasty. This brownies recipe is a crowd-pleaser at parties, family meals, and school treats, because kids and adults both love the mix of deep chocolate and crunchy candy. Ready to bake a batch that looks like a party and tastes like a dream, you will smile when you pull them from the oven.

How to prepare Gourmet Cosmic Brownies Recipe

Ingredients

  • 1 cup (225 g) unsalted butter, melted
  • 2 cups (400 g) granulated sugar
  • 4 large eggs
  • 2 tsp vanilla extract
  • 1 cup (85 g) unsweetened cocoa powder
  • 1 cup (170 g) semi-sweet chocolate chips, melted
  • 1 cup (125 g) all-purpose flour
  • 1/2 tsp salt
  • 1 tsp baking powder
  • 1 cup candy-coated chocolate pieces, for top (M&M style)
  • Optional, 1/2 cup chopped nuts

Directions

  1. Preheat your oven to 350°F (175°C). Line an 8×8 inch pan with parchment paper, leave some overhang to lift brownies out.
  2. In a large bowl, stir melted butter and sugar until smooth.
  3. Add eggs, one at a time, stirring well after each. Add vanilla and mix.
  4. Stir in cocoa powder and melted chocolate until the mix is even.
  5. Add flour, salt, and baking powder. Stir just until you do not see dry flour. Do not overmix.
  6. Fold in nuts if you use them.
  7. Pour the batter into the pan and smooth the top.
  8. Bake for 25 to 30 minutes, or until a toothpick comes out with a few moist crumbs. Do not bake until dry.
  9. Let the brownies cool in the pan for 15 minutes. Then lift them out with the parchment and cool on a rack.
  10. For a classic cosmic look, melt 1 cup of semi-sweet chocolate with 2 tbsp butter, spread a thin layer over cooled brownies, then press candy-coated chocolates into the top. Chill a few minutes to set.
  11. Cut into squares and serve.

Gourmet Cosmic Brownies Recipe

Why You’ll Love Gourmet Cosmic Brownies Recipe

  • Fudgy, rich chocolate taste that feels indulgent.
  • Fun candy topping adds color, crunch, and a sweet pop.
  • Easy steps, no fancy tools, so anyone can make them.
  • Great for sharing, gifts, and a quick dessert for guests.

Tips for success

  • Use good quality chocolate for better flavor, not cheap chips.
  • Do not overbake, brownies stay fudgy when you pull them out with moist crumbs on a toothpick.
  • Let brownies cool before adding the glossy chocolate top, so candy stays bright and neat.
  • Press candies gently into the top so they stick but do not crack.
  • If you want extra gooey centers, remove from oven a few minutes early and let rest, they will finish cooking as they cool.

Serving Suggestions

  • Serve warm with a scoop of vanilla ice cream for a classic combo.
  • Dust with a little powdered sugar for a pretty look.
  • Plate with fresh berries for a pop of color and mild tartness.
  • Cut in small bite sizes for parties or large squares for dessert plates.

Gourmet Cosmic Brownies Recipe

FAQs

Q: Can I use a larger pan? A: Yes, but thinner brownies will bake faster. Reduce bake time and check early.

Q: How do I store these brownies? A: Store in an airtight container at room temperature for 2 days, or in the fridge for up to 5 days. Bring to room temp before serving for best taste.

Q: Can I skip the candy topping? A: Yes, they are great plain. Try chopped nuts or extra chocolate chips instead.

Q: Can I make them gluten free? A: Yes, swap the flour for a 1-to-1 gluten free flour mix. Texture may change a bit.

Q: Can I freeze them? A: Yes, wrap squares well and freeze up to 3 months. Thaw in the fridge or at room temp.

Conclusion

If you want another take on cosmic brownies, you can compare methods and tips with The Best Cosmic Brownies Recipe – Lifestyle of a Foodie, it offers a helpful guide and more ideas. Enjoy baking, share with friends, and have fun with the colorful candy topping.

Gourmet Cosmic Brownies

These Gourmet Cosmic Brownies bring a fun twist to a classic chocolate treat with a rich, fudgy texture and a glossy chocolate top adorned with bright candy pieces.

Brownie Base

  • 1 cup unsalted butter, melted
  • 2 cups granulated sugar
  • 4 large eggs
  • 2 tsp vanilla extract
  • 1 cup unsweetened cocoa powder
  • 1 cup semi-sweet chocolate chips, melted
  • 1 cup all-purpose flour
  • 1/2 tsp salt
  • 1 tsp baking powder
  • 1 cup candy-coated chocolate pieces, for top ((M&M style))
  • 1/2 cup chopped nuts (Optional)

Preparation

  1. Preheat your oven to 350°F (175°C). Line an 8×8 inch pan with parchment paper, leaving some overhang to lift brownies out.
  2. In a large bowl, stir melted butter and sugar until smooth.
  3. Add eggs, one at a time, stirring well after each addition. Add vanilla and mix.
  4. Stir in cocoa powder and melted chocolate until the mix is even.
  5. Add flour, salt, and baking powder. Stir just until you do not see dry flour. Do not overmix.
  6. Fold in nuts if you are using them.
  7. Pour the batter into the pan and smooth the top.

Baking

  1. Bake for 25 to 30 minutes, or until a toothpick comes out with a few moist crumbs. Do not bake until dry.
  2. Let the brownies cool in the pan for 15 minutes. Then lift them out with the parchment and cool on a rack.
  3. For a classic cosmic look, melt 1 cup of semi-sweet chocolate with 2 tbsp butter, spread a thin layer over cooled brownies, then press candy-coated chocolates into the top. Chill a few minutes to set.
  4. Cut into squares and serve.

Use good quality chocolate for better flavor, and do not overbake to ensure brownies stay fudgy. Let them cool before adding the glossy chocolate top for best results.

Dessert, Snack
American, Baked Goods
Brownies, Chocolate, dessert recipe, Fudgy Brownies, Gourmet Brownies