Spicy Potato Noodles

Bowl of spicy potato noodles garnished with herbs and spices

Spicy Potato Noodles feel like a hug with a kick. They are warm, spicy, and full of good textures, with soft noodles and crisp vegetables. This featured recipe is a crowd-pleaser because it balances heat, salt, and a touch of sweet, while the noodles soak up the sauce. It is simple to make, and many people ask for seconds. Give it a try and you may find it becomes a go-to dinner. Get ready to make a bowl that tastes bold, bright, and very comforting.

Why You’ll Love Spicy Potato Noodles

This spicy potato noodles recipe brings bold flavor with simple steps. The dish mixes soft potato noodles with a spicy, tangy sauce, fresh veggies, and a little crunch. It works as a quick weeknight meal, a fun party dish, or a cozy bowl when you want something warm and lively. If you like spicy noodles or potato noodle stir-fry, you will love how fast it comes together and how tasty it feels.

How to prepare Spicy Potato Noodles

Ingredients

  • 8 ounces potato noodles, or glass noodles, soaked or cooked as package says
  • 2 large potatoes, peeled and cut into thin matchsticks, or use pre-made potato noodles
  • 1 small carrot, thinly sliced
  • 1/2 cup green onion, sliced
  • 2 cloves garlic, minced
  • 1 tablespoon vegetable oil
  • 2 tablespoons soy sauce
  • 1 tablespoon gochujang, or chili paste, adjust to taste
  • 1 tablespoon rice vinegar or white vinegar
  • 1 teaspoon sugar or honey
  • 1/2 teaspoon sesame oil (optional)
  • Salt and pepper to taste
  • Sesame seeds for garnish (optional)

Directions

  1. If using dried noodles, cook them or soak them until soft, then drain and set aside. If using fresh potato noodles, rinse and drain.
  2. Heat oil in a large pan over medium heat. Add garlic and stir for 30 seconds.
  3. Add the potato matchsticks or potato noodles and carrot. Stir-fry until the potatoes soften and start to brown, about 6 to 8 minutes.
  4. Mix soy sauce, gochujang, vinegar, sugar, and sesame oil in a small bowl. Taste and change the spice level to your liking.
  5. Add the cooked noodles to the pan. Pour the sauce over the noodles and vegetables. Toss well so the noodles and vegetables get coated. Cook 2 to 3 minutes more so the flavors join.
  6. Add green onion, salt, and pepper. Stir and turn off the heat.
  7. Serve hot, sprinkle sesame seeds if you like.

Spicy Potato Noodles

Tips for success

  • Cut potatoes thin and even, this helps them cook fast and match the noodle texture.
  • Soak dried noodles as the package says, to avoid breaking when you stir them.
  • Taste the sauce before you add it, this lets you change the heat or salt easily.
  • Use a non-stick pan or a well-seasoned pan to stop the noodles from sticking.
  • If you want less heat, use half the gochujang and add a splash more soy sauce for flavor.
  • For a gluten-free version, use tamari instead of soy sauce.

Serving Suggestions

  • Top the noodles with extra green onion and sesame seeds for color and taste.
  • Serve with a side of pickled vegetables or a simple cucumber salad to cool the heat.
  • For protein, add cooked tofu, chicken, or shrimp to make it a full meal.
  • Pair with a light soup or steamed greens to make the meal balanced.

Spicy Potato Noodles

FAQs

Q: Can I make this dish ahead of time,
A: You can make the noodles ahead and store them in the fridge for a day. Reheat in a pan with a splash of water and mix the sauce again, the texture will be best fresh.

Q: What if I can not find potato noodles,
A: Use glass noodles or rice noodles as a good substitute. The sauce and method stay the same.

Q: Is this recipe vegetarian,
A: Yes, as written it is vegetarian. Use tofu or mushrooms to add protein and keep it meat free.

Q: How spicy is this recipe,
A: The heat level depends on how much gochujang or chili paste you use. Start with less, then add more if you want more spice.

Q: Can I freeze leftovers,
A: Freezing is not ideal because potato noodles can change texture. It is best to keep leftovers in the fridge and eat within 2 days.

Conclusion

If you want a tasty, simple spicy potato noodles recipe to try tonight, this one hits the spot. For another clear, tested version with step by step photos and tips, see Spicy Potato Noodles | Two Plaid Aprons.

Spicy Potato Noodles

A flavorful dish combining soft potato noodles and a spicy sauce with fresh veggies, perfect for a quick weeknight meal or a cozy dinner.

Noodles and Vegetables

  • 8 ounces potato noodles, or glass noodles, soaked or cooked as package says
  • 2 large potatoes, peeled and cut into thin matchsticks, or use pre-made potato noodles
  • 1 small carrot, thinly sliced
  • 1/2 cup green onion, sliced (For garnish and flavor)
  • 2 cloves garlic, minced

Sauce

  • 1 tablespoon vegetable oil
  • 2 tablespoons soy sauce
  • 1 tablespoon gochujang, or chili paste, adjust to taste
  • 1 tablespoon rice vinegar or white vinegar
  • 1 teaspoon sugar or honey
  • 1/2 teaspoon sesame oil (optional)
  • Salt and pepper to taste
  • Sesame seeds for garnish (optional)

Preparation

  1. If using dried noodles, cook them or soak them until soft, then drain and set aside. If using fresh potato noodles, rinse and drain.

Cooking

  1. Heat oil in a large pan over medium heat. Add garlic and stir for 30 seconds.
  2. Add the potato matchsticks or potato noodles and carrot. Stir-fry until the potatoes soften and start to brown, about 6 to 8 minutes.
  3. Mix soy sauce, gochujang, vinegar, sugar, and sesame oil in a small bowl. Taste and change the spice level to your liking.
  4. Add the cooked noodles to the pan. Pour the sauce over the noodles and vegetables. Toss well so the noodles and vegetables get coated. Cook 2 to 3 minutes more so the flavors join.
  5. Add green onion, salt, and pepper. Stir and turn off the heat.
  6. Serve hot, sprinkle sesame seeds if you like.

Cut potatoes thin and even to help them cook fast and match the noodle texture. Use a non-stick pan or a well-seasoned pan to stop the noodles from sticking. For a gluten-free version, use tamari instead of soy sauce.
Dinner, Main Course
Asian
Comfort Food, Potato Noodles, Quick Dinner, Spicy Potato Noodles, Stir-Fry

Egg Muffins with Spinach and Feta

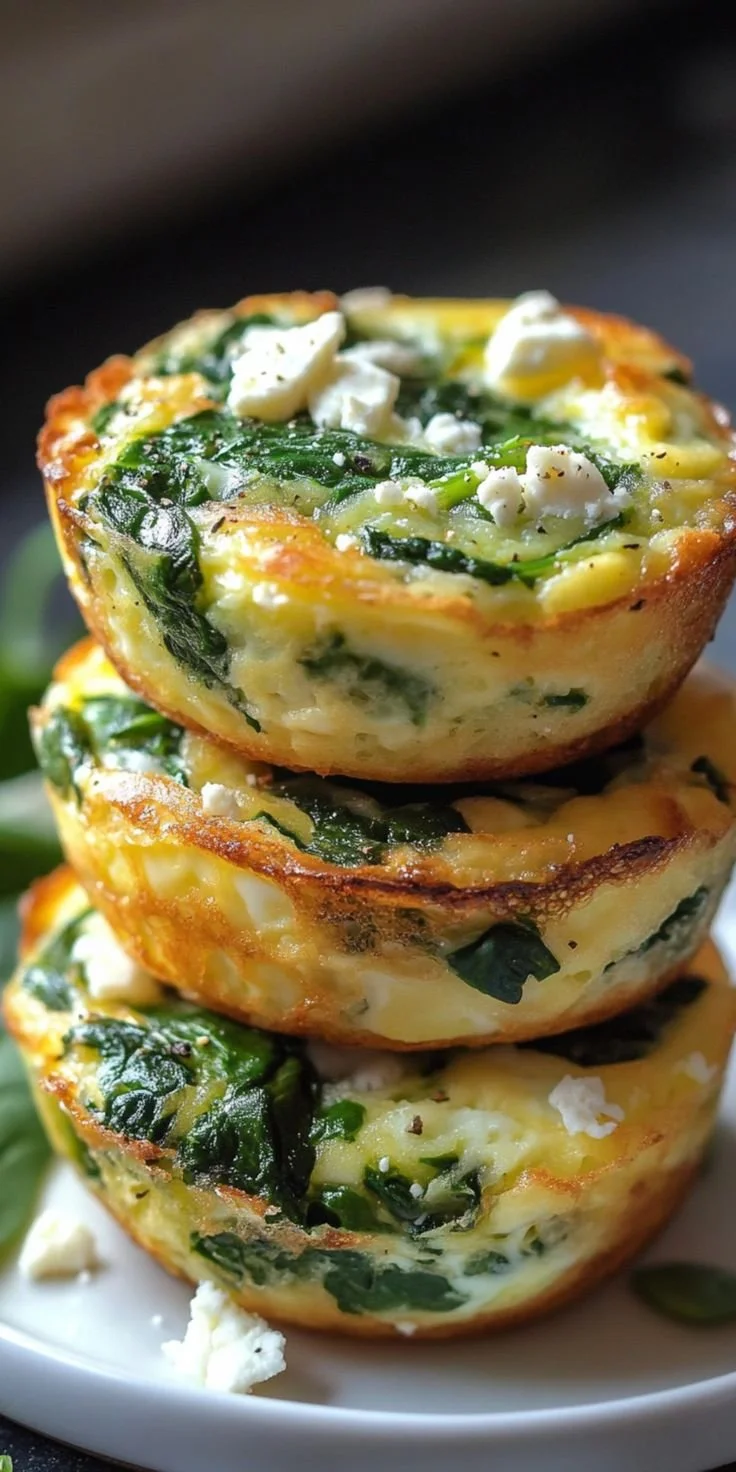
Savory egg muffins with spinach and feta cheese, perfect for a healthy meal.

I love a simple breakfast that feels a bit special, and Egg Muffins with Spinach and Feta do just that. They are light, savory, and full of green spinach and tangy feta cheese. These muffins cook fast, they hold well for meal prep, and they please both kids and adults. This recipe is a true crowd-pleaser, with soft egg, bright spinach, and salty feta in every bite. You will smile when you smell them baking, and you might eat one straight from the tin, warm and happy.

How to prepare Egg Muffins with Spinach and Feta

  1. Preheat the oven to 180°C (350°F). Grease a 12-cup muffin tin or use liners.
  2. Chop about 2 cups of fresh spinach, or thaw and drain 1 cup of frozen spinach. Squeeze out extra water.
  3. In a bowl, whisk 8 large eggs with 1/3 cup milk, a pinch of salt, and a little black pepper.
  4. Mix in the spinach and about 3/4 cup crumbled feta cheese. You can add 1/4 cup chopped onion or bell pepper if you like.
  5. Spoon the egg mix into the muffin cups, filling each about 3/4 full.
  6. Bake for 18 to 22 minutes, until the muffins are set and the tops are lightly golden. A toothpick comes out clean.
  7. Let the muffins cool in the tin for a few minutes, then move them to a rack. Serve warm, or cool completely to store.

Egg Muffins with Spinach and Feta

Why You’ll Love Egg Muffins with Spinach and Feta

  • They are quick to make, and they bake all at once.
  • These egg muffins are great for make ahead breakfasts and meal prep.
  • Spinach adds color and vitamins, feta adds salty, tangy flavor.
  • They are easy to change, add herbs, or swap cheese.
  • They are high in protein and keep you full longer.

Tips for success

  • Drain the spinach well, extra water makes the muffins soggy.
  • Do not overfill the cups, eggs will puff up while baking.
  • Whisk the eggs until the yolk and white look even, this helps a smooth texture.
  • Use room temperature eggs for even cooking.
  • Check at 18 minutes, ovens vary, you want set but not dry muffins.
  • Cool fully before freezing in a zip bag for up to 2 months.

Serving Suggestions

  • Serve hot with toast or a simple green salad for a light lunch.
  • Pack two muffins in a lunchbox with fruit and yogurt for an easy meal.
  • Top with a spoon of salsa or a little hot sauce for more flavor.
  • Pair with roasted potatoes or a slice of avocado for a heartier plate.

Egg Muffins with Spinach and Feta

FAQs

Q: Can I make these ahead and reheat them?
A: Yes, bake, cool, and store in the fridge for up to 4 days. Reheat in the microwave for 30 to 60 seconds.

Q: Can I freeze egg muffins?
A: Yes, cool fully, wrap or place in a freezer bag, freeze up to 2 months. Reheat from frozen in the microwave for 60 to 90 seconds, or thaw in the fridge overnight.

Q: Can I use other greens or cheese?
A: Yes, kale, chard, or arugula work. Try goat cheese, cheddar, or mozzarella instead of feta.

Q: Do I need milk in the eggs?
A: Milk makes the muffins a bit softer, but you can skip it or use water or a splash of cream.

Q: How do I make them dairy free?
A: Leave out the feta, add savory herbs, and use a dairy free cheese if you like.

Conclusion

If you want another variation or visual guide, check this simple recipe for inspiration, Spinach Feta Egg Cups – Perchance to Cook. Enjoy making these egg muffins, they are a small, tasty win any morning.

Egg Muffins with Spinach and Feta

A delicious and healthy breakfast option, these egg muffins are packed with spinach and feta cheese, making them a quick and satisfying meal prep choice that pleases the whole family.

Main Ingredients

  • 8 large eggs (Use room temperature for even cooking.)
  • 1/3 cup milk (Can substitute with water or cream.)
  • 2 cups fresh spinach (Chopped or thawed if frozen. Drain well.)
  • 3/4 cup crumbled feta cheese (Can replace with goat cheese or cheddar.)
  • 1/4 cup chopped onion or bell pepper (Optional add-in for extra flavor.)
  • 1 pinch salt (To taste.)
  • To taste black pepper (Add according to preference.)

Preparation

  1. Preheat the oven to 180°C (350°F). Grease a 12-cup muffin tin or use liners.
  2. Chop about 2 cups of fresh spinach or thaw and drain 1 cup of frozen spinach, squeezing out extra water.
  3. In a bowl, whisk the eggs with milk, salt, and black pepper until mixed well.
  4. Mix in the spinach and feta cheese (and onion or bell pepper if using).
  5. Spoon the egg mixture into muffin cups, filling each about 3/4 full.

Baking

  1. Bake for 18 to 22 minutes, until muffins are set and tops are lightly golden. Use a toothpick to check if it comes out clean.
  2. Let the muffins cool in the tin for a few minutes before transferring to a rack.
  3. Serve warm or cool completely to store.

Drain spinach well to avoid sogginess. Do not overfill muffin cups as eggs will puff up while baking. Cool fully before freezing, can last up to 2 months.

Breakfast, Brunch
American
Egg Muffins, Healthy Breakfast, Meal Prep, Quick Breakfast, Spinach and Feta

Chocolate Strawberry Yogurt Clusters

Chocolate strawberry yogurt clusters featuring rich chocolate and fresh strawberries.

A simple bite of sweet strawberry, creamy yogurt, and rich chocolate makes snack time feel like a small treat. Chocolate Strawberry Yogurt Clusters are easy to make, light, and fun for kids and adults. They freeze firm, hold together well, and taste like a tiny dessert that is also a bit healthy. This recipe is a crowd-pleaser at parties, a quick after-school snack, and a good way to use fresh strawberries. Get ready to make a frozen treat that everyone will ask about, and you will smile when they do.

How to prepare Chocolate Strawberry Yogurt Clusters

Ingredients

  • 1 cup plain or vanilla Greek yogurt
  • 1 tablespoon honey or maple syrup, if you like sweeter yogurt
  • 1 cup strawberries, washed and diced small
  • 1/2 cup dark chocolate chips or chopped dark chocolate
  • 1 teaspoon coconut oil or a little butter, optional for smoother chocolate
  • Parchment paper and a baking sheet

Directions

  1. Mix the yogurt and honey in a bowl, taste, and add more sweetener if needed.
  2. Fold the diced strawberries into the yogurt gently.
  3. Line a baking sheet with parchment paper. Use a small spoon to drop tablespoon-sized mounds of the yogurt-strawberry mix onto the paper. Leave space between each mound.
  4. Freeze the tray for about 1 to 2 hours, until the clusters are firm.
  5. Melt the chocolate chips with the coconut oil in a small bowl over low heat or in 20-second bursts in the microwave, stirring until smooth.
  6. Dip half of each frozen yogurt cluster into the melted chocolate, or drizzle chocolate on top with a spoon.
  7. Place the clusters back on the parchment and freeze for another 10 to 20 minutes, until the chocolate sets.
  8. Store the clusters in an airtight container in the freezer. Eat straight from the freezer for a firm bite, or let sit a minute if you want them softer.

Chocolate Strawberry Yogurt Clusters

Why You’ll Love Chocolate Strawberry Yogurt Clusters

  • They mix fruit and chocolate in one bite, so you get fresh flavor and a sweet touch.
  • You make them in minutes and freeze, so they are ready when you need a snack.
  • They are light, lower in sugar if you use plain yogurt, and good for kids lunch boxes.
  • You can change the yogurt, fruit, or chocolate to match what you have, so they stay simple and flexible.

Tips for success

  • Use firm, ripe strawberries so the clusters hold shape and taste fresh.
  • Freeze the yogurt mounds fully before adding chocolate, this keeps the chocolate from melting into the yogurt.
  • If chocolate is too thick, add a tiny bit of coconut oil to loosen it.
  • Work quickly when dipping, and keep the tray in the freezer so the clusters stay cold.
  • Store in a single layer first to avoid sticking, then you can stack with parchment between layers.

Serving Suggestions

  • Serve straight from the freezer on a small plate for a cool treat.
  • Add a few chopped nuts or shredded coconut on top of the chocolate before it sets for extra texture.
  • Pair with fresh fruit or a small bowl of extra yogurt for dipping.
  • Bring them to a potluck or use them as a sweet finish for a summer picnic.

Chocolate Strawberry Yogurt Clusters

FAQs

Q: How long do these stay good in the freezer?
A: They last about 2 to 3 weeks in an airtight container, and still taste good. For best texture, eat within two weeks.

Q: Can I use frozen strawberries instead of fresh?
A: You can, but thaw and drain them well so the yogurt does not get watery.

Q: Can I make these dairy-free?
A: Yes, use plant-based yogurt and dairy-free chocolate to keep them vegan.

Q: Will the chocolate crack when I bite into the frozen cluster?
A: The chocolate may crack a little, which gives a nice texture contrast. Let clusters sit a minute if you want softer chocolate.

Q: Can I add other fruit or mix-ins?
A: Yes, try blueberries, raspberries, small banana pieces, or a few chopped nuts.

Conclusion

If you want another take or inspiration for making frozen fruit and yogurt treats, check this helpful recipe guide from a registered dietitian, Chocolate-Covered Strawberry Yogurt Clusters | Walder Wellness, RD.

Chocolate Strawberry Yogurt Clusters

A delightful frozen treat combining sweet strawberries, creamy yogurt, and rich chocolate, perfect for snacks or parties.

For the yogurt mixture

  • 1 cup plain or vanilla Greek yogurt (Use plain for lower sugar)
  • 1 tablespoon honey or maple syrup (Optional, adjust to desired sweetness)
  • 1 cup strawberries, washed and diced small (Use firm, ripe strawberries)

For the chocolate coating

  • 1/2 cup dark chocolate chips or chopped dark chocolate (Can substitute with dairy-free chocolate for vegan)
  • 1 teaspoon coconut oil or a little butter (Optional for smoother chocolate)

Equipment

  • Parchment paper (To line the baking sheet)
  • Baking sheet (For freezing the clusters)

Preparation

  1. Mix the yogurt and honey in a bowl, taste, and add more sweetener if needed.
  2. Fold the diced strawberries into the yogurt gently.
  3. Line a baking sheet with parchment paper. Use a small spoon to drop tablespoon-sized mounds of the yogurt-strawberry mix onto the paper. Leave space between each mound.
  4. Freeze the tray for about 1 to 2 hours, until the clusters are firm.

Chocolate Coating

  1. Melt the chocolate chips with the coconut oil in a small bowl over low heat or in 20-second bursts in the microwave, stirring until smooth.
  2. Dip half of each frozen yogurt cluster into the melted chocolate, or drizzle chocolate on top with a spoon.
  3. Place the clusters back on the parchment and freeze for another 10 to 20 minutes, until the chocolate sets.

Storage

  1. Store the clusters in an airtight container in the freezer. Eat straight from the freezer for a firm bite, or let sit a minute if you want them softer.

Use firm, ripe strawberries for best results. Freeze yogurt mounds fully before adding chocolate to avoid melting. Store in a single layer first to avoid sticking.

Dessert, Snack
American
Chocolate Strawberry Yogurt Clusters, Easy Recipes, Frozen Treats, Healthy Desserts, Kid-Friendly Snacks

Cinnamon Crumb Banana Bread: A Cozy Twist on Comfort Food

Cinnamon Crumb Banana Bread baked to a golden perfection with a delicious crumb topping.

Warm, cozy smells make a house feel like home, and this cinnamon crumb banana bread does that in one bake. Soft, moist banana bread meets a sweet, cinnamon crumb top. It tastes like breakfast and dessert at once, and people smile when it comes out of the oven. If you like warm comfort food like bacon cheddar gnocchi soup, you will find this bread just as comforting. This recipe is a crowd pleaser, easy to make, and full of banana and cinnamon flavor, so get your loaf pan ready, and have fun baking something that feels like a hug.

How to prepare Cinnamon Crumb Banana Bread

  • Preheat oven to 350 F, and grease a 9×5 inch loaf pan or line it with parchment.
  • In a bowl, mash 3 ripe bananas until smooth.
  • Stir in 1/2 cup melted butter, 1 cup sugar, and 2 beaten eggs until mixed.
  • Add 1 teaspoon vanilla extract.
  • In another bowl, mix 1 1/2 cups all purpose flour, 1 teaspoon baking soda, 1/2 teaspoon salt, and 1/2 teaspoon ground cinnamon.
  • Fold the dry mix into the banana mix, stir until just combined, do not over mix.
  • For the crumb topping, mix 1/3 cup brown sugar, 1/4 cup flour, 1/2 teaspoon cinnamon, and 3 tablespoons cold butter cut into small pieces. Use a fork to mix until crumbly.
  • Pour batter into the pan, sprinkle crumb topping evenly over the batter.
  • Bake 55 to 65 minutes, or until a toothpick in the center comes out clean.
  • Let cool in the pan 10 minutes, then turn out to finish cooling on a rack.
  • Cinnamon Crumb Banana Bread: A Cozy Twist on Comfort Food

Why You’ll Love Cinnamon Crumb Banana Bread

  • It is moist and full of banana flavor, not dry.
  • The cinnamon crumb adds a sweet crunch on top, giving a nice contrast.
  • You can eat it for breakfast, snack, or dessert, it works any time.
  • It uses simple pantry ingredients, and ripened bananas make it even better.
  • It makes a great gift, and it fills the house with warm, cozy smells.

Tips for success

  • Use very ripe bananas, they add natural sweetness and soft texture.
  • Measure flour lightly, pack it not too tight, to keep the bread tender.
  • Do not over mix the batter, mix until just combined for a soft crumb.
  • Keep the butter cold when making the crumb, this helps make good crumbs.
  • Check the bread at 55 minutes, ovens vary, and a clean toothpick means it is done.
  • Cool a bit before slicing, the bread firms up and slices cleanly.

Serving Suggestions

  • Serve warm with a pat of butter or cream cheese.
  • Cut into thick slices for breakfast with coffee.
  • Add a scoop of vanilla ice cream for a simple dessert.
  • Toast slices lightly and spread nut butter for a hearty snack.
  • Pair with fruit, yogurt, or a hot drink for a cozy plate.

Cinnamon Crumb Banana Bread: A Cozy Twist on Comfort Food

FAQs

Q: Can I freeze this banana bread? A: Yes, wrap slices or the whole loaf in foil and freeze up to 3 months, thaw at room temperature.

Q: Can I use less sugar? A: Yes, you can reduce sugar by up to a quarter cup, the bread will be less sweet but still good.

Q: Can I add nuts or chocolate? A: Yes, fold in 1/2 to 3/4 cup chopped nuts or chocolate chips into the batter before baking.

Q: Can I make it gluten free? A: You can try a 1 to 1 gluten free flour blend, baking time may change, check with a toothpick.

Q: How do I make the crumb extra crunchy? A: Use cold butter and do not over mix the crumb, press larger crumbs on top for more texture.

Conclusion

This cinnamon crumb banana bread is simple, cozy, and a real crowd pleaser, it brings sweet cinnamon and ripe banana together in every bite. For a lighter, gluten free take on banana bread, see Healthy Banana Bread: Gluten-Free & Delicious – TraveLynn Eats, it has ideas that may inspire swaps for your next loaf. Enjoy baking, and share a slice with someone you love.

Cinnamon Crumb Banana Bread

This moist and delicious cinnamon crumb banana bread features a sweet crumb topping and is perfect for breakfast or dessert.

For the Banana Bread

  • 3 pieces ripe bananas (Use very ripe bananas for natural sweetness.)
  • 1/2 cup melted butter (Keep the butter cold for the crumb topping.)
  • 1 cup sugar (Can be reduced by up to a quarter cup.)
  • 2 pieces eggs, beaten
  • 1 teaspoon vanilla extract

For the Dry Mix

  • 1 1/2 cups all-purpose flour (Measure lightly and do not pack tightly.)
  • 1 teaspoon baking soda
  • 1/2 teaspoon salt
  • 1/2 teaspoon ground cinnamon

For the Crumb Topping

  • 1/3 cup brown sugar
  • 1/4 cup flour
  • 1/2 teaspoon cinnamon
  • 3 tablespoons cold butter (Cut into small pieces.)

Preparation

  1. Preheat oven to 350°F and grease a 9×5 inch loaf pan or line it with parchment.
  2. In a bowl, mash the ripe bananas until smooth.
  3. Stir in the melted butter, sugar, and beaten eggs until well mixed.
  4. Add the vanilla extract.
  5. In another bowl, mix the all-purpose flour, baking soda, salt, and ground cinnamon.
  6. Fold the dry mix into the banana mix and stir until just combined; do not over mix.

Crumb Topping Preparation

  1. To make the crumb topping, mix the brown sugar, flour, cinnamon, and cold butter in a bowl.
  2. Use a fork to mix until crumbly.

Baking

  1. Pour the batter into the prepared pan and sprinkle the crumb topping evenly over the batter.
  2. Bake for 55 to 65 minutes, or until a toothpick inserted in the center comes out clean.
  3. Let cool in the pan for 10 minutes, then turn out to finish cooling on a rack.

Serve warm with butter or cream cheese. For a heartier snack, toast slices and spread with nut butter.

Breakfast, Dessert, Snack
American
Baking, banana bread, Cinnamon Bread, Comfort Food, Easy Recipes

Nana’s Secret Banana Nut Bread That Will Wow Your Family

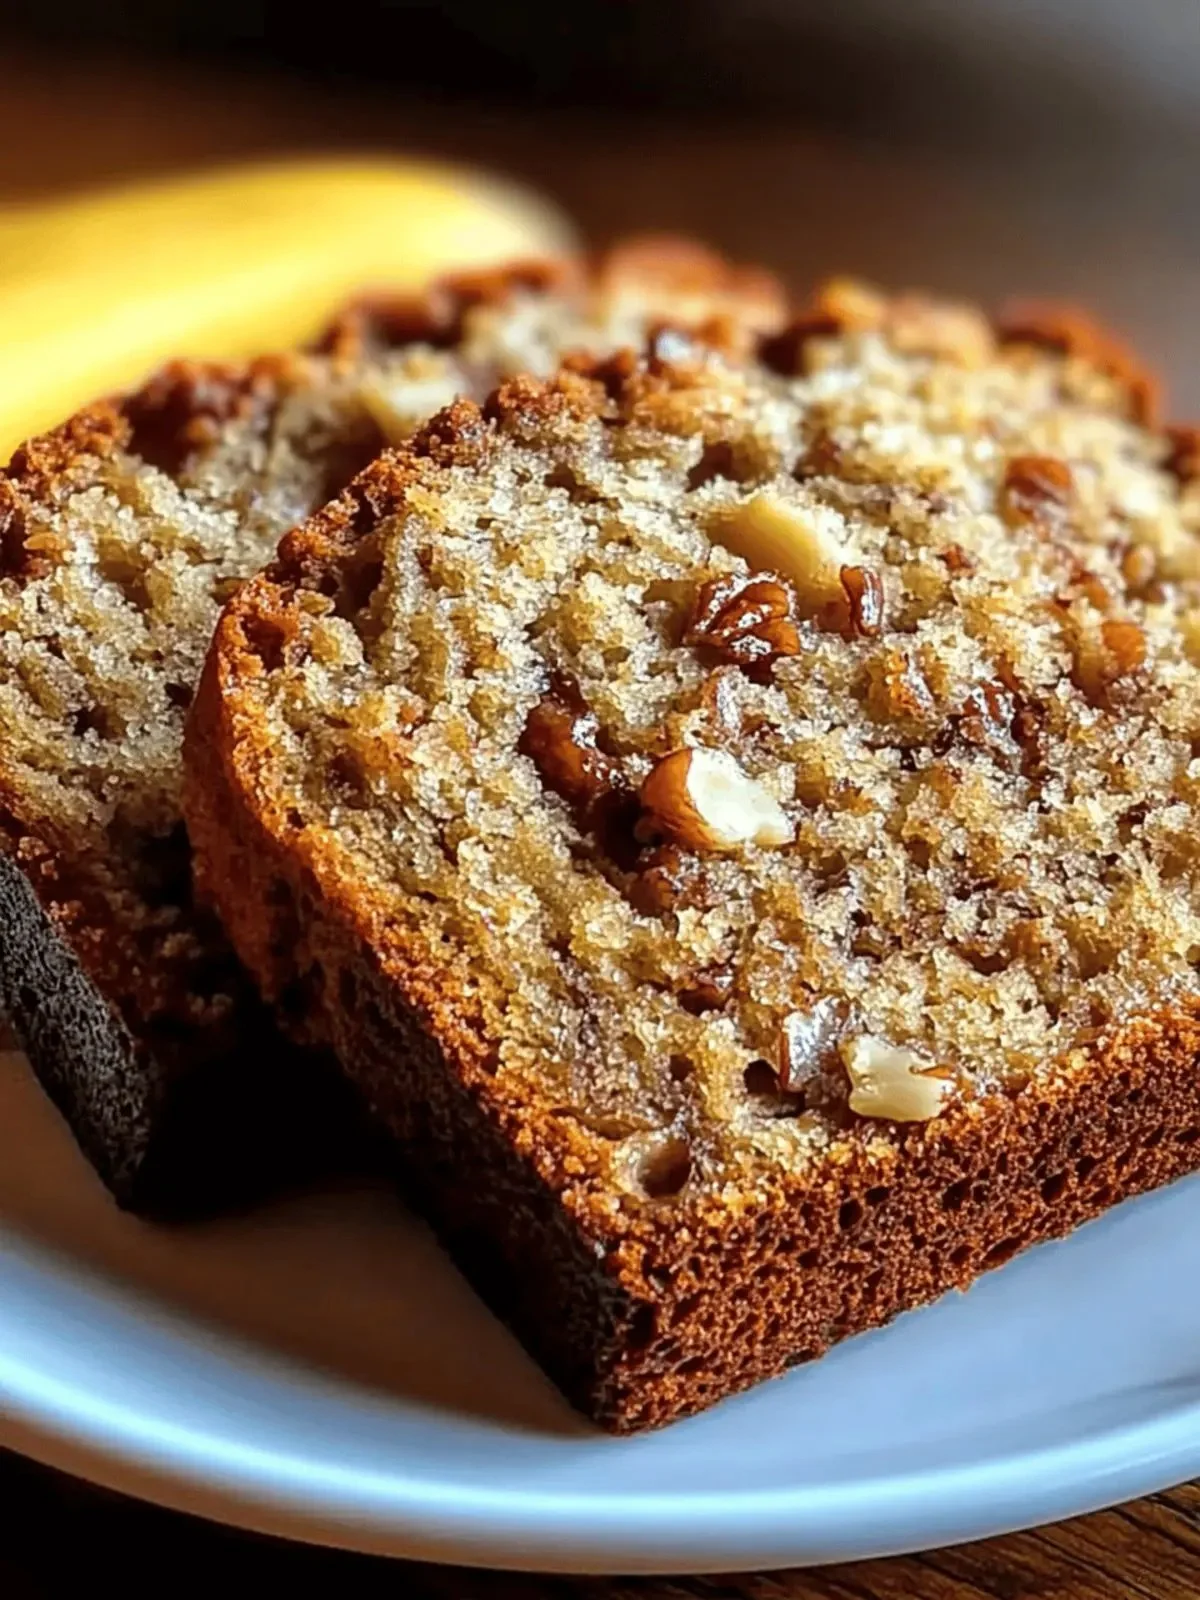
Delicious sliced banana nut bread fresh out of the oven with walnuts.

Nana’s Secret Banana Nut Bread That Will Wow Your Family feels like a warm hug from the kitchen. It smells sweet, it is soft, and it has a nice nut crunch that people love. This banana nut bread is a true crowd-pleaser, easy to make, and great for busy mornings, simple snacks, or a cozy tea time. If you want other simple dessert ideas to try later, check these Valentine cake ideas. Get ready to bake, have fun, and enjoy every warm slice.

How to prepare Banana Nut Bread.

Ingredients

  • 3 ripe bananas, mashed well
  • 1 cup sugar
  • 1 egg, beaten
  • 1/3 cup butter, melted
  • 1 teaspoon vanilla
  • 1 teaspoon baking soda
  • Pinch of salt
  • 1 1/2 cups all purpose flour
  • 1/2 cup chopped walnuts or pecans

Directions

  1. Preheat the oven to 350°F, grease a 9×5 inch loaf pan.
  2. In a bowl, mash bananas until smooth.
  3. Stir in sugar, beaten egg, melted butter, and vanilla.
  4. Sprinkle baking soda and salt over the mix, stir in.
  5. Add flour, fold in until the batter is just mixed, do not over mix.
  6. Fold in the chopped nuts.
  7. Pour batter into the pan, smooth the top.
  8. Bake 55 to 65 minutes, or until a toothpick in the center comes out clean.
  9. Let the bread cool in the pan 10 minutes, then turn out on a wire rack to cool more.
  10. Slice and serve warm or at room temperature.

Nana’s Secret Banana Nut Bread That Will Wow Your Family

Why You’ll Love Banana Nut Bread

This bread is moist and full of banana flavor, with a nice nut crunch in each bite. It uses ripe bananas, so it tastes sweet and natural. It is quick to mix, and you can make it with simple pantry items. Kids and adults both love it, and it fills the house with a lovely smell while it bakes.

Tips for success

  • Use very ripe bananas, they add the best flavor and moisture.
  • Do not over mix the batter, a few lumps are fine.
  • Check the bread at 50 minutes, ovens vary, and cover with foil if the top browns too fast.
  • Chop nuts small for even bites, or leave them larger for a crunchier top.
  • Let the bread cool a bit before slicing, it slices cleaner and keeps its shape.

Serving Suggestions

  • Serve warm with a dab of butter for a simple treat.
  • Add a light drizzle of honey or a smear of cream cheese for a sweeter bite.
  • Pair with coffee or milk for a cozy snack.
  • Cut into small pieces for a party plate, or wrap slices for a quick breakfast on the go.

Nana’s Secret Banana Nut Bread That Will Wow Your Family

FAQs

Q: Can I freeze this banana nut bread? A: Yes, wrap the cooled loaf in foil or plastic wrap, then place it in a freezer bag. It keeps well for up to 3 months. Thaw at room temperature when ready to eat.

Q: Can I use oil instead of butter? A: Yes, use the same amount of neutral oil like vegetable oil for a moist loaf.

Q: What if I have no nuts, can I skip them? A: Yes, you can skip nuts or add chocolate chips or dried fruit instead.

Q: How ripe should the bananas be? A: Use bananas with brown spots or fully brown skin, they are sweet and soft and make the bread very moist.

Q: Can I make muffins with this recipe? A: Yes, bake muffins at 350°F for about 18 to 22 minutes, watch for a toothpick to come out clean.

Conclusion

This recipe keeps Nana’s simple, good, and home style. It makes a soft, moist banana nut bread that will bring smiles to your table and fill your house with a warm smell. For a step by step visual guide and more tips, see this helpful Nana’s Banana Bread on Instructables.

Banana Nut Bread

This banana nut bread is a true crowd-pleaser with a sweet aroma, soft texture, and a satisfying nut crunch. Perfect for busy mornings and cozy tea times.

Main Ingredients

  • 3 items ripe bananas, mashed well (Use very ripe bananas for the best flavor.)
  • 1 cup sugar
  • 1 item egg, beaten
  • 1/3 cup butter, melted (Can substitute with vegetable oil.)
  • 1 teaspoon vanilla
  • 1 teaspoon baking soda
  • Pinch salt
  • 1 1/2 cups all purpose flour (Do not over mix the batter.)
  • 1/2 cup chopped walnuts or pecans (Chop nuts small for even bites.)

Preparation

  1. Preheat the oven to 350°F, grease a 9×5 inch loaf pan.
  2. In a bowl, mash bananas until smooth.
  3. Stir in sugar, beaten egg, melted butter, and vanilla.
  4. Sprinkle baking soda and salt over the mix, stir in.
  5. Add flour, fold in until the batter is just mixed, do not over mix.
  6. Fold in the chopped nuts.

Baking

  1. Pour batter into the pan, smooth the top.
  2. Bake for 55 to 65 minutes, or until a toothpick in the center comes out clean.

Cooling

  1. Let the bread cool in the pan for 10 minutes, then turn out on a wire rack to cool more.

Serving

  1. Slice and serve warm or at room temperature.

Tips for success: Use very ripe bananas, do not over mix the batter, check the bread at 50 minutes, cover with foil if the top browns too fast, and let the bread cool a bit before slicing.

Breakfast, Snack
American
Baking, banana bread, Dessert, Nut Bread, Quick Bread

Egg Fried Rice

Plate of flavorful Egg Fried Rice garnished with vegetables and egg

Egg Fried Rice is a delicious dish that feels like home. It mixes soft eggs, savory soy sauce, and fluffy rice for a quick meal that most people love. This featured recipe is a true crowd-pleaser, easy to make for a weeknight dinner or a fast lunch. It tastes bright from green onions and rich from sesame oil, and it works well with many leftovers. If you like quick rice bowls, you might enjoy trying a similar idea, like the spicy ground beef stir fry bowl for more meal ideas. Give this egg fried rice a try and watch it disappear, one spoonful at a time.

How to prepare Egg Fried Rice

Ingredients

  • 3 cups cold cooked rice, day-old is best
  • 2 large eggs
  • 2 tablespoons vegetable oil
  • 1 small onion, chopped
  • 2 cloves garlic, minced
  • 2 green onions, sliced
  • 2 tablespoons soy sauce
  • 1 teaspoon sesame oil, optional
  • Salt and pepper to taste
  • Frozen peas or diced carrots, optional, 1/2 cup

Directions

  1. Break up the cold rice with your hands or a fork so it is loose and not in big clumps.
  2. Heat 1 tablespoon oil in a large pan or wok over medium-high heat. Scramble the eggs until just set, then move them to the side and break them up.
  3. Add the other tablespoon of oil. Stir in the chopped onion and cook 1 to 2 minutes until soft. Add garlic and cook 20 to 30 seconds.
  4. If you use peas or carrots, add them now and cook until heated.
  5. Add the rice to the pan and spread it out. Stir and toss the rice so it heats and gets a little color.
  6. Push rice to the side, add the eggs back in and mix. Stir in soy sauce and sesame oil, if using. Add salt and pepper to taste.
  7. Stir in sliced green onions and serve hot.

Egg Fried Rice

Why You’ll Love Egg Fried Rice

  • Fast to make, ready in about 15 to 20 minutes.
  • Uses simple ingredients you likely have at home.
  • Flexible, you can add veggies or meat for more flavor.
  • Great use for leftover rice, it keeps the rice from getting soggy.

Tips for success

  • Use cold, day-old rice, it fries better and stays separate.
  • Work on high heat, and keep the rice moving in the pan.
  • Don’t overcrowd the pan, cook in batches if needed.
  • Season at the end so you control the salt level.
  • Taste as you go, add more soy sauce or pepper if needed.

Serving Suggestions

  • Serve with a side of steamed vegetables or a simple salad.
  • Top with extra sliced green onions or a drizzle of sesame oil.
  • Add cooked shrimp, chicken, or tofu for protein.
  • Offer chili sauce or soy sauce at the table for extra flavor.

Egg Fried Rice

FAQs

Q: Can I use fresh rice?

A: You can, but fresh hot rice can be sticky. Cool it on a tray first so it dries a little.

Q: Can I make this without oil?

A: Oil helps fry and add flavor, but you can use a nonstick pan and a small spray of oil if you want less fat.

Q: How do I store leftovers?

A: Cool quickly and keep in an airtight container. Use within 2 days and reheat on the stove or in a microwave.

Q: Can I add more vegetables?

A: Yes, bell peppers, peas, carrots, and corn work well. Cook harder veggies first.

Conclusion

For a quick and tasty guide to a very similar recipe, see this simple version, The Easiest Egg Fried Rice (20 Minutes) | Healthy Nibbles by Lisa Lin, for more tips and a fast method to try.

Egg Fried Rice

A quick and delicious dish that mixes soft eggs, savory soy sauce, and fluffy rice, perfect for a crowd-pleasing meal any night of the week.

Main Ingredients

  • 3 cups cold cooked rice (day-old is best)
  • 2 large eggs
  • 2 tablespoons vegetable oil
  • 1 small onion, chopped
  • 2 cloves garlic, minced
  • 2 tablespoons soy sauce
  • 1 teaspoon sesame oil (optional)
  • 1/2 cup frozen peas or diced carrots (optional)
  • Salt and pepper (to taste)

Preparation

  1. Break up the cold rice with your hands or a fork so it is loose and not in big clumps.
  2. Heat 1 tablespoon oil in a large pan or wok over medium-high heat. Scramble the eggs until just set, then move them to the side and break them up.
  3. Add the other tablespoon of oil. Stir in the chopped onion and cook for 1 to 2 minutes until soft. Add garlic and cook for 20 to 30 seconds.
  4. If using peas or carrots, add them now and cook until heated.
  5. Add the rice to the pan and spread it out. Stir and toss the rice so it heats and gets a little color.
  6. Push rice to the side, add the eggs back in and mix. Stir in soy sauce and sesame oil, if using. Add salt and pepper to taste.
  7. Stir in sliced green onions and serve hot.

Use cold, day-old rice for the best texture. Work on high heat to keep the rice moving in the pan, and avoid overcrowding. Taste and adjust seasoning as needed.

Dinner, lunch, Main Course
Asian, Chinese
Egg Fried Rice, Fried Rice Recipe, Leftover Rice, Quick Meal, Vegetable Fried Rice

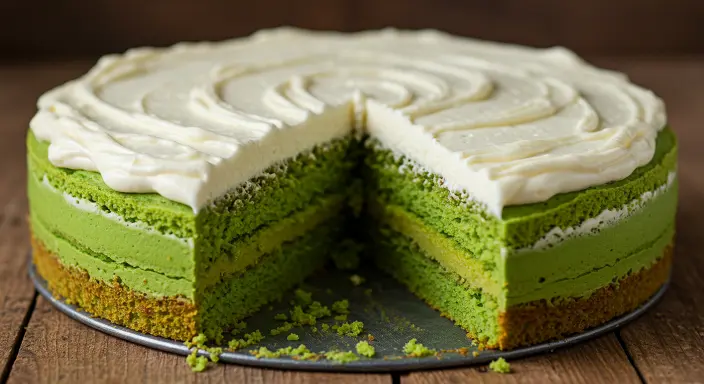
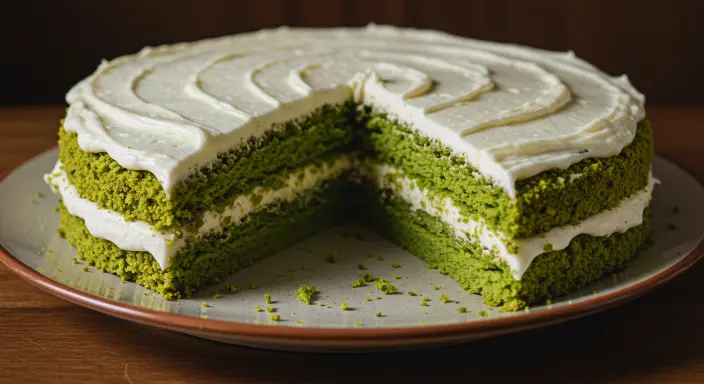
Easy and delicious Green Pistachio Cake Recipe with nuts

pistachio cake

I have an unshakable obsession with pistachios and pomegranates, two ingredients I grew up eating with zero restraint. Back then, they were everywhere, no big deal. But once I moved to the East Coast, they suddenly turned into these elusive little luxuries. Lately, they’ve started popping up more in grocery stores, but honestly, it still stings that I can’t grab them as easily as, say, a bag of peanuts or a bunch of oranges. Which is why, when I do bake with pistachio cake I want them to be the star.

The spotlight. The main act. The tricky part, though, is that pistachios have this soft, subtle flavor that can so easily get bulldozed. Chocolate? Too aggressive. Vanilla? Weirdly overpowering. Add too much else and you lose the magic. More often than not, pistachio desserts just don’t taste like pistachio at all. Sometimes it’s because the real nut is barely there. Or they’re drowned out by stronger, louder ingredients (rose water, I’m looking at you). And don’t even get me started on those neon-green muffins masquerading as pistachio, just sugar and green jello in disguise.

What You’ll Need

Pistachio Flour or Whole Pistachios
If you can get your hands on ready-made pistachio flour (basically just very finely ground pistachios), go for it—it saves time. But if not, making your own is easy. Start with shelled pistachios—if they’re raw, toast them first: spread them out on a baking sheet and bake at 350°F for about 7 minutes. Once they’ve cooled a bit, pulse them in a food processor with the flour until you get a super fine texture.

Unsalted Butter
This part’s key: use unsalted butter. Some pistachios already have salt in them, and if your butter is salted too, the cake can end up overly salty. Stick with unsalted to keep the balance right.

All-Purpose Flour
Just your standard AP flour here. If you need a gluten-free version, a 1:1 gluten-free baking flour will work as a direct substitute.

Lemon
You’ll need one whole lemon. If it’s not organic, be sure to scrub off any wax before zesting. Don’t have berries or pomegranate for the glaze? You can swap in the juice from this lemon for a bright, simple glaze instead.

Vanilla Extract & Sea Salt
Go with pure vanilla extract and fine sea salt to round out the flavors and make everything pop.

Eggs
Use two whole eggs and make sure they’re at room temperature. If they’re straight from the fridge, just let them sit in a bowl of warm water for a few minutes to take off the chill.

How to Make a Small Batch of Pistachio Cake.

pistachio cake

Start by preheating your oven and selecting your baking pan—either an 8-inch loaf pan or an 8-inch square pan will work. Both options allow you to slice the cake in half for layering the glaze in the middle and on top (for the loaf, you’ll slice it horizontally). Grease and flour your pan, then line it with parchment paper, leaving some overhang to help lift the cake out easily.

If you’re using pistachio flour, you can skip ahead. But if you’re starting with raw pistachios, toast them in the oven for 5–7 minutes until they become fragrant. Let them cool completely. Once cool (or if you’re starting with pre-toasted pistachios), blend them together with the flour in a food processor until finely ground.

In a mixing bowl, cream together the butter, sugar, lemon zest, salt, and vanilla.

Storage and Serving Tips

Storage:
This pistachio loaf keeps really well, so don’t worry if you don’t finish it all in one go. Just let it cool completely, then pop it into an airtight container. You can leave it out at room temp for up to 3 days, and it’ll still be soft and tasty. If you want it to last a bit longer, stash it in the fridge—it’ll stay good for about 5 days. Just bring it back to room temp before eating so the texture and flavor shine.

Got leftovers and don’t want to waste a single slice? Freeze them! Wrap each slice in parchment or plastic wrap, then toss them all into a freezer bag or container. They’ll keep for up to 3 months. When you’re ready for one, just let it thaw for a bit or give it a quick zap in the microwave.

Serving Ideas:
This cake is super versatile and tastes amazing with all sorts of extras—or totally plain if that’s your vibe. Here are a few easy ideas:

  • With tea or coffee: A slice of this with your morning brew or an afternoon cup of tea is chef’s kiss.

  • With whipped cream or Greek yogurt: Want to dress it up a little? Add a spoonful of whipped cream or a dollop of thick Greek yogurt. So good.

  • Topped with ice cream: Feeling fancy? A scoop of vanilla or rose-flavored ice cream takes it to dessert level.

  • Drizzled with honey or rose syrup: Add a sweet floral twist with a light drizzle—it pairs beautifully with the pistachios.

1. Can I just buy pistachio flour instead of grinding the nuts myself?
Yep, totally! If you can get your hands on pistachio flour, it’ll save you some time—and it works great in this recipe. Just double-check that it’s made from 100% pistachios with no extras thrown in.

2. How do I grind pistachios without turning them into pistachio butter?
Easy trick: toss the nuts in a food processor with a bit of the flour from the recipe. Pulse it a few times, don’t just let it spin non-stop. That’ll give you a nice, fine texture without making it oily or paste-like.

3. Can I make this cake gluten-free?
Absolutely! Just swap the regular flour for a good 1:1 gluten-free baking flour. Make sure it has something like xanthan gum in it so the cake holds together well. Texture-wise, you won’t even miss the gluten.

4. Is it okay to use salted pistachios?
If that’s all you’ve got, it’s fine—but go easy on any extra salt in the recipe. Give the nuts a little taste first and adjust as needed. That said, unsalted is the safer bet so you don’t end up with a salty cake.

5. How do I know when the cake’s done?
Stick a toothpick in the middle around the 35-minute mark. If it comes out clean or with just a few soft crumbs, you’re good to go. The top should be lightly golden too. Just keep an eye on it—every oven’s a little different.

[tasty-recipe id=”2000″]

Pistachio Cake

A soft and fluffy pistachio cake that highlights the delicate flavor of pistachios, perfect as a dessert or with tea.

Cake Ingredients

  • 1 cup Pistachio Flour or Whole Pistachios (If using whole pistachios, toast before grinding.)
  • 1/2 cup Unsalted Butter (Use unsalted to avoid over-salting the cake.)
  • 1 cup All-Purpose Flour (Can substitute with a 1:1 gluten-free baking flour.)
  • 1 whole Lemon (Scrub off any wax if not organic.)
  • 1 teaspoon Vanilla Extract (Use pure vanilla extract.)
  • 1/4 teaspoon Sea Salt (Fine sea salt to enhance flavor.)
  • 2 whole Eggs (Make sure they’re at room temperature.)

Preparation

  1. Preheat your oven to 350°F (175°C) and grease an 8-inch loaf pan or an 8×8-inch square pan. Line it with parchment paper, allowing overhang.
  2. If using whole pistachios, toast them on a baking sheet for 5-7 minutes until fragrant, then let them cool. Blend the pistachios with the flour in a food processor until finely ground.
  3. In a mixing bowl, cream together the unsalted butter and sugar, then add lemon zest, sea salt, and vanilla extract.

Baking

  1. Incorporate the flour and pistachio mixture into the wet ingredients until combined.
  2. Pour the batter into the prepared pan and smooth the top.
  3. Bake for approximately 35 minutes or until a toothpick comes out clean.

Serving

  1. Allow the cake to cool completely before removing from the pan and slicing.

Storage: Keep the cake in an airtight container at room temperature for up to 3 days or in the fridge for about 5 days. For longer storage, freeze the slices wrapped in parchment or plastic wrap for up to 3 months.

Dessert, Snack
American, Mediterranean
Baking, Desserts, Homemade Cake, Nut Cake, Pistachio Cake

Pecan Pie Dump Cake for the Ultimate Southern Dessert

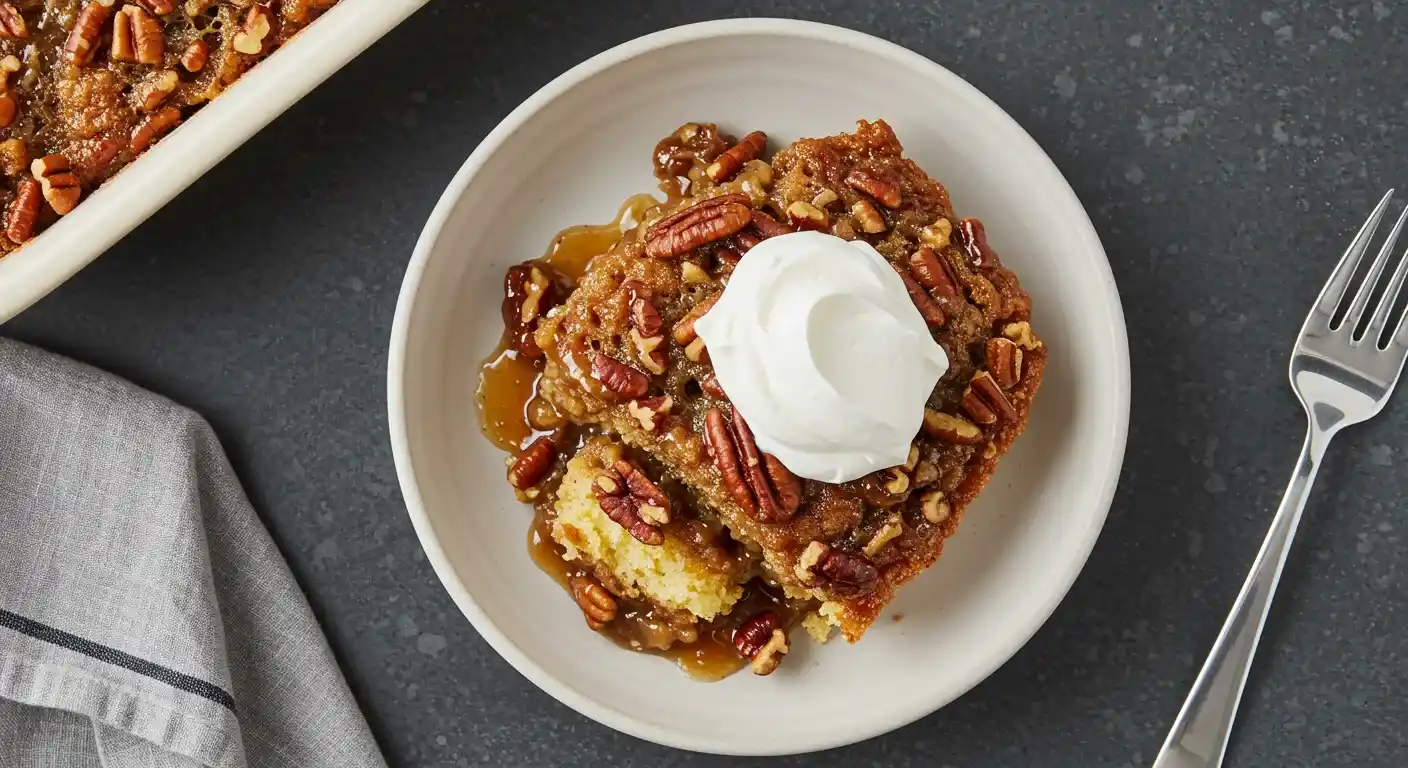
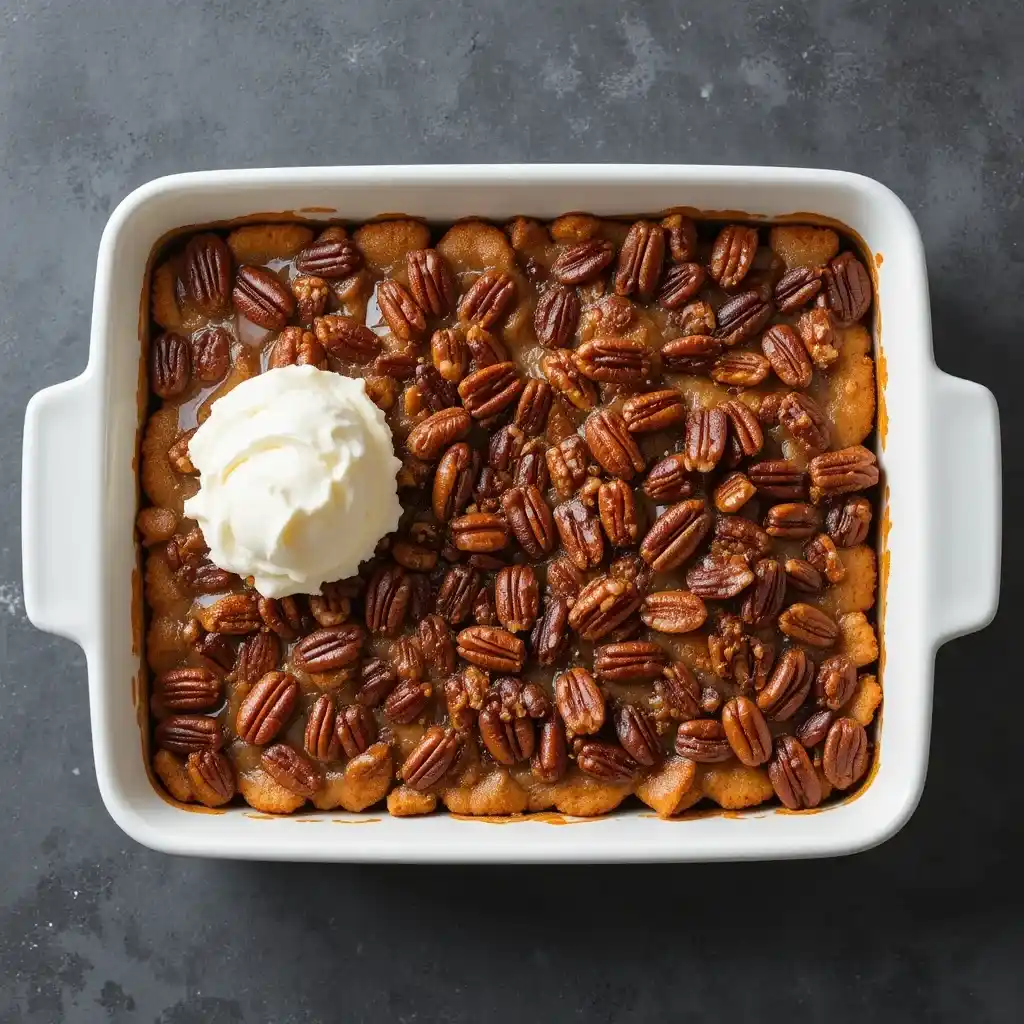
Pecan Pie Dump

Ever had one of those days where all you want is something sweet, warm, and comforting—but the idea of making a full-on pie just feels like too much? We’ve all been there. That’s where this little miracle of a dessert comes in: pecan pie dump cake. It’s rich, gooey, nutty, and buttery in all the best ways, and the best part? No pie crust, no mixer, no stress. Just dump, bake, and dig in.

This dessert feels like a hug from grandma. Every bite is layered with love sweet, caramel-like pecan filling on the bottom, and a golden, buttery cake topping that melts right into it. It’s the kind of treat that brings people to the kitchen with wide eyes and bigger appetites. Whether it’s for a holiday gathering, a cozy Sunday, or a pick-me-up after a long week, this dump cake delivers comfort in every forkful.

You don’t have to be a baking whiz to nail this recipe. In fact, you don’t even have to try that hard. And trust me, once you serve this up, everyone will think you did. Let’s dive in and make the easiest, most soul-soothing dessert you didn’t know you needed.

Why You’ll Love This Recipe

This dessert is the definition of low effort, high reward. Whether you’re baking for a crowd or craving something indulgent after dinner, this pecan pie dump cake brings the nostalgic flavors of the holidays to your plate without the rolling pin.

  • Quick prep: Just 5 minutes!

  • No mixing bowls needed

  • Foolproof for beginners

  • Perfectly sweet, buttery, and nutty

  • A hit at every gathering

What is a Dump Cake?

Let’s clear this up. A dump cake isn’t about looks, it’s about ease and taste. You literally dump ingredients into a baking dish, layer by layer, and let the oven do the work. No crust-making. No stress.

Pecan pie dump cake is like if pecan pie and butter cake had a baby gooey on the bottom, golden and crisp on top.

Ingredients Needed

Here’s what you’ll need for this gooey, golden magic:

Ingredient Amount
Pecan halves 1 ½ cups
Brown sugar ¾ cup
Eggs 3 large
Corn syrup 1 cup (light or dark)
Vanilla extract 1 tsp
Salt ¼ tsp
Yellow cake mix 1 box (15.25 oz)
Unsalted butter ¾ cup (melted)

Optional:

  • Cinnamon (½ tsp)

  • Chocolate chips (½ cup)

Step-by-Step Instructions

  1. Preheat oven to 350°F (175°C). Grease a 9×13 baking dish.

  2. Layer the pecans on the bottom of the dish.

  3. In a bowl, whisk together eggs, brown sugar, corn syrup, vanilla, and salt. Pour over pecans.

  4. Sprinkle the dry cake mix evenly over the top, don’t stir.

  5. Drizzle melted butter all over the dry mix. Make sure most of it is covered.

  6. Bake for 45–50 minutes, until the top is golden brown and bubbling.

  7. Let it cool slightly before serving.

Pecan Pie Dump cake

Tips for Best Results

  • Use real butter, not margarine, it makes a difference.

  • Don’t overbake; the center should be slightly gooey.

  • For richer flavor, toast your pecans beforehand.

  • Use dark corn syrup for a deeper, more caramel-like flavor.

  • Cover with foil halfway if the top browns too quickly.

Variations to Try

Want to get creative? Here are some fun twists:

  • Chocolate Pecan Dump Cake: Add a layer of chocolate chips before the cake mix.

  • Maple Pecan: Substitute corn syrup with real maple syrup.

  • Bourbon Bliss: Add a splash of bourbon to the pecan filling.

  • Pumpkin Spice Pecan: Mix in ½ cup canned pumpkin and pumpkin spice.

  • Salted Caramel: Drizzle caramel sauce on top before baking.

Storage & Reheating

This dessert stores well, if there’s anything left.

To Store:

  • Cool completely and refrigerate covered for up to 5 days.

To Reheat:

  • Microwave individual slices for 20–30 seconds.

  • Or bake at 300°F for 10 minutes until warm.

Serving Suggestions

  • Top with vanilla ice cream or whipped cream.

  • Serve warm with a coffee or dessert wine.

  • Pair it with brunch for a sweet surprise.

  • Add a dusting of powdered sugar for flair.

Health & Nutritional Info (per serving)

Nutrient Amount
Calories 410
Total Fat 22g
Saturated Fat 9g
Carbohydrates 51g
Sugar 36g
Protein 4g
Fiber 2g

Note: This is a treat, not a diet food. But you can enjoy it in moderation with zero guilt!

Common Mistakes to Avoid

  • Mixing the layers: Just dump, don’t stir.

  • Using cold butter: It won’t spread evenly.

  • Skipping the grease: It’ll stick like glue.

  • Overbaking: The filling should be soft and gooey.

Perfect Pairings

Pair your pecan pie dump cake with:

  • Chai tea or cinnamon coffee

  • Spiked eggnog during holidays

  • Hot buttered rum or brandy

  • A scoop of bourbon vanilla ice cream

This dessert was made for cozy vibes.

Make-Ahead Instructions

Hosting a crowd? Make life easier:

  • Prep the pecan filling 1 day ahead and store it covered in the fridge.

  • Assemble the whole cake and refrigerate it unbaked. Bake the next day fresh.

  • Or bake it fully and reheat before serving—still gooey and great!

FAQs

1. Can I use a butter pecan or spice cake mix instead?

Absolutely! Spice cake adds warm, autumnal notes, and butter pecan is a match made in dessert heaven.

2. Can I make this gluten-free?

Yes—just use a certified gluten-free cake mix and double-check all other ingredients.

3. Is this freezer-friendly?

Yes, but the texture changes slightly. Freeze in an airtight container for up to 2 months. Thaw and reheat in the oven.

4. Can I reduce the sugar?

You can slightly reduce the brown sugar or use sugar substitutes like Swerve, but flavor and texture may change.

5. Why isn’t my dump cake setting properly?

It may be underbaked. Also, make sure you’re using the correct ingredient ratios and not mixing the layers.

6. Can I make this in a slow cooker?

Yes! Cook on low for 3–4 hours or until set and golden on top.

Final Thoughts

Pecan pie dump cake is the kind of dessert that turns any day into a special occasion. It’s rich, gooey, nostalgic, and oh-so-easy. Whether you’re baking it for the holidays, a potluck, or a personal sweet fix, it’s guaranteed to leave your kitchen smelling like a dream and your guests asking for seconds.

So go ahead—dump, bake, and enjoy every buttery, nutty, caramel-soaked bite.

[tasty-recipe id=”5258″]

Pecan Pie Dump Cake

A rich, gooey, and buttery dessert that combines the flavors of pecan pie with cake, requiring no mixer or complex steps.

Main Ingredients

  • 1.5 cups Pecan halves
  • 0.75 cups Brown sugar
  • 3 large Eggs
  • 1 cups Corn syrup (light or dark)
  • 1 tsp Vanilla extract
  • 0.25 tsp Salt
  • 1 box (15.25 oz) Yellow cake mix
  • 0.75 cups Unsalted butter (melted)

Optional Ingredients

  • 0.5 tsp Cinnamon (Optional)
  • 0.5 cups Chocolate chips (Optional)

Preparation

  1. Preheat oven to 350°F (175°C). Grease a 9×13 baking dish.
  2. Layer the pecans on the bottom of the dish.
  3. In a bowl, whisk together eggs, brown sugar, corn syrup, vanilla, and salt. Pour over pecans.
  4. Sprinkle the dry cake mix evenly over the top, don’t stir.
  5. Drizzle melted butter all over the dry mix. Make sure most of it is covered.

Baking

  1. Bake for 45–50 minutes, until the top is golden brown and bubbling.
  2. Let it cool slightly before serving.

Use real butter for the best flavor. Don’t overbake; the center should be slightly gooey. Cover with foil halfway if the top browns too quickly.

Dessert, Snack
American
Comfort Food, Dump Cake, easy dessert, Holiday Treat, Pecan Pie

Greek Yogurt Popsicles

Colorful Greek yogurt popsicles with fresh fruits in a sunny setting

These Greek yogurt popsicles are an easy, healthy treat you can make at home. They feel like a cool snack on hot days, and they have real fruit and creamy yogurt, so they taste fresh and sweet. This recipe is a crowd-pleaser for kids and adults, and it keeps well in the freezer for quick snacks. You will love how simple they are, and how bright the fruit makes them look. Get your molds ready, because these popsicles are fun to make and fun to eat.

How to prepare Greek Yogurt Popsicles

Ingredients

  • 2 cups plain Greek yogurt
  • 1/4 cup honey or maple syrup, more to taste
  • 1 tsp vanilla extract
  • 1 to 1 1/2 cups fresh fruit, chopped or mashed (strawberries, blueberries, mango, or peaches work well)
  • Popsicle molds and sticks

Directions

  1. Taste the yogurt, add honey or maple syrup and vanilla, stir until smooth.
  2. If using soft fruit like berries or mango, mash or lightly blend some of it for color, leave some pieces for texture.
  3. You can swirl fruit into the yogurt or mix it all together for even flavor.
  4. Spoon the yogurt and fruit into popsicle molds, tap molds gently to remove air pockets.
  5. Insert sticks, cover, and freeze for at least 4 to 6 hours, until solid.
  6. To remove popsicles, run the mold under warm water for a few seconds, then pull gently.

Greek Yogurt Popsicles

Why You’ll Love Greek Yogurt Popsicles

  • They are creamy and tangy from the Greek yogurt, and sweet from the fruit and honey.
  • They use real fruit, so they taste fresh and natural, not like store popsicles.
  • They are a healthier frozen snack, with protein from the yogurt and vitamins from the fruit.
  • You can change fruits, add spices like cinnamon, or make them dairy-free with coconut yogurt, so they fit your taste.

Tips for success

  • Use thick Greek yogurt for a creamy texture, low-fat or full-fat both work.
  • Sweeten to your taste, remember fruit sweetness varies by season.
  • For layered popsicles, fill half the mold with fruit puree, freeze 30 minutes, then add yogurt.
  • Don’t overblend the fruit if you want chunks, pulse a few times instead.
  • If sticks slip, cover molds with foil and poke sticks through to hold them straight.
  • Freeze long enough, at least 4 hours, to get fully firm popsicles.

Serving Suggestions

  • Serve plain as a snack, or on a small plate with extra fresh berries.
  • Crumble granola on top right before serving for crunch.
  • Drizzle a little honey or chocolate sauce over a thawed popsicle for a treat.
  • Pack one in a cooler for a picnic or bring to a pool day, they travel well if kept cold.

Greek Yogurt Popsicles

FAQs

Q: Can I use frozen fruit?
A: Yes, thaw frozen fruit first and drain excess water, so the mixture is not too runny.

Q: How long do these keep in the freezer?
A: Store in an airtight container, they stay good for about 1 to 2 months, but eat within a month for best taste.

Q: Can I make them without sugar?
A: Yes, skip honey or maple syrup if your fruit is very sweet, or use a sugar substitute you like.

Q: Can I make dairy-free popsicles?
A: Use a thick dairy-free yogurt like coconut or almond Greek-style yogurt, the method is the same.

Q: How do I get smooth popsicles without ice crystals?
A: Use thick yogurt, don’t over-dilute with fruit juice, and freeze fully in a cold freezer.

Conclusion

If you want more flavor ideas and a similar simple recipe with fruit and Greek yogurt, check this version for inspiration, Fresh Fruit Greek Yogurt Popsicles – Amee’s Savory Dish: Fresh Fruit Greek Yogurt Popsicles – Amee’s Savory Dish.

Greek Yogurt Popsicles

These Greek yogurt popsicles are a creamy and refreshing treat made with real fruit and honey, perfect for hot days.

Main Ingredients

  • 2 cups plain Greek yogurt (Use thick Greek yogurt for a creamy texture.)
  • 1/4 cup honey or maple syrup (Sweeten to taste; honey or maple syrup can be adjusted based on fruit sweetness.)
  • 1 tsp vanilla extract
  • 1 to 1 1/2 cups fresh fruit, chopped or mashed (Strawberries, blueberries, mango, or peaches work well.)

Equipment

  • 1 popsicle molds
  • 6 sticks

Preparation

  1. Taste the yogurt, add honey or maple syrup and vanilla, stir until smooth.
  2. If using soft fruit like berries or mango, mash or lightly blend some of it for color, leaving some pieces for texture.
  3. You can swirl fruit into the yogurt or mix it all together for even flavor.
  4. Spoon the yogurt and fruit into popsicle molds, tapping molds gently to remove air pockets.

Freezing

  1. Insert sticks, cover, and freeze for at least 4 to 6 hours, until solid.
  2. To remove popsicles, run the mold under warm water for a few seconds, then pull gently.

These popsicles can be made dairy-free using coconut or almond yogurt. They keep well in the freezer for 1 to 2 months, but best consumed within a month for optimal flavor.

Dessert, Snack
Greek, Healthy
Frozen Treat, Fruit Popsicles, Greek Yogurt Popsicles, Healthy Snack, Summer Desserts

Cajun Sausage Pasta

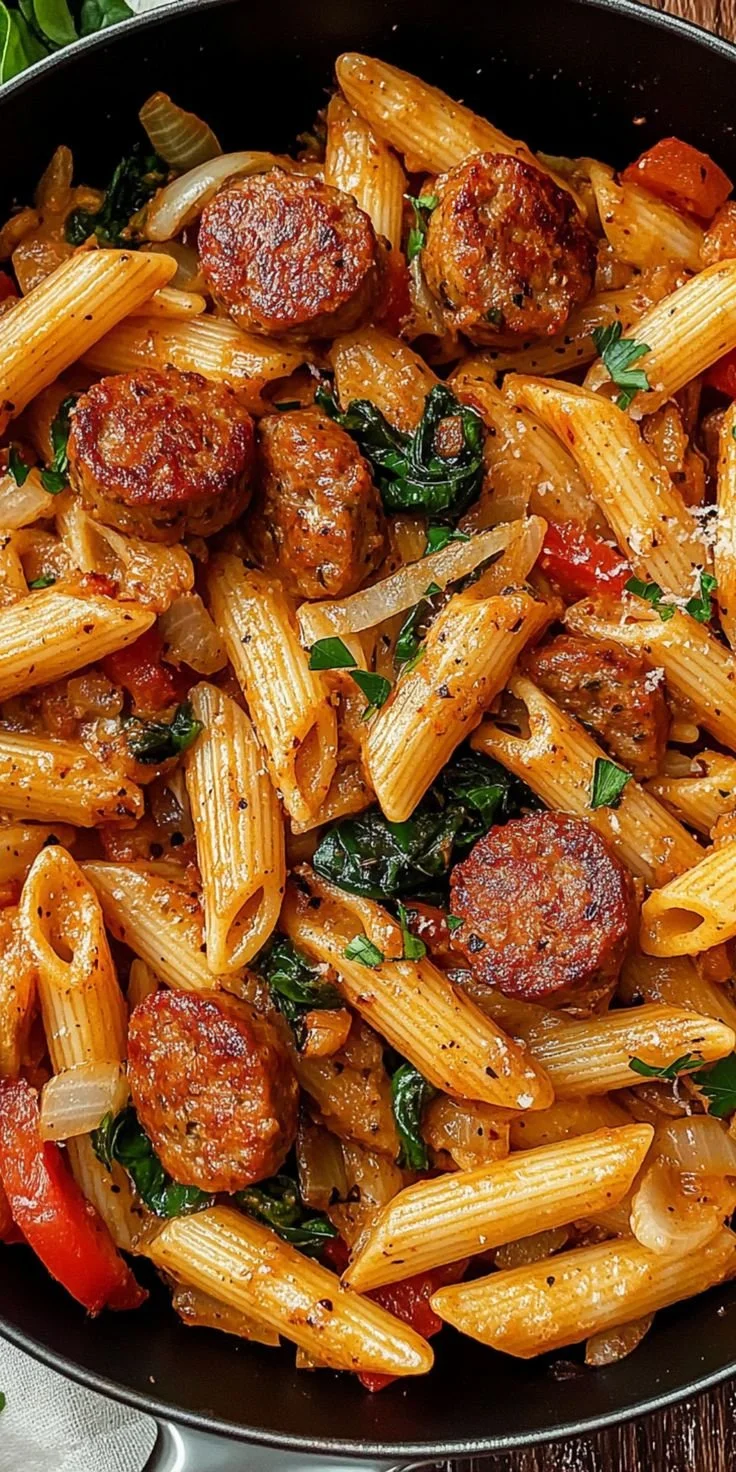
Bowl of Cajun Sausage Pasta topped with fresh herbs and spices

I love meals that are quick, bold, and fill the whole house with good smells. Cajun Sausage Pasta is one of those dishes. It blends spicy Cajun seasoning, smoky sausage, and a creamy sauce with pasta. This dish is a crowd-pleaser, easy to make, and tastes like a warm hug with a little kick. Get ready to make a bowl that your family will ask for again and again.

How to prepare Cajun Sausage Pasta

  1. Cook 12 ounces of pasta in salted water until just tender, drain and save a cup of pasta water.
  2. Slice 1 pound smoked sausage into rounds. Heat a large pan, add a little oil, brown the sausage, then move to a plate.
  3. In the same pan, add 1 chopped onion and 1 chopped bell pepper, cook until soft. Add 2 minced garlic cloves and 1 to 2 tablespoons Cajun seasoning, stir for 30 seconds.
  4. Add a can of diced tomatoes with juice, and 1 cup of chicken broth, bring to a simmer.
  5. Stir in 1 cup heavy cream, then add the cooked sausage back to the pan. Let it warm through and thicken a little.
  6. Add the cooked pasta to the sauce, toss to coat. If the sauce is too thick, add some reserved pasta water until you like the texture.
  7. Taste and add salt, pepper, or more Cajun seasoning if you want more spice. Top with chopped parsley and grated Parmesan if you like.

Cajun Sausage Pasta

Why You’ll Love Cajun Sausage Pasta

  • It mixes spicy Cajun flavors with a creamy sauce, for a rich, tasty meal.
  • Sausage gives a smoky, meaty bite that works well with pasta.
  • You can make it fast on a weeknight, and it still feels special.
  • It works as a one pot or nearly one pot meal, so cleanup is easy.
  • You can change the heat level to suit your family, from mild to very spicy.

Tips for success

  • Use good Cajun seasoning or make your own, it makes the main flavor.
  • Brown the sausage well, browning adds depth and more flavor.
  • Save some pasta water, it helps the sauce stick to the noodles.
  • If you want creamier sauce, add a little more cream or a splash of milk.
  • Taste as you go, adjust salt and spice to your liking.
  • Cook the pasta al dente, it will finish cooking in the sauce and not get mushy.

Serving Suggestions

  • Serve with a green salad and a light vinaigrette to balance the rich sauce.
  • Offer crusty bread to soak up the sauce.
  • Top with chopped green onions or parsley for a fresh note.
  • Add a side of roasted vegetables for color and texture.
  • Pair with a crisp white wine or a cold beer to cut the creaminess.

Cajun Sausage Pasta

FAQs

Q: Can I make this dish less spicy?
A: Yes, use less Cajun seasoning, or choose a mild sausage. You can also add more cream to lower the heat.

Q: Can I make it in one pot?
A: Yes, you can brown the sausage, sauté the veggies, add pasta, broth, and finish with cream in the same pan. Stir often so the pasta cooks evenly.

Q: How do I store leftovers?
A: Keep leftovers in a sealed container in the fridge for up to 3 days. Reheat gently on the stove, add a splash of water or cream if the sauce thickened.

Q: Can I use chicken instead of sausage?
A: Yes, cooked chicken works well, but you may want to add a little smoked paprika or liquid smoke for that smoky flavor.

Q: Is there a vegetarian option?
A: Use a plant-based sausage or extra vegetables like mushrooms and eggplant, and use vegetable broth instead of chicken broth.

Conclusion

If you want another version or a one pot take on this spicy, creamy dish, see this recipe for more ideas, One Pot Creamy Cajun Sausage Pasta – Pass Me Some Tasty.

Cajun Sausage Pasta

A quick and bold blend of spicy Cajun seasoning, smoky sausage, and a creamy sauce with pasta, perfect for family meals.

Pasta

  • 12 ounces pasta (Cook in salted water until just tender.)

Sausage and Vegetables

  • 1 pound smoked sausage (Slice into rounds.)
  • 1 large onion, chopped
  • 1 large bell pepper, chopped
  • 2 cloves garlic, minced
  • 1 to 2 tablespoons Cajun seasoning (Adjust to taste.)

Sauce

  • 1 can diced tomatoes with juice
  • 1 cup chicken broth
  • 1 cup heavy cream

Toppings

  • chopped parsley (For garnish.)
  • grated Parmesan cheese (Optional topping.)

Preparation

  1. Cook the pasta in salted water until just tender, drain, and save a cup of pasta water.
  2. Slice the smoked sausage into rounds.
  3. In a large pan, heat a little oil and brown the sausage, then move to a plate.

Cooking

  1. In the same pan, add chopped onion and bell pepper, and cook until soft.
  2. Add minced garlic and Cajun seasoning, stir for 30 seconds.
  3. Add diced tomatoes with juice and chicken broth, bring to a simmer.
  4. Stir in heavy cream, then add the cooked sausage back to the pan.
  5. Let it warm through and thicken a little.
  6. Add the cooked pasta to the sauce and toss to coat. If it’s too thick, add reserved pasta water until the desired texture is reached.
  7. Taste and add salt, pepper or more Cajun seasoning for more spice.
  8. Top with chopped parsley and grated Parmesan if desired.

Use good Cajun seasoning or make your own for the best flavor. Brown the sausage well for depth and more flavor. Save some pasta water to help the sauce stick to the noodles. Adjust cream and spice to your liking. Cook the pasta al dente so it finishes cooking in the sauce and avoids being mushy.

Dinner, Main Course
American, Southern
Cajun Sausage Pasta, Creamy Pasta, One Pot Meal, Quick Dinner, Spicy Pasta