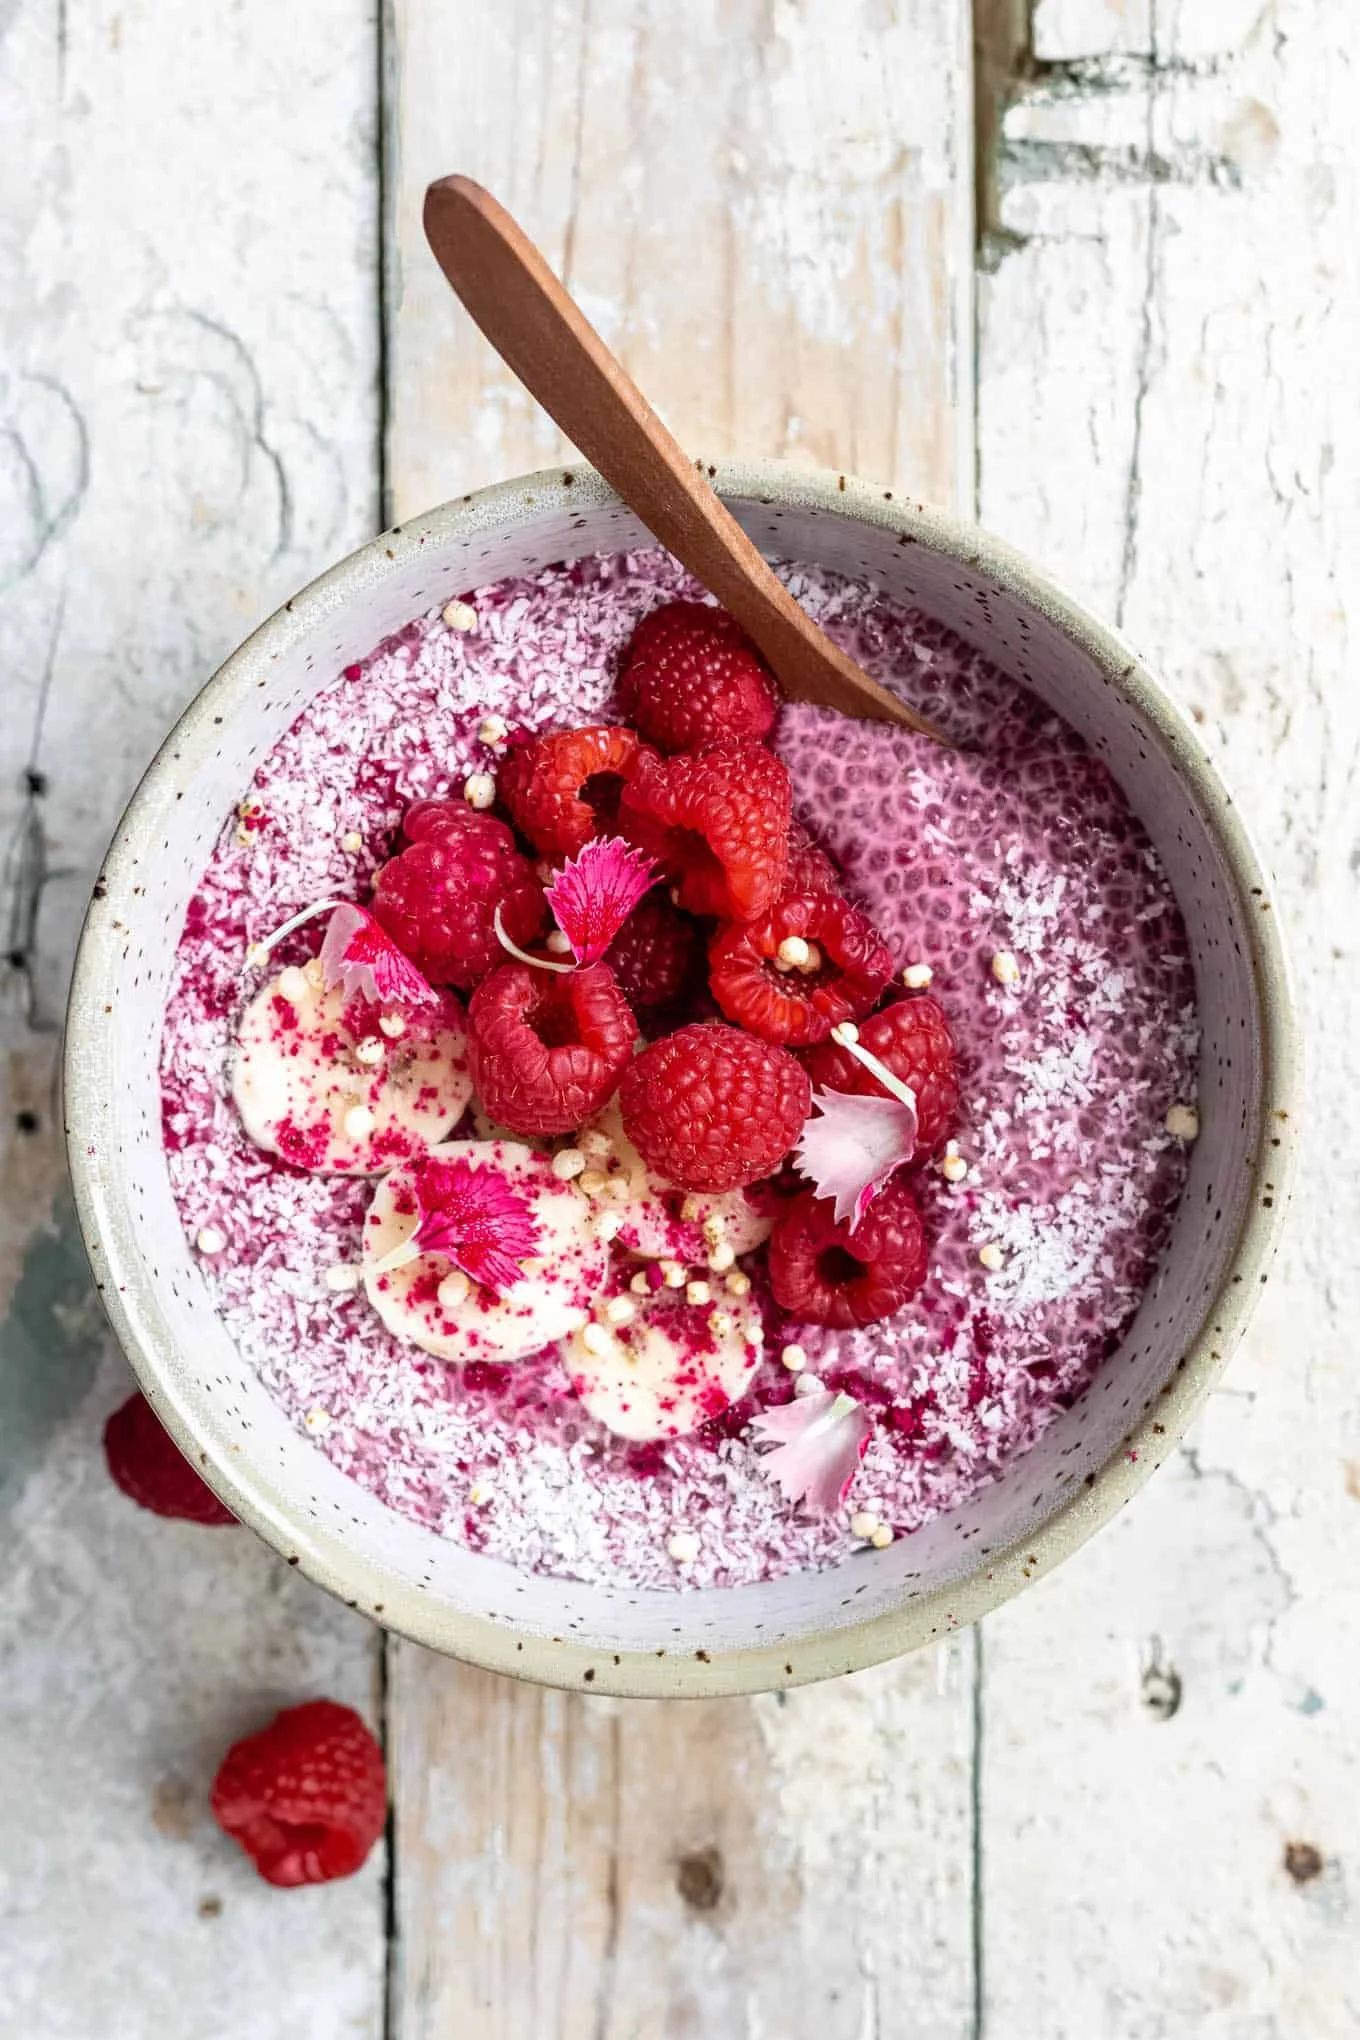
Raspberry Chia Pudding

A bowl of Raspberry Chia Pudding topped with fresh raspberries and mint leaves

Raspberry chia pudding is a simple, fresh treat that feels like a small celebration in a bowl. It is light, creamy, and full of bright raspberry taste. This pudding fits breakfast, snack, or a light dessert. It mixes tiny chia seeds that swell and make a pudding texture, with raspberries that add a sweet and tart flavor. The recipe below is a real crowd-pleaser, easy to make, and leaves your kitchen smelling like fresh berries. Grab a spoon and get ready to enjoy a healthy, feel-good dish that is quick to make and fun to eat.

How to prepare Raspberry Chia Pudding

Ingredients

  • 1 cup milk, use almond, oat, or dairy milk for a vegan option
  • 1 cup fresh or frozen raspberries
  • 3 tablespoons chia seeds
  • 1 to 2 tablespoons maple syrup or honey, to taste
  • 1/2 teaspoon vanilla extract (optional)
  • Pinch of salt

Directions

  1. Put the raspberries and half the milk in a blender. Blend until smooth.
  2. Taste the raspberry mix, add maple syrup or honey if you want it sweeter.
  3. In a bowl or jar, mix the raspberry blend, the rest of the milk, vanilla, and a pinch of salt.
  4. Stir in the chia seeds well, so no seeds clump.
  5. Cover and put in the fridge for at least 2 hours, or overnight. The chia seeds will swell and make a thick pudding.
  6. Stir again before serving. If it is too thick, add a little milk and stir to loosen.
  7. Top with extra raspberries, nuts, or coconut if you like, then serve.

Raspberry Chia Pudding

Why You’ll Love Raspberry Chia Pudding

  • It is easy to make, no cooking needed.
  • It tastes fresh and fruity, with the bright flavor of raspberries.
  • It is healthy, full of fiber and omega-3 from chia seeds.
  • It can be vegan and dairy-free, just pick a plant milk.
  • You can make it ahead, great for busy mornings or meal prep.

Tips for success

  • Stir well after adding chia seeds, to avoid clumps.
  • Let it chill long enough, overnight gives the best texture.
  • Use frozen raspberries if fresh are not in season, they work fine.
  • Adjust sweetness little by little, raspberries can be tart.
  • For creamier pudding, use a thicker milk like canned coconut milk mixed with water.

Serving Suggestions

  • Top with fresh raspberries and a sprinkle of granola for crunch.
  • Add sliced banana and a few chopped almonds for extra protein.
  • Drizzle a little honey or extra maple syrup for dessert.
  • Serve in small jars for packed lunches or grab-and-go breakfasts.
  • Layer with yogurt for a parfait style treat.

Raspberry Chia Pudding

FAQs

Q: Can I make this ahead for the week?
A: Yes, make it and keep in the fridge for up to 4 days. Stir before you eat.

Q: Can I use frozen raspberries?
A: Yes, frozen raspberries work well. Thaw or blend them frozen, both are fine.

Q: Is chia pudding good for a meal?
A: Yes, it is filling. Add nuts or a spoon of nut butter for more protein.

Q: Can I use other berries?
A: Yes, blueberries or strawberries work great too. Mix berries for new flavors.

Q: How do I make it less thick?
A: Add a little more milk and stir, until you reach the texture you like.

Conclusion

If you want another simple, fruity version to try, see this well-loved Raspberry Chia Pudding recipe for more tips and ideas, Raspberry Chia Pudding | Gorgeous, healthy and super delicious ….

Raspberry Chia Pudding

A simple, fresh treat that combines creamy chia pudding with bright raspberry flavor, perfect for breakfast, a snack, or a light dessert.

Main ingredients

  • 1 cup milk, use almond, oat, or dairy milk for a vegan option (Choose your preferred type of milk.)
  • 1 cup fresh or frozen raspberries (Use frozen if fresh is not in season.)
  • 3 tablespoons chia seeds (Chia seeds swell to form pudding texture.)
  • 1-2 tablespoons maple syrup or honey, to taste (Adjust sweetness gradually.)
  • 1/2 teaspoon vanilla extract (optional) (Adds flavor to the pudding.)
  • pinch of salt

Preparation

  1. Put the raspberries and half the milk in a blender. Blend until smooth.
  2. Taste the raspberry mix, and add maple syrup or honey if you want it sweeter.
  3. In a bowl or jar, mix the raspberry blend with the rest of the milk, vanilla, and a pinch of salt.
  4. Stir in the chia seeds well, ensuring no seeds clump together.
  5. Cover and refrigerate for at least 2 hours, or overnight, until the pudding thickens.
  6. Stir the pudding again before serving. If it is too thick, add a little milk to loosen.
  7. Top with extra raspberries, nuts, or coconut if desired, then serve.

Stir well after adding chia seeds to avoid clumps. Overnight chilling gives the best texture. Adjust the fruit for different flavors.

Breakfast, Dessert, Snack
Healthy, Vegan
Chia Pudding, Healthy Dessert, No-Cook Recipe, Raspberry, Vegan Snack

Small Batch Pistachio Cream Cinnamon Rolls

Delicious small batch pistachio cream cinnamon rolls with cinnamon and icing

These Small Batch Pistachio Cream Cinnamon Rolls are a cozy, nutty twist on a classic. They pair soft, yeasted dough with a rich pistachio cream and a touch of cinnamon sugar. The rolls bake up tender, with a green, nutty swirl that looks as good as it tastes. This recipe makes just a few rolls, so you get fresh, warm sweet rolls without a lot of extra work. It is a real crowd-pleaser, perfect for a small family breakfast, a lazy weekend, or when you want a special treat. You will love how the pistachio cream adds a mild, buttery nut flavor that balances the sweet cinnamon. Ready to make a little baking magic, one small batch at a time?

How to prepare Small Batch Pistachio Cream Cinnamon Rolls

  1. Make a soft dough, using flour, yeast, milk, a little sugar, butter, and salt. Knead until smooth, then let it rise until doubled.
  2. Roll the dough into a small rectangle on a floured surface.
  3. Mix pistachio cream, a little powdered sugar, and softened butter to make a spreadable pistachio filling. Spread it evenly over the dough.
  4. Sprinkle cinnamon sugar over the pistachio layer for extra warmth and sweetness.
  5. Roll the dough tightly from the long side into a log, then cut into 4 to 6 equal rolls for a small batch.
  6. Place the rolls in a small pan, let them rise briefly, then bake until golden and puffed.
  7. Make a simple glaze or cream cheese frosting and drizzle it over the warm rolls. Serve right away for the best texture.

Small Batch Pistachio Cream Cinnamon Rolls

Why You’ll Love Small Batch Pistachio Cream Cinnamon Rolls

  • Small batch, so you bake just what you need, no waste.
  • The pistachio cream gives a mild, buttery nut taste that is different from regular cinnamon rolls.
  • The rolls stay soft and fresh, with a nice green swirl that looks pretty on the plate.
  • They feel special but are simple to make, even if you bake alone.
  • Great for gifts, brunch, or a weekend treat.

Tips for success

  • Use room temperature ingredients so the dough rises well.
  • Don’t add too much flour when rolling, a slightly tacky dough makes softer rolls.
  • Spread the pistachio cream thin and even for a neat spiral.
  • Let the rolls rise until puffy, but not overproofed, or they may collapse in the oven.
  • Watch the oven, small pans bake fast, reduce time if needed.
  • Cool the rolls a little before glazing, so the glaze sets nicely.

Serving Suggestions

  • Serve warm with coffee or tea for a simple brunch.
  • Add a scoop of vanilla ice cream for a dessert twist.
  • Plate with fresh berries for color and a bright contrast.
  • Make a small platter for guests, these rolls are great shared.

Small Batch Pistachio Cream Cinnamon Rolls

FAQs

Q: Can I make the pistachio cream ahead of time?

A: Yes, you can make the pistachio cream a day ahead and keep it in the fridge, bring to room temperature before spreading.

Q: Can I use store bought pistachio paste?

A: Yes, store bought pistachio paste works well, just mix it with a little butter or cream to reach a spreadable texture.

Q: How do I store leftovers?

A: Keep leftovers in an airtight container at room temperature for one day, or in the fridge for up to three days. Reheat gently in the oven or microwave.

Q: Can I make these vegan or dairy free?

A: You can swap milk and butter for plant based options and use a vegan glaze. The texture will be similar, but you may need to adjust liquids slightly.

Conclusion

If you want a similar idea with a vegan twist or more small batch inspiration, see the Brown Butter Small Batch Vegan Pistachio Sweet Rolls recipe for more tips and a vegan approach.

Small Batch Pistachio Cream Cinnamon Rolls

These Small Batch Pistachio Cream Cinnamon Rolls offer a cozy, nutty twist on a classic, featuring soft dough paired with rich pistachio cream and a touch of cinnamon sugar, perfect for a small family breakfast or special treat.

Dough ingredients

  • 2 cups all-purpose flour (Use as needed, don’t add too much when rolling out.)
  • 1 packet instant yeast (To help the dough rise.)
  • 1/4 cup milk (Use at room temperature.)
  • 1 tablespoon sugar (For slight sweetness.)
  • 2 tablespoons butter (Melted, at room temperature.)
  • 1/4 teaspoon salt (For flavor.)

Pistachio cream filling ingredients

  • 1/2 cup pistachio cream (Homemade or store-bought.)
  • 1/4 cup powdered sugar (Adjust for sweetness as desired.)
  • 1 tablespoon butter (Softened for spreading.)

Cinnamon sugar topping

  • 1 tablespoon cinnamon (For flavor.)
  • 2 tablespoons sugar (To sprinkle over the filling.)

Preparation

  1. Make a soft dough by combining flour, yeast, milk, sugar, butter, and salt. Knead until smooth, then let it rise until doubled in size.
  2. Roll the dough into a small rectangle on a floured surface.
  3. Mix pistachio cream, powdered sugar, and softened butter to form a spreadable filling.
  4. Spread the pistachio filling evenly over the rolled dough.
  5. Sprinkle cinnamon sugar over the pistachio layer.
  6. Roll the dough tightly from the long side into a log, then cut into 4 to 6 equal rolls.
  7. Place the rolls in a small pan, let them rise briefly, then bake at 350°F until golden and puffed.

Finishing Touch

  1. Prepare a simple glaze or cream cheese frosting and drizzle over the warm rolls before serving.

Use room temperature ingredients for better rise. Don’t over-flour when rolling, and let the rolls rise until puffy before baking. Cool before glazing for the best texture.

Baking, Breakfast, Dessert
American
Baking Recipe, Breakfast Treat, Cinnamon Rolls, Pistachio Cream, Small Batch

Healthy Peanut Butter Banana Muffins

Healthy peanut butter banana muffins fresh out of the oven.

Peanut Butter Banana Muffins fit busy mornings, and this do just that. They are soft, nutty, and sweet from ripe bananas. The muffins make a great breakfast, snack, or lunchbox treat. This recipe is simple, uses real food, and pleases a crowd. You will love the peanut butter flavor with banana, and how easy they are to make. Ready to bake something warm and comforting, that still feels good to eat?

How to prepare Peanut Butter Banana Muffins

Yield: about 12 muffins, Bake time: 18 to 22 minutes, Oven: 350°F (175°C)

Ingredients

  • 3 ripe bananas, mashed
  • 1/2 cup peanut butter, smooth or crunchy
  • 1/3 cup honey or maple syrup
  • 2 eggs, room temperature
  • 1/4 cup milk, dairy or plant milk
  • 1 tsp vanilla extract
  • 1 cup whole wheat flour or oat flour
  • 1 tsp baking powder
  • 1/2 tsp baking soda
  • 1/4 tsp salt
  • 1/3 cup rolled oats or chopped nuts, optional
  • 1/4 cup dark chocolate chips, optional

Directions

  1. Preheat your oven to 350°F, line a muffin tin with paper cups or grease it lightly.
  2. In a big bowl, mash the bananas with a fork until smooth. Add peanut butter, honey, eggs, milk, and vanilla, mix well.
  3. In another bowl, stir together the flour, baking powder, baking soda, and salt.
  4. Pour the dry mix into the wet mix, stir until just combined, do not overmix. Fold in oats or nuts and chocolate chips if you like.
  5. Spoon the batter into the muffin cups, fill each about two thirds full.
  6. Bake 18 to 22 minutes, until tops are golden and a toothpick comes out clean.
  7. Let muffins cool in the tin for 5 minutes, then move to a rack to cool more. Enjoy warm or room temperature.

Healthy Peanut Butter Banana Muffins

Why You’ll Love Peanut Butter Banana Muffins

  • They use ripe bananas, so you get natural sweetness and moist muffins.
  • Peanut butter adds protein and rich flavor, making them filling and tasty.
  • They work as a quick breakfast, snack, or lunchbox treat.
  • You can make them with whole wheat or oat flour for a healthier twist.
  • They are easy to make, and kids usually love them.

Tips for success

  • Use very ripe bananas, they give the best taste and moisture.
  • Do not overmix the batter, a few lumps are okay, this keeps muffins soft.
  • If you want less sugar, use less honey or skip the chocolate chips.
  • For a gluten free option, use certified gluten free oat flour.
  • Check muffins at 18 minutes, ovens vary, and you do not want them dry.

Serving Suggestions

  • Serve warm with a thin spread of peanut butter on top.
  • Pair with yogurt and fruit for a quick breakfast.
  • Pack them in a lunch box with fresh apples or carrot sticks.
  • Crumble over plain yogurt for a simple parfait.

Healthy Peanut Butter Banana Muffins

FAQs

Q: Can I freeze these muffins?
A: Yes, cool them fully, wrap in foil or put in a freezer bag, freeze up to 3 months. Thaw at room temperature or warm in the oven.

Q: Can I make these without eggs?
A: Yes, use flax eggs, mix 2 tablespoons ground flax with 6 tablespoons water, let sit 5 minutes, then use in place of 2 eggs.

Q: Are these muffins high in protein?
A: They have more protein than plain banana muffins because of the peanut butter and eggs, but they are not a protein bar. Add Greek yogurt or extra peanut butter for more protein.

Q: Can I use almond butter instead of peanut butter?
A: Yes, almond butter or any nut butter works, the flavor will change slightly but they stay very good.

Q: Can I make mini muffins?
A: Yes, bake mini muffins 10 to 14 minutes, check often as they cook faster.

Conclusion

If you want one more simple reference for a similar version, you can find a good recipe example at Healthy Peanut Butter Banana Muffins – Broma Bakery.

Healthy Peanut Butter Banana Muffins

These soft, nutty, and sweet muffins are easy to make and perfect for a busy morning. Enjoy them as a breakfast, snack, or lunchbox treat!

Main Ingredients

  • 3 pieces ripe bananas, mashed (Use very ripe bananas for the best taste and moisture.)
  • 1/2 cup peanut butter, smooth or crunchy (Can substitute with almond butter or other nut butters.)
  • 1/3 cup honey or maple syrup (Use less if you prefer a less sweet muffin.)
  • 2 pieces eggs, room temperature (Optional: can use flax eggs as a substitute.)
  • 1/4 cup milk, dairy or plant milk
  • 1 tsp vanilla extract
  • 1 cup whole wheat flour or oat flour (For gluten-free, use certified gluten-free oat flour.)
  • 1 tsp baking powder
  • 1/2 tsp baking soda
  • 1/4 tsp salt
  • 1/3 cup rolled oats or chopped nuts, optional
  • 1/4 cup dark chocolate chips, optional

Preparation

  1. Preheat your oven to 350°F (175°C) and line a muffin tin with paper cups or grease it lightly.
  2. In a big bowl, mash the bananas with a fork until smooth. Add peanut butter, honey, eggs, milk, and vanilla, then mix well.
  3. In another bowl, stir together the flour, baking powder, baking soda, and salt.
  4. Pour the dry mix into the wet mix and stir until just combined. Do not overmix. Fold in oats or nuts and chocolate chips if desired.
  5. Spoon the batter into the muffin cups, filling each about two thirds full.
  6. Bake for 18 to 22 minutes, until tops are golden and a toothpick comes out clean.
  7. Let muffins cool in the tin for 5 minutes, then transfer to a rack to cool more. Enjoy warm or at room temperature.

For serving suggestions, enjoy warm with a thin spread of peanut butter, pair with yogurt and fruit, or crumble over yogurt for a parfait. Muffins can be frozen for up to 3 months.

Breakfast, Snack
American
Baking, Easy Breakfast Recipe, Healthy Muffins, Nutty Muffins, Peanut Butter Banana Muffins

Delicious Honey Lime Chicken & Avocado Rice Stack Recipe

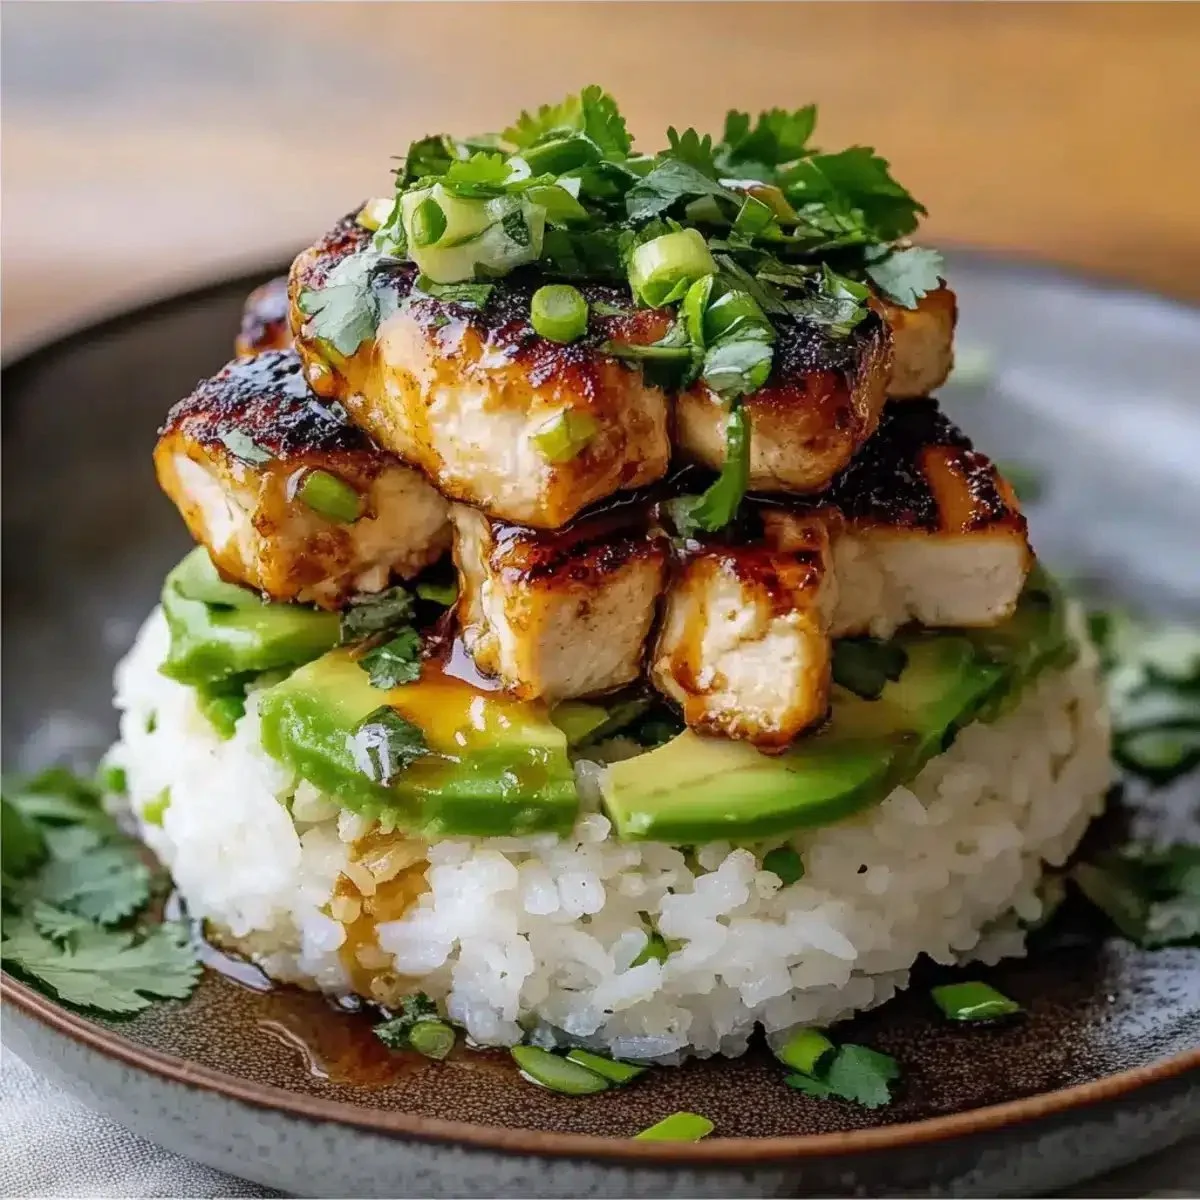
Honey Lime Chicken served on a bed of Avocado Rice Stack

This dish brings bright, fresh flavors and simple cooking together. The honey lime chicken is sweet and tangy, and the creamy avocado adds a soft, rich layer. The avocado rice stack looks pretty on the plate, and it tastes even better. It is an easy weeknight dinner that feels a little special. Give it a try, and enjoy a meal that will make everyone smile, you might want seconds.

How to prepare Delicious Honey Lime Chicken & Avocado Rice Stack Recipe

Ingredients

  • 2 boneless, skinless chicken breasts
  • 3 tablespoons honey
  • 2 tablespoons lime juice
  • 1 teaspoon lime zest
  • 1 clove garlic, minced
  • 1 tablespoon olive oil
  • Salt and pepper to taste
  • 2 cups cooked white or brown rice
  • 1 ripe avocado
  • 1 tablespoon lime juice for avocado
  • 2 tablespoons chopped fresh cilantro
  • Optional, chopped green onion or red pepper for garnish

Directions

  1. Make the honey lime marinade, mix honey, lime juice, lime zest, minced garlic, olive oil, salt, and pepper in a bowl.
  2. Put the chicken in the bowl, coat well, and let it sit for at least 15 minutes, or up to 1 hour in the fridge.
  3. Cook the chicken in a hot skillet over medium heat, about 5 to 7 minutes per side, until done. Let it rest, then slice or chop.
  4. Warm the cooked rice. Press the rice into a small bowl or ring mold to make a neat rice cake.
  5. Mash the avocado with 1 tablespoon lime juice, a pinch of salt, and some chopped cilantro.
  6. To build the stack, place the rice cake on a plate, add a layer of avocado mash, then top with sliced honey lime chicken.
  7. Sprinkle extra cilantro, green onion, or red pepper over the top. Serve warm.

Delicious Honey Lime Chicken & Avocado Rice Stack Recipe

Why You’ll Love Delicious Honey Lime Chicken & Avocado Rice Stack Recipe

  • Fresh flavors, the lime and honey give the chicken a lively taste.
  • Creamy avocado pairs well with warm rice and savory chicken.
  • Easy to make, good for a quick meal or for guests.
  • Versatile, you can use brown rice, quinoa, or add beans for more protein.
  • Eye catching, the stack looks like a restaurant plate but is simple to make.

Tips for success

  • Pat the chicken dry before adding the marinade, the sauce will stick better.
  • Don’t overcook the chicken, check with a thermometer or cut a small piece to test.
  • Use a ripe but firm avocado, it will mash smooth and hold shape on the stack.
  • Press rice firmly into a mold or small bowl to make tidy rice cakes.
  • Taste and adjust salt and lime at the end, a little extra lime brightens the dish.

Serving Suggestions

  • Serve with a light green salad for a fresh side.
  • Offer lime wedges and extra cilantro on the side.
  • Add a spoon of salsa or pico de gallo for more color and kick.
  • Pair with a cold beer or a simple iced tea for a relaxed meal.

Delicious Honey Lime Chicken & Avocado Rice Stack Recipe

FAQs

Q: Can I use chicken thighs instead of breasts? A: Yes, chicken thighs work well. They stay juicy and add more flavor. Cook until they reach a safe internal temperature.

Q: How can I make this dish vegetarian? A: Swap the chicken for grilled tofu or a mix of beans and roasted vegetables, and keep the honey lime sauce for a bright flavor.

Q: Can I make parts ahead of time? A: Yes, cook the rice and chicken ahead. Store separately in the fridge. Mash the avocado just before serving to keep it bright and green.

Q: What if I do not have a mold for the rice stack? A: Use a small bowl or cup to press the rice, then turn it out onto the plate. A spoon can help shape the stack too.

Conclusion

If you want the original recipe page and more notes, check the full write up at Honey Lime Chicken & Avocado Rice Stack – NorthEast Nosh Recipes, it has helpful tips and photos.

Honey Lime Chicken & Avocado Rice Stack

This dish brings bright, fresh flavors and simple cooking together. The honey lime chicken is sweet and tangy, and the creamy avocado adds a soft, rich layer, making it an easy weeknight dinner that feels a little special.

For the Marinade

  • 3 tablespoons honey
  • 2 tablespoons lime juice
  • 1 teaspoon lime zest
  • 1 clove garlic, minced
  • 1 tablespoon olive oil
  • Salt and pepper to taste

For the Rice Stack

  • 2 cups cooked white or brown rice
  • 1 ripe avocado
  • 1 tablespoon lime juice for avocado
  • 2 tablespoons chopped fresh cilantro
  • Optional, chopped green onion or red pepper for garnish

Preparation

  1. Make the honey lime marinade by mixing honey, lime juice, lime zest, minced garlic, olive oil, salt, and pepper in a bowl.
  2. Put the chicken in the bowl, coat well, and let it sit for at least 15 minutes, or up to 1 hour in the fridge.
  3. Cook the chicken in a hot skillet over medium heat, about 5 to 7 minutes per side, until done. Let it rest, then slice or chop.
  4. Warm the cooked rice.
  5. Mash the avocado with 1 tablespoon lime juice, a pinch of salt, and some chopped cilantro.

Assembly

  1. Press the rice into a small bowl or ring mold to make a neat rice cake.
  2. To build the stack, place the rice cake on a plate, add a layer of avocado mash, then top with sliced honey lime chicken.
  3. Sprinkle extra cilantro, green onion, or red pepper over the top. Serve warm.

Pat the chicken dry before adding the marinade for better adherence. Don’t overcook the chicken; check with a thermometer. Use a ripe but firm avocado for mashing. Firmly press rice into the mold for neatness. Adjust salt and lime for brightness.

Dinner, Main Course
American, Mexican
Avocado Rice Stack, Easy Dinner, Flavorful Chicken, Honey Lime Chicken, Weeknight Meal

Easy Protein Bistro Snack Box

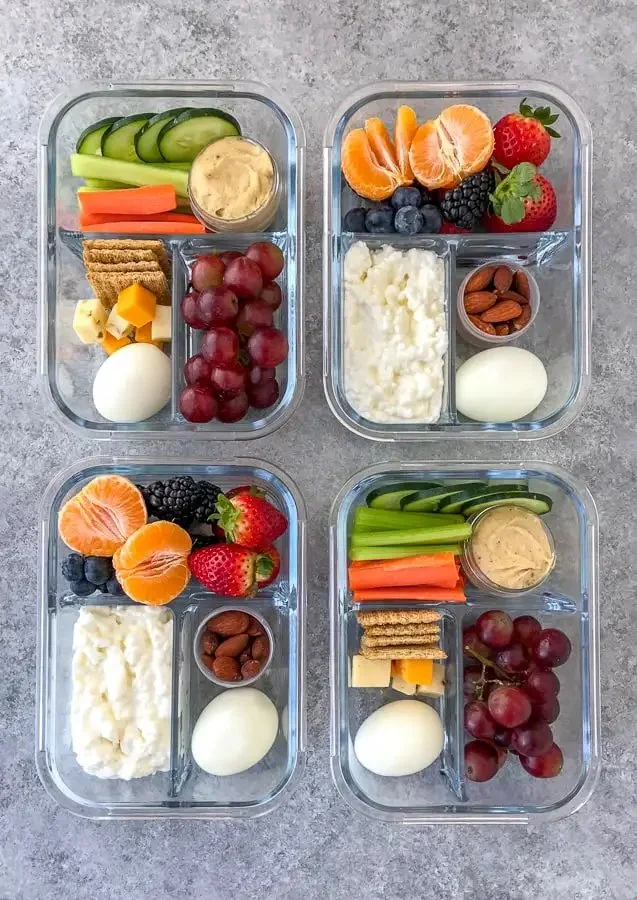
Easy Protein Bistro Snack Box filled with nutritious protein snacks

Easy Protein Bistro Snack Box is a fun and simple snack that fills you up and tastes great. It mixes protein rich foods, fresh veggies, and tasty bites in one box. This snack box works well for busy days, quick lunch, or a light dinner. The flavors are bright, the textures are nice, and it feels special even when you are in a hurry. This Easy Protein Bistro Snack Box is a crowd pleaser, with salty and fresh bits that everyone likes. Give it a try, and you might find yourself making it all the time, with a smile on your face.

How to prepare Easy Protein Bistro Snack Box

  1. Gather ingredients, wash and dry fresh items.
  2. Cook or warm any protein, for example grilled chicken or turkey slices. Let it cool.
  3. Slice cheese into cubes or sticks. Hard boiled eggs, cut in half, work well too.
  4. Arrange items in a box or container, keeping wet items separate if possible. Place protein, cheese, eggs in one section.
  5. Add fresh veggies, like cherry tomatoes, cucumber slices, or carrot sticks.
  6. Add a small cup of hummus or Greek yogurt dip, and a handful of nuts or seeds.
  7. Put crackers, olives, or grapes in their own small area.
  8. Close the box, refrigerate if not eating right away, and enjoy when ready.

Easy Protein Bistro Snack Box

Why You’ll Love Easy Protein Bistro Snack Box

  • It gives you lots of protein to keep you full and focused.
  • It is quick to make, with no cooking skills needed for many parts.
  • The box looks nice, so it feels like a treat, even for a weekday.
  • It is flexible, you can swap foods to match your taste or what you have.
  • It makes a great on the go protein snack for work, school, or travel.

Tips for success

  • Use cooked, cooled protein, such as roasted chicken or canned tuna, for easy prep.
  • Keep dips in small containers to avoid soggy veggies and crackers.
  • Chop vegetables to bite size, so they are easy to eat.
  • Choose firm cheeses and nuts, they travel well and stay fresh.
  • Make boxes the night before for busy mornings, but add delicate greens right before serving.

Serving Suggestions

  • Serve with a simple side salad or fresh fruit for a fuller meal.
  • Pair with sparkling water or a light iced tea.
  • Use small containers to portion dips and nuts, and add lemon or herbs for extra flavor.
  • Turn it into a light picnic dish by adding whole grain bread or pita.

Easy Protein Bistro Snack Box

FAQs

Q: Can I make the Easy Protein Bistro Snack Box ahead of time?

A: Yes, you can prep the box the night before. Keep wet items separate and add them just before eating if possible.

Q: How long will it stay fresh?

A: Store in the fridge and eat within 24 hours for best taste and texture.

Q: Can I make a vegetarian version?

A: Yes, swap meat with extra hard boiled eggs, tofu cubes, or chickpeas for protein.

Q: What if I do not like one of the ingredients?

A: Swap it for something you prefer, like different cheese, fruit, or a seed mix.

Conclusion

If you want more ideas for a protein box, you can see a lovely DIY example at Easy DIY Bistro Box from Good Cheap Eats.

Easy Protein Bistro Snack Box

A fun and simple snack box filled with protein-rich foods, fresh veggies, and tasty bites, perfect for busy days or quick meals.

Protein

  • 1 cup cooked and cooled protein (grilled chicken, turkey slices, or other protein) (Use cooked protein for easy prep.)
  • 2 large hard boiled eggs (Cut in half.)

Cheese

  • 1 cup cubed or sliced cheese (Choose firm cheese that travels well.)

Fresh Veggies

  • 1 cup cherry tomatoes (Wash and dry before using.)
  • 1 cup cucumber slices (Chop into bite-size pieces.)
  • 1 cup carrot sticks (Chop into bite-size pieces.)

Dips and Extras

  • 1 small cup hummus or Greek yogurt dip (Keep dips in small containers to avoid sogginess.)
  • 1/2 cup nuts or seeds (Choose firm types that travel well.)

Carbs/Fruits

  • 1 cup crackers, olives, or grapes (Put in their own small area.)

Preparation

  1. Gather ingredients and wash and dry fresh items.
  2. Cook or warm any protein if necessary, then let it cool.
  3. Slice cheese into cubes or sticks.
  4. Arrange items in a box or container, keeping wet items separate if possible.

Assembly

  1. Place protein, cheese, and eggs in one section.
  2. Add fresh veggies like cherry tomatoes, cucumber slices, and carrot sticks.
  3. Include a small cup of hummus or Greek yogurt dip, and a handful of nuts or seeds.
  4. Put crackers, olives, or grapes in their own small area.
  5. Close the box, refrigerate if not eating right away, and enjoy when ready.

Make boxes the night before for busy mornings, but add delicate greens right before serving. This recipe is flexible, you can swap foods based on taste or availability.

Light Meal, Snack
American, Healthy
Bistro Box, Easy Meal Prep, Healthy Eating, Protein Snack

Easy Yogurt Granola Bowls (4 Ways!)

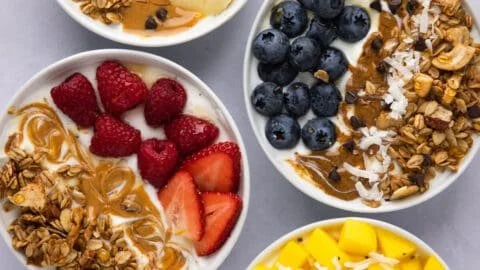
Delicious yogurt granola bowls served in colorful dishes with fresh fruits

Welcome to a simple, tasty idea for breakfast or a snack, Easy Yogurt Granola Bowls (4 Ways!). This dish is quick to make, healthy, and works for any time you want something fresh and crunchy. Each bowl mixes creamy yogurt with crunchy granola and fresh fruit, so every bite feels bright and satisfying. It’s a crowd-pleaser because you can change it up fast, and everyone can pick their favorite mix-ins. Get ready to build a bowl you will want to eat again and again.

How to prepare Easy Yogurt Granola Bowls (4 Ways!)

  1. Start with plain or flavored yogurt, about 1 cup per bowl. Spoon the yogurt into a bowl.
  2. Add 1/2 to 3/4 cup granola on top for crunch.
  3. Choose one of the 4 ways below and add the toppings.
  • Classic Berry: fresh strawberries, blueberries, a drizzle of honey.
  • Tropical: diced mango, pineapple, shredded coconut.
  • Nutty Banana: sliced banana, chopped almonds or walnuts, a pinch of cinnamon.
  • Apple Cinnamon: chopped apple, raisins, a little maple syrup and cinnamon.
  1. Stir a little if you like mixed textures, or leave layers for a pretty bowl.
  2. Taste, then add a touch more honey or a squeeze of lemon if you want more flavor.
  3. Serve right away for the best crunch, or cover and chill for up to a few hours, knowing the granola may soften.

Easy Yogurt Granola Bowls (4 Ways!)

Why You’ll Love Easy Yogurt Granola Bowls (4 Ways!)

  • They are fast to make, perfect for busy mornings or an easy snack.
  • You get creamy yogurt, crunchy granola, and fresh fruit in one bowl, great for texture and taste.
  • They are easy to change, so kids and adults can each have the flavors they like.
  • This recipe is healthy, full of protein, fiber, and real fruit to start your day well.

Tips for success

  • Use cold yogurt for a fresh taste.
  • Keep granola in a sealed bag or jar so it stays crunchy.
  • Add wet toppings like chopped fruit last to keep the granola crisp.
  • If you need more protein, choose Greek yogurt or add a spoon of nut butter.
  • Chop fruit into even pieces so every bite is balanced.

Serving Suggestions

  • Serve with a side of toast or a boiled egg for a fuller breakfast.
  • Pack in a jar for an easy take-to-work or school lunch.
  • Top with seeds or a spoon of chia for extra fiber.
  • Pair with coffee or a smoothie for a bright morning combo.

Easy Yogurt Granola Bowls (4 Ways!)

FAQs

Q: Can I use flavored yogurt instead of plain?

A: Yes, flavored yogurt works great, it adds more sweetness and flavor.

Q: How long will the bowls keep?

A: If you plan to eat right away, the bowl is best immediately. If you make ahead, keep yogurt and granola separate, then combine within a few hours.

Q: Can I make this dairy free?

A: Yes, use plant-based yogurt like almond or coconut yogurt and choose a dairy-free granola.

Q: Is granola high in sugar?

A: Some store-bought granolas have added sugar, so check labels or use a low-sugar or homemade granola.

Q: Can kids help make these bowls?

A: Definitely, kids can pick and add toppings, which makes breakfast fun and easy.

Conclusion

If you want more ideas for mix-ins and simple ways to build bowls, this recipe idea pairs well with many guides online, such as Granola & Yogurt Bowls (4 Ways) – Jar Of Lemons.

Easy Yogurt Granola Bowls (4 Ways)

A quick, healthy breakfast or snack that combines creamy yogurt, crunchy granola, and fresh fruit, perfect for customization.

Base Ingredients

  • 4 cup plain or flavored yogurt (1 cup per bowl)
  • 2-3 cup granola (1/2 to 3/4 cup per bowl)

Toppings Options

  • 1 cup fresh strawberries, blueberries (For Classic Berry variation)
  • 1 cup diced mango, pineapple, shredded coconut (For Tropical variation)
  • 1 cup sliced banana, chopped almonds or walnuts, pinch of cinnamon (For Nutty Banana variation)
  • 1 cup chopped apple, raisins, maple syrup, pinch of cinnamon (For Apple Cinnamon variation)

Preparation

  1. Start by spooning 1 cup of yogurt into a bowl.
  2. Add 1/2 to 3/4 cup of granola on top.
  3. Choose one of the four topping options and add them to your bowl.
  4. Stir to combine if you prefer mixed textures, or leave in layers for a prettier presentation.
  5. Taste the bowl and add more honey or a squeeze of lemon if desired.
  6. Serve immediately for the best crunch, or chill for up to a few hours (note that granola may soften).

Use cold yogurt for a fresher taste. Keep granola stored in a sealed bag or jar to maintain crunchiness. Add wet toppings last to keep granola crisp. For more protein, opt for Greek yogurt or add nut butter. Make sure to chop fruit into even pieces for balanced bites.

Breakfast, Snack
American
Customizable Snacks, Easy Recipes, Granola Bowls, Healthy Breakfast, Yogurt Bowls

Hibachi Chicken: 7 Sizzling Secrets to Mouthwatering Flavor

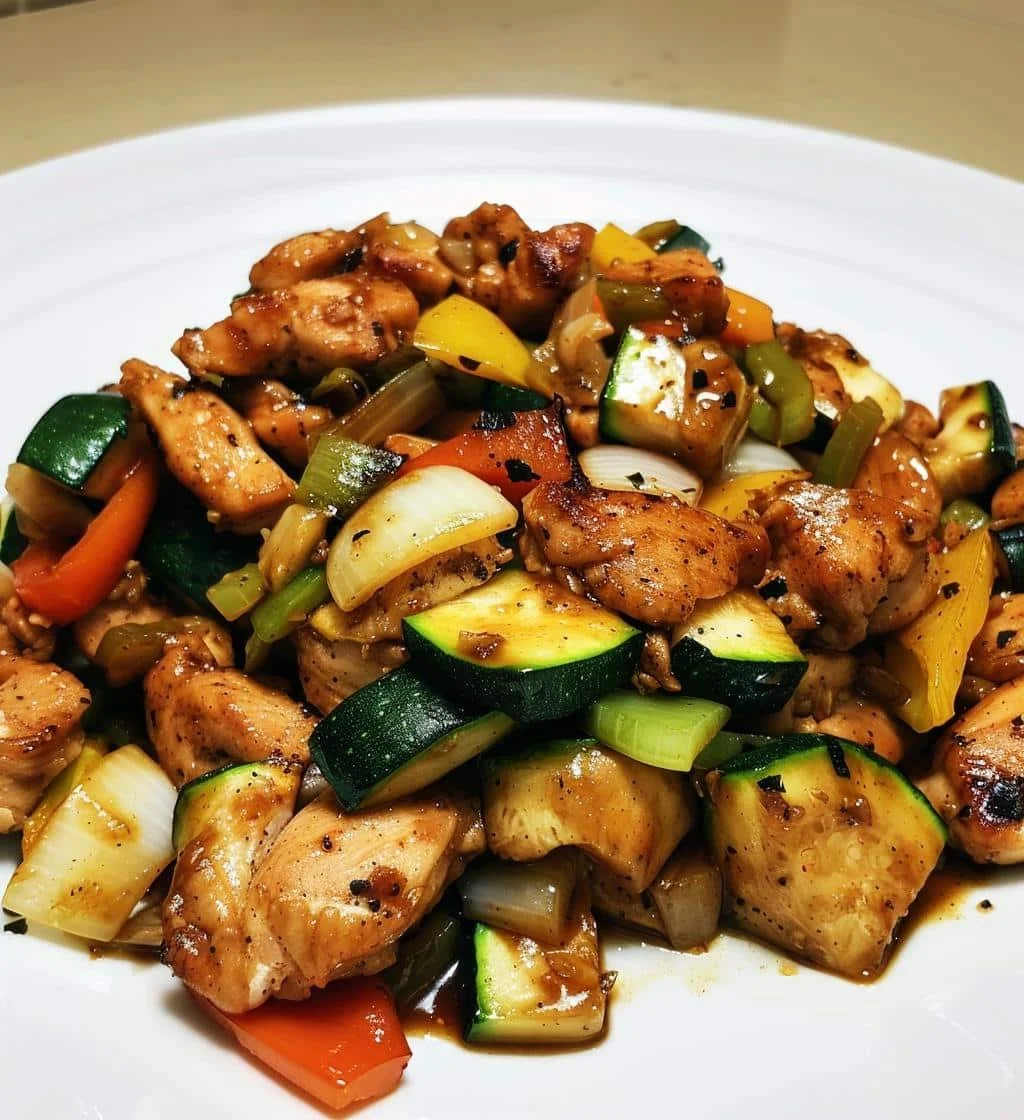
Delicious hibachi chicken sizzling on a grill, showcasing mouthwatering flavor.

Hibachi chicken is a simple, tasty dish that feels special. It has salty soy, warm garlic, and a bit of sweet from mirin or sugar. This style of cooking gives you seared edges and juicy bites, just like a Japanese steakhouse. The recipe below is a crowd pleaser, easy to make, and fast on busy nights. Get ready for a meal that smells amazing and brings smiles, you will want to make it again and again.

How to prepare Hibachi Chicken

  1. Cut 1 pound of boneless chicken breasts into bite size pieces. Pat dry with a paper towel.
  2. Mix 2 tbsp soy sauce, 1 tbsp mirin or rice wine, 1 tsp sesame oil, 1 tsp sugar, 1 clove garlic minced, and a pinch of black pepper. This is the simple hibachi marinade.
  3. Toss the chicken in the marinade and let sit 10 to 20 minutes, or up to 1 hour in the fridge for more flavor.
  4. Heat a skillet or flat top over medium high heat. Add 1 to 2 tbsp vegetable oil and 1 tbsp butter.
  5. Add chicken in a single layer, let brown without moving for 2 minutes, then stir and cook 3 to 4 more minutes until cooked through.
  6. Add chopped onion and sliced zucchini or mushrooms to the pan, cook until tender, toss with the chicken.
  7. Finish with a splash of soy sauce and a squeeze of lemon, or add a small drizzle of hibachi sauce if you like it sweet and savory. Serve hot with rice and steamed vegetables.

Hibachi Chicken: 7 Sizzling Secrets to Mouthwatering Flavor

Why You’ll Love Hibachi Chicken

  • Fast to cook, ready in about 20 minutes.
  • Big, bold flavors from simple sauces like soy, garlic, and sesame oil.
  • Versatile, you can add your favorite veggies, serve with rice or noodles.
  • Crowd pleaser, kids and adults enjoy the mild savory taste.
  • Feels like a restaurant meal at home, no fancy tools needed.

Tips for success

  • Pat chicken dry before marinating, this helps a good sear.
  • Do not crowd the pan, cook in batches if needed for a crisp edge.
  • Use medium high heat so the chicken browns quickly without overcooking.
  • Add butter near the end for that classic hibachi flavor.
  • Taste the sauce before serving, add a little sugar or lemon if it needs balance.
  • Cut veggies into similar size pieces so they cook evenly.

Serving Suggestions

  • Serve with steamed white rice or fried rice for a full plate.
  • Add grilled shrimp or steak for a mixed protein hibachi dinner.
  • Offer hot mustard, ginger sauce, or a simple teriyaki for dipping.
  • Plate with lemon wedges and chopped green onions for a bright finish.
  • For a low carb option, serve over cauliflower rice or a bed of stir fried greens.

Hibachi Chicken: 7 Sizzling Secrets to Mouthwatering Flavor

FAQs

Q: Can I use chicken thighs instead of breasts?

A: Yes, chicken thighs work well, they stay juicy and add rich flavor. Adjust cooking time so they reach a safe internal temp.

Q: Do I need mirin for the marinade?

A: No, you can use a little sugar and a splash of rice vinegar or white wine if you do not have mirin.

Q: How do I make hibachi sauce at home?

A: Mix soy sauce, a little sugar, mirin or sake, and minced garlic. Simmer for a minute to blend flavors, then cool.

Q: Can I make this ahead?

A: You can marinate the chicken for up to 1 day. Cook just before serving for best texture.

Q: Is there a vegetarian option?

A: Yes, use tofu or large mushrooms, press tofu well and cook the same way for a tasty hibachi style dish.

Conclusion

If you love the bold, simple taste of hibachi style meals, this hibachi chicken recipe is an easy way to bring that flavor home. For more authentic dishes or to order ready made options, consider exploring local Japanese restaurants online, for example Order Authentic Japanese Online | Shogun Japanese Grill & Sushi.

Hibachi Chicken

A simple yet flavorful dish featuring tender chicken marinated in soy sauce, garlic, and sesame oil, cooked to perfection for a taste reminiscent of Japanese steakhouses.

Chicken and Marinade

  • 1 pound boneless chicken breasts (Cut into bite size pieces)
  • 2 tablespoons soy sauce
  • 1 tablespoon mirin or rice wine (You can substitute with sugar and a splash of rice vinegar if needed)
  • 1 teaspoon sesame oil
  • 1 teaspoon sugar
  • 1 clove garlic minced
  • 1 pinch black pepper

Cooking Ingredients

  • 1-2 tablespoons vegetable oil (For cooking)
  • 1 tablespoon butter (Adds flavor)
  • 1 cup chopped onion
  • 1 cup sliced zucchini or mushrooms (Add your favorite veggies)

Preparation

  1. Cut the chicken breasts into bite-size pieces and pat dry with a paper towel.
  2. In a bowl, mix soy sauce, mirin or rice wine, sesame oil, sugar, minced garlic, and black pepper to create the marinade.
  3. Toss the chicken pieces in the marinade and let them sit for 10 to 20 minutes or up to 1 hour in the fridge for more flavor.

Cooking

  1. Heat a skillet or flat top over medium-high heat. Add vegetable oil and butter.
  2. Add the marinated chicken in a single layer and let it brown without moving for 2 minutes.
  3. Stir the chicken and cook for 3 to 4 more minutes until cooked through.
  4. Add chopped onion and sliced zucchini or mushrooms to the pan and cook until tender, tossing with the chicken.
  5. Finish with a splash of soy sauce and a squeeze of lemon or a drizzle of hibachi sauce, if desired. Serve hot with rice and steamed vegetables.

Pat chicken dry before marinating for better sear. Do not crowd the pan; cook in batches if necessary. Add butter near the end for classic hibachi flavor. Taste the sauce before serving for balance. Cut vegetables into similar sizes for even cooking.

Dinner, Main Course
Asian, Japanese
Chicken Recipe, Easy Dinner, Hibachi Chicken, Japanese Cuisine, Quick Meal

Lentil Spinach Curry

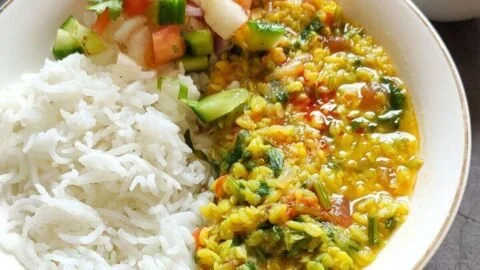
Bowl of delicious lentil spinach curry garnished with fresh herbs

I love a warm bowl of Lentil Spinach Curry on a busy night, it feels like a hug that is healthy and simple. This dal with spinach mixes soft lentils, bright greens, and gentle spices, and it cooks fast. The flavors are mild but full, the texture is creamy, and the dish works as a comfort food or a healthy weeknight meal. This Lentil Spinach Curry is a crowd-pleaser, it tastes fresh, earthy, and a little bright from tomatoes and lemon, and most people ask for seconds. Get ready, it is easy to make, and you will want to make it again and again.

How to prepare Lentil Spinach Curry

Ingredients

  • 1 cup red lentils, rinsed and drained
  • 4 cups fresh spinach, washed and chopped
  • 1 medium onion, chopped
  • 2 cloves garlic, minced
  • 1 inch ginger, grated or minced
  • 1 medium tomato, chopped, or 1/2 cup canned tomato
  • 1 tsp ground cumin
  • 1 tsp ground coriander
  • 1/2 tsp turmeric
  • 1/2 tsp chili powder, or to taste
  • 1 tsp salt, or to taste
  • 2 tbsp oil or ghee
  • 4 cups water or vegetable broth
  • Juice of 1/2 lemon, optional
  • Fresh cilantro to garnish, optional

Directions

  1. Heat oil in a pot over medium heat. Add chopped onion, cook until soft and light brown, about 5 minutes.
  2. Add garlic and ginger, stir for 1 minute until fragrant.
  3. Mix in cumin, coriander, turmeric, and chili powder. Cook spices for 30 seconds, stir so they do not burn.
  4. Add chopped tomato, cook until soft and saucy, about 3 minutes.
  5. Add rinsed lentils and water or broth. Stir, bring to a boil, then lower heat and simmer, covered, 15 to 20 minutes, until lentils are soft.
  6. Add chopped spinach, stir, and cook 2 to 4 minutes until spinach wilts and mixes into the dal.
  7. Season with salt and lemon juice, taste and adjust spices.
  8. Serve warm, garnish with cilantro if you like.

Lentil Spinach Curry

Why You’ll Love Lentil Spinach Curry

  • It is healthy and protein-rich, perfect for a vegetarian meal.
  • The spinach adds color and iron, while lentils give body and creaminess.
  • The spices are simple, they make the curry tasty without being too strong.
  • It is quick to cook, it fits well as an easy weeknight dinner or meal prep.

Tips for success

  • Rinse lentils well, this removes dust and helps them cook evenly.
  • Use red lentils for a soft, creamy texture, they break down faster.
  • If you like a smoother dal, mash some lentils with the back of a spoon.
  • Adjust water for thickness, add more for a soup feel, less for a thicker curry.
  • Cook spices gently, low heat keeps them from tasting bitter.
  • Add lemon at the end, it brightens the whole dish.

Serving Suggestions

  • Serve with steamed rice, or warm naan bread.
  • Top with plain yogurt for a cool contrast.
  • Add roasted vegetables on the side for a fuller meal.
  • Enjoy with pickles or a simple cucumber salad for freshness.

Lentil Spinach Curry

FAQs

Q: Can I use other lentils,

A: Yes, you can use brown or green lentils, they take longer to cook and stay firmer, so increase cooking time and water.

Q: Can I freeze this curry,

A: Yes, cool it fully, put in airtight containers, freeze up to 3 months, thaw and reheat gently with a splash of water.

Q: Is this spicy,

A: The base recipe is mild, you can add more chili or cayenne if you want more heat.

Q: Can I use frozen spinach,

A: Yes, add frozen spinach after the lentils cook, allow extra time for it to heat through.

Q: How long does it keep in the fridge,

A: It keeps well for 3 to 4 days in the fridge in a sealed container.

Conclusion

For a classic take on this dish and more tips, see dal palak – indian spinach and lentil curry – glebe kitchen, it has a clear recipe and helpful notes.

Lentil Spinach Curry

A warm and comforting Lentil Spinach Curry featuring soft lentils, fresh spinach, and gentle spices, perfect for busy weeknights.

Main Ingredients

  • 1 cup red lentils, rinsed and drained (Use red lentils for a soft, creamy texture.)
  • 4 cups fresh spinach, washed and chopped (Can also use frozen spinach.)
  • 1 medium onion, chopped
  • 2 cloves garlic, minced
  • 1 inch ginger, grated or minced
  • 1 medium tomato, chopped, or 1/2 cup canned tomato
  • 1 tsp ground cumin
  • 1 tsp ground coriander
  • 1/2 tsp turmeric
  • 1/2 tsp chili powder, or to taste (Adjust based on spice preference.)
  • 1 tsp salt, or to taste (Add to taste.)
  • 2 tbsp oil or ghee (Cooking fat for sautéing.)
  • 4 cups water or vegetable broth (Use broth for added flavor.)
  • 1/2 unit lemon juice, optional (Fresh lemon enhances flavor.)
  • Fresh cilantro to garnish, optional (For garnish.)

Cooking Instructions

  1. Heat oil in a pot over medium heat.
  2. Add chopped onion, cook until soft and light brown, about 5 minutes.
  3. Add garlic and ginger, stir for 1 minute until fragrant.
  4. Mix in cumin, coriander, turmeric, and chili powder. Cook spices for 30 seconds, stirring to prevent burning.
  5. Add chopped tomato, and cook until soft and saucy, about 3 minutes.
  6. Add rinsed lentils and water or broth. Stir, bring to a boil, then lower heat and simmer, covered, for 15 to 20 minutes until lentils are soft.
  7. Add chopped spinach, stir, and cook for 2 to 4 minutes until spinach wilts and mixes into the dal.
  8. Season with salt and lemon juice, taste and adjust spices as necessary.
  9. Serve warm, garnished with cilantro if desired.

Rinse lentils well to remove dust and help them cook evenly. Adjust water for thickness; add more for soup, less for thicker curry. Cook spices gently to avoid bitterness. Add lemon juice at the end for brightness.

Dinner, Main Course
Indian, Vegetarian
Comfort Food, Easy Recipe, Healthy Dinner, Lentil Spinach Curry, Vegetarian Curry

Crispy Dosa

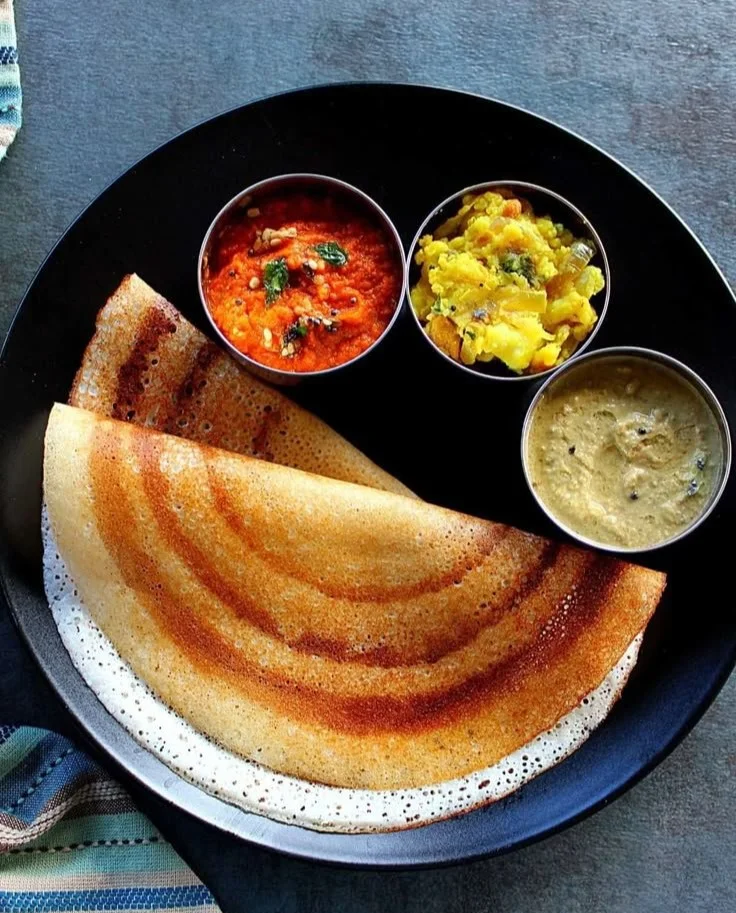
Golden brown crispy dosa served with chutney and sambar on a plate

Dosa is a simple, tasty food from South India. Crispy dosa is thin, light, and crunchy. It has a mild fermented flavor from rice and urad dal batter. This recipe makes a dosa that is golden and crisp on the edges, soft in some places, and full of comfort. It is a crowd-pleaser for breakfast, dinner, or a snack. The taste is warm, slightly tangy, and very satisfying. Get ready to make a crispy dosa that your family will ask for again and again, and enjoy the fun of spreading the batter on the hot pan.

How to prepare Crispy Dosa

Ingredients

  • 2 cups raw rice (idli or regular rice)
  • 1/2 cup urad dal (split black gram)
  • 2 tablespoons cooked rice or poha, optional
  • 1/2 teaspoon fenugreek seeds, optional
  • Salt to taste
  • Water as needed
  • Oil or ghee for cooking

Directions

  1. Rinse rice and urad dal well. Soak rice and fenugreek in one bowl, urad dal in another, for 4 to 6 hours.
  2. Drain. Grind urad dal with a little water to a smooth, fluffy batter. Grind rice to a slightly grainy paste. Add cooked rice or poha if using, this helps crispness.
  3. Mix both batters in a large bowl. Add salt. Cover and keep in a warm place to ferment 8 to 12 hours, until it rises and looks airy.
  4. Stir batter gently. It should be pourable, like a thick pancake batter. Add a little water if too thick.
  5. Heat a nonstick or cast iron tawa, wipe with oil. Pour a ladle of batter in the center. Spread quickly in a circular motion to make a thin crepe.
  6. Drizzle oil or ghee around the edges and on top. Cook on medium-high heat until the dosa turns golden and crisp. If you like it extra crisp, press edges with a spatula and cook a bit longer.
  7. Fold and serve hot with potato masala, coconut chutney, or sambar.

Crispy Dosa

Why You’ll Love Crispy Dosa

  • It is crispy and light, a great texture contrast with soft fillings.
  • The batter is simple, made from rice and urad dal, common pantry items.
  • You can make plain dosa or fill it with potato masala to make a masala dosa.
  • It is quick to cook once the batter is ready, perfect for busy mornings or a quick dinner.
  • Crispy dosa pairs well with many chutneys and sambar, so you get many flavor options.

Tips for success

  • Ferment batter in a warm place, it helps dosa get a mild tang and good airiness.
  • Batter consistency matters, make it pourable but not too thin, like heavy cream.
  • Use a well-heated pan and medium-high heat for crisp edges.
  • Add a little cooked rice or poha to the batter for extra crispness.
  • Use oil or ghee around the edges, this helps make the dosa golden and crunchy.
  • Clean the pan well between dosas if residue builds up, a clean hot surface spreads batter thin and cooks evenly.

Serving Suggestions

  • Serve with coconut chutney and hot sambar for a classic meal.
  • Add potato masala inside to make a masala dosa, a favorite South Indian street food.
  • Try tomato chutney or peanut chutney for a change in flavor.
  • Serve with a cup of filter coffee or hot tea for a full, cozy meal.

Crispy Dosa

FAQs

Q: How long should I ferment dosa batter? A: Ferment 8 to 12 hours in a warm place. Shorter in hot weather, longer in cool weather.

Q: Can I make dosa batter without a grinder? A: Yes, use a high-speed blender. Grind urad dal until fluffy, rice until slightly grainy.

Q: How do I make dosa extra crispy? A: Spread batter thin, use a hot pan, add a little cooked rice or poha to batter, and cook on medium-high heat with oil at the edges.

Q: Can I make batter ahead and store it? A: Yes, keep fermented batter in the fridge for 2 to 3 days. Stir before using and adjust water if thick.

Q: Can I use only rice or only urad dal? A: No, dosa needs both for the right texture. A common mix is 4 parts rice to 1 part urad dal.

Conclusion

If you want a step-by-step visual guide or a related masala dosa twist, check this detailed recipe, Crispy Masala Dosa – Cook With Manali. Try this simple crispy dosa at home and enjoy the warm, crunchy taste with your favorite chutney.

Crispy Dosa

A simple, tasty South Indian dish that features crispy, golden dosas made from fermented rice and urad dal batter, perfect for breakfast or as a snack.

Main Ingredients

  • 2 cups raw rice (idli or regular rice)
  • 1/2 cup urad dal (split black gram)
  • 2 tablespoons cooked rice or poha (optional, helps crispness)
  • 1/2 teaspoon fenugreek seeds (optional)
  • to taste Salt
  • Water (as needed)
  • Oil or ghee (for cooking)

Preparation

  1. Rinse the raw rice and urad dal well.
  2. Soak the rice and fenugreek in one bowl and urad dal in another for 4 to 6 hours.
  3. Drain the soaked ingredients.
  4. Grind urad dal with a little water to make a smooth, fluffy batter.
  5. Grind the rice into a slightly grainy paste.
  6. If using, add cooked rice or poha to the rice batter to help with crispness.
  7. Mix both batters in a large bowl and add salt.
  8. Cover and keep in a warm place to ferment for 8 to 12 hours until it rises and appears airy.

Cooking

  1. Stir the batter gently; it should be pourable like thick pancake batter. Add a little water if too thick.
  2. Heat a nonstick or cast iron tawa and wipe with oil.
  3. Pour a ladle of batter in the center and spread quickly in a circular motion to make a thin crepe.
  4. Drizzle oil or ghee around the edges and on top.
  5. Cook on medium-high heat until the dosa turns golden and crisp. For extra crispiness, press the edges with a spatula and cook a bit longer.
  6. Fold and serve hot with potato masala, coconut chutney, or sambar.

Ferment the batter in a warm place for best results, as it helps achieve the right tangy flavor and airy texture. Ensure the batter is pourable but not too thin, similar to heavy cream. A clean, well-heated pan is crucial for achieving crisp edges.

Breakfast, Snack
Indian, South Indian
Crispy Dosa, Fermented Batter, Gluten-Free, Indian Pancake, Quick Meal

Shrimp Salad Recipe

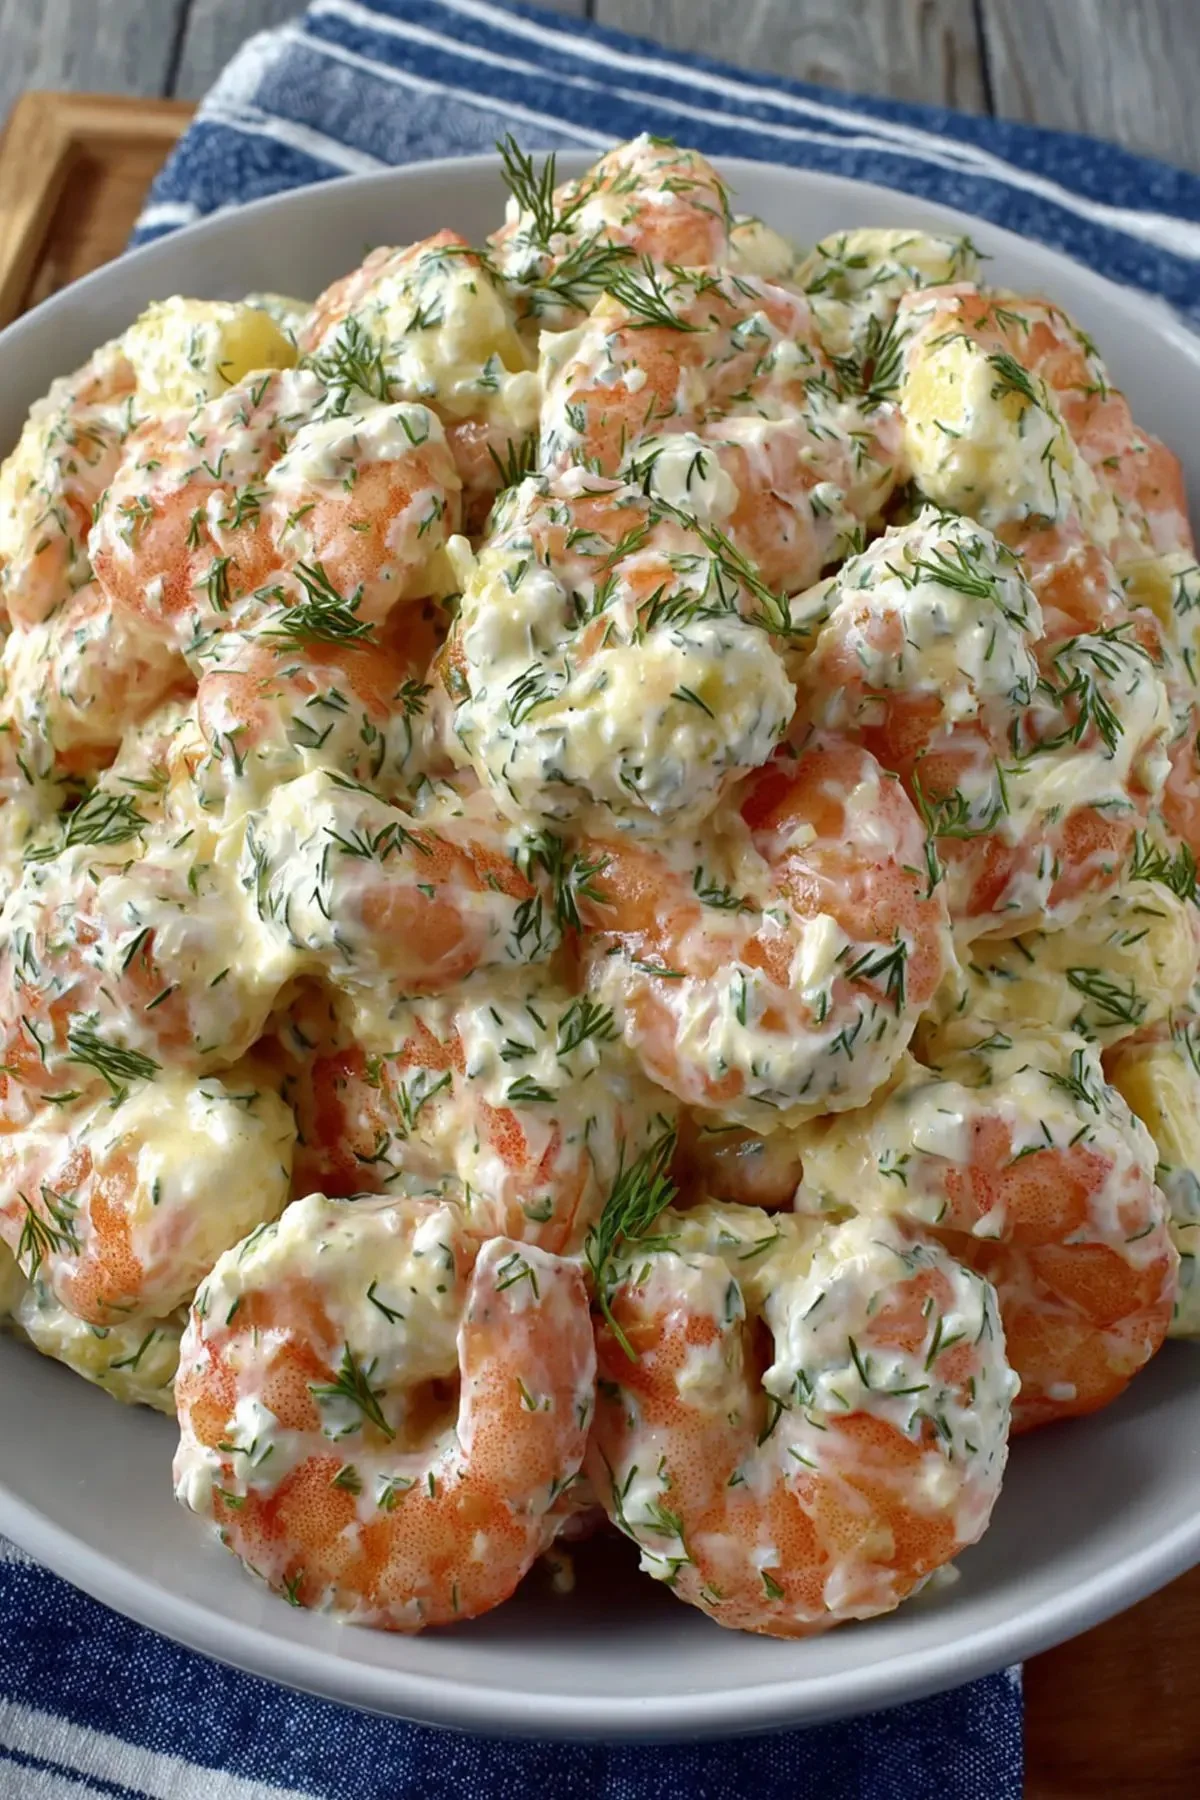
Delicious shrimp salad served in a bowl with fresh vegetables and dressing

I love a simple salad that feels fresh and bright, and shrimp salad does exactly that. It is light, tasty, and easy to make any time you want a quick meal. This Shrimp Salad Recipe is a crowd pleaser, with tender shrimp, crisp vegetables, and a creamy lemon dressing that fits many tastes. It works well for lunch, a light dinner, or a summer party, and people often ask for seconds. Try it and smile when you see how fast it disappears, because who can resist a good shrimp salad?

How to prepare Shrimp Salad

Ingredients

  • 1 pound cooked shrimp, peeled and deveined, chopped into bite size pieces
  • 4 cups mixed lettuce or your favorite salad greens
  • 1 cup cherry tomatoes, halved
  • 1/2 cup celery, thinly sliced
  • 1/4 cup red onion, thinly sliced
  • 1 avocado, diced (optional)
  • 1/4 cup mayonnaise
  • 2 tablespoons plain yogurt or sour cream
  • 2 tablespoons lemon juice, fresh
  • 1 tablespoon olive oil
  • 1 teaspoon Dijon mustard
  • Salt and black pepper, to taste
  • Fresh parsley or dill, chopped, for garnish

Directions

  1. If shrimp are frozen, thaw them in cold water, then pat dry with paper towels.
  2. In a small bowl, whisk together mayonnaise, yogurt, lemon juice, olive oil, Dijon mustard, salt and pepper to make the dressing.
  3. In a large bowl, add chopped shrimp, celery, red onion, and cherry tomatoes. Toss gently.
  4. Add the dressing to the shrimp mix, stir until all pieces are coated.
  5. Add avocado and greens last, toss lightly so avocado holds its shape.
  6. Taste and adjust salt and pepper. Garnish with chopped parsley or dill.
  7. Chill in the fridge for 15 to 30 minutes if you want a cold shrimp salad, then serve.

Shrimp Salad Recipe

Why You’ll Love Shrimp Salad

  • Easy and quick to make, perfect for busy days.
  • Fresh flavors, with lemon and herbs that lift the shrimp.
  • Versatile, you can make it as a cold shrimp salad, a hearty green salad, or a sandwich filling.
  • Healthy, with lean protein from shrimp and lots of vegetables.
  • Great for parties, picnics, and weeknight meals, it pleases many tastes.

Tips for success

  • Use cooked shrimp for speed, or grill fresh shrimp for more flavor.
  • Pat shrimp dry so the dressing sticks and does not get watery.
  • Chill the salad for a short time to let flavors blend, but add avocado just before serving to keep it fresh.
  • Taste the dressing before you add it, and adjust lemon, salt, or pepper.
  • If you like spice, add a pinch of paprika or a dash of hot sauce.
  • Use fresh herbs like parsley or dill for a brighter taste than dried herbs.

Serving Suggestions

  • Serve the shrimp salad on a bed of mixed greens for a light meal.
  • Fill a crusty roll or wrap for a tasty shrimp sandwich.
  • Spoon over sliced cucumbers or avocado halves for a low carb option.
  • Pair with crusty bread, a simple soup, or a chilled white wine for a full meal.
  • Bring it to picnics or potlucks, it travels well when kept cool.

Shrimp Salad Recipe

FAQs

Q: Can I use raw shrimp in this recipe? A: Yes, you can, but cook the raw shrimp first by boiling, grilling, or sautéing, then cool before mixing with the dressing.

Q: How long does shrimp salad last in the fridge? A: Keep it in an airtight container, and eat within 2 days for best taste and quality. Avocado may darken, so add it fresh if you prefer.

Q: Can I make this recipe ahead of time? A: Yes, mix shrimp and dressing ahead and store in the fridge. Add delicate items like greens and avocado right before serving.

Q: Is this shrimp salad healthy? A: Yes, shrimp is lean protein, and with lots of vegetables it makes a healthy meal. Use yogurt instead of some mayo to lower calories.

Conclusion

For another take and extra tips on making a great shrimp salad, see The Best Shrimp Salad Recipe – Inspired Taste.

Shrimp Salad

This refreshing and bright shrimp salad combines tender shrimp, crisp vegetables, and a creamy lemon dressing, making it perfect for lunch or light dinner.

Main Ingredients

  • 1 pound cooked shrimp, peeled and deveined, chopped into bite size pieces (Use fresh or pre-cooked shrimp.)
  • 4 cups mixed lettuce or your favorite salad greens (Any variety of greens works.)
  • 1 cup cherry tomatoes, halved (Adds sweetness to the salad.)
  • 1/2 cup celery, thinly sliced (Provides crunch.)
  • 1/4 cup red onion, thinly sliced (Adjust amount to taste.)
  • 1 each avocado, diced (optional) (Add just before serving for freshness.)

Dressing Ingredients

  • 1/4 cup mayonnaise (Creamy base for the dressing.)
  • 2 tablespoons plain yogurt or sour cream (Use yogurt for a lighter dressing.)
  • 2 tablespoons lemon juice, fresh (Adds tanginess.)
  • 1 tablespoon olive oil (For richness in the dressing.)
  • 1 teaspoon Dijon mustard (Gives depth of flavor.)
  • to taste Salt and black pepper (Adjust according to preference.)

Garnish

  • to taste Fresh parsley or dill, chopped (Used for garnish.)

Preparation

  1. If shrimp are frozen, thaw them in cold water, then pat dry with paper towels.
  2. In a small bowl, whisk together mayonnaise, yogurt, lemon juice, olive oil, Dijon mustard, salt and pepper to make the dressing.
  3. In a large bowl, add chopped shrimp, celery, red onion, and cherry tomatoes. Toss gently.
  4. Add the dressing to the shrimp mix, stir until all pieces are coated.
  5. Add avocado and greens last, toss lightly so avocado holds its shape.
  6. Taste and adjust salt and pepper. Garnish with chopped parsley or dill.
  7. Chill in the fridge for 15 to 30 minutes if you want a cold shrimp salad, then serve.

Use cooked shrimp for speed, or grill fresh shrimp for more flavor. Chill the salad briefly to blend flavors, but add avocado just before serving to ensure freshness. Adjust dressing ingredients to taste, and consider adding spices if desired.

Dinner, lunch, Salad
American, Seafood
Easy Recipe, Healthy Recipe, Quick Meal, Shrimp Salad, summer salad