High Protein Chicken Orzo

High Protein Chicken Orzo is a delightful dish that packs a punch with its rich flavors and wholesome ingredients. This recipe combines tender chicken with the delightful chewiness of orzo pasta, making it a perfect choice for family dinners or gatherings. Not only is it satisfying, but it’s also an excellent way to boost your protein intake while enjoying a comforting meal. Picture this: a warm bowl of savory goodness that both kids and adults will love, bringing everyone together around the table. Let’s dive into the steps to whip up this crowd-pleaser.

High Protein Chicken Orzo

Why You’ll Love High Protein Chicken Orzo

This dish stands out for many reasons. First, the combination of chicken and orzo not only makes for a great texture but also ensures that you are getting a good amount of protein in each serving. Additionally, the flavors meld beautifully, creating a satisfying taste that feels like a warm hug. It’s also a versatile recipe; you can easily add vegetables like spinach or bell peppers to enhance the nutritional value. If you’re looking for a quick meal that doesn’t sacrifice taste or nutrition, then this recipe is perfect for you.

Tips for success

To ensure your High Protein Chicken Orzo turns out perfectly, here are some tips to follow. First, make sure to sauté the chicken until it’s golden brown to seal in the flavors. Also, cook the orzo separately to avoid it becoming mushy if it’s added too early. When seasoning, feel free to experiment with herbs; adding fresh basil or thyme can elevate the flavor. Finally, for an extra layer of taste, consider finishing the dish with a sprinkle of parmesan cheese. If you’re interested in similar simple recipes, check out this quick and easy recipe for boiled chicken thighs.

High Protein Chicken Orzo

Serving Suggestions

This dish pairs wonderfully with a light salad or garlic bread. You can also serve it with a side of steamed vegetables, like broccoli or green beans, to round out the meal. For those looking for a heartier option, consider serving it alongside a creamy risotto or a fresh vegetable medley. No matter how you choose to enjoy it, this High Protein Chicken Orzo is sure to become a favorite.

FAQs

Can I prepare High Protein Chicken Orzo in advance?

Yes, you can prepare the ingredients in advance and store them separately. Just combine them when you’re ready to cook.

What type of chicken works best for this recipe?

Boneless, skinless chicken thighs or breasts work best as they remain juicy while cooking.

Can I swap orzo for another type of pasta?

Absolutely! If you prefer, you can use other small pasta shapes like ditalini or even quinoa for a gluten-free option.

High Protein Chicken Orzo

A delightful dish combining tender chicken with orzo pasta, perfect for boosting your protein intake while enjoying a comforting meal.

Main Ingredients

  • 2 cups orzo pasta (Cook separately to avoid mushiness.)
  • 1 lb boneless, skinless chicken thighs or breasts (Juicy when cooked.)
  • 1 tbsp olive oil (For sautéing chicken.)

Seasoning and Extras

  • to taste salt and pepper (For general seasoning.)
  • 1/4 cup grated parmesan cheese (Optional, for finishing the dish.)
  • 1 cup spinach or bell peppers (Optional, for added nutrition and flavor.)
  • 1 tbsp fresh basil or thyme (Optional, for enhancing flavor.)

Preparation

  1. Heat olive oil in a pan over medium heat.
  2. Sauté the chicken until golden brown and cooked through.
  3. While the chicken is cooking, boil the orzo according to package instructions.
  4. Add optional vegetables, such as spinach or bell peppers, during the last few minutes of cooking.
  5. Once cooked, drain orzo and set aside.

Assembly

  1. Combine the sautéed chicken with the orzo in the pan.
  2. Season with salt, pepper, and herbs to taste.
  3. If using, sprinkle with parmesan cheese before serving.

Prepare ingredients in advance and store them separately; combine when ready to cook. Experiment with herbs for different flavors.

Dinner, Main Course
American
Chicken Orzo, Comfort Food, Family Dinner, High Protein, Quick Meal

Honey Garlic Ground Turkey Recipe

Prepare your taste buds for a delightful treat with this Sweet and Savory Honey Garlic Ground Turkey recipe. It combines succulent ground turkey with a luscious honey garlic sauce, creating a mouth-watering dish that is sure to impress. Whether you’re cooking for family or friends, this easy recipe is a crowd-pleaser that balances sweet and savory flavors perfectly. Plus, with just 25 minutes of cooking time, you’ll have a delicious meal ready in no time, leaving everyone wanting more!

How to prepare Honey Garlic Ground Turkey

To make this dish, you’ll need some basic ingredients that you likely already have in your kitchen. The main star is ground turkey, which is lean and versatile. The honey and garlic come together to form a delightful sauce that brings the whole dish to life.

Sweet and Savory Honey Garlic Ground Turkey Recipe in 25 Minutes

Why You’ll Love Sweet and Savory Honey Garlic Ground Turkey

One of the best things about this Sweet and Savory Honey Garlic Ground Turkey recipe is how quick it is to make. In just 25 minutes, you can whip up a flavorful meal that is not only delicious but also healthy. This dish is perfect for weeknight dinners when you don’t have much time to spare. Additionally, the combination of honey and garlic creates a wonderful aroma that fills your kitchen, making it an appealing meal for everyone.

Tips for success

  • Always season your turkey well before cooking to enhance its natural flavor.
  • For extra texture, consider adding some vegetables like bell peppers or broccoli to the dish.
  • If you have leftover turkey, it can easily be stored in the fridge for a quick lunch the next day.

Sweet and Savory Honey Garlic Ground Turkey Recipe in 25 Minutes

Serving Suggestions

Serve the Sweet and Savory Honey Garlic Ground Turkey over a bed of fluffy rice or alongside steamed vegetables. You could also wrap it in lettuce leaves for a fresh and healthy option. For an added twist, try pairing it with crispy air fryer honey garlic salmon bites to elevate your meal even further.

FAQs

Q: Can I use chicken or beef instead of turkey?

A: Yes, you can substitute ground chicken or beef for turkey. Just keep in mind that cooking times may vary slightly.

Q: How can I store leftovers?

A: Store any leftovers in an airtight container in the refrigerator for up to three days.

Q: Is this recipe suitable for meal prep?

A: Absolutely! This dish is great for meal prepping because it holds up well and reheats nicely.

With these tips and suggestions, you’re all set to make the Sweet and Savory Honey Garlic Ground Turkey a new favorite in your home. Enjoy the delightful flavors and the compliments that come your way!

Sweet and Savory Honey Garlic Ground Turkey

A quick and delicious recipe combining ground turkey with a sweet and savory honey garlic sauce, perfect for busy weeknight dinners.

Main Ingredients

  • 1 lb ground turkey (Lean and versatile meat.)
  • 1/3 cup honey (Provides sweetness.)
  • 3 cloves garlic, minced (Adds flavor to the sauce.)

Optional Ingredients

  • 1 bell pepper, diced bell pepper, diced (For added texture.)
  • 1 cup broccoli florets (For added nutrition.)

Preparation

  1. In a skillet over medium heat, cook the ground turkey, breaking it apart until browned and cooked through.
  2. Add minced garlic and continue to cook for 1-2 minutes until fragrant.
  3. Stir in honey and mix well to coat the turkey.
  4. If using, add diced bell pepper and broccoli, cooking until they are tender.

Serving

  1. Serve over a bed of rice, alongside steamed vegetables, or in lettuce wraps.

For extra flavor, season the turkey well before cooking. Leftovers can be stored in an airtight container in the fridge for up to three days.

Dinner, Main Course
American
Easy Dinner, Ground Turkey, Healthy Recipe, Honey Garlic, Quick Meal

High Protein Crustless Chicken Pot Pie

If you’re looking for a dish that brings both comfort and nutrition, look no further than High Protein Crustless Chicken Pot Pie. This recipe combines the classic flavors of chicken pot pie with a protein-packed twist, making it a dish that everyone will love. With tender chicken, fresh vegetables, and a creamy sauce, it’s a delightful meal that’s perfect for family dinners or cozy nights in. The best part? You won’t miss the crust at all! It’s so good that your taste buds will be begging for more.

How to Prepare High Protein Crustless Chicken Pot Pie

To get started, gather your ingredients, which typically include chicken breast, mixed vegetables, and a few basic spices. You will sauté the chicken and vegetables before combining everything in a baking dish with a creamy mixture. It’s as easy as that! For a visual guide, you can check out similar comforting recipes like the savory chicken pot pie cooked in a crockpot.

High Protein Crustless Chicken Pot Pie

Why You’ll Love High Protein Crustless Chicken Pot Pie

This dish is not only delicious but also nutritious. The absence of crust cuts down on carbohydrates while the protein-rich chicken fills you up. Each bite is creamy and full of flavor, making it a true crowd-pleaser that fits well into a balanced diet. Plus, it takes minimal time to prepare, which means more time for you to enjoy with family or friends.

Tips for Success

  1. Make sure to use fresh vegetables for the best flavor and texture.
  2. You can customize the protein by adding turkey or tofu for a vegetarian option.
  3. Allow the pie to cool slightly before serving to help it hold its shape.

High Protein Crustless Chicken Pot Pie

Serving Suggestions

Pair this dish with a side salad or some crusty bread for a complete meal. It’s also delicious on its own and can easily serve as a hearty lunch the next day!

FAQs

Can I use frozen vegetables?

Absolutely! Frozen vegetables work great and are convenient, just make sure to thaw and drain them before mixing.

How can I make this dish dairy-free?

You can substitute the creamy ingredients with coconut milk or a dairy-free cream alternative to keep it creamy without dairy.

How do I store the leftovers?

Store any leftovers in an airtight container in the fridge for up to three days. You can reheat it in the oven or microwave when you’re ready to enjoy it again.

With its comforting flavors and healthy profile, High Protein Crustless Chicken Pot Pie is sure to become a family favorite. Enjoy making this easy recipe!

High Protein Crustless Chicken Pot Pie

A nutritious twist on the classic chicken pot pie, this crustless version is packed with protein and fresh vegetables, offering comfort and flavor without the carbs.

Main Ingredients

  • 2 cups chicken breast, cooked and shredded (Use rotisserie chicken for a quicker option.)
  • 2 cups mixed vegetables, fresh or frozen (Use a mix of your favorite vegetables.)
  • 1 cup cream or dairy-free cream alternative (Coconut milk works great for dairy-free.)
  • 1 teaspoon salt (Adjust to taste.)
  • 0.5 teaspoon black pepper (Freshly ground preferred.)

Preparation

  1. Preheat your oven to 375°F (190°C).
  2. In a skillet, sauté the shredded chicken and mixed vegetables over medium heat until heated through.
  3. In a large bowl, combine the sautéed mixture with the cream, salt, and pepper.
  4. Pour the mixture into a greased baking dish.

Baking

  1. Bake in the preheated oven for 25-30 minutes or until the top is slightly golden.
  2. Remove from the oven and allow to cool for a few minutes before serving.

For added protein, consider using turkey or tofu as a substitute. Store leftovers in an airtight container in the fridge for up to three days. Reheat in the oven or microwave when ready to enjoy again.

Dinner, Main Course
American
Chicken Pot Pie, Comfort Food, Crustless, Healthy Dinner, High Protein

Juicy Grilled California Avocado Chicken

Grilling season is here, and there’s nothing quite like the taste of juicy chicken paired with creamy avocado. Juicy Grilled California Avocado Chicken is the perfect dish to impress your family and friends at your next barbecue. This recipe combines succulent chicken breasts marinated in zesty flavors, topped with fresh California avocados that bring a delightful creaminess to each bite. With its vibrant colors and fresh ingredients, this dish is sure to be a crowd-pleaser. You’ll find that the combination of flavors not only excites your taste buds but also warms your heart. So, get ready to dive into a recipe that will make your grilling adventures unforgettable!

How to prepare Juicy Grilled California Avocado Chicken

Getting started with this recipe is as simple as gathering your ingredients and following a few straightforward steps. Begin by marinating the chicken in a mixture of lime juice, garlic, and your favorite spices. This helps to infuse the chicken with wonderful flavors. After marinating, grill the chicken until it reaches a perfect golden brown, then add sliced California avocados on top right before serving.

Juicy Grilled California Avocado Chicken

Why You’ll Love Juicy Grilled California Avocado Chicken

This dish isn’t just about flavor; it’s also about freshness. The combination of grilled chicken and ripe avocados makes for a healthy and satisfying meal. Moreover, it’s easy to prepare and requires minimal ingredients, making it accessible even for beginner cooks. If you want to kick things up a notch, you can even explore variations of the dish by adding different toppings or sauces. You can find another delicious recipe to try with avocados at this link.

Juicy Grilled California Avocado Chicken

Tips for success

  1. Make sure to marinate the chicken for at least 30 minutes for the best flavor.
  2. Preheat the grill to medium-high heat for even cooking.
  3. Use ripe avocados for the best texture and taste, but avoid overripe ones that may be too mushy.

Serving Suggestions

Once your Juicy Grilled California Avocado Chicken is ready, serve it with a side of fresh salad or grilled vegetables. This not only complements the chicken but also adds a colorful aspect to your meal. You can also serve it with rice or quinoa for a heartier option.

FAQs

Can I use frozen chicken for this recipe?

Yes, but make sure to fully thaw it before marinating and grilling.

What can I do with leftovers?

Leftovers can be stored in an airtight container in the fridge for up to three days. They can be enjoyed cold in a salad or reheated gently.

Can I grill the avocados as well?

Absolutely! Grilling avocados adds a smoky flavor that pairs wonderfully with the chicken. Just slice them in half, remove the pit, and grill cut-side down for a few minutes.

Juicy Grilled California Avocado Chicken

A perfect dish for grilling season, combining juicy marinated chicken with fresh California avocados for a delightful and healthy meal.

For the Chicken Marinade

  • 4 pieces chicken breasts (Boneless and skinless)
  • 1/4 cup lime juice (Freshly squeezed)
  • 3 cloves garlic (Minced)
  • to taste favorite spices (E.g., salt, pepper, paprika)

For Topping

  • 2 California avocados (Sliced)

Preparation

  1. Marinate the chicken breasts in lime juice, minced garlic, and your favorite spices for at least 30 minutes.

Grilling

  1. Preheat the grill to medium-high heat.
  2. Grill the marinated chicken breasts until they reach a golden brown color and are cooked through, about 15 minutes.
  3. Add the sliced California avocados on top of the chicken just before serving.

For best flavor, marinate chicken for at least 30 minutes. Use ripe avocados, but avoid overripe ones. Grilling avocados adds a delicious smoky flavor.

Dinner, Main Course
American, Grilling
Avocado Chicken, grilled chicken, Healthy Grill, Summer Recipes

low carb Firecracker ground Chicken

Firecracker Chicken is a delightful dish that bursts with flavor and is sure to be a hit at any gathering. This recipe features tender chicken pieces coated in a spicy sauce that perfectly balances heat and sweetness. It’s a dish that not only excites the taste buds but also brings a touch of fun to your dinner table. Picture the vibrant colors and the irresistible aroma wafting through your kitchen, inviting everyone to dig in. Plus, it’s easy to prepare, making it perfect for both busy weeknights and special occasions.

How to prepare Firecracker ground Chicken

To prepare Firecracker Chicken, begin by gathering your ingredients like chicken breast, soy sauce, and a mix of spices. Start by cutting the chicken into bite-sized pieces and marinating them in soy sauce and some of your favorite spices. Next, cook the chicken in a hot skillet until it’s golden brown and cooked through. For that signature “firecracker” kick, whip together a sauce made of honey, sriracha, and other zesty ingredients. Once the chicken is ready, toss it in the sauce until each piece is evenly coated.

Firecracker Chicken

Why You’ll Love Firecracker ground Chicken

One of the best things about Firecracker Chicken is how versatile it is. You can easily adjust the level of spice to suit your taste or even add veggies like bell peppers or broccoli for an extra pop of color and nutrition. It pairs wonderfully with rice or noodles, making it a complete meal. If you’re a fan of flavorful, spicy dishes, you’re going to love this recipe. For another great chicken dish, consider trying this air fryer chicken and potatoes, which offers a different but equally delightful flavor.

Tips for success

To ensure your Firecracker Chicken turns out perfectly, here are some helpful tips. First, don’t skimp on the marinating time; even 30 minutes can make a big difference in flavor. Secondly, when making the sauce, taste as you go—this way, you can find the right balance of sweetness and heat for your palate. And finally, serve it immediately after cooking to enjoy the best texture and flavor.

Firecracker Chicken

Serving Suggestions

Firecracker Chicken is fantastic on its own, but you can elevate your meal by serving it with steamed rice or crispy fried noodles. Add a side of stir-fried vegetables or a refreshing salad for a complete dining experience. If you’re looking for more unique flavors, you might also enjoy air fryer Cajun chicken.

FAQs

1. Can I use chicken thighs instead of chicken breast?

Yes, chicken thighs work beautifully in this recipe as they tend to be juicier and will absorb the flavors well.

2. How can I adjust the spiciness of the dish?

To make your Firecracker Chicken milder, reduce the amount of sriracha or honey and add a touch more soy sauce to balance the flavors.

3. Can I prepare this dish ahead of time?

Absolutely! You can marinate the chicken in advance and store it in the refrigerator until ready to cook, making it a great make-ahead dinner option.

Firecracker Chicken

A delightful dish that bursts with flavor, featuring tender chicken coated in a spicy and sweet sauce, perfect for any gathering.

Main Ingredients

  • 1 lb chicken breast (Cut into bite-sized pieces)
  • 1/4 cup soy sauce (For marinating)
  • 2 tbsp honey (For sauce)
  • 2 tbsp sriracha (For sauce, adjust to taste)

Spices

  • 1 tsp zesty spices (Mix your favorite spices for marinating)

Preparation

  1. Gather the ingredients: chicken breast, soy sauce, honey, sriracha, and your favorite spices.
  2. Cut the chicken into bite-sized pieces and marinate them in soy sauce and your chosen spices for at least 30 minutes.

Cooking

  1. Heat a skillet and cook the marinated chicken until golden brown and cooked through.
  2. In a separate bowl, mix honey, sriracha, and any other zesty ingredients to create the sauce.
  3. Once the chicken is cooked, toss it in the sauce until each piece is evenly coated.

For the best flavor, marinate the chicken for longer if possible. Serve immediately for the best texture.

Dinner, Main Course
American, Asian
Chicken Recipe, Firecracker Chicken, Flavorful Chicken, Quick Dinner, Spicy Chicken

One Pan Mediterranean Chicken And Rice

Get ready to enjoy a delightful dish that transports you straight to the sunny shores of the Mediterranean! This One Pan Mediterranean Chicken and Rice recipe is sure to become a family favorite. With its vibrant flavors, tender chicken, and perfectly cooked rice, this dish brings a taste of warmth and comfort to your dinner table. It’s not only delicious but also incredibly easy to prepare, making it a perfect choice for busy weeknights. So, let’s dive into this crowd-pleaser and get cooking! You may also find One Pan Bold Honey Bbq Chicken Rice useful.

How to prepare One Pan Mediterranean Chicken and Rice

To make this flavorful dish, you will need a few simple ingredients, including chicken thighs, aromatics, rice, and a mix of your favorite Mediterranean spices. First, you’ll start by seasoning the chicken and searing it until it’s golden brown. Next, you’ll add in the rice and broth, letting everything simmer together, absorbing all those tasty flavors. The best part is that it’s all made in one pan, reducing cleanup and making the process so much simpler.

One Pan Mediterranean Chicken And Rice

Why You’ll Love One Pan Mediterranean Chicken And Rice

This recipe is a fantastic way to enjoy a healthy meal without spending hours in the kitchen. The combination of spices gives the dish a lovely depth of flavor, and the one-pan method keeps the dish moist and tender. Plus, it’s versatile! You can easily add your favorite vegetables or switch up the spices to make it your own. If you’re looking for something similar, check out this creamy chicken and rice recipe for another delicious option.

Tips for success

  • Make sure to sear the chicken well; this adds a nice flavor and texture.
  • Use low-sodium broth to control the salt level in your dish.
  • Keep an eye on the cooking time; overcooking the rice can make it mushy.

One Pan Mediterranean Chicken And Rice

Serving Suggestions

One Pan Mediterranean Chicken and Rice pairs wonderfully with a fresh salad or steamed vegetables on the side. For a cozy evening, serve it with warm pita bread and a side of tzatziki for dipping. This dish is so colorful and inviting that it’s sure to impress your guests.

FAQs

Can I use chicken breasts instead of thighs?

Yes, chicken breasts can be used, but they may dry out quicker than thighs. Adjust the cooking time accordingly.

What if I want to add more vegetables?

Feel free to toss in your favorite vegetables such as bell peppers, zucchini, or spinach during the cooking process.

Can I make this dish in advance?

Absolutely! You can prepare it ahead of time and reheat it when you’re ready to serve. Just store it in an airtight container in the fridge.

One Pan Mediterranean Chicken and Rice

A vibrant, flavorful dish featuring tender chicken thighs and perfectly cooked rice, all made in one pan for easy preparation and cleanup.

Main Ingredients

  • 4 pieces chicken thighs (Boneless and skinless preferred.)
  • 1 cup rice (Long-grain or Basmati works well.)
  • 2 cups low-sodium chicken broth (To control the salt level.)

Aromatics and Spices

  • 1 medium onion (Chopped.)
  • 2 cloves garlic (Minced.)
  • 1 teaspoon paprika (For flavoring.)
  • 1 teaspoon oregano (Dried.)
  • 1 teaspoon thyme (Dried.)

Preparation

  1. Season the chicken thighs with salt, pepper, paprika, oregano, and thyme.
  2. Sear the chicken thighs in a hot, large pan until golden brown on both sides.

Cooking

  1. Add chopped onion and minced garlic to the pan; sauté until translucent.
  2. Stir in the rice, coating it well in the mixture.
  3. Pour in the chicken broth, stirring to combine.
  4. Place the seared chicken back into the pan, cover, and let simmer until rice is cooked and has absorbed the liquid.

Serve with a fresh salad or steamed vegetables. Warm pita bread and tzatziki on the side make a great pairing.

Dinner, Main Course
Mediterranean
Chicken Recipe, Mediterranean chicken, one pan

Juicy 30-Minute Baked Chicken Breast

Are you looking for a quick and delicious meal that will surely impress your family? If so, the Juicy 30-Minute Baked Chicken Breast is just the recipe you need! This dish brings together tender chicken, flavorful seasoning, and a hint of mouthwatering juices that make it a crowd-pleaser at any dinner table. It’s perfect for busy weeknights when you want something tasty without spending hours in the kitchen. Just imagine biting into a juicy piece of chicken that’s bursting with flavor—sounds delicious, right? Let’s dive into how to prepare this delightful meal.

How to prepare Juicy Baked Chicken Breast

First, gather your ingredients and preheat your oven. You will want your chicken to cook evenly and quickly. Make sure to season it well with your favorite spices. For a truly delicious twist, you might also want to check out this Pineapple BBQ Baked Chicken Breast recipe, which adds a fun fruity flavor to your chicken!

Juicy 30-Minute Baked Chicken Breast

Once your oven is ready, place the chicken breasts in a baking dish. Brush them with some olive oil, season with salt and pepper, and sprinkle any additional herbs or spices that you enjoy. Bake them for around 20-30 minutes, or until the chicken reaches an internal temperature of 165°F. This will ensure that your chicken is cooked perfectly and remains juicy.

Juicy 30-Minute Baked Chicken Breast

Why You’ll Love Baked Chicken Breast

This recipe is not only quick to make but also adaptable to everyone’s taste! You can easily customize the seasoning to suit your palate, whether you enjoy something zesty, sweet, or savory. Besides, baked chicken is loaded with protein and is a healthier option compared to fried versions. It pairs wonderfully with various side dishes, making it an ideal choice for family gatherings or meal prep for the week ahead.

Tips for success

To ensure your chicken is as juicy as possible, here are some helpful tips:

  • Always let the chicken rest for a few minutes before slicing, which helps to lock in those tasty juices.
  • Consider marinating the chicken for a few hours before baking for even more flavor.
  • Experiment with different spices and herbs to discover your favorite combination.

Serving Suggestions

Juicy 30-Minute Baked Chicken Breast

Baked chicken breast is versatile and can be served in many ways. Serve it alongside a fresh salad, roasted vegetables, or creamy mashed potatoes. You could even slice the chicken and put it in a sandwich or wrap for a delicious lunch option. If you’re in the mood for something different, you might also enjoy trying out the Balsamic Baked Chicken Breast with Mozzarella Cheese, which adds a delightful twist to your meal.

FAQs

1. How can I store leftover baked chicken?

Store any leftover chicken in an airtight container in the refrigerator for up to 4 days.

2. Can I freeze baked chicken?

Yes, baked chicken can be frozen. Make sure it’s completely cool, then wrap it tightly in freezer-safe packaging. It should be good for up to 3 months.

3. What are some easy sides to serve with baked chicken?

Some great sides include steamed broccoli, quinoa, or a simple rice pilaf. You can choose sides that add nutrition and color to your plate.

Juicy Baked Chicken Breast

A quick and delicious baked chicken breast recipe that is tender, flavorful, and perfect for busy weeknights.

Main Ingredients

  • 4 pieces chicken breasts (Boneless and skinless for best results)
  • 2 tablespoons olive oil (For brushing the chicken)
  • 1 teaspoon salt (Adjust to taste)
  • 1 teaspoon black pepper (Adjust to taste)

Optional Seasonings

  • to taste additional herbs and spices (Customize to your preference (e.g., garlic powder, paprika))

Preparation

  1. Preheat your oven to 375°F (190°C).
  2. Gather all the ingredients.

Seasoning

  1. Brush the chicken breasts with olive oil.
  2. Season the chicken with salt, pepper, and any additional herbs or spices.

Baking

  1. Place the seasoned chicken breasts in a baking dish.
  2. Bake in the preheated oven for 20-30 minutes until the internal temperature reaches 165°F (74°C).

Serving

  1. Let the chicken rest for a few minutes before slicing to lock in the juices.
  2. Serve with your choice of sides like salad, roasted vegetables, or mashed potatoes.

For added flavor, consider marinating the chicken for a few hours before baking. Experiment with different spices to discover your favorite flavor combination.

Dinner, Main Course
American
Baked Chicken, Easy Dinner, Family Dinner, Healthy Recipe, Quick Meal

Ground Turkey and Peppers

Ground turkey and peppers is a delicious and satisfying dish that strikes a balance between flavors and nutrition. This recipe combines savory ground turkey with colorful and crunchy bell peppers, creating a meal that is not only good for you but also pleasing to the taste buds. Whether you are hosting a family dinner, meal prepping for the week, or just looking for a quick weeknight dinner, this dish is sure to be a hit. The combination of spices adds depth, while the peppers provide a delightful crunch. It’s a true crowd-pleaser that everyone will enjoy. So, roll up your sleeves and let’s get cooking!

Ground Turkey and Peppers

Why You’ll Love Ground Turkey and Peppers

There are many reasons to love this ground turkey and peppers recipe. First, it is very easy to make and takes less than 30 minutes from start to finish. Secondly, ground turkey is a lean protein that is healthier compared to beef, making it a great choice for a light meal. The vibrant asparagus, red, yellow, and green peppers not only make the dish look beautiful but also add wonderful taste and nutrition. Plus, it’s easily customizable—feel free to add your favorite vegetables or spices according to your taste. You can serve it over rice, in wraps, or even on its own. This recipe can become a staple in your household, and your family will ask for it again and again!

Ground Turkey and Peppers

Tips for success

To make sure your ground turkey and peppers turn out great every time, follow these helpful tips:

  1. Use Fresh Ingredients: Use fresh ground turkey and ripe bell peppers for the best taste and texture. Fresh produce always makes a difference.
  2. Don’t Overcook the Turkey: Cook the turkey until it is just done to prevent it from drying out. It should be cooked to an internal temperature of 165°F.
  3. Experiment with Spices: Feel free to play with the seasonings. Adding garlic powder, cumin, or even a dash of hot sauce can elevate the flavor profile and make it your own.
  4. Customize Your Veggies: If you have other vegetables at home, like zucchini or onions, chop them up and toss them in. You can find a delicious way to combine flavors by checking out more recipes like this ground turkey and zucchini skillet.

Serving Suggestions

This ground turkey and peppers dish can be served in various ways. Here are a few ideas:

  • Serve it over a bed of steaming white or brown rice for a hearty meal.
  • Fill taco shells or tortillas for tasty handheld wraps, perfect for lunch or dinner.
  • Besides being delicious on its own, you can top it with some fresh avocado or a sprinkle of cheese for extra flavor.
  • Pair it with a light salad or steamed veggies on the side to round out your meal.

FAQs

Can I use other types of meat instead of ground turkey?

Yes, you can substitute ground chicken, lean beef, or even a plant-based meat for this recipe. Just adjust the cooking time as needed.

What can I do with leftovers?

Leftovers can be stored in an airtight container in the fridge for up to three days. You can also freeze them for longer storage. Reheat in the microwave or on the stovetop.

Can I make this dish ahead of time?

Absolutely! You can prepare it ahead of time and store it in the refrigerator until you’re ready to eat. Just reheat before serving.

Dive into the delightful flavors of ground turkey and peppers, and enjoy the compliments you’ll surely receive when you bring this dish to the table!

Ground Turkey and Peppers

A delicious and nutritious dish that combines savory ground turkey with colorful bell peppers for a satisfying meal.

Main ingredients

  • 1 lb ground turkey (Use fresh ground turkey for the best taste.)
  • 1 each red bell pepper (Chopped.)
  • 1 each yellow bell pepper (Chopped.)
  • 1 each green bell pepper (Chopped.)

Spices

  • 1 tsp garlic powder (Add more for extra flavor.)
  • 1 tsp cumin (Can be adjusted to taste.)
  • 1 dash hot sauce (Optional, for added heat.)

Preparation

  1. Chop the bell peppers into bite-sized pieces.

Cooking

  1. In a large skillet, cook the ground turkey over medium heat until browned, about 5-7 minutes.
  2. Add the chopped bell peppers and spices to the skillet. Cook for an additional 10-15 minutes until the peppers are tender and the turkey is fully cooked.
  3. Ensure the turkey reaches an internal temperature of 165°F.

Customize with additional veggies like zucchini or onions as desired. Store leftovers in an airtight container in the fridge for up to three days, or freeze for longer storage.

Dinner, Main Course
American
Bell Peppers, Ground Turkey, Healthy Dinner, Meal Prep, quick recipe

Vegan Baked Ziti

Vegan baked ziti served in a bowl with fresh basil and melted cheese alternatives

Everyone loves a hearty meal that warms the soul, and Vegan Baked Ziti fits the bill perfectly. This dish is a delightful blend of pasta, rich tomato sauce, and creamy vegan cheese, making it a satisfying comfort food that everyone can enjoy. Whether you are a longtime vegan or just looking for a delicious meal that everyone in the family can eat, Vegan Baked Ziti is sure to be a new favorite.

The layers of flavor in this baked ziti will tantalize your taste buds. Each bite brings the comforting familiar tastes of home-cooked Italian fare without any animal products. It’s a crowd-pleaser guaranteed to impress even the pickiest eaters. You may even find yourself wanting seconds (or thirds)! So, let’s dive into the deliciousness and discover why you’ll love this Vegan Baked Ziti.

How to prepare Vegan Baked Ziti

Making Vegan Baked Ziti at home is simple and straightforward. Here’s what you need and how to do it:

Ingredients:

  • 12 ounces of ziti pasta
  • 2 cups of marinara sauce
  • 1 cup of vegan ricotta cheese
  • 1 cup of vegan mozzarella cheese, shredded
  • 1 teaspoon of garlic powder
  • 1 teaspoon of dried basil
  • Salt and pepper to taste
  • Fresh basil for garnish (optional)

Directions:

  1. Preheat your oven to 375°F (190°C).
  2. Cook the ziti according to package instructions until al dente. Drain and set aside.
  3. In a large bowl, mix the cooked ziti, marinara sauce, garlic powder, dried basil, salt, and pepper.
  4. In a baking dish, spread half of the ziti mixture, then layer half of the vegan ricotta cheese and half of the vegan mozzarella cheese.
  5. Add the remaining ziti mixture on top, followed by the remaining vegan ricotta and mozzarella cheese.
  6. Cover the dish with aluminum foil and bake for 25 minutes.
  7. Remove the foil and bake for an additional 15 minutes, until the cheese is melted and bubbly.
  8. Allow to cool for a few minutes, then serve with fresh basil on top if desired.

Vegan Baked Ziti: 7 Reasons You'll Love This Comfort Food

Why You’ll Love Vegan Baked Ziti

  1. Creamy and Cheesy: The vegan ricotta and mozzarella provide a creamy texture that mimics traditional cheese without using any dairy.
  2. Quick and Easy: This recipe is simple enough for a weeknight dinner, making it convenient for busy families.
  3. Nutritious Ingredients: Packed with pasta and tomato sauce, it offers a good balance of carbs and vitamins.
  4. Customizable: Feel free to add your favorite vegetables, such as spinach or mushrooms, for extra nutrition and taste.
  5. Budget-Friendly: Vegan ingredients are often less expensive and can be a great way to save money while preparing a hearty meal.
  6. Crowd-Pleasing: Whether it’s a family dinner or a gathering with friends, this dish satisfies everyone.
  7. Leftover Friendly: Baked ziti is even better the next day. Enjoy the flavors as they meld together overnight.

Tips for success

  • Make sure to cook the pasta just until al dente since it will continue cooking in the oven.
  • Feel free to swap out the vegan cheeses for your favorite brand or use homemade versions if you have time.
  • Adding spices like red pepper flakes can give the dish a nice kick if you’re feeling adventurous.

Vegan Baked Ziti: 7 Reasons You'll Love This Comfort Food

Serving Suggestions

Vegan Baked Ziti pairs perfectly with a simple side salad or some garlic bread. For a comforting touch, serve it with a glass of red wine or your favorite non-alcoholic beverage.

FAQs

Can I use gluten-free pasta?

Yes, feel free to use gluten-free ziti or any pasta shape that you prefer.

How long do leftovers last?

Store leftover baked ziti in an airtight container in the fridge for up to 4 days.

Can I freeze Vegan Baked Ziti?

Absolutely! You can freeze it before baking. Just defrost and bake when you’re ready to enjoy it.

With all these benefits, it’s clear that Vegan Baked Ziti is not just a meal, but a comforting experience. So gather your ingredients and get ready to make this delectable dish that everyone will love!

Vegan Baked Ziti

A hearty and delicious meal featuring layers of pasta, marinara sauce, and creamy vegan cheese, perfect for families and gatherings.

Main ingredients

  • 12 ounces ziti pasta
  • 2 cups marinara sauce
  • 1 cup vegan ricotta cheese
  • 1 cup vegan mozzarella cheese, shredded
  • 1 teaspoon garlic powder
  • 1 teaspoon dried basil
  • to taste Salt and pepper
  • optional Fresh basil for garnish

Preparation

  1. Preheat your oven to 375°F (190°C).
  2. Cook the ziti according to package instructions until al dente. Drain and set aside.
  3. In a large bowl, mix the cooked ziti, marinara sauce, garlic powder, dried basil, salt, and pepper.

Assembly and Baking

  1. In a baking dish, spread half of the ziti mixture, then layer half of the vegan ricotta cheese and half of the vegan mozzarella cheese.
  2. Add the remaining ziti mixture on top, followed by the remaining vegan ricotta and mozzarella cheese.
  3. Cover the dish with aluminum foil and bake for 25 minutes.
  4. Remove the foil and bake for an additional 15 minutes, until the cheese is melted and bubbly.
  5. Allow to cool for a few minutes, then serve with fresh basil on top if desired.

Make sure to cook the pasta just until al dente since it will continue cooking in the oven. Feel free to swap out the vegan cheeses for your favorite brand or use homemade versions if you have time. Adding spices like red pepper flakes can give the dish a nice kick if you’re feeling adventurous.

Dinner, Main Course
Italian, Vegan
Comfort Food, Easy Vegan Dinner, Family Meal, Pasta Recipe, Vegan Baked Ziti

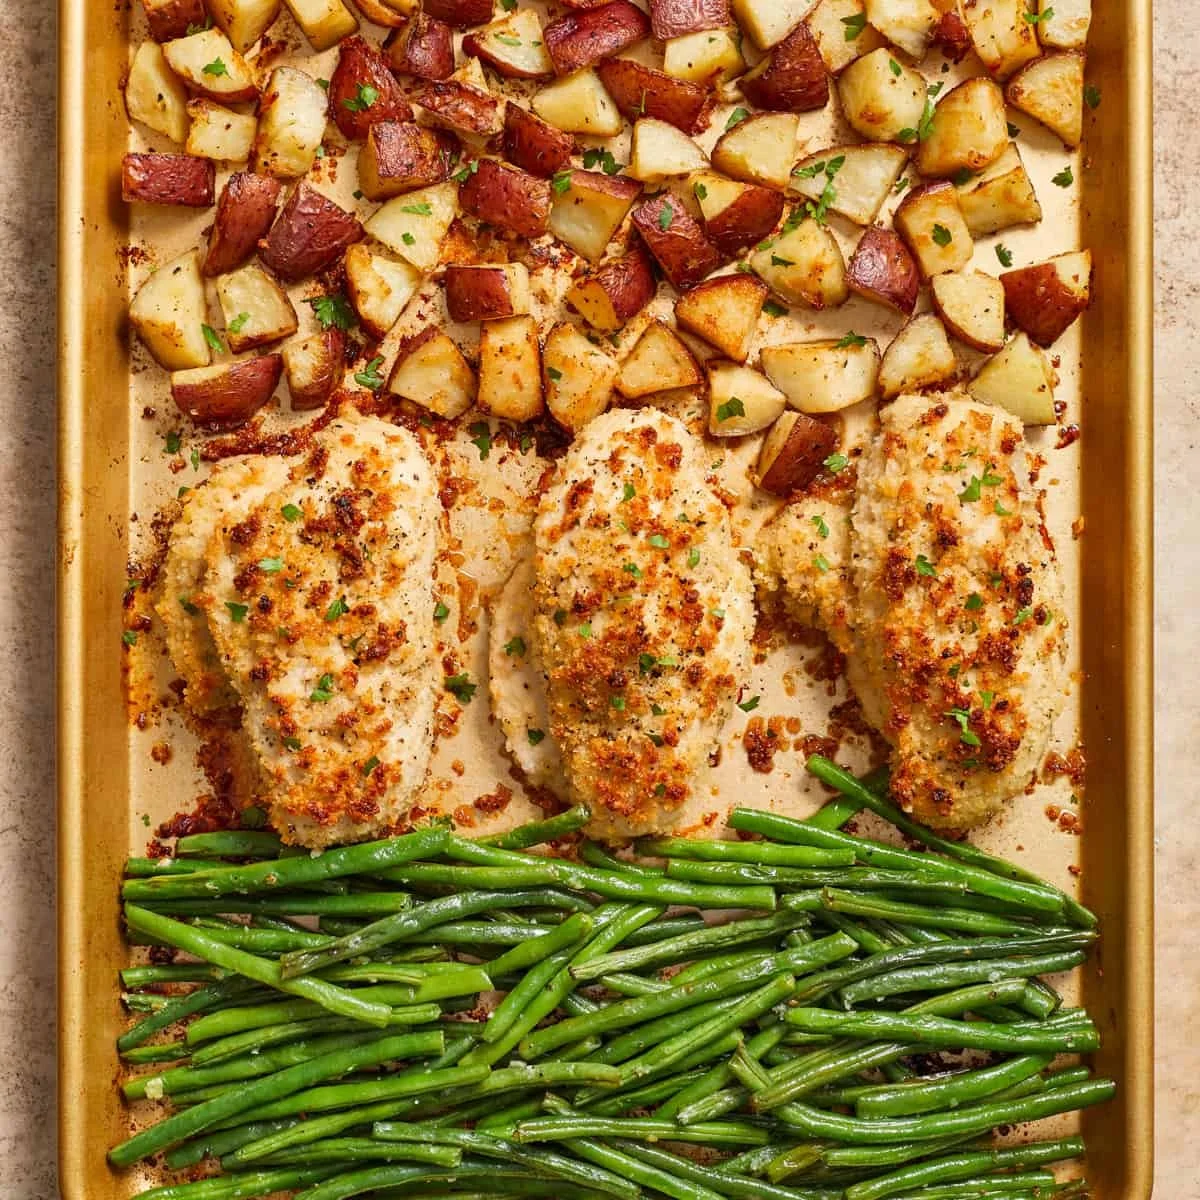
Parmesan Crusted Chicken Sheet Pan Dinner

Parmesan Crusted Chicken on a sheet pan with vegetables, ready for dinner.

Parmesan Crusted Chicken Sheet Pan Dinner is the perfect solution for busy weeknights when you want something delicious without spending hours in the kitchen. This meal combines crispy, cheesy chicken with roasted vegetables, all cooked on one pan. It’s a crowd-pleaser that everyone will love, from kids to adults. The rich flavor of parmesan cheese adds a delightful twist, making each bite a treat. If you’re looking for a simple yet satisfying dish that makes cleanup a breeze, this recipe is just what you need. Get ready to impress your family with this fantastic meal!

How to prepare Parmesan Crusted Chicken Sheet Pan Dinner

Preparing this tasty dish is simple and quick. Here’s how you can whip it up in no time:

  1. Preheat your oven to 400°F (200°C).
  2. Begin by preparing your chicken breasts. Use a meat mallet to gently pound them to an even thickness. This helps them cook evenly.
  3. In a bowl, combine breadcrumbs, grated parmesan cheese, garlic powder, salt, and pepper. Mix well.
  4. Dip each chicken breast into the breadcrumb mixture, making sure to coat it evenly.
  5. Place the chicken on a large sheet pan.
  6. Now, chop your favorite vegetables, like broccoli, bell peppers, or carrots. Toss them in olive oil, salt, and pepper, then scatter them around the chicken on the sheet pan.
  7. Bake everything in the preheated oven for about 25-30 minutes or until the chicken is cooked through and the veggies are tender.
  8. Serve hot and enjoy!

Parmesan Crusted Chicken Sheet Pan Dinner

Why You’ll Love Parmesan Crusted Chicken Sheet Pan Dinner

You will love this recipe because it combines simplicity with fantastic flavor. The parmesan crust makes the chicken crispy on the outside while keeping it juicy on the inside. Plus, you can customize the vegetables to suit your family’s taste. It’s a one-pan meal, which means easy preparation and cleanup. Enjoying a hearty dinner while spending minimal time in the kitchen is something everyone appreciates!

Tips for success

  • For extra flavor, marinate the chicken in olive oil and lemon juice for an hour before coating it with breadcrumbs.
  • Use panko breadcrumbs for an even crispier texture.
  • Don’t overcrowd the pan; give each ingredient some space to roast properly.
  • Feel free to swap the vegetables with whatever you have on hand or prefer!

Serving Suggestions

Serve your Parmesan Crusted Chicken with a fresh side salad, crusty bread, or even a light pasta to balance the meal. This dish pairs nicely with a lemon wedge for a fresh squeeze that brightens the flavors.

FAQs

Can I use bone-in chicken for this recipe?

Yes, but cooking time will be longer. A meat thermometer should read 165°F (75°C) for safety.

What vegetables work best with this dish?

You can use any vegetables like zucchini, asparagus, or Brussels sprouts. Just adjust the cooking time based on the veggies you choose.

Can I make this ahead of time?

Yes, you can prepare the chicken and coat it with breadcrumbs in advance. Just store it in the fridge until you’re ready to bake it.

Creating meals that taste great and are easy to clean up is possible with the right recipe. The Parmesan Crusted Chicken Sheet Pan Dinner is not only a delightful meal, but it also brings the family together around the table. For more details, you can visit Parmesan Crusted Chicken Sheet Pan Dinner – Lemons & Zest. Why not give it a try tonight? Happy cooking!

Parmesan Crusted Chicken Sheet Pan Dinner

A simple, one-pan meal featuring crispy, cheesy chicken and roasted vegetables that everyone will love.

For the Chicken

  • 4 pieces chicken breasts (Pounded to even thickness)
  • 1 cup breadcrumbs (Panko breadcrumbs recommended for crispiness)
  • 1/2 cup grated parmesan cheese (For a rich flavor)
  • 1 teaspoon garlic powder
  • 1 teaspoon salt
  • 1/2 teaspoon pepper

For the Vegetables

  • 2 cups mixed vegetables (e.g., broccoli, bell peppers, carrots) (Chopped and tossed in olive oil, salt, and pepper)
  • 2 tablespoons olive oil (For tossing the vegetables)

Preparation

  1. Preheat your oven to 400°F (200°C).
  2. Use a meat mallet to gently pound the chicken breasts to an even thickness.
  3. In a bowl, combine breadcrumbs, grated parmesan cheese, garlic powder, salt, and pepper. Mix well.
  4. Dip each chicken breast into the breadcrumb mixture, making sure to coat it evenly.
  5. Place the coated chicken on a large sheet pan.
  6. Chop your favorite vegetables (such as broccoli, bell peppers, or carrots). Toss them in olive oil, salt, and pepper, then scatter them around the chicken on the sheet pan.

Cooking

  1. Bake everything in the preheated oven for about 25-30 minutes or until the chicken is cooked through and the veggies are tender.

Serving

  1. Serve hot and enjoy!

For extra flavor, marinate the chicken in olive oil and lemon juice for an hour before coating it with breadcrumbs. Don’t overcrowd the pan; give each ingredient some space to roast properly. Feel free to swap the vegetables with whatever you have on hand or prefer.

Dinner, Main Course
American
Easy Dinner, One Pan Meal, Parmesan Chicken, quick recipes, Sheet Pan Dinner