Honey Garlic Ground Turkey Recipe

Prepare your taste buds for a delightful treat with this Sweet and Savory Honey Garlic Ground Turkey recipe. It combines succulent ground turkey with a luscious honey garlic sauce, creating a mouth-watering dish that is sure to impress. Whether you’re cooking for family or friends, this easy recipe is a crowd-pleaser that balances sweet and savory flavors perfectly. Plus, with just 25 minutes of cooking time, you’ll have a delicious meal ready in no time, leaving everyone wanting more!

How to prepare Honey Garlic Ground Turkey

To make this dish, you’ll need some basic ingredients that you likely already have in your kitchen. The main star is ground turkey, which is lean and versatile. The honey and garlic come together to form a delightful sauce that brings the whole dish to life.

Sweet and Savory Honey Garlic Ground Turkey Recipe in 25 Minutes

Why You’ll Love Sweet and Savory Honey Garlic Ground Turkey

One of the best things about this Sweet and Savory Honey Garlic Ground Turkey recipe is how quick it is to make. In just 25 minutes, you can whip up a flavorful meal that is not only delicious but also healthy. This dish is perfect for weeknight dinners when you don’t have much time to spare. Additionally, the combination of honey and garlic creates a wonderful aroma that fills your kitchen, making it an appealing meal for everyone.

Tips for success

  • Always season your turkey well before cooking to enhance its natural flavor.
  • For extra texture, consider adding some vegetables like bell peppers or broccoli to the dish.
  • If you have leftover turkey, it can easily be stored in the fridge for a quick lunch the next day.

Sweet and Savory Honey Garlic Ground Turkey Recipe in 25 Minutes

Serving Suggestions

Serve the Sweet and Savory Honey Garlic Ground Turkey over a bed of fluffy rice or alongside steamed vegetables. You could also wrap it in lettuce leaves for a fresh and healthy option. For an added twist, try pairing it with crispy air fryer honey garlic salmon bites to elevate your meal even further.

FAQs

Q: Can I use chicken or beef instead of turkey?

A: Yes, you can substitute ground chicken or beef for turkey. Just keep in mind that cooking times may vary slightly.

Q: How can I store leftovers?

A: Store any leftovers in an airtight container in the refrigerator for up to three days.

Q: Is this recipe suitable for meal prep?

A: Absolutely! This dish is great for meal prepping because it holds up well and reheats nicely.

With these tips and suggestions, you’re all set to make the Sweet and Savory Honey Garlic Ground Turkey a new favorite in your home. Enjoy the delightful flavors and the compliments that come your way!

Sweet and Savory Honey Garlic Ground Turkey

A quick and delicious recipe combining ground turkey with a sweet and savory honey garlic sauce, perfect for busy weeknight dinners.

Main Ingredients

  • 1 lb ground turkey (Lean and versatile meat.)
  • 1/3 cup honey (Provides sweetness.)
  • 3 cloves garlic, minced (Adds flavor to the sauce.)

Optional Ingredients

  • 1 bell pepper, diced bell pepper, diced (For added texture.)
  • 1 cup broccoli florets (For added nutrition.)

Preparation

  1. In a skillet over medium heat, cook the ground turkey, breaking it apart until browned and cooked through.
  2. Add minced garlic and continue to cook for 1-2 minutes until fragrant.
  3. Stir in honey and mix well to coat the turkey.
  4. If using, add diced bell pepper and broccoli, cooking until they are tender.

Serving

  1. Serve over a bed of rice, alongside steamed vegetables, or in lettuce wraps.

For extra flavor, season the turkey well before cooking. Leftovers can be stored in an airtight container in the fridge for up to three days.

Dinner, Main Course
American
Easy Dinner, Ground Turkey, Healthy Recipe, Honey Garlic, Quick Meal

30-Minute Lemon Chicken

30-Minute Lemon Chicken is a delightful and flavorful dish that makes dinner feel special, even on a busy weeknight. This recipe is quick to prepare and brings a bright, zesty flavor that pleases almost everyone at the table. The juicy chicken combined with a fresh lemon sauce makes this meal both refreshing and satisfying. Plus, if you’re looking for more lemony inspiration, don’t forget to check out the easy lemon butter chicken recipe for another crowd-pleaser.

Why You’ll Love 30-Minute Lemon Chicken

This dish is an absolute favorite for several reasons. First of all, it comes together in just half an hour, making it ideal for those hectic days when time is short but good food is still wanted. The combination of tender chicken and vibrancy from the lemon brings a refreshing twist that can brighten up any dinner routine. Additionally, it’s not only delicious but also healthy, making it a great meal choice for anyone looking to eat lighter without sacrificing taste.

Tips for Success

To ensure your 30-Minute Lemon Chicken turns out perfectly every time, consider these helpful tips. First, make sure to use fresh lemons for the best flavor; bottled lemon juice simply doesn’t compare. Searing the chicken until golden brown also locks in moisture and flavor, giving you that delightful taste and texture. If you want to elevate your dish even further, serve it with a side of steamed vegetables or a light salad, such as a Greek yogurt chicken salad with dill and lemon zest.

30-Minute Lemon Chicken

Serving Suggestions

After preparing your delicious lemon chicken, it pairs beautifully with a variety of sides. Consider serving it with fluffy rice, creamy mashed potatoes, or a vibrant seasonal salad. You can also choose to drizzle some additional lemon sauce over the top for an extra citrus kick.

FAQs

Can I use chicken thighs instead of breasts?

Yes, chicken thighs would work wonderfully and provide a richer flavor.

Can I make this recipe ahead of time?

While this dish is best enjoyed fresh, you can marinate the chicken beforehand for added flavor.

What other herbs can I use?

You can use fresh herbs like thyme or parsley to enhance the flavors even more.

By following this guide, you’ll have a delicious 30-Minute Lemon Chicken recipe that’s easy to enjoy and share with family and friends!

30-Minute Lemon Chicken

A delightful and flavorful dish that brings a bright, zesty flavor to your dinner routine in just 30 minutes.

Chicken

  • 1 lb chicken breasts (Fresh, can substitute with chicken thighs for richer flavor.)

Lemon Sauce

  • 2 tbsp fresh lemon juice (Use fresh lemons for best flavor.)
  • 1 zest lemon (Adds extra lemon flavor.)
  • 2 tbsp olive oil (For searing the chicken.)

Optional Sides

  • 4 servings rice or mashed potatoes (Great side options.)
  • 1 cup seasonal salad (Enhances the meal.)

Preparation

  1. Begin by marinating the chicken in lemon juice and zest for added flavor.
  2. Heat olive oil in a skillet over medium heat.

Cooking

  1. Sear the chicken until golden brown, about 5-7 minutes on each side.
  2. Cook until the chicken is thoroughly cooked and juices run clear.

Serving

  1. Serve the chicken with fluffy rice, creamy mashed potatoes, or a vibrant seasonal salad.
  2. Drizzle additional lemon sauce over the top if desired.

For best results, use fresh ingredients. Pair with steamed vegetables or a light salad. This dish is best enjoyed fresh, but marinating ahead can enhance the flavor.

Dinner, Main Course
American
30-Minute Meal, easy chicken recipe, Healthy Recipe, Lemon Chicken, Quick Dinner

Chicken & Vegetable Stir Fry

If you’re looking for a dinner idea that brings a burst of flavor and color to your plate, Chicken & Vegetable Stir Fry is the answer. This dish is not only quick to make, but it also combines tender chicken with a vibrant mix of fresh vegetables, making it a wonderful choice for both busy weeknights and laid-back weekends. You’ll absolutely love the sweet and savory sauce that ties everything together. Plus, it’s a great way to get your family to eat their veggies, a true crowd-pleaser! Get your wok ready, because this recipe will soon become a favorite in your home.

How to prepare Chicken & Vegetable Stir Fry

Start by gathering your ingredients, which typically include chicken breast, bell peppers, broccoli, carrots, and soy sauce. Begin by chopping your vegetables into bite-sized pieces and slicing the chicken. Heat a large pan over medium-high heat and add a bit of oil. Once the oil is hot, add the chicken pieces and cook until they are golden.

Next, toss in your colorful vegetables and stir everything together until they are tender-crisp. Drizzle the soy sauce over the mixture, allowing it to coat the chicken and vegetables beautifully. Serve this delight hot over rice or noodles for a complete meal.

Chicken & Vegetable Stir Fry

Why You’ll Love Chicken & Vegetable Stir Fry

One of the reasons you’ll adore this Chicken & Vegetable Stir Fry is its versatility. You can easily swap in seasonal vegetables or your favorite proteins to make it your own. If you’re a fan of unique flavors, you might enjoy adding a splash of sesame oil or some crushed garlic for an extra kick. For a different spin, you could also try this lemon chicken stir fry, which is equally delicious and easy to make.

Tips for success

For the best results, ensure that your pan is hot enough before adding the chicken so it sears nicely. This seals in the juices and keeps the meat tender. Additionally, don’t overcrowd the pan, as this can lead to steaming rather than frying. Cooking in batches may be necessary if you have a lot of ingredients. Finally, remember that stir-frying is fast, so have everything prepped and ready to go before you start cooking.

Chicken & Vegetable Stir Fry

Serving Suggestions

You can serve Chicken & Vegetable Stir Fry over fluffy white rice, cooked noodles, or even quinoa for a healthier alternative. For a bit of crunch, sprinkle some toasted sesame seeds or chopped scallions on top before serving. Pair it with a light salad or egg rolls as side dishes.

FAQs

1. Can I use frozen vegetables?

Yes, frozen vegetables can work well for this recipe. Just make sure to cook them a bit longer to ensure they heat through.

2. Is it possible to prepare this dish without chicken?

Absolutely! You can use tofu, shrimp, or beef instead, depending on your dietary preferences.

3. How can I store leftovers?

Leftovers can be stored in an airtight container in the refrigerator for up to three days. Reheat in a microwave or on the stovetop until warmed through.

For those interested in exploring more chicken recipes, don’t forget to check out this delicious air fryer cajun chicken for another easy meal option!

Chicken & Vegetable Stir Fry

A quick and flavorful dish featuring tender chicken and a vibrant mix of fresh vegetables served with a sweet and savory sauce.

Main Ingredients

  • 1 pound chicken breast
  • 1 cup bell peppers, chopped (Use a mix of colors for a vibrant presentation.)
  • 1 cup broccoli florets
  • 1 cup carrots, sliced
  • 3 tablespoons soy sauce (Adjust to taste.)
  • 2 tablespoons oil (For cooking.)

Preparation

  1. Chop vegetables into bite-sized pieces and slice the chicken breast.

Cooking

  1. Heat a large pan over medium-high heat and add the oil.
  2. Once the oil is hot, add the chicken pieces and cook until they are golden.
  3. Add the colorful vegetables and stir together until tender-crisp.
  4. Drizzle the soy sauce over the mixture and stir to coat.
  5. Serve hot over rice or noodles.

For best results, ensure your pan is hot before adding the chicken to prevent steaming. You can substitute seasonal vegetables or proteins like tofu or shrimp. Consider adding sesame oil or crushed garlic for more flavor.

Dinner, Main Course
Asian, Stir Fry
Chicken Stir Fry, Easy Recipe, Healthy Dinner, Quick Dinner, Vegetable Stir Fry

Ground Turkey and Peppers

Ground turkey and peppers is a delicious and satisfying dish that strikes a balance between flavors and nutrition. This recipe combines savory ground turkey with colorful and crunchy bell peppers, creating a meal that is not only good for you but also pleasing to the taste buds. Whether you are hosting a family dinner, meal prepping for the week, or just looking for a quick weeknight dinner, this dish is sure to be a hit. The combination of spices adds depth, while the peppers provide a delightful crunch. It’s a true crowd-pleaser that everyone will enjoy. So, roll up your sleeves and let’s get cooking!

Ground Turkey and Peppers

Why You’ll Love Ground Turkey and Peppers

There are many reasons to love this ground turkey and peppers recipe. First, it is very easy to make and takes less than 30 minutes from start to finish. Secondly, ground turkey is a lean protein that is healthier compared to beef, making it a great choice for a light meal. The vibrant asparagus, red, yellow, and green peppers not only make the dish look beautiful but also add wonderful taste and nutrition. Plus, it’s easily customizable—feel free to add your favorite vegetables or spices according to your taste. You can serve it over rice, in wraps, or even on its own. This recipe can become a staple in your household, and your family will ask for it again and again!

Ground Turkey and Peppers

Tips for success

To make sure your ground turkey and peppers turn out great every time, follow these helpful tips:

  1. Use Fresh Ingredients: Use fresh ground turkey and ripe bell peppers for the best taste and texture. Fresh produce always makes a difference.
  2. Don’t Overcook the Turkey: Cook the turkey until it is just done to prevent it from drying out. It should be cooked to an internal temperature of 165°F.
  3. Experiment with Spices: Feel free to play with the seasonings. Adding garlic powder, cumin, or even a dash of hot sauce can elevate the flavor profile and make it your own.
  4. Customize Your Veggies: If you have other vegetables at home, like zucchini or onions, chop them up and toss them in. You can find a delicious way to combine flavors by checking out more recipes like this ground turkey and zucchini skillet.

Serving Suggestions

This ground turkey and peppers dish can be served in various ways. Here are a few ideas:

  • Serve it over a bed of steaming white or brown rice for a hearty meal.
  • Fill taco shells or tortillas for tasty handheld wraps, perfect for lunch or dinner.
  • Besides being delicious on its own, you can top it with some fresh avocado or a sprinkle of cheese for extra flavor.
  • Pair it with a light salad or steamed veggies on the side to round out your meal.

FAQs

Can I use other types of meat instead of ground turkey?

Yes, you can substitute ground chicken, lean beef, or even a plant-based meat for this recipe. Just adjust the cooking time as needed.

What can I do with leftovers?

Leftovers can be stored in an airtight container in the fridge for up to three days. You can also freeze them for longer storage. Reheat in the microwave or on the stovetop.

Can I make this dish ahead of time?

Absolutely! You can prepare it ahead of time and store it in the refrigerator until you’re ready to eat. Just reheat before serving.

Dive into the delightful flavors of ground turkey and peppers, and enjoy the compliments you’ll surely receive when you bring this dish to the table!

Ground Turkey and Peppers

A delicious and nutritious dish that combines savory ground turkey with colorful bell peppers for a satisfying meal.

Main ingredients

  • 1 lb ground turkey (Use fresh ground turkey for the best taste.)
  • 1 each red bell pepper (Chopped.)
  • 1 each yellow bell pepper (Chopped.)
  • 1 each green bell pepper (Chopped.)

Spices

  • 1 tsp garlic powder (Add more for extra flavor.)
  • 1 tsp cumin (Can be adjusted to taste.)
  • 1 dash hot sauce (Optional, for added heat.)

Preparation

  1. Chop the bell peppers into bite-sized pieces.

Cooking

  1. In a large skillet, cook the ground turkey over medium heat until browned, about 5-7 minutes.
  2. Add the chopped bell peppers and spices to the skillet. Cook for an additional 10-15 minutes until the peppers are tender and the turkey is fully cooked.
  3. Ensure the turkey reaches an internal temperature of 165°F.

Customize with additional veggies like zucchini or onions as desired. Store leftovers in an airtight container in the fridge for up to three days, or freeze for longer storage.

Dinner, Main Course
American
Bell Peppers, Ground Turkey, Healthy Dinner, Meal Prep, quick recipe

Air Fryer Chicken and Potatoes

Crispy air fryer chicken and potatoes served on a plate

This air fryer chicken and potatoes recipe feels like a warm, home cooked meal with less fuss. The chicken stays juicy and the potatoes get a nice crisp, all without a lot of oil. It is a real crowd-pleaser for busy families and anyone who likes easy dinners. If you want more simple air fryer ideas, try this air fryer chicken and veggies recipe for more inspiration. Trust me, you will smile when you taste how good this combo is.

How to prepare Air Fryer Chicken and Potatoes Recipe

This simple recipe makes juicy chicken and crispy potatoes in one air fryer. It is easy for weeknights and tastes great.

Ingredients:

  • 4 boneless, skinless chicken thighs or breasts
  • 1 pound small potatoes, cut in halves or quarters
  • 2 tablespoons olive oil
  • 1 teaspoon salt
  • 1/2 teaspoon black pepper
  • 1 teaspoon garlic powder
  • 1 teaspoon paprika
  • 1/2 teaspoon dried thyme or rosemary
  • Optional, a squeeze of lemon or chopped parsley for serving

Directions:

  1. Pat the chicken dry with a paper towel. Place chicken and potatoes in a bowl.
  2. Add olive oil, salt, pepper, garlic powder, paprika, and thyme. Toss until chicken and potatoes are coated.
  3. Preheat the air fryer to 380°F (about 190°C) for 3 minutes if your model needs preheating.
  4. Arrange potatoes in the air fryer basket first, then add chicken on top so air circulates.
  5. Cook for 18 to 20 minutes, shaking the basket and turning the chicken once at about 10 minutes. Cook until the chicken reaches 165°F and potatoes are golden and tender.
  6. If you want extra crisp, increase temperature to 400°F for 2 to 3 minutes at the end.
  7. Let rest 3 to 5 minutes, then serve with lemon or parsley.

Air Fryer Chicken and Potatoes Recipe

Why You’ll Love Air Fryer Chicken and Potatoes Recipe

  • Quick cooking time, perfect for weeknight dinner.
  • Uses one air fryer basket, less cleanup.
  • Crispy potatoes and flavorful chicken, a hit with kids and adults.
  • Uses simple pantry spices, no fancy ingredients.

Tips for success

  • Cut potatoes into even pieces so they cook the same time.
  • Don’t crowd the basket, leave space for air to move.
  • Pat chicken dry before seasoning, it helps the outside turn golden.
  • Check internal temperature of chicken to be safe, aim for 165°F.
  • If your potatoes cook slower than chicken, start them 5 minutes earlier.

Serving Suggestions

  • Serve with a simple salad or steamed green beans for color and freshness.
  • Spoon a little garlic butter or plain yogurt sauce over the top.
  • Add lemon wedges on the side for a bright finish.
  • This recipe pairs well with crusty bread or a scoop of rice.

Air Fryer Chicken and Potatoes Recipe

FAQs

Q: Can I use bone in chicken? A: Yes, you can. Bone in pieces may need a few more minutes to cook, check doneness with a thermometer.

Q: Can I use frozen potatoes or chicken? A: For best results, use thawed chicken and fresh potatoes. Frozen items change cook time and texture.

Q: What temperature is best for crispy potatoes? A: Start at 380°F, then finish with 400°F for 2 to 3 minutes if you want extra crisp.

Q: Can I double this recipe? A: You can, but cook in batches or use a larger air fryer so food does not crowd the basket.

Q: How do I store leftovers? A: Keep leftovers in an airtight container in the fridge for up to 3 days. Reheat in the air fryer for best crisp.

Conclusion

This Air Fryer Chicken and Potatoes Recipe is a simple, tasty choice for busy nights. For another clear take on this classic dish, see Air Fryer Chicken and Potatoes – Little Sunny Kitchen for more ideas and tips.

Air Fryer Chicken and Potatoes

A simple and delicious recipe for juicy chicken and crispy potatoes made effortlessly in an air fryer.

Main Ingredients

  • 4 pieces boneless, skinless chicken thighs or breasts
  • 1 pound small potatoes, cut in halves or quarters
  • 2 tablespoons olive oil
  • 1 teaspoon salt
  • 1/2 teaspoon black pepper
  • 1 teaspoon garlic powder
  • 1 teaspoon paprika
  • 1/2 teaspoon dried thyme or rosemary (Choose one or use a combination.)

Optional Garnish

  • 1 squeeze lemon (For serving)
  • 1/4 cup chopped parsley (For serving)

Preparation

  1. Pat the chicken dry with a paper towel. Place chicken and potatoes in a bowl.
  2. Add olive oil, salt, pepper, garlic powder, paprika, and thyme. Toss until chicken and potatoes are coated.

Cooking

  1. Preheat the air fryer to 380°F (about 190°C) for 3 minutes if your model needs preheating.
  2. Arrange potatoes in the air fryer basket first, then add chicken on top so air circulates.
  3. Cook for 18 to 20 minutes, shaking the basket and turning the chicken once at about 10 minutes. Cook until the chicken reaches 165°F and potatoes are golden and tender.
  4. If you want extra crisp, increase temperature to 400°F for 2 to 3 minutes at the end.
  5. Let rest for 3 to 5 minutes, then serve with lemon or parsley.

Cut potatoes into even pieces for uniform cooking. Don’t crowd the basket to allow proper air circulation. Check the internal temperature of chicken for safety.

Dinner, Main Course
American
Air Fryer Chicken, Crispy Potatoes, Easy Dinner, Healthy Cooking, Weeknight Meal

Healthy Oats Khichdi Weight Loss Khichdi Recipe

Healthy Oats Khichdi bowl garnished with vegetables and herbs

I love simple, warm meals that make you feel good, and oats khichdi is one of those. This healthy weight loss khichdi uses oats instead of rice, so it cooks fast, fills you up, and keeps the meal light. It tastes mild, a little nutty from the oats, and well spiced with cumin and turmeric. It is a great crowd-pleaser, easy to make any day of the week, and kind to your stomach. Ready to try a new comfort food that helps your weight goals? Let’s make it together and enjoy a cozy bowl.

How to prepare Oats Khichdi Recipe | Healthy Weight Loss Khichdi Recipe

Ingredients (simple list)

  • 1 cup rolled oats
  • 1/4 cup moong dal, washed (optional, for protein)
  • 1 small carrot, chopped
  • 1 small potato, chopped (optional)
  • 1 small tomato, chopped
  • 1/2 cup peas or mixed vegetables
  • 1 tsp cumin seeds
  • 1/4 tsp turmeric powder
  • 1/2 tsp ginger, grated
  • 1 green chili, slit (optional)
  • 1 tbsp oil or ghee
  • Salt to taste
  • 3 cups water
  • Fresh coriander for garnish
    Directions
  1. Heat oil or ghee in a pan. Add cumin seeds and let them crackle.
  2. Add grated ginger and green chili, sauté for a few seconds.
  3. Add chopped vegetables, and sauté for 2 to 3 minutes.
  4. Add washed moong dal, turmeric, and salt. Mix well.
  5. Pour in water and bring to a gentle boil.
  6. Lower the heat, add oats, and stir. Cook for 4 to 6 minutes until oats and dal are soft. Stir often to avoid sticking.
  7. Turn off heat. Let it sit for a minute, then garnish with fresh coriander.
  8. Serve hot, with a drizzle of ghee if you like.

Oats Khichdi Recipe | Healthy Weight Loss Khichdi Recipe

Why You’ll Love Oats Khichdi Recipe | Healthy Weight Loss Khichdi Recipe

  • Simple and quick to cook, perfect for busy days.
  • Light on the stomach, yet filling, so it helps with weight control.
  • Uses oats, which add fiber and a nutty taste.
  • Mild spices make it friendly for kids and adults.
  • Easy to change with any vegetables you have, so it never gets boring.

Tips for success

  • Use rolled oats, not instant flavored oats, for best texture.
  • Rinse the dal well if using, and soak for 15 minutes to cut cooking time.
  • Keep the water ratio right, about 3 cups water for 1 cup oats and dal, adjust for your preferred thickness.
  • Stir while cooking to prevent the oats from sticking to the bottom.
  • Add lemon or a spoon of ghee at the end for extra flavor, if you want.

Serving Suggestions

  • Serve hot in a bowl, with plain yogurt or a small salad on the side.
  • Top with roasted nuts or a spoon of ghee for extra taste.
  • Pair with a light pickle or steamed vegetables for a fuller meal.
  • Great as a breakfast, lunch, or easy dinner for weight loss plans.

Oats Khichdi Recipe | Healthy Weight Loss Khichdi Recipe

FAQs

Q: Can I make oats khichdi without dal?
A: Yes, you can make it only with oats and vegetables, it will still be filling and light.

Q: Can I use instant oats?
A: Instant oats get mushy fast, they work but the texture will be softer. Rolled oats give a better bite.

Q: How long does it keep in the fridge?
A: Store in an airtight container for up to 2 days. Reheat with a splash of water.

Q: Is this good for weight loss?
A: Yes, it is low in calories, high in fiber, and keeps you full, which helps control hunger.

Conclusion

If you want a tested recipe and more tips for making this healthy dish, check this Oats Khichdi Recipe, it has a clear method and variations you can try. Enjoy your warm, healthy bowl and have fun cooking.

Oats Khichdi

A comforting and nutritious dish made with rolled oats, vegetables, and mild spices, perfect for weight loss.

Main Ingredients

  • 1 cup rolled oats (Use rolled oats for best texture.)
  • 1/4 cup moong dal, washed (Optional, for added protein.)
  • 1 small carrot, chopped
  • 1 small potato, chopped (Optional.)
  • 1 small tomato, chopped
  • 1/2 cup peas or mixed vegetables
  • 1 tsp cumin seeds
  • 1/4 tsp turmeric powder
  • 1/2 tsp ginger, grated
  • 1 unit green chili, slit (Optional.)
  • 1 tbsp oil or ghee
  • to taste unit Salt
  • 3 cups water
  • to garnish unit Fresh coriander

Cooking Instructions

  1. Heat oil or ghee in a pan. Add cumin seeds and let them crackle.
  2. Add grated ginger and green chili, sauté for a few seconds.
  3. Add chopped vegetables, and sauté for 2 to 3 minutes.
  4. Add washed moong dal, turmeric, and salt. Mix well.
  5. Pour in water and bring to a gentle boil.
  6. Lower the heat, add oats, and stir. Cook for 4 to 6 minutes until oats and dal are soft. Stir often to avoid sticking.
  7. Turn off heat. Let it sit for a minute, then garnish with fresh coriander.
  8. Serve hot, with a drizzle of ghee if you like.

Use rolled oats, not instant flavored oats, for best texture. Rinse the dal well if using, and soak for 15 minutes to cut cooking time. Keep the water ratio right, about 3 cups water for 1 cup oats and dal, adjust for your preferred thickness. Stir while cooking to prevent the oats from sticking to the bottom. Add lemon or a spoon of ghee at the end for extra flavor, if desired. Serve hot in a bowl, with plain yogurt or a small salad on the side. Top with roasted nuts or a spoon of ghee for extra taste. Pair with a light pickle or steamed vegetables for a fuller meal. Great as a breakfast, lunch, or easy dinner for weight loss plans.

Dinner, lunch, Main Course
Indian
Healthy Recipe, Oats Khichdi, Weight Loss

Garlic Butter Steak Bites

Delicious garlic butter steak bites served on a plate

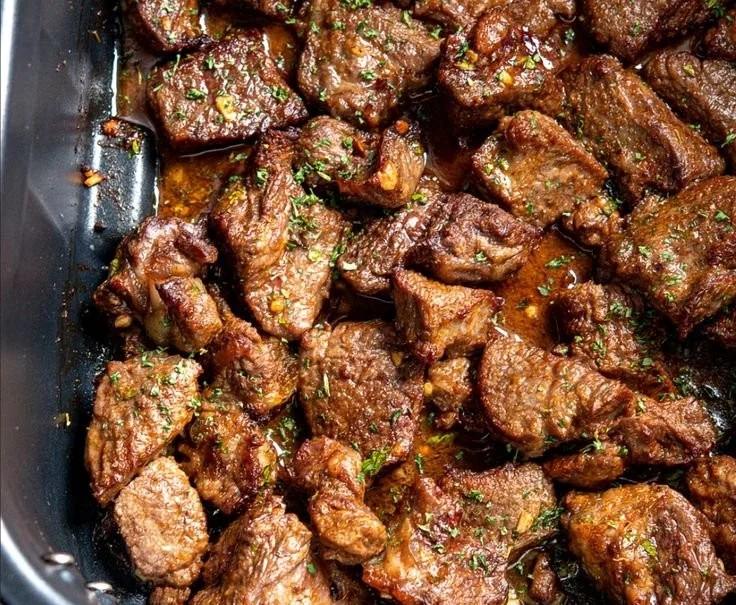
Garlic Butter Steak Bites are small pieces of steak cooked in garlic and butter until they are brown and tender. This dish uses simple ingredients, and it cooks fast. It works for busy weeknights, easy dinners, or when you want a tasty snack to share.

This featured recipe for Garlic Butter Steak Bites is a real crowd-pleaser, full of rich garlic flavor and buttery crust, with juicy beef in every bite. The mix of garlic, butter, and seared steak makes a very savory and comforting dish. If you like quick steak recipes, try this one and you will see why friends and family come back for more. For a creamy twist, you can also check a related version like garlic butter steak bites with parmesan cream sauce which pairs well with pasta.

how to prepare Garlic Butter Steak Bites

  1. Cut steak into bite-size cubes, pat dry with paper towels.
  2. Season the steak with salt and pepper on all sides.
  3. Heat a heavy skillet over medium-high heat, add oil until hot.
  4. Add steak in a single layer, do not crowd the pan. Cook 2 to 3 minutes per side until browned. Remove steak and keep warm.
  5. Lower heat to medium, add butter to the pan. Stir in minced garlic and cook 30 to 60 seconds until fragrant.
  6. Return steak to the pan, toss with the garlic butter and any pan juices. Cook 1 more minute to combine flavors.
  7. Finish with chopped fresh parsley if you like, then serve immediately.

Garlic Butter Steak Bites

Why You’ll Love Garlic Butter Steak Bites

  • They cook very fast, ready in about 15 to 20 minutes.
  • Big garlic and butter flavor makes the steak taste rich and savory.
  • The recipe uses few ingredients you likely have at home, beef, garlic, and butter.
  • It works as an easy weeknight dinner, appetizer, or game day snack.
  • You can pair it with rice, salad, pasta, or roasted vegetables.

tips for success

  • Pat the steak dry before seasoning, this helps get a good sear.
  • Do not crowd the pan, cook in batches if needed so the steak browns well.
  • Use a hot pan and a high smoke point oil, like canola or vegetable oil.
  • Add butter near the end so it does not burn, then toss the steak quickly.
  • Let steak rest a minute off the heat to keep the juices inside.

Serving Suggestions

  • Serve over white rice or mashed potatoes for a simple meal.
  • Add to a salad for a hearty steak salad.
  • Toss with pasta and a spoonful of the garlic butter for a fast dinner.
  • Place on toothpicks for an easy party appetizer.
  • Pair with steamed vegetables or roasted green beans for a balanced plate.

Garlic Butter Steak Bites

FAQs

Q: What cut of steak is best for steak bites?
A: Use tender cuts like sirloin, ribeye, or New York strip. They stay tender when cut into bites.

Q: Can I use frozen steak?
A: It is best to thaw fully and pat dry first. Frozen steak will not brown well.

Q: How do I keep the steak from getting tough?
A: Cook quickly on high heat and do not overcook. Let the meat rest a short time before serving.

Q: Can I make this ahead of time?
A: You can cook the steak and reheat gently, but it is best fresh for the juiciest bites.

Q: Can I add other seasonings?
A: Yes, add a pinch of smoked paprika, onion powder, or a splash of Worcestershire sauce for extra flavor.

Conclusion

Garlic Butter Steak Bites are an easy, tasty dish that fits many meals, from weeknight dinners to party snacks. If you want another take on the same idea, see the detailed recipe on Garlic Butter Steak Bites – Simply Recipes for more tips and variations, or compare notes with the version on Garlic Butter Steak Bites Recipe – Allrecipes for reader reviews and serving ideas. Enjoy making this quick and flavorful beef dish at home.

Garlic Butter Steak Bites

These Garlic Butter Steak Bites are quick to make, full of rich garlic flavor and buttery crust, perfect for busy weeknights or as an appetizer for gatherings.

Main Ingredients

  • 1 pound beef steak (sirloin, ribeye, or New York strip) (Cut into bite-size cubes)
  • 2 tablespoons canola or vegetable oil (For cooking)
  • 3 tablespoons butter (Add at the end to avoid burning)
  • 4 cloves garlic (Minced)
  • 1 teaspoon salt (To season steak)
  • 1 teaspoon black pepper (To season steak)
  • 2 tablespoons parsley (Chopped for garnish (optional))

Preparation

  1. Cut steak into bite-size cubes and pat dry with paper towels.
  2. Season the steak with salt and pepper on all sides.

Cooking

  1. Heat a heavy skillet over medium-high heat and add oil until hot.
  2. Add the steak in a single layer, avoiding crowding the pan. Cook for 2 to 3 minutes per side until browned. Remove the steak and keep warm.
  3. Lower the heat to medium, add butter to the pan, then stir in minced garlic and cook for 30 to 60 seconds until fragrant.
  4. Return the steak to the pan and toss with the garlic butter and any pan juices. Cook for 1 more minute to combine flavors.
  5. Finish with chopped fresh parsley if desired, then serve immediately.

Pat the steak dry before seasoning for better sear. Don’t crowd the pan; cook in batches if needed. Use a hot pan with high smoke point oil. Add butter near the end to prevent burning. Let steak rest briefly to retain juices.

Appetizer, Dinner
American
Appetizer, Garlic Butter Steak Bites, Quick Dinner, Snack, Steak Recipe