No-Bake Chocolate Cream Pie

chocolate cream pie

The first time I made this No-Bake Chocolate Cream Pie, it was out of pure desperation. It was a sweltering summer afternoon, the oven was off-limits, and my sweet tooth was loudly demanding something rich and chocolatey. I rummaged through my pantry, pieced together a few humble ingredients, and hoped for the best. What came out of the fridge hours later wasn’t just a dessert, it was a silky, dreamy masterpiece that made everyone at the table pause, then beg for the recipe. Since then, this pie has become my go-to crowd-pleaser, especially when I need something impressive without breaking a sweat. If you love decadent chocolate and zero oven drama, this pie is about to be your new best friend.

Why Make This Recipe

No-Bake Chocolate Cream Pie is a dessert that brings joy with every bite. It’s perfect for hot summer days or when you’re looking for something sweet without turning on the oven. This easy recipe combines simple ingredients to create a rich and creamy filling set inside a crunchy graham cracker crust. Whether you are a baking novice or a seasoned cook, this pie is sure to impress your friends and family.

How to Make No-Bake Chocolate Cream Pie

Ingredients:

  • 1 1/2 cups graham cracker crumbs
  • 5 tablespoons unsalted butter, melted
  • 1 tablespoon granulated sugar
  • 1 (14 oz) can sweetened condensed milk
  • 1 (8 oz) package cream cheese, softened
  • 1/3 cup cocoa powder
  • 1/4 teaspoon salt
  • 1/2 cup whipped topping

Directions:

  1. Start by combining the graham cracker crumbs, melted butter, and sugar in a bowl. Mix until well combined and then press this mixture firmly into a pie plate to form the crust.
  2. In another bowl, beat the cream cheese until it becomes smooth. Gradually add the sweetened condensed milk while mixing.
  3. Sift in cocoa powder and salt. Continue to mix until everything is fully combined.
  4. Gently fold in the whipped topping until it is just combined.
  5. Pour the chocolate filling into the prepared crust. Smooth the surface with a spatula.
  6. Refrigerate the pie for at least 4 hours, or overnight for the best results.
  7. Before serving, garnish as desired, and enjoy!

How to Serve No-Bake Chocolate Cream Pie


Serving No-Bake Chocolate Cream Pie is all about creating a moment of indulgence with minimal fuss. Once the pie has chilled for at least 4 hours—or ideally overnight, it’s ready to be the star of your dessert table. For clean slices, use a sharp knife dipped in hot water and wiped dry between each cut. Serve each slice on a chilled dessert plate to keep the creamy filling firm and refreshing.

Top each piece with a generous dollop of freshly whipped cream, a light dusting of cocoa powder, or delicate chocolate shavings for an elegant finish. You can also add fresh raspberries, a mint leaf, or a drizzle of chocolate sauce to dress it up for dinner parties or holiday tables.

For a casual setting, simply let guests help themselves straight from the pie dish with a serving spatula, no judgments here! Pair it with a hot espresso or a glass of cold milk, and watch the smiles appear. This dessert is rich, chilled, and pure chocolate heaven.

How to Store No-Bake Chocolate Cream Pie
chocolate cream pie

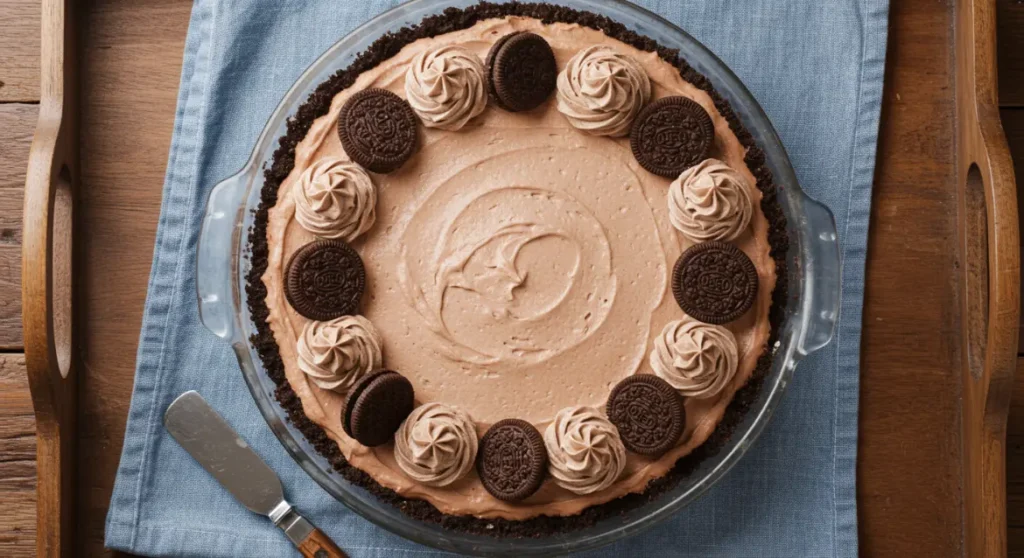
Got leftovers or making it ahead? You can totally freeze this pie. Just wrap it up tight in plastic wrap, then add a layer of foil to keep it safe from freezer smells. Pop it in the freezer for up to a month. When you’re ready to eat, let it thaw in the fridge overnight. One thing to keep in mind, if your pie already has whipped cream on top, freezing might mess with the texture a bit. So if you want it to look extra fresh and fluffy, it’s best to add the whipped cream after it thaws.

Tips to Make No-Bake Chocolate Cream Pie

  • Ensure that the cream cheese is at room temperature so it blends smoothly with the condensed milk.
  • For added flavor, try adding a splash of vanilla extract to the filling.
  • If you want a thicker crust, use a bit more graham cracker crumbs and butter.

Variation
chocolate cream pie

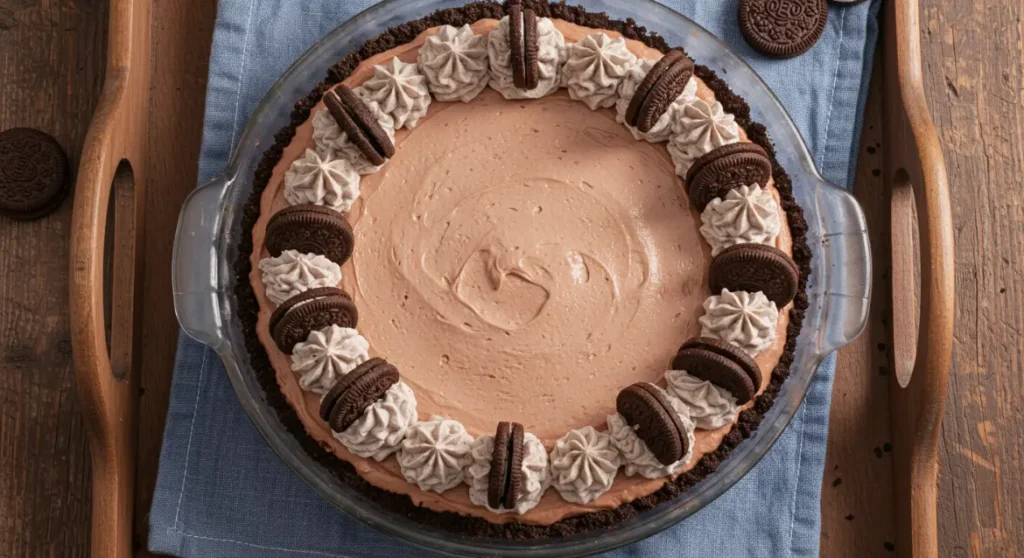
If you’re looking for a different flavor, try substituting the cocoa powder with caramel or coffee. You could also experiment with different types of cookies for the crust, like Oreo or chocolate cookies, to create a unique twist.

FAQs

1. Can I use a store-bought pie crust?
Yes, a store-bought graham cracker or chocolate pie crust will save you time and still taste great.

2. Can I freeze No-Bake Chocolate Cream Pie?
Yes, you can freeze it. Just make sure to wrap it tightly to prevent freezer burn. Thaw in the refrigerator before serving.

3. How can I make the pie gluten-free?
Use gluten-free graham cracker crumbs or a gluten-free cookie crust as a substitute for the traditional crust.

[tasty-recipe id=”4395″]

No-Bake Chocolate Cream Pie

An easy and decadent dessert made without baking, featuring a rich chocolate filling in a crunchy graham cracker crust, perfect for warm summer days.

For the Crust

  • 1 1/2 cups graham cracker crumbs
  • 5 tablespoons unsalted butter, melted
  • 1 tablespoon granulated sugar

For the Filling

  • 1 14 oz can sweetened condensed milk
  • 1 8 oz package cream cheese, softened (Ensure it’s at room temperature for smooth blending.)
  • 1/3 cup cocoa powder
  • 1/4 teaspoon salt
  • 1/2 cup whipped topping

Preparation of the Crust

  1. Combine the graham cracker crumbs, melted butter, and sugar in a bowl. Mix until well combined.
  2. Press this mixture firmly into a pie plate to form the crust.

Making the Filling

  1. In another bowl, beat the cream cheese until smooth.
  2. Gradually add the sweetened condensed milk while mixing.
  3. Sift in cocoa powder and salt. Continue mixing until fully combined.
  4. Gently fold in the whipped topping until just combined.

Assembling the Pie

  1. Pour the chocolate filling into the prepared crust. Smooth the surface with a spatula.
  2. Refrigerate the pie for at least 4 hours, or overnight for best results.

For clean slices, use a sharp knife dipped in hot water and wiped dry between each cut. Garnish with whipped cream, cocoa powder, chocolate shavings, fresh raspberries, or mint leaves before serving. If freezing leftovers, wrap tightly in plastic wrap and then in foil to prevent freezer burn.


Dessert
American
Chocolate Cream Pie, Chocolate Pie, Easy Recipe, No-Bake Dessert, Summer Treat


No-Bake Chocolate Cream Pie

An easy and decadent dessert made without baking, featuring a rich chocolate filling in a crunchy graham cracker crust, perfect for warm summer days.

For the Crust

  • 1 1/2 cups graham cracker crumbs
  • 5 tablespoons unsalted butter, melted
  • 1 tablespoon granulated sugar

For the Filling

  • 1 14 oz can sweetened condensed milk
  • 1 8 oz package cream cheese, softened (Ensure it’s at room temperature for smooth blending.)
  • 1/3 cup cocoa powder
  • 1/4 teaspoon salt
  • 1/2 cup whipped topping

Preparation of the Crust

  1. Combine the graham cracker crumbs, melted butter, and sugar in a bowl. Mix until well combined.
  2. Press this mixture firmly into a pie plate to form the crust.

Making the Filling

  1. In another bowl, beat the cream cheese until smooth.
  2. Gradually add the sweetened condensed milk while mixing.
  3. Sift in cocoa powder and salt. Continue mixing until fully combined.
  4. Gently fold in the whipped topping until just combined.

Assembling the Pie

  1. Pour the chocolate filling into the prepared crust. Smooth the surface with a spatula.
  2. Refrigerate the pie for at least 4 hours, or overnight for best results.

For clean slices, use a sharp knife dipped in hot water and wiped dry between each cut. Garnish with whipped cream, cocoa powder, chocolate shavings, fresh raspberries, or mint leaves before serving. If freezing leftovers, wrap tightly in plastic wrap and then in foil to prevent freezer burn.

Dessert
American
Chocolate Cream Pie, easy dessert, No-Bake Dessert, No-Bake Recipe, Summer Dessert

Outback Potato Soup

Outback Potato Soup

If you’re looking for a comforting dish to warm your soul, Outback Potato Soup is a delightful choice! This creamy soup captures the flavors of the beloved Outback Steakhouse recipe, making it perfect for a cozy night in. With its rich blend of bacon, potatoes, and cheese, it’s not just food; it’s a hug in a bowl. Ready in under an hour, this recipe is ideal for anyone who craves a delicious homemade soup that offers comfort and satisfaction. In this article, we’ll explore the reasons to make this recipe, how to prepare it step by step, and tips to enhance your experience with Outback Potato Soup!

Why Make This Recipe

Making Outback Potato Soup at home allows you to customize the flavors and ingredients to suit your taste. It’s an incredibly hearty option for lunches or dinners, satisfying both hungry bellies and taste buds. You can enjoy the warm, creamy texture while knowing exactly what goes into each bowl. Plus, it’s a fun dish to share with family and friends, making gatherings feel even cozier. With the added benefit of being easy to prepare, this soup is definitely worth making!

How to Make Outback Potato Soup

Ingredients:

  • Water (enough to cover the potatoes and boil)
  • 4 large russet or golden potatoes
  • 8 slices of bacon (cooked and crumbled)
  • 2 ½ cups chicken stock (you can also use chicken broth)
  • 1 cup cold water
  • ¾ cup cheddar cheese (plus more for topping optional)
  • ¾ cup heavy whipping cream
  • ½ cup butter
  • ⅓ cup all-purpose flour
  • ¼ cup green onion (diced)
  • ½ sweet yellow onion (diced optional)
  • ½ teaspoon salt
  • ½ teaspoon ground black pepper

Directions:

  1. Begin by dicing the potatoes into bite-sized pieces and boiling them until they’re tender. Once cooked, set them aside for later use.
  2. In a large pot, combine the broth, diced onions, salt, pepper, and water. Bring the mixture to a gentle simmer over medium heat and allow it to cook for about 20 minutes, ensuring the flavors meld together.
  3. In a separate saucepan, melt ½ cup of butter over medium heat. Once melted, gradually whisk in ⅓ cup of flour until a smooth paste forms. Allow the roux to cook for a couple of minutes to remove the raw flour taste.
  4. Slowly incorporate the roux into the simmering broth, whisking continuously to prevent lumps from forming. This will help thicken the soup and give it a creamy consistency.
  5. Pour in approximately ¾ cups of heavy cream, stirring gently as you do so. This will further enrich the soup and add a luxurious creaminess.
  6. Allow the soup to simmer for an additional 20 minutes, stirring occasionally to ensure it doesn’t stick to the bottom of the pot. This gives the flavors a chance to meld together beautifully.
  7. Once the soup has simmered and thickened to your liking, gently add the diced potatoes. Stir well to distribute them evenly throughout the soup.
  8. Ladle the soup into bowls and garnish each serving with a generous sprinkle of Colby-Monterey Jack cheese, crispy bacon bits, and finely chopped green onions. These toppings add both flavor and visual appeal to the dish.
  9. Serve the soup hot and enjoy the comforting flavors of this creamy potato soup with its delightful garnishes.

How to Serve Outback Potato Soup

To serve Outback Potato Soup, ladle generous portions into warm bowls. For an appetizing look, consider adding extra toppings. A sprinkle of fresh green onions adds color and flavor, while more crispy bacon bits provide an irresistible crunch. A bit of extra cheddar cheese on top melts beautifully and enhances the richness of the soup. Serve alongside crusty bread or crackers for a complete meal, and don’t forget to share it with your loved ones. Enjoying this delicious soup with family or friends can make for a lovely gathering!

How to Store Outback Potato Soup

Storing Outback Potato Soup is simple! Allow the soup to cool completely before transferring it to airtight containers. It can be kept in the refrigerator for up to 4 days. If you want to save it for a longer period, you can freeze the soup for up to 3 months. When reheating, remember to stir it well, as the flavors can settle. You might need to add a splash of water or cream if it thickens too much during storage. Enjoying this comforting soup at a later date is a great way to relive the cozy feelings it brings!

Tips to Make Outback Potato Soup

To elevate your Outback Potato Soup, consider these helpful tips. First, ensure your potatoes are diced evenly for uniform cooking. If you want a deeper flavor, try roasting the potatoes before adding them to the soup. Adding garlic or herbs like thyme or chives can further enhance the taste. For a lighter version, use half-and-half instead of heavy cream. To make it extra creamy, use an immersion blender to slightly blend some of the soup before adding back the potatoes. Lastly, personalizing the toppings with your favorite ingredients keeps it exciting every time you make it!

Variation

Add different vegetables, such as carrots or celery, to the mix for more nutrition. You could also swap out the cheddar for gouda or mozzarella for a unique twist. Consider making the soup spicier by adding jalapeño or hot sauce. These variations can give your Outback Potato Soup a personal touch tailored to your preferences!

Conclusion

In summary, Outback Potato Soup is a delicious and comforting recipe that anyone can prepare at home. Its creamy texture and rich flavors make it a favorite dish for many, perfect for satisfying your cravings or sharing with loved ones. By following the simple instructions and tips covered in this article, anyone can create warm bowls of happiness. So, why not gather the ingredients and give this delightful soup a try? You’re sure to enjoy every creamy, cheesy bite!

FAQs

1. How long can I store Outback Potato Soup in the refrigerator?
You can store it in an airtight container for up to 4 days.

2. Can I freeze Outback Potato Soup?
Yes, it can be frozen for up to 3 months. Make sure to cool it completely before freezing.

3. What can I use instead of bacon?
You can use turkey bacon or omit it entirely for a vegetarian version.

4. How can I make the soup spicier?
Add diced jalapeños or a few dashes of your favorite hot sauce to the soup during cooking.

5. What toppings work well on Outback Potato Soup?
Popular toppings include extra cheese, crumbled bacon, green onions, and sour cream.

[tasty-recipe id=”2789″]

Outback Potato Soup

A creamy and comforting soup inspired by the Outback Steakhouse recipe, featuring bacon, potatoes, and cheese.

Main Ingredients

  • 4 large russet or golden potatoes (Diced into bite-sized pieces)
  • 8 slices bacon (Cooked and crumbled)
  • 2.5 cups chicken stock (You can also use chicken broth)
  • 1 cup cold water
  • 0.75 cup cheddar cheese (Plus more for topping, optional)
  • 0.75 cup heavy whipping cream
  • 0.5 cup butter
  • 0.33 cup all-purpose flour
  • 0.25 cup green onion (Diced)
  • 0.5 medium sweet yellow onion (Diced, optional)
  • 0.5 teaspoon salt
  • 0.5 teaspoon ground black pepper

Preparation

  1. Dice the potatoes into bite-sized pieces and boil them until tender. Set aside.
  2. In a large pot, combine the broth, diced onions, salt, pepper, and water. Bring to a simmer over medium heat for about 20 minutes.

Cooking

  1. In a separate saucepan, melt ½ cup of butter over medium heat. Whisk in ⅓ cup of flour until a smooth paste forms. Cook for a couple of minutes.
  2. Slowly incorporate the roux into the simmering broth while whisking continuously to prevent lumps.
  3. Pour in ¾ cup of heavy cream, stirring gently.
  4. Allow the soup to simmer for an additional 20 minutes, stirring occasionally.
  5. Gently add the diced potatoes and stir well.

Serving

  1. Ladle soup into bowls and garnish with cheddar cheese, bacon bits, and green onions.

To elevate the soup, try adding garlic or herbs like thyme. For a lighter version, use half-and-half instead of heavy cream.

Appetizer, Soup
American
Comfort Food, Creamy Soup, Easy Soup, Outback Recipe, Potato Soup

Bang Bang Salmon Bites

salmon bites

Bang Bang Salmon Bites are a delicious and easy-to-make appetizer that’s perfect for gatherings or simply enjoying at home. These bite-sized morsels of salmon are seasoned with spices and cooked to golden perfection, then tossed in a creamy, spicy sauce that brings a punch of flavor with every taste. If you’re looking for a quick recipe that combines nutrition and bold taste, these salmon bites are an excellent choice. They offer a fun twist on traditional seafood dishes and can be prepared using various cooking methods. Whether you decide to pan-sear, bake, or air-fry, you will end up with a dish that not only looks great but also delivers satisfying flavors.

Why Make This Recipe

Making Bang Bang Salmon Bites is a must for anyone who loves seafood or wants to try something new. It’s a great way to use fresh salmon, and the quick preparation and cooking time makes it ideal for busy individuals and families. This recipe is also easily adaptable for various dietary needs and can be made to fit your taste preferences.

How to Make Bang Bang Salmon Bites

Ingredients

  • 1 pound salmon fillets, skin removed
  • 1 tablespoon olive oil
  • ½ teaspoon garlic powder
  • ½ teaspoon onion powder
  • ½ teaspoon smoked paprika
  • ¼ teaspoon cayenne pepper (optional)
  • Salt and black pepper to taste
  • ¼ cup mayonnaise
  • 2 tablespoons Thai sweet chili sauce
  • 1 teaspoon sriracha
  • 1 teaspoon honey
  • ½ teaspoon lime juice

Directions

  1. Prep Salmon
    Cut salmon into 1-inch cubes and toss with oil and seasonings. Learn more
  2. Pan-sear Option
    Cook salmon in a hot skillet for 2-3 minutes per side until golden. Learn more
  3. Bake Option
    Bake at 400°F on a lined sheet for 10-12 minutes. Learn more
  4. Air-fry Option
    Air fry at 375°F for 8-10 minutes, flipping halfway. Learn more
  5. Make Sauce
    Whisk together mayo, chili sauce, sriracha, honey, and lime juice. Learn more
  6. Finish
    Toss or drizzle cooked salmon with sauce and garnish. Learn more

How to Serve Bang Bang Salmon Bites

These salmon bites can be served in various ways. For the best presentation, arrange the bites on a plate and drizzle some of the bang bang sauce over them. You can also serve them with toothpicks for an easy grab-and-go appetizer option. Pair them with a fresh side salad or crunchy veggies to create a complete meal. They make a great starter for dinner parties or simply a satisfying snack while watching your favorite show. Don’t forget to keep some extra sauce on the side for dipping!

How to Store Bang Bang Salmon Bites

To store leftover Bang Bang Salmon Bites, let them cool down to room temperature. Place them in an airtight container and keep them in the refrigerator. They will stay fresh for up to 3 days. When you’re ready to eat them again, you can reheat them in the oven at a low temperature or air fry them briefly to retain their texture. Avoid microwaving them as that can make the salmon rubbery. For longer storage, consider freezing the cooked bites, but be sure to thaw them in the refrigerator before reheating.

Tips to Make Bang Bang Salmon Bites

  • Choose Fresh Salmon: For the best flavor and texture, use fresh salmon fillets.
  • Adjust Spices: Feel free to adjust the spices according to your heat preference. Skip the cayenne for a milder option.
  • Cooking Method: Experiment with different cooking methods. Air frying provides a crispy texture without much oil.
  • Garnish Creatively: Use sliced green onions or sesame seeds to add an appealing garnish to your final dish.
  • Make Ahead: You can prep the salmon and sauce ahead of time. Just combine and cook when you’re ready.

Variation

You can modify the sauce by adding more heat with extra sriracha or incorporating different herbs like cilantro for a fresh twist. If you prefer a healthier option, use Greek yogurt instead of mayonnaise in the sauce.

Conclusion

Bang Bang Salmon Bites are a fun and flavor-packed appetizer that will impress your guests or satisfy your cravings at home. With their quick prep and cooking times, they’re perfect for busy days or last-minute gatherings. Whether you choose to bake, air fry, or pan-sear, this recipe offers something for every cook. So, gather your ingredients and start making these delicious bites today! You’ll love the combination of crispy salmon and spicy sauce.

FAQs

1. Can I use frozen salmon for this recipe?
Yes, you can use frozen salmon, but make sure to thaw it completely before preparing.

2. How spicy are Bang Bang Salmon Bites?
The level of spiciness can vary based on your personalized seasoning and sauce levels. Adjust sriracha and cayenne to your taste.

3. Can I make the sauce in advance?
Absolutely! You can prepare the bang bang sauce in advance and store it in the fridge for up to a week.

4. Are Bang Bang Salmon Bites healthy?
Yes, salmon is packed with healthy omega-3 fatty acids, and with the right ingredients, this recipe can be both delicious and nutritious!

5. What can I serve with Bang Bang Salmon Bites?
These bites pair well with a fresh salad, steamed vegetables, or rice for a complete meal!

[tasty-recipe id=”2781″]

Bang Bang Salmon Bites

A delicious and easy-to-make appetizer of bite-sized salmon, seasoned and tossed in a creamy, spicy sauce, perfect for gatherings or enjoying at home.

For the Salmon

  • 1 pound salmon fillets, skin removed (Use fresh salmon for best flavor.)
  • 1 tablespoon olive oil
  • ½ teaspoon garlic powder
  • ½ teaspoon onion powder
  • ½ teaspoon smoked paprika
  • ¼ teaspoon cayenne pepper (optional) (Adjust to heat preference.)
  • Salt and black pepper to taste

For the Sauce

  • ¼ cup mayonnaise (Can substitute with Greek yogurt for a healthier option.)
  • 2 tablespoons Thai sweet chili sauce
  • 1 teaspoon sriracha (Add more for extra heat.)
  • 1 teaspoon honey
  • ½ teaspoon lime juice

Preparation

  1. Cut salmon into 1-inch cubes and toss with olive oil and seasonings.

Cooking Options

  1. For pan-searing: Cook salmon in a hot skillet for 2-3 minutes per side until golden.
  2. For baking: Bake at 400°F on a lined sheet for 10-12 minutes.
  3. For air-frying: Air fry at 375°F for 8-10 minutes, flipping halfway.

Making the Sauce

  1. Whisk together mayonnaise, Thai sweet chili sauce, sriracha, honey, and lime juice.

Finishing Touch

  1. Toss or drizzle cooked salmon with sauce and garnish as desired.

Serve with toothpicks for an easy appetizer option. Pair with a fresh salad or crunchy veggies. Store leftovers in an airtight container in the refrigerator for up to 3 days.

Appetizer, Snack
American, Seafood
Bang Bang Salmon Bites, Easy Seafood Recipe, Healthy Snack, Party Food, Salmon Appetizer

Fried green tomatoes

Fried green tomatoes

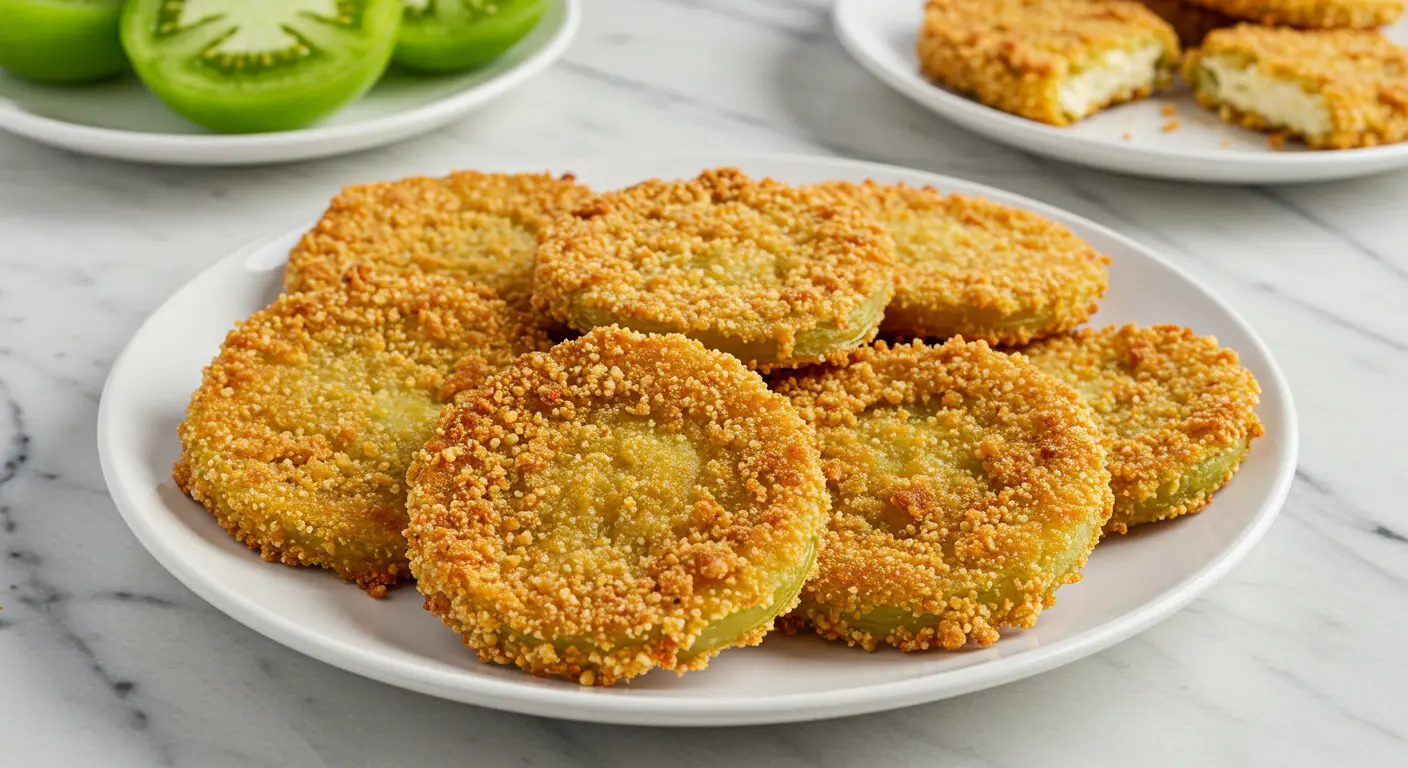
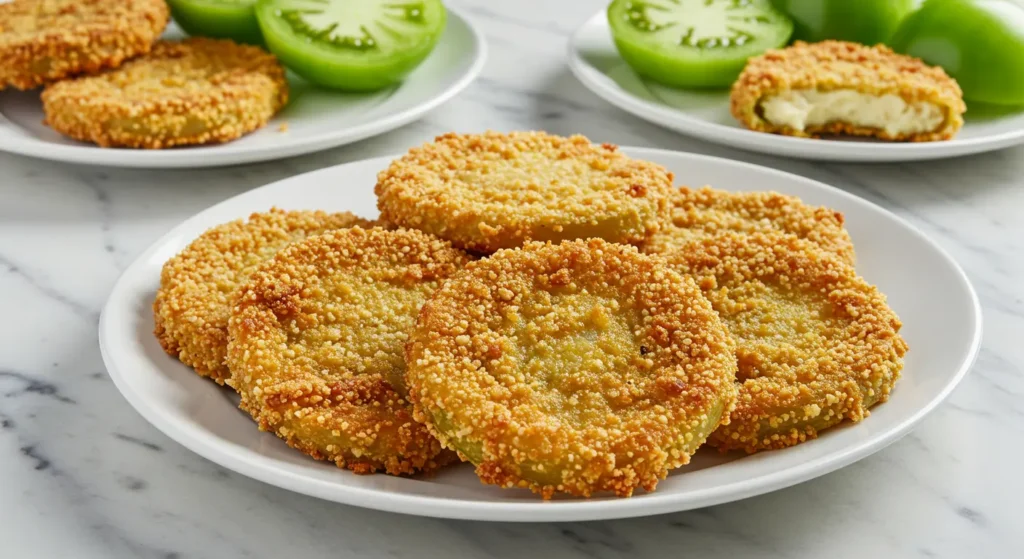
Every summer, I get excited to whip up this crispy fried green tomatoes recipe, it’s hands-down one of my Southern favorites. These tangy green slices are coated in a flavorful mix of cornmeal and panko breadcrumbs, then fried to golden perfection. I’ll walk you through how to make fried green tomatoes that are perfect tucked into a BLT or served on their own with a simple dipping sauce.

Years ago, I was living in Brooklyn with a few raised beds and a dream of ripe, juicy tomatoes. But one chilly October, my tomato plants had other plans. As the days shortened, I found myself staring at a harvest of firm, unripe green tomatoes that refused to ripen. I could’ve composted them, but something reminded me of home.

I grew up in North Carolina, where fried green tomatoes were a familiar sight on the table during spring and fall. Back then, I didn’t pay them much attention. But now, far from home and armed with my cast iron skillet, I dredged those green beauties in seasoned cornmeal and fried them until they were golden and crisp. One bite took me straight back.

That moment turned what felt like kitchen improvisation into one of my all-time favorite dishes—especially with a dollop of rémoulade or tucked between slices of white bread with pimento cheese. Since then, fried green tomatoes have reclaimed their spot at the top of my warm-weather recipe list, especially now that I’ve refined my method for getting them extra crispy, just like Jasmine Smith from our Alabama test kitchen does.

Why You’ll Love This Fried Green Tomatoes Recipe

  • Crispy perfection: These are crunchy on the outside and tender inside, even after they sit for a while.

  • Southern soul: A taste of Southern tradition no matter where you live.

  • Waste not: It’s the best use of under-ripe tomatoes from your garden or local market.

  • Versatile: Enjoy as an appetizer, side dish, sandwich filler, or brunch star.

  • Surprisingly simple: You don’t need fancy tools, just a skillet, cornmeal, and a few pantry staples.

How to Make Fried Green Tomatoes

Fried green tomatoes

Making fried green tomatoes is simple and satisfying. Start with firm, unripe green tomatoes—these hold their shape best during frying. Slice them about ¼-inch thick. Lightly salt the slices and let them sit for 10 minutes to draw out excess moisture, then pat dry.

Set up a breading station with three bowls: one with flour (seasoned with salt, pepper, and a little paprika), one with beaten eggs or buttermilk, and one with a mix of cornmeal and panko breadcrumbs. Dip each slice in flour, then egg, then coat thoroughly in the cornmeal-panko mixture.

Heat oil in a skillet (about ½ inch deep) over medium heat. Once hot (about 350°F or 175°C), carefully place the tomato slices in the pan without crowding. Fry 2–3 minutes per side until golden brown and crispy. Drain on a paper towel-lined plate. Serve warm with a dipping sauce or stacked in a BLT.

How to Store Fried Green Tomatoes

Fried green tomatoes are best enjoyed fresh, but if you have leftovers, you can store them properly to maintain some of their crispness. First, allow the fried slices to cool completely at room temperature. Then, place them in a single layer on a plate or baking sheet and refrigerate uncovered for up to 24 hours—this helps prevent sogginess.

For longer storage, layer the cooled tomatoes between parchment paper in an airtight container and refrigerate for up to 3 days. To reheat, skip the microwave (which makes them soggy) and instead warm them in an air fryer at 375°F for 4–5 minutes or in a 400°F oven for 10–12 minutes until crispy again. Avoid stacking them while reheating to keep the crust intact.

Tips for Fried Green Tomatoes That Are Perfectly Crispy and Delicious

  • Choose the right tomato: Firm, pale green tomatoes work best. Avoid soft or starting-to-ripen ones, they’ll be too juicy and fall apart.

  • Salt and drain: Salting the slices beforehand pulls out excess water, preventing sogginess.

  • Double dredge for extra crunch: For an ultra-thick crust, dip twice in buttermilk and breading before frying.

  • Use cornmeal, not just flour: Cornmeal gives them that signature crunch and golden color.

  • Keep the oil hot: Don’t let the oil cool down, wait for it to reheat between batches.

  • Drain on a rack, not paper towels: If you’re frying in batches, a wire rack helps maintain crispness better than stacking on paper towels.

  • Eat fresh, but don’t worry: These hold up surprisingly well even after an hour or two.

FAQS

What kind of tomatoes should I use for fried green tomatoes?

Use firm, unripe green tomatoes, the kind that haven’t begun to blush red. They should feel solid when you press them and have a bright green color. Avoid soft or overripe tomatoes; they’ll fall apart during frying.

Are fried green tomatoes just unripe red tomatoes?

Yes, most of the time. Fried green tomatoes are typically made from standard red tomato varieties that haven’t ripened yet. They’re picked early and have a tangy, slightly acidic flavor that holds up beautifully to frying.

Can I make fried green tomatoes in an air fryer?

Absolutely! You can air fry them at 400°F (200°C) for 10–12 minutes, flipping halfway. Spray both sides with oil for a crispy finish. While they won’t be as deeply golden as pan-fried versions, the crunch is still satisfying and they’re lighter too.

How do I keep fried green tomatoes crispy after cooking?

To keep them crispy:

  • Drain on a wire rack instead of paper towels.

  • Don’t stack them while hot.

  • Reheat leftovers in the oven or air fryer instead of the microwave.

What sauces go well with fried green tomatoes?

Popular dipping sauces include:

  • Rémoulade (a zesty mayo-based Cajun sauce)

  • Ranch dressing

  • Spicy aioli

  • Comeback sauce

[tasty-recipe id=”4507″]

Fried Green Tomatoes

A Southern favorite, these crispy fried green tomatoes are coated in a flavorful mix of cornmeal and panko breadcrumbs, then fried to golden perfection.

For Breading

  • 1 cup flour (Seasoned with salt, pepper, and paprika.)
  • 2 large eggs or buttermilk (For coating the tomatoes.)
  • 1 cup cornmeal (For the crispy texture.)
  • 1/2 cup panko breadcrumbs (To add extra crunch.)

For the Tomatoes

  • 4 medium green tomatoes (Firm and unripe for best results.)
  • vegetable oil for frying (About ½ inch deep in skillet.)

Preparation

  1. Slice the green tomatoes into ¼-inch thick slices.
  2. Lightly salt the slices and let them sit for 10 minutes to draw out excess moisture, then pat dry.

Breading Station

  1. Set up three bowls: one with flour, one with beaten eggs or buttermilk, and one with a mixture of cornmeal and panko breadcrumbs.
  2. Dip each tomato slice in flour, then egg, and finally coat thoroughly in the cornmeal-panko mixture.

Cooking

  1. Heat oil in a skillet over medium heat until it reaches 350°F (175°C).
  2. Carefully add the tomato slices to the pan without crowding and fry for 2–3 minutes per side until golden brown and crispy.
  3. Drain the fried tomatoes on a paper towel-lined plate and serve warm with a dipping sauce or in a BLT.

For optimal crispness, drain on a wire rack instead of paper towels. Refrigerate leftovers in a single layer and reheat in an air fryer to maintain crunch.

Appetizer, Brunch, Side Dish
American, Southern
BLT Filler, Crispy Tomatoes, Fried Green Tomatoes, Southern Comfort Food, Vegetable Appetizer

Pineapple Upside Sugar Cookies

Pineapple Upside Sugar Cookies

so you know how pineapple upside-down cake is basically the ultimate comfort dessert? Well, what if I told you we could turn all those amazing flavors into cookies that you can just grab and munch on? Yeah, I’m talking about Pineapple Upside Sugar Cookies that taste exactly like the cake but way easier to eat.

Why Make Pineapple Upside Sugar Cookies

I’ve been making cookies for forever, and these little beauties are something special. You get that buttery sugar cookie base (because let’s be real, sugar cookies are already perfect), but then we top them with tiny caramelized pineapple rings and those cute little red cherries. It’s like having mini pineapple upside-down cakes that you can actually hold in your hand without making a mess.

Pineapple Upside Down Sugar Cookies bring a unique twist to the classic cookie experience. They capture the delightful flavors of the traditional pineapple upside-down cake in a fun, bite-sized treat. With the sweet, buttery flavor complemented by juicy pineapple and a cherry on top, these cookies are sure to impress at any gathering. Plus, they are easy to make and perfect for sharing with friends and family!

How to Make Pineapple Upside Down Sugar Cookies

Ingredients:

  • 1 cup unsalted butter, softened
  • 1 cup granulated sugar
  • 1 egg
  • 1 teaspoon vanilla extract
  • 2 1/2 cups all-purpose flour
  • 1/2 teaspoon baking powder
  • 1/4 teaspoon salt
  • 1/2 cup crushed pineapple, drained
  • Maraschino cherries, halved

Directions:

  1. Prepare Your Ingredients
    Begin by preheating your oven to 350°F (175°C). Line your baking sheets with parchment paper for easy cleanup. Ensure your butter is properly softened – it should yield to gentle pressure but still hold its shape. Drain your crushed pineapple thoroughly, pressing out excess moisture with a paper towel to prevent soggy cookies.
  2. Create the Cookie Base
    In a large bowl, cream together the softened butter and granulated sugar until light and fluffy – this usually takes about 3-4 minutes with an electric mixer. The mixture should be pale yellow and noticeably increased in volume. Add the egg and vanilla extract, beating until fully incorporated. The batter should look smooth and glossy at this stage.
  3. Add Dry Ingredients
    In a separate bowl, whisk together the all-purpose flour, baking powder, and salt until evenly combined. Gradually add this dry mixture to your wet ingredients, mixing on low speed just until incorporated. Overmixing will develop gluten and make your cookies tough, so stop as soon as no dry streaks remain. The dough should be soft but not sticky.
  4. Incorporate the Pineapple
    Gently fold in the well-drained crushed pineapple using a spatula. You want to distribute it evenly throughout the dough without overmixing. The dough will become slightly more moist but should still hold its shape. If it seems too wet, add an additional tablespoon of flour.
  5. Form and Bake the Cookies
    Using a cookie scoop or tablespoon, drop rounded portions of dough onto your prepared baking sheets, spacing them about 2 inches apart. Press a halved maraschino cherry into the center of each cookie, gently pushing it down. Bake for 12-15 minutes, until the edges are lightly golden but the centers still look slightly soft. The cookies will continue to set as they cool.

How to Serve Pineapple Upside Down Sugar Cookies

Pineapple Upside Sugar Cookies

Serve these cookies warm or at room temperature. They make a great dessert or a sweet snack alongside a cup of coffee or tea. You can also arrange them on a beautiful plate for a lovely presentation at parties or gatherings.

How to Store Pineapple Upside Down Sugar Cookies

Store your cookies in an airtight container at room temperature for up to one week. If you want to keep them fresh for longer, you can freeze the cookies in a resealable bag or container for up to three months. Just thaw at room temperature when you are ready to enjoy them again!

Tips to Make Pineapple Upside Down Sugar Cookies

  • Make sure your butter is softened properly; this helps create a light and fluffy texture.
  • Don’t overmix the dough after adding the flour to keep the cookies tender.
  • For added flavor, consider mixing in some crushed walnuts or pecans.
  • Adjust the amount of crushed pineapple based on your preference for fruitiness.

Variation

For a fun twist, try adding coconut flakes to the cookie dough to give it a tropical flair. You can also substitute almond extract for the vanilla for a different flavor profile.

FAQs

  1. Can I use fresh pineapple instead of crushed pineapple?
    Yes, you can use fresh pineapple. Just ensure to chop it finely and drain it well to reduce moisture.
  2. How do I know when the cookies are done baking?
    The cookies are done when the edges are lightly golden, and the centers look slightly soft. They will continue to firm up as they cool.
  3. Can I make the dough ahead of time?
    Yes, you can make the dough ahead of time and refrigerate it for up to 2 days. Just let it sit at room temperature for a bit before baking.

[tasty-recipe id=”3947″]

Pineapple Upside Down Sugar Cookies

These delightful cookies capture the flavors of traditional pineapple upside-down cake in a fun, bite-sized treat, topped with caramelized pineapple and cherries.

Cookie Base Ingredients

  • 1 cup unsalted butter, softened (Ensure the butter is properly softened, yielding to gentle pressure.)
  • 1 cup granulated sugar
  • 1 egg
  • 1 teaspoon vanilla extract
  • 2 1/2 cups all-purpose flour
  • 1/2 teaspoon baking powder
  • 1/4 teaspoon salt

Topping

  • 1/2 cup crushed pineapple, drained (Ensure the pineapple is well-drained to prevent soggy cookies.)
  • as needed Maraschino cherries, halved (Use as a topping for each cookie.)

Preparation

  1. Preheat your oven to 350°F (175°C) and line your baking sheets with parchment paper.
  2. Soften the butter so it yields to gentle pressure but still holds its shape.
  3. Drain the crushed pineapple thoroughly, pressing out excess moisture with a paper towel.

Create the Cookie Base

  1. In a large bowl, cream together the softened butter and granulated sugar until light and fluffy, about 3-4 minutes with an electric mixer.
  2. Add the egg and vanilla extract, beating until fully incorporated.

Add Dry Ingredients

  1. In a separate bowl, whisk together the all-purpose flour, baking powder, and salt until evenly combined.
  2. Gradually add the dry mixture to the wet ingredients, mixing on low speed just until incorporated.
  3. Stop mixing as soon as no dry streaks remain to prevent tough cookies.

Incorporate the Pineapple

  1. Gently fold in the well-drained crushed pineapple using a spatula until evenly distributed.

Form and Bake the Cookies

  1. Using a cookie scoop or tablespoon, drop rounded portions of dough onto prepared baking sheets, spacing them about 2 inches apart.
  2. Press a halved maraschino cherry into the center of each cookie, gently pushing it down.
  3. Bake for 12-15 minutes until the edges are lightly golden but the centers still look slightly soft.

Store cookies in an airtight container at room temperature for up to one week. If freezing, use a resealable bag for up to three months.

Dessert, Snack
American
Baking Cookies, Comfort Dessert, Flavored Sugar Cookies, Pineapple Cookies, Pineapple Upside Down Cookies

Air Fryer Grilled Cheese Hot Dogs

grilled cheese hot dogs

Get ready to experience the ultimate comfort food mashup that’s taking kitchens by storm, grilled cheese hot dogs that combine everything you love about two classic favorites into one irresistible bite. Imagine biting into golden, buttery bread that gives way to perfectly melted cheese and a juicy hot dog at the center, creating a harmony of textures and flavors that’s pure nostalgic bliss.

This isn’t just another hot dog recipe or a simple grilled cheese variation, it’s a game-changing fusion that elevates both dishes to new heights. The concept is beautifully simple: wrap a hot dog in cheese and bread, then cook it until the outside is perfectly crispy and the inside becomes a molten, savory paradise. It’s comfort food innovation at its finest, delivering that satisfying crunch followed by the creamy, meaty goodness that makes every bite memorable.

Whether you’re feeding hungry kids after school, looking for a quick and satisfying lunch, or wanting to add some playful creativity to dinner time, grilled cheese hot dogs offer the perfect solution. They’re easy enough for beginners yet delicious enough to impress, proving that sometimes the most brilliant culinary ideas come from combining the foods we already love most.

Why Make This Recipe

Air Fryer Grilled Cheese Hot Dogs are a fun twist on two classic favorites: grilled cheese sandwiches and hot dogs. Combining both into one delicious snack makes for a comforting meal that’s perfect for lunch, dinner, or a late-night craving. They are quick to prepare, packed with cheesy goodness, and sure to satisfy your taste buds. Plus, making them in the air fryer gives you the crispiness without all the extra oil.

How to Make Air Fryer Grilled Cheese Hot Dogs

Ingredients:

  • 4 hot dog buns
  • 4 hot dogs
  • 8 slices of cheddar cheese (or your preferred cheese)
  • 2 tablespoons butter (softened)
  • Optional: ketchup, mustard, relish, or any desired toppings

Directions:

  1. Butter the outside of each hot dog bun generously.
  2. Place one cheese slice inside each bun.
  3. Add a hot dog on top of the cheese slice.
  4. Place a second cheese slice over the hot dog to create a cheesy layer.
  5. If needed, secure the buns closed with toothpicks.
  6. Preheat the air fryer to 350°F (175°C).
  7. Cook the hot dogs in the air fryer for about 4-5 minutes, or until they turn golden brown.
  8. Once cooked, let them rest for 1 minute before serving.
  9. Serve with your favorite condiments like ketchup, mustard, or relish.

How to Serve Air Fryer Grilled Cheese Hot Dogs

You can serve Air Fryer Grilled Cheese Hot Dogs as a fun meal or snack at any time of the day. Pair them with chips, fries, or a fresh salad for a complete meal. They are also a great addition to parties or game days. Make sure to provide a selection of condiments so everyone can customize their hot dog to their taste.

How to Store Air Fryer Grilled Cheese Hot Dogs

grilled cheese hot dogs

If you have any leftovers, let them cool completely before storing. Place the grilled cheese hot dogs in an airtight container and keep them in the refrigerator for up to 3 days. To reheat, you can use the air fryer again to restore their crispiness.

Tips to Make Air Fryer Grilled Cheese Hot Dogs

  • Use your favorite cheese. While cheddar works great, you can experiment with mozzarella, pepper jack, or any cheese that melts well.
  • Don’t overstuff the buns. Keep the fillings balanced to ensure even cooking.
  • Try different toppings! Adding jalapeños, onions, or even sautéed mushrooms can elevate the flavor.

Variation

You can switch up this recipe by using sausages instead of hot dogs. Additionally, you can use different types of bread like slices of sourdough or even pretzel buns for a unique taste.

FAQs

Can I make these ahead of time?
Yes, you can prepare the hot dogs and buns ahead of time and assemble them. Then you can cook them in the air fryer just before serving.

What else can I add to my hot dogs?
Feel free to add ingredients like diced onions, pickles, or spicy sauces for extra flavor. The options are endless!

Can I freeze them?
It’s best to avoid freezing these hot dogs once cooked, as they may lose their texture. However, you can freeze the assembled un-cooked hot dogs and air fry them directly from frozen. Just increase the cooking time by a couple of minutes.

[tasty-recipe id=”4385″]

Air Fryer Grilled Cheese Hot Dogs

Experience the ultimate comfort food mashup with Air Fryer Grilled Cheese Hot Dogs, combining melted cheese and juicy hot dogs inside crispy buns for an irresistible treat.

Main Ingredients

  • 4 pieces hot dog buns
  • 4 pieces hot dogs
  • 8 slices cheddar cheese (or your preferred cheese) (You can use mozzarella, pepper jack, or any cheese that melts well.)
  • 2 tablespoons butter (softened) (Generously butter the outside of each bun.)

Optional Toppings

  • ketchup (For serving.)
  • mustard (For serving.)
  • relish (For serving.)

Preparation

  1. Butter the outside of each hot dog bun generously.
  2. Place one cheese slice inside each bun.
  3. Add a hot dog on top of the cheese slice.
  4. Place a second cheese slice over the hot dog to create a cheesy layer.
  5. If needed, secure the buns closed with toothpicks.

Cooking

  1. Preheat the air fryer to 350°F (175°C).
  2. Cook the hot dogs in the air fryer for about 4-5 minutes, or until they turn golden brown.
  3. Once cooked, let them rest for 1 minute before serving.

Serve with your favorite condiments and pair them with chips, fries, or a fresh salad. They are perfect for parties or game days. You can prepare the hot dogs and buns ahead of time and assemble them before cooking.

Dinner, lunch, Snack
American
Air Fryer Recipes, Comfort Food, Easy Snack, Grilled Cheese Hot Dogs, Hot Dog Recipe

Oatmeal Raisin Cookies

oatmeal raisin cookies

I still remember the smell of fresh oatmeal raisin cookies filling the kitchen when my grandmother baked them on weekends. The warm scent of cinnamon and sweet raisins made the whole house feel cozy, and she would let us sneak a soft, warm cookie before they even cooled. Oatmeal raisin cookies are loved for their chewy texture and comforting flavor, making them a perfect snack or a cozy treat with a cup of tea. They are easy to prepare and bring a homemade touch to any day.

Why Make This Recipe

Oatmeal raisin cookies are a classic treat loved by many. They have a perfect balance of chewy oats and sweet raisins, making them a comfort food that brings back happy memories. Whether you’re baking for a family gathering, a school event, or just for yourself, these cookies are a delightful choice. They are simple to make and can fill your kitchen with a wonderful aroma that will entice anyone nearby.

How to Make Oatmeal Raisin Cookies

Ingredients:

  • 2 cups all-purpose flour
  • 1 teaspoon baking powder
  • 1 teaspoon salt
  • 3/4 teaspoon cinnamon
  • 1/4 teaspoon nutmeg
  • 1 1/2 cups (3 sticks) butter, softened
  • 1 cup granulated sugar
  • 1 cup brown sugar, packed
  • 2 eggs
  • 1 teaspoon vanilla extract
  • 3 cups old-fashioned rolled oats
  • 1 1/2 cups raisins

Directions:

  1. In a medium bowl, whisk together the flour, baking powder, salt, cinnamon, and nutmeg.
  2. In a large bowl, cream the softened butter and both sugars together until they are light and fluffy, about 3-4 minutes.
  3. Add the eggs one at a time, followed by the vanilla extract, mixing well after each addition.
  4. Gradually incorporate the dry ingredients into the wet mixture on low speed until everything is just combined.
  5. Use a spatula to fold in the oats and raisins until they are evenly distributed throughout the dough.
  6. Chill the dough in the refrigerator for at least 1 hour.
  7. Preheat your oven to 350°F (175°C) and line baking sheets with parchment paper.
  8. Scoop tablespoons of dough onto the prepared sheets, making sure to space them about 2 inches apart.
  9. Bake in the preheated oven for 12-14 minutes until the edges are golden, but the centers still look slightly underdone.
  10. Allow the cookies to cool on the baking sheets for 5 minutes before transferring them to wire racks to cool completely.

How to Serve Oatmeal Raisin Cookies

Oatmeal raisin cookies are best enjoyed fresh from the oven. Pair them with a glass of milk, a cup of coffee, or some herbal tea for a comforting snack. They also make a great addition to lunchboxes or as a sweet treat after dinner.

How to Store Oatmeal Raisin Cookies

To keep your cookies fresh, store them in an airtight container at room temperature. They can last for about a week. You can also freeze the cookies for longer storage. Just place them in a freezer-safe container or bag, and they can last for up to three months.

Tips to Make Oatmeal Raisin Cookies

  • Make sure your butter is softened, as this helps to create a light and fluffy texture.
  • Chilling the dough is important; it helps the cookies hold their shape while baking.
  • If you prefer a chewier cookie, slightly underbake them. They will continue to cook on the baking sheet after being removed from the oven.

Variation

For a twist on the classic recipe, consider adding chocolate chips or nuts. You can also substitute dried cranberries or cherries for the raisins for a fruity variation.

FAQs

Q: Can I use quick oats instead of rolled oats?
A: Yes, you can use quick oats, but keep in mind that the texture may be slightly different. Rolled oats give more chewiness.

Q: Why are my cookies spreading too much?
A: If your cookies spread too much, it may be due to the butter being too warm or not chilling the dough long enough. Ensure the dough is firm when you scoop it.

Q: Can I make the dough ahead of time?
A: Absolutely! You can prepare the dough, chill it, and store it in the refrigerator for a couple of days before baking. You can also freeze it for later use.

[tasty-recipe id=”4391″]

Oatmeal Raisin Cookies

Delightfully chewy oatmeal raisin cookies are a classic treat that fill your kitchen with a wonderful aroma. Perfect for any occasion, they are easy to make and truly comforting.

Dry Ingredients

  • 2 cups all-purpose flour
  • 1 teaspoon baking powder
  • 1 teaspoon salt
  • 3/4 teaspoon cinnamon
  • 1/4 teaspoon nutmeg

Wet Ingredients

  • 1 1/2 cups (3 sticks) butter, softened (Make sure butter is softened for a light texture.)
  • 1 cup granulated sugar
  • 1 cup brown sugar, packed
  • 2 large eggs
  • 1 teaspoon vanilla extract

Other Ingredients

  • 3 cups old-fashioned rolled oats (Rolled oats give the best chewiness.)
  • 1 1/2 cups raisins (Consider substituting with dried cranberries for variation.)

Preparation

  1. In a medium bowl, whisk together the flour, baking powder, salt, cinnamon, and nutmeg.
  2. In a large bowl, cream the softened butter and both sugars together until they are light and fluffy, about 3-4 minutes.
  3. Add the eggs one at a time, followed by the vanilla extract, mixing well after each addition.
  4. Gradually incorporate the dry ingredients into the wet mixture on low speed until everything is just combined.
  5. Use a spatula to fold in the oats and raisins until they are evenly distributed throughout the dough.
  6. Chill the dough in the refrigerator for at least 1 hour.

Baking

  1. Preheat your oven to 350°F (175°C) and line baking sheets with parchment paper.
  2. Scoop tablespoons of dough onto the prepared sheets, making sure to space them about 2 inches apart.
  3. Bake in the preheated oven for 12-14 minutes until the edges are golden, but the centers still look slightly underdone.
  4. Allow the cookies to cool on the baking sheets for 5 minutes before transferring them to wire racks to cool completely.

Store cookies in an airtight container at room temperature for about a week. Freezing is an option to last up to three months.

Dessert, Snack
American
Baking, Comfort Food, Cookies, Dessert Recipes, Oatmeal Raisin Cookies


Oatmeal Raisin Cookies

Delightfully chewy oatmeal raisin cookies are a classic treat that fill your kitchen with a wonderful aroma. Perfect for any occasion, they are easy to make and truly comforting.

Dry Ingredients

  • 2 cups all-purpose flour
  • 1 teaspoon baking powder
  • 1 teaspoon salt
  • 3/4 teaspoon cinnamon
  • 1/4 teaspoon nutmeg

Wet Ingredients

  • 1 1/2 cups (3 sticks) butter, softened (Make sure butter is softened for a light texture.)
  • 1 cup granulated sugar
  • 1 cup brown sugar, packed
  • 2 large eggs
  • 1 teaspoon vanilla extract

Other Ingredients

  • 3 cups old-fashioned rolled oats (Rolled oats give the best chewiness.)
  • 1 1/2 cups raisins (Consider substituting with dried cranberries for variation.)

Preparation

  1. In a medium bowl, whisk together the flour, baking powder, salt, cinnamon, and nutmeg.
  2. In a large bowl, cream the softened butter and both sugars together until they are light and fluffy, about 3-4 minutes.
  3. Add the eggs one at a time, followed by the vanilla extract, mixing well after each addition.
  4. Gradually incorporate the dry ingredients into the wet mixture on low speed until everything is just combined.
  5. Use a spatula to fold in the oats and raisins until they are evenly distributed throughout the dough.
  6. Chill the dough in the refrigerator for at least 1 hour.

Baking

  1. Preheat your oven to 350°F (175°C) and line baking sheets with parchment paper.
  2. Scoop tablespoons of dough onto the prepared sheets, making sure to space them about 2 inches apart.
  3. Bake in the preheated oven for 12-14 minutes until the edges are golden, but the centers still look slightly underdone.
  4. Allow the cookies to cool on the baking sheets for 5 minutes before transferring them to wire racks to cool completely.

Store cookies in an airtight container at room temperature for about a week. Freezing is an option to last up to three months.

Dessert, Snack
American
Baking, Cookies, Dessert, Oatmeal Raisin Cookies, Snack

Creamy Smothered Chicken and Rice

smothered chicken

Creamy Smothered Chicken and Rice is a comforting dish that elevates a simple weeknight dinner into something truly special. This recipe combines tender, juicy chicken breasts smothered in a rich, cheesy sauce, served over fluffy rice. It’s not just filling; it captures the essence of home-cooked meals that evoke warmth and nostalgia. Perfect for family gatherings or winding down after a long day, this creamy dish can please even picky eaters. In less than an hour, you can create an unforgettable meal that will leave everyone asking for seconds. Why not bring some comfort to your table with this delightful recipe?

Why Make This Recipe

This recipe for Creamy Smothered Chicken and Rice is a perfect choice for those busy weeknights when you crave something quick yet satisfying. It’s a one-pan dish that combines main ingredients that most people have on hand. The creamy sauce adds a burst of flavor and richness, making even the simplest rice and chicken really shine. Moreover, it’s a fantastic way to use chicken breasts and rice, which are staples in many kitchens. Easy to prepare and full of delicious comfort, this recipe is simply a must-try.

How to Make Creamy Smothered Chicken and Rice

Ingredients:

  • 4 boneless (skinless chicken breasts)
  • 1 teaspoon garlic powder
  • 1 teaspoon onion powder
  • 1 teaspoon smoked paprika
  • Salt and black pepper (to taste)
  • 2 tablespoons olive oil
  • 1 cup long-grain white rice
  • 2 cups chicken broth
  • ½ teaspoon salt
  • For the Creamy Sauce:
    • 2 tablespoons unsalted butter
    • 2 tablespoons all-purpose flour
    • 1 ½ cups whole milk
    • ½ cup chicken broth
    • ½ teaspoon garlic powder
    • ¼ teaspoon thyme
    • ½ cup shredded cheddar cheese
    • ½ cup grated Parmesan cheese
    • Fresh parsley (chopped, for garnish)

Directions:

  1. Prepare the Chicken: Season the chicken breasts with garlic powder, onion powder, smoked paprika, salt, and black pepper.
  2. Sear the Chicken: Heat olive oil in a large skillet over medium-high heat. Sear the chicken for 4-5 minutes on each side until golden brown. Remove from the skillet and set aside.
  3. Cook the Rice: In a medium saucepan, bring chicken broth and salt to a boil. Add the rice, reduce heat to low, cover, and simmer for 15-18 minutes until tender and the liquid is absorbed. Fluff with a fork and set aside.
  4. Make the Sauce: In the same skillet used for the chicken, melt the butter over medium heat. Whisk in the flour and cook for 1-2 minutes until lightly golden.
  5. Gradually add the milk and chicken broth, whisking constantly to create a smooth sauce. Stir in garlic powder, thyme, cheddar cheese, and Parmesan cheese. Cook for 3-4 minutes until the sauce thickens and the cheese is melted.
  6. Combine Everything: Return the chicken breasts to the skillet, spooning the creamy sauce over the top. Cover and simmer on low heat for 10 minutes until the chicken is fully cooked and tender.
  7. Serve: Plate the cooked rice and top with the smothered chicken and sauce. Garnish with fresh parsley and serve immediately.

How to Serve Creamy Smothered Chicken and Rice

Serve Creamy Smothered Chicken and Rice hot for the best experience. A generous scoop of the creamy sauce over the chicken also enhances the flavor of the rice. For an additional touch, sprinkle some chopped fresh parsley on top for a splash of color and freshness. This dish pairs well with a simple green salad or steamed vegetables for a complete meal. You can also add some crusty bread on the side to soak up the dreamy sauce, turning your meal into a hearty feast. Enjoy this delicious dish with family and friends, as it’s sure to be a hit at the dinner table!

How to Store Creamy Smothered Chicken and Rice

To store Creamy Smothered Chicken and Rice, allow it to cool completely before transferring it to an airtight container. You can refrigerate it for up to 3-4 days. If you know you won’t eat it all quickly, consider portioning it into smaller containers. This makes it easier to reheat only what you need. For longer storage, you can freeze the chicken and rice together for up to 2 months. Just make sure to label the container with the date. When you’re ready to enjoy it again, defrost in the refrigerator overnight and reheat on the stove or in the microwave until heated through.

Tips to Make Creamy Smothered Chicken and Rice

  1. Thickening the Sauce: If you like a thicker sauce, you can add an extra tablespoon of flour when making the sauce. Just make sure to whisk well to avoid lumps.
  2. Add Vegetables: Consider adding some sautéed vegetables like bell peppers, spinach, or broccoli for extra nutrition and flavor.
  3. Browning the Chicken: For a more flavorful dish, ensure you sear the chicken until it’s nicely brown. This adds a delicious depth to the dish.
  4. Cheese Variations: Feel free to mix and match the cheeses used in the sauce. Gruyere or mozzarella can be great alternatives to cheddar and Parmesan, offering unique flavors to the sauce.
  5. Spice It Up: If your taste buds are looking for more excitement, consider adding a pinch of red pepper flakes to the creamy sauce for a little heat.

Variations

There are several ways to customize Creamy Smothered Chicken and Rice to suit your tastes. If you prefer a bit of a kick, you can add hot sauce or cayenne pepper to the sauce. For a Mediterranean twist, try adding sun-dried tomatoes and olives. You can also switch out the chicken for other proteins like shrimp or tofu, making it a versatile meal that caters to various dietary preferences.

Conclusion

Creamy Smothered Chicken and Rice is more than just a meal; it’s a comforting tradition that brings families together. With its rich flavors and satisfying texture, it’s bound to become a favorite in your home. Easy to prepare and packed with flavor, this recipe is ideal for busy nights or family gatherings. Don’t wait; try it today and indulge in the creamy goodness that this dish offers. Share your experiences and personal tweaks to the recipe as you gather around the dinner table, making every meal an occasion.

FAQs

  1. Can I use brown rice instead of white rice?
    Yes, but brown rice will require a longer cooking time. Adjust accordingly.
  2. How can I make it healthier?
    You can use lower-fat milk and reduce the cheese or add plenty of vegetables to the dish.
  3. Can I make this dish ahead of time?
    Yes, you can prepare it a day in advance. Just reheat before serving for a quick meal.
  4. What can I serve with Creamy Smothered Chicken and Rice?
    It pairs nicely with a simple green salad or steamed veggies.
  5. Can this recipe be doubled?
    Absolutely! Just make sure you have a large enough skillet or pot.

[tasty-recipe id=”2784″]

Creamy Smothered Chicken and Rice

A comforting one-pan dish featuring juicy chicken breasts in a rich, cheesy sauce served over fluffy rice. Perfect for busy weeknights and family gatherings.

For the Chicken

  • 4 pieces boneless skinless chicken breasts
  • 1 teaspoon garlic powder
  • 1 teaspoon onion powder
  • 1 teaspoon smoked paprika
  • Salt and black pepper (to taste)
  • 2 tablespoons olive oil

For the Rice

  • 1 cup long-grain white rice
  • 2 cups chicken broth
  • ½ teaspoon salt

For the Creamy Sauce

  • 2 tablespoons unsalted butter
  • 2 tablespoons all-purpose flour
  • 1 ½ cups whole milk
  • ½ cup chicken broth
  • ½ teaspoon garlic powder
  • ¼ teaspoon thyme
  • ½ cup shredded cheddar cheese
  • ½ cup grated Parmesan cheese
  • Fresh parsley (chopped, for garnish)

Preparation

  1. Season the chicken breasts with garlic powder, onion powder, smoked paprika, salt, and black pepper.

Cooking Chicken

  1. Heat olive oil in a large skillet over medium-high heat. Sear the chicken for 4-5 minutes on each side until golden brown. Remove from the skillet and set aside.

Cooking Rice

  1. In a medium saucepan, bring chicken broth and salt to a boil.
  2. Add the rice, reduce heat to low, cover, and simmer for 15-18 minutes until tender and the liquid is absorbed.
  3. Fluff with a fork and set aside.

Making the Sauce

  1. In the same skillet used for the chicken, melt the butter over medium heat.
  2. Whisk in the flour and cook for 1-2 minutes until lightly golden.
  3. Gradually add the milk and chicken broth, whisking constantly to create a smooth sauce.
  4. Stir in garlic powder, thyme, cheddar cheese, and Parmesan cheese.
  5. Cook for 3-4 minutes until the sauce thickens and the cheese is melted.

Combining Everything

  1. Return the chicken breasts to the skillet, spooning the creamy sauce over the top.
  2. Cover and simmer on low heat for 10 minutes until the chicken is fully cooked and tender.

Serving

  1. Plate the cooked rice and top with the smothered chicken and sauce.
  2. Garnish with fresh parsley and serve immediately.

For a thicker sauce, add an extra tablespoon of flour. You can also add sautéed vegetables for extra nutrition and flavor. To store leftovers, refrigerate for up to 3-4 days or freeze for up to 2 months.

Dinner, Main Course
American
Comfort Food, Creamy Chicken and Rice, Family Recipe, One-Pan Meal, Quick Dinner

Bacon Fried Rice

bacon fried rice

Bacon Fried Rice is a delicious way to use up leftover rice and bring a touch of flavor to your meals. This easy recipe combines crispy bacon with hearty vegetables and fluffy rice for a comforting dish everyone will love. Whether it’s a quick weeknight dinner or a delightful side dish for a gathering, Bacon Fried Rice hits all the right notes. With its savory ingredients and simple steps, this recipe is perfect for cooks of any skill level. Let’s dive into why this dish is a must-try in your kitchen.

why make this recipe

Making Bacon Fried Rice is not only simple, but it’s also a great way to use up leftover rice and any vegetables in your fridge. The crispy bacon adds a smoky flavor that elevates the dish to something truly special. This recipe can be made in less than 30 minutes, making it perfect for busy weeknights or last-minute meals. Plus, it allows you to customize it with your favorite ingredients and spices. Your family will appreciate the hearty meal, and you’ll enjoy how quick and easy it is to prepare.

how to make Bacon Fried Rice

Ingredients:

  • 6 slices thick-cut bacon, chopped
  • 1/2 large onion, diced
  • 2 cloves garlic, minced
  • 1 cup frozen peas and carrots
  • 4 cups cooked and cooled long-grain rice (preferably day-old)
  • 3 large eggs, beaten
  • 2 tablespoons soy sauce
  • 1 tablespoon oyster sauce
  • 1 teaspoon sesame oil
  • Salt and pepper to taste
  • 2 green onions, chopped

Directions:

  1. Add chopped bacon to a cold skillet and turn the heat to medium. Cook until crispy, then remove and set aside, reserving the bacon fat.
  2. In the same skillet, sauté the diced onion in the bacon fat for 3-5 minutes until translucent.
  3. Add minced garlic and frozen peas and carrots, cooking for 2-3 minutes until tender.
  4. Stir in the chilled rice, cooking for 2-4 minutes. Push the rice and veggies to one side of the pan.
  5. In the empty side of the pan, scramble the beaten eggs until fully cooked, then mix them with the rice and veggies.
  6. Turn the heat to high. Add soy sauce, oyster sauce, sesame oil, and the cooked bacon. Stir thoroughly.
  7. Season with salt and pepper, garnish with chopped green onions, and serve hot.

how to serve Bacon Fried Rice

Bacon Fried Rice can be served in many delicious ways. You can enjoy it as a main dish alongside your favorite protein, such as chicken, shrimp, or tofu. It also makes a fantastic side dish to complement grilled meats or other Asian-inspired meals. For an extra touch, consider garnishing with more green onions or a sprinkle of sesame seeds. Serve it hot right off the stove for the best flavor and texture. Sharing this dish with family or friends makes it even more enjoyable!

how to store Bacon Fried Rice

Storing Bacon Fried Rice is easy and ensures you can enjoy leftovers later. Allow the fried rice to cool completely before transferring it to an airtight container. It can be stored in the refrigerator for up to 3-4 days. When ready to eat, reheat the rice in a skillet over medium heat, adding a splash of water or broth to prevent sticking. You can also reheat it in a microwave-safe dish covered with a damp paper towel to keep it moist. This way, you’ll enjoy the wonderful flavors again with minimal effort.

tips to make Bacon Fried Rice

To make the best Bacon Fried Rice, consider using leftover rice as it’s drier and less sticky, making it perfect for frying. If you don’t have leftover rice, spread freshly cooked rice on a baking sheet to cool before using it. Make sure the bacon is crispy for great flavor and texture. Feel free to add your favorite vegetables or proteins to customize the dish to your taste. Lastly, watch the seasoning; adjusting the soy sauce and oyster sauce can help you hit the perfect balance of flavors!

variation

You can make Bacon Fried Rice vegetarian by omitting the bacon and using vegetable oil instead. Consider adding tofu or tempeh for protein. Other tasty variations include adding different vegetables like bell peppers, mushrooms, or broccoli. You could also spice things up with chopped chili or hot sauce for a bit of heat. The beauty of this dish is its adaptability—feel free to get creative!

Conclusion

Bacon Fried Rice is a delightful and comforting meal that is simple to prepare and versatile enough for any occasion. With just a few ingredients and easy steps, you can whip up a flavorful dish that pleases everyone at the table. It’s a fantastic way to use leftover rice while enjoying the delicious taste of crispy bacon. Next time you’re in need of a quick and satisfying meal, try this recipe, and you’ll see why it’s a favorite. Get cooking, and enjoy every bite!

FAQs

Q1: Can I use day-old rice for Bacon Fried Rice?
A1: Yes! Day-old rice is best because it’s drier and helps achieve better texture in fried rice.

Q2: Can I freeze leftovers of Bacon Fried Rice?
A2: Yes, you can freeze Bacon Fried Rice for up to 2 months in an airtight container. Just be sure to cool it fully before storing.

Q3: What vegetables can I add to Bacon Fried Rice?
A3: You can add any veggies you like! Popular options include bell peppers, corn, broccoli, or even mushrooms for extra flavor.

[tasty-recipe id=”2792″]

Bacon Fried Rice

A delicious way to use up leftover rice, this easy Bacon Fried Rice combines crispy bacon, hearty vegetables, and fluffy rice for a comforting dish perfect for any occasion.

Main Ingredients

  • 6 slices thick-cut bacon, chopped (Crispy bacon adds great flavor.)
  • 1/2 large onion, diced (Adds sweetness.)
  • 2 cloves garlic, minced (Enhances flavor.)
  • 1 cup frozen peas and carrots (Use frozen for convenience.)
  • 4 cups cooked and cooled long-grain rice (Preferably day-old rice for best texture.)
  • 3 large eggs, beaten (Adds protein and richness.)
  • 2 tablespoons soy sauce
  • 1 tablespoon oyster sauce
  • 1 teaspoon sesame oil (Adds a nutty flavor.)
  • to taste Salt and pepper
  • 2 green onions chopped (For garnish.)

Cooking

  1. Add chopped bacon to a cold skillet and turn the heat to medium. Cook until crispy, then remove and set aside, reserving the bacon fat.
  2. In the same skillet, sauté the diced onion in the bacon fat for 3-5 minutes until translucent.
  3. Add minced garlic and frozen peas and carrots, cooking for 2-3 minutes until tender.
  4. Stir in the chilled rice, cooking for 2-4 minutes. Push the rice and veggies to one side of the pan.
  5. In the empty side of the pan, scramble the beaten eggs until fully cooked, then mix them with the rice and veggies.
  6. Turn the heat to high. Add soy sauce, oyster sauce, sesame oil, and the cooked bacon. Stir thoroughly.
  7. Season with salt and pepper, garnish with chopped green onions, and serve hot.

For best results, use day-old rice as it’s drier and less sticky. Feel free to customize with your favorite veggies or proteins, and adjust the seasoning to taste.

Main Course, Side Dish
Asian, Comfort Food
Bacon Fried Rice, Easy Recipes, fried rice, Leftover Rice, Quick Dinner

Irresistible Flank Steak Recipe

flat steak

Have you ever wondered why some steaks are tender and juicy while others seem tough and chewy? The secret often lies in understanding the cut you’re working with. Flank steak is one of those cuts that can either be your best friend in the kitchen or your biggest frustration, depending on how you handle it.

Think of flank steak as the hardworking athlete of the beef world. It’s lean, it’s strong, and it’s got incredible flavor potential, but just like training an athlete, you need to know the right techniques to bring out its best qualities.

Why Make This Recipe

Flank steak is a fantastic choice for family dinners and gatherings with friends. It’s affordable, easy to prepare, and packs a lot of flavor when cooked correctly. This Irresistible Flank Steak recipe takes simple ingredients and transforms them into a delicious meal that’s sure to impress. The marinade tenderizes the meat and adds a depth of flavor that will make you want to make it again and again.

How to Make Irresistible Flank Steak

Ingredients:

  • 1 1/2 – 2 pounds flank steak
  • 1/2 cup olive oil
  • 1/3 cup low sodium soy sauce
  • 1/4 cup balsamic vinegar
  • 2 tablespoons fresh lemon juice
  • 2 tablespoons brown sugar
  • 1 1/2 tablespoons Worcestershire sauce
  • 1 tablespoon Dijon mustard
  • 1 tablespoon each, onion powder and garlic powder
  • 1 teaspoon each, paprika, black pepper, red pepper flakes, and dried dill weed
  • 1/2 teaspoon each, dried oregano, dried rosemary, and ground coriander

Directions:

  1. In a medium-sized bowl, whisk together olive oil, soy sauce, balsamic vinegar, lemon juice, and Worcestershire sauce. Add the brown sugar, Dijon mustard, and all the seasonings—from onion powder to ground coriander. Stir until the sugar dissolves completely, enhancing the depth of flavor.
  2. Place your flank steak in a shallow dish or resealable plastic bag. Pour in the marinade, ensuring it fully covers the steak. For best results, let it marinate in the refrigerator for at least 2 hours or up to 12. The marinade will infuse the meat with a rich, tangy aroma while tenderizing it for a succulent bite.
  3. Heat your grill to medium-high. If you’re using a grill pan, preheat it on high on your stovetop. A properly heated grill ensures that beautiful, caramelized char on the outside while keeping the inside juicy.
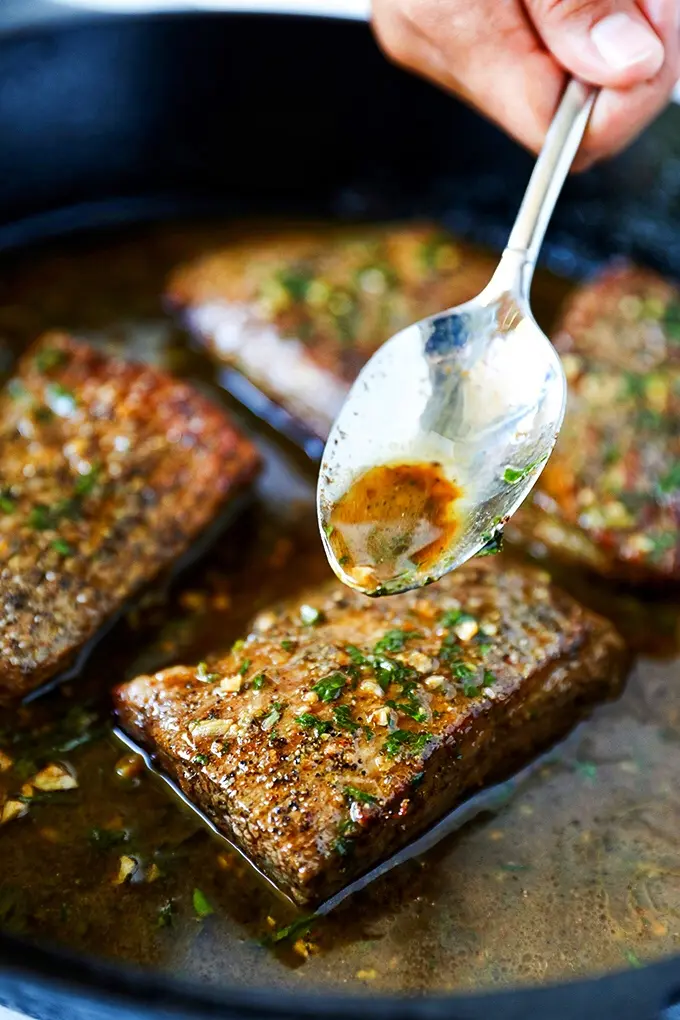
  4. Remove the steak from the marinade, allowing the excess to drip off. Place it on the hot grill and cook for about 4-5 minutes per side for medium-rare, depending on the thickness. Aim for a deep brown sear on the outside, with visible grill marks for both visual and flavorful appeal.
  5. Let the flank steak rest on a cutting board for at least 5 minutes. This resting period allows juices to redistribute within the meat, resulting in every bite being tender and juicy.
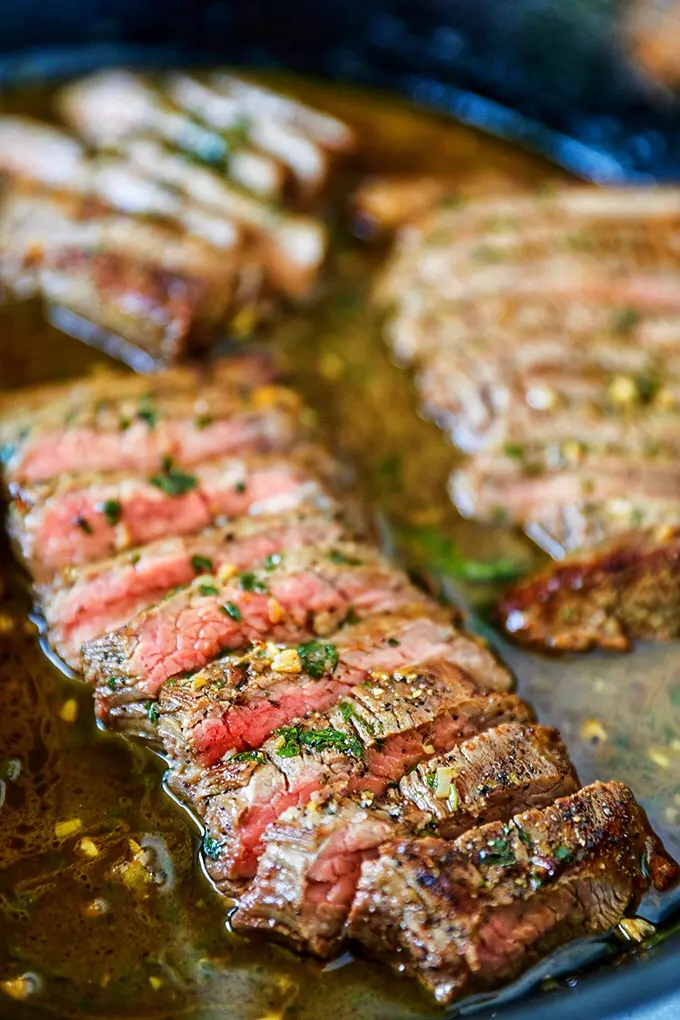
  6. Slice and serve your beautifully grilled flank steak. Thinly slice the steak against the grain at a diagonal angle. Doing so ensures the tenderest texture. Serve immediately to enjoy the full flavor profile that each marinated layer offers.

Selecting the Perfect Flank Steak: A Buyer’s Guide

Walking into a butcher shop or grocery store can feel overwhelming when you’re faced with dozens of meat options. How do you choose the best flank steak? The good news is that with a few key indicators, you can consistently select high-quality cuts.

What to Look for at the Butcher Shop

First, examine the color. Fresh flank steak should display a bright, cherry-red color without any brown or gray spots. The surface should look moist but not slimy, and there shouldn’t be any off-putting odors.

Look for meat that feels firm to the touch. Avoid cuts that seem mushy or leave indentations when pressed. The grain should be clearly visible and run consistently in one direction across the surface.

Check the packaging date if you’re shopping at a grocery store. Flank steak is best used within 2-3 days of packaging when stored in the refrigerator, so choose the freshest option available.

Fresh vs. Frozen: Making the Right Choice

Fresh flank steak offers the best texture and flavor when cooked properly. However, frozen options can work well if you’re planning ahead or find a good deal. If choosing frozen, look for packages without ice crystals or freezer burn, which indicate the meat has been stored too long or at inconsistent temperatures.

When thawing frozen flank steak, plan ahead and use the refrigerator method. This slow thawing process maintains the meat’s texture better than quick-thaw methods.

How to Serve Irresistible Flank Steak

flat steak

Flank steak is versatile and can be served in many ways. You can enjoy it on its own, or pair it with side dishes like grilled vegetables, mashed potatoes, or a fresh salad. It’s also great for sandwiches, tacos, or stir-fries.

How to Store Irresistible Flank Steak

If you have leftovers, let the meat cool down to room temperature. Wrap it tightly in plastic wrap or aluminum foil, or store it in an airtight container. It can be stored in the refrigerator for up to 3 days. You can also freeze it for longer storage, up to 3 months. To reheat, simply warm it up in the oven or on the grill.

Tips to Make Irresistible Flank Steak

  • Don’t skip the marinating process; it’s crucial for flavor and tenderness.
  • Make sure your grill is hot before adding the steak for a good sear.
  • Resting the steak after grilling is essential for juicy meat.
  • Slice against the grain for the best texture.

Variation

You can customize the marinade to suit your taste. Try adding herbs like fresh rosemary or thyme, or switch up the vinegar with apple cider vinegar for a different flavor profile.

FAQs

Can I use a different cut of meat?
Yes, you can use other cuts like skirt steak or sirloin, but cooking times may vary.

What if I don’t have a grill?
You can cook the flank steak in a grill pan on your stovetop or in the oven under the broiler.

How do I know when the steak is cooked?
Use a meat thermometer to check for doneness: 130°F for medium-rare, 140°F for medium.

[tasty-recipe id=”4381″]

Irresistible Flank Steak

Learn how to prepare juicy and flavorful flank steak with this easy marinade recipe, perfect for family dinners and gatherings.

For the Marinade

  • 1/2 cup olive oil
  • 1/3 cup low sodium soy sauce
  • 1/4 cup balsamic vinegar
  • 2 tablespoons fresh lemon juice
  • 2 tablespoons brown sugar
  • 1 1/2 tablespoons Worcestershire sauce
  • 1 tablespoon Dijon mustard
  • 1 tablespoon onion powder
  • 1 tablespoon garlic powder
  • 1 teaspoon paprika
  • 1 teaspoon black pepper
  • 1 teaspoon red pepper flakes
  • 1 teaspoon dried dill weed
  • 1/2 teaspoon dried oregano
  • 1/2 teaspoon dried rosemary
  • 1/2 teaspoon ground coriander

For the Steak

  • 1 1/2 – 2 pounds flank steak

Preparation

  1. In a medium-sized bowl, whisk together olive oil, soy sauce, balsamic vinegar, lemon juice, and Worcestershire sauce.
  2. Add the brown sugar, Dijon mustard, and all the seasonings—from onion powder to ground coriander. Stir until the sugar dissolves completely.
  3. Place the flank steak in a shallow dish or resealable plastic bag. Pour the marinade over the steak, ensuring it is fully covered.
  4. Let it marinate in the refrigerator for at least 2 hours or up to 12 hours.

Cooking

  1. Heat your grill to medium-high or preheat a grill pan on high on your stovetop.
  2. Remove the steak from the marinade, allowing the excess to drip off. Place it on the hot grill.
  3. Cook for about 4-5 minutes per side for medium-rare, depending on thickness.
  4. Let the flank steak rest on a cutting board for at least 5 minutes before slicing.
  5. Thinly slice the steak against the grain at a diagonal angle and serve immediately.

Don’t skip the marinating process; it’s crucial for flavor and tenderness. Make sure your grill is hot before adding the steak for a good sear. Resting the steak after grilling is essential for juicy meat. Slice against the grain for the best texture.

Dinner, Main Course
American, Grill
Easy Recipe, Family Dinner, Flank Steak, Grilled Steak, Marinade