No-Bake Cheesecake

No-Bake Cheesecake is a delightful dessert that manages to be both simple and impressive. This creamy treat is perfect for any gathering, as it combines the rich flavors of cream cheese and sweetness without the need for an oven. Best of all, it’s a crowd-pleaser, making it an ideal choice for parties, gatherings, or a sweet treat after dinner. If you’re looking for a fun and delicious dessert to make at home, this no-bake cheesecake is just what you need. Get ready to satisfy your sweet tooth and impress your friends and family with this delightful recipe!

How to Prepare No-Bake Cheesecake

  1. Start by crushing your favorite cookies for the crust. Mix the crushed cookies with melted butter until combined. Press the mixture firmly into the bottom of a springform pan.
  2. In a bowl, beat the cream cheese until it’s smooth. Gradually add sugar and vanilla extract, mixing well.
  3. Fold in whipped cream until the mixture is fluffy and well combined.
  4. Pour the cream cheese filling over the crust and spread it evenly.
  5. Refrigerate for at least four hours, or until set.

No-Bake Cheesecake

Why You’ll Love No-Bake Cheesecake

You’ll absolutely love this No-Bake Cheesecake for many reasons. Firstly, it is extremely easy to prepare, making it perfect even for novice bakers. Moreover, it’s wonderfully creamy and can be topped with an array of fruits or sauces to suit your taste. It’s a versatile dessert that can change depending on the season or your preference. Additionally, if you’re looking to inspire your baking adventures, check out this No-Bake Pastel Oreo Cheesecake Cups for a colorful twist on the classic.

Tips for Success

  • Always use room temperature cream cheese for the best texture. Cold cream cheese will create lumps in your filling.
  • Whip the cream until stiff peaks form for a light and airy cheesecake.
  • You can experiment with different flavors by adding fruit purees or extracts into the filling.

No-Bake Cheesecake

Serving Suggestions

Serve your No-Bake Cheesecake chilled, topped with fresh fruits like strawberries or blueberries. You can also add a drizzle of chocolate or caramel sauce for extra flavor. Consider pairing it with a scoop of vanilla ice cream for an extra indulgent treat.

FAQs

1. How long does a No-Bake Cheesecake last in the fridge?

A No-Bake Cheesecake can last up to five days in the refrigerator if properly covered.

2. Can I freeze No-Bake Cheesecake?

Yes, you can freeze it! Wrap it tightly in plastic wrap and store it in an airtight container. It can last for about a month in the freezer.

3. What can I use for the crust besides cookies?

You can use graham crackers, crushed nuts, or even a combination of oats and nuts for a gluten-free option.

No-Bake Cheesecake

A delightful and simple dessert that combines rich cream cheese flavors without the need for baking, making it perfect for any gathering.

For the crust

  • 1 cup Crushed cookies (your favorite)
  • 1/4 cup Melted butter

For the filling

  • 16 oz Cream cheese, room temperature (Using room temperature ensures the best texture.)
  • 2/3 cup Sugar
  • 1 tsp Vanilla extract
  • 1 cup Whipped cream (Whip until stiff peaks form.)

Preparation

  1. Crush your favorite cookies for the crust.
  2. Mix the crushed cookies with melted butter until combined.
  3. Press the mixture firmly into the bottom of a springform pan.
  4. In a bowl, beat the cream cheese until smooth.
  5. Gradually add sugar and vanilla extract, mixing well.
  6. Fold in whipped cream until the mixture is fluffy and well combined.
  7. Pour the cream cheese filling over the crust and spread it evenly.
  8. Refrigerate for at least four hours, or until set.

Serve chilled, topped with fresh fruits or sauces. Can be frozen for about a month in an airtight container.

Dessert
American
Cream Cheese Dessert, Easy Cheesecake, No-Bake Cheesecake

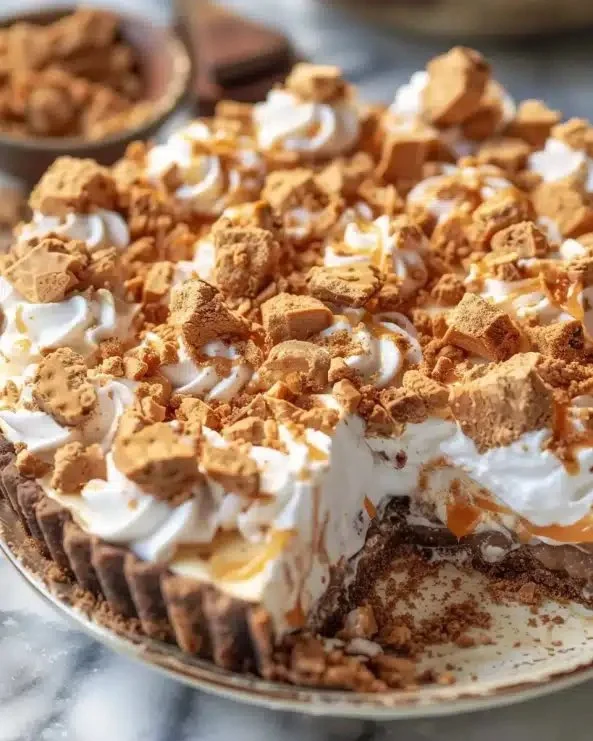
No Bake Biscoff Cheesecake

When you think of desserts that bring joy and delight, the No Bake Biscoff Cheesecake tops the list. With its creamy texture, rich flavor, and the warm notes of caramelized cookie goodness, this cheesecake is a true crowd-pleaser. If you’ve had a long day or just want to treat yourself, this recipe is perfect. Plus, it’s super easy to make, which means more time enjoying and less time stressing in the kitchen. Ready to dive into this deliciousness? Let’s get started!

How to prepare No Bake Biscoff Cheesecake

To whip up this delightful cheesecake, you’ll need a few key ingredients. Start by gathering the essentials like Biscoff cookies, cream cheese, powdered sugar, and heavy cream. Then, follow these simple steps:

  1. Crush the Biscoff cookies into fine crumbs.
  2. Mix the crumbs with melted butter to create the crust.
  3. Press the cookie mixture into the bottom of your preferred cheesecake pan.
  4. In a mixing bowl, beat the cream cheese and powdered sugar until smooth.
  5. In a separate bowl, whip the heavy cream until soft peaks form, then gently fold it into the cream cheese mixture.
  6. Spread this dreamy cream mixture over the crust.
  7. Chill the cheesecake for at least four hours or until it sets properly.

No Bake Biscoff Cheesecake

Why You’ll Love No Bake Biscoff Cheesecake

This recipe is not only quick but also extremely versatile. You can customize it by adding chocolate drizzle, fresh fruits, or even a layer of caramel on top. The harmonious blend of flavors makes each bite special, and it’s sure to become a favorite among your family and friends. If you are looking for something sweet that does not require baking, this cheesecake fits the bill perfectly. It’s a treat that everyone can enjoy together, making it a fantastic choice for gatherings.

Tips for success

To ensure your cheesecake turns out flawless, keep these tips in mind:

  • Make sure your cream cheese is at room temperature before mixing; this helps to achieve a smooth texture.
  • Don’t skimp on chilling time; allowing the cheesecake to set correctly is crucial for that perfect slice.
  • Feel free to experiment with different toppings, such as chocolate or caramel, to elevate the flavor even further.

If you’re looking for another no-bake dessert idea, try making some delicious Pastel Oreo Cheesecake Cups for variety!

Serving Suggestions

When it comes to serving, slice the cheesecake into generous pieces and add a dollop of whipped cream on top. For an extra touch, sprinkle some crushed Biscoff cookies as a garnish. Your guests will be reaching for seconds, and they won’t be able to resist this indulgence.

FAQs

1. Can I use other cookies for the crust?

Yes, you can substitute Biscoff cookies with any other cookie of your choice, but it may alter the flavor slightly.

2. How long will this cheesecake last in the fridge?

The no bake Biscoff cheesecake can be stored in the refrigerator for about 5 days, covered tightly.

3. Can I freeze the cheesecake?

Absolutely! Just wrap it well and store it in the freezer. Let it thaw in the fridge overnight before serving.

Enjoy creating this delightful No Bake Biscoff Cheesecake, and let the flavors transport you to a world of sweetness!

No Bake Biscoff Cheesecake

A creamy and delightful cheesecake made with Biscoff cookies and no baking required, perfect for any occasion.

Crust

  • 200 g Biscoff cookies (Crushed into fine crumbs)
  • 100 g Butter (Melted)

Filling

  • 400 g Cream cheese (At room temperature)
  • 100 g Powdered sugar
  • 300 ml Heavy cream (Whipped until soft peaks form)

Preparation

  1. Crush the Biscoff cookies into fine crumbs.
  2. Mix the crumbs with melted butter to create the crust.
  3. Press the cookie mixture into the bottom of your preferred cheesecake pan.
  4. In a mixing bowl, beat the cream cheese and powdered sugar until smooth.
  5. In a separate bowl, whip the heavy cream until soft peaks form, then gently fold it into the cream cheese mixture.
  6. Spread this dreamy cream mixture over the crust.
  7. Chill the cheesecake for at least four hours or until it sets properly.

Tips: Make sure your cream cheese is at room temperature for a smooth texture. Don’t skimp on chilling time; this is crucial for the perfect slice. Experiment with toppings like chocolate drizzle or caramel.

Dessert
American
Biscoff Dessert, Creamy Cheesecake, dessert recipe, Easy Cheesecake, No Bake Cheesecake

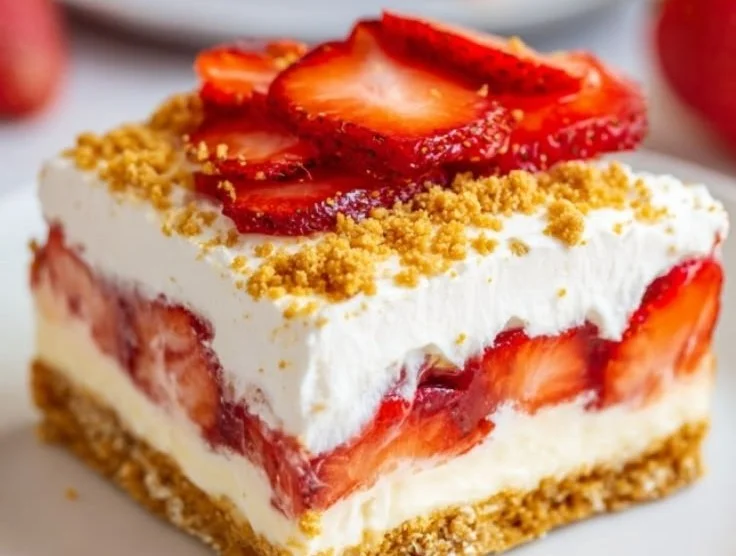
No-Bake Strawberry Dessert

Delicious no-bake strawberry dessert topped with fresh strawberries and whipped cream

When the weather gets warm, there’s nothing quite like a refreshing dessert to cool you down. This No-Bake Strawberry Dessert is a delightful way to enjoy the sweetness of fresh strawberries without turning on the oven. Packed with creamy goodness and a buttery crust, it’s a treat that will have everyone coming back for seconds. Whether you’re hosting a summer barbecue or enjoying a quiet evening at home, this dessert is sure to impress. So grab your mixing bowl, and let’s dive into making this luscious treat that is as fun to make as it is to eat!

How to prepare No-Bake Strawberry Dessert

To make this no-bake treat, gather the following ingredients:

Ingredients

  • 1 cup crushed graham crackers
  • 1/2 cup unsalted butter, melted
  • 1 cup cream cheese, softened
  • 1 cup powdered sugar
  • 1 cup whipped topping
  • 2 cups fresh strawberries, sliced
  • 1 cup strawberry gelatin
  • 1 cup boiling water
  • Extra strawberries for garnish

Now, let’s get started on how to prepare this delicious dessert!

  1. In a medium bowl, mix the crushed graham crackers with melted butter until well combined. Press this mixture firmly into the bottom of a 9×9 inch baking dish to form the crust.
  2. In another bowl, beat the softened cream cheese and powdered sugar together until smooth. Gently fold in the whipped topping until fully incorporated.
  3. Spread the cream cheese mixture over the crust in the baking dish.
  4. In a separate bowl, dissolve the strawberry gelatin in boiling water. Allow it to cool slightly before pouring it over the cream cheese layer.
  5. Arrange the sliced strawberries on top of the gelatin layer, ensuring they’re well distributed.
  6. Refrigerate the dessert for at least four hours, or until the gelatin is set.
  7. Once set, cut into squares and serve chilled. You can add extra strawberries as a garnish if desired.

No-Bake Strawberry Dessert

Why You’ll Love No-Bake Strawberry Dessert

This No-Bake Strawberry Dessert is not just easy to whip up, it’s also incredibly satisfying. The combination of the sweet, creamy filling with the tartness of the strawberries creates a delightful balance. Plus, the no-bake aspect means you won’t have to deal with any complicated baking steps, making it an ideal recipe for beginners. It’s the perfect way to enjoy a summer treat without fuss, making it a hit not just for families, but for gatherings and parties too. If you love no-bake desserts, this one is sure to become a favorite!

Tips for Success

To make sure your No-Bake Strawberry Dessert turns out perfectly, keep these tips in mind:

  • Use fresh strawberries for the best flavor. They will add a burst of freshness that complements the creamy filling.
  • Allow the dessert to sit in the fridge for the full four hours; this will ensure that the gelatin sets properly.
  • For a creative twist, consider adding other fruits like blueberries or raspberries along with the strawberries.

No-Bake Strawberry Dessert

Serving Suggestions

This No-Bake Strawberry Dessert can be served on its own or paired with a scoop of vanilla ice cream for extra indulgence. You might even consider serving it alongside a refreshing glass of iced tea or lemonade. It’s simple, yet elegant enough for any occasion!

FAQs

Can I use frozen strawberries instead of fresh ones?

Yes, you can use frozen strawberries, but fresh ones give the best flavor and texture.

How long will this dessert last in the fridge?

It can last for about 3-4 days in the refrigerator, but it’s best enjoyed fresh on the first couple of days.

Can I make this dessert a day ahead?

Absolutely! This dessert is perfect for making ahead of time, giving it ample time to set before serving.

For those who enjoy exploring more no-bake options, check out this decadent dessert that you might adore just as much! Enjoy making this delightful No-Bake Strawberry Dessert and let those sweet summer vibes shine through!

No-Bake Strawberry Dessert

A refreshing no-bake dessert featuring creamy layers and fresh strawberries, perfect for warm weather gatherings.

For the crust

  • 1 cup crushed graham crackers
  • 1/2 cup unsalted butter, melted

For the filling

  • 1 cup cream cheese, softened
  • 1 cup powdered sugar
  • 1 cup whipped topping

For the gelatin layer

  • 1 cup strawberry gelatin
  • 1 cup boiling water (Use to dissolve the gelatin)
  • 2 cups fresh strawberries, sliced (Use extra for garnish)

Preparation

  1. In a medium bowl, mix the crushed graham crackers with melted butter until well combined. Press this mixture firmly into the bottom of a 9×9 inch baking dish to form the crust.
  2. In another bowl, beat the softened cream cheese and powdered sugar together until smooth. Gently fold in the whipped topping until fully incorporated.
  3. Spread the cream cheese mixture over the crust in the baking dish.
  4. In a separate bowl, dissolve the strawberry gelatin in boiling water. Allow it to cool slightly before pouring it over the cream cheese layer.
  5. Arrange the sliced strawberries on top of the gelatin layer, ensuring they are well distributed.
  6. Refrigerate the dessert for at least four hours, or until the gelatin is set.
  7. Once set, cut into squares and serve chilled. You can add extra strawberries as a garnish if desired.

Use fresh strawberries for the best flavor. Ensure to refrigerate for the full four hours for proper gelatin setting. Can add other fruits like blueberries or raspberries for a twist.

Dessert
American
Creamy Dessert, easy dessert, No-Bake Dessert, Strawberry Dessert, Summer Treat

Butterfinger Pie

Delicious Butterfinger Pie with crispy Butterfinger candy topping

Butterfinger Pie is a delightful dessert that brings together the creamy goodness of peanut butter and the crunchy sweetness of Butterfinger candy bars. This pie is not just a treat for your taste buds, but also a feast for the eyes. With its rich layers and a graham cracker crust, it has everything you need to impress friends and family. It’s a perfect dessert for any occasion, whether it’s a holiday gathering or a casual get-together. Just one bite of this pie will make you understand why it’s a crowd-pleaser! You’ll want to dive right in and make it yourself after hearing how simple it is to whip up.

How to prepare Butterfinger Pie

To make this delicious Butterfinger Pie, you will need the following ingredients:

Ingredients

  • 1 (9-inch) graham cracker crust
  • 1 cup creamy peanut butter
  • 1 cup powdered sugar
  • 1 (8-ounce) package cream cheese, softened
  • 1 (12-ounce) container whipped topping
  • 2-3 Butterfinger candy bars, crushed (plus extra for garnish)
  • Chocolate syrup for drizzling (optional)

Directions

  1. In a large bowl, mix together the peanut butter, powdered sugar, and softened cream cheese until smooth and creamy.
  2. Gently fold in the whipped topping until it’s well combined.
  3. Add the crushed Butterfinger candy bars and mix them into the filling.
  4. Pour the mixture into the graham cracker crust and spread it evenly.
  5. Refrigerate for at least 4 hours, or overnight for best results.
  6. Before serving, drizzle chocolate syrup on top and sprinkle with extra crushed Butterfinger bars.

Butterfinger Pie

Why You’ll Love Butterfinger Pie

You will love Butterfinger Pie for its incredible flavor and texture. The combination of creamy peanut butter and crunchy candy is simply irresistible. It’s not too sweet, making it perfect for those who enjoy a well-balanced dessert. Plus, it’s a no-bake recipe, which means less time in the kitchen and more time enjoying your pie! Whether you are a peanut butter fan or just love a good dessert, this pie is sure to become a favorite in your household.

Tips for success

To make your Butterfinger Pie even better, consider these tips:

  • Allow the cream cheese to soften completely for a smoother filling.
  • Use fresh whipped topping rather than a thawed version for the best texture.
  • If you prefer a stronger chocolate flavor, feel free to add more chocolate syrup on top.
  • To make it even more festive, try adding whipped cream decorations around the edges before serving.

Serving Suggestions

This pie is perfect as a standalone dessert. However, you can take it to the next level by serving it with a scoop of vanilla ice cream on the side or fresh whipped cream on top. A sprinkle of crushed Butterfinger makes for a delightful garnish, and a drizzle of chocolate sauce can make it look extra special.

FAQs

1. How long can Butterfinger Pie be stored in the fridge?

Butterfinger Pie can be stored in the refrigerator for up to 5 days. Just make sure to cover it well so it stays fresh.

2. Can I use a different candy bar?

Absolutely! Feel free to swap out Butterfinger for your favorite candy bar, such as Reese’s or Snickers for a fun twist.

3. Is it necessary to refrigerate before serving?

Yes, refrigerating the pie is important because it helps set the filling, giving it the perfect texture when you slice into it.

Butterfinger Pie

Now that you have all the information you need to make this delightful Butterfinger Pie, why not give it a try? Its rich flavors and creamy texture make it a perfect choice for any gathering. For more ideas on fun desserts, check out this amazing recipe on Butterfinger Pie for some inspiration! Enjoy your baking adventure!

Butterfinger Pie

A delightful no-bake dessert combining creamy peanut butter with crunchy Butterfinger candy bars, perfect for any occasion.

Crust

  • 1 9-inch graham cracker crust

Filling

  • 1 cup creamy peanut butter (Use smooth peanut butter for the best texture.)
  • 1 cup powdered sugar
  • 1 8-ounce package cream cheese, softened (Allow to soften completely for a smoother filling.)
  • 1 12-ounce container whipped topping (Use fresh whipped topping for best results.)
  • 2-3 pieces Butterfinger candy bars, crushed (Plus extra for garnish.)
  • to taste chocolate syrup (For drizzling (optional).)

Preparation

  1. In a large bowl, mix together the peanut butter, powdered sugar, and softened cream cheese until smooth and creamy.
  2. Gently fold in the whipped topping until well combined.
  3. Add the crushed Butterfinger candy bars and mix them into the filling.
  4. Pour the mixture into the graham cracker crust and spread it evenly.
  5. Refrigerate for at least 4 hours, or overnight for best results.
  6. Before serving, drizzle chocolate syrup on top and sprinkle with extra crushed Butterfinger bars.

Butterfinger Pie can be stored in the refrigerator for up to 5 days. Consider serving with a scoop of vanilla ice cream or whipped cream on top.

Dessert
American
Butterfinger Pie, Chocolate Dessert, Crowd-Pleaser, No-Bake Dessert, Peanut Butter Dessert

No-Bake Chocolate Cream Pie

chocolate cream pie

The first time I made this No-Bake Chocolate Cream Pie, it was out of pure desperation. It was a sweltering summer afternoon, the oven was off-limits, and my sweet tooth was loudly demanding something rich and chocolatey. I rummaged through my pantry, pieced together a few humble ingredients, and hoped for the best. What came out of the fridge hours later wasn’t just a dessert, it was a silky, dreamy masterpiece that made everyone at the table pause, then beg for the recipe. Since then, this pie has become my go-to crowd-pleaser, especially when I need something impressive without breaking a sweat. If you love decadent chocolate and zero oven drama, this pie is about to be your new best friend.

Why Make This Recipe

No-Bake Chocolate Cream Pie is a dessert that brings joy with every bite. It’s perfect for hot summer days or when you’re looking for something sweet without turning on the oven. This easy recipe combines simple ingredients to create a rich and creamy filling set inside a crunchy graham cracker crust. Whether you are a baking novice or a seasoned cook, this pie is sure to impress your friends and family.

How to Make No-Bake Chocolate Cream Pie

Ingredients:

  • 1 1/2 cups graham cracker crumbs
  • 5 tablespoons unsalted butter, melted
  • 1 tablespoon granulated sugar
  • 1 (14 oz) can sweetened condensed milk
  • 1 (8 oz) package cream cheese, softened
  • 1/3 cup cocoa powder
  • 1/4 teaspoon salt
  • 1/2 cup whipped topping

Directions:

  1. Start by combining the graham cracker crumbs, melted butter, and sugar in a bowl. Mix until well combined and then press this mixture firmly into a pie plate to form the crust.
  2. In another bowl, beat the cream cheese until it becomes smooth. Gradually add the sweetened condensed milk while mixing.
  3. Sift in cocoa powder and salt. Continue to mix until everything is fully combined.
  4. Gently fold in the whipped topping until it is just combined.
  5. Pour the chocolate filling into the prepared crust. Smooth the surface with a spatula.
  6. Refrigerate the pie for at least 4 hours, or overnight for the best results.
  7. Before serving, garnish as desired, and enjoy!

How to Serve No-Bake Chocolate Cream Pie


Serving No-Bake Chocolate Cream Pie is all about creating a moment of indulgence with minimal fuss. Once the pie has chilled for at least 4 hours—or ideally overnight, it’s ready to be the star of your dessert table. For clean slices, use a sharp knife dipped in hot water and wiped dry between each cut. Serve each slice on a chilled dessert plate to keep the creamy filling firm and refreshing.

Top each piece with a generous dollop of freshly whipped cream, a light dusting of cocoa powder, or delicate chocolate shavings for an elegant finish. You can also add fresh raspberries, a mint leaf, or a drizzle of chocolate sauce to dress it up for dinner parties or holiday tables.

For a casual setting, simply let guests help themselves straight from the pie dish with a serving spatula, no judgments here! Pair it with a hot espresso or a glass of cold milk, and watch the smiles appear. This dessert is rich, chilled, and pure chocolate heaven.

How to Store No-Bake Chocolate Cream Pie
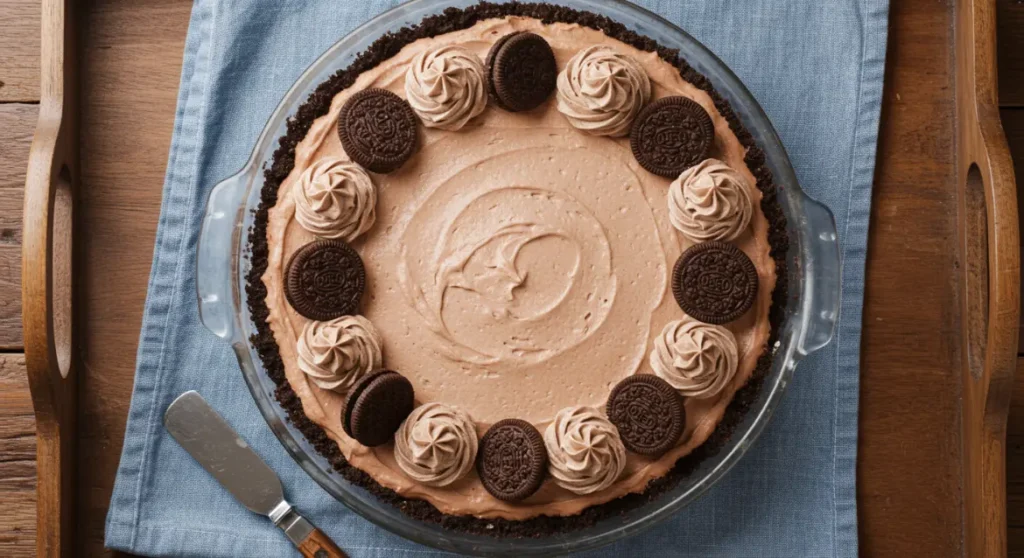
chocolate cream pie

Got leftovers or making it ahead? You can totally freeze this pie. Just wrap it up tight in plastic wrap, then add a layer of foil to keep it safe from freezer smells. Pop it in the freezer for up to a month. When you’re ready to eat, let it thaw in the fridge overnight. One thing to keep in mind, if your pie already has whipped cream on top, freezing might mess with the texture a bit. So if you want it to look extra fresh and fluffy, it’s best to add the whipped cream after it thaws.

Tips to Make No-Bake Chocolate Cream Pie

  • Ensure that the cream cheese is at room temperature so it blends smoothly with the condensed milk.
  • For added flavor, try adding a splash of vanilla extract to the filling.
  • If you want a thicker crust, use a bit more graham cracker crumbs and butter.

Variation
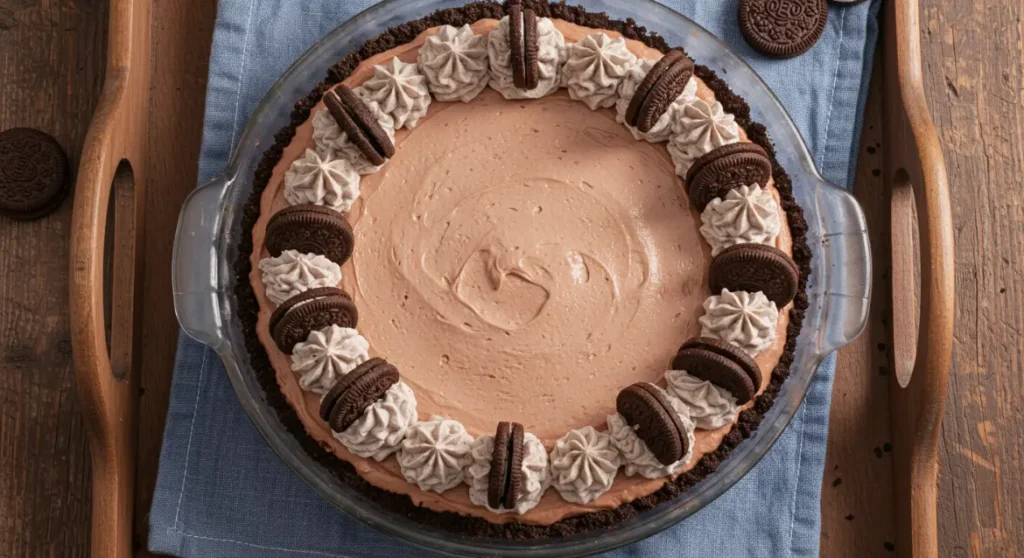
chocolate cream pie

If you’re looking for a different flavor, try substituting the cocoa powder with caramel or coffee. You could also experiment with different types of cookies for the crust, like Oreo or chocolate cookies, to create a unique twist.

FAQs

1. Can I use a store-bought pie crust?
Yes, a store-bought graham cracker or chocolate pie crust will save you time and still taste great.

2. Can I freeze No-Bake Chocolate Cream Pie?
Yes, you can freeze it. Just make sure to wrap it tightly to prevent freezer burn. Thaw in the refrigerator before serving.

3. How can I make the pie gluten-free?
Use gluten-free graham cracker crumbs or a gluten-free cookie crust as a substitute for the traditional crust.

[tasty-recipe id=”4395″]

No-Bake Chocolate Cream Pie

An easy and decadent dessert made without baking, featuring a rich chocolate filling in a crunchy graham cracker crust, perfect for warm summer days.

For the Crust

  • 1 1/2 cups graham cracker crumbs
  • 5 tablespoons unsalted butter, melted
  • 1 tablespoon granulated sugar

For the Filling

  • 1 14 oz can sweetened condensed milk
  • 1 8 oz package cream cheese, softened (Ensure it’s at room temperature for smooth blending.)
  • 1/3 cup cocoa powder
  • 1/4 teaspoon salt
  • 1/2 cup whipped topping

Preparation of the Crust

  1. Combine the graham cracker crumbs, melted butter, and sugar in a bowl. Mix until well combined.
  2. Press this mixture firmly into a pie plate to form the crust.

Making the Filling

  1. In another bowl, beat the cream cheese until smooth.
  2. Gradually add the sweetened condensed milk while mixing.
  3. Sift in cocoa powder and salt. Continue mixing until fully combined.
  4. Gently fold in the whipped topping until just combined.

Assembling the Pie

  1. Pour the chocolate filling into the prepared crust. Smooth the surface with a spatula.
  2. Refrigerate the pie for at least 4 hours, or overnight for best results.

For clean slices, use a sharp knife dipped in hot water and wiped dry between each cut. Garnish with whipped cream, cocoa powder, chocolate shavings, fresh raspberries, or mint leaves before serving. If freezing leftovers, wrap tightly in plastic wrap and then in foil to prevent freezer burn.

Dessert
American
Chocolate Cream Pie, Chocolate Pie, Easy Recipe, No-Bake Dessert, Summer Treat


No-Bake Chocolate Cream Pie

An easy and decadent dessert made without baking, featuring a rich chocolate filling in a crunchy graham cracker crust, perfect for warm summer days.

For the Crust

  • 1 1/2 cups graham cracker crumbs
  • 5 tablespoons unsalted butter, melted
  • 1 tablespoon granulated sugar

For the Filling

  • 1 14 oz can sweetened condensed milk
  • 1 8 oz package cream cheese, softened (Ensure it’s at room temperature for smooth blending.)
  • 1/3 cup cocoa powder
  • 1/4 teaspoon salt
  • 1/2 cup whipped topping

Preparation of the Crust

  1. Combine the graham cracker crumbs, melted butter, and sugar in a bowl. Mix until well combined.
  2. Press this mixture firmly into a pie plate to form the crust.

Making the Filling

  1. In another bowl, beat the cream cheese until smooth.
  2. Gradually add the sweetened condensed milk while mixing.
  3. Sift in cocoa powder and salt. Continue mixing until fully combined.
  4. Gently fold in the whipped topping until just combined.

Assembling the Pie

  1. Pour the chocolate filling into the prepared crust. Smooth the surface with a spatula.
  2. Refrigerate the pie for at least 4 hours, or overnight for best results.

For clean slices, use a sharp knife dipped in hot water and wiped dry between each cut. Garnish with whipped cream, cocoa powder, chocolate shavings, fresh raspberries, or mint leaves before serving. If freezing leftovers, wrap tightly in plastic wrap and then in foil to prevent freezer burn.

Dessert
American
Chocolate Cream Pie, easy dessert, No-Bake Dessert, No-Bake Recipe, Summer Dessert