Mongolian Chicken

Mongolian Chicken is a delightful dish that has become a favorite in many homes. It features tender chicken pieces coated in a sweet and savory sauce, making it a crowd-pleaser at family dinners and gatherings. The balance of flavors from soy sauce, ginger, and garlic creates a delicious experience that will have everyone asking for seconds. If you’re looking to impress your friends or family, this recipe is a surefire hit. So, get ready to whip up this flavorful dish that’s as fun to make as it is to eat!

How to prepare Mongolian Chicken

To make Mongolian Chicken, you’ll need some simple ingredients that pack a punch. Gather chicken breast, soy sauce, ginger, garlic, brown sugar, and some green onions for garnish. Start by marinating the chicken in soy sauce, ginger, and garlic for an hour. Then, sauté the chicken until it’s cooked through, and pour in the sweet and savory sauce made from brown sugar and soy sauce. Simmer it for a few minutes until it thickens and coats the chicken beautifully.

Mongolian Chicken

Why You’ll Love Mongolian Chicken

One of the best things about Mongolian Chicken is its versatility. It pairs perfectly with rice or noodles, making it a great choice for an easy weeknight meal. You can also switch things up by adding vegetables like bell peppers or broccoli, creating a colorful plate that is both satisfying and nutritious. If you enjoy experimenting, try serving it alongside an easy recipe like Air Fryer Cajun Chicken for a delicious twist!

Tips for success

For the best results, it’s important to slice the chicken against the grain. This will ensure that the chicken is tender and easy to chew. Additionally, don’t skip the marinating step, as it enhances the flavor tremendously. If you want to save time, you can even prepare the sauce in advance and store it in the fridge until you’re ready to cook. Getting the sauce just right is key, so taste it towards the end and adjust the sweetness if needed.

Mongolian Chicken

Serving Suggestions

Mongolian Chicken is a delightful dish on its own, but serving it with steamed jasmine rice or fried rice elevates the meal to another level. You can also serve it with a side of stir-fried vegetables, creating a balanced plate that’s as pleasing to the eye as it is to the palate. For a twist, try it with noodles, and don’t forget to sprinkle some sesame seeds on top for added crunch.

FAQs

1. Can I use other meats instead of chicken?

Yes, you can substitute beef or tofu if you prefer. Both can be cooked with the same marinade for a delicious variation.

2. How spicy is Mongolian Chicken?

Mongolian Chicken is not typically spicy, but you can add some red pepper flakes or chili sauce if you like a little heat.

3. Can I make Mongolian Chicken ahead of time?

Absolutely! You can prepare the chicken and sauce in advance. Just reheat it before serving. If you want it to be a complete meal, consider using Air Fryer Chicken and Potatoes as a side for a fulfilling dinner option!

Enjoy your cooking adventure with Mongolian Chicken, and don’t forget to share it with friends and family!

Mongolian Chicken

A delightful dish featuring tender chicken pieces coated in a sweet and savory sauce, perfect for family dinners and gatherings.

For the chicken

  • 1 lb chicken breast (Sliced against the grain for tenderness.)
  • 1/2 cup soy sauce (For marinating and the sauce.)
  • 1 tbsp ginger (Freshly grated for best flavor.)
  • 3 cloves garlic (Minced.)
  • 1/4 cup brown sugar (To sweeten the sauce.)
  • 2 stalks green onions (Chopped for garnish.)

Preparation

  1. Marinate the chicken in soy sauce, ginger, and garlic for 1 hour.

Cooking

  1. Sauté the marinated chicken in a pan until it’s cooked through.
  2. Pour in the sweet and savory sauce made from brown sugar and soy sauce.
  3. Simmer for a few minutes until the sauce thickens and coats the chicken beautifully.

Serve with steamed jasmine rice or fried rice. For added flavor, sprinkle sesame seeds on top. You can also substitute beef or tofu as an alternative to chicken.
Dinner, Main Course
Asian, Mongolian
Chicken Recipe, Dinner Recipe, easy chicken, Family Meal, Mongolian Chicken

Bacon Fried Rice

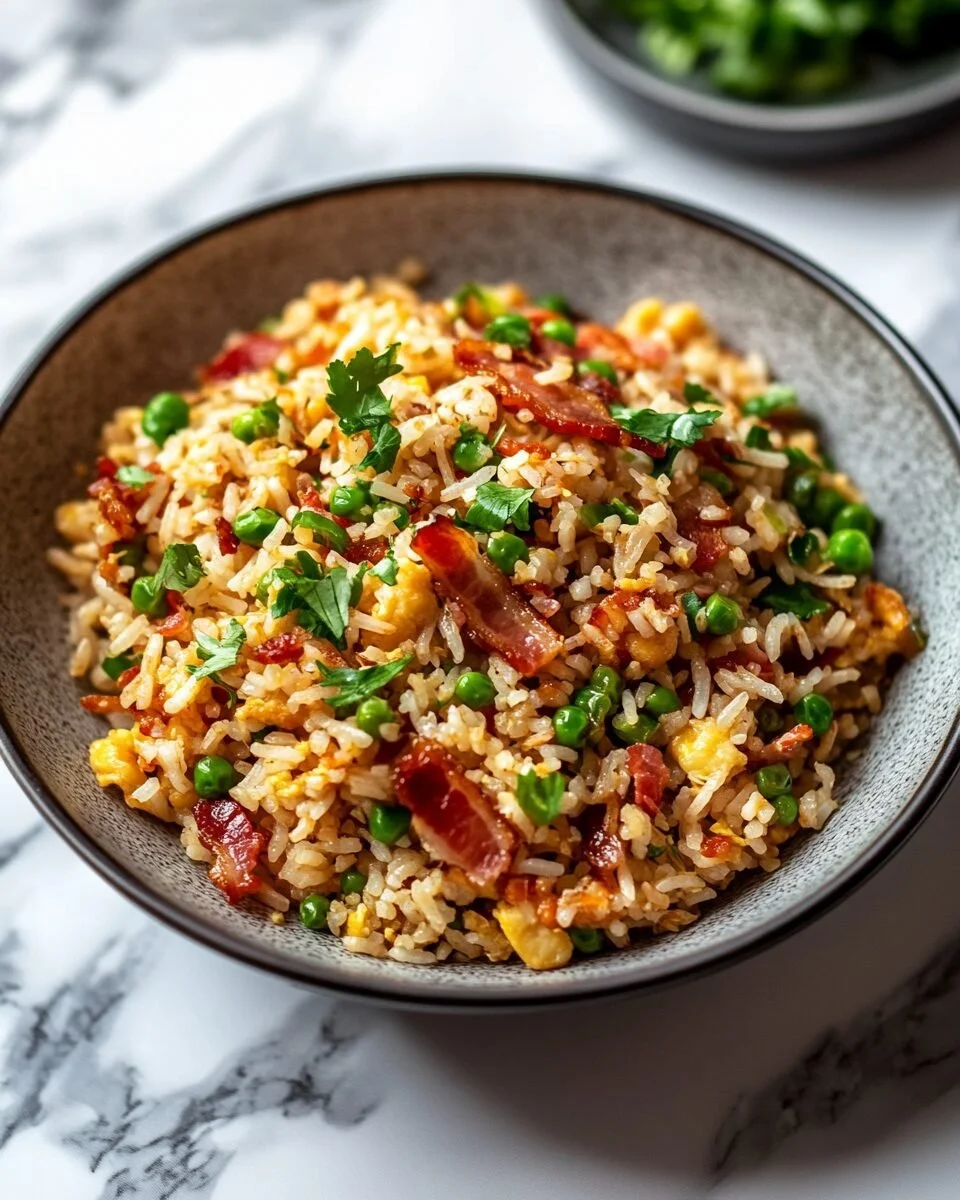
bacon fried rice

Bacon Fried Rice is a delicious way to use up leftover rice and bring a touch of flavor to your meals. This easy recipe combines crispy bacon with hearty vegetables and fluffy rice for a comforting dish everyone will love. Whether it’s a quick weeknight dinner or a delightful side dish for a gathering, Bacon Fried Rice hits all the right notes. With its savory ingredients and simple steps, this recipe is perfect for cooks of any skill level. Let’s dive into why this dish is a must-try in your kitchen.

why make this recipe

Making Bacon Fried Rice is not only simple, but it’s also a great way to use up leftover rice and any vegetables in your fridge. The crispy bacon adds a smoky flavor that elevates the dish to something truly special. This recipe can be made in less than 30 minutes, making it perfect for busy weeknights or last-minute meals. Plus, it allows you to customize it with your favorite ingredients and spices. Your family will appreciate the hearty meal, and you’ll enjoy how quick and easy it is to prepare.

how to make Bacon Fried Rice

Ingredients:

  • 6 slices thick-cut bacon, chopped
  • 1/2 large onion, diced
  • 2 cloves garlic, minced
  • 1 cup frozen peas and carrots
  • 4 cups cooked and cooled long-grain rice (preferably day-old)
  • 3 large eggs, beaten
  • 2 tablespoons soy sauce
  • 1 tablespoon oyster sauce
  • 1 teaspoon sesame oil
  • Salt and pepper to taste
  • 2 green onions, chopped

Directions:

  1. Add chopped bacon to a cold skillet and turn the heat to medium. Cook until crispy, then remove and set aside, reserving the bacon fat.
  2. In the same skillet, sauté the diced onion in the bacon fat for 3-5 minutes until translucent.
  3. Add minced garlic and frozen peas and carrots, cooking for 2-3 minutes until tender.
  4. Stir in the chilled rice, cooking for 2-4 minutes. Push the rice and veggies to one side of the pan.
  5. In the empty side of the pan, scramble the beaten eggs until fully cooked, then mix them with the rice and veggies.
  6. Turn the heat to high. Add soy sauce, oyster sauce, sesame oil, and the cooked bacon. Stir thoroughly.
  7. Season with salt and pepper, garnish with chopped green onions, and serve hot.

how to serve Bacon Fried Rice

Bacon Fried Rice can be served in many delicious ways. You can enjoy it as a main dish alongside your favorite protein, such as chicken, shrimp, or tofu. It also makes a fantastic side dish to complement grilled meats or other Asian-inspired meals. For an extra touch, consider garnishing with more green onions or a sprinkle of sesame seeds. Serve it hot right off the stove for the best flavor and texture. Sharing this dish with family or friends makes it even more enjoyable!

how to store Bacon Fried Rice

Storing Bacon Fried Rice is easy and ensures you can enjoy leftovers later. Allow the fried rice to cool completely before transferring it to an airtight container. It can be stored in the refrigerator for up to 3-4 days. When ready to eat, reheat the rice in a skillet over medium heat, adding a splash of water or broth to prevent sticking. You can also reheat it in a microwave-safe dish covered with a damp paper towel to keep it moist. This way, you’ll enjoy the wonderful flavors again with minimal effort.

tips to make Bacon Fried Rice

To make the best Bacon Fried Rice, consider using leftover rice as it’s drier and less sticky, making it perfect for frying. If you don’t have leftover rice, spread freshly cooked rice on a baking sheet to cool before using it. Make sure the bacon is crispy for great flavor and texture. Feel free to add your favorite vegetables or proteins to customize the dish to your taste. Lastly, watch the seasoning; adjusting the soy sauce and oyster sauce can help you hit the perfect balance of flavors!

variation

You can make Bacon Fried Rice vegetarian by omitting the bacon and using vegetable oil instead. Consider adding tofu or tempeh for protein. Other tasty variations include adding different vegetables like bell peppers, mushrooms, or broccoli. You could also spice things up with chopped chili or hot sauce for a bit of heat. The beauty of this dish is its adaptability—feel free to get creative!

Conclusion

Bacon Fried Rice is a delightful and comforting meal that is simple to prepare and versatile enough for any occasion. With just a few ingredients and easy steps, you can whip up a flavorful dish that pleases everyone at the table. It’s a fantastic way to use leftover rice while enjoying the delicious taste of crispy bacon. Next time you’re in need of a quick and satisfying meal, try this recipe, and you’ll see why it’s a favorite. Get cooking, and enjoy every bite!

FAQs

Q1: Can I use day-old rice for Bacon Fried Rice?
A1: Yes! Day-old rice is best because it’s drier and helps achieve better texture in fried rice.

Q2: Can I freeze leftovers of Bacon Fried Rice?
A2: Yes, you can freeze Bacon Fried Rice for up to 2 months in an airtight container. Just be sure to cool it fully before storing.

Q3: What vegetables can I add to Bacon Fried Rice?
A3: You can add any veggies you like! Popular options include bell peppers, corn, broccoli, or even mushrooms for extra flavor.

[tasty-recipe id=”2792″]

Bacon Fried Rice

A delicious way to use up leftover rice, this easy Bacon Fried Rice combines crispy bacon, hearty vegetables, and fluffy rice for a comforting dish perfect for any occasion.

Main Ingredients

  • 6 slices thick-cut bacon, chopped (Crispy bacon adds great flavor.)
  • 1/2 large onion, diced (Adds sweetness.)
  • 2 cloves garlic, minced (Enhances flavor.)
  • 1 cup frozen peas and carrots (Use frozen for convenience.)
  • 4 cups cooked and cooled long-grain rice (Preferably day-old rice for best texture.)
  • 3 large eggs, beaten (Adds protein and richness.)
  • 2 tablespoons soy sauce
  • 1 tablespoon oyster sauce
  • 1 teaspoon sesame oil (Adds a nutty flavor.)
  • to taste Salt and pepper
  • 2 green onions chopped (For garnish.)

Cooking

  1. Add chopped bacon to a cold skillet and turn the heat to medium. Cook until crispy, then remove and set aside, reserving the bacon fat.
  2. In the same skillet, sauté the diced onion in the bacon fat for 3-5 minutes until translucent.
  3. Add minced garlic and frozen peas and carrots, cooking for 2-3 minutes until tender.
  4. Stir in the chilled rice, cooking for 2-4 minutes. Push the rice and veggies to one side of the pan.
  5. In the empty side of the pan, scramble the beaten eggs until fully cooked, then mix them with the rice and veggies.
  6. Turn the heat to high. Add soy sauce, oyster sauce, sesame oil, and the cooked bacon. Stir thoroughly.
  7. Season with salt and pepper, garnish with chopped green onions, and serve hot.

For best results, use day-old rice as it’s drier and less sticky. Feel free to customize with your favorite veggies or proteins, and adjust the seasoning to taste.

Main Course, Side Dish
Asian, Comfort Food
Bacon Fried Rice, Easy Recipes, fried rice, Leftover Rice, Quick Dinner

Lemon Garlic Pasta

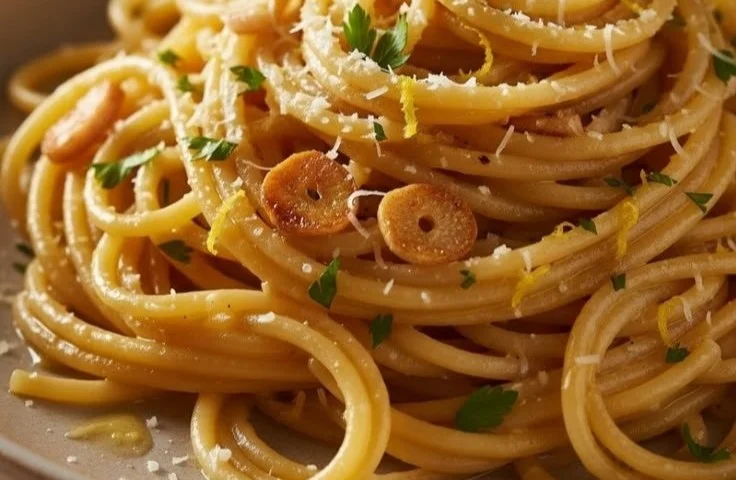
Bowl of Lemon Garlic Pasta garnished with fresh parsley and lemon slices

Lemon garlic pasta is bright, warm, and easy to make. The lemon lifts the pasta, the garlic adds depth, and a little butter or olive oil ties it all together. This dish feels fancy, but it comes together fast, so it is great for weeknights or for guests. If you love simple pasta dishes, you might also enjoy this baked chicken parmesan pasta. Try this lemon garlic pasta, and you will see how a few fresh ingredients can turn into a crowd-pleaser. Trust me, you will want to make it again and again.

how to prepare Lemon Garlic Pasta

Ingredients:

  • 12 ounces pasta, such as spaghetti or linguine
  • 3 tablespoons olive oil
  • 2 tablespoons butter
  • 4 garlic cloves, minced
  • Zest and juice of 2 lemons
  • 1/2 cup grated Parmesan cheese
  • 1/4 cup reserved pasta water, more if needed
  • Salt and black pepper to taste
  • Fresh parsley, chopped, for garnish
  • Optional, red pepper flakes for heat

Directions:

  1. Bring a large pot of salted water to a boil. Cook the pasta until al dente, following package time. Reserve 1/2 cup pasta water, then drain the pasta.
  2. While the pasta cooks, heat olive oil and butter in a large pan over medium heat.
  3. Add the minced garlic and cook 1 to 2 minutes, until fragrant and soft, do not let it burn.
  4. Turn off the heat for a moment, add lemon zest and lemon juice to the pan, stir well.
  5. Add the drained pasta to the pan, toss to coat. Add Parmesan and 1/4 cup reserved pasta water. Toss again, adding more pasta water if the sauce seems dry.
  6. Season with salt, pepper, and red pepper flakes if you like heat.
  7. Serve with chopped parsley and extra Parmesan on top.

Lemon Garlic Pasta

Why You’ll Love Lemon Garlic Pasta

  • It is simple to make, with few ingredients and quick steps.
  • The lemon gives a fresh, bright taste that pairs well with garlic and cheese.
  • You can change it easily, add chicken, shrimp, or vegetables for a full meal.
  • It feels light, but the Parmesan and pasta make it filling and satisfying.

tips for success

  • Save some pasta water, it helps make a smooth, creamy sauce.
  • Use fresh lemon juice and zest for the best bright flavor.
  • Do not overcook the garlic, it should be soft and golden, not brown.
  • Toss the pasta in the pan off heat to keep the cheese from clumping.
  • Taste and adjust salt and lemon at the end, small changes make a big difference.

Serving Suggestions

  • Add grilled chicken or sautéed shrimp for protein.
  • Serve with a simple green salad and a light vinaigrette.
  • Top with extra Parmesan and a squeeze of lemon for more zing.
  • Pair with crusty bread to soak up any sauce.

Lemon Garlic Pasta

FAQs

Q: Can I make this pasta creamy without cream?
A: Yes, use pasta water and Parmesan. The cheese and starchy water make a light, creamy sauce.

Q: Can I use bottled lemon juice?
A: Fresh lemon juice tastes best, but bottled will work in a pinch.

Q: How do I keep the garlic from burning?
A: Cook garlic on medium or medium-low heat and watch it closely. Remove from heat if it starts to brown.

Q: Can I make this gluten free?
A: Yes, use gluten free pasta and cook it to the right doneness.

Q: Can I keep leftovers?
A: Store in the fridge in a covered container for 2 to 3 days, reheat gently with a little water or oil.

Conclusion

If you want another take on lemon pasta ideas and extra tips, check this Love and Lemons lemon pasta recipe for inspiration and bright flavor ideas.

Lemon Garlic Pasta

Bright, warm, and easy to make, this lemon garlic pasta dish is perfect for weeknights or guests, combining simple ingredients for a crowd-pleaser.

Pasta and Base

  • 12 ounces pasta, such as spaghetti or linguine
  • 3 tablespoons olive oil
  • 2 tablespoons butter

Flavoring

  • 4 cloves garlic, minced
  • 2 lemons Zest and juice of
  • 1/2 cup grated Parmesan cheese
  • 1/4 cup reserved pasta water, more if needed
  • Salt and black pepper to taste
  • Fresh parsley, chopped, for garnish (Optional, red pepper flakes for heat)

Cooking Pasta

  1. Bring a large pot of salted water to a boil. Cook the pasta until al dente, following package time. Reserve 1/2 cup pasta water, then drain the pasta.

Preparing the Sauce

  1. While the pasta cooks, heat olive oil and butter in a large pan over medium heat.
  2. Add the minced garlic and cook for 1 to 2 minutes, until fragrant and soft, do not let it burn.
  3. Turn off the heat for a moment, add lemon zest and lemon juice to the pan, stir well.

Combining Ingredients

  1. Add the drained pasta to the pan, toss to coat. Add Parmesan and 1/4 cup reserved pasta water. Toss again, adding more pasta water if the sauce seems dry.
  2. Season with salt, pepper, and red pepper flakes if you like heat.
  3. Serve with chopped parsley and extra Parmesan on top.

Make sure to save some pasta water to help make a smooth, creamy sauce. For best results, use fresh lemon juice and zest, and avoid overcooking the garlic.

Dinner, Main Course
Italian
Easy Pasta Dish, Lemon Garlic Pasta, Pasta Recipe, Quick Dinner, Weeknight Meal