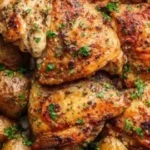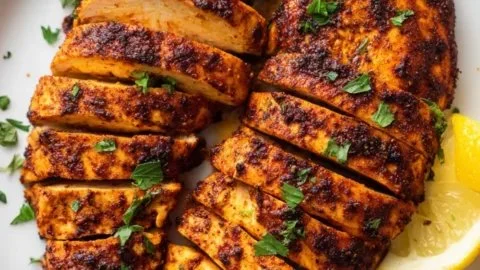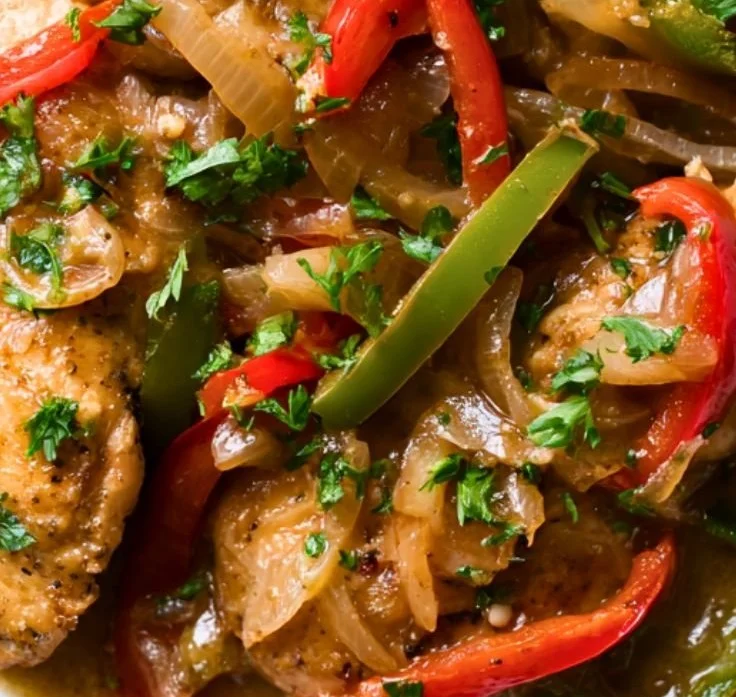
Chicken with Bell Peppers

Delicious Chicken with Bell Peppers served on a plate

Chicken with bell peppers is warm, simple, and full of flavor. The chicken cooks in a soft bed of peppers, onions, and a light sauce, so every bite feels homey. This dish is a real crowd-pleaser, great for weeknight dinners or a relaxed weekend meal. If you like stuffed pepper flavors, try this Mediterranean chicken stuffed peppers for another easy dinner idea. You will smile when the house smells good, and you will want to make this again and again.

How to prepare Chicken with Bell Peppers

Ingredients

  • 4 boneless, skinless chicken breasts
  • 2 tablespoons olive oil
  • 1 large onion, thinly sliced
  • 2 bell peppers, one red, one green, sliced into strips
  • 3 cloves garlic, minced
  • 1 teaspoon paprika
  • 1 teaspoon dried oregano
  • 1/2 teaspoon salt, or to taste
  • 1/2 teaspoon black pepper
  • 1 cup chicken broth
  • 1/2 cup heavy cream or half and half
  • 1 cup shredded cheddar or Monterey Jack cheese (optional)
  • Fresh parsley, chopped, for garnish

Directions

  1. Pat the chicken dry and season both sides with salt, pepper, paprika, and oregano.
  2. Heat 1 tablespoon olive oil in a large skillet over medium heat. Add the chicken and brown for 3 to 4 minutes per side, until golden. Remove chicken and set aside.
  3. Add the other tablespoon of oil to the same skillet. Add the onion and bell peppers, cook for 5 to 7 minutes until soft. Stir in the garlic and cook 30 seconds more.
  4. Pour in the chicken broth and scrape the bottom of the pan to loosen any browned bits. Let the broth simmer 2 minutes.
  5. Stir in the cream, bring to a low simmer, then return the chicken to the pan. Spoon some sauce and peppers over the chicken. Cover and cook 8 to 10 minutes, until the chicken reaches 165°F and the sauce thickens slightly.
  6. If you like cheese, sprinkle it over the chicken in the last 2 minutes, cover until melted.
  7. Garnish with chopped parsley and serve hot.

Smothered Chicken with Bell Peppers

Why You’ll Love Chicken with Bell Peppers

  • It is simple and quick, perfect for weeknights.
  • The peppers and onions give sweet, bright flavor to the chicken.
  • The light creamy sauce keeps the chicken moist and tasty.
  • It pairs well with rice, pasta, or bread for a full meal.
  • It uses common ingredients you likely have on hand.

Tips for success

  • Pound thicker chicken breasts to an even thickness so they cook the same.
  • Don’t crowd the pan, brown the chicken in batches if needed for a better sear.
  • Use low to medium heat when simmering the sauce, this keeps it smooth.
  • Taste the sauce before serving, add a little more salt or pepper if needed.
  • For a lighter option, use low-fat milk instead of cream, but watch the sauce for thinning.

Serving Suggestions

  • Serve over steamed white rice or brown rice for a simple plate.
  • Toss with cooked pasta and a little extra cheese for a hearty bowl.
  • Spoon over mashed potatoes for comfort food style.
  • Add a green salad or roasted vegetables on the side to round the meal.

Smothered Chicken with Bell Peppers

FAQs

Q: Can I use chicken thighs instead of breasts?

A: Yes, boneless thighs work well and stay juicy. Cut larger pieces to even size so they cook evenly.

Q: How long will leftovers last?

A: Store in an airtight container in the fridge for 3 to 4 days. Reheat gently on the stove or in the microwave.

Q: Can I make this ahead of time?

A: You can cook it, then cool and refrigerate. Reheat with a splash of broth to refresh the sauce.

Q: Can I freeze smothered chicken?

A: Yes, freeze in a freezer-safe container for up to 2 months. Thaw in the fridge before reheating.

Conclusion

This smothered chicken with bell peppers gives you a tasty, easy meal that feels like home. For a spicy Cajun take on a smothered chicken recipe, see this Cajun smothered chicken breasts recipe for more ideas.

Chicken with Bell Peppers

Warm, simple, and full of flavor, this chicken dish cooks in a bed of peppers and onions with a light sauce, making it perfect for weeknight dinners or relaxed weekend meals.

Main Ingredients

  • 4 pieces boneless, skinless chicken breasts (Pound to an even thickness for even cooking.)
  • 2 tablespoons olive oil (Divided for cooking.)
  • 1 large onion, thinly sliced
  • 2 pieces bell peppers, one red, one green, sliced into strips
  • 3 cloves garlic, minced
  • 1 teaspoon paprika
  • 1 teaspoon dried oregano
  • 1/2 teaspoon salt, or to taste
  • 1/2 teaspoon black pepper (Or to taste.)
  • 1 cup chicken broth
  • 1/2 cup heavy cream or half and half (For a lighter option, use low-fat milk.)
  • 1 cup shredded cheddar or Monterey Jack cheese (optional) (Add for the last 2 minutes of cooking.)
  • to taste none Fresh parsley, chopped, for garnish

Preparation

  1. Pat the chicken dry and season both sides with salt, pepper, paprika, and oregano.
  2. Heat 1 tablespoon olive oil in a large skillet over medium heat.
  3. Add the chicken and brown for 3 to 4 minutes per side, until golden. Remove chicken and set aside.
  4. Add the other tablespoon of oil to the same skillet.
  5. Add the onion and bell peppers, cook for 5 to 7 minutes until soft.
  6. Stir in the garlic and cook 30 seconds more.

Cooking

  1. Pour in the chicken broth and scrape the bottom of the pan to loosen any browned bits.
  2. Let the broth simmer for 2 minutes.
  3. Stir in the cream, bring to a low simmer, then return the chicken to the pan.
  4. Spoon some sauce and peppers over the chicken.
  5. Cover and cook for 8 to 10 minutes, until the chicken reaches 165°F and the sauce thickens slightly.
  6. If you like cheese, sprinkle it over the chicken in the last 2 minutes, cover until melted.

Serving

  1. Garnish with chopped parsley and serve hot.

Serve over steamed rice, pasta, or mashed potatoes to round out the meal. For additional taste, consider pairing with a green salad or roasted vegetables. Leftovers can be refrigerated for 3 to 4 days and reheated gently.
Dinner, Main Course
American
Chicken with Bell Peppers, Comfort Food, Easy Dinner, Quick Meals, Weeknight Dinner

Air Fryer Chicken and Potatoes

Crispy air fryer chicken and potatoes served on a plate

This air fryer chicken and potatoes recipe feels like a warm, home cooked meal with less fuss. The chicken stays juicy and the potatoes get a nice crisp, all without a lot of oil. It is a real crowd-pleaser for busy families and anyone who likes easy dinners. If you want more simple air fryer ideas, try this air fryer chicken and veggies recipe for more inspiration. Trust me, you will smile when you taste how good this combo is.

How to prepare Air Fryer Chicken and Potatoes Recipe

This simple recipe makes juicy chicken and crispy potatoes in one air fryer. It is easy for weeknights and tastes great.

Ingredients:

  • 4 boneless, skinless chicken thighs or breasts
  • 1 pound small potatoes, cut in halves or quarters
  • 2 tablespoons olive oil
  • 1 teaspoon salt
  • 1/2 teaspoon black pepper
  • 1 teaspoon garlic powder
  • 1 teaspoon paprika
  • 1/2 teaspoon dried thyme or rosemary
  • Optional, a squeeze of lemon or chopped parsley for serving

Directions:

  1. Pat the chicken dry with a paper towel. Place chicken and potatoes in a bowl.
  2. Add olive oil, salt, pepper, garlic powder, paprika, and thyme. Toss until chicken and potatoes are coated.
  3. Preheat the air fryer to 380°F (about 190°C) for 3 minutes if your model needs preheating.
  4. Arrange potatoes in the air fryer basket first, then add chicken on top so air circulates.
  5. Cook for 18 to 20 minutes, shaking the basket and turning the chicken once at about 10 minutes. Cook until the chicken reaches 165°F and potatoes are golden and tender.
  6. If you want extra crisp, increase temperature to 400°F for 2 to 3 minutes at the end.
  7. Let rest 3 to 5 minutes, then serve with lemon or parsley.

Air Fryer Chicken and Potatoes Recipe

Why You’ll Love Air Fryer Chicken and Potatoes Recipe

  • Quick cooking time, perfect for weeknight dinner.
  • Uses one air fryer basket, less cleanup.
  • Crispy potatoes and flavorful chicken, a hit with kids and adults.
  • Uses simple pantry spices, no fancy ingredients.

Tips for success

  • Cut potatoes into even pieces so they cook the same time.
  • Don’t crowd the basket, leave space for air to move.
  • Pat chicken dry before seasoning, it helps the outside turn golden.
  • Check internal temperature of chicken to be safe, aim for 165°F.
  • If your potatoes cook slower than chicken, start them 5 minutes earlier.

Serving Suggestions

  • Serve with a simple salad or steamed green beans for color and freshness.
  • Spoon a little garlic butter or plain yogurt sauce over the top.
  • Add lemon wedges on the side for a bright finish.
  • This recipe pairs well with crusty bread or a scoop of rice.

Air Fryer Chicken and Potatoes Recipe

FAQs

Q: Can I use bone in chicken? A: Yes, you can. Bone in pieces may need a few more minutes to cook, check doneness with a thermometer.

Q: Can I use frozen potatoes or chicken? A: For best results, use thawed chicken and fresh potatoes. Frozen items change cook time and texture.

Q: What temperature is best for crispy potatoes? A: Start at 380°F, then finish with 400°F for 2 to 3 minutes if you want extra crisp.

Q: Can I double this recipe? A: You can, but cook in batches or use a larger air fryer so food does not crowd the basket.

Q: How do I store leftovers? A: Keep leftovers in an airtight container in the fridge for up to 3 days. Reheat in the air fryer for best crisp.

Conclusion

This Air Fryer Chicken and Potatoes Recipe is a simple, tasty choice for busy nights. For another clear take on this classic dish, see Air Fryer Chicken and Potatoes – Little Sunny Kitchen for more ideas and tips.

Air Fryer Chicken and Potatoes

A simple and delicious recipe for juicy chicken and crispy potatoes made effortlessly in an air fryer.

Main Ingredients

  • 4 pieces boneless, skinless chicken thighs or breasts
  • 1 pound small potatoes, cut in halves or quarters
  • 2 tablespoons olive oil
  • 1 teaspoon salt
  • 1/2 teaspoon black pepper
  • 1 teaspoon garlic powder
  • 1 teaspoon paprika
  • 1/2 teaspoon dried thyme or rosemary (Choose one or use a combination.)

Optional Garnish

  • 1 squeeze lemon (For serving)
  • 1/4 cup chopped parsley (For serving)

Preparation

  1. Pat the chicken dry with a paper towel. Place chicken and potatoes in a bowl.
  2. Add olive oil, salt, pepper, garlic powder, paprika, and thyme. Toss until chicken and potatoes are coated.

Cooking

  1. Preheat the air fryer to 380°F (about 190°C) for 3 minutes if your model needs preheating.
  2. Arrange potatoes in the air fryer basket first, then add chicken on top so air circulates.
  3. Cook for 18 to 20 minutes, shaking the basket and turning the chicken once at about 10 minutes. Cook until the chicken reaches 165°F and potatoes are golden and tender.
  4. If you want extra crisp, increase temperature to 400°F for 2 to 3 minutes at the end.
  5. Let rest for 3 to 5 minutes, then serve with lemon or parsley.

Cut potatoes into even pieces for uniform cooking. Don’t crowd the basket to allow proper air circulation. Check the internal temperature of chicken for safety.

Dinner, Main Course
American
Air Fryer Chicken, Crispy Potatoes, Easy Dinner, Healthy Cooking, Weeknight Meal

Air Fryer Cajun Chicken

Delicious Air Fryer Cajun Chicken served with a side of vegetables.

This Air Fryer Cajun Chicken Recipe is simple, bold, and ready in minutes. The chicken gets a spicy, smoky crust and stays juicy inside, so it makes a great weeknight dinner or a party snack. If you like easy air fryer chicken ideas, you might also enjoy this air fryer honey butter garlic chicken tenders recipe for a sweeter change. This recipe is a crowd-pleaser, full of flavor and low fuss, you will want to make it again and again.

How to prepare Air Fryer Cajun Chicken Recipe

Ingredients

  • 4 boneless, skinless chicken breasts, about 1 pound
  • 2 tablespoons olive oil
  • 2 tablespoons Cajun seasoning
  • 1 teaspoon garlic powder
  • 1/2 teaspoon paprika
  • 1/2 teaspoon salt, or to taste
  • 1/4 teaspoon black pepper
  • Lemon wedges, for serving

Directions

  1. Pat the chicken dry with paper towels. This helps the spice mix stick and the outside get crispy.
  2. In a bowl, mix the olive oil, Cajun seasoning, garlic powder, paprika, salt, and pepper.
  3. Rub the spice mix over each chicken breast, coating all sides. Let sit 5 to 10 minutes, or refrigerate up to 2 hours for more flavor.
  4. Preheat the air fryer to 380°F (190°C) for 3 minutes if your model needs preheating.
  5. Place the chicken in the air fryer basket in a single layer. Do not crowd the basket.
  6. Cook at 380°F (190°C) for 10 minutes. Flip the chicken and cook another 6 to 8 minutes, until the internal temperature reaches 165°F (74°C).
  7. Let the chicken rest 5 minutes before slicing. Serve with lemon wedges.

Air Fryer Cajun Chicken Recipe

Why You’ll Love Air Fryer Cajun Chicken Recipe

  • Fast cooking, ready in about 25 minutes from start to finish.
  • Crispy outside, juicy inside, thanks to the air fryer.
  • Bold Cajun spice without a lot of work.
  • Low cleanup, no frying oil needed.
  • Great for meal prep, salads, sandwiches, and wraps.

Tips for success

  • Dry the chicken well before seasoning, this gives a better crust.
  • Do not overcrowd the air fryer, cook in batches if needed.
  • Use a meat thermometer to check for 165°F, this keeps chicken safe and juicy.
  • If your chicken pieces are very thick, pound them to even thickness for even cooking.
  • Adjust Cajun seasoning to your heat preference, add more for extra spice or less for mild taste.

Serving Suggestions

  • Slice and add to a salad with greens, tomatoes, and avocado.
  • Serve over rice or quinoa with steamed vegetables.
  • Make sandwiches or wraps with lettuce, mayo, and pickles.
  • Pair with roasted potatoes or air fryer fries for a fuller meal.

Air Fryer Cajun Chicken Recipe

FAQs

Q: Can I use chicken thighs instead of breasts?

A: Yes, boneless thighs work well. Cook times may be a few minutes longer, check for 165°F internal temp.

Q: Is this recipe very spicy?

A: Cajun seasoning brings heat, but you can reduce the amount or use a mild Cajun blend for less spice.

Q: Can I cook frozen chicken in the air fryer?

A: You can, but thawed chicken gives the best texture and even seasoning. If you must cook frozen, add extra time and check the temperature.

Q: How do I store leftovers?

A: Keep leftover chicken in an airtight container in the fridge for up to 4 days. Reheat in the air fryer at 350°F for a few minutes to keep it crisp.

Q: Can I double the recipe?

A: Yes, but cook in batches so the air can circulate and the chicken gets crispy on all sides.

Conclusion

This Air Fryer Cajun Chicken Recipe is a simple way to get big flavor fast, perfect for busy nights or casual gatherings. For another tasty take on air fryer chicken you can try a different flavor profile with the Air Fryer Cajun Chicken (An Easy Recipe Loaded with Flavor!).

Air Fryer Cajun Chicken

A simple and bold Air Fryer Cajun Chicken recipe that features a spicy, smoky crust and juicy interior, perfect for weeknight dinners or as a party snack.

Main ingredients

  • 4 pieces boneless, skinless chicken breasts, about 1 pound
  • 2 tablespoons olive oil
  • 2 tablespoons Cajun seasoning
  • 1 teaspoon garlic powder
  • 1/2 teaspoon paprika
  • 1/2 teaspoon salt, or to taste
  • 1/4 teaspoon black pepper
  • Lemon wedges, for serving

Preparation

  1. Pat the chicken dry with paper towels to help the spice mix stick and achieve a crispy outer layer.
  2. In a bowl, mix the olive oil, Cajun seasoning, garlic powder, paprika, salt, and pepper.
  3. Rub the spice mix over each chicken breast, coating all sides. Let sit for 5 to 10 minutes, or refrigerate for up to 2 hours for more flavor.
  4. Preheat the air fryer to 380°F (190°C) for 3 minutes if your model requires preheating.

Cooking

  1. Place the chicken in the air fryer basket in a single layer, avoiding crowding.
  2. Cook at 380°F (190°C) for 10 minutes. Flip the chicken and continue to cook for another 6 to 8 minutes, until the internal temperature reaches 165°F (74°C).

Serving

  1. Let the chicken rest for 5 minutes before slicing. Serve with lemon wedges.

For best results, dry the chicken well before seasoning. Cook in batches if necessary to avoid overcrowding. Adjust the Cajun seasoning according to your spice preference.

Dinner, Main Course
American, Cajun
Air Fryer Chicken, Cajun Chicken, easy chicken recipe, Healthy Dinner, Quick Meal

Honey Garlic Chicken Thighs

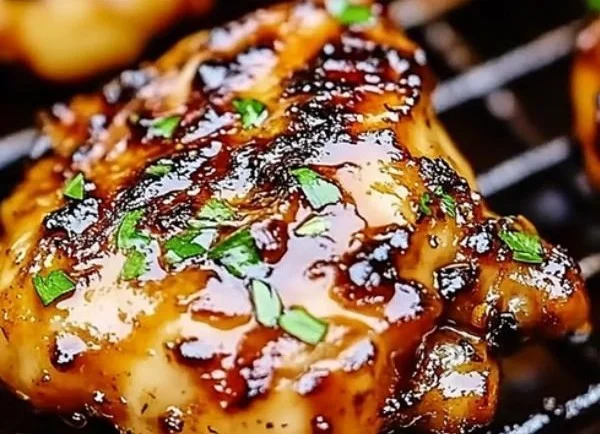
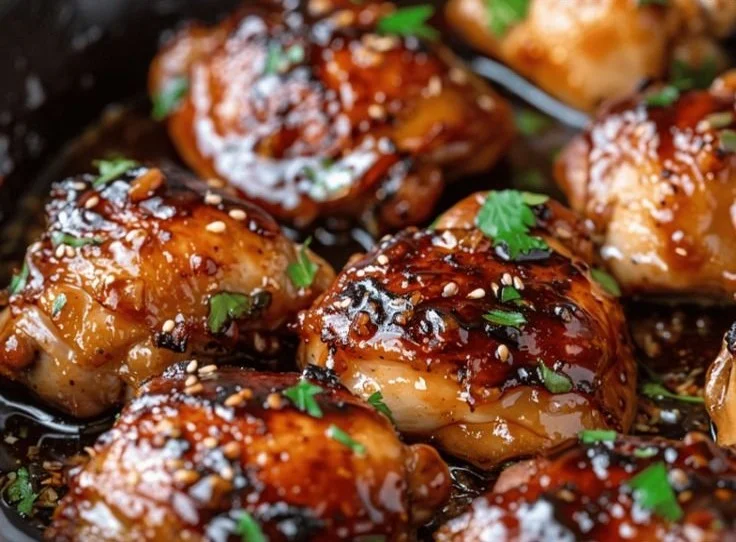
Honey Garlic Chicken Thighs glazed with savory honey and garlic sauce

Warm, golden chicken thighs glazed in a sweet, garlicky sauce feel like a hug on a plate. Honey Garlic Chicken Thighs are simple to make, full of flavor, and perfect for busy weeknights or a cozy weekend meal. The skin gets a little crisp, the sauce turns sticky, and every bite tastes rich and comforting. If you like a faster, air-fryer version, try the air fryer honey butter garlic chicken tenders for a similar sweet, garlicky bite.

How to prepare Honey Garlic Chicken Thighs

  1. Preheat oven to 400°F, pat chicken thighs dry, and season with salt and pepper.
  2. In a bowl, mix 1/3 cup honey, 3 tablespoons soy sauce, 3 cloves minced garlic, 1 tablespoon rice vinegar or lemon juice, 1 tablespoon olive oil, and a pinch of red pepper flakes.
  3. Heat a skillet over medium-high heat, add a little oil, and brown the thighs skin-side down 3 to 4 minutes until golden. Flip and brown the other side 2 minutes.
  4. Pour the honey garlic sauce over the thighs. Let it bubble for 1 minute, then transfer skillet to oven, or move thighs and sauce to a baking dish.
  5. Bake 20 to 25 minutes, spooning the sauce over the chicken once or twice, until the thighs reach 165°F and the sauce is sticky.
  6. If the sauce needs thickening, pour out a little, simmer on the stove until syrupy, and spoon back over the chicken. Rest 5 minutes before serving.

Honey Garlic Chicken Thighs

Why You’ll Love Honey Garlic Chicken Thighs

  • The sauce is sweet and garlicky, and it sticks to the chicken for big flavor in every bite.
  • Thighs stay moist and forgiving, so they work well for cooks of any skill level.
  • It makes a quick, tasty weeknight dinner, but it is nice enough for guests.
  • You can bake, pan-sear then roast, or cook in an air fryer for a crisp finish.

Tips for success

  • Pat the chicken dry so the skin browns well, do not skip this.
  • Use bone-in, skin-on thighs for best taste and juiciness.
  • Taste the sauce before you bake, add a bit more soy or vinegar if it needs balance.
  • Watch the oven in the last minutes to avoid burning the honey.
  • Let the chicken rest a few minutes so juices settle and the sauce sticks.

Serving Suggestions

  • Serve with steamed rice or mashed potatoes to soak up the sauce.
  • Add steamed broccoli, green beans, or a simple salad on the side for color.
  • Garnish with chopped green onions and sesame seeds for a bright finish.
  • Leftovers make great sandwiches or salads the next day.

Honey Garlic Chicken Thighs

FAQs

Q: Can I use chicken breasts instead of thighs?

A: Yes, but bake a little less time and watch for dryness. Thighs stay juicier.

Q: How do I make the sauce less sweet?

A: Add more soy sauce or a splash of vinegar, and taste as you go.

Q: Can I make this ahead and reheat?

A: You can cook ahead, cool, and store in the fridge. Reheat gently in the oven or on the stove, and spoon fresh sauce over it.

Q: Is there a gluten-free option?

A: Use tamari or a gluten-free soy sauce to keep the flavor but avoid gluten.

Conclusion

If you want another trusted version of this classic, check the detailed Honey Garlic Chicken Thighs Recipe – Allrecipes for tips and variations.

Honey Garlic Chicken Thighs

Warm, golden chicken thighs glazed in a sweet, garlicky sauce are a comforting dish that’s perfect for busy weeknights or cozy weekend meals.

Chicken Thighs

  • 4 pieces bone-in, skin-on chicken thighs (For best taste and juiciness.)

Honey Garlic Sauce

  • 1/3 cup honey (Sweet base for the sauce.)
  • 3 tablespoons soy sauce (Can substitute with tamari for gluten-free.)
  • 3 cloves minced garlic
  • 1 tablespoon rice vinegar or lemon juice
  • 1 tablespoon olive oil (For browning the chicken.)
  • a pinch red pepper flakes (For a little heat.)

Serving Suggestions

  • Steamed rice or mashed potatoes (To soak up the sauce.)
  • Steamed broccoli or green beans (For color and nutrition.)
  • Chopped green onions and sesame seeds (For garnish.)

Preparation

  1. Preheat oven to 400°F (200°C).
  2. Pat chicken thighs dry, and season with salt and pepper.
  3. In a bowl, mix honey, soy sauce, minced garlic, rice vinegar or lemon juice, olive oil, and red pepper flakes.

Cooking

  1. Heat a skillet over medium-high heat, add a little oil, and brown the thighs skin-side down for 3 to 4 minutes until golden.
  2. Flip and brown the other side for 2 minutes.
  3. Pour the honey garlic sauce over the thighs, let it bubble for 1 minute.
  4. Transfer skillet to oven or move thighs and sauce to a baking dish.
  5. Bake for 20 to 25 minutes, spooning the sauce over the chicken once or twice, until thighs reach 165°F (74°C) and the sauce is sticky.
  6. If sauce needs thickening, pour out a little, simmer on the stove until syrupy, and spoon back over the chicken.
  7. Rest for 5 minutes before serving.

Pat the chicken dry to ensure crispy skin. Taste the sauce before baking to adjust the flavor balance. Watch the oven last minutes to avoid burning the honey. Let chicken rest for juices to settle.

Dinner, Main Course
American
Baked Chicken Thighs, Chicken Thigh Recipe, Comfort Food, Easy Weeknight Dinner, Honey Garlic Chicken

Honey Garlic Bourbon Glazed Chicken Thighs

Honey Garlic Bourbon Glazed Chicken Thighs cooked to perfection with a savory glaze

This Honey Garlic Bourbon Glazed Chicken Thighs recipe is warm, sweet, and just a little smoky. It makes sticky, glossy chicken with a bright garlic bite and a hint of bourbon flavor. People love it for weeknight dinners and for serving guests because it looks and tastes special but it is not hard to make.

If you want a similar sweet garlic chicken idea for a quick meal, check this air fryer honey butter garlic chicken tenders recipe, it shows another easy way to use honey and garlic with chicken.

How to prepare Honey Garlic Bourbon Glazed Chicken Thighs

Start by patting the chicken thighs dry with paper towels. Season them with salt and pepper on both sides. Heat a large skillet over medium high heat, add a little oil, and brown the thighs skin side down for 4 to 6 minutes until golden, then flip and brown the other side for 3 to 4 minutes.

While the chicken browns, make the glaze. In a small bowl mix honey, minced garlic, a splash of bourbon, soy sauce, and a little apple cider vinegar. Lower the heat to medium low, pour the glaze over the chicken, and spoon it over the thighs as it simmers. Cook until the sauce thickens and the chicken reaches an internal temperature of 165°F, about 10 more minutes. Remove from heat and let rest for a few minutes before serving.

For a crisp finish, you can place the glazed thighs under the broiler for 1 to 2 minutes, watching closely so the glaze does not burn.

Honey Garlic Bourbon Glazed Chicken Thighs

Why You’ll Love Honey Garlic Bourbon Glazed Chicken Thighs

  • The glaze is sticky and bright, it makes the chicken look and taste great.
  • Chicken thighs stay juicy and forgiving, they do not dry out easily.
  • The recipe uses simple ingredients you probably have at home, honey, garlic, soy sauce, and a splash of bourbon or cooking bourbon flavor.
  • It works for weeknights and for casual dinner guests, it feels a bit fancy without a lot of work.

Tips for success

  • Pat the chicken dry before cooking, this helps the skin brown.
  • Use medium high heat to get a good sear, then lower the heat to finish cooking.
  • Stir the glaze ingredients well and taste, add a pinch of salt or a squeeze of lemon if it needs brightness.
  • Keep an eye on the glaze as it thickens, sugar in the honey can burn fast.
  • If you worry about alcohol, use a non alcoholic bourbon flavored extract or skip the bourbon and add a splash more soy sauce and a little orange juice for depth.

Serving Suggestions

  • Serve with steamed rice or mashed potatoes to soak up the glaze.
  • Add a simple green salad or roasted broccoli for a fresh contrast.
  • Garnish with chopped green onions and sesame seeds for color and texture.
  • Leftovers work well in sandwiches or on top of a grain bowl for lunch.

Honey Garlic Bourbon Glazed Chicken Thighs

FAQs

Q: Can I use chicken breasts instead of thighs?

A: Yes, you can, but watch cooking time, breasts cook faster and can dry out. Lower the heat and check temperature often.

Q: Do I need real bourbon for the glaze?

A: No, you can use a little chicken stock or orange juice with a splash of vanilla extract if you prefer no alcohol, the glaze will still be tasty.

Q: How do I make the glaze thicker?

A: Simmer the sauce a few extra minutes on low heat until it reduces and coats the back of a spoon. Be careful not to burn it.

Q: Can I make this ahead?

A: You can make the glaze ahead and reheat it, and you can cook the chicken and store it in the fridge, then reheat and glaze before serving for best shine.

Conclusion

Give this Honey Garlic Bourbon Glazed Chicken Thighs a try for a meal that tastes special but stays simple to make, and for another take on honey garlic chicken, see the Honey Bourbon Chicken – Grilled Cheese Social recipe for more ideas.

Honey Garlic Bourbon Glazed Chicken Thighs

This Honey Garlic Bourbon Glazed Chicken Thighs recipe is warm, sweet, and just a little smoky. Enjoy sticky, glossy chicken with a bright garlic bite and a hint of bourbon flavor, perfect for weeknight dinners or serving guests.

Chicken Preparation

  • 4 pieces chicken thighs (Bone-in, skin-on for best flavor)
  • 1 teaspoon salt (To taste)
  • 1 teaspoon black pepper (To taste)
  • 1 tablespoon oil (For browning the chicken)

Glaze Ingredients

  • 1/4 cup honey
  • 4 cloves minced garlic
  • 2 tablespoons bourbon (Can substitute with chicken stock or orange juice if needed)
  • 2 tablespoons soy sauce
  • 1 tablespoon apple cider vinegar

Preparation

  1. Start by patting the chicken thighs dry with paper towels.
  2. Season them with salt and pepper on both sides.

Cooking the Chicken

  1. Heat a large skillet over medium high heat and add a little oil.
  2. Brown the thighs skin side down for 4 to 6 minutes until golden, then flip and brown the other side for 3 to 4 minutes.

Making the Glaze

  1. While the chicken browns, mix honey, minced garlic, bourbon, soy sauce, and apple cider vinegar in a small bowl.
  2. Lower the heat to medium low, pour the glaze over the chicken, and spoon it over the thighs.
  3. Cook until the sauce thickens and the chicken reaches an internal temperature of 165°F, about 10 more minutes.
  4. Remove from heat and let rest for a few minutes before serving.

Finishing Touches

  1. For a crisp finish, place the glazed thighs under the broiler for 1 to 2 minutes, watching closely so the glaze does not burn.

Pat chicken dry before cooking for better browning. Use medium high heat initially, then lower to finish cooking. Stir glaze well and taste, add salt or lemon for brightness if needed. Watch the glaze as it thickens to prevent burning. If you prefer no alcohol, use a bourbon-flavored extract or skip bourbon and add more soy sauce with orange juice.

Dinner, Main Course
American
Bourbon Chicken, Glazed Chicken Thighs, Honey Garlic Chicken

Apple Cheesecake Streusel Buns

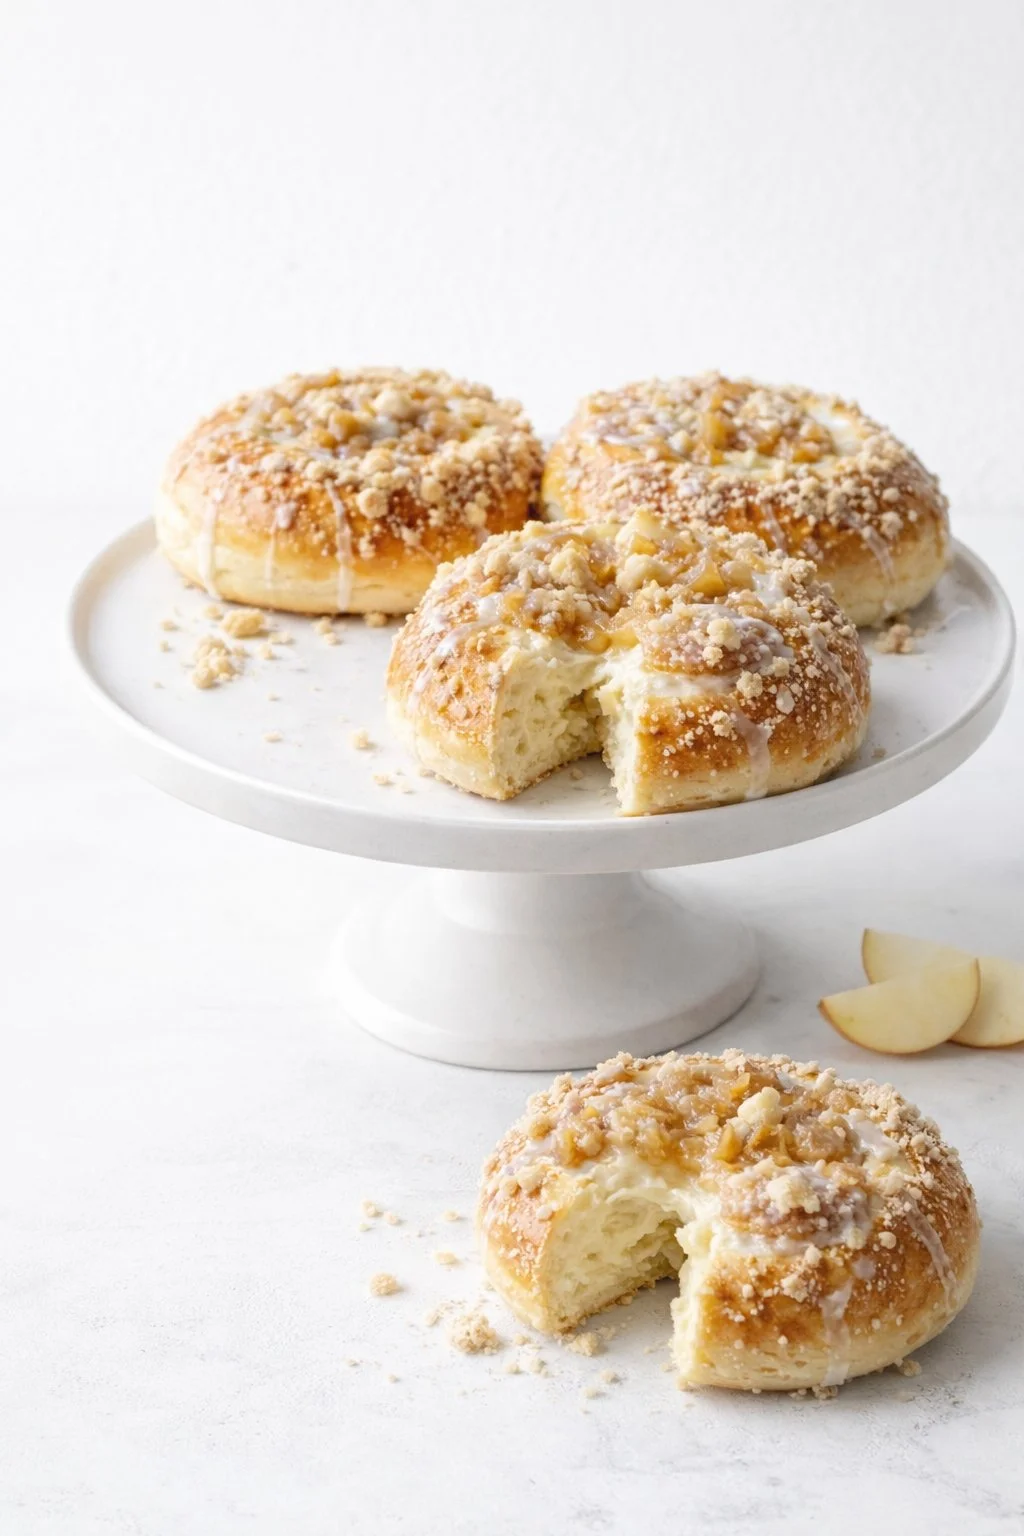
Delicious apple cheesecake streusel buns on a wooden table

These Apple Cheesecake Streusel Buns are warm, soft buns filled with sweet apple and creamy cheesecake, topped with a crunchy streusel. They smell like fall and taste like a treat you want for breakfast or dessert. The filling is mild and creamy, the apples add bright flavor, and the streusel gives a nice crisp bite. This recipe is a crowd-pleaser at family breakfasts, bake sales, or a cozy weekend. If you like simple cheesecakes, try a similar easy dessert like 2-Ingredient Yogurt Cheesecake for more cheesecake ideas. Get ready to bake, and have fun making these sweet buns for friends and family.

How to prepare Apple Cheesecake Streusel Buns

  1. Make the dough, follow a basic sweet roll dough recipe, and let it rise until doubled.
  2. Prepare the cheesecake filling, beat cream cheese with a little sugar and vanilla until smooth.
  3. Cook the apple filling, chop apples small, toss with sugar, cinnamon, and a touch of lemon, and cook until soft. Let cool.
  4. Roll the dough on a floured surface into a large rectangle. Spread the cheesecake filling in a thin layer over the dough.
  5. Scatter the cooled apple filling over the cheesecake layer. Roll the dough tightly from the long side, like a jelly roll.
  6. Cut the roll into buns about 1 to 1.5 inches wide. Place buns in a greased pan with space between them.
  7. Make the streusel, mix flour, brown sugar, cold butter, and a pinch of salt until crumbly. Sprinkle streusel over each bun.
  8. Let buns rise a short time, then bake in a preheated oven at 350°F (175°C) for 20 to 30 minutes, until golden and cooked through.
  9. Cool slightly before serving, or drizzle a simple icing if you like.

Apple Cheesecake Streusel Buns

Why You’ll Love Apple Cheesecake Streusel Buns

  • Soft and tender buns with a creamy cheesecake center.
  • Warm, spiced apples bring fresh, cozy flavor.
  • Crunchy streusel adds texture and a sweet finish.
  • Great for serving to guests, kids, or for a special morning treat.
  • They store well for a day, and warm up nicely in the oven or microwave.

Tips for success

  • Use room temperature cream cheese, it mixes smooth and keeps the filling creamy.
  • Cook the apples until they are soft but not mushy, so the buns hold shape.
  • Chill the filling if it gets too loose before you roll the dough.
  • Keep butter cold for the streusel, that makes a better crumb texture.
  • Do not overfill the dough, or buns can leak while baking.
  • Test one bun for doneness, if the center is doughy, give the pan a few more minutes.

Serving Suggestions

  • Serve warm with a cup of coffee or tea.
  • Add a light vanilla glaze or dust with powdered sugar for extra sweetness.
  • Pair with fresh fruit or a simple yogurt to balance richness.
  • These buns are nice on a brunch table with eggs and a salad.

Apple Cheesecake Streusel Buns

FAQs

Q: Can I use pre-made dough?

A: Yes, store-bought sweet roll dough or puff pastry works fine for a quicker version.

Q: How far ahead can I make these?

A: You can assemble the buns, cover, and refrigerate overnight. Bake the next morning.

Q: Can I freeze the buns?

A: Yes, freeze baked buns in an airtight bag for up to 2 months. Thaw and warm before serving.

Q: What apples work best?

A: Firm apples like Granny Smith, Honeycrisp, or Fuji hold their texture and add good flavor.

Q: Can I make the streusel without butter?

A: Butter gives the best flavor and texture, but you can try cold coconut oil as a substitute.

Conclusion

For a close look at a very similar recipe and extra tips, check the detailed version on Apple Streusel Cheesecake Buns – Apron & Whisk. Enjoy baking these Apple Cheesecake Streusel Buns, and share them with people you love.

Apple Cheesecake Streusel Buns

Warm, soft buns filled with sweet apple and creamy cheesecake, topped with a crunchy streusel for a delightful breakfast or dessert treat.

Dough

  • 2 cups all-purpose flour (plus more for dusting)
  • 1 tbsp sugar (for sweetening the dough)
  • 1 tsp yeast (instant or active dry)
  • 1 cup milk (warm, for activating yeast)
  • 1 large egg (for enriching the dough)
  • 1/2 cup butter (melted, for richness)

Cheesecake Filling

  • 8 oz cream cheese (room temperature for easier mixing)
  • 1/2 cup sugar (for sweetness in the filling)
  • 1 tsp vanilla extract (for flavoring)

Apple Filling

  • 2 cups apples (finely chopped, such as Granny Smith or Honeycrisp)
  • 1 tbsp sugar (for sweetness)
  • 1 tsp cinnamon (for spice)
  • 1 tsp lemon juice (to enhance flavor)

Streusel Topping

  • 1/2 cup all-purpose flour (for the streusel)
  • 1/2 cup brown sugar (to give sweetness and depth)
  • 1/4 cup cold butter (for texture in the streusel)
  • a pinch salt (to enhance flavor)

Dough Preparation

  1. Make the dough by following a basic sweet roll dough recipe and let it rise until doubled.

Cheesecake Filling Preparation

  1. In a mixing bowl, beat cream cheese with sugar and vanilla until smooth.

Apple Filling Preparation

  1. Chop apples small, toss with sugar, cinnamon, and lemon juice, and cook until soft. Let cool.

Assembly

  1. Roll the dough on a floured surface into a large rectangle.
  2. Spread the cheesecake filling in a thin layer over the dough.
  3. Scatter the cooled apple filling over the cheesecake layer.
  4. Roll the dough tightly from the long side, like a jelly roll.
  5. Cut the roll into buns about 1 to 1.5 inches wide.
  6. Place buns in a greased pan with space between them.

Streusel Preparation and Baking

  1. Mix flour, brown sugar, cold butter, and a pinch of salt until crumbly to make the streusel.
  2. Sprinkle streusel over each bun.
  3. Let buns rise a short time, then bake in a preheated oven at 350°F (175°C) for 20 to 30 minutes, until golden and cooked through.

Serving

  1. Cool slightly before serving, or drizzle with a simple icing if desired.

Use room temperature cream cheese for a smooth filling. Cook apples until soft but not mushy. Chill the filling if it gets too loose before rolling the dough. Keep butter cold when making streusel for better texture. Do not overfill the dough. Test one bun for doneness before serving.

Breakfast, Brunch, Dessert
American
Apple Cheesecake, Baking, Comfort Food, Streusel Buns, sweet rolls

Fluffiest Chocolate Chip Milk Buns

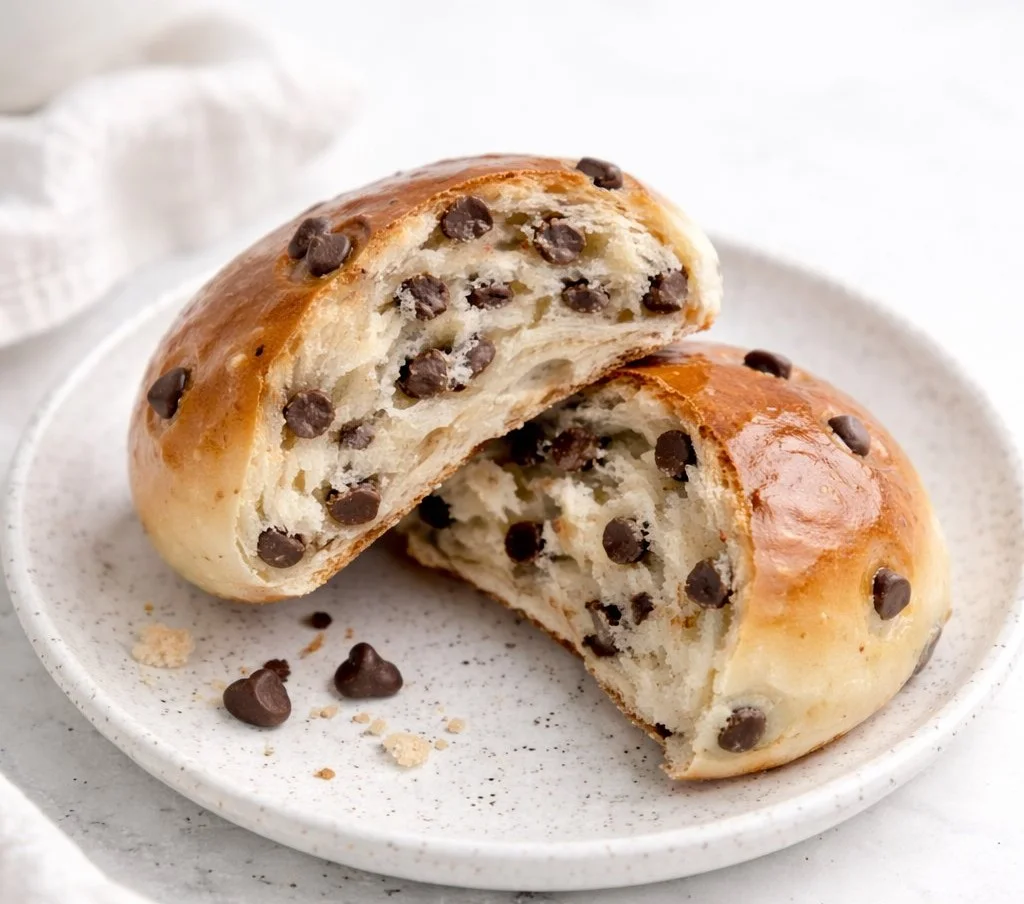
Fluffiest chocolate chip milk buns fresh out of the oven

These milk buns feel like a warm hug, soft and light, with chocolate chips in every bite. They stay tender for days, and they make great snacks, breakfast, or a sweet treat after dinner. I call them The Fluffiest Chocolate Chip Milk Buns because they puff up soft and airy, with a mild sweet milk flavor that pairs perfectly with chocolate. If you like similar cozy bakes, you might enjoy this banana chocolate chip pumpkin bread for a different twist.

This recipe is a real crowd-pleaser, easy to share, and fun to make with kids. The dough is simple, and the small buns bake fast, giving you warm, soft chocolate chip buns in under two hours. Ready to make them and fill your kitchen with that sweet, bakery smell?

How to prepare The Fluffiest Chocolate Chip Milk Buns

  1. Warm milk and mix with yeast and a little sugar, let sit until foamy, about 5 to 10 minutes.
  2. In a bowl, mix flour, sugar, salt. Add the foamy milk, an egg, softened butter, and knead until smooth and elastic, about 8 to 10 minutes by hand, or 5 with a mixer.
  3. Fold in chocolate chips evenly into the dough.
  4. Cover and let the dough rise in a warm place until doubled, about 1 hour.
  5. Punch down the dough, divide into equal pieces, shape into small rounds, place on a baking tray with space between each.
  6. Let the shaped buns rise again, about 30 to 40 minutes, until puffy.
  7. Brush the tops with milk or an egg wash for shine.
  8. Bake in a preheated 350°F (175°C) oven for 12 to 15 minutes, until light golden.
  9. Cool slightly on a rack, serve warm or at room temperature.

The Fluffiest Chocolate Chip Milk Buns

Why You’ll Love The Fluffiest Chocolate Chip Milk Buns

These buns are soft, light, and tender, not dense. The milk in the dough gives a gentle sweetness and keeps the crumb moist. Chocolate chips add small pockets of rich flavor in each bite. They are perfect for school lunches, coffee time, or a quick dessert. The recipe works well as a basic soft bread base, so you can try other mix-ins to make sweet rolls or soft chocolate chip bread.

Tips for success

  • Use warm, not hot, milk to activate yeast, around 105°F to 110°F, it should feel warm to your wrist.
  • Measure flour by spooning into the cup and leveling, or weigh it if you can, to avoid dry dough.
  • Knead until the dough is smooth and slightly springy, this builds gluten for good lift and fluff.
  • Keep butter and egg at room temperature so they mix evenly.
  • Let the dough rise in a warm, draft-free spot, cover with a damp towel or plastic wrap.
  • Do not overbake, they should stay pale golden to keep soft centers.
  • Freeze any leftover buns safely in a zip bag, then thaw and warm before serving.

Serving Suggestions

  • Serve warm with butter for a simple treat.
  • Slice and spread with jam, Nutella, or cream cheese for a richer snack.
  • Make mini sandwiches with ham and cheese for a savory twist.
  • Pack in lunch boxes, or serve on a brunch table with fruit and coffee.
  • These milk buns pair well with milk, tea, or coffee for a cozy snack.

The Fluffiest Chocolate Chip Milk Buns

FAQs

Q: Can I use instant yeast instead of active dry yeast?

A: Yes, use about the same amount, mix it directly with dry ingredients, and reduce proof time slightly if needed.

Q: How do I keep the buns soft for longer?

A: Store in an airtight container at room temperature for up to 2 days, or freeze for longer. Reheat briefly to refresh softness.

Q: Can I use different chocolate, like chunks or white chocolate?

A: Yes, you can use any chips or chopped chocolate, just fold them in evenly so every bun gets chocolate.

Q: Can I make the dough in advance?

A: Yes, you can refrigerate the dough after the first rise for up to 24 hours. Let it come to room temperature before shaping and the second rise.

Q: Are these buns good for breakfast?

A: Definitely, they are soft and mild, perfect with coffee or milk, and kids love them for morning or snack time.

Conclusion

If you want a reliable, soft, and fluffy chocolate chip milk bun recipe, this one is easy and satisfying, and it gives you bakery-style buns at home. For another tested version with step by step tips, see this Most Amazing Fluffy Chocolate Chip Milk Buns Recipe – Bakeomaniac, it offers helpful photos and tweaks you might like.

Chocolate Chip Milk Buns

Soft and light milk buns filled with chocolate chips, perfect for snacks, breakfast, or a sweet treat.

Dough Ingredients

  • 1 cup warm milk (Should be between 105°F to 110°F)
  • 2 teaspoons active dry yeast (or instant yeast)
  • 2 tablespoons sugar (for yeast activation)
  • 4 cups all-purpose flour (spooned and leveled or weighed)
  • 1 teaspoon salt (for flavor)
  • 1 large egg (at room temperature)
  • 1/2 cup unsalted butter (softened and at room temperature)
  • 1 cup chocolate chips (use any type or mix-ins)

Preparing the Dough

  1. Warm the milk and mix it with yeast and a little sugar; let sit until foamy, about 5 to 10 minutes.
  2. In a bowl, mix flour, sugar, and salt. Add the foamy milk, an egg, and softened butter; knead until smooth and elastic, about 8 to 10 minutes by hand, or 5 with a mixer.
  3. Fold in the chocolate chips evenly into the dough.
  4. Cover and let the dough rise in a warm place until doubled, about 1 hour.

Shaping and Baking

  1. Punch down the dough, divide it into equal pieces, shape into small rounds, and place on a baking tray with space between each.
  2. Let the shaped buns rise again for about 30 to 40 minutes, until puffy.
  3. Brush the tops with milk or an egg wash for shine.
  4. Bake in a preheated 350°F (175°C) oven for 12 to 15 minutes, until light golden.
  5. Cool slightly on a rack, serve warm or at room temperature.

Store leftovers in an airtight container for up to 2 days or freeze. Reheat briefly to refresh softness. Avoid overbaking.

Breakfast, Dessert, Snack
American, Bakery
Chocolate Chip Milk Buns, Easy Baking, Fluffy Buns, Homemade Bread, Kid-Friendly Recipe

Brown Butter Brookies

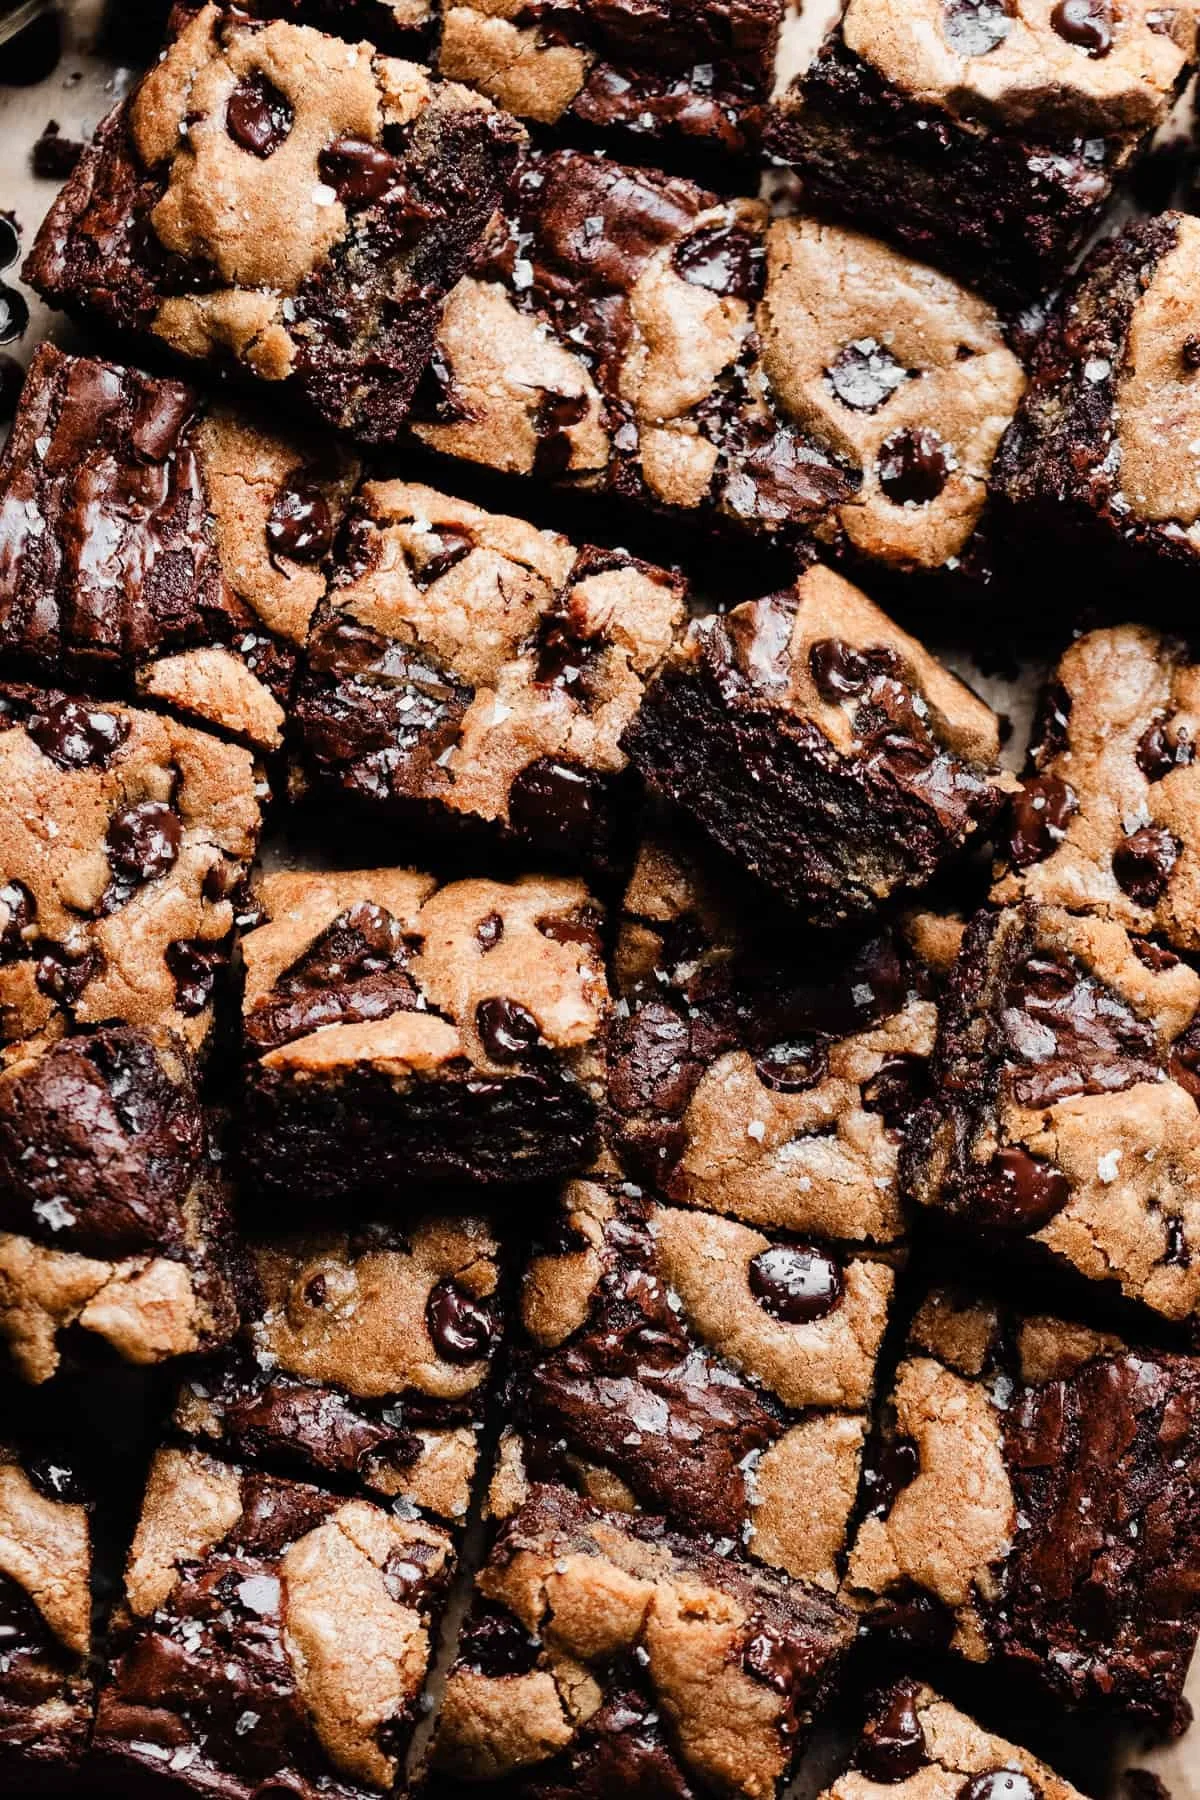
Delicious Brown Butter Brookies stacked on a plate, showcasing rich chocolate and fudgy texture.

Brown butter brookies are the ultimate desserts. They are fudgy brownies and chewy cookies in one bite. The brown butter adds a deep, nutty flavor that lifts both the chocolate and the cookie dough. This recipe is an easy crowd-pleaser for family nights, potlucks, or a sweet weeknight bake. If you love browned butter treats, also try fluffy honey butter pull apart rolls with browned butter glaze for another tasty twist. Get your oven ready, because these brookies are fun to make and even more fun to eat, you might not share more than a piece or two.

How to prepare Brown Butter Brookies

Ingredients

  • 1 cup unsalted butter
  • 1 cup brown sugar
  • 1/2 cup white sugar
  • 2 large eggs
  • 1 tsp vanilla
  • 1 cup all purpose flour
  • 1/3 cup cocoa powder
  • 1 tsp baking powder
  • 1/4 tsp salt
  • 1 cup chocolate chips
  • 1 cup cookie dough, homemade or store bought (plain or chocolate chip)

Directions

  1. Preheat oven to 350°F, line an 8×8 inch pan with parchment and set aside.
  2. Brown the butter, melt the butter in a light pan over medium heat, stir as the milk solids darken and smell nutty, cool slightly.

  3. In a bowl, mix cooled brown butter with both sugars until smooth.
  4. Add eggs one at a time, then stir in vanilla.
  5. In another bowl, whisk flour, cocoa powder, baking powder, and salt.
  6. Add dry mix to wet mix until just combined, fold in chocolate chips for the brownie batter.
  7. Press half the brownie batter into the pan, spread cookie dough over it in an even layer, then dollop and spread the remaining brownie batter on top, swirl gently if you like a marbled look.
  8. Bake for 25 to 30 minutes, a toothpick should come out with a few moist crumbs, do not overbake to keep the brownies fudgy.
  9. Cool in the pan for 15 minutes, then lift out on parchment and cool more before cutting.

Brown Butter Brookies

Why You’ll Love Brown Butter Brookies

These brookies bring two favorite textures together, fudgy brownies and chewy cookies, with a rich, nutty twist from the brown butter. The brown butter deepens the flavor, making chocolate and butter notes pop, while the cookie layer gives a nice chew and extra sweetness. They look special but are simple to make, perfect for a bake that feels homemade and a little fancy at the same time.

Tips for success

  • Brown the butter slowly and watch it, stop when it smells nutty, do not burn it.
  • Let the brown butter cool a bit before mixing with eggs, this prevents scrambling.
  • Use room temperature eggs for easy mixing.
  • Press the first brownie layer gently but evenly for a flat base.
  • If cookie dough is too stiff, warm it a little to spread easily.
  • Check for doneness early, ovens vary, and you want fudgy brownies not dry ones.
  • Chill the brookies briefly before cutting for cleaner slices.

Serving Suggestions

  • Warm a piece and add a scoop of vanilla ice cream on top.
  • Dust with powdered sugar or drizzle melted chocolate.
  • Serve with a glass of cold milk or a cup of strong coffee.
  • Cut into small squares for a party plate, they are rich so small bites work well.

Brown Butter Brookies

FAQs

Q: Can I use store bought cookie dough? A: Yes, store bought cookie dough works well and saves time, use a plain or chocolate chip dough.

Q: Can I make these ahead? A: Yes, you can bake them a day ahead, store in an airtight container at room temperature for up to 2 days, or freeze for longer.

Q: How do I keep the brookies fudgy? A: Do not overbake, remove when a few moist crumbs cling to a toothpick, and cool before cutting.

Q: Can I add nuts? A: Yes, fold chopped nuts into the batter or sprinkle on top before baking for extra crunch.

Q: What pan size should I use? A: An 8×8 inch pan makes thick brookies, a 9×9 pan will make them slightly thinner, adjust bake time by a few minutes.

Conclusion

For a trusted version of brown butter brookies with step by step photos and a tested method, see this detailed recipe, it brings the same fudgy brownies and chewy cookies together with browned butter for great flavor brown butter brookies, fudgy brownies & chewy cookies.

Brown Butter Brookies

Brown butter brookies combine fudgy brownies and chewy cookies in one delicious bite, enhanced by a rich, nutty flavor from browned butter.

For the brownie batter

  • 1 cup unsalted butter (Browned)
  • 1 cup brown sugar
  • 1/2 cup white sugar
  • 2 large eggs (Use room temperature)
  • 1 tsp vanilla
  • 1 cup all purpose flour
  • 1/3 cup cocoa powder
  • 1 tsp baking powder
  • 1/4 tsp salt
  • 1 cup chocolate chips

For the cookie layer

  • 1 cup cookie dough (homemade or store-bought (plain or chocolate chip))

Preparation

  1. Preheat oven to 350°F, line an 8×8 inch pan with parchment and set aside.
  2. Brown the butter by melting it in a light pan over medium heat, stirring as the milk solids darken and smell nutty, then cool slightly.
  3. In a bowl, mix the cooled brown butter with both sugars until smooth.
  4. Add eggs one at a time, then stir in vanilla.
  5. In another bowl, whisk flour, cocoa powder, baking powder, and salt.
  6. Add the dry mix to the wet mix until just combined, then fold in chocolate chips for the brownie batter.
  7. Press half the brownie batter into the pan, spread cookie dough evenly over it, then dollop and spread the remaining brownie batter on top.
  8. Swirl gently if desired for a marbled look.

Baking

  1. Bake for 25 to 30 minutes, until a toothpick comes out with a few moist crumbs. Do not overbake to keep the brownies fudgy.
  2. Cool in the pan for 15 minutes, then lift out with parchment and cool more before cutting.

Brown the butter slowly and watch it closely; stop when it smells nutty, do not burn it. Let the brown butter cool a bit before mixing with eggs to prevent scrambling. Use room temperature eggs for easier mixing. Press the first brownie layer gently but evenly for a flat base. If the cookie dough is too stiff, warm it slightly for easier spreading. Check for doneness early as ovens vary, aiming for fudgy brownies. Chill the brookies briefly before cutting for cleaner slices.

Dessert, Snack
American
Brown Butter, Brown Butter Brookies, Chewy Cookies, dessert recipe, Fudgy Brownies

Grilled Salsa Verde Pepper Jack Chicken

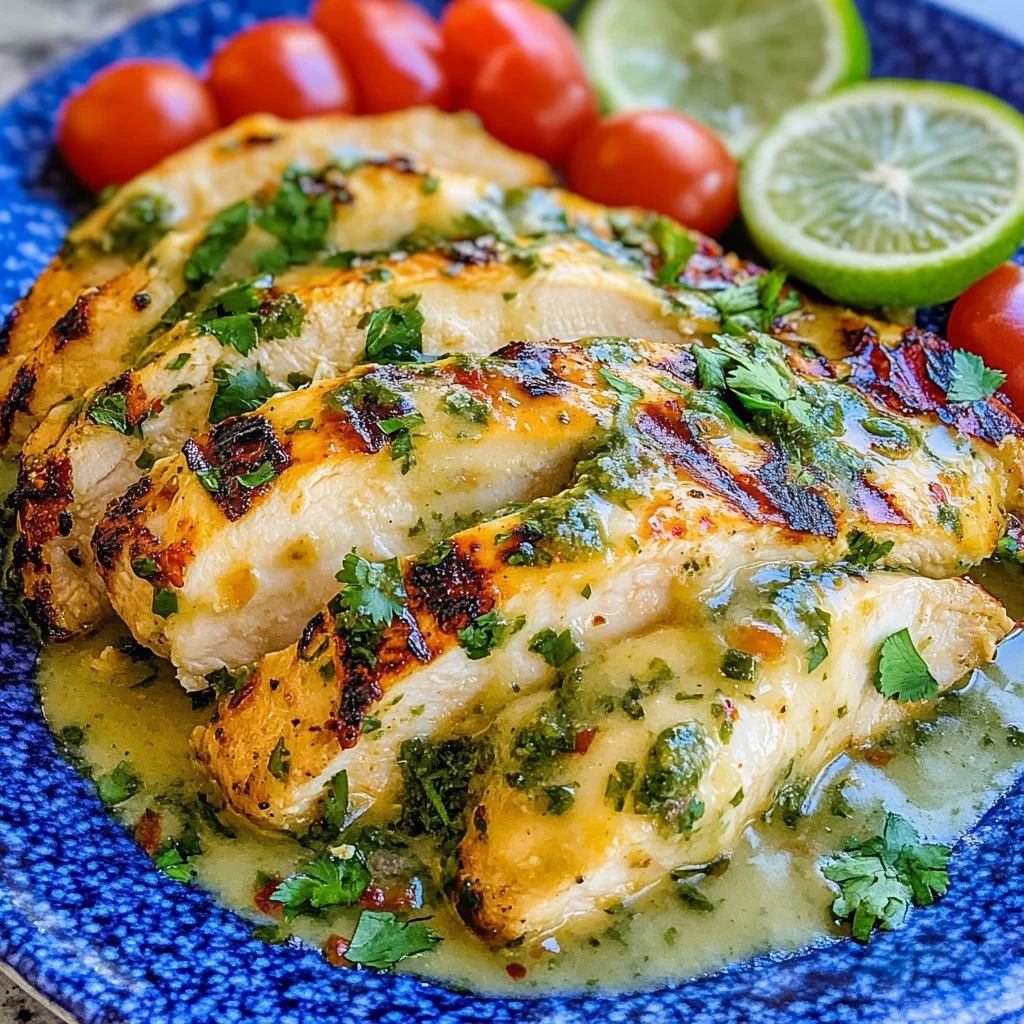
Grilled Salsa Verde Chicken with Pepper Jack Cheese

This grilled salsa verde pepper jack chicken is bright, cheesy, and full of color. It brings fresh green salsa flavor, a touch of spice from pepper jack cheese, and simple grill smoke into one easy dish. The chicken stays juicy, the cheese melts just right, and the salsa verde adds a tangy kick that most people love.

This recipe is a crowd pleaser for a weeknight meal or a backyard cookout, and it comes together fast with few steps. If you like bold, fresh grilled chicken, you might also enjoy this authentic Peruvian grilled chicken Pollo a la Brasa recipe for more grilling ideas.

How to prepare Grilled Salsa Verde Pepper Jack Chicken

  1. Pat chicken breasts dry, and season with salt and pepper.
  2. Spread a thin layer of salsa verde over each breast, and drizzle with a little olive oil.
  3. Let the chicken sit for 10 to 20 minutes to absorb the flavors.
  4. Heat the grill to medium high, and oil the grates.
  5. Grill chicken 5 to 7 minutes per side, until cooked through and grill marks form.
  6. In the last 1 to 2 minutes, top each breast with shredded pepper jack cheese, and close the lid so the cheese melts.
  7. Remove the chicken from the grill, let it rest 5 minutes, then spoon extra salsa verde on top and serve.

Grilled Salsa Verde Pepper Jack Chicken

Why You’ll Love Grilled Salsa Verde Pepper Jack Chicken

  • Bright, fresh salsa verde adds zesty flavor without heavy sauce.
  • Pepper jack gives a mild spice and creamy melt.
  • Fast to make, great for busy nights or last minute plans.
  • Works well on the grill or in a hot skillet if you do not have a grill.
  • Kid friendly when you use mild salsa, and adult friendly when you keep it spicy.

Tips for success

  • Use chicken breasts of similar size so they cook at the same rate.
  • Pat the chicken dry first, this helps get nice grill marks.
  • Do not add cheese too early, it can burn. Add it in the last minute.
  • If your salsa verde is thin, spoon off some excess before grilling.
  • Let the chicken rest after cooking, this keeps it juicy.
  • For more flavor, marinate for 30 minutes to an hour in the fridge.

Serving Suggestions

  • Serve over rice or quinoa to soak up the salsa verde.
  • Slice the chicken and make tacos with warm tortillas, avocado, and lime.
  • Pair with a simple green salad and grilled corn for a full meal.
  • Add a side of black beans or a light slaw for texture and color.
  • Top with chopped cilantro and a squeeze of lime for a fresh finish.

Grilled Salsa Verde Pepper Jack Chicken

FAQs

Q: Can I use chicken thighs instead of breasts?

A: Yes, boneless skinless thighs work well. They take a little longer to cook, watch the internal temperature.

Q: Can I make this in the oven?

A: Yes, roast at 400°F until the chicken reaches 165°F, then add cheese and broil 1 to 2 minutes to melt.

Q: How spicy is this recipe?

A: The heat level depends on the salsa verde and pepper jack you use. Choose mild versions for less spice, or spicy salsa and pepper jack for more kick.

Q: Can I make this ahead?

A: You can grill the chicken and keep it warm, or chill and reheat gently in the oven. Fresh salsa verde is best added right before serving.

Conclusion

Try this recipe for a quick, tasty grilled meal that feels special without a lot of work, and for another take on grilled chicken see Grilled Salsa Verde Pepper Jack Chicken – Averie Cooks.

Grilled Salsa Verde Pepper Jack Chicken

This grilled salsa verde pepper jack chicken is bright, cheesy, and full of color, featuring fresh green salsa flavor and a touch of spice from pepper jack cheese.

Main Ingredients

  • 4 pieces boneless skinless chicken breasts (Use chicken breasts of similar size for even cooking.)
  • 1 cup salsa verde (Choose a thickness that suits grilling.)
  • 1 tablespoon olive oil (For drizzling over chicken.)
  • 1 cup shredded pepper jack cheese (Add in the last minute of grilling.)
  • to taste salt and pepper (Pat chicken dry and season before grilling.)

Preparation

  1. Pat chicken breasts dry, and season with salt and pepper.
  2. Spread a thin layer of salsa verde over each breast, and drizzle with a little olive oil.
  3. Let the chicken sit for 10 to 20 minutes to absorb the flavors.

Grilling

  1. Heat the grill to medium high, and oil the grates.
  2. Grill chicken 5 to 7 minutes per side, until cooked through and grill marks form.
  3. In the last 1 to 2 minutes, top each breast with shredded pepper jack cheese, and close the lid so the cheese melts.
  4. Remove the chicken from the grill, let it rest for 5 minutes, then spoon extra salsa verde on top and serve.

To maximize flavor, consider marinating the chicken for 30 minutes to an hour in the fridge before grilling. Serve over rice or quinoa, or slice for tacos with warm tortillas and fresh toppings.

Dinner, Main Course
Grilled, Mexican
Easy Grilling, grilled chicken, Pepper Jack Chicken, Salsa Verde Chicken, Weeknight Meal

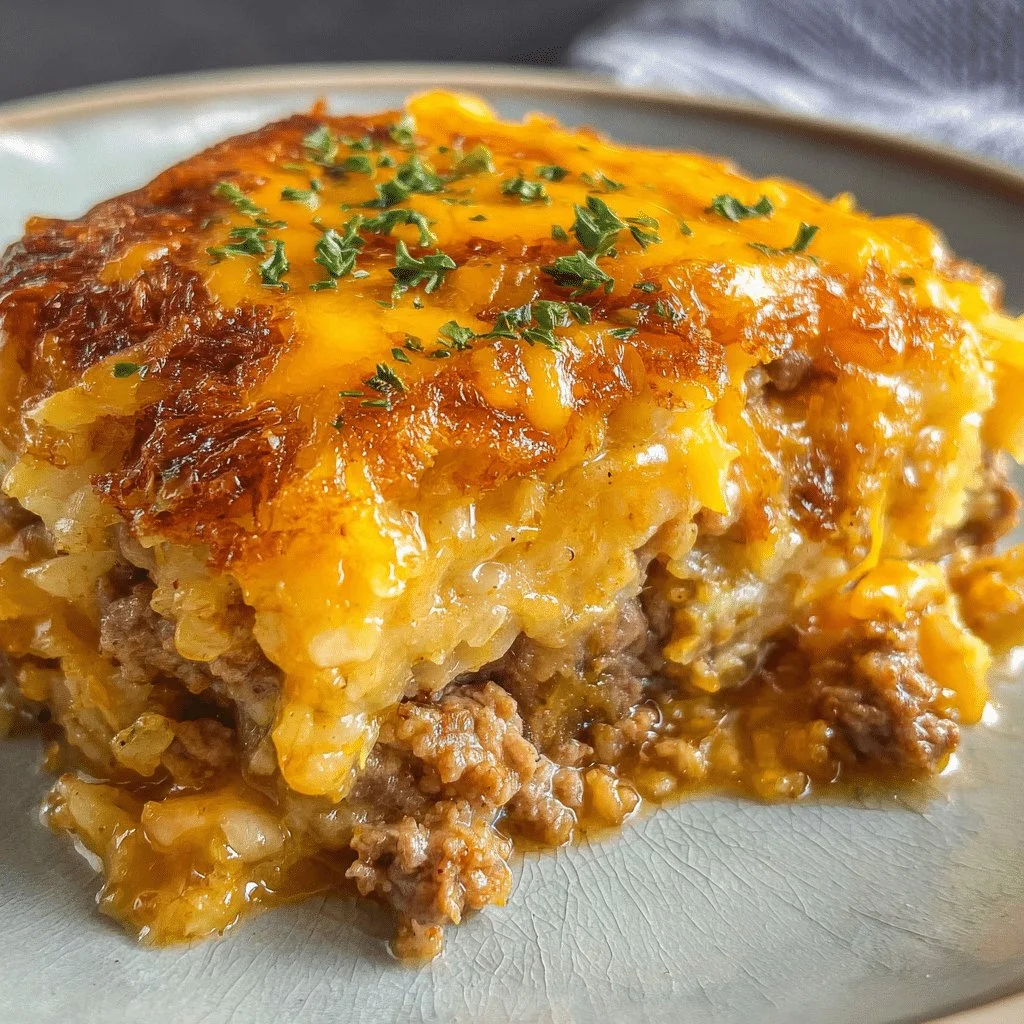
Cheesy Hamburger Hashbrown Casserole

Cheesy hamburger hashbrown casserole topped with melted cheese and crispy hashbrowns

Cheesy Hamburger Hashbrown Casserole brings together browned ground beef, shredded cheese, and crispy hashbrowns for a simple, homey meal. It fills the house with good smells, and it makes people smile at the table. If you want food that feels like a hug and feeds a crowd, this recipe is for you. If you like hearty casseroles like cheesy hamburger rice casserole, you will enjoy this one too. Get ready to dig in and feel proud you made it.

How to prepare Hamburger Hashbrown Casserole

  1. Preheat the oven to 350 F.
  2. Brown 1 to 1.5 pounds of ground beef in a skillet, drain the fat, and season with salt and pepper.
  3. In a large bowl, mix 1 bag (about 30 oz) of frozen shredded hashbrowns, the cooked beef, 1 can (10.5 oz) of condensed cream of mushroom or cream of chicken soup, 1 cup of sour cream, 2 cups of shredded cheddar cheese, and 1 small chopped onion if you like. Stir until it is well mixed.
  4. Pour the mix into a greased 9×13 inch baking dish and spread it evenly. Top with a little extra cheese if you want a cheesy crust.
  5. Bake for 40 to 50 minutes, until the top is golden and the casserole is hot in the center. Let it sit for 5 minutes before serving.

Cheesy Hamburger Hashbrown Casserole

Why You’ll Love Cheesy Hamburger Hashbrown Casserole

  • It is simple to make with common pantry items.
  • The flavors are rich and cheesy, kids and adults both like it.
  • It fills a table and works great for potlucks or family dinners.
  • You can make it ahead and warm it up later, it holds well.

Tips for success

  • Thaw hashbrowns a bit and squeeze out extra water for a less soggy bake.
  • Cook and drain the beef well to avoid a greasy casserole.
  • Use sharp cheddar for a stronger cheese taste, or mix cheeses for depth.
  • If the top browns too fast, cover with foil for the last 10 to 15 minutes.
  • Let it rest a few minutes after baking, it will set and slice better.

Serving Suggestions

  • Serve with a crisp green salad and a light vinaigrette.
  • Add steamed green beans or roasted carrots on the side.
  • Offer a small bowl of salsa or hot sauce for people who like a little heat.
  • For a brunch twist, top portions with a fried egg.

Cheesy Hamburger Hashbrown Casserole

FAQs

Q: Can I use frozen ground beef or turkey?

A: You can use ground turkey, but cook and season it well first. Frozen ground beef should be thawed and drained before use.

Q: Can I make this ahead and freeze it?

A: Yes, you can assemble and freeze before baking. Thaw in the fridge overnight and bake as directed, you may need a bit more time in the oven.

Q: How do I make it lower in calories?

A: Use low fat sour cream, reduced fat cheese, and lean ground turkey or beef. You can also add chopped veggies to bulk it up.

Q: What if I do not have condensed soup?

A: Mix a cup of milk with a tablespoon of flour and a little butter, cook until thick, then add to the mix. It will bind the casserole well.

Q: Can I add vegetables to this casserole?

A: Yes, add cooked peas, corn, or chopped bell peppers. Make sure they are not too wet.

Conclusion

This Cheesy Hamburger Hashbrown Casserole is a cozy, tasty dish that cooks up fast and feeds many. For the original recipe and more tips, see Cheesy Hamburger Hashbrown Casserole – Mandi of the Mountains, it has helpful notes and step by step photos.

Cheesy Hamburger Hashbrown Casserole

A hearty and comforting casserole made with ground beef, cheese, and hashbrowns, perfect for feeding a crowd.

Main Ingredients

  • 1 to 1.5 pounds ground beef (Browned and drained)
  • 1 bag frozen shredded hashbrowns (about 30 oz) (Thawed and excess water squeezed out)
  • 1 can condensed cream of mushroom or cream of chicken soup (10.5 oz)
  • 1 cup sour cream (Can use low-fat for lower calories)
  • 2 cups shredded cheddar cheese (Sharp cheddar recommended)
  • 1 small onion (Chopped, optional)

Topping

  • Extra shredded cheese (For topping, optional)

Preparation

  1. Preheat the oven to 350 F.
  2. Brown the ground beef in a skillet, drain the fat, and season with salt and pepper.
  3. In a large bowl, mix the thawed hashbrowns, cooked beef, cream of mushroom or chicken soup, sour cream, cheddar cheese, and chopped onion if using. Stir well.
  4. Pour the mix into a greased 9×13 inch baking dish and spread it evenly.
  5. Top with extra cheese if desired.

Baking

  1. Bake for 40 to 50 minutes, until the top is golden and the casserole is hot in the center.
  2. Let it sit for 5 minutes before serving.

For a less soggy bake, thaw hashbrowns and squeeze out extra water. Use sharp cheddar for a stronger taste. Cover with foil if the top browns too fast. Let it rest after baking for better slicing.

Casserole, Dinner, Main Course
American
Cheesy Casserole, Comfort Food, Easy Recipe, Hamburger Casserole, Hashbrown Casserole