Ground Turkey Sweet Potato Bake

If you’re looking for a cozy dinner option that brings the family together, the Ground Turkey Sweet Potato Bake is just the recipe you need. This dish combines the lean goodness of ground turkey and the earthy sweetness of sweet potatoes, creating a delightful meal that’s both nutritious and satisfying. Whether you’re cooking for family or entertaining friends, this bake is sure to be a crowd-pleaser. The combination of flavors and textures makes it an appealing choice for everyone at the table. So, put on your apron, and let’s dive into this fantastic recipe!

Ground Turkey Sweet Potato Bake

How to prepare Ground Turkey Sweet Potato Bake

First, gather your ingredients. You’ll need ground turkey, sweet potatoes, onions, garlic, spices, and some cheese for a little extra flavor. Start by preheating your oven, then prepare your sweet potatoes by peeling and dicing them. Sauté the onions and garlic until fragrant, then add the ground turkey, cooking it until browned. Mix in the sweet potatoes and spices, and then transfer everything to a baking dish. Top it off with cheese and bake until bubbly and golden!

Ground Turkey Sweet Potato Bake

Why You’ll Love Ground Turkey Sweet Potato Bake

This dish is a full meal in one pan, which means fewer dishes to clean after your family feast! The ground turkey provides lean protein, while sweet potatoes add fiber and vitamins. It’s a healthy choice that still feels indulgent. Plus, the recipe is easily adaptable; you can add your favorite veggies or swap in different spices to suit your tastes.

Tips for success

  1. Use fresh ingredients: Fresh sweet potatoes and spices can elevate the flavor.
  2. Don’t skimp on cheese: A good melting cheese makes this dish even more delicious.
  3. Let it rest: Allow the bake to cool for a few minutes before serving; this helps the layers set.

Serving Suggestions

This bake can stand alone or pair well with a crisp salad for a well-rounded meal. You can also serve it with a side of steamed vegetables for some extra color and nutrients. The leftovers can be enjoyed the next day and reheat beautifully for lunch!

FAQs

Can I use ground chicken instead of turkey?

Yes, ground chicken is a great substitute and will offer a similar flavor profile.

How can I make it vegetarian?

You can replace the ground turkey with a mix of beans and lentils for added protein and texture.

Can I freeze leftovers?

Absolutely! You can freeze individual portions for a quick meal on busy days. Just make sure to let it cool completely before placing it in airtight containers.

Enjoy crafting this Ground Turkey Sweet Potato Bake, and watch as it quickly becomes a favorite in your household!

Ground Turkey Sweet Potato Bake

A cozy and nutritious bake combining ground turkey and sweet potatoes for a delightful meal that satisfies the entire family.

Main Ingredients

  • 1 lb Ground turkey (Lean ground turkey for a healthier option.)
  • 2 medium Sweet potatoes (Peeled and diced.)
  • 1 medium Onion (Chopped.)
  • 2 cloves Garlic (Minced.)
  • 1 cup Cheese (Use a good melting cheese.)
  • to taste Spices (Season according to preference.)

Preparation

  1. Preheat your oven.
  2. Peel and dice the sweet potatoes.
  3. Sauté the chopped onions and minced garlic until fragrant.
  4. Add the ground turkey to the skillet and cook until browned.
  5. Mix in the diced sweet potatoes and spices.
  6. Transfer the mixture to a baking dish.
  7. Top with cheese and bake until bubbly and golden.

Use fresh ingredients for better flavor. Allow the bake to cool for a few minutes before serving to help the layers set. This dish can be frozen in individual portions for later use.

Dinner, Main Course
American
Baked Dish, Family Meal, Ground Turkey, Healthy Dinner, Sweet Potato

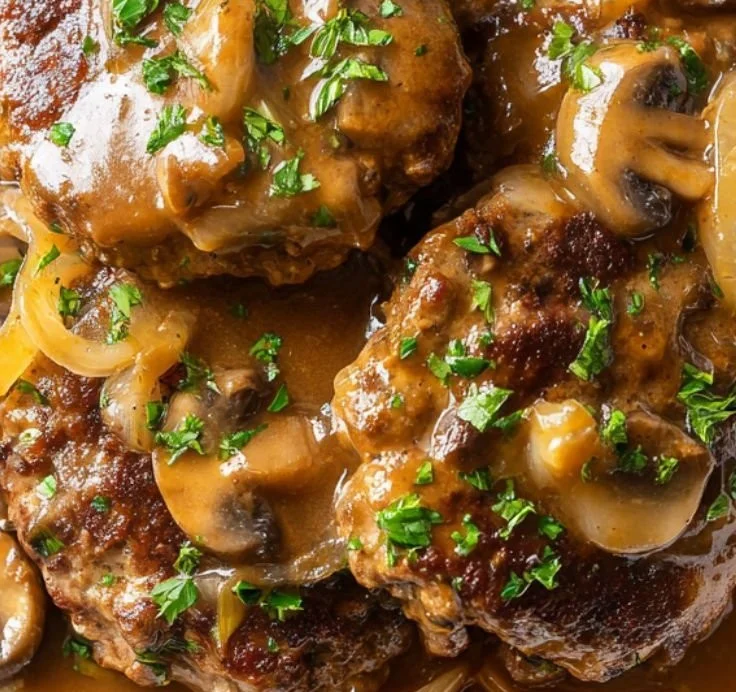
Smothered Beef Patties

Delicious smothered beef patties served with rich gravy and onions

Smothered Beef Patties are warm, simple, and full of flavor. The patties stay tender and the gravy soaks in for a cozy bite. This recipe is a real crowd-pleaser at home, easy to make, and great for busy nights. If you love comfort food like meat patties or a classic hamburger steak, you will enjoy this dish, and you might also like a similar treat like baked beef and cheese sliders. Get ready to smell good gravy and enjoy a plate of comfort food, you will want to make this again.

How to prepare Smothered Beef Patties

This simple method makes juicy beef patties covered in rich gravy. It works well for a weeknight meal or a big family dinner.

Ingredients

  • 1 lb ground beef
  • 1 small onion, finely chopped
  • 1 egg
  • 1/2 cup breadcrumbs
  • 1 tsp salt
  • 1/2 tsp black pepper
  • 2 tbsp oil or butter
  • 1 large onion, sliced for gravy
  • 2 cups beef broth
  • 2 tbsp flour
  • 1 tsp Worcestershire sauce (optional)

Directions

  1. Mix ground beef, chopped onion, egg, breadcrumbs, salt, and pepper in a bowl. Form into 4 to 6 round patties.
  2. Heat oil or butter in a large skillet over medium heat. Brown patties 3 to 4 minutes per side. Remove and set aside.
  3. In the same pan, add sliced onion. Cook until soft and golden, stir often.
  4. Sprinkle flour over the onions, stir to coat, cook 1 minute to remove raw flour taste.
  5. Slowly add beef broth while stirring, scrape the pan to lift brown bits. Add Worcestershire sauce if using.
  6. Return patties to the pan, spoon gravy over them. Reduce heat to low, cover, and simmer 10 to 15 minutes, until patties are cooked through.
  7. Taste the gravy, add salt and pepper if needed. Serve hot over mashed potatoes or rice.

Smothered Beef Patties

Why You’ll Love Smothered Beef Patties

  • Comfort food that cooks fast, perfect for weeknights.
  • Juicy beef patties with rich, savory gravy.
  • Uses pantry staples, no fancy tools needed.
  • Crowd-pleaser, both kids and adults will ask for seconds.

Tips for success

  • Don’t overmix the meat mix, press lightly to keep patties tender.
  • Brown the patties well, the browned bits add flavor to the gravy.
  • Cook onions slowly so they sweeten and deepen the gravy taste.
  • If gravy is too thin, simmer uncovered a few minutes to thicken, or mix a little water and flour then stir in.
  • Use a meat thermometer for safety, patties should reach 160°F, or cook until no pink remains.

Serving Suggestions

  • Serve over mashed potatoes for classic comfort food.
  • Try with white rice or buttered egg noodles for a simple plate.
  • Add steamed green beans or roasted carrots for color and veg.
  • Top with chopped parsley for a fresh note.

Smothered Beef Patties

FAQs

Q: Can I make these ahead of time?

A: Yes, cook patties and gravy, cool, then refrigerate up to 2 days. Reheat gently on the stove.

Q: Can I use ground turkey or chicken?

A: Yes, you can, but cook time may change and flavor will be milder. Add a bit more seasoning.

Q: How do I thicken the gravy quickly?

A: Mix 1 tsp flour or cornstarch with 1 tbsp water, stir into hot gravy and simmer until it thickens.

Q: Can I freeze Smothered Beef Patties?

A: Yes, place cooled patties and gravy in a freezer safe container for up to 3 months. Thaw overnight in fridge before reheating.

Conclusion

This Smothered Beef Patties recipe gives you tender meat and rich gravy in a simple way, perfect for family meals and comfort cooking. For another take on smothered beef and onions, see this classic version at Smothered Hamburger Steak and Onions – Boots and Biscuits.

Smothered Beef Patties

Smothered Beef Patties are tender beef patties covered in a rich gravy. This comforting dish is simple to make and perfect for busy weeknights.

For the patties

  • 1 lb ground beef (Choose a lean ground beef for better flavor.)
  • 1 small onion, finely chopped (Provides moisture and flavor.)
  • 1 egg (Acts as a binder for the patties.)
  • 1/2 cup breadcrumbs (Use plain or seasoned breadcrumbs.)
  • 1 tsp salt (Adjust to taste.)
  • 1/2 tsp black pepper (Freshly ground is best.)

For the gravy

  • 2 tbsp oil or butter (For frying the patties.)
  • 1 large onion, sliced (Adds sweetness to the gravy.)
  • 2 cups beef broth (For a rich flavor; use low sodium if preferred.)
  • 2 tbsp flour (To thicken the gravy.)
  • 1 tsp Worcestershire sauce (Optional for added flavor.)

Preparation

  1. In a bowl, mix ground beef, chopped onion, egg, breadcrumbs, salt, and pepper. Form the mixture into 4 to 6 round patties.

Cooking

  1. Heat oil or butter in a large skillet over medium heat.
  2. Brown the patties for 3 to 4 minutes on each side. Once done, remove and set aside.
  3. In the same pan, add sliced onions and cook until soft and golden brown, stirring often.
  4. Sprinkle flour over the onions, stir to coat, and cook for 1 minute to remove the raw flour taste.
  5. Slowly add the beef broth while stirring, scraping the pan to lift brown bits. If using, add Worcestershire sauce.
  6. Return the patties to the pan and spoon gravy over them. Reduce heat to low, cover, and simmer for 10 to 15 minutes, until the patties are cooked through.
  7. Taste the gravy and add additional salt and pepper if needed. Serve hot over mashed potatoes or rice.

For best results, avoid overmixing the meat mixture to keep patties tender. If gravy is too thin, simmer uncovered to thicken, or stir in a flour and water mix.

Dinner, Main Course
American
Beef Recipe, Comfort Food, Gravy, Quick Dinner, Smothered Beef Patties

Air Fryer Grilled Cheese Hot Dogs

grilled cheese hot dogs

Get ready to experience the ultimate comfort food mashup that’s taking kitchens by storm, grilled cheese hot dogs that combine everything you love about two classic favorites into one irresistible bite. Imagine biting into golden, buttery bread that gives way to perfectly melted cheese and a juicy hot dog at the center, creating a harmony of textures and flavors that’s pure nostalgic bliss.

This isn’t just another hot dog recipe or a simple grilled cheese variation, it’s a game-changing fusion that elevates both dishes to new heights. The concept is beautifully simple: wrap a hot dog in cheese and bread, then cook it until the outside is perfectly crispy and the inside becomes a molten, savory paradise. It’s comfort food innovation at its finest, delivering that satisfying crunch followed by the creamy, meaty goodness that makes every bite memorable.

Whether you’re feeding hungry kids after school, looking for a quick and satisfying lunch, or wanting to add some playful creativity to dinner time, grilled cheese hot dogs offer the perfect solution. They’re easy enough for beginners yet delicious enough to impress, proving that sometimes the most brilliant culinary ideas come from combining the foods we already love most.

Why Make This Recipe

Air Fryer Grilled Cheese Hot Dogs are a fun twist on two classic favorites: grilled cheese sandwiches and hot dogs. Combining both into one delicious snack makes for a comforting meal that’s perfect for lunch, dinner, or a late-night craving. They are quick to prepare, packed with cheesy goodness, and sure to satisfy your taste buds. Plus, making them in the air fryer gives you the crispiness without all the extra oil.

How to Make Air Fryer Grilled Cheese Hot Dogs

Ingredients:

  • 4 hot dog buns
  • 4 hot dogs
  • 8 slices of cheddar cheese (or your preferred cheese)
  • 2 tablespoons butter (softened)
  • Optional: ketchup, mustard, relish, or any desired toppings

Directions:

  1. Butter the outside of each hot dog bun generously.
  2. Place one cheese slice inside each bun.
  3. Add a hot dog on top of the cheese slice.
  4. Place a second cheese slice over the hot dog to create a cheesy layer.
  5. If needed, secure the buns closed with toothpicks.
  6. Preheat the air fryer to 350°F (175°C).
  7. Cook the hot dogs in the air fryer for about 4-5 minutes, or until they turn golden brown.
  8. Once cooked, let them rest for 1 minute before serving.
  9. Serve with your favorite condiments like ketchup, mustard, or relish.

How to Serve Air Fryer Grilled Cheese Hot Dogs

You can serve Air Fryer Grilled Cheese Hot Dogs as a fun meal or snack at any time of the day. Pair them with chips, fries, or a fresh salad for a complete meal. They are also a great addition to parties or game days. Make sure to provide a selection of condiments so everyone can customize their hot dog to their taste.

How to Store Air Fryer Grilled Cheese Hot Dogs

grilled cheese hot dogs

If you have any leftovers, let them cool completely before storing. Place the grilled cheese hot dogs in an airtight container and keep them in the refrigerator for up to 3 days. To reheat, you can use the air fryer again to restore their crispiness.

Tips to Make Air Fryer Grilled Cheese Hot Dogs

  • Use your favorite cheese. While cheddar works great, you can experiment with mozzarella, pepper jack, or any cheese that melts well.
  • Don’t overstuff the buns. Keep the fillings balanced to ensure even cooking.
  • Try different toppings! Adding jalapeños, onions, or even sautéed mushrooms can elevate the flavor.

Variation

You can switch up this recipe by using sausages instead of hot dogs. Additionally, you can use different types of bread like slices of sourdough or even pretzel buns for a unique taste.

FAQs

Can I make these ahead of time?
Yes, you can prepare the hot dogs and buns ahead of time and assemble them. Then you can cook them in the air fryer just before serving.

What else can I add to my hot dogs?
Feel free to add ingredients like diced onions, pickles, or spicy sauces for extra flavor. The options are endless!

Can I freeze them?
It’s best to avoid freezing these hot dogs once cooked, as they may lose their texture. However, you can freeze the assembled un-cooked hot dogs and air fry them directly from frozen. Just increase the cooking time by a couple of minutes.

[tasty-recipe id=”4385″]

Air Fryer Grilled Cheese Hot Dogs

Experience the ultimate comfort food mashup with Air Fryer Grilled Cheese Hot Dogs, combining melted cheese and juicy hot dogs inside crispy buns for an irresistible treat.

Main Ingredients

  • 4 pieces hot dog buns
  • 4 pieces hot dogs
  • 8 slices cheddar cheese (or your preferred cheese) (You can use mozzarella, pepper jack, or any cheese that melts well.)
  • 2 tablespoons butter (softened) (Generously butter the outside of each bun.)

Optional Toppings

  • ketchup (For serving.)
  • mustard (For serving.)
  • relish (For serving.)

Preparation

  1. Butter the outside of each hot dog bun generously.
  2. Place one cheese slice inside each bun.
  3. Add a hot dog on top of the cheese slice.
  4. Place a second cheese slice over the hot dog to create a cheesy layer.
  5. If needed, secure the buns closed with toothpicks.

Cooking

  1. Preheat the air fryer to 350°F (175°C).
  2. Cook the hot dogs in the air fryer for about 4-5 minutes, or until they turn golden brown.
  3. Once cooked, let them rest for 1 minute before serving.

Serve with your favorite condiments and pair them with chips, fries, or a fresh salad. They are perfect for parties or game days. You can prepare the hot dogs and buns ahead of time and assemble them before cooking.

Dinner, lunch, Snack
American
Air Fryer Recipes, Comfort Food, Easy Snack, Grilled Cheese Hot Dogs, Hot Dog Recipe

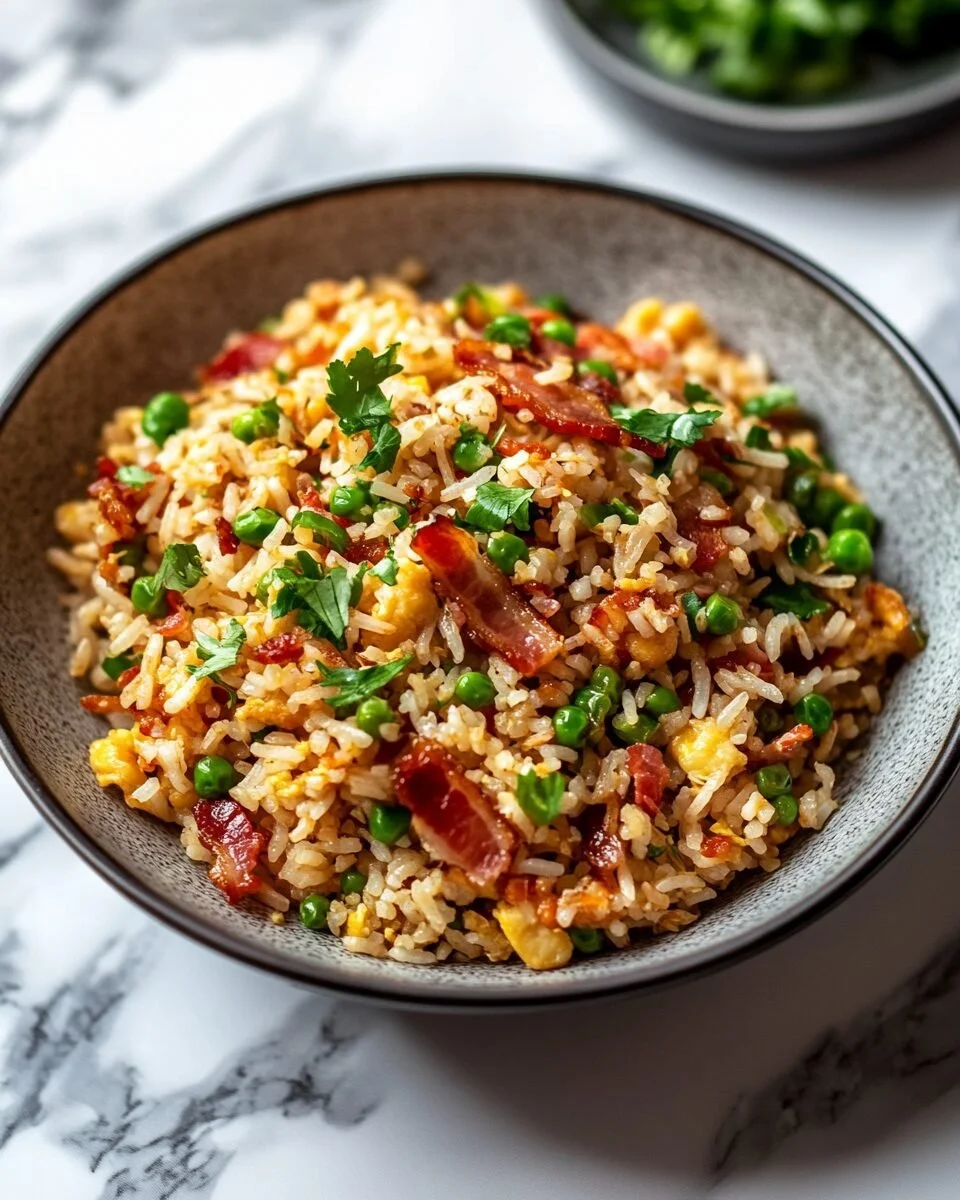
Bacon Fried Rice

bacon fried rice

Bacon Fried Rice is a delicious way to use up leftover rice and bring a touch of flavor to your meals. This easy recipe combines crispy bacon with hearty vegetables and fluffy rice for a comforting dish everyone will love. Whether it’s a quick weeknight dinner or a delightful side dish for a gathering, Bacon Fried Rice hits all the right notes. With its savory ingredients and simple steps, this recipe is perfect for cooks of any skill level. Let’s dive into why this dish is a must-try in your kitchen.

why make this recipe

Making Bacon Fried Rice is not only simple, but it’s also a great way to use up leftover rice and any vegetables in your fridge. The crispy bacon adds a smoky flavor that elevates the dish to something truly special. This recipe can be made in less than 30 minutes, making it perfect for busy weeknights or last-minute meals. Plus, it allows you to customize it with your favorite ingredients and spices. Your family will appreciate the hearty meal, and you’ll enjoy how quick and easy it is to prepare.

how to make Bacon Fried Rice

Ingredients:

  • 6 slices thick-cut bacon, chopped
  • 1/2 large onion, diced
  • 2 cloves garlic, minced
  • 1 cup frozen peas and carrots
  • 4 cups cooked and cooled long-grain rice (preferably day-old)
  • 3 large eggs, beaten
  • 2 tablespoons soy sauce
  • 1 tablespoon oyster sauce
  • 1 teaspoon sesame oil
  • Salt and pepper to taste
  • 2 green onions, chopped

Directions:

  1. Add chopped bacon to a cold skillet and turn the heat to medium. Cook until crispy, then remove and set aside, reserving the bacon fat.
  2. In the same skillet, sauté the diced onion in the bacon fat for 3-5 minutes until translucent.
  3. Add minced garlic and frozen peas and carrots, cooking for 2-3 minutes until tender.
  4. Stir in the chilled rice, cooking for 2-4 minutes. Push the rice and veggies to one side of the pan.
  5. In the empty side of the pan, scramble the beaten eggs until fully cooked, then mix them with the rice and veggies.
  6. Turn the heat to high. Add soy sauce, oyster sauce, sesame oil, and the cooked bacon. Stir thoroughly.
  7. Season with salt and pepper, garnish with chopped green onions, and serve hot.

how to serve Bacon Fried Rice

Bacon Fried Rice can be served in many delicious ways. You can enjoy it as a main dish alongside your favorite protein, such as chicken, shrimp, or tofu. It also makes a fantastic side dish to complement grilled meats or other Asian-inspired meals. For an extra touch, consider garnishing with more green onions or a sprinkle of sesame seeds. Serve it hot right off the stove for the best flavor and texture. Sharing this dish with family or friends makes it even more enjoyable!

how to store Bacon Fried Rice

Storing Bacon Fried Rice is easy and ensures you can enjoy leftovers later. Allow the fried rice to cool completely before transferring it to an airtight container. It can be stored in the refrigerator for up to 3-4 days. When ready to eat, reheat the rice in a skillet over medium heat, adding a splash of water or broth to prevent sticking. You can also reheat it in a microwave-safe dish covered with a damp paper towel to keep it moist. This way, you’ll enjoy the wonderful flavors again with minimal effort.

tips to make Bacon Fried Rice

To make the best Bacon Fried Rice, consider using leftover rice as it’s drier and less sticky, making it perfect for frying. If you don’t have leftover rice, spread freshly cooked rice on a baking sheet to cool before using it. Make sure the bacon is crispy for great flavor and texture. Feel free to add your favorite vegetables or proteins to customize the dish to your taste. Lastly, watch the seasoning; adjusting the soy sauce and oyster sauce can help you hit the perfect balance of flavors!

variation

You can make Bacon Fried Rice vegetarian by omitting the bacon and using vegetable oil instead. Consider adding tofu or tempeh for protein. Other tasty variations include adding different vegetables like bell peppers, mushrooms, or broccoli. You could also spice things up with chopped chili or hot sauce for a bit of heat. The beauty of this dish is its adaptability—feel free to get creative!

Conclusion

Bacon Fried Rice is a delightful and comforting meal that is simple to prepare and versatile enough for any occasion. With just a few ingredients and easy steps, you can whip up a flavorful dish that pleases everyone at the table. It’s a fantastic way to use leftover rice while enjoying the delicious taste of crispy bacon. Next time you’re in need of a quick and satisfying meal, try this recipe, and you’ll see why it’s a favorite. Get cooking, and enjoy every bite!

FAQs

Q1: Can I use day-old rice for Bacon Fried Rice?
A1: Yes! Day-old rice is best because it’s drier and helps achieve better texture in fried rice.

Q2: Can I freeze leftovers of Bacon Fried Rice?
A2: Yes, you can freeze Bacon Fried Rice for up to 2 months in an airtight container. Just be sure to cool it fully before storing.

Q3: What vegetables can I add to Bacon Fried Rice?
A3: You can add any veggies you like! Popular options include bell peppers, corn, broccoli, or even mushrooms for extra flavor.

[tasty-recipe id=”2792″]

Bacon Fried Rice

A delicious way to use up leftover rice, this easy Bacon Fried Rice combines crispy bacon, hearty vegetables, and fluffy rice for a comforting dish perfect for any occasion.

Main Ingredients

  • 6 slices thick-cut bacon, chopped (Crispy bacon adds great flavor.)
  • 1/2 large onion, diced (Adds sweetness.)
  • 2 cloves garlic, minced (Enhances flavor.)
  • 1 cup frozen peas and carrots (Use frozen for convenience.)
  • 4 cups cooked and cooled long-grain rice (Preferably day-old rice for best texture.)
  • 3 large eggs, beaten (Adds protein and richness.)
  • 2 tablespoons soy sauce
  • 1 tablespoon oyster sauce
  • 1 teaspoon sesame oil (Adds a nutty flavor.)
  • to taste Salt and pepper
  • 2 green onions chopped (For garnish.)

Cooking

  1. Add chopped bacon to a cold skillet and turn the heat to medium. Cook until crispy, then remove and set aside, reserving the bacon fat.
  2. In the same skillet, sauté the diced onion in the bacon fat for 3-5 minutes until translucent.
  3. Add minced garlic and frozen peas and carrots, cooking for 2-3 minutes until tender.
  4. Stir in the chilled rice, cooking for 2-4 minutes. Push the rice and veggies to one side of the pan.
  5. In the empty side of the pan, scramble the beaten eggs until fully cooked, then mix them with the rice and veggies.
  6. Turn the heat to high. Add soy sauce, oyster sauce, sesame oil, and the cooked bacon. Stir thoroughly.
  7. Season with salt and pepper, garnish with chopped green onions, and serve hot.

For best results, use day-old rice as it’s drier and less sticky. Feel free to customize with your favorite veggies or proteins, and adjust the seasoning to taste.

Main Course, Side Dish
Asian, Comfort Food
Bacon Fried Rice, Easy Recipes, fried rice, Leftover Rice, Quick Dinner

Canned Chicken Pizza Crust

Delicious pizza crust made with canned chicken, ready to be topped.

Canned Chicken Pizza Crust is a unique and easy way to make pizza. This clever Chicken Crust Pizza Recipe uses canned chicken to create a tasty, protein-rich base without traditional dough. The best part is that it requires minimal ingredients and comes together quickly. Whether you’re in a hurry or exploring new Chicken Pizza Ideas, this crust will surprise you with its simplicity and flavor.

why make this recipe

Many people enjoy pizza, but making a traditional dough can be time-consuming and complicated. This Chicken Breast Pizza Crust alternative is a fantastic shortcut. It allows you to skip the long waiting times associated with classic dough while still enjoying a satisfying homemade pizza.

Using canned chicken as the base gives the crust a unique texture and boosts the protein content, making it a filling option. It’s similar in concept to a Shredded Chicken Pizza Crust, but even faster because the chicken is already cooked and ready to use. Additionally, this recipe is perfect for those who want a gluten-free pizza without regular flour.

The ease of this recipe makes it accessible to everyone, from beginners to experienced home cooks. If you usually rely on Pillsbury Pizza Crust Recipes or other Canned Pizza Dough Recipes Ideas, this version offers a fun, low-carb twist worth trying.

You can also personalize your pizza with endless toppings. Turn it into a flavorful Chicken Ranch Pizza, a veggie-loaded pie, or even a bold Pizza Chicken Bake style dinner. It’s a fun way to engage kids in the kitchen, and they’ll love shaping their pizzas.

With all these benefits, making Canned Chicken Pizza Crust is a smart choice for busy weeknights or casual gatherings. In short, this recipe delivers a quick, tasty, and protein-packed way to satisfy your pizza cravings.

how to make Canned Chicken Pizza Crust

Making this Ground Chicken Pizza Crust Recipe style dish with canned chicken is very straightforward.

First, drain one can of chicken thoroughly. Place the chicken in a mixing bowl and break it apart with a fork until finely shredded.

Add:

  • ½ cup shredded mozzarella cheese

  • ¼ cup grated Parmesan cheese

  • 1 beaten egg

Mix until well combined. The egg acts as a binder to help hold the crust together.

Next, add:

  • 1 teaspoon Italian seasoning

  • Salt to taste

Stir until evenly mixed.

Preheat your oven to 425°F (220°C). Line a baking sheet with parchment paper. Spread the mixture into a circle or rectangle about ½ inch thick. Use your hands or a spatula to shape it evenly.

Bake for 15–20 minutes until the crust is golden brown and firm. Watch closely near the end to prevent over-browning.

Once baked, remove from the oven and let it cool slightly. Your Chicken Crust Pizza Recipe base is now ready for toppings. Add sauce, cheese, and your favorite toppings, then bake again until the cheese is melted and bubbly.

how to serve Canned Chicken Pizza Crust

Serving this pizza can be a fun and delicious experience. After baking with toppings, slice it just like a traditional pizza. Serve on a large plate or wooden board for a rustic presentation.

It pairs well with dipping sauces such as:

  • Marinara

  • Ranch dressing (perfect for Chicken Ranch Pizza)

  • Garlic butter

A fresh salad on the side balances the meal nicely.

One of the best parts of this recipe is customization. Some people may want extra cheese, while others prefer veggie-loaded slices. You can even host a DIY pizza night where guests build their own creations from your favorite Chicken Pizza Ideas.

For parties, cut into small squares and serve with toothpicks as a protein-packed appetizer. This versatile dish works as a main course or shareable snack.

how to store Canned Chicken Pizza Crust

Proper storage keeps your pizza tasting fresh.

First, allow the crust or finished pizza to cool completely. Then:

Refrigerator:

  • Store in an airtight container

  • Keeps up to 3 days

Freezer (best for plain crust):

  • Wrap tightly in foil or freezer-safe container

  • Freeze up to 3 months

To use frozen crust, thaw overnight in the refrigerator, add toppings, and bake.

To reheat topped pizza, warm in the oven at 350°F (175°C) until heated through and the cheese melts. Avoid the microwave, which can make the crust soft.

tips to make Canned Chicken Pizza Crust

Use these tips to get the best results every time.

Drain very well
Excess moisture is the main reason a chicken crust turns soggy. Press the canned chicken with paper towels if needed.

Experiment with cheeses
Mozzarella works best for structure, but mixing in cheddar, gouda, or pepper jack adds great flavor.

Boost the seasoning
Garlic powder, onion powder, or dried oregano can enhance the taste of your Chicken Breast Pizza Crust.

Pre-bake properly
Make sure the crust is firm and lightly golden before adding toppings.

Don’t overload with wet toppings
Too much sauce or watery vegetables can soften the crust.

Make it crispier
Bake a few extra minutes for a firmer, more sliceable base.

Get kids involved
Let them shape mini pizzas — one of the most fun Chicken Pizza Ideas for family cooking.

variation

There are many ways to customize this versatile crust.

Low-carb tweak
Replace a small portion of cheese with almond flour for a slightly different texture.

Veggie boost
Mix in finely chopped spinach or sun-dried tomatoes for added flavor.

BBQ version
Use barbecue sauce, cooked chicken, bacon, and red onions for a bold twist.

Chicken Ranch Pizza
Top with ranch dressing, mozzarella, and cooked chicken for a creamy favorite.

Pizza Chicken Bake style
Turn the mixture into a thicker base in a baking dish and load it like a casserole.

Mini pizzas
Shape small rounds for appetizers or lunchboxes.

Crazy Crust Pizza inspiration
Spread the mixture thinner and irregular for a rustic, crispy-edge finish similar in spirit to Crazy Crust Pizza.

This flexibility makes it one of the most adaptable Canned Pizza Dough Recipes Ideas you can try.

FAQs

1. Can I use fresh chicken instead of canned chicken?
Yes. Finely shredded cooked chicken works well and creates a similar Shredded Chicken Pizza Crust texture. Just remove excess moisture.

2. Is this recipe gluten-free?
Yes, the base Chicken Crust Pizza Recipe contains no flour. Always check labels on cheese and toppings to be safe.

3. Can I make this crust in advance?
Absolutely. Bake the crust, cool completely, then refrigerate or freeze for later use.

4. What toppings work best?
Popular options include pepperoni, bell peppers, olives, onions, extra cheese, or ranch drizzle for a Chicken Ranch Pizza variation.

5. How do I keep the crust crispy?
Drain the chicken thoroughly, pre-bake until golden, and avoid too many moist toppings.

Canned Chicken Pizza Crust

A unique and easy pizza crust alternative made from canned chicken that is protein-rich and gluten-free, perfect for quick homemade pizzas.

For the crust

  • 1 can canned chicken (Drained thoroughly)
  • ½ cup shredded mozzarella cheese
  • ¼ cup grated Parmesan cheese
  • 1 large beaten egg (Acts as a binder)
  • 1 teaspoon Italian seasoning
  • to taste salt salt

Preparation

  1. Drain one can of chicken thoroughly and place it in a mixing bowl.
  2. Break apart the chicken with a fork until finely shredded.
  3. Add shredded mozzarella, grated Parmesan, and beaten egg. Mix until well combined.
  4. Add Italian seasoning and salt, then stir until evenly mixed.
  5. Preheat your oven to 425°F (220°C) and line a baking sheet with parchment paper.
  6. Spread the mixture into a circle or rectangle about ½ inch thick, shaping it evenly.

Baking

  1. Bake for 15-20 minutes until the crust is golden brown and firm.
  2. Remove from the oven and let it cool slightly; your Chicken Crust Pizza base is ready for toppings.

Serving

  1. After baking with toppings, slice it like a traditional pizza and serve.
  2. Pair with dipping sauces and a fresh salad on the side.

Drain chicken well to avoid soggy crust. Mix different cheeses for flavor and avoid too many moist toppings to keep the crust crispy.

Appetizer, Main Course
American
Canned Chicken Recipes, Chicken Pizza Crust, Easy Pizza Recipe, Gluten-Free Pizza, Low-Carb Pizza

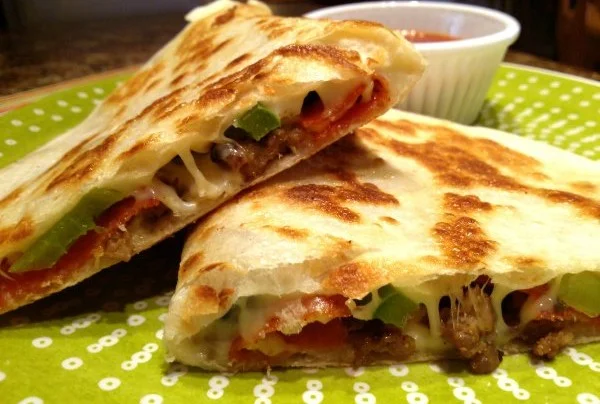
Pizza dillas

Delicious pizza dillas with melted cheese and fresh toppings

There’s something magical about combining two much-loved foods into one delightful dish, and that’s exactly what Pizza dillas do! Imagine the gooey goodness of cheesy pizza wrapped up in a crispy tortilla. It’s the ultimate comfort food that brings together flavors that everyone loves. Whether you’re making a quick weeknight meal or a fun snack for friends, Pizza dillas are sure to impress. With their crispy exterior and melty interior, these treats are not only delicious but also super easy to make. Who wouldn’t want to whip up a tasty twist on classic pizza? Let’s dive in and learn how to prepare these yummy Pizza dillas!

How to prepare Pizza dillas

  1. Ingredients:
  • 4 large flour tortillas
  • 2 cups shredded mozzarella cheese
  • 1 cup pizza sauce
  • 1 cup sliced pepperoni (or any favorite toppings)
  • Olive oil or butter for cooking
  1. Directions:
  • Heat a skillet over medium heat and lightly grease it with olive oil or butter.
  • Place a tortilla on the skillet and spread a generous amount of pizza sauce on half of it.
  • Sprinkle a layer of mozzarella cheese over the sauce, then add your chosen toppings.
  • Fold the tortilla over to create a half-moon shape.
  • Cook for about 3-4 minutes, or until the bottom is golden brown. Flip and cook for another 3-4 minutes, until both sides are crispy and the cheese is melted.
  • Remove from the skillet and let it cool for a minute before slicing into wedges.
  • Repeat with remaining tortillas and ingredients.

Pizzadillas

Why You’ll Love Pizza dillas

Pizza dillas are a fantastic way to enjoy all the flavors of pizza in a new and fun format. They’re crispy, gooey, and packed with your favorite toppings. Plus, they can be made in minutes, making them a perfect choice for busy days. With endless filling options, you can customize them to suit anyone’s taste. Kids love them, and adults do too! Plus, they make a great appetizer or party food. Once you take a bite, you’ll see why Pizza dillas are a hit on any table.

Tips for success

  • Use Fresh Ingredients: Fresh cheese and toppings enhance the flavor and texture.
  • Don’t Overfill: Keep the fillings to a moderate amount to make flipping easier.
  • Experiment with Toppings: Try vegetables, different cheeses, or even cooked meats for variety.
  • Cook at Medium Heat: This helps to ensure that the cheese melts perfectly without burning the tortilla.

Serving Suggestions

These delicious Pizza dillas can be paired with a variety of dips, like marinara sauce, ranch dressing, or sour cream. Serve them with a side salad for a balanced meal or alongside some crispy veggies for a great snack option. You can even cut them into smaller pieces for fun appetizers at gatherings!

FAQs

Can I make Pizza dillas ahead of time?

Yes, you can assemble the Pizza dillas in advance and store them in the fridge. Just cook them right before serving for the best taste.

What should I do with leftovers?

Leftover Pizza dillas can be stored in an airtight container in the fridge. Reheat them in a skillet until crispy again.

Can I freeze Pizza dillas?

Sure! You can freeze uncooked Pizza dillas. Just separate them with parchment paper and place them in a freezer bag. When ready to eat, cook them straight from frozen; it may just take a little longer.

Pizzadillas

Pizza Dillas

Combine the gooey goodness of cheesy pizza wrapped in a crispy tortilla for a fun and delicious twist on classic pizza.

Main Ingredients

  • 4 large large flour tortillas
  • 2 cups shredded mozzarella cheese (Use fresh cheese for better flavor.)
  • 1 cup pizza sauce
  • 1 cup sliced pepperoni (Or any favorite toppings.)
  • Olive oil or butter for cooking (Use for greasing the skillet.)

Cooking

  1. Heat a skillet over medium heat and lightly grease it with olive oil or butter.
  2. Place a tortilla on the skillet and spread a generous amount of pizza sauce on half of it.
  3. Sprinkle a layer of mozzarella cheese over the sauce, then add your chosen toppings.
  4. Fold the tortilla over to create a half-moon shape.
  5. Cook for about 3-4 minutes, or until the bottom is golden brown. Flip and cook for another 3-4 minutes, until both sides are crispy and the cheese is melted.
  6. Remove from the skillet and let it cool for a minute before slicing into wedges.
  7. Repeat with remaining tortillas and ingredients.

Use fresh ingredients for enhanced flavor. Don’t overfill to ensure easy flipping. Experiment with different toppings. Cook at medium heat for perfect cheese melting.

Appetizer, Snack
American, Italian
Cheesy Snacks, Comfort Food, Easy Recipes, Pizza Dillas, Tortilla Pizza

Spicy Potato Noodles

Bowl of spicy potato noodles garnished with herbs and spices

Spicy Potato Noodles feel like a hug with a kick. They are warm, spicy, and full of good textures, with soft noodles and crisp vegetables. This featured recipe is a crowd-pleaser because it balances heat, salt, and a touch of sweet, while the noodles soak up the sauce. It is simple to make, and many people ask for seconds. Give it a try and you may find it becomes a go-to dinner. Get ready to make a bowl that tastes bold, bright, and very comforting.

Why You’ll Love Spicy Potato Noodles

This spicy potato noodles recipe brings bold flavor with simple steps. The dish mixes soft potato noodles with a spicy, tangy sauce, fresh veggies, and a little crunch. It works as a quick weeknight meal, a fun party dish, or a cozy bowl when you want something warm and lively. If you like spicy noodles or potato noodle stir-fry, you will love how fast it comes together and how tasty it feels.

How to prepare Spicy Potato Noodles

Ingredients

  • 8 ounces potato noodles, or glass noodles, soaked or cooked as package says
  • 2 large potatoes, peeled and cut into thin matchsticks, or use pre-made potato noodles
  • 1 small carrot, thinly sliced
  • 1/2 cup green onion, sliced
  • 2 cloves garlic, minced
  • 1 tablespoon vegetable oil
  • 2 tablespoons soy sauce
  • 1 tablespoon gochujang, or chili paste, adjust to taste
  • 1 tablespoon rice vinegar or white vinegar
  • 1 teaspoon sugar or honey
  • 1/2 teaspoon sesame oil (optional)
  • Salt and pepper to taste
  • Sesame seeds for garnish (optional)

Directions

  1. If using dried noodles, cook them or soak them until soft, then drain and set aside. If using fresh potato noodles, rinse and drain.
  2. Heat oil in a large pan over medium heat. Add garlic and stir for 30 seconds.
  3. Add the potato matchsticks or potato noodles and carrot. Stir-fry until the potatoes soften and start to brown, about 6 to 8 minutes.
  4. Mix soy sauce, gochujang, vinegar, sugar, and sesame oil in a small bowl. Taste and change the spice level to your liking.
  5. Add the cooked noodles to the pan. Pour the sauce over the noodles and vegetables. Toss well so the noodles and vegetables get coated. Cook 2 to 3 minutes more so the flavors join.
  6. Add green onion, salt, and pepper. Stir and turn off the heat.
  7. Serve hot, sprinkle sesame seeds if you like.

Spicy Potato Noodles

Tips for success

  • Cut potatoes thin and even, this helps them cook fast and match the noodle texture.
  • Soak dried noodles as the package says, to avoid breaking when you stir them.
  • Taste the sauce before you add it, this lets you change the heat or salt easily.
  • Use a non-stick pan or a well-seasoned pan to stop the noodles from sticking.
  • If you want less heat, use half the gochujang and add a splash more soy sauce for flavor.
  • For a gluten-free version, use tamari instead of soy sauce.

Serving Suggestions

  • Top the noodles with extra green onion and sesame seeds for color and taste.
  • Serve with a side of pickled vegetables or a simple cucumber salad to cool the heat.
  • For protein, add cooked tofu, chicken, or shrimp to make it a full meal.
  • Pair with a light soup or steamed greens to make the meal balanced.

Spicy Potato Noodles

FAQs

Q: Can I make this dish ahead of time,
A: You can make the noodles ahead and store them in the fridge for a day. Reheat in a pan with a splash of water and mix the sauce again, the texture will be best fresh.

Q: What if I can not find potato noodles,
A: Use glass noodles or rice noodles as a good substitute. The sauce and method stay the same.

Q: Is this recipe vegetarian,
A: Yes, as written it is vegetarian. Use tofu or mushrooms to add protein and keep it meat free.

Q: How spicy is this recipe,
A: The heat level depends on how much gochujang or chili paste you use. Start with less, then add more if you want more spice.

Q: Can I freeze leftovers,
A: Freezing is not ideal because potato noodles can change texture. It is best to keep leftovers in the fridge and eat within 2 days.

Conclusion

If you want a tasty, simple spicy potato noodles recipe to try tonight, this one hits the spot. For another clear, tested version with step by step photos and tips, see Spicy Potato Noodles | Two Plaid Aprons.

Spicy Potato Noodles

A flavorful dish combining soft potato noodles and a spicy sauce with fresh veggies, perfect for a quick weeknight meal or a cozy dinner.

Noodles and Vegetables

  • 8 ounces potato noodles, or glass noodles, soaked or cooked as package says
  • 2 large potatoes, peeled and cut into thin matchsticks, or use pre-made potato noodles
  • 1 small carrot, thinly sliced
  • 1/2 cup green onion, sliced (For garnish and flavor)
  • 2 cloves garlic, minced

Sauce

  • 1 tablespoon vegetable oil
  • 2 tablespoons soy sauce
  • 1 tablespoon gochujang, or chili paste, adjust to taste
  • 1 tablespoon rice vinegar or white vinegar
  • 1 teaspoon sugar or honey
  • 1/2 teaspoon sesame oil (optional)
  • Salt and pepper to taste
  • Sesame seeds for garnish (optional)

Preparation

  1. If using dried noodles, cook them or soak them until soft, then drain and set aside. If using fresh potato noodles, rinse and drain.

Cooking

  1. Heat oil in a large pan over medium heat. Add garlic and stir for 30 seconds.
  2. Add the potato matchsticks or potato noodles and carrot. Stir-fry until the potatoes soften and start to brown, about 6 to 8 minutes.
  3. Mix soy sauce, gochujang, vinegar, sugar, and sesame oil in a small bowl. Taste and change the spice level to your liking.
  4. Add the cooked noodles to the pan. Pour the sauce over the noodles and vegetables. Toss well so the noodles and vegetables get coated. Cook 2 to 3 minutes more so the flavors join.
  5. Add green onion, salt, and pepper. Stir and turn off the heat.
  6. Serve hot, sprinkle sesame seeds if you like.

Cut potatoes thin and even to help them cook fast and match the noodle texture. Use a non-stick pan or a well-seasoned pan to stop the noodles from sticking. For a gluten-free version, use tamari instead of soy sauce.

Dinner, Main Course
Asian
Comfort Food, Potato Noodles, Quick Dinner, Spicy Potato Noodles, Stir-Fry

Greek Yogurt Chicken Salad with Dill & Lemon Zest (Healthy & Easy)

Delicious Greek yogurt chicken salad with dill and lemon zest in a bowl.

Few things compare to a fresh, satisfying meal that nourishes your body while still delivering amazing flavor. In my kitchen, this vibrant Greek yogurt chicken salad has become both a weeknight favorite and a reliable meal-prep option. It’s a lighter, healthier alternative to classic mayonnaise-based chicken salads, making it perfect when you want something wholesome yet filling. Best of all, it’s simple to make, loaded with protein, and finished with a fresh, herby touch that makes every bite feel bright and memorable

How make Greek yogurt chicken salad

Ingredients:

  • 2 cups cooked chicken, shredded
  • 1 cup Greek yogurt
  • 1/4 cup mayonnaise (optional for creaminess)
  • 1/4 cup diced celery
  • 1/4 cup chopped onion
  • 1/4 cup fresh dill, chopped (or 1 tablespoon dried dill)
  • Zest of 1 lemon
  • Juice of 1/2 lemon
  • Salt and pepper to taste

Directions:

  1. In a large bowl, combine the shredded chicken, Greek yogurt, and mayonnaise (if using).
  2. Add the diced celery, chopped onion, dill, lemon zest, and lemon juice.
  3. Mix everything together until well combined.
  4. Season with salt and pepper to taste.
  5. Chill in the fridge for at least 30 minutes before serving for the best flavor.

Greek Yogurt Chicken Salad with Dill & Lemon Zest (Healthy & Easy)

Why You’ll Love Greek Yogurt Chicken Salad with Dill & Lemon Zest

This Greek Yogurt Chicken Salad is not just another boring salad! It’s packed with flavors that come together beautifully. The Greek yogurt gives a creamy texture without all the extra calories, and the lemon zest adds a bright, zesty twist that you will love. Plus, the fresh dill infuses the salad with a delightful herbaceous flavor, making every bite a treat. It’s a perfect dish for lunch, a picnic, or any gathering, and it’s sure to impress your friends and family!

tips for success

  1. Cook Your Chicken Right: You can use leftover cooked chicken, rotisserie chicken, or poach your chicken breast for this recipe. Just make sure it’s fully cooked and shredded well.
  2. Balance the Flavors: Taste your salad before serving and adjust the salt, pepper, or lemon juice if needed. Everyone’s palate is different, so make it your own!
  3. Chill: Letting the salad chill in the fridge enhances the flavors. Try to prepare it a few hours in advance for the best result.

Serving Suggestions

This Greek Yogurt Chicken Salad pairs wonderfully with whole-grain bread, lettuce wraps, or even on top of a fresh garden salad. You can also serve it as a dip with crackers or fresh veggie sticks for a healthy snack. It’s versatile enough to fit any occasion!

FAQs

Q: Can I make this salad ahead of time?

A: Yes, you can make this chicken salad a day in advance. Just keep it stored in the fridge, and it will taste even better the next day!

Q: What can I substitute if I don’t have dill?

A: If you don’t have dill, you can substitute with parsley, basil, or chives for a different yet delicious flavor.

Q: Is this salad gluten-free?

A: Yes, this Greek Yogurt Chicken Salad is naturally gluten-free as long as you serve it with gluten-free bread or veggies.

Get ready to enjoy a light, refreshing meal that’s full of flavor! You’ll love how easy and satisfying this Greek Yogurt Chicken Salad with Dill & Lemon Zest is. Give it a try, and let me know how you like it!

Greek Yogurt Chicken Salad

A lighter, healthier alternative to classic chicken salads, bursting with flavors from fresh dill and lemon zest, making it perfect for any meal occasion.

Main Ingredients

  • 2 cups cooked chicken, shredded (Use leftover chicken, rotisserie chicken, or poach your chicken breast.)
  • 1 cup Greek yogurt (For a creamy texture with less calories.)
  • 1/4 cup mayonnaise (Optional for extra creaminess.)
  • 1/4 cup diced celery
  • 1/4 cup chopped onion
  • 1/4 cup fresh dill, chopped (Or 1 tablespoon of dried dill.)
  • 1 unit zest of 1 lemon
  • 1/2 unit Juice of 1/2 lemon
  • Salt and pepper to taste

Preparation

  1. In a large bowl, combine the shredded chicken, Greek yogurt, and mayonnaise (if using).
  2. Add the diced celery, chopped onion, dill, lemon zest, and lemon juice.
  3. Mix everything together until well combined.
  4. Season with salt and pepper to taste.
  5. Chill in the fridge for at least 30 minutes before serving for the best flavor.

Taste your salad before serving and adjust the seasonings as necessary. Make it a few hours in advance for the best flavor enhancement.

Healthy, lunch, Salad
Greek, Mediterranean
Dill and Lemon Salad, Greek Yogurt Chicken Salad, Healthy Chicken Salad, High Protein Salad, Meal Prep