Pineapple Upside Down Sugar Cookies That Delight Every Bite

Pineapple Upside Down Cookies with colorful cherry and pineapple topping

If you’re looking for a cookie that not only tastes amazing but also brings a touch of creativity to your baking, look no further than Pineapple Upside Down Sugar Cookies. These delightful treats combine the classic flavors of pineapple upside-down cake with a soft and chewy sugar cookie base, making them a fun and fruity snack for any occasion. Each bite is bursting with flavor, and the lovely caramelized pineapple on top is sure to impress your friends and family.

Whether you’re hosting a party or simply want to surprise your loved ones with a homemade treat, this cookie recipe is sure to be a crowd-pleaser. Now, get ready to whip up a batch of these Pineapple Upside Down Sugar Cookies that will delight every bite!

How to prepare Pineapple Upside Down Sugar Cookies

  1. Gather your ingredients: You will need flour, sugar, butter, eggs, baking powder, vanilla extract, a can of pineapple rings, and maraschino cherries.
  2. Preheat your oven to 350°F (175°C).
  3. Prepare the cookie base: In a bowl, cream together the softened butter and sugar until light and fluffy. Add in the eggs and vanilla, mixing well. In a separate bowl, combine flour and baking powder, then gradually add to the wet ingredients until fully combined.
  4. Prepare the pineapple topping: In a baking dish, place the pineapple rings and cherries in the center of each ring.
  5. Assemble the cookies: Using a scoop or spoon, place dollops of cookie dough over the pineapple and cherries, carefully spreading it to cover them.
  6. Bake for 15-20 minutes or until the edges are lightly golden.
  7. Cool: Allow the cookies to cool slightly before flipping them over to reveal the beautiful pineapple topping.

Pineapple Upside Down Sugar Cookies That Delight Every Bite

Why You’ll Love Pineapple Upside Down Sugar Cookies

These cookies bring the classic flavors of a beloved dessert into a fun and snackable form. The soft sugar cookie base pairs perfectly with the sweet, tangy pineapple and the pop of the cherry. They are not only delicious but also visually appealing, making them a great addition to any dessert tray. You can easily bring these cookies to potlucks, birthday parties, or just enjoy them at home as a delightful treat.

Tips for success

  • Use fresh ingredients: Ensure your butter is soft and your eggs are at room temperature for the best texture.
  • Don’t skip chilling the dough: If you have time, chilling the dough for about 30 minutes will help the cookies keep their shape.
  • Check your baking time: Every oven is different, so keep an eye on your cookies as they bake to avoid overbaking.

Pineapple Upside Down Sugar Cookies That Delight Every Bite

Serving Suggestions

These Pineapple Upside Down Sugar Cookies are delicious on their own, but consider pairing them with a scoop of vanilla ice cream or a drizzle of chocolate sauce for an extra special treat. You can also serve them with fresh fruit or a tropical smoothie to enhance the fruitiness of the cookies.

FAQs

Can I use fresh pineapple instead of canned?

Yes, you can use fresh pineapple, just make sure to slice it thinly and perhaps caramelize it slightly beforehand to enhance the flavor.

How should I store these cookies?

Store the cookies in an airtight container at room temperature for up to a week. You can also freeze them for longer storage.

Can I make this recipe gluten-free?

Absolutely! Just substitute all-purpose flour with a gluten-free flour blend, and ensure that your baking powder is gluten-free as well.

For more delicious cookie ideas, check out this detailed pineapple upside down sugar cookie recipe that will surely inspire you in your baking adventures!

Pineapple Upside Down Sugar Cookies

Delightful cookies that combine the classic flavors of pineapple upside-down cake with a soft and chewy sugar cookie base, perfect for any occasion.

Cookie Base

  • 2 cups all-purpose flour (Can substitute with gluten-free flour blend.)
  • 1 cup granulated sugar (For the cookie base.)
  • 1/2 cup butter, softened (Use room temperature butter for best texture.)
  • 1 large egg (At room temperature.)
  • 1 teaspoon vanilla extract
  • 2 teaspoons baking powder (Ensure gluten-free if needed.)

Pineapple Topping

  • 1 can pineapple rings (Canned or thinly sliced fresh pineapple can be used.)
  • 12 pieces maraschino cherries (One for each pineapple ring.)

Preparation

  1. Gather your ingredients: flour, sugar, butter, eggs, baking powder, vanilla extract, a can of pineapple rings, and maraschino cherries.
  2. Preheat your oven to 350°F (175°C).
  3. In a bowl, cream together the softened butter and sugar until light and fluffy.
  4. Add in the egg and vanilla, mixing well.
  5. In a separate bowl, combine flour and baking powder, then gradually add to the wet ingredients until fully combined.

Assembling and Baking

  1. In a baking dish, place the pineapple rings and cherries in the center of each ring.
  2. Using a scoop or spoon, place dollops of cookie dough over the pineapple and cherries, carefully spreading it to cover them.
  3. Bake for 15-20 minutes or until the edges are lightly golden.
  4. Allow the cookies to cool slightly before flipping them over to reveal the beautiful pineapple topping.

These cookies can be served on their own or with a scoop of vanilla ice cream or chocolate sauce. Store cookies in an airtight container at room temperature for up to a week or freeze for longer storage.
Dessert, Snack
American
Baking, Dessert Recipes, Pineapple Cookies, Sugar Cookies, Sweet Treats

Italian Almond Cake

Slice of Italian Almond Cake topped with almonds and powdered sugar

If you are looking for a delightful dessert that brings a touch of Italy to your table, look no further than the Italian Almond Cake. This cake is known for its soft, moist texture and rich flavor, making it a delightful treat for any occasion. Almonds are the star ingredient, lending a beautiful nutty taste that pairs exceptionally well with a simple icing or a dusting of powdered sugar. This cake is not only a crowd-pleaser at gatherings but also makes for a comforting slice enjoyed with morning coffee or as an afternoon snack. It’s truly a recipe that you will love sharing with friends and family, and it might just become a new favorite in your home.

How to prepare Italian Almond Cake

To create this delightful cake, start by gathering your ingredients. You will need the following:

  • 1 cup of ground almonds (blanched)
  • 1 cup of sugar
  • 1/2 cup of butter, softened
  • 3 large eggs
  • 1/2 teaspoon of almond extract
  • 1/2 cup of all-purpose flour
  • 1/2 teaspoon of baking powder
  • A pinch of salt

Now let’s bake this delicious cake!

  1. Preheat your oven to 350°F (175°C) and grease an 8-inch round cake pan.
  2. In a mixing bowl, cream the softened butter and sugar together until light and fluffy.
  3. Add in the eggs one at a time, mixing well after each addition.
  4. Stir in the almond extract and ground almonds until well combined.
  5. In another bowl, whisk together the flour, baking powder, and salt.
  6. Gradually add the dry ingredients to the wet mixture, stirring until just combined.
  7. Pour the batter into the prepared cake pan and spread it out evenly.
  8. Bake in the preheated oven for about 25-30 minutes, or until a toothpick inserted in the center comes out clean.
  9. Allow the cake to cool in the pan for about 10 minutes before transferring it to a wire rack to cool completely.

Italian Almond Cake

Why You’ll Love Italian Almond Cake

This Italian Almond Cake is a wonderful combination of sweet and nutty flavors. The ground almonds create a rich texture, and the cake is moist without being overly heavy. It beautifully serves as a simple dessert or even a special occasion cake. And don’t forget the ear-to-ear smiles you’ll receive when serving it to your family and friends! It’s great on its own, or you can enhance its flavor by pairing it with a scoop of ice cream or a dollop of whipped cream.

Tips for success

To ensure your cake turns out perfectly, keep these tips in mind:

  • Make sure your butter is soft to allow for the best mixing.
  • Do not overmix the batter; mix just until combined to keep the cake light.
  • Check for doneness a few minutes before the timer goes off, as ovens can vary.

Serving Suggestions

Serve your Italian Almond Cake plain or dusted with powdered sugar for a simple yet elegant finish. You can also pair it with fresh berries or a light fruit compote for added flavor. For a delightful twist, you might even enjoy it alongside a slice of Italian Lemon Cream Cake, creating a delicious dessert spread perfect for any gathering.

FAQs

Can I use almond flour instead of ground almonds?

Yes, almond flour works perfectly as a substitute.

How should I store the cake?

Keep the cake covered at room temperature for up to three days. For longer storage, refrigerate it for up to a week.

Can I freeze the Italian Almond Cake?

Absolutely! Wrap it tightly in plastic wrap and foil before freezing. Thaw it in the refrigerator when you are ready to enjoy it.

This Italian Almond Cake is a treat that will surely enchant your taste buds and warm your heart. Enjoy baking!

Italian Almond Cake

A delightful dessert with a soft, moist texture and rich almond flavor, perfect for any occasion.

Main Ingredients

  • 1 cup ground almonds (blanched)
  • 1 cup sugar
  • 0.5 cup butter, softened (Make sure butter is soft for best mixing.)
  • 3 large eggs
  • 0.5 teaspoon almond extract
  • 0.5 cup all-purpose flour
  • 0.5 teaspoon baking powder
  • a pinch salt

Preparation

  1. Preheat your oven to 350°F (175°C) and grease an 8-inch round cake pan.
  2. In a mixing bowl, cream the softened butter and sugar together until light and fluffy.
  3. Add in the eggs one at a time, mixing well after each addition.
  4. Stir in the almond extract and ground almonds until well combined.
  5. In another bowl, whisk together the flour, baking powder, and salt.
  6. Gradually add the dry ingredients to the wet mixture, stirring until just combined.
  7. Pour the batter into the prepared cake pan and spread it out evenly.

Baking

  1. Bake in the preheated oven for about 25-30 minutes, or until a toothpick inserted in the center comes out clean.
  2. Allow the cake to cool in the pan for about 10 minutes before transferring it to a wire rack to cool completely.

To ensure your cake turns out perfectly, avoid overmixing the batter and check for doneness a few minutes before the timer goes off. Serve plain or dusted with powdered sugar, and pair with fresh berries or light fruit compote.

Dessert
Italian
Almond Cake, Baking, cake, Dessert, Italian Almond Cake

Black Forest Cake

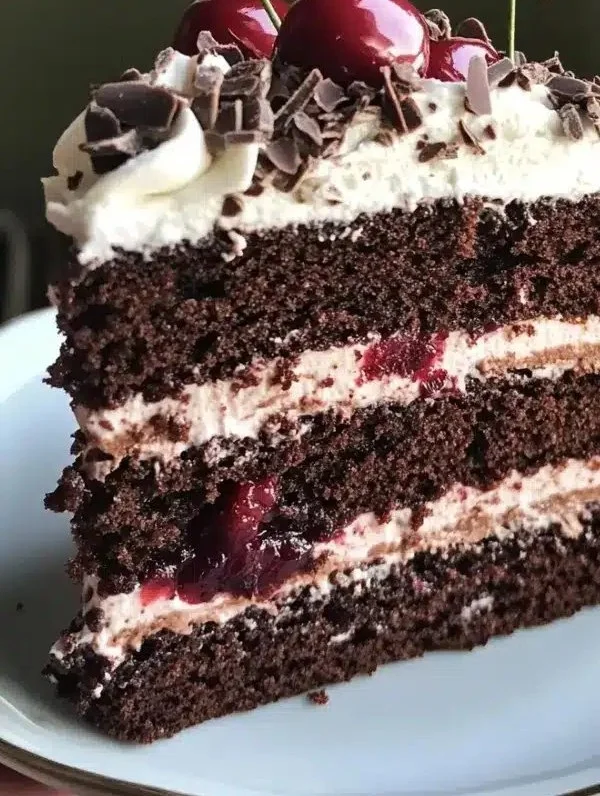
A delicious slice of Black Forest Cake topped with cherries and whipped cream.

There’s something truly magical about desserts that are as delightful to look at as they are to eat. Black Forest Cake is one of those treats that brings joy to every celebration. This classic German dessert features layers of rich chocolate cake, fluffy whipped cream, and tart cherries, making it a wonderful combination of flavors and textures. It’s not only a feast for the taste buds but also a showstopper at any gathering. Whether you’re planning a birthday party, a holiday celebration, or just a sweet treat for your family, Black Forest Cake is sure to impress.

If you’re ready to create a dessert that will have everyone asking for seconds, follow this simple recipe. It’s a crowd-pleaser that’s perfect for both novice bakers and seasoned pros. Best of all, you might find yourself sneaking a slice (or two) before it even makes it to the table!

How to prepare Black Forest Cake

  1. Bake the Chocolate Cake:
  • Preheat your oven to 350°F (175°C). Grease and flour two 9-inch round cake pans.
  • In a large bowl, mix 1 ¾ cups of all-purpose flour, 1 ¾ cups of sugar, ¾ cup of unsweetened cocoa powder, 1 ½ teaspoons of baking powder, 1 ½ teaspoons of baking soda, and 1 teaspoon of salt.
  • Add 2 large eggs, 1 cup of milk, ½ cup of vegetable oil, and 2 teaspoons of vanilla extract. Beat well for about 2 minutes.
  • Stir in 1 cup of boiling water until combined. Pour batter evenly into the prepared pans.
  • Bake for 30-35 minutes, or until a toothpick comes out clean. Cool in pans for 10 minutes, then remove from pans and cool completely.
  1. Prepare the Cherry Filling:
  • While the cake cools, drain 1 jar (about 14 ounces) of tart cherries. Reserve some juice for later.
  • In a small saucepan, combine the cherries, ¼ cup of sugar, and 1 tablespoon of cornstarch. Heat until bubbly and thickened. Let it cool.
  1. Make the Whipped Cream:
  • In a mixing bowl, whip 2 cups of heavy cream with ¼ cup of powdered sugar and 1 teaspoon of vanilla extract until soft peaks form.
  1. Assemble the Cake:
  • Place one layer of cake on a serving platter. Moisten with reserved cherry juice. Spread half of the cherry filling and a layer of whipped cream on top.
  • Add the second layer of cake and repeat the process with the remaining cherry filling and whipped cream. Decorate the top with chocolate shavings.
  1. Serve and Enjoy!
  • Slice the cake and serve to your enthusiastic guests!

Black Forest Cake

Why You’ll Love Black Forest Cake

Black Forest Cake stands out not just for its lovely appearance but also for its harmonious flavors. The sweet chocolate cake, the tart cherries, and the light whipped cream create a wonderful balance that keeps everyone coming back for more. This dessert is perfect for celebrations or as a comforting treat at home. It’s easy to make and adapts well for any occasion, whether you want it for a holiday or a casual family dinner.

Another reason to love this cake is it offers endless possibilities for customization. You can add more cherries, increase the whipped cream, or even incorporate some extra chocolate—making it your own masterpiece.

Tips for success

  1. Use Quality Ingredients: The quality of your chocolate and cherries can make a big difference in taste, so opt for the best you can find.
  2. Don’t Skip the Soaking: Moisten the cake layers with cherry juice to ensure they stay moist and flavorful.
  3. Chill the Whipped Cream: For best results, chill your mixing bowl and beaters before whipping cream. This helps it whip up faster and hold its shape.

Serving Suggestions

Pair your Black Forest Cake with a scoop of vanilla ice cream or a dollop of extra whipped cream for a decadent experience. You can also serve it with a side of fresh cherries or a drizzle of chocolate sauce to elevate the presentation.

FAQs

Can I make Black Forest Cake ahead of time?

Yes, you can bake the cake layers in advance. Just store them in an airtight container and assemble them closer to serving time.

What other fruits can I use?

If cherries aren’t your favorite, you can substitute them with raspberries or strawberries for a different twist.

How should I store leftovers?

Store any leftover cake in the refrigerator for up to 3 days. Make sure to cover it to keep it fresh, as the cream can spoil quickly.

Black Forest Cake

Making a scrumptious Black Forest Cake can be a rewarding experience, and we hope you enjoy every bit of this delicious recipe!

Black Forest Cake

A classic German dessert with layers of rich chocolate cake, fluffy whipped cream, and tart cherries that brings joy to every celebration.

For the Chocolate Cake

  • 1.75 cups all-purpose flour
  • 1.75 cups sugar
  • 0.75 cups unsweetened cocoa powder
  • 1.5 teaspoons baking powder
  • 1.5 teaspoons baking soda
  • 1 teaspoon salt
  • 2 large eggs
  • 1 cup milk
  • 0.5 cups vegetable oil
  • 2 teaspoons vanilla extract
  • 1 cup boiling water

For the Cherry Filling

  • 1 jar tart cherries (about 14 ounces) (Reserve some juice for later)
  • 0.25 cups sugar
  • 1 tablespoon cornstarch

For the Whipped Cream

  • 2 cups heavy cream
  • 0.25 cups powdered sugar
  • 1 teaspoon vanilla extract

For Assembly

  • 1 cup chocolate shavings (For decoration)

Bake the Chocolate Cake

  1. Preheat your oven to 350°F (175°C). Grease and flour two 9-inch round cake pans.
  2. In a large bowl, mix all-purpose flour, sugar, unsweetened cocoa powder, baking powder, baking soda, and salt.
  3. Add eggs, milk, vegetable oil, and vanilla extract. Beat well for about 2 minutes.
  4. Stir in boiling water until combined. Pour batter evenly into the prepared pans.
  5. Bake for 30-35 minutes, or until a toothpick comes out clean. Cool in pans for 10 minutes, then remove from pans and cool completely.

Prepare the Cherry Filling

  1. While the cake cools, drain the tart cherries and reserve some juice.
  2. In a small saucepan, combine cherries, sugar, and cornstarch. Heat until bubbly and thickened. Let it cool.

Make the Whipped Cream

  1. In a mixing bowl, whip heavy cream with powdered sugar and vanilla extract until soft peaks form.

Assemble the Cake

  1. Place one layer of cake on a serving platter. Moisten with reserved cherry juice.
  2. Spread half of the cherry filling and a layer of whipped cream on top.
  3. Add the second layer of cake and repeat the process with the remaining cherry filling and whipped cream.
  4. Decorate the top with chocolate shavings.

Serve

  1. Slice the cake and serve to your enthusiastic guests!

Use quality ingredients for the best taste; chill your mixing bowl and beaters before whipping cream for better results.

Cake, Dessert
German
Black Forest Cake, Celebration Cake, chocolate cake, dessert recipe, Layered Cake

Irresistible Rhubarb Bread

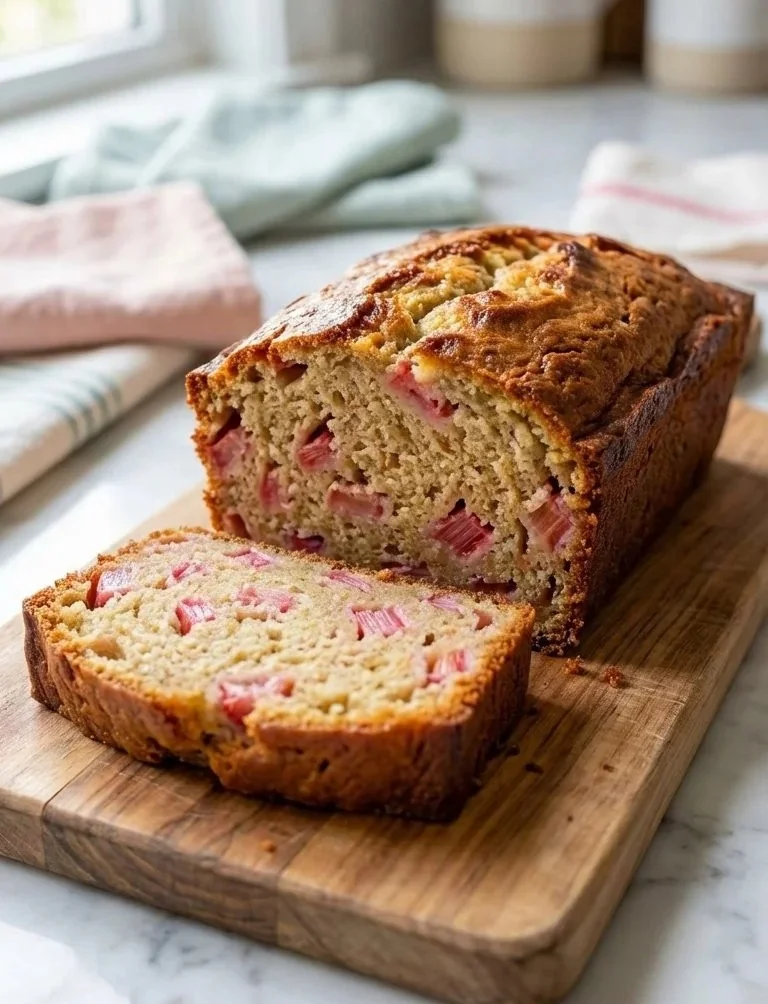
Irresistible rhubarb bread baked golden brown, garnished with fresh rhubarb.

Rhubarb is one of those unique ingredients that can add a delightful twist to your baking. The tartness of rhubarb blends beautifully with sweetness, creating a classic balance that many love. One such treat that captures this harmony perfectly is the Irresistible Rhubarb Bread. This bread is not just moist and tender, but it also carries a burst of fruity flavor in each bite. It’s perfect for breakfast, a snack, or even a dessert. Once you take a slice, you’ll find it hard to stop at just one! Let’s dive into this crowd-pleaser you’ll want to bake for friends and family.

How to prepare Irresistible Rhubarb Bread

To make this delicious bread, gather your ingredients and follow the simple steps below.

  1. Preheat your oven to 350°F (175°C).
  2. In a mixing bowl, combine sugar, eggs, and oil. Stir until well blended.
  3. Gradually add in flour, baking soda, and salt. Mix until just combined.
  4. Gently fold in chopped rhubarb and nuts if you are using them.
  5. Pour the mixture into a greased loaf pan.
  6. Bake for 50-60 minutes, or until a toothpick comes out clean.

Irresistible Rhubarb Bread

Why You’ll Love Irresistible Rhubarb Bread

There are so many reasons to love this bread! It is not only easy to make but also offers a lovely contrast between sweet and tart. The rhubarb gives it a refreshing zing, while the texture is soft and satisfying. It’s a wonderful way to enjoy rhubarb, especially if you are exploring how to use this versatile ingredient creatively. Plus, it makes your kitchen smell amazing as it bakes!

Tips for success

To ensure that your Irresistible Rhubarb Bread turns out perfectly, here are a few helpful tips:

  • Make sure to chop the rhubarb into small, even pieces to distribute the flavor well throughout the bread.
  • For added sweetness, you can sprinkle some sugar on top before baking.
  • Keep an eye on your baking time; every oven is different! Check for doneness a little early to avoid overbaking.
  • If you’d like to experiment with flavors, consider adding some cinnamon or lemon zest to the batter.

Irresistible Rhubarb Bread

Serving Suggestions

This bread can be enjoyed in many ways! Slice it and serve it plain, or spread a little butter on top for good measure. You can also pair it with a cup of tea or coffee for a delightful afternoon snack. For a creative twist, consider using it as a base for French toast. The options are endless!

FAQs

Can I use frozen rhubarb for this recipe?

Yes, you can absolutely use frozen rhubarb! Just make sure to thaw it and drain any excess moisture before adding it to the batter.

How should I store leftover bread?

Store your Irresistible Rhubarb Bread in an airtight container at room temperature for up to three days. If you want to keep it longer, wrap it well and freeze it.

Can I add other fruits to this recipe?

Definitely! Feel free to mix in some strawberries or blueberries along with the rhubarb for a fruity twist.

Now that you’re equipped with the recipe and tips, it’s time to grab that rhubarb and bake a loaf of this delicious bread. Trust us, you’ll be making it again and again! If you’re interested in trying out other easy baking ideas, check out this simple cottage cheese bread recipe. Happy baking!

Irresistible Rhubarb Bread

A delightful bread that combines the tartness of rhubarb with sweetness, perfect for breakfast, snacks, or dessert.

For the bread

  • 1 cup sugar
  • 2 large eggs
  • 1/2 cup oil (Can use vegetable or canola oil.)
  • 2 cups all-purpose flour
  • 1 teaspoon baking soda
  • 1/2 teaspoon salt
  • 2 cups chopped rhubarb (Chop into small, even pieces for best flavor distribution.)
  • 1/2 cup chopped nuts (Optional.)

Preparation

  1. Preheat your oven to 350°F (175°C).
  2. In a mixing bowl, combine sugar, eggs, and oil. Stir until well blended.
  3. Gradually add in flour, baking soda, and salt. Mix until just combined.
  4. Gently fold in chopped rhubarb and nuts if you are using them.
  5. Pour the mixture into a greased loaf pan.

Baking

  1. Bake for 50-60 minutes, or until a toothpick comes out clean.

For added sweetness, you can sprinkle some sugar on top before baking. Check for doneness a little early to avoid overbaking. Try adding cinnamon or lemon zest for extra flavor.

Breakfast, Dessert, Snack
American
Baking, Easy Recipes, Irresistible Bread, Quick Bread, Rhubarb Bread

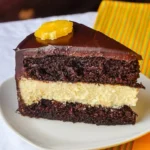
Chocolate Orange Cheesecake Layer Cake

Decadent chocolate orange cheesecake layer cake garnished with orange slices and chocolate shavings.

There’s something truly special about a Chocolate Orange Cheesecake Layer Cake that brings joy to any occasion. The rich, creamy cheesecake layered between moist chocolate cake layers is a heavenly treat that plays on the beloved combination of chocolate and orange. With a delightful burst of citrus paired with rich cocoa, this cake is sure to wow your family and friends. Whether you’re celebrating a birthday, having a casual get-together, or just indulging in a sweet craving, this recipe is a guaranteed crowd-pleaser. Get ready to roll up your sleeves and dive into making this delicious dessert!

How to prepare Chocolate Orange Cheesecake Layer Cake

  1. Gather Your Ingredients: Collect all the ingredients you’ll need for both the cheesecake and the cake layers. This includes cream cheese, chocolate, sugar, eggs, flour, and, of course, fresh oranges for that zesty flavor.
  2. Make the Cheesecake Filling: Start by beating the cream cheese and sugar until smooth. Add the eggs and orange zest, mixing well. Pour the mixture into a prepared springform pan and bake until set. Allow it to cool completely before removing it from the pan.
  3. Bake the Chocolate Cake Layers: Prepare a chocolate cake batter by combining flour, cocoa powder, sugar, baking powder, and eggs. Divide the batter into two greased round cake pans. Bake until a toothpick comes out clean.
  4. Assemble the Cake: Once everything has cooled, place the first chocolate layer on a cake plate. Spread a layer of the cheesecake filling on top, add the second chocolate layer, and finish with more cheesecake on top.
  5. Decorate: For the final touch, you can add whipped cream and orange slices.
  6. Chill and Serve: Refrigerate the cake for a few hours or overnight to let the flavors meld together before slicing into this stunning dessert.

Chocolate Orange Cheesecake Layer Cake

Why You’ll Love Chocolate Orange Cheesecake Layer Cake

This recipe is not just about looks, but taste as well. The combination of smooth cheesecake and rich chocolate creates a beautiful harmony that dances on your taste buds. Each bite is creamy, decadent, and refreshing, thanks to the citrus burst. It’s perfect for any occasion, from birthdays to family dinners. Plus, who doesn’t love layers? This cake is not just a dessert, it’s an experience that you, your friends, and family will remember.

Tips for Success

  • Be sure to let the cheesecake cool completely before assembling the cake. This prevents melting and gives you clean layers.
  • Use high-quality chocolate and fresh oranges for best flavors.
  • If you’re in a hurry, you can make the cheesecake a day in advance and assemble the cake later.

Serving Suggestions

Pair your Chocolate Orange Cheesecake Layer Cake with a scoop of vanilla ice cream or some fresh berries for a delightful contrast. A cup of coffee or tea also complements the cake beautifully, making it a perfect choice for an afternoon treat.

FAQs

Can I make this cheesecake layer ahead of time?

Yes, you can prepare the cheesecake layer a day in advance, just remember to give it time to cool completely before storing it.

Can I use a different flavor than orange?

Absolutely! You can experiment with other flavors like lemon or raspberry for a different twist.

How should I store any leftovers?

Keep any leftovers in the refrigerator, well wrapped. It should stay fresh for up to five days.

Chocolate Orange Cheesecake Layer Cake

With this lovely Chocolate Orange Cheesecake Layer Cake, your next gathering will surely be a hit! Happy baking!

Chocolate Orange Cheesecake Layer Cake

A delicious and visually stunning layer cake combining rich chocolate cake with creamy cheesecake and a zesty orange flavor, perfect for any occasion.

For the Cheesecake Filling

  • 16 oz cream cheese (Softened)
  • 1 cup sugar (Granulated)
  • 3 large eggs (Room temperature)
  • 1 tbsp orange zest (Freshly grated)

For the Chocolate Cake Layers

  • 2 cups all-purpose flour
  • 3/4 cup cocoa powder (Unsweetened)
  • 1.5 cups sugar (Granulated)
  • 1 tbsp baking powder
  • 4 large eggs (Room temperature)

For Assembly and Decoration

  • 1 cup whipped cream (For topping)
  • 1 orange sliced (For decoration)

Preparation

  1. Gather all the ingredients needed for both the cheesecake and the chocolate cake layers.
  2. Preheat your oven and prepare a springform pan for the cheesecake.

Cheesecake Filling

  1. Beat the cream cheese and sugar together until smooth.
  2. Add the eggs and orange zest, mixing well.
  3. Pour the mixture into the prepared springform pan and bake until set.
  4. Allow the cheesecake to cool completely before removing it from the pan.

Chocolate Cake Layers

  1. Prepare the chocolate cake batter by combining flour, cocoa powder, sugar, baking powder, and eggs.
  2. Divide the batter into two greased round cake pans.
  3. Bake until a toothpick comes out clean.

Assembly

  1. Once everything has cooled, place the first chocolate layer on a cake plate.
  2. Spread a layer of the cheesecake filling on top, then add the second chocolate layer.
  3. Finish with more cheesecake on top.

Decoration and Serving

  1. For the decoration, add whipped cream and orange slices on top.
  2. Refrigerate the cake for a few hours or overnight before cutting and serving.

Be sure to let the cheesecake cool completely before assembling to prevent melting. Use high-quality chocolate and fresh oranges for the best flavor. You can make cheesecake a day in advance and assemble the cake later.

Cake, Dessert
American
Celebration Cake, cheesecake, chocolate cake, Layer Cake, Orange Dessert

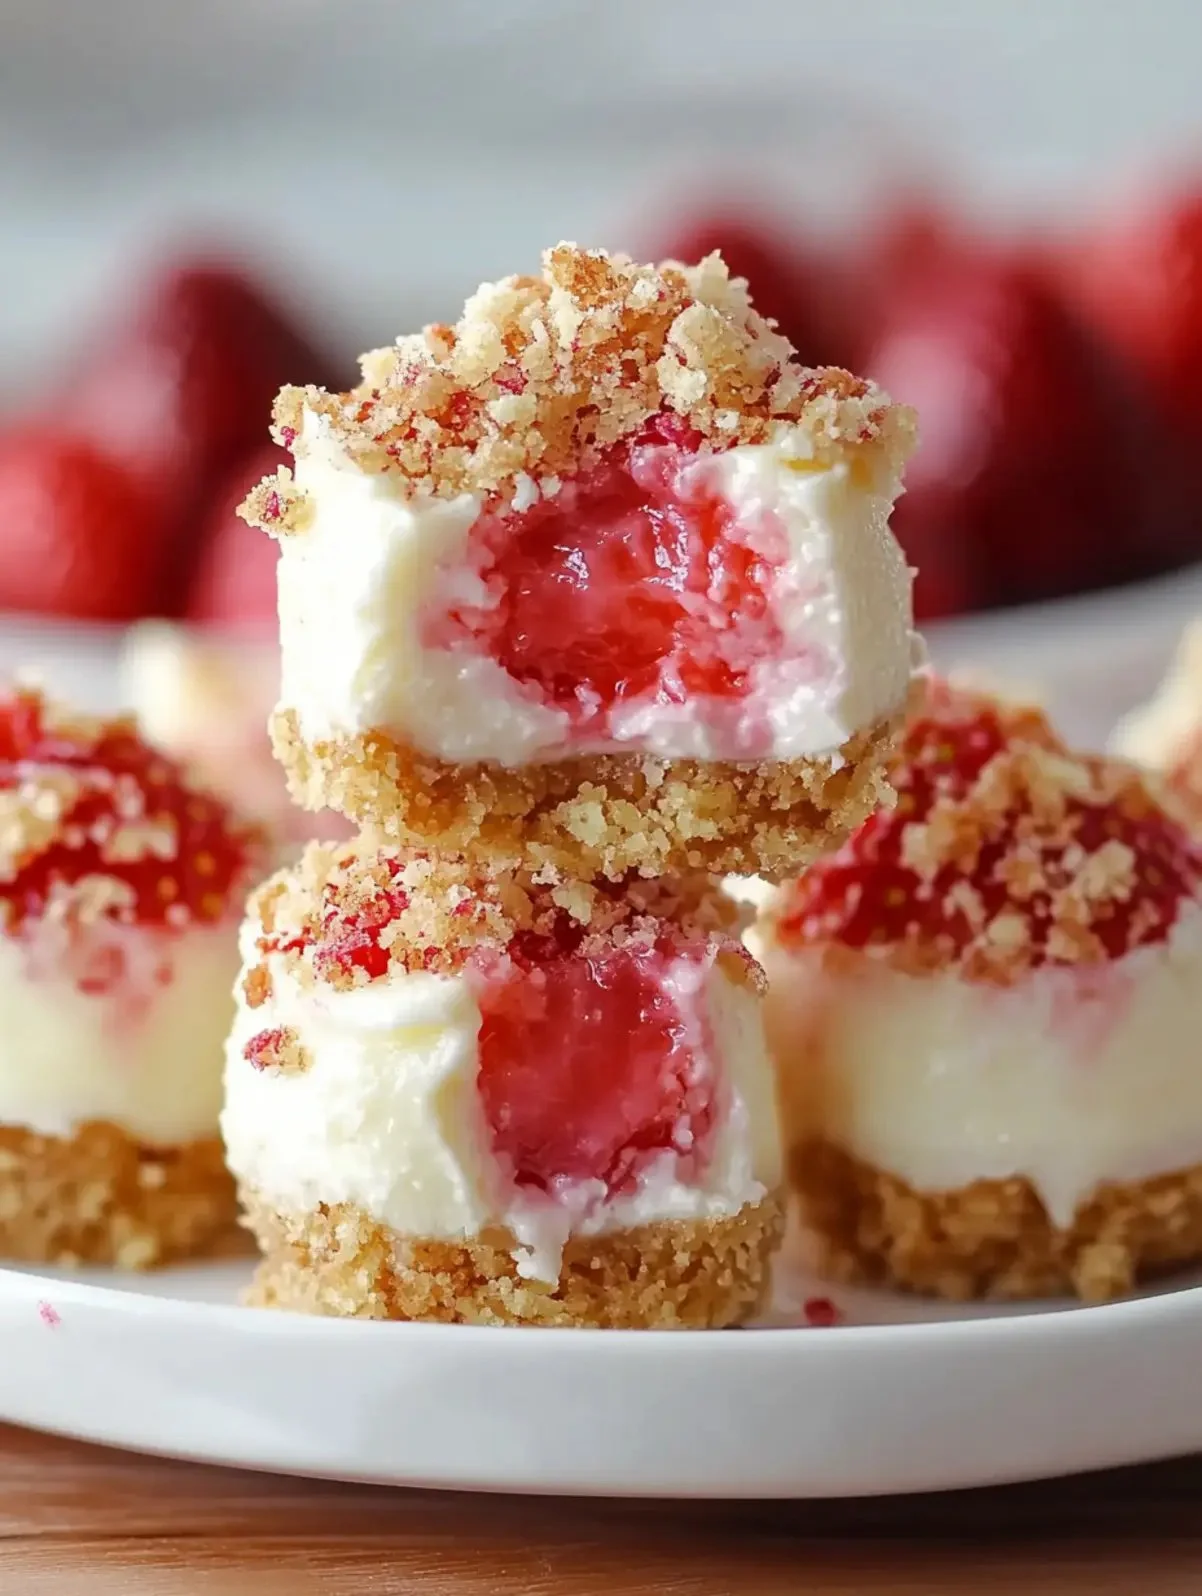
Strawberry Crunch Cheesecake Bites

Delicious strawberry crunch cheesecake bites topped with crushed strawberries.

There’s something magical about desserts that bring a little joy to our day. Better Than Bakery Strawberry Crunch Cheesecake Bites are exactly that, a delightful treat that captures the sweet essence of strawberry and the creamy goodness of cheesecake in every bite. These little bites are a show-stopper at any gathering, appealing to both kids and adults alike. Imagine the smooth, rich cheesecake filling surrounded by a crunchy topping, giving you the perfect blend of textures. This recipe is simple yet delicious, and it will surely become a favorite in your home. Let’s dive into this crowd-pleaser that’s waiting for you to make it yourself.

How to prepare Strawberry Crunch Cheesecake Bites

  1. Start by preheating your oven to 325°F (163°C).
  2. In a bowl, mix crushed graham crackers, melted butter, and sugar. Press this mixture into a lined baking dish to form your crust.
  3. For the cheesecake filling, beat cream cheese, sugar, and vanilla until smooth. Add in your eggs one at a time, mixing well after each addition.
  4. Pour the cheesecake filling over the crust and smooth it out. Bake for about 25-30 minutes, until set.
  5. Let it cool completely before chilling it in the fridge for at least 4 hours.
  6. Once chilled, slice into bite-sized pieces and top with crushed strawberries for that delicious crunchy finish.

Better Than Bakery Strawberry Crunch Cheesecake Bites

Why You’ll Love Strawberry Crunch Cheesecake Bites

These Strawberry Crunch Cheesecake Bites are a treat you won’t forget. The combination of the creamy cheesecake filling and the strawberry crunch creates a delightful flavor that’s refreshing yet rich. They are perfect for any occasion, whether it’s a family gathering, birthday party, or just a sweet snack at home. The best part is how easy they are to prepare, making them a great choice for both beginner and experienced bakers alike. If you love cheesecake, you should definitely check out more scrumptious options like cheesecake bites.

Tips for success

  • Make sure your cream cheese is at room temperature to avoid lumps in your filling.
  • For an extra kick of flavor, add a splash of lemon juice to your cheesecake mixture.
  • Don’t rush the cooling process; chilling the cheesecake is essential for the best texture.
  • You can substitute other berries or even mix different fruits for a unique twist!

Serving Suggestions

Serve these Strawberry Crunch Cheesecake Bites on a pretty platter, garnished with fresh strawberries or mint for a pop of color. They also pair nicely with whipped cream or a drizzle of chocolate sauce. For a special touch, consider adding some sparkle with edible glitter or colorful sprinkles.

FAQs

Can I make these cheesecake bites ahead of time?

Yes, they can be made a day in advance and stored in the fridge until you’re ready to serve. Just make sure they are covered properly.

Can I freeze the cheesecake bites?

Absolutely! Just ensure they are stored in an airtight container. They can be frozen for up to 3 months and thawed in the fridge before serving.

What can I use instead of strawberries?

You can use any berry or fruit you like, such as raspberries, blueberries, or even bananas for a different flavor profile.

These Better Than Bakery Strawberry Crunch Cheesecake Bites are sure to delight everyone who tries them. Get ready to whip up a batch and enjoy the sweet smiles they bring!

Strawberry Crunch Cheesecake Bites

A delightful treat that blends strawberry and creamy cheesecake flavors, perfect for gatherings and easy to prepare.

Crust

  • 1 cup crushed graham crackers
  • 1/4 cup melted butter
  • 1/4 cup sugar

Cheesecake Filling

  • 16 oz cream cheese (room temperature)
  • 1/2 cup sugar
  • 1 tsp vanilla extract
  • 2 large eggs

Topping

  • 1 cup crushed strawberries (for garnish)

Preparation

  1. Preheat your oven to 325°F (163°C).
  2. In a bowl, mix crushed graham crackers, melted butter, and sugar. Press this mixture into a lined baking dish to form your crust.

Cheesecake Filling

  1. In a mixing bowl, beat cream cheese, sugar, and vanilla until smooth.
  2. Add eggs one at a time, mixing well after each addition.
  3. Pour the cheesecake filling over the crust and smooth it out.
  4. Bake for about 25-30 minutes, until set.
  5. Let it cool completely before chilling in the fridge for at least 4 hours.

Serving

  1. Once chilled, slice into bite-sized pieces and top with crushed strawberries.

Make sure your cream cheese is at room temperature for a smooth filling. You can substitute other berries for a unique twist. Serve on a platter, garnished with fresh strawberries or mint.

Dessert, Snack
American
Cheesecake Bites, dessert recipe, Easy Cheesecake, Party Treats, Strawberry Crunch

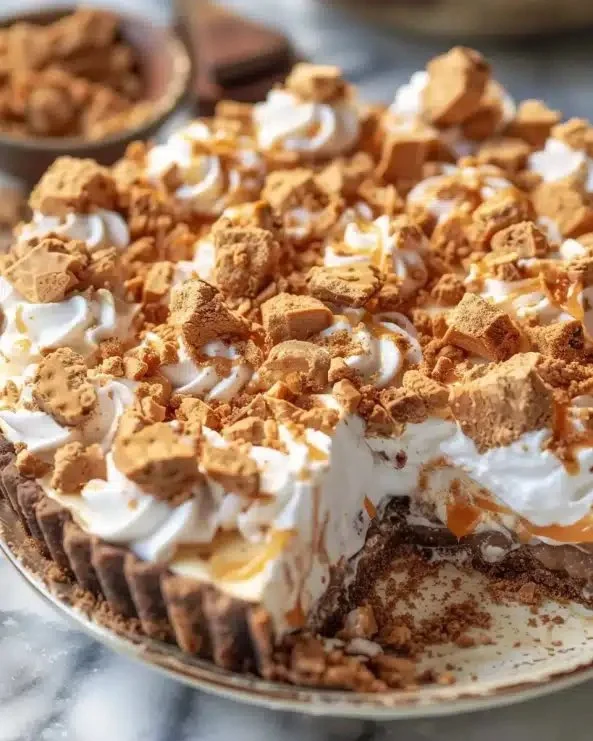
Butterfinger Pie

Delicious Butterfinger Pie with crispy Butterfinger candy topping

Butterfinger Pie is a delightful dessert that brings together the creamy goodness of peanut butter and the crunchy sweetness of Butterfinger candy bars. This pie is not just a treat for your taste buds, but also a feast for the eyes. With its rich layers and a graham cracker crust, it has everything you need to impress friends and family. It’s a perfect dessert for any occasion, whether it’s a holiday gathering or a casual get-together. Just one bite of this pie will make you understand why it’s a crowd-pleaser! You’ll want to dive right in and make it yourself after hearing how simple it is to whip up.

How to prepare Butterfinger Pie

To make this delicious Butterfinger Pie, you will need the following ingredients:

Ingredients

  • 1 (9-inch) graham cracker crust
  • 1 cup creamy peanut butter
  • 1 cup powdered sugar
  • 1 (8-ounce) package cream cheese, softened
  • 1 (12-ounce) container whipped topping
  • 2-3 Butterfinger candy bars, crushed (plus extra for garnish)
  • Chocolate syrup for drizzling (optional)

Directions

  1. In a large bowl, mix together the peanut butter, powdered sugar, and softened cream cheese until smooth and creamy.
  2. Gently fold in the whipped topping until it’s well combined.
  3. Add the crushed Butterfinger candy bars and mix them into the filling.
  4. Pour the mixture into the graham cracker crust and spread it evenly.
  5. Refrigerate for at least 4 hours, or overnight for best results.
  6. Before serving, drizzle chocolate syrup on top and sprinkle with extra crushed Butterfinger bars.

Butterfinger Pie

Why You’ll Love Butterfinger Pie

You will love Butterfinger Pie for its incredible flavor and texture. The combination of creamy peanut butter and crunchy candy is simply irresistible. It’s not too sweet, making it perfect for those who enjoy a well-balanced dessert. Plus, it’s a no-bake recipe, which means less time in the kitchen and more time enjoying your pie! Whether you are a peanut butter fan or just love a good dessert, this pie is sure to become a favorite in your household.

Tips for success

To make your Butterfinger Pie even better, consider these tips:

  • Allow the cream cheese to soften completely for a smoother filling.
  • Use fresh whipped topping rather than a thawed version for the best texture.
  • If you prefer a stronger chocolate flavor, feel free to add more chocolate syrup on top.
  • To make it even more festive, try adding whipped cream decorations around the edges before serving.

Serving Suggestions

This pie is perfect as a standalone dessert. However, you can take it to the next level by serving it with a scoop of vanilla ice cream on the side or fresh whipped cream on top. A sprinkle of crushed Butterfinger makes for a delightful garnish, and a drizzle of chocolate sauce can make it look extra special.

FAQs

1. How long can Butterfinger Pie be stored in the fridge?

Butterfinger Pie can be stored in the refrigerator for up to 5 days. Just make sure to cover it well so it stays fresh.

2. Can I use a different candy bar?

Absolutely! Feel free to swap out Butterfinger for your favorite candy bar, such as Reese’s or Snickers for a fun twist.

3. Is it necessary to refrigerate before serving?

Yes, refrigerating the pie is important because it helps set the filling, giving it the perfect texture when you slice into it.

Butterfinger Pie

Now that you have all the information you need to make this delightful Butterfinger Pie, why not give it a try? Its rich flavors and creamy texture make it a perfect choice for any gathering. For more ideas on fun desserts, check out this amazing recipe on Butterfinger Pie for some inspiration! Enjoy your baking adventure!

Butterfinger Pie

A delightful no-bake dessert combining creamy peanut butter with crunchy Butterfinger candy bars, perfect for any occasion.

Crust

  • 1 9-inch graham cracker crust

Filling

  • 1 cup creamy peanut butter (Use smooth peanut butter for the best texture.)
  • 1 cup powdered sugar
  • 1 8-ounce package cream cheese, softened (Allow to soften completely for a smoother filling.)
  • 1 12-ounce container whipped topping (Use fresh whipped topping for best results.)
  • 2-3 pieces Butterfinger candy bars, crushed (Plus extra for garnish.)
  • to taste chocolate syrup (For drizzling (optional).)

Preparation

  1. In a large bowl, mix together the peanut butter, powdered sugar, and softened cream cheese until smooth and creamy.
  2. Gently fold in the whipped topping until well combined.
  3. Add the crushed Butterfinger candy bars and mix them into the filling.
  4. Pour the mixture into the graham cracker crust and spread it evenly.
  5. Refrigerate for at least 4 hours, or overnight for best results.
  6. Before serving, drizzle chocolate syrup on top and sprinkle with extra crushed Butterfinger bars.

Butterfinger Pie can be stored in the refrigerator for up to 5 days. Consider serving with a scoop of vanilla ice cream or whipped cream on top.

Dessert
American
Butterfinger Pie, Chocolate Dessert, Crowd-Pleaser, No-Bake Dessert, Peanut Butter Dessert

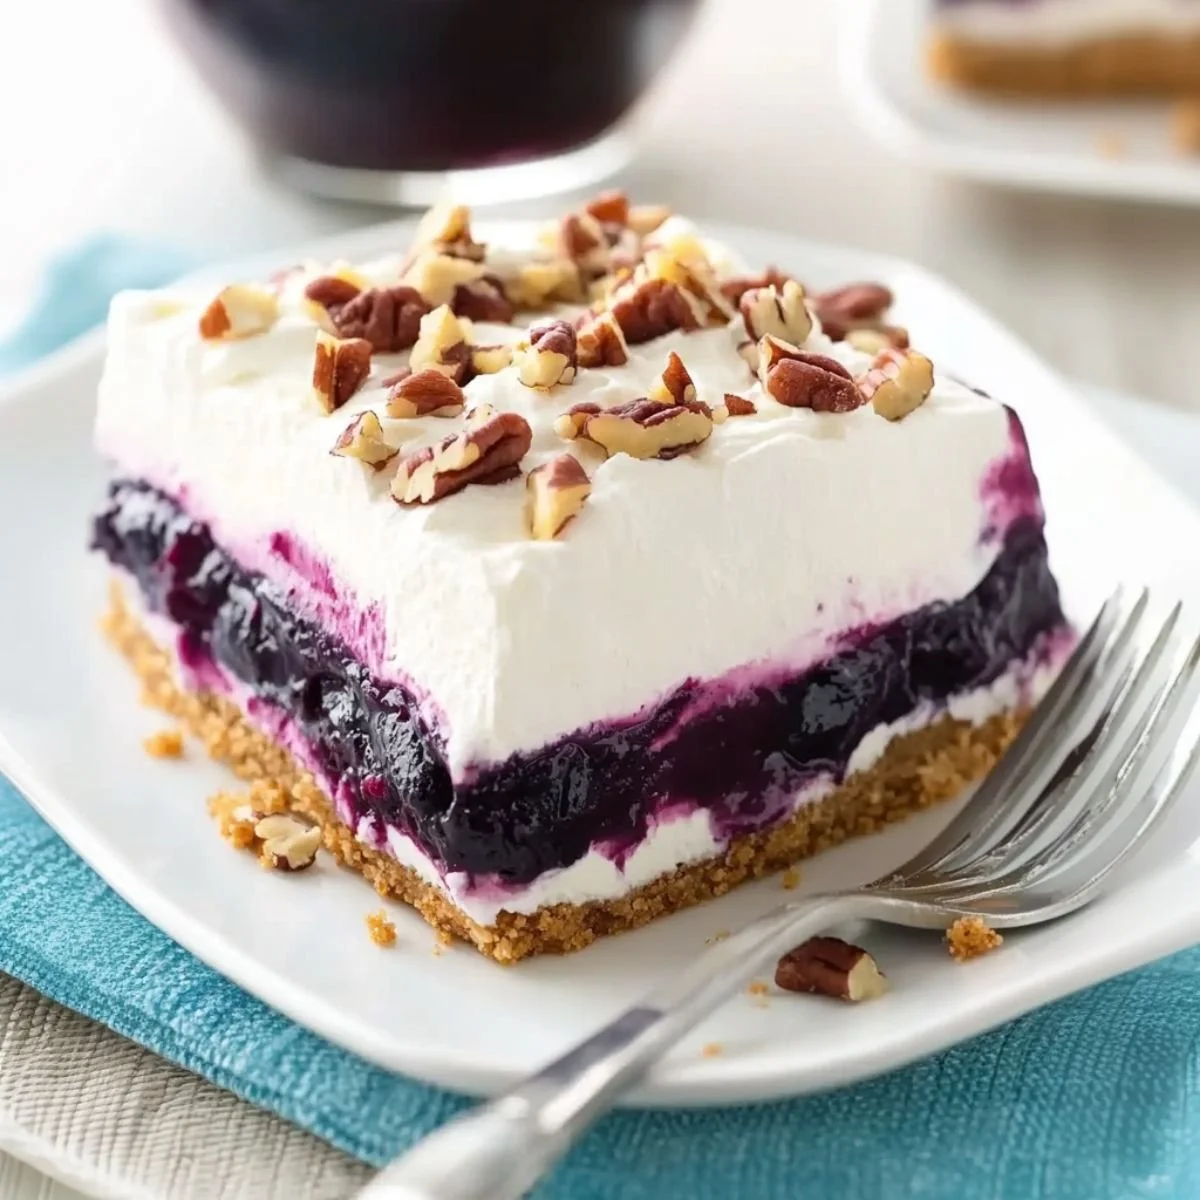
Blueberry Fluff Delight

Delicious Blueberry Fluff Delight dessert with fresh blueberries and fluffy texture

Growing up, summer meant backyard barbecues and endless dessert options. One highlight was always the Blueberry Fluff Delight, a fun and delicious dessert that would steal the show. Friends and family couldn’t resist its creamy layers and sweet blueberry topping. Anytime I hear the word “blueberry,” I’m instantly transported back to those sunny afternoons, savoring each delightful bite.

why make this recipe

Blueberry Fluff Delight is a perfect treat for any gathering or special occasion. It combines a crunchy crust, a creamy filling, and a burst of fruity flavor, making it an exciting dessert that everyone will love. Plus, it’s easy to make, requires no baking, and can be prepared ahead of time—it’s the ideal solution for busy days!

how to make Blueberry Fluff Delight

Ingredients:

  • 1 sleeve of graham crackers (approximately 9 pieces)
  • 1 cup of pecans
  • 1/2 cup of melted butter
  • 2 tablespoons of sugar
  • 1 package (8 ounces) of cream cheese, softened thoroughly
  • 1 cup of powdered sugar
  • 2 tubs (each 8 ounces) of whipped topping, separated
  • 2 cans (each 21 ounces) of blueberry pie filling
  • Pecans, chopped for optional garnish

Directions:

  1. Crush the graham crackers and toasted pecans together in a bowl.
  2. Mix the crushed mixture with melted butter and sugar.
  3. Press the mixture into the bottom of a baking pan to form the crust.
  4. Chill the crust in the refrigerator for 30 minutes.
  5. In another bowl, beat the softened cream cheese with powdered sugar until smooth.
  6. Spread this creamy mixture over the chilled crust.
  7. Spoon the whole berry blueberry pie filling on top of the cream cheese layer.
  8. Gently spread the whipped topping over the blueberry filling.
  9. Chill for at least 2 hours before serving to let the flavors meld together.

how to serve Blueberry Fluff Delight

Serve Blueberry Fluff Delight chilled for the best experience. You can cut it into squares and garnish with extra chopped pecans if desired. It looks great on a dessert table and is sure to impress your guests.

how to store Blueberry Fluff Delight

To store any leftovers, cover the dish with plastic wrap or transfer it to an airtight container. You can keep it in the refrigerator for up to 3-4 days. Just make sure to keep it chilled, so it remains fresh and tasty.

tips to make Blueberry Fluff Delight

  • Make sure the cream cheese is softened completely to avoid lumps in the filling.
  • You can use store-bought whipped topping or make your own for added freshness.
  • If you like a little crunch, consider adding more chopped pecans on top for garnish before serving.

variation

If blueberry isn’t your favorite, feel free to switch it up with other pie fillings like cherry or strawberry for a different flavor experience.

FAQs

1. Can I use fresh blueberries instead of blueberry pie filling?
Yes, you can use fresh blueberries, but you may want to add a bit of sugar and cornstarch to create a pie-like filling consistency.

2. Can I make this dessert a day in advance?
Absolutely! It’s actually better if you let it chill overnight. The flavors will blend nicely, and it will be ready to serve when you are.

3. Is there a gluten-free option for the crust?
Yes, you can use gluten-free graham crackers to make the crust and still enjoy all the flavors of this delightful dessert.

[tasty-recipe id=”3293″]

Blueberry Fluff Delight

A fun and delicious dessert featuring a crunchy graham cracker crust, creamy filling, and sweet blueberry topping, perfect for any gathering.

Crust Ingredients

  • 1 sleeve sleeve of graham crackers (approximately 9 pieces)
  • 1 cup pecans
  • 1/2 cup melted butter
  • 2 tablespoons sugar

Filling Ingredients

  • 1 package (8 ounces) cream cheese, softened thoroughly
  • 1 cup powdered sugar
  • 2 tubs (8 ounces each) whipped topping, separated
  • 2 cans (21 ounces each) blueberry pie filling
  • Pecans, chopped for optional garnish (Optional garnish)

Preparation

  1. Crush the graham crackers and toasted pecans together in a bowl.
  2. Mix the crushed mixture with melted butter and sugar.
  3. Press the mixture into the bottom of a baking pan to form the crust.
  4. Chill the crust in the refrigerator for 30 minutes.

Assembly

  1. In another bowl, beat the softened cream cheese with powdered sugar until smooth.
  2. Spread this creamy mixture over the chilled crust.
  3. Spoon the whole berry blueberry pie filling on top of the cream cheese layer.
  4. Gently spread the whipped topping over the blueberry filling.
  5. Chill for at least 2 hours before serving to let the flavors meld together.

Serve chilled. You can cut it into squares and garnish with extra chopped pecans if desired. To store leftovers, cover with plastic wrap or transfer to an airtight container and keep in the refrigerator for up to 3-4 days.

Dessert
American
Blueberry Dessert, Creamy Dessert, easy dessert, No-Bake Dessert, Summer Treat

Strawberry Pound Cake

Slice of moist strawberry pound cake topped with fresh strawberries

This strawberry pound cake feels like a warm hug on a plate. It uses fresh strawberries, rich butter, and simple ingredients to make a moist cake with real strawberry taste. Many people love it at family dinners, picnics, and slow weekends with a cup of tea. This featured recipe is a crowd-pleaser, with a soft crumb, gentle strawberry sweetness, and a simple glaze that makes each slice feel special. If you enjoy strawberry desserts, you might also like this strawberry charlotte cake for another soft, fruity treat. Get ready to bake a cake that will make everyone smile.

How to prepare Strawberry Pound Cake

  1. Preheat your oven to 325°F, and grease a 9×5 inch loaf pan, then line it with parchment paper.
  2. In a bowl, mash 1 cup fresh strawberries until smooth, set aside.
  3. In a large bowl, cream 1 cup softened butter with 1 1/2 cups sugar until light.
  4. Add 3 eggs, one at a time, beating after each egg. Add 1 teaspoon vanilla extract.
  5. In another bowl, whisk 2 cups all purpose flour, 1/2 teaspoon baking powder, and 1/2 teaspoon salt.
  6. Add the dry mix in two parts to the butter mix, alternating with the mashed strawberries, beginning and ending with the dry mix. Stir just until you have a smooth batter.
  7. Pour the batter into the prepared pan, smooth the top, and bake 60 to 70 minutes, until a toothpick comes out clean or with a few moist crumbs.
  8. Let the cake cool in the pan 15 minutes, then lift out and cool on a rack.
  9. For a simple glaze, mix 1 cup powdered sugar with 1 to 2 tablespoons strawberry juice or milk, drizzle over the cooled cake.

Strawberry Pound Cake

Why You’ll Love Strawberry Pound Cake

  • It is moist and full of real strawberry flavor, not just artificial taste.
  • The cake is easy to make with pantry basics and fresh fruit.
  • It works for many occasions, from a quick snack to a party dessert.
  • The texture is dense but soft, the classic pound cake feel with a fruity twist.

Tips for success

  • Use ripe, sweet strawberries for the best flavor.
  • Keep butter and eggs at room temperature so they mix well.
  • Do not overmix after you add the flour, mix just until combined.
  • Check the cake at 60 minutes, ovens vary, and cover with foil if the top browns too fast.
  • Cool the cake before glazing so the glaze stays on top and does not soak in too much.

Serving Suggestions

  • Serve slices plain, or with a dollop of whipped cream and fresh strawberry slices.
  • Add a scoop of vanilla ice cream for a simple dessert.
  • Cut into small squares for a tea party or potluck.
  • Pair with coffee or iced tea for a nice balance of sweet and warm flavors.

Strawberry Pound Cake

FAQs

Q: Can I use frozen strawberries?

A: Yes, thaw and drain them first, then mash well. Frozen berries add more moisture, so watch the bake time.

Q: Can I make this in a bundt pan?

A: Yes, but reduce baking time and check for doneness earlier, start checking at 45 minutes.

Q: How do I store the cake?

A: Wrap the cooled cake in plastic or keep in an airtight container. It stays fresh 3 to 4 days at room temperature, or longer in the fridge.

Q: Can I add strawberry chunks instead of mashed berries?

A: You can, but small chunks may sink. Toss them in a little flour before adding to the batter.

Conclusion

For another tested take on a fresh strawberry pound cake, try this clear recipe from Grandbaby Cakes, it gives extra tips and a bright strawberry glaze, Fresh Strawberry Pound Cake Recipe – Grandbaby Cakes. Enjoy baking, and have fun sharing warm slices with friends and family.

Strawberry Pound Cake

This moist strawberry pound cake is made with fresh strawberries and simple ingredients, perfect for family gatherings and special occasions.

Cake Ingredients

  • 1 cup fresh strawberries (mashed) (Use ripe, sweet strawberries for the best flavor.)
  • 1 cup softened butter (Keep at room temperature for better mixing.)
  • 1.5 cups sugar
  • 3 large eggs (Add one at a time, beating after each.)
  • 1 teaspoon vanilla extract
  • 2 cups all-purpose flour (Add in two parts to batter.)
  • 0.5 teaspoon baking powder
  • 0.5 teaspoon salt

Glaze Ingredients

  • 1 cup powdered sugar
  • 1-2 tablespoons strawberry juice or milk (For the glaze.)

Preparation

  1. Preheat your oven to 325°F and grease a 9×5 inch loaf pan, then line with parchment paper.
  2. In a bowl, mash 1 cup of fresh strawberries until smooth and set aside.
  3. In a large bowl, cream 1 cup softened butter with 1.5 cups sugar until light.
  4. Add 3 eggs, one at a time, beating after each egg. Then add 1 teaspoon of vanilla extract.
  5. In another bowl, whisk together 2 cups all-purpose flour, 0.5 teaspoon of baking powder, and 0.5 teaspoon of salt.
  6. Add the dry mix in two parts to the butter mixture, alternating with the mashed strawberries, beginning and ending with the dry mix. Stir just until you have a smooth batter.
  7. Pour the batter into the prepared pan, smooth the top, and bake for 60 to 70 minutes, until a toothpick comes out clean or with a few moist crumbs.
  8. Let the cake cool in the pan for 15 minutes, then lift out and cool on a rack.

Glazing

  1. For the glaze, mix 1 cup of powdered sugar with 1 to 2 tablespoons of strawberry juice or milk, and drizzle over the cooled cake.

Cool the cake before glazing so the glaze stays on top and does not soak in too much. Check the cake at 60 minutes, as oven times may vary. Cover with foil if the top browns too fast.

Dessert, Snack
American
cake recipe, dessert recipe, Moist Cake, Strawberry Desserts, Strawberry Pound Cake

Apple Cheesecake Streusel Buns

Delicious apple cheesecake streusel buns on a wooden table

These Apple Cheesecake Streusel Buns are warm, soft buns filled with sweet apple and creamy cheesecake, topped with a crunchy streusel. They smell like fall and taste like a treat you want for breakfast or dessert. The filling is mild and creamy, the apples add bright flavor, and the streusel gives a nice crisp bite. This recipe is a crowd-pleaser at family breakfasts, bake sales, or a cozy weekend. If you like simple cheesecakes, try a similar easy dessert like 2-Ingredient Yogurt Cheesecake for more cheesecake ideas. Get ready to bake, and have fun making these sweet buns for friends and family.

How to prepare Apple Cheesecake Streusel Buns

  1. Make the dough, follow a basic sweet roll dough recipe, and let it rise until doubled.
  2. Prepare the cheesecake filling, beat cream cheese with a little sugar and vanilla until smooth.
  3. Cook the apple filling, chop apples small, toss with sugar, cinnamon, and a touch of lemon, and cook until soft. Let cool.
  4. Roll the dough on a floured surface into a large rectangle. Spread the cheesecake filling in a thin layer over the dough.
  5. Scatter the cooled apple filling over the cheesecake layer. Roll the dough tightly from the long side, like a jelly roll.
  6. Cut the roll into buns about 1 to 1.5 inches wide. Place buns in a greased pan with space between them.
  7. Make the streusel, mix flour, brown sugar, cold butter, and a pinch of salt until crumbly. Sprinkle streusel over each bun.
  8. Let buns rise a short time, then bake in a preheated oven at 350°F (175°C) for 20 to 30 minutes, until golden and cooked through.
  9. Cool slightly before serving, or drizzle a simple icing if you like.

Apple Cheesecake Streusel Buns

Why You’ll Love Apple Cheesecake Streusel Buns

  • Soft and tender buns with a creamy cheesecake center.
  • Warm, spiced apples bring fresh, cozy flavor.
  • Crunchy streusel adds texture and a sweet finish.
  • Great for serving to guests, kids, or for a special morning treat.
  • They store well for a day, and warm up nicely in the oven or microwave.

Tips for success

  • Use room temperature cream cheese, it mixes smooth and keeps the filling creamy.
  • Cook the apples until they are soft but not mushy, so the buns hold shape.
  • Chill the filling if it gets too loose before you roll the dough.
  • Keep butter cold for the streusel, that makes a better crumb texture.
  • Do not overfill the dough, or buns can leak while baking.
  • Test one bun for doneness, if the center is doughy, give the pan a few more minutes.

Serving Suggestions

  • Serve warm with a cup of coffee or tea.
  • Add a light vanilla glaze or dust with powdered sugar for extra sweetness.
  • Pair with fresh fruit or a simple yogurt to balance richness.
  • These buns are nice on a brunch table with eggs and a salad.

Apple Cheesecake Streusel Buns

FAQs

Q: Can I use pre-made dough?

A: Yes, store-bought sweet roll dough or puff pastry works fine for a quicker version.

Q: How far ahead can I make these?

A: You can assemble the buns, cover, and refrigerate overnight. Bake the next morning.

Q: Can I freeze the buns?

A: Yes, freeze baked buns in an airtight bag for up to 2 months. Thaw and warm before serving.

Q: What apples work best?

A: Firm apples like Granny Smith, Honeycrisp, or Fuji hold their texture and add good flavor.

Q: Can I make the streusel without butter?

A: Butter gives the best flavor and texture, but you can try cold coconut oil as a substitute.

Conclusion

For a close look at a very similar recipe and extra tips, check the detailed version on Apple Streusel Cheesecake Buns – Apron & Whisk. Enjoy baking these Apple Cheesecake Streusel Buns, and share them with people you love.

Apple Cheesecake Streusel Buns

Warm, soft buns filled with sweet apple and creamy cheesecake, topped with a crunchy streusel for a delightful breakfast or dessert treat.

Dough

  • 2 cups all-purpose flour (plus more for dusting)
  • 1 tbsp sugar (for sweetening the dough)
  • 1 tsp yeast (instant or active dry)
  • 1 cup milk (warm, for activating yeast)
  • 1 large egg (for enriching the dough)
  • 1/2 cup butter (melted, for richness)

Cheesecake Filling

  • 8 oz cream cheese (room temperature for easier mixing)
  • 1/2 cup sugar (for sweetness in the filling)
  • 1 tsp vanilla extract (for flavoring)

Apple Filling

  • 2 cups apples (finely chopped, such as Granny Smith or Honeycrisp)
  • 1 tbsp sugar (for sweetness)
  • 1 tsp cinnamon (for spice)
  • 1 tsp lemon juice (to enhance flavor)

Streusel Topping

  • 1/2 cup all-purpose flour (for the streusel)
  • 1/2 cup brown sugar (to give sweetness and depth)
  • 1/4 cup cold butter (for texture in the streusel)
  • a pinch salt (to enhance flavor)

Dough Preparation

  1. Make the dough by following a basic sweet roll dough recipe and let it rise until doubled.

Cheesecake Filling Preparation

  1. In a mixing bowl, beat cream cheese with sugar and vanilla until smooth.

Apple Filling Preparation

  1. Chop apples small, toss with sugar, cinnamon, and lemon juice, and cook until soft. Let cool.

Assembly

  1. Roll the dough on a floured surface into a large rectangle.
  2. Spread the cheesecake filling in a thin layer over the dough.
  3. Scatter the cooled apple filling over the cheesecake layer.
  4. Roll the dough tightly from the long side, like a jelly roll.
  5. Cut the roll into buns about 1 to 1.5 inches wide.
  6. Place buns in a greased pan with space between them.

Streusel Preparation and Baking

  1. Mix flour, brown sugar, cold butter, and a pinch of salt until crumbly to make the streusel.
  2. Sprinkle streusel over each bun.
  3. Let buns rise a short time, then bake in a preheated oven at 350°F (175°C) for 20 to 30 minutes, until golden and cooked through.

Serving

  1. Cool slightly before serving, or drizzle with a simple icing if desired.

Use room temperature cream cheese for a smooth filling. Cook apples until soft but not mushy. Chill the filling if it gets too loose before rolling the dough. Keep butter cold when making streusel for better texture. Do not overfill the dough. Test one bun for doneness before serving.

Breakfast, Brunch, Dessert
American
Apple Cheesecake, Baking, Comfort Food, Streusel Buns, sweet rolls