Easy Beef and Broccoli

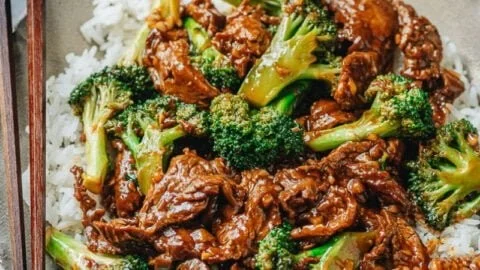
Delicious Chinese Beef and Broccoli dish served in a bowl

Beef and Broccoli is a beloved dish that brings the taste of restaurant-quality  cooking right into your home. There are many reasons to try this recipe. First, it is simple to make, requiring just a few ingredients and a quick cooking time. Busy weeknights can be stressful, and this dish provides a delicious meal in about 30 minutes!

Another great reason to make this dish is its balanced flavor. The tender beef pairs perfectly with crunchy broccoli, creating a delightful contrast. The sauce, typically made from soy sauce, garlic, and ginger, adds a savory taste that pleases many palates.

Additionally, cooking at home allows you to control the ingredients. You can use high-quality beef, fresh vegetables, and avoid unwanted additives. Plus, it’s a great way to incorporate more veggies into your diet. The combination of protein and fiber in this dish makes it satisfying and filling.

Lastly, preparing food like this can be a fun and rewarding experience. By following the recipe, you can impress family or friends with your cooking skills. It’s a perfect dish for gatherings or family dinners, making it a winner in many households. Enjoying a hearty meal, made with love, always feels good!

How to Make Beef and Broccoli

Making Beef and Broccoli is easy and straightforward. Start by gathering your ingredients: thinly sliced beef (like flank steak), fresh broccoli florets, soy sauce, garlic, ginger, and a bit of cornstarch.

Begin by marinating the beef. In a bowl, mix a tablespoon of soy sauce with a teaspoon of cornstarch, garlic, and ginger. Toss the beef in this mixture and let it sit for about 15 minutes. While the beef is marinating, prepare the broccoli. Steam it lightly until it is bright green and slightly tender, but still crisp.

Next, heat a large pan or wok over medium-high heat. Add a bit of oil and let it heat up. Once hot, add the marinated beef. Stir-fry it until it begins to brown and is cooked through, which should take about 3 to 4 minutes. Then, add the steamed broccoli to the pan. Pour in a bit more soy sauce to add flavor and continue cooking for another 2 to 3 minutes.

Stir everything well to combine the flavors, making sure the beef and broccoli are well coated in the sauce. Once everything is heated through, it’s ready to serve. You can enjoy this dish with rice or noodles for a complete meal.

How to Serve Beef and Broccoli

Serving Beef and Broccoli is simple and enjoyable. It’s best to serve the dish hot and fresh from the pan. You can place it directly on a large serving platter for everyone to help themselves, or serve it on individual plates.

One of the most common sides for this dish is steamed white rice. The rice absorbs the delicious sauce, which enhances the overall flavor. You can also use fried rice for a nice twist. If you’re looking for something lighter, consider offering a side of quinoa.

You can garnish the dish with some sesame seeds or chopped green onions to add a touch of color and extra flavor. If you have some chili flakes, a sprinkle can add a nice kick for those who enjoy spicier food.

This dish is versatile, and you can serve it alongside other dishes for a full meal experience. Consider pairing it with spring rolls or hot and sour soup for a delightful dinner that’s sure to impress everyone at the table.

How to Store Beef and Broccoli

If you have leftovers of Beef and Broccoli, storing it correctly is important to maintain its flavor. Allow the dish to cool completely at room temperature. Once cooled, transfer the leftovers into an airtight container.

You can store the dish in the fridge for up to three days. When you’re ready to eat again, simply reheat the dish on the stovetop or in the microwave. If reheating in a pan, add a splash of water or broth to keep the beef and broccoli moist.

For longer storage, consider freezing the dish. Place the cooled meal in a freezer-safe container. It can last for about two to three months in the freezer. When you want to eat it, thaw it overnight in the fridge before reheating.

Take note that the texture of broccoli may change slightly after freezing and reheating, but it will still be tasty! Enjoy your leftovers as a quick meal on busy days.

Tips to Make Beef and Broccoli

Here are some helpful tips to ensure your Beef and Broccoli turns out great each time. First, choose the right cut of beef. Flank steak or sirloin works best, as they are tender and cook quickly. Make sure to slice the beef thinly against the grain for better texture.

Second, do not overcook the broccoli. Aim for that perfect crunch by steaming it just until it turns bright green. This keeps the nutrients intact and maintains the vibrant color.

Third, use high-quality soy sauce. The flavor greatly impacts the dish, so opt for low-sodium soy sauce if you want to reduce salt intake. You can also add oyster sauce for an extra depth of flavor!

Fourth, don’t hesitate to experiment. You can add other vegetables like bell peppers, carrots, or snap peas to enhance the dish.

Lastly, always taste and adjust the seasoning to your preference. Everyone’s palate is different, so using your own taste buds to guide you can create a dish that you will love. Happy cooking!

Variation

You can customize Beef and Broccoli in a few ways. One popular variation is to add different proteins. Chicken or tofu can be excellent substitutes if you prefer. You can also try adding more spices, such as black pepper or crushed red pepper, for added heat. For a sweeter flavor, include some sugar or honey in the marinade.

Another variation includes changing the vegetables. Instead of just broccoli, try using bok choy, snow peas, or bell peppers. This will create a colorful and varied dish! Cooking methods can also vary; grilling the beef for a smoky taste or using a slow cooker for a deeply flavored result can be great adaptations. Experimenting is part of the fun!

FAQs

1. Can I make this dish gluten-free?
Yes! Use gluten-free soy sauce or tamari to keep the dish gluten-free while still enjoying that savory flavor.

2. How do I make it vegan or vegetarian?
You can replace the beef with tofu or seitan and use vegetable broth or soy sauce for the sauce. It will still be delicious!

3. Can I use frozen broccoli instead of fresh?
Yes, you can use frozen broccoli. Just make sure to thaw it beforehand and drain any excess water to prevent the dish from becoming too watery.

[tasty-recipe id=”4689″]

Beef and Broccoli

A simple yet delicious dish that brings the flavors of restaurant-quality beef and broccoli to your home in about 30 minutes.

For the Marinade

  • 1 tablespoon soy sauce (Use low-sodium soy sauce if desired)
  • 1 teaspoon cornstarch (Helps to tenderize the beef)
  • 3 cloves garlic, minced (Adds flavor)
  • 1 teaspoon ginger, minced (Adds a savory taste to the marinade)

Main Ingredients

  • 1 pound flank steak, thinly sliced (A tender cut ideal for quick cooking)
  • 4 cups broccoli florets (Fresh florets preferred for best texture)
  • 2 tablespoons oil (For stir-frying)
  • 2 tablespoons soy sauce, to taste (For additional flavor when cooking)

Preparation

  1. In a bowl, mix the soy sauce, cornstarch, garlic, and ginger.
  2. Toss the sliced beef in the mixture and let it marinate for about 15 minutes.
  3. While the beef is marinating, steam the broccoli until bright green and slightly tender.

Cooking

  1. Heat a large pan or wok over medium-high heat and add oil.
  2. Once hot, add the marinated beef and stir-fry until browned and cooked through (about 3 to 4 minutes).
  3. Add the steamed broccoli to the pan and pour in additional soy sauce.
  4. Continue cooking for another 2 to 3 minutes, stirring well to combine.

Serving

  1. Serve the Beef and Broccoli hot with rice, noodles, or quinoa.
  2. Garnish with sesame seeds or chopped green onions if desired.

For variations, consider adding other vegetables like bell peppers or using chicken or tofu as protein. Adjust seasoning to personal taste.
Dinner, Main Course
Asian, Chinese
Beef and Broccoli, Easy Recipe, Healthy Meal, Quick Dinner, Stir-Fry

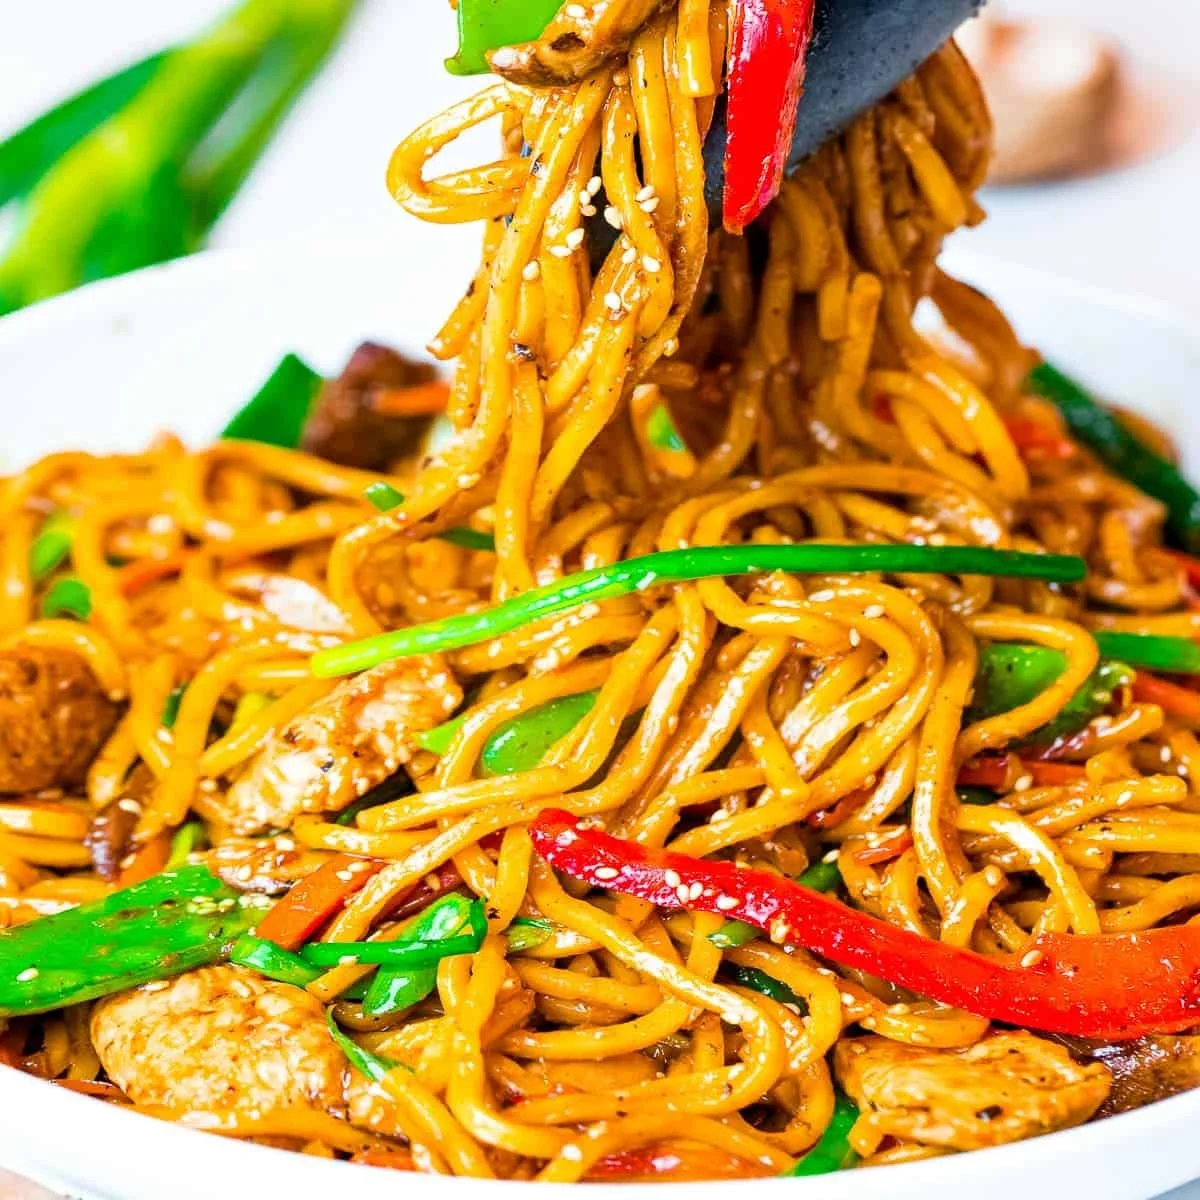
The Best Chicken Lo Mein

Plate of delicious chicken lo mein with vegetables and noodles

This Chicken Lo Mein is warm, simple, and tasty. It mixes soft lo mein noodles, tender chicken, crisp vegetables, and a savory sauce. It feels like takeout, but you make it faster and fresher at home. If you like easy chicken meals, you might also enjoy a rich Peruvian roast, see this Pollo a la Brasa recipe for another bold chicken idea. This lo mein is a crowd-pleaser, full of garlic, soy, and a little sweetness, and it comes together in one pan. Get ready to stir, toss, and enjoy something everyone will ask for again.

How to prepare The Best Chicken Lo Mein

  1. Cook lo mein noodles according to package directions, drain, and set aside.
  2. Cut boneless chicken into thin strips, season with a pinch of salt and pepper.
  3. Mix sauce in a bowl, use soy sauce, a little oyster sauce or hoisin, a splash of sesame oil, and a bit of sugar. Add garlic and ginger if you like.
  4. Heat oil in a large pan or wok over medium-high heat. Add chicken, stir-fry until cooked through, then remove from pan.
  5. In the same pan add more oil, then stir-fry carrots, bell peppers, and sliced onions until crisp-tender.
  6. Add mushrooms and green onions, cook one minute. Return chicken to pan.
  7. Add cooked noodles and pour the sauce over everything. Toss well so the sauce coats all noodles and pieces. Stir for 1 to 2 minutes until hot.
  8. Taste and add more soy or a pinch of sugar if needed. Serve right away for best texture.

The Best Chicken Lo Mein

Why You’ll Love The Best Chicken Lo Mein

  • It tastes like takeout, but you control the ingredients.
  • The sauce is savory, slightly sweet, and full of garlic and soy flavor.
  • It cooks fast, ready in about 20 to 30 minutes.
  • You can use any vegetables you have, so it is flexible and easy.
  • Leftovers reheat well, making great next-day lunch.

Tips for success

  • Use high heat to get a light sear on the chicken and veggies, this adds flavor.
  • Don’t overcook the noodles, undercook them slightly so they finish in the pan.
  • Slice the chicken thin, so it cooks quickly and stays tender.
  • Prepare all ingredients before you start, stir-fry moves fast.
  • Taste the sauce before adding, adjust soy or sweetness to your liking.
  • Add a splash of water or chicken broth if the sauce looks too thick while tossing.

Serving Suggestions

  • Serve with a side of steamed broccoli or bok choy for greens.
  • Top with sesame seeds and extra sliced green onions.
  • Add a small drizzle of chili oil for heat.
  • Pair with simple egg rolls or a light soup for a round meal.

The Best Chicken Lo Mein

FAQs

Q: Can I use other meats or tofu instead of chicken?

A: Yes, thinly sliced beef, pork, shrimp, or firm tofu all work well. Adjust cook time for each protein.

Q: What noodles should I use for lo mein?

A: Use lo mein noodles or other egg noodles. Spaghetti can work in a pinch, but egg noodles have the best texture.

Q: How do I keep the noodles from sticking?

A: Rinse cooked noodles in cold water and toss with a little oil after draining. Do not overcook them.

Q: Can I make this gluten free?

A: Yes, use gluten free soy sauce or tamari and check any sauces like oyster or hoisin for gluten free versions.

Conclusion

This homemade Chicken Lo Mein is simple, fast, and full of flavor, a perfect weeknight dinner that tastes like your favorite takeout. For another takeout-style chicken classic and extra ideas, check this version called The Best Chicken Lo Mein – Drive Me Hungry.

Chicken Lo Mein

This Chicken Lo Mein is a warm, simple, and tasty dish that combines soft lo mein noodles, tender chicken, and crisp vegetables in a savory sauce, perfect for a quick weeknight meal.

Main Ingredients

  • 8 ounces lo mein noodles (Cook according to package directions)
  • 1 pound boneless chicken (Cut into thin strips and seasoned with salt and pepper)
  • 2 tablespoons oil (For stir-frying)
  • 1 cup carrots (Sliced)
  • 1 cup bell peppers (Sliced)
  • 1 cup sliced onions
  • 1 cup mushrooms (Sliced)
  • 1 cup green onions (Sliced)

Sauce

  • 3 tablespoons soy sauce
  • 1 tablespoon oyster sauce or hoisin
  • 1 teaspoon sesame oil
  • 1 teaspoon sugar
  • 2 cloves garlic (Minced)
  • 1 teaspoon ginger (Minced)

Preparation

  1. Cook lo mein noodles according to package directions, drain, and set aside.
  2. Cut boneless chicken into thin strips and season with salt and pepper.
  3. Mix sauce ingredients in a bowl: soy sauce, oyster sauce or hoisin, sesame oil, sugar, garlic, and ginger.

Cooking

  1. Heat oil in a large pan or wok over medium-high heat. Add chicken and stir-fry until cooked through, then remove from the pan.
  2. In the same pan, add more oil and stir-fry carrots, bell peppers, and sliced onions until crisp-tender.
  3. Add mushrooms and green onions, cooking for one minute.
  4. Return the cooked chicken to the pan.
  5. Add the cooked noodles and pour the sauce over everything. Toss well to coat all noodles and pieces.
  6. Stir for 1 to 2 minutes until everything is hot.
  7. Taste and adjust seasoning with more soy or sugar if needed. Serve immediately for the best texture.

Tips for success: Use high heat for searing, don’t overcook the noodles, slice chicken thin, prepare all ingredients beforehand, and taste the sauce before serving.

Dinner, Main Course
Asian, Chinese
Chicken Lo Mein, Easy Dinner, Stir Fry

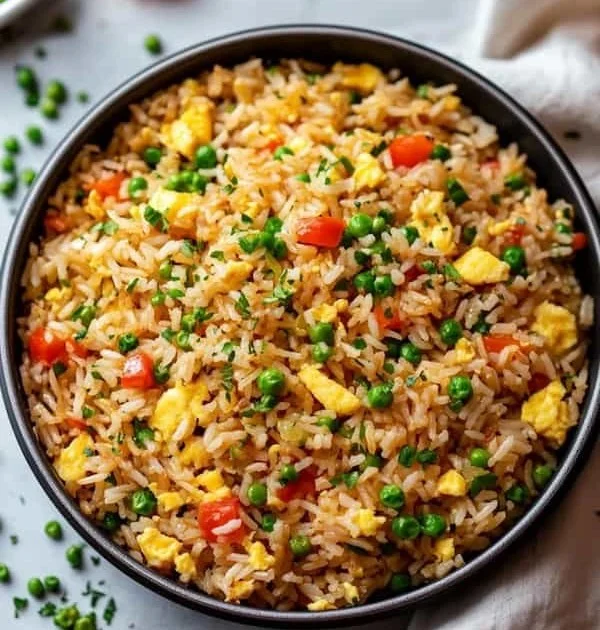
Egg Fried Rice

Plate of flavorful Egg Fried Rice garnished with vegetables and egg

Egg Fried Rice is a delicious dish that feels like home. It mixes soft eggs, savory soy sauce, and fluffy rice for a quick meal that most people love. This featured recipe is a true crowd-pleaser, easy to make for a weeknight dinner or a fast lunch. It tastes bright from green onions and rich from sesame oil, and it works well with many leftovers. If you like quick rice bowls, you might enjoy trying a similar idea, like the spicy ground beef stir fry bowl for more meal ideas. Give this egg fried rice a try and watch it disappear, one spoonful at a time.

How to prepare Egg Fried Rice

Ingredients

  • 3 cups cold cooked rice, day-old is best
  • 2 large eggs
  • 2 tablespoons vegetable oil
  • 1 small onion, chopped
  • 2 cloves garlic, minced
  • 2 green onions, sliced
  • 2 tablespoons soy sauce
  • 1 teaspoon sesame oil, optional
  • Salt and pepper to taste
  • Frozen peas or diced carrots, optional, 1/2 cup

Directions

  1. Break up the cold rice with your hands or a fork so it is loose and not in big clumps.
  2. Heat 1 tablespoon oil in a large pan or wok over medium-high heat. Scramble the eggs until just set, then move them to the side and break them up.
  3. Add the other tablespoon of oil. Stir in the chopped onion and cook 1 to 2 minutes until soft. Add garlic and cook 20 to 30 seconds.
  4. If you use peas or carrots, add them now and cook until heated.
  5. Add the rice to the pan and spread it out. Stir and toss the rice so it heats and gets a little color.
  6. Push rice to the side, add the eggs back in and mix. Stir in soy sauce and sesame oil, if using. Add salt and pepper to taste.
  7. Stir in sliced green onions and serve hot.

Egg Fried Rice

Why You’ll Love Egg Fried Rice

  • Fast to make, ready in about 15 to 20 minutes.
  • Uses simple ingredients you likely have at home.
  • Flexible, you can add veggies or meat for more flavor.
  • Great use for leftover rice, it keeps the rice from getting soggy.

Tips for success

  • Use cold, day-old rice, it fries better and stays separate.
  • Work on high heat, and keep the rice moving in the pan.
  • Don’t overcrowd the pan, cook in batches if needed.
  • Season at the end so you control the salt level.
  • Taste as you go, add more soy sauce or pepper if needed.

Serving Suggestions

  • Serve with a side of steamed vegetables or a simple salad.
  • Top with extra sliced green onions or a drizzle of sesame oil.
  • Add cooked shrimp, chicken, or tofu for protein.
  • Offer chili sauce or soy sauce at the table for extra flavor.

Egg Fried Rice

FAQs

Q: Can I use fresh rice?

A: You can, but fresh hot rice can be sticky. Cool it on a tray first so it dries a little.

Q: Can I make this without oil?

A: Oil helps fry and add flavor, but you can use a nonstick pan and a small spray of oil if you want less fat.

Q: How do I store leftovers?

A: Cool quickly and keep in an airtight container. Use within 2 days and reheat on the stove or in a microwave.

Q: Can I add more vegetables?

A: Yes, bell peppers, peas, carrots, and corn work well. Cook harder veggies first.

Conclusion

For a quick and tasty guide to a very similar recipe, see this simple version, The Easiest Egg Fried Rice (20 Minutes) | Healthy Nibbles by Lisa Lin, for more tips and a fast method to try.

Egg Fried Rice

A quick and delicious dish that mixes soft eggs, savory soy sauce, and fluffy rice, perfect for a crowd-pleasing meal any night of the week.

Main Ingredients

  • 3 cups cold cooked rice (day-old is best)
  • 2 large eggs
  • 2 tablespoons vegetable oil
  • 1 small onion, chopped
  • 2 cloves garlic, minced
  • 2 tablespoons soy sauce
  • 1 teaspoon sesame oil (optional)
  • 1/2 cup frozen peas or diced carrots (optional)
  • Salt and pepper (to taste)

Preparation

  1. Break up the cold rice with your hands or a fork so it is loose and not in big clumps.
  2. Heat 1 tablespoon oil in a large pan or wok over medium-high heat. Scramble the eggs until just set, then move them to the side and break them up.
  3. Add the other tablespoon of oil. Stir in the chopped onion and cook for 1 to 2 minutes until soft. Add garlic and cook for 20 to 30 seconds.
  4. If using peas or carrots, add them now and cook until heated.
  5. Add the rice to the pan and spread it out. Stir and toss the rice so it heats and gets a little color.
  6. Push rice to the side, add the eggs back in and mix. Stir in soy sauce and sesame oil, if using. Add salt and pepper to taste.
  7. Stir in sliced green onions and serve hot.

Use cold, day-old rice for the best texture. Work on high heat to keep the rice moving in the pan, and avoid overcrowding. Taste and adjust seasoning as needed.

Dinner, lunch, Main Course
Asian, Chinese
Egg Fried Rice, Fried Rice Recipe, Leftover Rice, Quick Meal, Vegetable Fried Rice

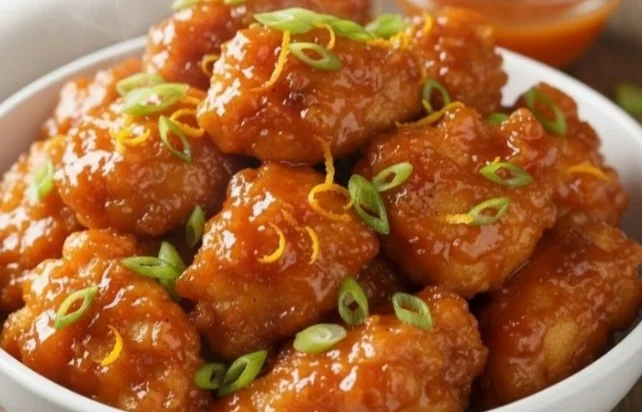
Orange Chicken

Plate of crispy orange chicken with a tangy sauce and garnishes

Orange Chicken is a bright, warm dish many people love. It mixes crisp chicken with a sweet and tangy orange sauce. This dish feels like happy takeout at home, and it fills the room with a fresh citrus smell. The featured recipe is a crowd-pleaser, with a sticky orange glaze that clings to every bite, and a nice crunch from the fried chicken. It tastes sweet, a little sour, and a bit spicy if you like heat, so it makes people smile. If you like orange flavors, try my take on orange cranberry chicken thighs for another easy meal. Get ready to make this and enjoy a plate that feels like your favorite takeout, right at home.

how to prepare Orange Chicken

  1. Cut boneless chicken into bite sized pieces. Pat dry with paper towel.
  2. Toss chicken in a little salt and pepper. Coat with flour or cornstarch for a crisp crust.
  3. Heat oil in a pan or deep fryer to medium high heat. Fry chicken until golden and cooked through, drain on paper towel.
  4. Make the orange sauce, mix orange juice, sugar, soy sauce, vinegar, garlic, and a bit of ginger in a small pot. Add a splash of water and taste, add chili flakes if you want heat.
  5. Bring sauce to a simmer, then stir in a cornstarch slurry to thicken. Cook until glossy and sticky.
  6. Toss the fried chicken in the sauce until every piece is coated. Serve hot with rice or noodles, and top with sesame seeds and sliced green onion.

Orange Chicken

Why You’ll Love Orange Chicken

  • It has a sweet and tangy orange flavor that feels fresh.
  • The sauce is sticky and clings to crispy chicken for a great texture.
  • It is fast to make and works for weeknights or a party.
  • You can change the heat level or make it more sweet, so it fits your taste.
  • It tastes like takeout, but it is homemade and you control the ingredients.

tips for success

  • Dry the chicken well before coating, this keeps it crisp.
  • Use cornstarch or a mix of flour and cornstarch for a light, crunchy crust.
  • Fry at the right oil temperature, not too low, so the chicken does not get soggy.
  • Make the sauce a little thicker than you think, it will thin a bit when you toss the chicken.
  • Taste the sauce as you cook, add more soy sauce for salt, or more sugar for sweetness.
  • If you want less oil, you can bake or air fry the chicken, then toss with the sauce.

Serving Suggestions

  • Serve with steamed white rice or brown rice to soak the sauce.
  • Try it with fried rice, lo mein, or steamed vegetables for a full meal.
  • Add steamed broccoli or snap peas for color and crunch.
  • Garnish with sesame seeds, sliced green onion, or thin orange slices for a fresh look.

Orange Chicken

FAQs

Q: Can I make the sauce without fresh orange juice?

A: Yes, you can use bottled orange juice. Fresh juice is brighter, but bottled works fine.

Q: Can I bake the chicken instead of frying?

A: Yes, bake or air fry the chicken for a lighter dish, then toss with sauce for the same flavor.

Q: How do I store leftovers?

A: Put chicken and sauce in an airtight box in the fridge. Eat within 2 to 3 days. Reheat in a pan or oven to keep it crisp.

Q: Can I make this gluten free?

A: Yes, use tamari or a gluten free soy sauce and cornstarch to coat the chicken.

Conclusion

I hope this simple Orange Chicken recipe helps you enjoy a sweet and tangy meal at home. For another take on orange flavored chicken, you can compare methods with Chinese Orange Chicken – Modern Honey, which shows a classic style and more sauce tips. Give this recipe a try and have fun cooking a bright, tasty dinner.

Orange Chicken

A bright and tangy dish featuring crisp chicken coated in a sweet orange sauce, reminiscent of your favorite takeout.

For the Chicken

  • 1 pound boneless chicken, cut into bite-sized pieces (Pat dry with a paper towel)
  • 1 teaspoon salt
  • 1/2 teaspoon black pepper
  • 1/2 cup flour or cornstarch (For coating chicken)

For the Sauce

  • 1 cup orange juice (Freshly squeezed recommended)
  • 1/2 cup sugar
  • 1/4 cup soy sauce (Use tamari for gluten-free option)
  • 2 tablespoons vinegar (White or rice vinegar)
  • 1 clove garlic, minced
  • 1/2 teaspoon ginger, minced (Optional for flavor)
  • 1 cup water (Add splash to taste)
  • 1 tablespoon cornstarch (Mixed with water to form slurry)
  • 1/2 teaspoon chili flakes (Optional for heat)

Preparation

  1. Cut boneless chicken into bite-sized pieces and pat dry with paper towel.
  2. Toss chicken with salt and pepper, then coat with flour or cornstarch.

Cooking Chicken

  1. Heat oil in a pan or deep fryer to medium-high heat.
  2. Fry chicken until golden and cooked through, then drain on paper towels.

Making the Sauce

  1. In a small pot, mix together orange juice, sugar, soy sauce, vinegar, garlic, ginger, and a splash of water.
  2. Bring sauce to a simmer, then stir in a cornstarch slurry to thicken.
  3. Cook until the sauce is glossy and sticky.

Combining

  1. Toss the fried chicken in the sauce until every piece is coated.
  2. Serve hot with rice or noodles, and top with sesame seeds and sliced green onion.

Dry the chicken well before coating, fry at the right temperature, and adjust sauce according to taste. Baking or air frying is an alternative for reduced oil without losing flavor.

Dinner, Main Course
Asian, Chinese
Crispy Chicken, Orange Chicken, Quick Dinner, Sweet and Tangy, Takeout Style