Strawberry Pound Cake

Slice of moist strawberry pound cake topped with fresh strawberries

This strawberry pound cake feels like a warm hug on a plate. It uses fresh strawberries, rich butter, and simple ingredients to make a moist cake with real strawberry taste. Many people love it at family dinners, picnics, and slow weekends with a cup of tea. This featured recipe is a crowd-pleaser, with a soft crumb, gentle strawberry sweetness, and a simple glaze that makes each slice feel special. If you enjoy strawberry desserts, you might also like this strawberry charlotte cake for another soft, fruity treat. Get ready to bake a cake that will make everyone smile.

How to prepare Strawberry Pound Cake

  1. Preheat your oven to 325°F, and grease a 9×5 inch loaf pan, then line it with parchment paper.
  2. In a bowl, mash 1 cup fresh strawberries until smooth, set aside.
  3. In a large bowl, cream 1 cup softened butter with 1 1/2 cups sugar until light.
  4. Add 3 eggs, one at a time, beating after each egg. Add 1 teaspoon vanilla extract.
  5. In another bowl, whisk 2 cups all purpose flour, 1/2 teaspoon baking powder, and 1/2 teaspoon salt.
  6. Add the dry mix in two parts to the butter mix, alternating with the mashed strawberries, beginning and ending with the dry mix. Stir just until you have a smooth batter.
  7. Pour the batter into the prepared pan, smooth the top, and bake 60 to 70 minutes, until a toothpick comes out clean or with a few moist crumbs.
  8. Let the cake cool in the pan 15 minutes, then lift out and cool on a rack.
  9. For a simple glaze, mix 1 cup powdered sugar with 1 to 2 tablespoons strawberry juice or milk, drizzle over the cooled cake.

Strawberry Pound Cake

Why You’ll Love Strawberry Pound Cake

  • It is moist and full of real strawberry flavor, not just artificial taste.
  • The cake is easy to make with pantry basics and fresh fruit.
  • It works for many occasions, from a quick snack to a party dessert.
  • The texture is dense but soft, the classic pound cake feel with a fruity twist.

Tips for success

  • Use ripe, sweet strawberries for the best flavor.
  • Keep butter and eggs at room temperature so they mix well.
  • Do not overmix after you add the flour, mix just until combined.
  • Check the cake at 60 minutes, ovens vary, and cover with foil if the top browns too fast.
  • Cool the cake before glazing so the glaze stays on top and does not soak in too much.

Serving Suggestions

  • Serve slices plain, or with a dollop of whipped cream and fresh strawberry slices.
  • Add a scoop of vanilla ice cream for a simple dessert.
  • Cut into small squares for a tea party or potluck.
  • Pair with coffee or iced tea for a nice balance of sweet and warm flavors.

Strawberry Pound Cake

FAQs

Q: Can I use frozen strawberries?

A: Yes, thaw and drain them first, then mash well. Frozen berries add more moisture, so watch the bake time.

Q: Can I make this in a bundt pan?

A: Yes, but reduce baking time and check for doneness earlier, start checking at 45 minutes.

Q: How do I store the cake?

A: Wrap the cooled cake in plastic or keep in an airtight container. It stays fresh 3 to 4 days at room temperature, or longer in the fridge.

Q: Can I add strawberry chunks instead of mashed berries?

A: You can, but small chunks may sink. Toss them in a little flour before adding to the batter.

Conclusion

For another tested take on a fresh strawberry pound cake, try this clear recipe from Grandbaby Cakes, it gives extra tips and a bright strawberry glaze, Fresh Strawberry Pound Cake Recipe – Grandbaby Cakes. Enjoy baking, and have fun sharing warm slices with friends and family.

Strawberry Pound Cake

This moist strawberry pound cake is made with fresh strawberries and simple ingredients, perfect for family gatherings and special occasions.

Cake Ingredients

  • 1 cup fresh strawberries (mashed) (Use ripe, sweet strawberries for the best flavor.)
  • 1 cup softened butter (Keep at room temperature for better mixing.)
  • 1.5 cups sugar
  • 3 large eggs (Add one at a time, beating after each.)
  • 1 teaspoon vanilla extract
  • 2 cups all-purpose flour (Add in two parts to batter.)
  • 0.5 teaspoon baking powder
  • 0.5 teaspoon salt

Glaze Ingredients

  • 1 cup powdered sugar
  • 1-2 tablespoons strawberry juice or milk (For the glaze.)

Preparation

  1. Preheat your oven to 325°F and grease a 9×5 inch loaf pan, then line with parchment paper.
  2. In a bowl, mash 1 cup of fresh strawberries until smooth and set aside.
  3. In a large bowl, cream 1 cup softened butter with 1.5 cups sugar until light.
  4. Add 3 eggs, one at a time, beating after each egg. Then add 1 teaspoon of vanilla extract.
  5. In another bowl, whisk together 2 cups all-purpose flour, 0.5 teaspoon of baking powder, and 0.5 teaspoon of salt.
  6. Add the dry mix in two parts to the butter mixture, alternating with the mashed strawberries, beginning and ending with the dry mix. Stir just until you have a smooth batter.
  7. Pour the batter into the prepared pan, smooth the top, and bake for 60 to 70 minutes, until a toothpick comes out clean or with a few moist crumbs.
  8. Let the cake cool in the pan for 15 minutes, then lift out and cool on a rack.

Glazing

  1. For the glaze, mix 1 cup of powdered sugar with 1 to 2 tablespoons of strawberry juice or milk, and drizzle over the cooled cake.

Cool the cake before glazing so the glaze stays on top and does not soak in too much. Check the cake at 60 minutes, as oven times may vary. Cover with foil if the top browns too fast.

Dessert, Snack
American
cake recipe, dessert recipe, Moist Cake, Strawberry Desserts, Strawberry Pound Cake

Simple Peach Bruschetta with Whipped Ricotta

Delicious peach bruschetta topped with whipped ricotta served on toasted bread

Peach Bruschetta with Whipped Ricotta is a fresh snacks that feel a little fancy. It uses ripe peaches, creamy ricotta, and a bit of bread to make a bright, sweet, and salty bite. This dish works for summer nights, a light lunch, or a party starter. If you like warm fruit on toast, you might also enjoy a simple grilled peach recipe to pair with it, like this grilled peaches with brown butter cinnamon sugar glaze. Give it a try, you will smile at every bite and want to make it again.

How to prepare Simple Peach Bruschetta with Whipped Ricotta

Ingredients:

  • 4 ripe peaches, thinly sliced
  • 8 oz ricotta cheese
  • 1-2 tbsp honey, plus more to finish
  • 1 tbsp lemon juice
  • 1 baguette, sliced and toasted
  • 1 tbsp olive oil
  • Pinch of salt
  • Fresh basil leaves, torn
  • Optional, a little black pepper or flaky sea salt

Directions:

  1. Make whipped ricotta, put ricotta, 1 tbsp honey, lemon juice, and a pinch of salt in a bowl, whip with a fork or small blender until smooth and light.
  2. Toast baguette slices, brush each slice with olive oil, toast in a pan or oven until light brown.
  3. Slice peaches thin, if peaches are very soft, gently pat dry with a towel.
  4. Spread a spoonful of whipped ricotta on each toast slice.
  5. Top with 2-3 peach slices, add torn basil.
  6. Drizzle a little honey over each bruschetta, finish with a pinch of pepper or flaky salt if you like.

Simple Peach Bruschetta with Whipped Ricotta

Why You’ll Love Simple Peach Bruschetta with Whipped Ricotta

  • It is fast to make, most work is slicing and spreading.
  • The ricotta is light and creamy, it balances the sweet peaches.
  • You get fresh flavors, texture from toast, and a touch of herbs.
  • It looks pretty and works well for guests or a simple snack.

Tips for success

  • Use ripe, but firm peaches so slices hold their shape.
  • Whip ricotta until smooth, it spreads easier and feels lighter.
  • Toast bread well, a crisp base stops it from getting soggy.
  • Taste and adjust honey, add more if peaches are tart.
  • Prepare peaches and ricotta just before serving for best texture.

Serving Suggestions

  • Serve with a light salad, like arugula with lemon.
  • Pair with chilled white wine or sparkling water with lemon.
  • Make smaller slices for a party platter or larger for a light meal.
  • Add prosciutto for a salty contrast if you want a savory version.

Simple Peach Bruschetta with Whipped Ricotta

FAQs

Q: Can I use frozen peaches? A: Fresh peaches work best. If you use frozen, thaw and drain well, the texture will be softer.

Q: How long can I keep the whipped ricotta? A: Store in the fridge up to 2 days in a covered container. Stir before using.

Q: Can I use another cheese? A: Yes, mascarpone or cream cheese will work, but change the flavor and richness.

Q: Is there a vegan option? A: Use a plant-based ricotta and vegan honey or maple syrup, it will still be tasty.

Conclusion

Try this Simple Peach Bruschetta with Whipped Ricotta for a quick, tasty treat that looks like you spent hours on it. For another take on peaches and a sweet finish, see the full Peach Bruschetta with Whipped Ricotta recipe on How Sweet Eats.

Simple Peach Bruschetta with Whipped Ricotta

A fresh and fancy snack featuring ripe peaches, creamy ricotta, and toasted bread, perfect for summer or parties.

For the Whipped Ricotta

  • 8 oz ricotta cheese (Use light and creamy ricotta)
  • 1-2 tbsp honey (Plus more to finish)
  • 1 tbsp lemon juice
  • pinch salt

For the Bruschetta

  • 4 ripe peaches, thinly sliced (Use ripe but firm peaches)
  • 1 baguette sliced and toasted (Toast until light brown)
  • 1 tbsp olive oil (For brushing on the bread)
  • Fresh basil leaves, torn
  • optional a little black pepper or flaky sea salt

Preparation

  1. In a bowl, whip ricotta, 1 tbsp honey, lemon juice, and a pinch of salt until smooth and light.
  2. Brush baguette slices with olive oil and toast in a pan or oven until light brown.
  3. Thinly slice the peaches; pat dry with a towel if they are very soft.

Assembly

  1. Spread a spoonful of whipped ricotta on each toasted baguette slice.
  2. Top with 2-3 peach slices and add torn basil.
  3. Drizzle with honey and finish with a pinch of black pepper or flaky salt if desired.

For best texture, prepare peaches and ricotta just before serving. Adjust honey based on the tartness of the peaches.

Appetizer, Snack
Italian, Mediterranean
Light Lunch, Party Starter, Peach Bruschetta, Summer Snack, Whipped Ricotta

Fresh Tomato Soup with Roma Tomatoes

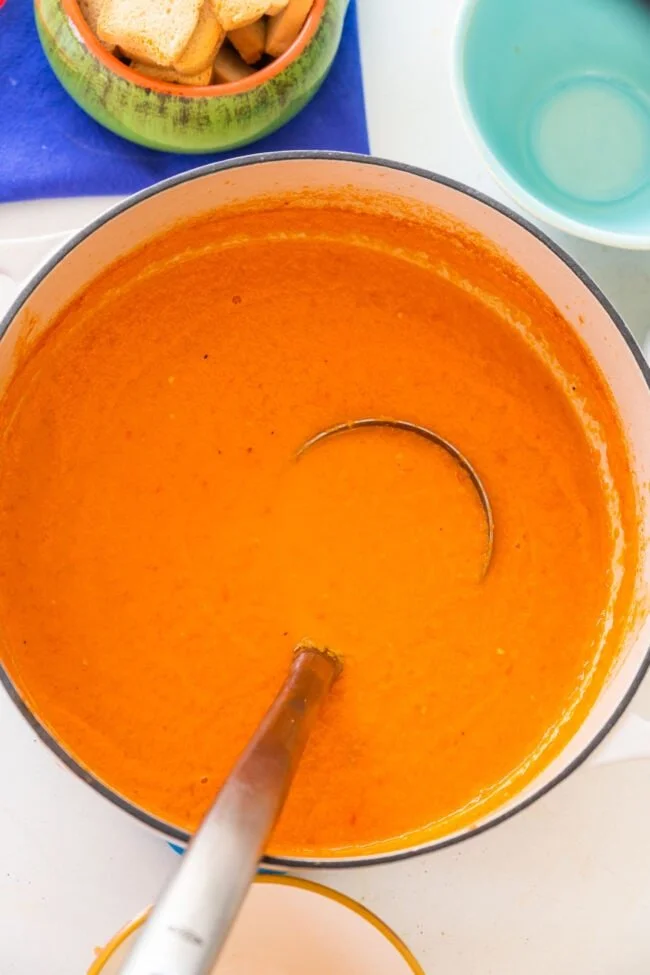
Fresh tomato soup made with ripe Roma tomatoes, garnished and ready to serve.

On a bright summer afternoon, my grandmother’s kitchen filled with the warm scent of fresh tomatoes simmering on the stove. I sat by her side, eager to learn her secrets. Each time she made her famous tomato soup, it wasn’t just for the nourishment; it was a labor of love, a way to bring family together. Today, I want to share a simple yet delicious recipe for Fresh Tomato Soup with Roma Tomatoes, inspired by those fond memories.

Why make this recipe

Fresh tomato soup is comforting and healthy, making it a great choice for any meal. This recipe uses ripe roma tomatoes, bringing out their sweet and tangy flavor. With easy-to-find ingredients and straightforward steps, you can create a bowl of warmth that reminds you of sunny days and family gatherings.

How to make Fresh Tomato Soup with Roma Tomatoes

Ingredients:

  • 3 pounds roma tomatoes
  • 2 tablespoons olive oil
  • 2 medium onions (thinly sliced)
  • 2 cloves garlic (minced)
  • Salt
  • Fresh ground black pepper
  • 4 cups vegetable broth
  • 1/2 cup heavy cream

Directions:

  1. Bring a large pot of water to a boil over high heat. Cut a small X in the stem end of each tomato.
  2. Drop the tomatoes into the boiling water and blanch them for about 1 minute.
  3. Using a slotted spoon, transfer them to a pot of cold water to cool.
  4. When cool enough to handle, remove and discard the skin from the tomatoes, remove the core, and coarsely chop the flesh.
  5. In a large soup pot over medium-high heat, warm the olive oil.
  6. Add onions and garlic and cook until onions are translucent and garlic is fragrant, about 5 minutes.
  7. Add the chopped tomatoes to the soup pot with onions, season with salt and pepper, and cook for 5 minutes.
  8. Turn the heat to high, add the vegetable broth, and bring to a boil.
  9. Turn the heat to low and simmer for 30 minutes.
  10. Use an immersion blender (or regular blender – careful, it’s hot!) and puree the soup until smooth.
  11. Return the soup to the pot, add the heavy cream and simmer over low heat for about 15 minutes.
  12. If the soup is too thin, simmer for about 10 more minutes until slightly thickened. Taste and adjust the seasoning, adding more salt and pepper if needed.
  13. Serve into bowls, adding croutons, Parmesan cheese, and fresh basil on top if preferred.

How to serve Fresh Tomato Soup with Roma Tomatoes

Serve hot in bowls and top with croutons, grated Parmesan cheese, or fresh basil for a garnish. Pair it with a slice of crusty bread to soak up every last drop.

How to store Fresh Tomato Soup with Roma Tomatoes

If you have leftover soup, let it cool completely before transferring it to an airtight container. Store it in the refrigerator for up to 4 days. If you want to keep it longer, freeze it in portions for up to 3 months. To reheat, thaw it in the fridge overnight and warm it on the stove.

Tips to make Fresh Tomato Soup with Roma Tomatoes

  • Use ripe tomatoes for the best flavor.
  • Adjust the seasoning to your taste; more salt or pepper can enhance the flavor.
  • For extra creaminess, add more heavy cream or a dollop of sour cream when serving.

Variation

For a twist, add fresh basil or other herbs like thyme or oregano while simmering to infuse extra flavor. You can also add a pinch of red pepper flakes for some heat.

FAQ SECTION

1. Can I use canned tomatoes instead of fresh?
Yes, you can use canned tomatoes. Just skip the blanching step and use about 2 cans of whole or diced tomatoes instead.

2. Is it possible to make this vegan?
Absolutely! Simply omit the heavy cream or substitute it with coconut cream or a non-dairy creamer.

3. Can I add other vegetables?
Certainly! Carrots, bell peppers, or zucchini can be added for more nutrition and flavor. Just chop them and sauté with the onions and garlic before adding the tomatoes.


[tasty-recipe id=”3330″]

Fresh Tomato Soup with Roma Tomatoes

A comforting and delicious fresh tomato soup made with ripe roma tomatoes, perfect for warm summer days and family gatherings.

Main Ingredients

  • 3 pounds roma tomatoes (Use ripe tomatoes for the best flavor.)
  • 2 tablespoons olive oil
  • 2 medium onions, thinly sliced
  • 2 cloves garlic, minced
  • to taste Salt (Adjust the seasoning to your taste.)
  • to taste Fresh ground black pepper (Adjust the seasoning to your taste.)
  • 4 cups vegetable broth
  • 1/2 cup heavy cream (For extra creaminess, add more heavy cream or a dollop of sour cream when serving.)

Preparation

  1. Bring a large pot of water to a boil over high heat. Cut a small X in the stem end of each tomato.
  2. Drop the tomatoes into the boiling water and blanch them for about 1 minute.
  3. Using a slotted spoon, transfer them to a pot of cold water to cool.
  4. When cool enough to handle, remove and discard the skin from the tomatoes, remove the core, and coarsely chop the flesh.

Cooking

  1. In a large soup pot over medium-high heat, warm the olive oil.
  2. Add onions and garlic and cook until onions are translucent and garlic is fragrant, about 5 minutes.
  3. Add the chopped tomatoes to the soup pot with onions, season with salt and pepper, and cook for 5 minutes.
  4. Turn the heat to high, add the vegetable broth, and bring to a boil.
  5. Turn the heat to low and simmer for 30 minutes.
  6. Use an immersion blender (or regular blender – careful, it’s hot!) and puree the soup until smooth.
  7. Return the soup to the pot, add the heavy cream and simmer over low heat for about 15 minutes.
  8. If the soup is too thin, simmer for about 10 more minutes until slightly thickened. Taste and adjust the seasoning, adding more salt and pepper if needed.

Serving

  1. Serve hot in bowls and top with croutons, grated Parmesan cheese, or fresh basil for a garnish. Pair it with a slice of crusty bread to soak up every last drop.

If you have leftover soup, let it cool completely before transferring it to an airtight container. Store it in the refrigerator for up to 4 days. If you want to keep it longer, freeze it in portions for up to 3 months. To reheat, thaw it in the fridge overnight and warm it on the stove.

Appetizer, Soup
American
Comfort Food, easy soup recipe, Fresh Tomatoes, Healthy Recipe, Tomato Soup

Easy 2-Ingredient Cottage Cheese Bread

Sliced easy 2-ingredient cottage cheese bread on a wooden table

I love quick recipes that feel like a hug from the oven, and Easy 2-Ingredient Cottage Cheese Bread is just that. It is soft, slightly tangy, and so simple to make. This two-ingredient bread is a real crowd-pleaser, great for busy mornings, simple lunches, or when you want fresh bread without a lot of work. If you want a quick read on one version of this recipe, see this simple two-ingredient cottage cheese bread recipe for a clear how-to. You will smile when the kitchen fills with the bread smell, and you’ll be ready to slice it warm with butter in no time.

How to prepare Easy 2-Ingredient Cottage Cheese Bread

Ingredients

  • 2 cups self-rising flour
  • 2 cups cottage cheese

Directions

  1. Preheat your oven to 350°F, and grease a loaf pan or line it with parchment paper.
  2. In a bowl, add the self-rising flour.
  3. Add the cottage cheese to the flour.
  4. Mix with a spoon until a sticky dough forms. It should pull together and not be very runny.
  5. Turn the dough into the prepared pan, and smooth the top with a spatula or wet hands.
  6. Bake for 35 to 45 minutes, until the top is golden and a toothpick in the center comes out clean.
  7. Let the bread cool in the pan for 10 minutes, then remove and cool on a rack before slicing.

Easy 2-Ingredient Cottage Cheese Bread

Why You’ll Love Easy 2-Ingredient Cottage Cheese Bread

  • Very simple, only two main items needed, perfect for busy days.
  • Soft inside, with a light tang from the cottage cheese.
  • No yeast, no rise time, so you make it fast.

  • Works as a basic loaf to use with sweet or savory toppings.

Tips for success

  • Use self-rising flour for the best rise, do not substitute plain flour unless you add baking powder and salt.
  • If the dough seems too dry, add a tablespoon of milk at a time until it comes together.
  • If it is too sticky to handle, dust your hands with a little flour.
  • Check the bread after 35 minutes, ovens vary, and you don’t want to overbake.
  • Let it cool a bit before slicing, warm slices hold together better.

Serving Suggestions

  • Slice and toast, then spread with butter or jam.
  • Use as a sandwich bread with eggs, cheese, or deli meats.
  • Serve with soup or stew as a soft, comforting side.
  • Cut into cubes and toast for croutons or bread bites.

Easy 2-Ingredient Cottage Cheese Bread

FAQs

Q: Can I use low-fat cottage cheese? A: Yes, low-fat cottage cheese works. The bread may be a bit denser, but it still bakes well.

Q: Is this bread gluten-free? A: Not with regular self-rising flour. For a gluten-free version, use a gluten-free self-rising flour blend that is made to replace regular flour.

Q: How can I store leftover bread? A: Wrap the cooled bread in plastic or keep it in an airtight container at room temperature for 2 days, or freeze slices for up to 2 months.

Q: Can I add herbs or cheese to the dough? A: Yes, mix in chopped herbs, grated cheese, or garlic for extra flavor, about 1/2 cup total.

Conclusion

If you want another take or more tips, check this detailed version of the recipe at Easy 2 Ingredient Cottage Cheese Bread Recipe – Suzie The Foodie, it has helpful notes and photos to guide you.

Easy 2-Ingredient Cottage Cheese Bread

This soft and slightly tangy bread is made with just two ingredients, perfect for busy mornings and requires no yeast or rise time.

Bread Ingredients

  • 2 cups self-rising flour (Use self-rising flour for best results; do not substitute with plain flour.)
  • 2 cups cottage cheese (Low-fat cottage cheese can be used.)

Preparation

  1. Preheat your oven to 350°F (175°C) and grease a loaf pan or line it with parchment paper.
  2. In a bowl, add the self-rising flour.
  3. Add the cottage cheese to the flour.
  4. Mix with a spoon until a sticky dough forms. It should pull together and not be very runny.
  5. Turn the dough into the prepared pan, and smooth the top with a spatula or wet hands.

Baking

  1. Bake for 35 to 45 minutes, until the top is golden and a toothpick in the center comes out clean.
  2. Let the bread cool in the pan for 10 minutes, then remove and cool on a rack before slicing.

If the dough seems too dry, add a tablespoon of milk at a time until it comes together. If it is too sticky to handle, dust your hands with a little flour. Check the bread after 35 minutes, as oven times may vary.

Breakfast, Snack
American
2-Ingredient Bread, Cottage Cheese Bread, Easy Recipe, Homemade Bread, Quick Bread

Lobster Risotto

Delicious Lobster Risotto topped with fresh herbs and seafood, served in a bowl

Lobster Risotto feels like a special night at home, warm and rich, with the sweet taste of lobster in every bite. This Lobster Risotto recipe is a crowd pleaser, creamy and silky, with bright lemon and fresh parsley to lift the flavor. It works for a dinner party or a cozy meal for two. If you like creamy rice dishes, try a similar warm option like this perfect asparagus risotto for more ideas. Get ready to make a dish that tastes fancy, but is easy to cook at home, and you might even surprise yourself with how good it turns out.

How to prepare Lobster Risotto

Ingredients

  • 1 pound lobster meat, cooked, chopped
  • 1 1/2 cups arborio rice
  • 4 cups warm lobster stock or fish/vegetable stock
  • 1 small onion, finely chopped
  • 2 garlic cloves, minced
  • 1/2 cup dry white wine
  • 3 tablespoons butter
  • 2 tablespoons olive oil
  • 1/2 cup grated Parmesan cheese
  • Salt and black pepper to taste
  • Fresh parsley, chopped, for garnish
  • Lemon wedges, to serve

Directions

  1. Warm the stock in a pot and keep it at low heat.
  2. In a large pan, heat olive oil and 1 tablespoon butter, add onion and cook until soft, 4 to 5 minutes.
  3. Add garlic and cook 1 minute more.
  4. Stir in the arborio rice, toast for 1 to 2 minutes until the edges look clear.
  5. Pour in the white wine, stir until the wine mostly evaporates.
  6. Add one ladle of warm stock, stir often until the rice absorbs the liquid. Repeat, one ladle at a time, for 18 to 20 minutes, until rice is creamy and al dente.
  7. Stir in the lobster meat in the last 2 minutes to warm through.
  8. Remove from heat, add remaining butter and Parmesan, stir until smooth. Season with salt and pepper.
  9. Let rest 1 minute, then serve with parsley and lemon wedges.

Lobster Risotto

Why You’ll Love Lobster Risotto

  • Creamy texture that feels luxurious but comes from simple steps.
  • Sweet lobster meat adds a clear, fresh seafood flavor.
  • You can make it ahead up to the stock step, then finish it quick before serving.
  • It works for holidays, dates, and family dinners, it looks and tastes special.

Tips for success

  • Keep the stock warm, cold stock slows the cooking and makes the rice sticky.
  • Stir often but gently, this helps release the rice starch and makes the risotto creamy.
  • Use good quality arborio rice, it holds the sauce well.
  • Add lobster near the end, do not cook it too long or it becomes tough.
  • Taste the rice as you go, stop when it is tender but still has a slight bite.
  • If you want more lobster flavor, use lobster shells to make the stock.

Serving Suggestions

  • Serve with a simple green salad and a light vinaigrette to balance the cream.
  • Pair with a chilled glass of dry white wine, like Pinot Grigio or Sauvignon Blanc.
  • Top with extra chopped parsley and a squeeze of lemon for brightness.
  • For a richer plate, add a drizzle of good olive oil or a few shavings of extra Parmesan.

Lobster Risotto

FAQs

Q: Can I use frozen lobster meat?

A: Yes, thaw it in the fridge and pat dry. Add it near the end to warm it, do not overcook.

Q: What if I do not have lobster stock?

A: Use good fish or vegetable stock, and add a bit of butter and lemon to boost taste.

Q: Can I make risotto ahead of time?

A: You can cook the rice until just before it is done, cool it, then finish with hot stock and lobster before serving.

Q: How do I keep the risotto creamy if it sits for a while?

A: Add a splash of warm stock or hot water and stir before serving to loosen it.

Conclusion

This Lobster Risotto is a simple way to make an elegant meal at home, with creamy rice and tender lobster that many people love. For another trusted take on this dish, see the detailed guide at Lobster Risotto Recipe – NYT Cooking.

Lobster Risotto

A creamy and luxurious dish featuring sweet lobster meat, perfect for special occasions or a cozy dinner at home.

Main Ingredients

  • 1 pound lobster meat, cooked, chopped (Use fresh or thawed frozen lobster)
  • 1.5 cups arborio rice (Good quality rice is recommended)
  • 4 cups warm lobster stock or fish/vegetable stock (Keep the stock warm during preparation)
  • 1 small onion, finely chopped
  • 2 cloves garlic, minced
  • 0.5 cup dry white wine (Adds depth of flavor)
  • 3 tablespoons butter (Divided use)
  • 2 tablespoons olive oil
  • 0.5 cup grated Parmesan cheese (Use freshly grated for better flavor)
  • Salt and black pepper to taste
  • Fresh parsley, chopped, for garnish
  • Lemon wedges, to serve

Preparation

  1. Warm the stock in a pot and keep it at low heat.
  2. In a large pan, heat olive oil and 1 tablespoon butter, add onion and cook until soft, about 4 to 5 minutes.
  3. Add garlic and cook for 1 minute more.
  4. Stir in the arborio rice, toasting for 1 to 2 minutes until the edges look clear.
  5. Pour in the white wine and stir until most of the wine evaporates.
  6. Add one ladle of warm stock, stirring often until the rice absorbs the liquid. Repeat this process, one ladle at a time, for 18 to 20 minutes, until the rice is creamy and al dente.
  7. Stir in the lobster meat during the last 2 minutes to warm it through.
  8. Remove from heat, add remaining butter and Parmesan, stirring until smooth. Season with salt and pepper.
  9. Let rest for 1 minute, then serve garnished with parsley and lemon wedges.

Keep the stock warm to prevent sticky rice. Taste the rice as you cook to ensure the desired tenderness. If you want more lobster flavor, use lobster shells to make the stock.

Dinner, Main Course
Italian, Seafood
Creamy Rice, Dinner Party, Elegant Meal, Lobster Risotto, Seafood Risotto

Lobster Thermidor

Delicious Lobster Thermidor served in a creamy sauce with cheese topping.

Lobster Thermidor is a classic French dish that feels fancy but is easy to enjoy. It has tender lobster meat, a creamy sauce, and a golden cheese top. The mix of rich cream, sharp Gruyere, and a touch of wine makes each bite warm and satisfying.

This recipe for Lobster Thermidor is a true crowd-pleaser. It tastes rich and savory, with a good balance of seafood and creamy sauce. People love it at holidays, dinner parties, or any time you want a special meal. Give it a try, and you might find yourself making it more than once, just for the applause.

How to prepare Lobster Thermidor

  1. Cook two whole lobsters in boiling salted water for about 8 to 10 minutes, until bright red. Cool and split them in half. Remove the meat from the tails and claws, chop it into bite-size pieces. Save the shells for later, if you like.
  2. In a pan, melt 2 tablespoons butter. Add 1 small chopped shallot, cook until soft.
  3. Add 1/4 cup dry white wine, simmer until it reduces by half.
  4. Stir in 1 tbsp Dijon mustard, 1 cup heavy cream, salt, and pepper. Cook until the sauce thickens, stir often.
  5. Mix the chopped lobster meat into the sauce. Add 1/2 cup grated Gruyere cheese, stir until melted.
  6. If you kept shells, spoon the lobster mix back into the shells. If not, use a baking dish and arrange the meat in it.
  7. Top with extra Gruyere and a light sprinkle of breadcrumbs or parsley.
  8. Broil or bake at 425°F (220°C) for 3 to 5 minutes, until the top is bubbly and golden brown.
  9. Serve hot, right away.

Lobster Thermidor

Why You’ll Love Lobster Thermidor

  • Rich, creamy lobster flavor that feels special, not heavy.
  • The Gruyere and slight mustard bite give a nice contrast to the sweet lobster.
  • It looks elegant when served in shells, great for parties and holiday dinners.
  • It uses simple steps but delivers a restaurant-style result at home.
  • Works as a main dish for seafood lovers and anyone who likes classic French food.

Tips for success

  • Use fresh lobster if you can, for the best taste.
  • Don’t overcook the lobster meat when you boil it, it should stay tender.
  • Reduce the wine well before adding cream, this keeps the sauce smooth.
  • Taste the sauce and adjust salt and pepper at the end.
  • Warm the shells or dish slightly before filling, so the lobster does not cool down fast.
  • Watch closely under the broiler, the top browns fast.

Serving Suggestions

  • Serve with a simple green salad and a light vinaigrette.
  • Pair with steamed asparagus or green beans for a fresh side.
  • A small mound of buttered rice or mashed potatoes soaks up the sauce well.
  • Offer crusty bread to enjoy every last bit of the creamy sauce.
  • A chilled glass of white wine, like Chardonnay or Sauvignon Blanc, pairs nicely.

Lobster Thermidor

FAQs

Q: Can I use frozen lobster for Lobster Thermidor?

A: Yes, you can. Thaw it fully and pat it dry. Fresh lobster gives the best texture, but frozen works fine.

Q: Is there a non-dairy version of the sauce?

A: You can use coconut cream or a cashew cream, but the flavor will change. The classic Thermidor taste is rich due to dairy.

Q: Can I make the sauce ahead of time?

A: Yes, make the sauce and lobster mix a few hours ahead, cool and store in the fridge. Reheat gently before filling shells and broiling.

Q: Do I need the lobster shells to serve it?

A: No, shells are for presentation. You can bake the lobster mix in a casserole dish if you prefer.

Q: What cheese is best for the top?

A: Gruyere is traditional, it melts well and adds a nutty flavor. Emmental or mild cheddar also work.

Conclusion

If you want a clear, tested version of Lobster Thermidor to follow step by step, you can read a trusted recipe here, Lobster Thermidor Recipe – Serious Eats. This will help with exact measurements and extra tips so your finished dish looks and tastes great.

Lobster Thermidor

A classic French dish featuring tender lobster meat in a creamy sauce topped with golden cheese, perfect for special occasions.

Lobster and Cooking Ingredients

  • 2 whole whole lobsters (Fresh lobsters for best quality.)
  • 2 tablespoons butter (For sautéing shallots.)
  • 1 small shallot, chopped (Adds flavor to the sauce.)
  • 1/4 cup dry white wine (Enhances sauce flavor.)
  • 1 tablespoon Dijon mustard (For added tang.)
  • 1 cup heavy cream (Makes the sauce rich and creamy.)
  • to taste salt (Adjust according to preference.)
  • to taste pepper (Adjust according to preference.)

Cheese and Topping

  • 1/2 cup Gruyere cheese, grated (For mixing into the sauce and topping.)
  • optional breadcrumbs or parsley (For topping before baking.)

Preparation

  1. Cook two whole lobsters in boiling salted water for about 8 to 10 minutes, until bright red.
  2. Cool and split them in half. Remove the meat from the tails and claws, chop it into bite-size pieces.
  3. Save the shells for later, if you like.

Sauce Preparation

  1. In a pan, melt 2 tablespoons butter. Add 1 small chopped shallot, cook until soft.
  2. Add 1/4 cup dry white wine, simmer until it reduces by half.
  3. Stir in 1 tablespoon Dijon mustard, 1 cup heavy cream, salt, and pepper. Cook until the sauce thickens, stir often.
  4. Mix the chopped lobster meat into the sauce. Add 1/2 cup grated Gruyere cheese, stir until melted.

Baking

  1. If you kept shells, spoon the lobster mix back into the shells. If not, use a baking dish and arrange the meat in it.
  2. Top with extra Gruyere and a light sprinkle of breadcrumbs or parsley.
  3. Broil or bake at 425°F (220°C) for 3 to 5 minutes, until the top is bubbly and golden brown.

Serving

  1. Serve hot, right away.

Use fresh lobster for the best taste. Don’t overcook the lobster meat when boiling; it should remain tender. Warm the shells before filling to keep the lobster warm longer. Watch closely under the broiler as it browns quickly.

Dinner, Main Course
French
Creamy Sauce, French Dish, Lobster Thermidor, Seafood, Special Occasion

Lobster Mac and Cheese

Delicious Lobster Mac and Cheese topped with breadcrumbs and herbs

Lobster mac and cheese is comfort food with a fancy twist. It mixes tender lobster meat and a creamy cheese sauce with pasta, so every bite feels special. This featured recipe is a crowd pleaser, easy enough for a weeknight but nice for guests too. If you enjoy fun mac and cheese snacks, try air fryer fried macaroni and cheese balls for a party bite. Give this lobster mac a try, you will smile when you taste it.

How to prepare Lobster Mac and Cheese

This recipe makes a rich, creamy lobster mac and cheese that feeds 4 to 6 people. Use cooked lobster meat and simple pantry ingredients for the best taste.

Ingredients

  • 12 oz elbow macaroni or small pasta
  • 8 oz cooked lobster meat, chopped
  • 3 tbsp butter
  • 3 tbsp all purpose flour
  • 2 cups milk, warm
  • 1 cup heavy cream
  • 2 cups shredded sharp cheddar cheese
  • 1 cup shredded Gruyere or Monterey Jack
  • 1/2 tsp salt
  • 1/4 tsp black pepper
  • 1/4 tsp paprika
  • 1/2 cup breadcrumbs, optional
  • 2 tbsp parsley, chopped, for garnish

Directions

  1. Cook the pasta in salted water until just al dente, drain and set aside.
  2. In a large pot, melt butter over medium heat. Stir in flour and cook 1 minute, stir constantly.
  3. Slowly add warm milk and cream, whisk until smooth and thickened, about 3 to 4 minutes.
  4. Remove from heat, add cheeses in batches, stir until melted and smooth.
  5. Season with salt, pepper, and paprika.
  6. Fold in the cooked pasta and chopped lobster meat gently.
  7. If you like a baked top, put in a baking dish, sprinkle breadcrumbs and a little extra cheese, bake at 375°F (190°C) for 10 to 12 minutes until golden.
  8. Garnish with chopped parsley and serve hot.

Lobster Mac and Cheese

Why You’ll Love Lobster Mac and Cheese

  • Creamy, cheesy sauce that clings to every forkful.
  • Sweet, tender lobster pieces that lift the dish, they make it feel special.
  • Simple steps, few hard parts, you can make it at home any night.
  • It works for a cozy dinner or a small holiday meal, guests will praise it.

Tips for success

  • Use good quality cheese, it makes the sauce smooth and rich.
  • Warm the milk before adding it to the roux, this prevents lumps.
  • Do not overcook the lobster, add it at the end so it stays tender.
  • If you bake with breadcrumbs, toast them first for a crisp top.
  • Taste the sauce before baking, adjust salt and pepper as needed.

Serving Suggestions

  • Serve with a simple green salad, light lemon vinaigrette works well.
  • Pair with steamed asparagus or roasted broccoli for color and crunch.
  • Add a squeeze of lemon juice to brighten the rich cheese flavors.
  • Offer crusty bread or garlic toast to scoop up the sauce.

Lobster Mac and Cheese

FAQs

Q: Can I use frozen lobster for this dish?

A: Yes, thaw the lobster slowly in the fridge and pat dry before adding, it will work fine.

Q: Can I make the sauce ahead?

A: Yes, make the sauce and pasta, keep them separate in the fridge, then warm and combine when ready to bake.

Q: What cheeses work best for lobster mac and cheese?

A: Sharp cheddar and Gruyere or Monterey Jack blend well, they give flavor and a smooth melt.

Q: Can I make this gluten free?

A: Use gluten free pasta and a gluten free flour or cornstarch for the sauce, adjust thickness as needed.

Q: How do I reheat leftovers?

A: Reheat gently on the stove with a splash of milk, or bake covered at low heat until warmed through.

Conclusion

This lobster mac and cheese recipe is creamy, simple, and full of flavor, a great way to make a regular mac and cheese into something special. For another take on lobster mac, see Lobster Mac and Cheese – Grandbaby Cakes.

Lobster Mac and Cheese

Creamy lobster mac and cheese featuring tender lobster and a rich cheese sauce, making every bite feel special.

Pasta and Lobster

  • 12 oz elbow macaroni or small pasta (Any small pasta can be used.)
  • 8 oz cooked lobster meat, chopped (Use good quality lobster for best flavor.)

Sauce Ingredients

  • 3 tbsp butter
  • 3 tbsp all purpose flour (Can use gluten free flour for a gluten free option.)
  • 2 cups milk, warm (Warm milk prevents lumps in the sauce.)
  • 1 cup heavy cream
  • 2 cups shredded sharp cheddar cheese (Sharp cheddar provides rich flavor.)
  • 1 cup shredded Gruyere or Monterey Jack (Both give a smooth melt.)
  • 1/2 tsp salt (Adjust to taste.)
  • 1/4 tsp black pepper (Adjust to taste.)
  • 1/4 tsp paprika

Topping

  • 1/2 cup breadcrumbs, optional (Toast before adding for a crisp top.)
  • 2 tbsp parsley, chopped, for garnish (Fresh parsley adds color.)

Cooking the Pasta

  1. Cook the pasta in salted water until just al dente, then drain and set aside.

Making the Sauce

  1. In a large pot, melt butter over medium heat. Stir in flour and cook for 1 minute, stirring constantly.
  2. Slowly add warm milk and cream, whisking until smooth and thickened, about 3 to 4 minutes.
  3. Remove from heat and add the cheeses in batches, stirring until melted and smooth.
  4. Season the sauce with salt, pepper, and paprika.

Combining Ingredients

  1. Gently fold in the cooked pasta and chopped lobster meat into the cheese sauce.

Baking (Optional)

  1. If desired, transfer to a baking dish, sprinkle with breadcrumbs and a little extra cheese. Bake at 375°F (190°C) for 10 to 12 minutes until golden.

Serving

  1. Garnish with chopped parsley and serve hot.

For best results, use high-quality cheese. Taste the sauce before baking to adjust seasoning as needed. Can be made ahead and stored separately.

Dinner, Main Course
American
Cheesy Pasta, Comfort Food, Lobster Mac and Cheese, Rich Mac and Cheese, Seafood Pasta

Mozzarella Sticks

Plate of golden brown mozzarella sticks with marinara sauce

Mozzarella sticks are a simple, fun treat. They are crunchy on the outside and gooey on the inside. People love them as a snack or an appetizer at parties. This recipe for Mozzarella Sticks is a crowd-pleaser, with golden, crispy breading and melty, stretchy cheese inside. If you like fried mozzarella or breaded cheese sticks, this recipe will make you smile. If you enjoy other cheesy bites, try a similar idea like Mediterranean quesadillas with spinach, feta and mozzarella, and you will see how great melted cheese can be. Get ready to make a snack that is crunchy, cheesy, and very easy to love.

How to prepare Mozzarella Sticks

  1. Cut low-moisture mozzarella into sticks, about 3 inches long. Pat dry with a paper towel.
  2. Set up three shallow bowls, one with flour, one with beaten eggs, one with plain breadcrumbs or panko. Add salt and pepper to the flour, and a little garlic powder to the breadcrumbs if you like.
  3. Dip each cheese stick in flour, shake off extra, then dip in egg, then press into breadcrumbs. For extra crunch, repeat egg and breadcrumbs for a double coat.
  4. Place the coated sticks on a tray and freeze for at least 30 minutes, this helps the cheese stay inside when frying.
  5. Heat oil in a deep pan to about 350°F, or heat enough oil to cover the sticks. Fry a few at a time until golden brown, about 1 to 2 minutes. Do not overcrowd the pan.
  6. Remove to a paper towel to drain. Let cool for a minute, then serve with warm marinara or your favorite dipping sauce.

Mozzarella Sticks

Why You’ll Love Mozzarella Sticks

  • They are quick to make and fun to eat.
  • Crunchy outside, melty inside, a perfect contrast.
  • Great as an appetizer, party snack, or late night treat.
  • You can bake them for a lighter version, or fry for a crispier crust.
  • They go well with many dipping sauces, like marinara, ranch, or spicy mayo.

Tips for success

  • Use low-moisture mozzarella, it melts well and keeps its shape.
  • Freeze the sticks after breading, this prevents cheese leaks when frying.
  • Keep oil at a steady medium-high heat, too hot will burn the crust, too cool will make them greasy.
  • Double coat with egg and breadcrumbs for extra crunch.
  • Do not fry too many at once, give them room to brown evenly.

Serving Suggestions

  • Serve with warm marinara sauce for dipping.
  • Try ranch or garlic aioli for a different taste.
  • Pair with a simple salad to make a fuller snack or small meal.
  • Add as a side to burgers or sandwiches for a fun twist.

Mozzarella Sticks

FAQs

Q: Can I bake mozzarella sticks instead of frying them?

A: Yes, you can bake them on a lined tray at 425°F for 8 to 10 minutes, turn once, until golden and melted.

Q: How do I stop the cheese from leaking out?

A: Freeze the breaded sticks for at least 30 minutes before cooking, and make sure you use a good double coat of crumbs.

Q: What cheese is best for mozzarella sticks?

A: Low-moisture, part-skim mozzarella is best. It melts well and does not release too much liquid.

Q: Can I make them ahead and freeze?

A: Yes, freeze them on a tray until firm, then store in a sealed bag. Fry or bake from frozen, add a minute or two to the cook time.

Conclusion

These mozzarella sticks are a simple, tasty snack you can make at home for parties or a cozy night in. For a detailed step by step recipe and extra tips, check this helpful guide, Homemade Mozzarella Sticks – Sugar Spun Run.

Mozzarella Sticks

These crunchy, gooey mozzarella sticks are a simple, fun snack or appetizer perfect for any gathering.

For the mozzarella sticks

  • 1 pound low-moisture mozzarella (Cut into sticks, about 3 inches long)
  • 1 cup all-purpose flour (Mixed with salt and pepper)
  • 2 large eggs (Beaten)
  • 1 cup plain breadcrumbs or panko (You can add garlic powder for extra flavor)

Preparation

  1. Cut low-moisture mozzarella into sticks, about 3 inches long. Pat dry with a paper towel.
  2. Set up three shallow bowls: one with flour, one with beaten eggs, and one with breadcrumbs or panko. Add salt and pepper to the flour, and garlic powder to the breadcrumbs if desired.
  3. Dip each cheese stick in flour, shake off the excess, then dip into the egg, and press into breadcrumbs. For extra crunch, repeat egg and breadcrumb coating.
  4. Place the coated sticks on a tray and freeze for at least 30 minutes.

Cooking

  1. Heat oil in a deep pan to about 350°F, or enough oil to cover the sticks.
  2. Fry a few sticks at a time for about 1 to 2 minutes until golden brown. Avoid overcrowding the pan.
  3. Remove the fried sticks to a paper towel to drain and let cool for a minute before serving.

Use low-moisture mozzarella for best results. Freezing the sticks helps prevent the cheese from leaking out when frying. If you prefer a lighter version, you can bake them at 425°F for 8 to 10 minutes. Serve with dipping sauces like marinara, ranch, or garlic aioli.

Appetizer, Snack
American
Appetizers, Cheese Sticks, Fried Snacks, Mozzarella Sticks, Party Food

Delicious Smothered Meatballs

Plate of delicious smothered meatballs topped with savory sauce and herbs

Smothered Meatballs are warm, tasty, and full of home-cooked flavor. This dish wraps juicy meatballs in a rich, brown gravy and hugs every bite with comfort. It is a crowd-pleaser for family dinners and simple enough for weeknights. If you like creamy, savory sauces and soft meatballs, you will love this recipe and the way it makes the whole house smell like dinner, and it pairs nicely with other smothered dishes like the creamy smothered chicken I tried recently at a creamy smothered chicken recipe. Get your apron on, because this one feels like a warm hug on a plate.

How to prepare Smothered Meatballs

  1. Mix the meatball mix, use about 1 pound ground beef or a mix of beef and pork, 1/2 cup breadcrumbs, 1 egg, salt, pepper, and a small chopped onion. Mix with your hands until just combined.
  2. Shape the mix into meatballs, about 1 to 1 1/2 inches each. Keep them all about the same size to cook evenly.
  3. Heat 2 tablespoons oil in a large skillet over medium heat. Brown the meatballs on all sides, do not cook all the way through, about 6 to 8 minutes. Remove and set aside.
  4. In the same skillet, add 2 tablespoons butter and 2 tablespoons flour, stir to make a roux, cook 1 minute. Slowly add 2 cups beef broth while stirring, then add 1 teaspoon Worcestershire sauce, 1 teaspoon soy sauce or a pinch of salt, and a sprinkle of black pepper. Bring to a low simmer.
  5. Add the meatballs back into the gravy, cover, and simmer 10 to 15 minutes until meatballs are cooked through and the gravy is thick. Taste and adjust salt and pepper.
  6. Serve the smothered meatballs over mashed potatoes, rice, or buttered egg noodles. Garnish with chopped parsley if you like.

Smothered Meatballs

Why You’ll Love Smothered Meatballs

  • They are simple, using common pantry ingredients, yet very flavorful.
  • The gravy keeps the meatballs moist and adds deep, savory taste.
  • This dish works great for feeding a group, it stretches well and stays warm.
  • Kids and adults both usually enjoy the soft meatballs and rich sauce.

Tips for success

  • Do not overmix the meat, mix until just combined to keep meatballs tender.
  • Brown the meatballs well, the browned bits in the pan add flavor to the gravy.
  • Make the gravy slowly, add broth little by little while stirring to avoid lumps.
  • If the gravy is too thin, simmer uncovered to reduce, if too thick, stir in a splash of broth or milk.
  • For extra flavor add a little garlic powder, or a splash of red wine to the gravy while it simmers.

Serving Suggestions

  • Serve over mashed potatoes, rice, or buttered egg noodles for a classic meal.
  • Add a side of steamed green beans, peas, or a simple green salad to balance the meal.
  • Top with chopped fresh parsley or a little grated Parmesan for color and taste.
  • Leftovers reheat well, spoon extra gravy over when reheating to keep meatballs moist.

Smothered Meatballs

FAQs

Q: Can I bake the meatballs instead of frying?

A: Yes, bake at 400°F (200°C) for 15 to 20 minutes, then add them to the gravy to finish cooking.

Q: Can I make the gravy ahead of time?

A: Yes, make the gravy and meatballs separately, then combine and warm gently before serving.

Q: What meat is best for meatballs?

A: A mix of ground beef and pork gives good flavor and juiciness, but all beef works fine too.

Q: Can I freeze smothered meatballs?

A: Yes, freeze cooked meatballs and gravy in a freezer-safe container for up to 3 months. Thaw overnight in the fridge before reheating.

Q: How do I thicken the gravy if it is too thin?

A: Mix a small spoon of flour or cornstarch with cold water to make a slurry, stir into simmering gravy until it thickens.

Conclusion

Smothered Meatballs make a simple, comforting meal that is full of flavor and easy to share. For another take on meatballs and gravy, you can see a related classic recipe at Meatballs and Gravy – The Cozy Cook. Enjoy making this cozy dish and sharing it with people you love.

Smothered Meatballs

These warm and tasty smothered meatballs are wrapped in a rich, savory gravy that guarantees comfort in every bite. Perfect for family dinners or weeknight meals.

For the Meatballs

  • 1 pound ground beef or a mix of beef and pork (Use a mix for better flavor.)
  • 1/2 cup breadcrumbs
  • 1 egg
  • to taste salt
  • to taste pepper
  • 1 small chopped onion (Finely chopped for mixing.)

For the Gravy

  • 2 tablespoons oil (For browning meatballs.)
  • 2 tablespoons butter
  • 2 tablespoons flour (To make roux.)
  • 2 cups beef broth (Add slowly while stirring.)
  • 1 teaspoon Worcestershire sauce
  • 1 teaspoon soy sauce or pinch of salt
  • to taste black pepper

Preparation

  1. Mix ground meat, breadcrumbs, egg, salt, pepper, and chopped onion in a bowl until just combined.
  2. Shape into meatballs approximately 1 to 1.5 inches in size.

Cooking Meatballs

  1. Heat oil in a large skillet over medium heat and brown the meatballs on all sides for 6 to 8 minutes. Remove meatballs from skillet and set aside.

Making the Gravy

  1. In the same skillet, add butter and flour. Stir to make a roux and cook for 1 minute.
  2. Slowly add beef broth while stirring. Then add Worcestershire sauce, soy sauce, and black pepper. Bring to a low simmer.

Combining

  1. Add browned meatballs back into the gravy, cover, and let them simmer for 10 to 15 minutes until cooked through and gravy thickens. Adjust salt and pepper to taste.

Serving

  1. Serve smothered meatballs over mashed potatoes, rice, or buttered egg noodles, and garnish with chopped parsley if desired.

Do not overmix meat to keep meatballs tender. Brown meatballs well for added flavor. Adjust gravy thickness as needed by simmering uncovered or adding broth/milk.

Dinner, Main Course
American
Comfort Food, Easy Dinner, Gravy, meatballs, Smothered Meatballs

Smothered Beef Patties

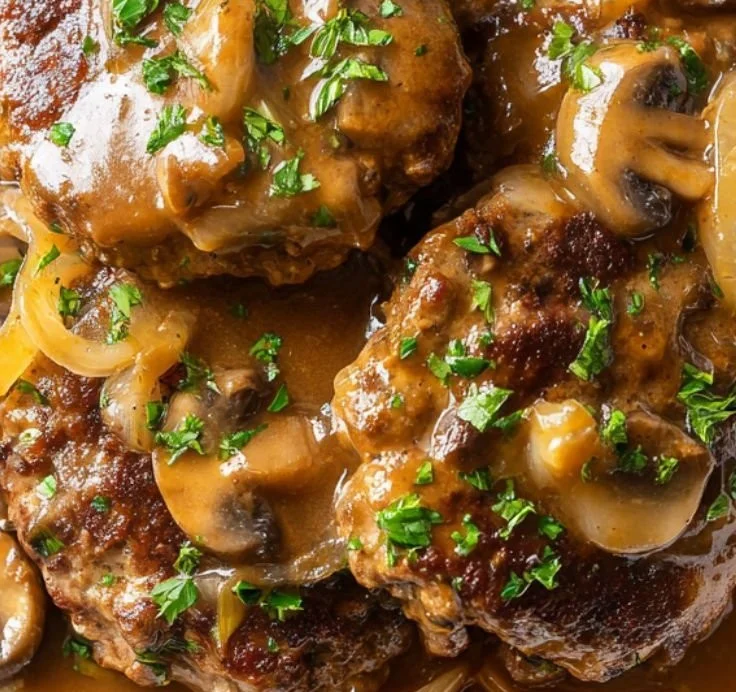
Delicious smothered beef patties served with rich gravy and onions

Smothered Beef Patties are warm, simple, and full of flavor. The patties stay tender and the gravy soaks in for a cozy bite. This recipe is a real crowd-pleaser at home, easy to make, and great for busy nights. If you love comfort food like meat patties or a classic hamburger steak, you will enjoy this dish, and you might also like a similar treat like baked beef and cheese sliders. Get ready to smell good gravy and enjoy a plate of comfort food, you will want to make this again.

How to prepare Smothered Beef Patties

This simple method makes juicy beef patties covered in rich gravy. It works well for a weeknight meal or a big family dinner.

Ingredients

  • 1 lb ground beef
  • 1 small onion, finely chopped
  • 1 egg
  • 1/2 cup breadcrumbs
  • 1 tsp salt
  • 1/2 tsp black pepper
  • 2 tbsp oil or butter
  • 1 large onion, sliced for gravy
  • 2 cups beef broth
  • 2 tbsp flour
  • 1 tsp Worcestershire sauce (optional)

Directions

  1. Mix ground beef, chopped onion, egg, breadcrumbs, salt, and pepper in a bowl. Form into 4 to 6 round patties.
  2. Heat oil or butter in a large skillet over medium heat. Brown patties 3 to 4 minutes per side. Remove and set aside.
  3. In the same pan, add sliced onion. Cook until soft and golden, stir often.
  4. Sprinkle flour over the onions, stir to coat, cook 1 minute to remove raw flour taste.
  5. Slowly add beef broth while stirring, scrape the pan to lift brown bits. Add Worcestershire sauce if using.
  6. Return patties to the pan, spoon gravy over them. Reduce heat to low, cover, and simmer 10 to 15 minutes, until patties are cooked through.
  7. Taste the gravy, add salt and pepper if needed. Serve hot over mashed potatoes or rice.

Smothered Beef Patties

Why You’ll Love Smothered Beef Patties

  • Comfort food that cooks fast, perfect for weeknights.
  • Juicy beef patties with rich, savory gravy.
  • Uses pantry staples, no fancy tools needed.
  • Crowd-pleaser, both kids and adults will ask for seconds.

Tips for success

  • Don’t overmix the meat mix, press lightly to keep patties tender.
  • Brown the patties well, the browned bits add flavor to the gravy.
  • Cook onions slowly so they sweeten and deepen the gravy taste.
  • If gravy is too thin, simmer uncovered a few minutes to thicken, or mix a little water and flour then stir in.
  • Use a meat thermometer for safety, patties should reach 160°F, or cook until no pink remains.

Serving Suggestions

  • Serve over mashed potatoes for classic comfort food.
  • Try with white rice or buttered egg noodles for a simple plate.
  • Add steamed green beans or roasted carrots for color and veg.
  • Top with chopped parsley for a fresh note.

Smothered Beef Patties

FAQs

Q: Can I make these ahead of time?

A: Yes, cook patties and gravy, cool, then refrigerate up to 2 days. Reheat gently on the stove.

Q: Can I use ground turkey or chicken?

A: Yes, you can, but cook time may change and flavor will be milder. Add a bit more seasoning.

Q: How do I thicken the gravy quickly?

A: Mix 1 tsp flour or cornstarch with 1 tbsp water, stir into hot gravy and simmer until it thickens.

Q: Can I freeze Smothered Beef Patties?

A: Yes, place cooled patties and gravy in a freezer safe container for up to 3 months. Thaw overnight in fridge before reheating.

Conclusion

This Smothered Beef Patties recipe gives you tender meat and rich gravy in a simple way, perfect for family meals and comfort cooking. For another take on smothered beef and onions, see this classic version at Smothered Hamburger Steak and Onions – Boots and Biscuits.

Smothered Beef Patties

Smothered Beef Patties are tender beef patties covered in a rich gravy. This comforting dish is simple to make and perfect for busy weeknights.

For the patties

  • 1 lb ground beef (Choose a lean ground beef for better flavor.)
  • 1 small onion, finely chopped (Provides moisture and flavor.)
  • 1 egg (Acts as a binder for the patties.)
  • 1/2 cup breadcrumbs (Use plain or seasoned breadcrumbs.)
  • 1 tsp salt (Adjust to taste.)
  • 1/2 tsp black pepper (Freshly ground is best.)

For the gravy

  • 2 tbsp oil or butter (For frying the patties.)
  • 1 large onion, sliced (Adds sweetness to the gravy.)
  • 2 cups beef broth (For a rich flavor; use low sodium if preferred.)
  • 2 tbsp flour (To thicken the gravy.)
  • 1 tsp Worcestershire sauce (Optional for added flavor.)

Preparation

  1. In a bowl, mix ground beef, chopped onion, egg, breadcrumbs, salt, and pepper. Form the mixture into 4 to 6 round patties.

Cooking

  1. Heat oil or butter in a large skillet over medium heat.
  2. Brown the patties for 3 to 4 minutes on each side. Once done, remove and set aside.
  3. In the same pan, add sliced onions and cook until soft and golden brown, stirring often.
  4. Sprinkle flour over the onions, stir to coat, and cook for 1 minute to remove the raw flour taste.
  5. Slowly add the beef broth while stirring, scraping the pan to lift brown bits. If using, add Worcestershire sauce.
  6. Return the patties to the pan and spoon gravy over them. Reduce heat to low, cover, and simmer for 10 to 15 minutes, until the patties are cooked through.
  7. Taste the gravy and add additional salt and pepper if needed. Serve hot over mashed potatoes or rice.

For best results, avoid overmixing the meat mixture to keep patties tender. If gravy is too thin, simmer uncovered to thicken, or stir in a flour and water mix.

Dinner, Main Course
American
Beef Recipe, Comfort Food, Gravy, Quick Dinner, Smothered Beef Patties