Garlic Herb Cod Strips with Creamy Lemon Sauce

When you think of delicious seafood meals that are both simple to make and full of flavor, Garlic Herb Cod Strips with Creamy Lemon Sauce should come to mind. This dish is a fantastic choice for family dinners or entertaining guests, as it’s not only mouth-watering but also easy to whip up in no time. The combination of tender cod, fragrant herbs, and a zesty lemon sauce is bound to capture hearts and taste buds alike. So, whether you’re an experienced cook or just starting in the kitchen, you’ll find this recipe a real delight.

How to prepare Garlic Herb Cod Strips with Creamy Lemon Sauce

To make these delicious cod strips, you’ll need to gather your ingredients and get ready for a cooking adventure. Here’s how to bring this delightful dish to life:

  1. Ingredients Needed:
  • 1 lb cod fillets, cut into strips
  • 1/4 cup breadcrumbs
  • 2 tablespoons olive oil
  • 1 teaspoon garlic powder
  • 1 teaspoon dried oregano
  • 1 teaspoon dried parsley
  • Salt and pepper to taste
  • 1/2 cup sour cream
  • Zest and juice of 1 lemon
  • Fresh parsley for garnish
  1. Directions:
  2. Preheat your oven to 400°F (200°C).
  3. In a bowl, mix together breadcrumbs, garlic powder, oregano, parsley, salt, and pepper.
  4. Coat each cod strip with olive oil, then dip it in the breadcrumb mixture.
  5. Place the cod strips on a baking sheet lined with parchment paper.
  6. Bake for about 12-15 minutes, or until the fish is flaky and golden.
  7. While the cod is baking, prepare the creamy lemon sauce by mixing sour cream, lemon zest, and lemon juice in a small bowl.
  8. Once the cod is done, serve it hot with the creamy lemon sauce on the side.

Garlic Herb Cod Strips with Creamy Lemon Sauce

Why You’ll Love Garlic Herb Cod Strips with Creamy Lemon Sauce

This dish is a perfect balance of flavors and textures. The cod strips are crispy on the outside yet flaky and tender on the inside. The creamy lemon sauce adds a refreshing zing that brightens the whole meal. It’s also a great option for those who want to eat healthier without sacrificing taste. Plus, the vibrant presentation of golden cod on the plate invites everyone to dig in. It truly is a crowd-pleaser that leaves you wanting more with each bite.

Tips for success

  • Ensure your cod fillets are fresh for the best taste and texture.
  • Experiment with fresh herbs if you have them on hand; they can elevate the dish even more.
  • Keep an eye on the cod while it’s baking to prevent overcooking, as fish can dry out quickly.

Garlic Herb Cod Strips with Creamy Lemon Sauce

Serving Suggestions

Garlic Herb Cod Strips pair wonderfully with a side of steamed vegetables, a fresh salad, or even some fluffy rice. You could also serve it with crispy roasted potatoes for a heartier meal. A glass of chilled white wine would be a lovely addition too, making your dinner feel extra special.

FAQs

1. Can I use a different type of fish?

Yes, you can substitute cod with other white fish like tilapia or haddock if you prefer.

2. How can I store leftovers?

Store any leftover cod strips in an airtight container in the fridge for up to 2 days. Reheat in the oven for best results.

3. Can I make the creamy lemon sauce in advance?

Absolutely! You can prepare the sauce ahead of time and keep it in the fridge for up to 3 days. Just give it a good stir before serving.

Now that you have this simple and delectable recipe at your fingertips, it’s time to get cooking. Gather your ingredients, and enjoy the delightful experience of making Garlic Herb Cod Strips with Creamy Lemon Sauce!

Garlic Herb Cod Strips with Creamy Lemon Sauce

Delicious seafood dish featuring tender cod strips coated in herbs and served with a creamy lemon sauce, perfect for family dinners or entertaining guests.

For the cod strips

  • 1 lb cod fillets, cut into strips (Ensure fillets are fresh for best taste and texture)
  • 1/4 cup breadcrumbs
  • 2 tablespoons olive oil (For coating the cod strips)
  • 1 teaspoon garlic powder
  • 1 teaspoon dried oregano
  • 1 teaspoon dried parsley
  • to taste Salt and pepper

For the creamy lemon sauce

  • 1/2 cup sour cream
  • 1 Zest and juice of 1 lemon
  • for garnish Fresh parsley

Preparation

  1. Preheat your oven to 400°F (200°C).
  2. In a bowl, mix together breadcrumbs, garlic powder, oregano, parsley, salt, and pepper.
  3. Coat each cod strip with olive oil, then dip it in the breadcrumb mixture.
  4. Place the cod strips on a baking sheet lined with parchment paper.

Cooking

  1. Bake for about 12-15 minutes, or until the fish is flaky and golden.
  2. While the cod is baking, prepare the creamy lemon sauce by mixing sour cream, lemon zest, and lemon juice in a small bowl.
  3. Once the cod is done, serve it hot with the creamy lemon sauce on the side.

Keep an eye on the cod while it’s baking to prevent overcooking, as fish can dry out quickly. You can substitute cod with other white fish like tilapia or haddock if you prefer.

Dinner, Main Course
American, Seafood
Creamy Lemon Sauce, Easy Dinner, Garlic Herb Cod Strips, Healthy Meal, Seafood Recipe

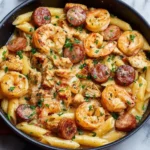
Garlic Butter Shrimp and Sausage Skillet Pasta Recipe

Delicious Garlic Butter Shrimp and Sausage in a skillet with pasta.

Garlic Butter Shrimp and Sausage Skillet Pasta is the kind of dish that lights up a dinner table. Its wonderful blend of shrimp and sausage tossed in creamy, garlic butter sauce brings joy to everyone who tries it. This recipe is not just flavorsome, but it’s also a great crowd-pleaser for family gatherings or casual get-togethers with friends. The crisp, savory notes of sausage combined with the juicy shrimp create a deliciously comforting meal. Plus, it’s quick to make, making it perfect for busy evenings when you want to impress without the hassle. Get ready to bring this tasty delight into your kitchen!

How to prepare Garlic Butter Shrimp and Sausage Skillet Pasta

Getting started with this delightful dish is quite simple. Here’s how to prepare Garlic Butter Shrimp and Sausage Skillet Pasta in just a few easy steps:

  1. First, gather your ingredients. You will need shrimp, sausage, pasta, garlic, butter, and a few seasonings.
  2. Start by cooking your pasta according to package instructions. Drain and set it aside.
  3. In a large skillet, melt the butter over medium heat. Once melted, add minced garlic and sauté until fragrant.
  4. Next, add sliced sausage to the skillet and cook it until it’s browned.
  5. Stir in the shrimp and cook until they turn pink, which usually takes about 3-4 minutes.
  6. Add the cooked pasta to the skillet and toss everything together. Season with salt, pepper, and any other spices you prefer.
  7. Serve hot, garnished with parsley or grated parmesan cheese if desired.

Garlic Butter Shrimp and Sausage Skillet Pasta Recipe

Why You’ll Love Garlic Butter Shrimp and Sausage Skillet Pasta

This recipe is packed with flavor and perfect for seafood lovers, making it a must-try. The garlic butter sauce creates a rich, savory finish that will have you going back for seconds. Not only does it taste amazing, but it is also an all-in-one meal that combines protein, carbs, and flavor in one skillet. Additionally, the recipe can easily be modified to include more vegetables or spices, making it a versatile dish for various dietary preferences. If you enjoy delightful meals that don’t take all evening to prepare, this Garlic Butter Shrimp and Sausage Skillet Pasta won’t disappoint.

Tips for success

To make sure your dish turns out perfect every time, keep these tips in mind:

  • Always use fresh shrimp for the best flavor; frozen shrimp can work as well, just ensure they’re thawed before cooking.
  • Adjust the spices according to your taste; adding a pinch of red pepper flakes can give it a nice kick.
  • Don’t overcook the shrimp; they cook very quickly and can become rubbery if overdone.
  • Feel free to add vegetables like spinach or cherry tomatoes to make the dish even healthier and colorful.

Serving Suggestions

Serve your Garlic Butter Shrimp and Sausage Skillet Pasta with a side of warm garlic bread to soak up that delicious sauce. A light, green salad drizzled with a lemon vinaigrette pairs perfectly, complementing the rich flavors. For a cozy feel, consider serving it in large bowls for family-style dining.

FAQs

1. Can I use chicken instead of sausage?

Yes, you can absolutely substitute chicken for sausage! It’ll change the flavor profile, but it will still be delicious.

2. What kind of pasta works best for this recipe?

Short pasta like penne or fusilli works well, but you can use any pasta you prefer, including spaghetti or fettuccine.

3. Can I prepare this dish ahead of time?

It’s best enjoyed fresh, but you can cook the sausage and shrimp ahead of time and reheat when ready to combine with pasta.

Garlic Butter Shrimp and Sausage Skillet Pasta Recipe

Garlic Butter Shrimp and Sausage Skillet Pasta is a delightful meal that everyone will love. The abundance of flavors and quick preparation makes it perfect for weeknight dinners or special occasions. For more ideas on creating delicious meals, you can check out this Skillet Garlic Butter Shrimp and Sausage recipe from Mel’s Kitchen Cafe. Happy cooking!

Garlic Butter Shrimp and Sausage Skillet Pasta

A delightful and quick dish featuring shrimp and sausage tossed in a creamy, garlic butter sauce that’s perfect for busy evenings or special occasions.

Main Ingredients

  • 1 pound shrimp, peeled and deveined (Use fresh shrimp for best flavor; frozen is fine if thawed.)
  • 8 ounces sausage, sliced (Use your preferred type of sausage.)
  • 8 ounces pasta (Short pasta like penne or fusilli works best.)
  • 3 cloves garlic, minced (Sauté until fragrant.)
  • 1/2 cup butter
  • to taste salt and pepper (Adjust according to your preference.)
  • optional parsley or grated parmesan cheese for garnish (For serving.)

Preparation

  1. Gather all the ingredients needed for the recipe.
  2. Cook the pasta according to package instructions, then drain and set aside.

Cooking

  1. In a large skillet, melt the butter over medium heat.
  2. Add minced garlic to the skillet and sauté until fragrant.
  3. Add sliced sausage to the skillet and cook until browned.
  4. Stir in the shrimp and cook until they turn pink, about 3-4 minutes.
  5. Add the cooked pasta to the skillet and toss everything together. Season with salt, pepper, and any other spices you prefer.

Serving

  1. Serve hot, garnished with parsley or grated parmesan cheese if desired.

Feel free to add vegetables like spinach or cherry tomatoes for added nutrition. Serve with garlic bread and a light salad for a complete meal.

Dinner, Main Course
American, Seafood
Easy Recipe, Garlic Butter Shrimp, One-Pan Meal, Quick Dinner, Sausage Pasta

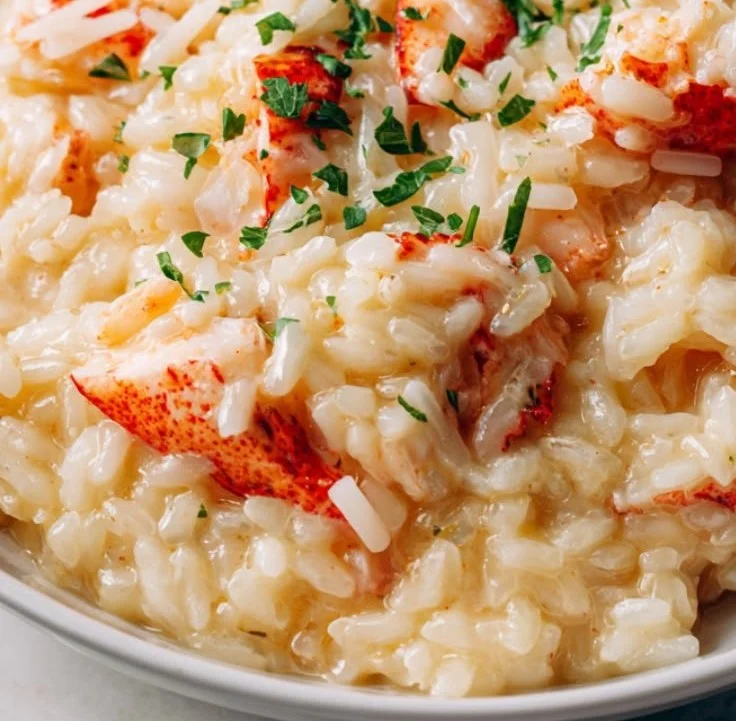
Lobster Risotto

Delicious Lobster Risotto topped with fresh herbs and seafood, served in a bowl

Lobster Risotto feels like a special night at home, warm and rich, with the sweet taste of lobster in every bite. This Lobster Risotto recipe is a crowd pleaser, creamy and silky, with bright lemon and fresh parsley to lift the flavor. It works for a dinner party or a cozy meal for two. If you like creamy rice dishes, try a similar warm option like this perfect asparagus risotto for more ideas. Get ready to make a dish that tastes fancy, but is easy to cook at home, and you might even surprise yourself with how good it turns out.

How to prepare Lobster Risotto

Ingredients

  • 1 pound lobster meat, cooked, chopped
  • 1 1/2 cups arborio rice
  • 4 cups warm lobster stock or fish/vegetable stock
  • 1 small onion, finely chopped
  • 2 garlic cloves, minced
  • 1/2 cup dry white wine
  • 3 tablespoons butter
  • 2 tablespoons olive oil
  • 1/2 cup grated Parmesan cheese
  • Salt and black pepper to taste
  • Fresh parsley, chopped, for garnish
  • Lemon wedges, to serve

Directions

  1. Warm the stock in a pot and keep it at low heat.
  2. In a large pan, heat olive oil and 1 tablespoon butter, add onion and cook until soft, 4 to 5 minutes.
  3. Add garlic and cook 1 minute more.
  4. Stir in the arborio rice, toast for 1 to 2 minutes until the edges look clear.
  5. Pour in the white wine, stir until the wine mostly evaporates.
  6. Add one ladle of warm stock, stir often until the rice absorbs the liquid. Repeat, one ladle at a time, for 18 to 20 minutes, until rice is creamy and al dente.
  7. Stir in the lobster meat in the last 2 minutes to warm through.
  8. Remove from heat, add remaining butter and Parmesan, stir until smooth. Season with salt and pepper.
  9. Let rest 1 minute, then serve with parsley and lemon wedges.

Lobster Risotto

Why You’ll Love Lobster Risotto

  • Creamy texture that feels luxurious but comes from simple steps.
  • Sweet lobster meat adds a clear, fresh seafood flavor.
  • You can make it ahead up to the stock step, then finish it quick before serving.
  • It works for holidays, dates, and family dinners, it looks and tastes special.

Tips for success

  • Keep the stock warm, cold stock slows the cooking and makes the rice sticky.
  • Stir often but gently, this helps release the rice starch and makes the risotto creamy.
  • Use good quality arborio rice, it holds the sauce well.
  • Add lobster near the end, do not cook it too long or it becomes tough.
  • Taste the rice as you go, stop when it is tender but still has a slight bite.
  • If you want more lobster flavor, use lobster shells to make the stock.

Serving Suggestions

  • Serve with a simple green salad and a light vinaigrette to balance the cream.
  • Pair with a chilled glass of dry white wine, like Pinot Grigio or Sauvignon Blanc.
  • Top with extra chopped parsley and a squeeze of lemon for brightness.
  • For a richer plate, add a drizzle of good olive oil or a few shavings of extra Parmesan.

Lobster Risotto

FAQs

Q: Can I use frozen lobster meat?

A: Yes, thaw it in the fridge and pat dry. Add it near the end to warm it, do not overcook.

Q: What if I do not have lobster stock?

A: Use good fish or vegetable stock, and add a bit of butter and lemon to boost taste.

Q: Can I make risotto ahead of time?

A: You can cook the rice until just before it is done, cool it, then finish with hot stock and lobster before serving.

Q: How do I keep the risotto creamy if it sits for a while?

A: Add a splash of warm stock or hot water and stir before serving to loosen it.

Conclusion

This Lobster Risotto is a simple way to make an elegant meal at home, with creamy rice and tender lobster that many people love. For another trusted take on this dish, see the detailed guide at Lobster Risotto Recipe – NYT Cooking.

Lobster Risotto

A creamy and luxurious dish featuring sweet lobster meat, perfect for special occasions or a cozy dinner at home.

Main Ingredients

  • 1 pound lobster meat, cooked, chopped (Use fresh or thawed frozen lobster)
  • 1.5 cups arborio rice (Good quality rice is recommended)
  • 4 cups warm lobster stock or fish/vegetable stock (Keep the stock warm during preparation)
  • 1 small onion, finely chopped
  • 2 cloves garlic, minced
  • 0.5 cup dry white wine (Adds depth of flavor)
  • 3 tablespoons butter (Divided use)
  • 2 tablespoons olive oil
  • 0.5 cup grated Parmesan cheese (Use freshly grated for better flavor)
  • Salt and black pepper to taste
  • Fresh parsley, chopped, for garnish
  • Lemon wedges, to serve

Preparation

  1. Warm the stock in a pot and keep it at low heat.
  2. In a large pan, heat olive oil and 1 tablespoon butter, add onion and cook until soft, about 4 to 5 minutes.
  3. Add garlic and cook for 1 minute more.
  4. Stir in the arborio rice, toasting for 1 to 2 minutes until the edges look clear.
  5. Pour in the white wine and stir until most of the wine evaporates.
  6. Add one ladle of warm stock, stirring often until the rice absorbs the liquid. Repeat this process, one ladle at a time, for 18 to 20 minutes, until the rice is creamy and al dente.
  7. Stir in the lobster meat during the last 2 minutes to warm it through.
  8. Remove from heat, add remaining butter and Parmesan, stirring until smooth. Season with salt and pepper.
  9. Let rest for 1 minute, then serve garnished with parsley and lemon wedges.

Keep the stock warm to prevent sticky rice. Taste the rice as you cook to ensure the desired tenderness. If you want more lobster flavor, use lobster shells to make the stock.

Dinner, Main Course
Italian, Seafood
Creamy Rice, Dinner Party, Elegant Meal, Lobster Risotto, Seafood Risotto

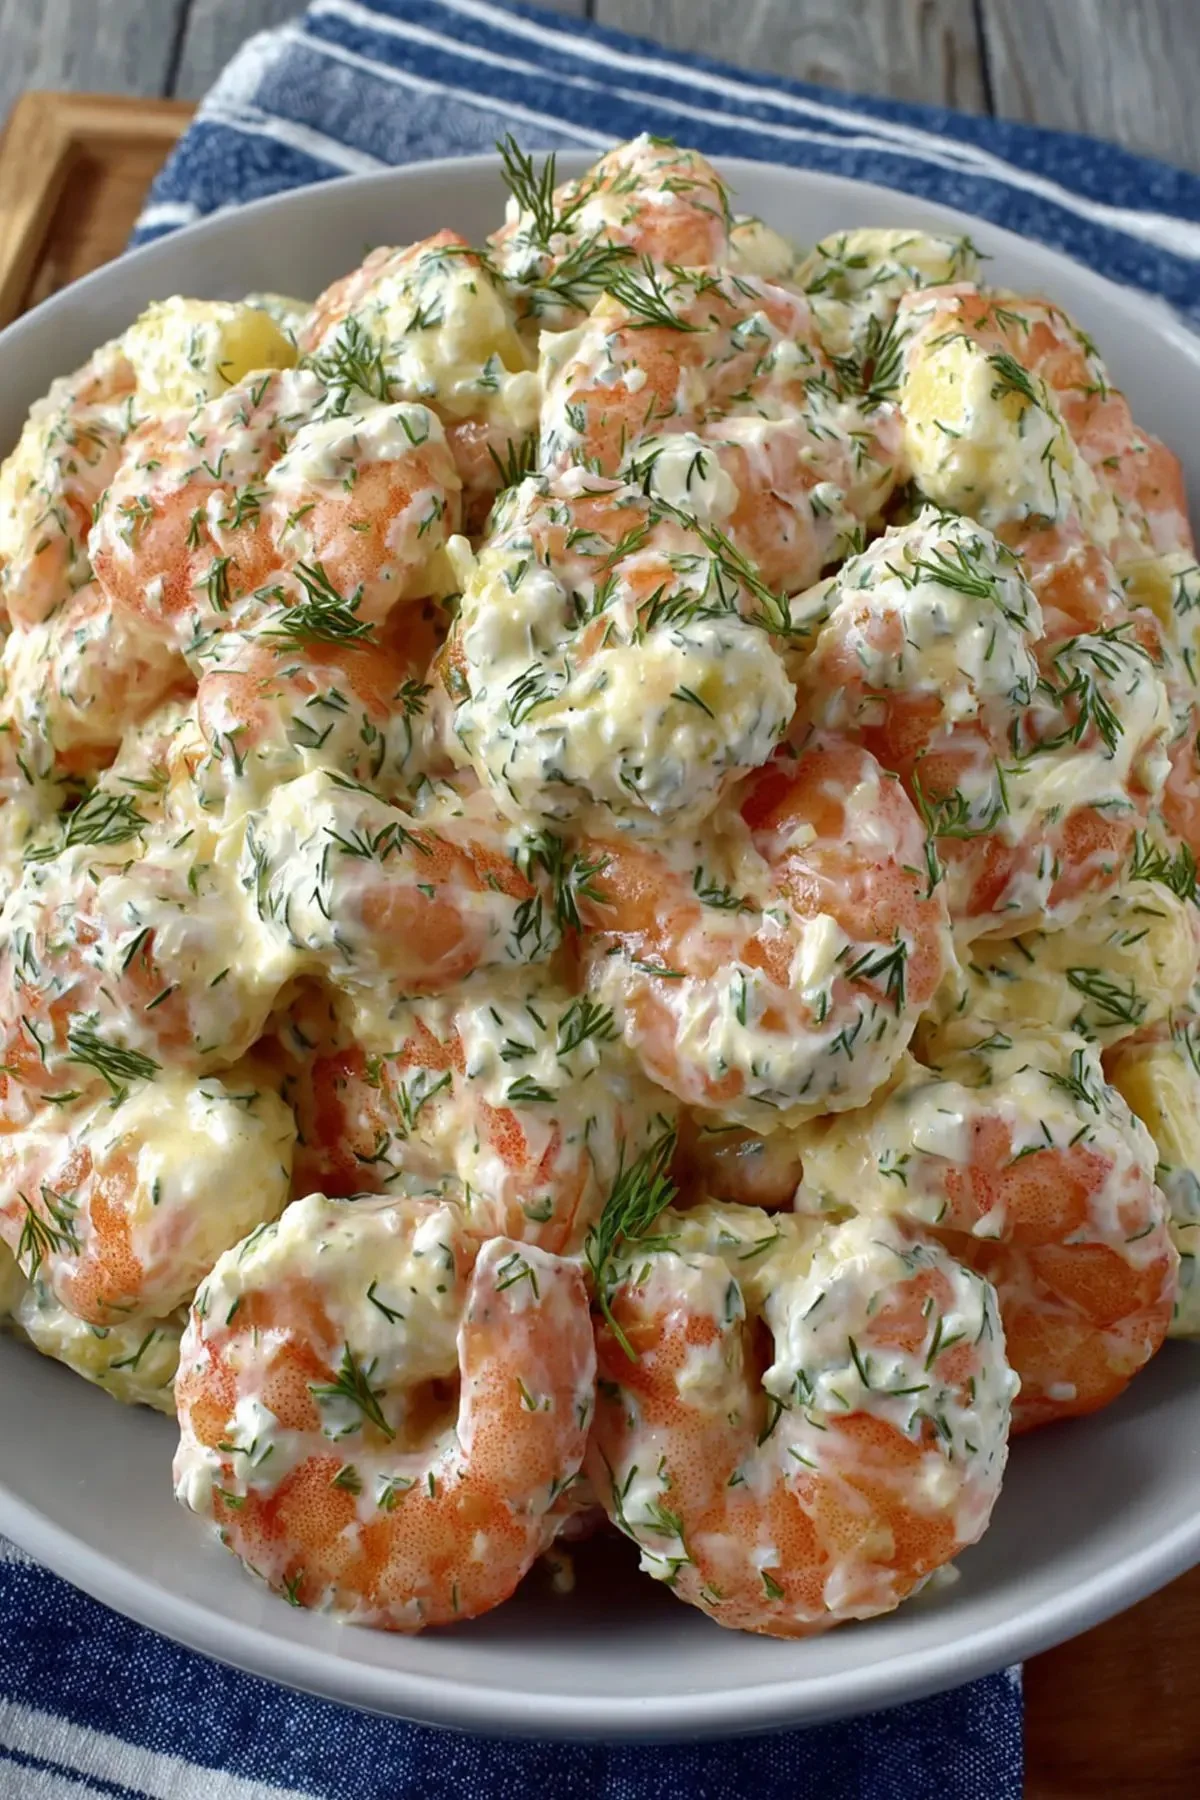
Shrimp Salad Recipe

Delicious shrimp salad served in a bowl with fresh vegetables and dressing

I love a simple salad that feels fresh and bright, and shrimp salad does exactly that. It is light, tasty, and easy to make any time you want a quick meal. This Shrimp Salad Recipe is a crowd pleaser, with tender shrimp, crisp vegetables, and a creamy lemon dressing that fits many tastes. It works well for lunch, a light dinner, or a summer party, and people often ask for seconds. Try it and smile when you see how fast it disappears, because who can resist a good shrimp salad?

How to prepare Shrimp Salad

Ingredients

  • 1 pound cooked shrimp, peeled and deveined, chopped into bite size pieces
  • 4 cups mixed lettuce or your favorite salad greens
  • 1 cup cherry tomatoes, halved
  • 1/2 cup celery, thinly sliced
  • 1/4 cup red onion, thinly sliced
  • 1 avocado, diced (optional)
  • 1/4 cup mayonnaise
  • 2 tablespoons plain yogurt or sour cream
  • 2 tablespoons lemon juice, fresh
  • 1 tablespoon olive oil
  • 1 teaspoon Dijon mustard
  • Salt and black pepper, to taste
  • Fresh parsley or dill, chopped, for garnish

Directions

  1. If shrimp are frozen, thaw them in cold water, then pat dry with paper towels.
  2. In a small bowl, whisk together mayonnaise, yogurt, lemon juice, olive oil, Dijon mustard, salt and pepper to make the dressing.
  3. In a large bowl, add chopped shrimp, celery, red onion, and cherry tomatoes. Toss gently.
  4. Add the dressing to the shrimp mix, stir until all pieces are coated.
  5. Add avocado and greens last, toss lightly so avocado holds its shape.
  6. Taste and adjust salt and pepper. Garnish with chopped parsley or dill.
  7. Chill in the fridge for 15 to 30 minutes if you want a cold shrimp salad, then serve.

Shrimp Salad Recipe

Why You’ll Love Shrimp Salad

  • Easy and quick to make, perfect for busy days.
  • Fresh flavors, with lemon and herbs that lift the shrimp.
  • Versatile, you can make it as a cold shrimp salad, a hearty green salad, or a sandwich filling.
  • Healthy, with lean protein from shrimp and lots of vegetables.
  • Great for parties, picnics, and weeknight meals, it pleases many tastes.

Tips for success

  • Use cooked shrimp for speed, or grill fresh shrimp for more flavor.
  • Pat shrimp dry so the dressing sticks and does not get watery.
  • Chill the salad for a short time to let flavors blend, but add avocado just before serving to keep it fresh.
  • Taste the dressing before you add it, and adjust lemon, salt, or pepper.
  • If you like spice, add a pinch of paprika or a dash of hot sauce.
  • Use fresh herbs like parsley or dill for a brighter taste than dried herbs.

Serving Suggestions

  • Serve the shrimp salad on a bed of mixed greens for a light meal.
  • Fill a crusty roll or wrap for a tasty shrimp sandwich.
  • Spoon over sliced cucumbers or avocado halves for a low carb option.
  • Pair with crusty bread, a simple soup, or a chilled white wine for a full meal.
  • Bring it to picnics or potlucks, it travels well when kept cool.

Shrimp Salad Recipe

FAQs

Q: Can I use raw shrimp in this recipe? A: Yes, you can, but cook the raw shrimp first by boiling, grilling, or sautéing, then cool before mixing with the dressing.

Q: How long does shrimp salad last in the fridge? A: Keep it in an airtight container, and eat within 2 days for best taste and quality. Avocado may darken, so add it fresh if you prefer.

Q: Can I make this recipe ahead of time? A: Yes, mix shrimp and dressing ahead and store in the fridge. Add delicate items like greens and avocado right before serving.

Q: Is this shrimp salad healthy? A: Yes, shrimp is lean protein, and with lots of vegetables it makes a healthy meal. Use yogurt instead of some mayo to lower calories.

Conclusion

For another take and extra tips on making a great shrimp salad, see The Best Shrimp Salad Recipe – Inspired Taste.

Shrimp Salad

This refreshing and bright shrimp salad combines tender shrimp, crisp vegetables, and a creamy lemon dressing, making it perfect for lunch or light dinner.

Main Ingredients

  • 1 pound cooked shrimp, peeled and deveined, chopped into bite size pieces (Use fresh or pre-cooked shrimp.)
  • 4 cups mixed lettuce or your favorite salad greens (Any variety of greens works.)
  • 1 cup cherry tomatoes, halved (Adds sweetness to the salad.)
  • 1/2 cup celery, thinly sliced (Provides crunch.)
  • 1/4 cup red onion, thinly sliced (Adjust amount to taste.)
  • 1 each avocado, diced (optional) (Add just before serving for freshness.)

Dressing Ingredients

  • 1/4 cup mayonnaise (Creamy base for the dressing.)
  • 2 tablespoons plain yogurt or sour cream (Use yogurt for a lighter dressing.)
  • 2 tablespoons lemon juice, fresh (Adds tanginess.)
  • 1 tablespoon olive oil (For richness in the dressing.)
  • 1 teaspoon Dijon mustard (Gives depth of flavor.)
  • to taste Salt and black pepper (Adjust according to preference.)

Garnish

  • to taste Fresh parsley or dill, chopped (Used for garnish.)

Preparation

  1. If shrimp are frozen, thaw them in cold water, then pat dry with paper towels.
  2. In a small bowl, whisk together mayonnaise, yogurt, lemon juice, olive oil, Dijon mustard, salt and pepper to make the dressing.
  3. In a large bowl, add chopped shrimp, celery, red onion, and cherry tomatoes. Toss gently.
  4. Add the dressing to the shrimp mix, stir until all pieces are coated.
  5. Add avocado and greens last, toss lightly so avocado holds its shape.
  6. Taste and adjust salt and pepper. Garnish with chopped parsley or dill.
  7. Chill in the fridge for 15 to 30 minutes if you want a cold shrimp salad, then serve.

Use cooked shrimp for speed, or grill fresh shrimp for more flavor. Chill the salad briefly to blend flavors, but add avocado just before serving to ensure freshness. Adjust dressing ingredients to taste, and consider adding spices if desired.

Dinner, lunch, Salad
American, Seafood
Easy Recipe, Healthy Recipe, Quick Meal, Shrimp Salad, summer salad

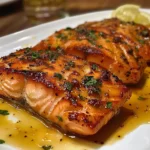
Texas Roadhouse Salmon Recipe

Delicious Texas Roadhouse-style salmon recipe served on a plate

If you’ve ever ordered salmon at Texas Roadhouse, you know it’s simple, juicy, and incredibly flavorful. The secret is a bold seasoning blend, perfectly grilled salmon, and a rich lemon butter finish that enhances the natural flavor of the fish.

How to Prepare Texas Roadhouse Salmon Recipe

Texas Roadhouse Salmon Recipe

The Texas Roadhouse Salmon recipe is not just any salmon dish, it’s a delightful combination of flavors that captures the essence of a great day out at a Texas Roadhouse. The salmon is grilled to perfection with a zesty seasoning that makes every bite burst with taste. It’s a dish that feels both comforting and fancy, perfect for special occasions or a cozy dinner at home. If you love seafood and enjoy the inviting atmosphere of a Texas Roadhouse, this recipe is sure to become a favorite. Get your apron on, and let’s dive into making this mouthwatering dish!

Why You’ll Love Texas Roadhouse Salmon Recipe

This recipe is all about simple, fresh ingredients that create a fantastic meal. The salmon is rich in flavor and packed with nutrients, making it a healthy choice. The seasoning gives it a slightly smoky and tangy taste, which pairs beautifully with the flaky texture of the fish. Plus, it’s easy to prepare, so even if you’re not a kitchen whiz, you’ll find success with this dish.

Tips for Success

  • Always choose fresh salmon for the best flavor.
  • Marinate the salmon for at least 30 minutes to enhance the taste.
  • Don’t overcook the salmon; it should be flaky but still moist inside.
  • Garnish with lemon wedges and fresh herbs for a bright finish.

Serving Suggestions

Serve the Texas Roadhouse Salmon with a side of garlic mashed potatoes or a refreshing salad. You can also pair it with grilled vegetables for a colorful and nutritious meal. A glass of white wine or iced tea can complement the flavors nicely.

FAQs

1. Can I use frozen salmon for this recipe?

Yes, just make sure to thaw it properly before cooking to ensure even cooking.

2. What can I substitute for salmon?

You can use other types of fish like trout or tilapia, but cooking times may vary.

3. Can I make this recipe in the oven?

Absolutely! You can bake the salmon at 400°F for about 15-20 minutes, depending on thickness.

Texas Roadhouse Salmon Recipe

Texas Roadhouse Salmon

A delightful grilled salmon dish with a zesty seasoning and a rich lemon butter finish, capturing the essence of dining at Texas Roadhouse.

For the Salmon

  • 2 fillets salmon fillets (Choose fresh salmon for best flavor.)
  • 1 tablespoon olive oil (For grilling.)
  • 1 teaspoon zesty seasoning (Can include salt, pepper, and paprika.)
  • 2 tablespoons lemon butter (For finishing the dish.)

Preparation

  1. Preheat the grill to medium-high heat.
  2. Marinate the salmon fillets in olive oil and zesty seasoning for at least 30 minutes.

Cooking

  1. Place the marinated salmon fillets on the grill.
  2. Grill for about 15-20 minutes, flipping halfway through, until salmon is flaky but moist.
  3. Baste with lemon butter during the last few minutes of grilling.

Garnish with lemon wedges and fresh herbs for a bright finish. Serve with garlic mashed potatoes or a refreshing salad.

Dinner, Main Course
American, Seafood
easy salmon recipe, grilled salmon, seafood dish, Texas Roadhouse Salmon

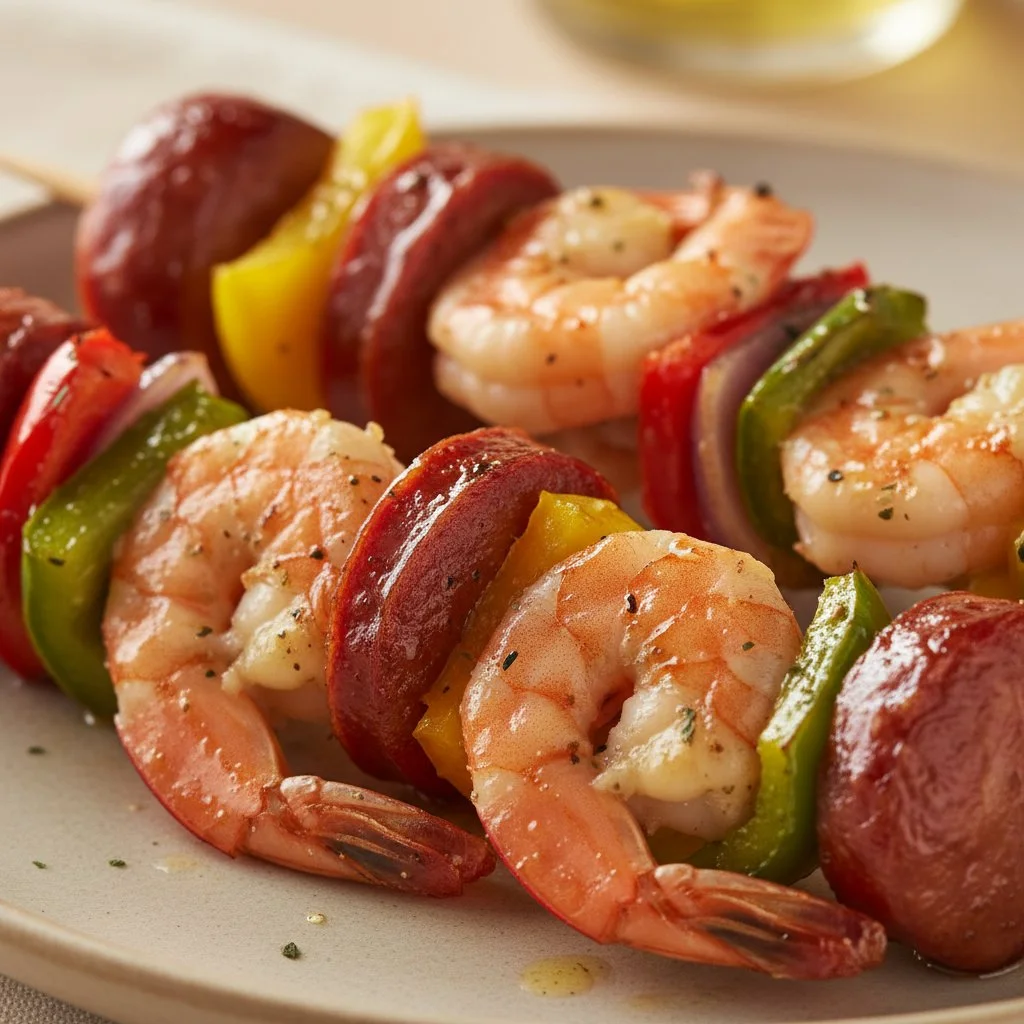
Smoky-Sweet Sausage Shrimp Kabobs

Smoky-sweet sausage shrimp kabobs on a grill, ready to enjoy.

Smoky-Sweet Sausage Shrimp Kabobs are a fun and tasty treat that brings together the best of both worlds: juicy shrimp and flavorful sausage. These kabobs are a hit for gatherings, barbecues, or just a fun family dinner. With their smoky and sweet glaze, each bite packs a punch of deliciousness that is sure to keep everyone coming back for more. Perfectly grilled and bursting with flavor, these kabobs are your ticket to delighting your taste buds and impressing your guests. So, are you ready to fire up the grill?

how to prepare Smoky-Sweet Sausage Shrimp Kabobs

Gather your ingredients and start your cooking adventure. Here’s how to prepare these delicious kabobs:

  1. Ingredients Needed:

    • Sausage (your favorite type)
    • Shrimp, peeled and deveined
    • Bell peppers, chopped
    • Red onion, chopped
    • Olive oil
    • Honey
    • Smoked paprika
    • Garlic powder
    • Salt and pepper
    • Skewers (wooden or metal)
  2. Prepare the Marinade:
    In a bowl, mix olive oil, honey, smoked paprika, garlic powder, salt, and pepper. This marinade gives the kabobs their special flavor.

  3. Assemble the Kabobs:
    Begin threading the sausage, shrimp, bell peppers, and red onion onto the skewers. Alternate the ingredients for a colorful and appealing look.

  4. Marinate:
    Brush the marinade all over the assembled kabobs. Let them sit for a bit to soak up those yummy flavors.

  5. Grill:
    Preheat the grill to medium heat. Place the kabobs on the grill, cooking for about 10-12 minutes. Turn them occasionally until the shrimp are pink and the sausage is cooked through.

  6. Serve:
    Remove the kabobs from the grill and enjoy them hot!

Smoky-Sweet Sausage Shrimp Kabobs

Why You’ll Love Smoky-Sweet Sausage Shrimp Kabobs

These kabobs are incredibly versatile and will appeal to everyone. They are perfect for a summertime barbecue or even as a quick weeknight dinner. The combination of smoky sausage and sweet shrimp creates a mesmerizing taste that’s hard to resist. Plus, they are fun to eat and can be served with your favorite dipping sauces. Everyone will love gathering around a plate of these kabobs, laughing and enjoying each other’s company.

tips for success

  • Soak Wooden Skewers: If you’re using wooden skewers, soak them in water for at least 30 minutes before grilling. This prevents them from burning on the grill.
  • Even Sizes: Cut sausage, peppers, and onion into similar sizes for even cooking. This way, all ingredients cook perfectly together.
  • Don’t Overcrowd: Give your kabobs some space on the grill, don’t overcrowd them or they may not cook evenly.

Serving Suggestions

Serve these Smoky-Sweet Sausage Shrimp Kabobs with a side of fresh salad, grilled corn on the cob, or even a zesty dipping sauce. They also pair well with rice or quinoa for a complete meal. A refreshing drink or lemonade on the side makes it an even better feast!

FAQs

Q: Can I use different vegetables in the kabobs?
A: Absolutely! Feel free to mix in your favorite veggies like zucchini, cherry tomatoes, or mushrooms.

Q: What type of sausage is best for this recipe?
A: You can use any type of sausage you like, such as Italian, chorizo, or even chicken sausage for a healthier option.

Q: Can I make these kabobs ahead of time?
A: Yes, you can assemble the kabobs ahead of time and marinate them in the fridge. Just grill them fresh when you’re ready to eat!

Now that you have the steps to create these delicious Smoky-Sweet Sausage Shrimp Kabobs, it’s time to get started in the kitchen and impress your friends and family. Happy cooking!

Smoky-Sweet Sausage Shrimp Kabobs

Juicy shrimp and flavorful sausage skewered with vibrant vegetables, perfectly grilled with a smoky-sweet glaze.

Main Ingredients

  • 1 lb Sausage (your favorite type)
  • 1 lb Shrimp, peeled and deveined
  • 2 cups Bell peppers, chopped
  • 1 cup Red onion, chopped
  • 1 tbsp Olive oil
  • 2 tbsp Honey
  • 1 tbsp Smoked paprika
  • 1 tsp Garlic powder
  • 1 tsp Salt
  • 1 tsp Pepper
  • 6 pieces Skewers (wooden or metal) (Soak wooden skewers in water for at least 30 minutes before grilling)

Preparation

  1. In a bowl, mix olive oil, honey, smoked paprika, garlic powder, salt, and pepper to create the marinade.
  2. Thread the sausage, shrimp, bell peppers, and red onion onto the skewers, alternating the ingredients.
  3. Brush the marinade all over the assembled kabobs and let them sit to soak up the flavors.

Grilling

  1. Preheat the grill to medium heat.
  2. Place the kabobs on the grill and cook for about 10-12 minutes, turning occasionally until the shrimp are pink and the sausage is cooked through.

Serving

  1. Remove the kabobs from the grill and enjoy them hot.

Serve with a side of fresh salad, grilled corn, or dipping sauce. Pairs well with rice or quinoa.

Appetizer, Main Course
American, Barbecue
Barbecue Recipes, Grilled Kabobs, Sausage Kabobs, Shrimp Kabobs, Summer Recipes