Classic Bruschetta recipe

Bruschetta is a delightful dish that brings vibrant flavors and fresh ingredients together, making it a perfect starter or snack for any occasion. Picture this: crispy, toasted bread topped with a mixture of juicy tomatoes, fragrant basil, and a drizzle of olive oil. It’s a simple yet elegant treat that everyone will love. Whether you’re hosting a gathering or just enjoying a quiet night at home, bruschetta is sure to impress. So, let’s dive into making the best bruschetta you’ll ever taste.

How to prepare Bruschetta

To make the best bruschetta, you’ll need fresh ingredients and a few easy steps to follow. Start with some crusty baguette or ciabatta bread, and slice it into thick pieces. Toast the bread slices until they are golden and crispy. In a bowl, mix diced ripe tomatoes, chopped basil, minced garlic, a pinch of salt, and a splash of balsamic vinegar. Once your toppings are ready, simply spoon them onto the toasted bread slices just before serving. Enjoy the burst of fresh flavors in each bite!

Best Bruschetta

Why You’ll Love Bruschetta

The reason you’ll love this bruschetta recipe is its freshness and simplicity. Each ingredient shines, from the sweet juiciness of the tomatoes to the aromatic basil. It’s a crowd-pleaser that works well for both casual gatherings and formal events. Plus, you can customize the toppings to suit your taste. Want to try something different? Click to explore another refreshing recipe with seasonal ingredients, like this delicious broccoli pasta salad.

Tips for success

To ensure your bruschetta turns out perfectly, here are some helpful tips. First, use the freshest tomatoes you can find for the best flavor. Let your tomato mixture sit for about 10 minutes before serving; this allows the flavors to meld beautifully. Additionally, if you’re making bruschetta ahead of time, store the topping separate from the toasted bread to keep it crispy. Finally, consider adding a sprinkle of cheese on top for an extra richness!

Best Bruschetta

Serving Suggestions

Bruschetta is best served right away while the bread is warm and crispy. You can serve it as an appetizer before a meal or enjoy it at a picnic. Pair it with a refreshing beverage, like a light white wine or sparkling water, to enhance the experience. For a fun twist, serve your bruschetta alongside a fresh salad or other small bites for a delightful spread that will please everyone.

FAQs

1. Can I prepare bruschetta ahead of time?

While you can make the topping in advance, it’s best to assemble the bruschetta just before serving to ensure the bread remains crunchy.

2. What kind of bread works best for bruschetta?

Crusty bread like a baguette or ciabatta is ideal because it holds up well to the toppings and offers a satisfying crunch.

3. Can I add other toppings to bruschetta?

Absolutely! You can get creative with toppings like roasted peppers, olives, or even different herbs. Enjoy experimenting with flavors!

Bruschetta

A delightful dish featuring crispy toasted bread topped with a fresh mixture of juicy tomatoes, fragrant basil, and olive oil. Perfect as a starter or snack for any occasion.

For the Bruschetta

  • 1 loaf Baguette or ciabatta bread (Crusty bread works best for this recipe.)
  • 2 cups Diced ripe tomatoes (Use the freshest tomatoes for the best flavor.)
  • 1/2 cup Chopped fresh basil (Delicious and aromatic!)
  • 2 cloves Minced garlic (Adds depth of flavor.)
  • 1 pinch Salt
  • 1 tablespoon Balsamic vinegar (Adds acidity and brightness.)
  • 1/4 cup Olive oil (For drizzling.)

Preparation

  1. Preheat the oven for toasting bread.
  2. Slice the baguette or ciabatta into thick pieces.
  3. Toast the bread slices in the oven until golden and crispy.
  4. In a bowl, mix together diced tomatoes, chopped basil, minced garlic, salt, and balsamic vinegar.
  5. Let the tomato mixture sit for about 10 minutes for flavors to meld.

Assembly

  1. Spoon the tomato mixture onto the toasted bread slices just before serving.
  2. Drizzle with olive oil and serve immediately.

To keep the bruschetta crispy, store the topping separately from the toasted bread if making ahead of time. Consider adding cheese for extra richness. Serve while warm.

Appetizer, Snack
Italian
Appetizer, Basil, Bruschetta, Starter, Tomato

Summer Corn Salad

There’s something special about summer that makes fresh, vibrant dishes particularly appealing. One such dish is Summer Corn Salad, which is not only refreshing but also packed with flavor. This salad showcases sweet corn, crisp veggies, and zesty dressing, making it a perfect side dish for barbecues or family gatherings. Bursting with colors and textures, it’s a crowd-pleaser that everyone will love. Plus, it’s simple to whip up, so you can enjoy more time basking in the sun instead of slaving in the kitchen!

How to prepare Summer Corn Salad

To get started, you’ll need fresh corn, ripe tomatoes, bell peppers, red onion, cilantro, lime juice, and a touch of seasoning. Begin by cooking the corn until tender, let it cool, and then slice the kernels off the cob. Combine the corn with diced tomatoes, bell peppers, and red onion in a large bowl. Drizzle with lime juice and season to taste. Toss everything together, and your salad is ready to serve!

Summer Corn Salad

Why You’ll Love Summer Corn Salad

This Summer Corn Salad is not just about taste; it’s about making memories around the dinner table. The crunch from the vegetables, the sweetness of the corn, and the brightness of the lime create a delightful explosion of flavors. It pairs well with various main dishes, and it can be served chilled or at room temperature, making it highly versatile. For those looking for more fresh ideas, check out this dill pickle pasta salad for another summer delight!

Tips for success

To ensure that your Summer Corn Salad is a hit, opt for the freshest ingredients you can find. If you can get your hands on local corn, that’s even better! Don’t be afraid to personalize the salad with your favorite ingredients, such as avocado or black beans. For added flavor, let the salad sit for at least 30 minutes before serving. This allows the flavors to meld beautifully.

Always remember to make extra; this salad is so delicious that your family and friends will want more!

Summer Corn Salad

Serving Suggestions

This salad pairs beautifully with grilled meats like chicken, steak, or fish. It can also stand alone as a light lunch. For an even more filling meal, try incorporating protein by adding grilled shrimp or chickpeas. If you enjoy hearty salads, check out the balsamic steak gorgonzola salad for a satisfying option!

FAQs

Can I use frozen corn in this recipe?

Yes, frozen corn can be used as a convenient alternative. Just make sure to thaw and drain it before adding it to the salad.

How long can I store Summer Corn Salad?

The salad can be stored in the refrigerator for up to three days. However, to maintain its crispness, it is best enjoyed within the first day.

Can I make this salad ahead of time?

Absolutely! You can prepare the salad a few hours in advance and refrigerate it. Just give it a good stir before serving to refresh the flavors.

Summer Corn Salad

A refreshing and vibrant salad showcasing sweet corn, crisp veggies, and zesty dressing, perfect for summer gatherings.

Fresh Ingredients

  • 4 ears of fresh corn (Choose local corn if possible for the best flavor.)
  • 2 ripe tomatoes, diced
  • 1 bell pepper, diced (Any color bell pepper can be used.)
  • 1/2 red onion, diced
  • 1/4 cup fresh cilantro, chopped (Can substitute with parsley if desired.)
  • 2 tablespoons lime juice (Fresh lime juice is recommended.)

Seasoning

  • to taste salt (Adjust according to preference.)
  • to taste black pepper

Preparation

  1. Cook the corn in boiling water until tender, about 10 minutes.
  2. Let the corn cool, then slice the kernels off the cob.
  3. In a large bowl, combine the corn, diced tomatoes, bell pepper, red onion, and cilantro.
  4. Drizzle with lime juice and season with salt and pepper to taste.
  5. Toss everything together until well combined.

For best flavor, let the salad sit for at least 30 minutes before serving. This salad can be served chilled or at room temperature. You can personalize it with ingredients like avocado or black beans.

Salad, Side Dish
American, Summer
Corn Salad, Fresh Salad, Summer Corn Salad, Summer Recipes, Vegetarian Salad

Irresistible Mediterranean Pasta Salad

There’s something about a Mediterranean Pasta Salad that just feels like a burst of sunshine on your plate. This dish is perfect for picnics, barbecues, or a casual supper. It’s a vibrant mix of flavors that comes together beautifully, making it a crowd-pleaser. Just imagine sunkissed tomatoes, crunchy cucumbers, tangy olives, and creamy feta cheese all mingling in a delightful pasta base. With a taste this good, you’ll find yourself making it over and over again, much like the best broccoli pasta salad.

How to prepare Irresistible Mediterranean Pasta Salad

Preparing this delicious salad is simple and quick. Start by cooking your favorite pasta until it’s al dente. While the pasta cooks, chop up some fresh veggies like cherry tomatoes, bell peppers, and red onions. Add olives and feta cheese for that Mediterranean touch. Once the pasta is ready, drain it and let it cool. Combine everything in a big bowl and drizzle with olive oil, red wine vinegar, salt, and pepper. Toss well to mix all the bright flavors together.

Irresistible Mediterranean Pasta Salad - moanaskitchen

Why You’ll Love Irresistible Mediterranean Pasta Salad

This salad is not just quick to make, but it’s also full of vibrant colors and flavors. It’s a refreshing dish that can brighten up any meal. The mix of crunchy vegetables, tasty pasta, and tangy dressing make every bite exciting. Plus, it’s easily customizable. You can switch out veggies or add proteins like grilled chicken or chickpeas for a heartier version. Whether for a party or a family dinner, it’s sure to impress.

Irresistible Mediterranean Pasta Salad - moanaskitchen

Tips for success

To ensure your pasta salad turns out perfectly, here are some helpful tips. First, use high-quality olive oil and vinegar, as they make a big difference in taste. Also, consider letting the salad chill in the fridge for at least an hour before serving, allowing the flavors to deepen. If you have leftovers, store them in an airtight container and enjoy them the next day. This Mediterranean concoction tastes even better as it sits! For more summer salad ideas, you might also want to try dill pickle pasta salad.

Serving Suggestions

This pasta salad pairs wonderfully with grilled meats and fish. It can also stand alone as a light meal or a side dish. For a complete Mediterranean feast, consider serving it alongside hummus, pita bread, and tzatziki sauce.

FAQs

Can I make this pasta salad ahead of time?

Absolutely! You can prepare it the day before and keep it in the refrigerator. Just remember to give it a good toss before serving.

What type of pasta works best?

You can use any pasta, but bowties and rotini hold the dressing and veggies well.

How long will leftovers last?

The salad will stay fresh in the fridge for up to three days, making it a great option for meal prep.

Mediterranean Pasta Salad

A vibrant and refreshing mix of pasta, sunkissed tomatoes, crunchy cucumbers, tangy olives, and creamy feta cheese, perfect for picnics and barbecues.

Pasta and Base Ingredients

  • 8 ounces pasta (any preferred type) (Bowties or rotini are recommended for holding dressing.)

Vegetables and Cheese

  • 1 cup cherry tomatoes, halved (Fresh and sweet.)
  • 1 cup bell peppers, chopped (Use any color for variety.)
  • 1/2 cup red onions, diced (For a slightly sharp flavor.)
  • 1/2 cup black olives, sliced (Adds a briny flavor.)
  • 1 cup feta cheese, crumbled (Brings creaminess and saltiness.)

Dressing

  • 1/4 cup olive oil (Use high-quality for best taste.)
  • 2 tablespoons red wine vinegar (Adds tanginess.)
  • 1 teaspoon salt (Adjust according to taste.)
  • 1/2 teaspoon black pepper (To taste.)

Preparation

  1. Cook the pasta in a pot of boiling water until al dente, then drain and let it cool.
  2. While the pasta cooks, chop the cherry tomatoes, bell peppers, and red onions.

Mixing

  1. In a large bowl, combine the cooled pasta with the chopped veggies, olives, and feta cheese.
  2. Drizzle with olive oil, red wine vinegar, salt, and pepper.
  3. Toss well to mix all the ingredients and flavors together.

For best results, chill the salad in the fridge for at least an hour before serving to allow the flavors to blend. Leftovers can be stored in an airtight container for up to three days.

Salad, Side Dish
Mediterranean
Healthy Salad, Mediterranean Pasta Salad, pasta salad, picnic food, quick recipe

Fresh Tomato Soup with Roma Tomatoes

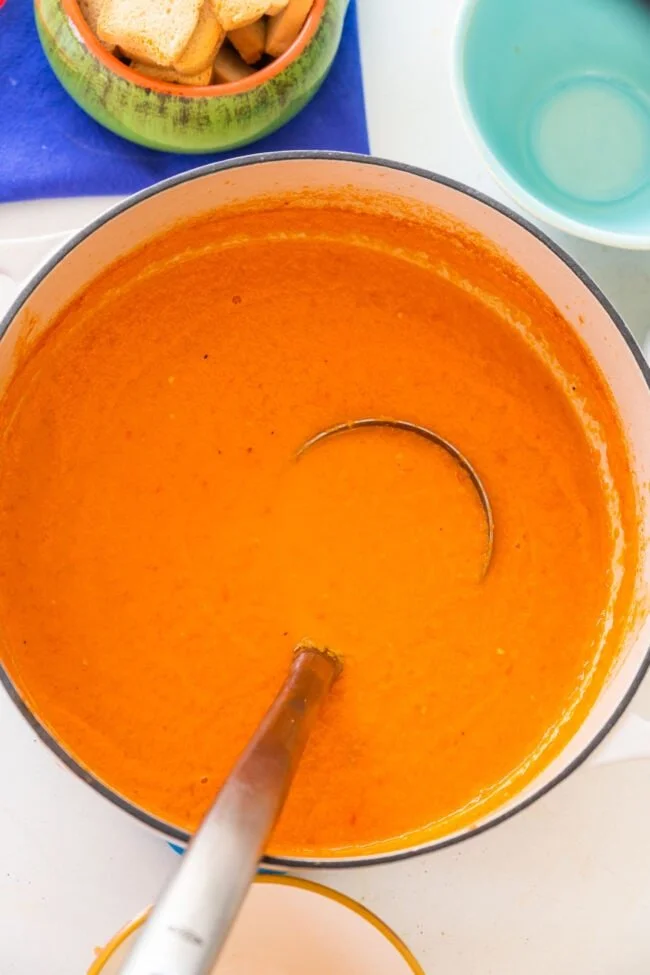
Fresh tomato soup made with ripe Roma tomatoes, garnished and ready to serve.

On a bright summer afternoon, my grandmother’s kitchen filled with the warm scent of fresh tomatoes simmering on the stove. I sat by her side, eager to learn her secrets. Each time she made her famous tomato soup, it wasn’t just for the nourishment; it was a labor of love, a way to bring family together. Today, I want to share a simple yet delicious recipe for Fresh Tomato Soup with Roma Tomatoes, inspired by those fond memories.

Why make this recipe

Fresh tomato soup is comforting and healthy, making it a great choice for any meal. This recipe uses ripe roma tomatoes, bringing out their sweet and tangy flavor. With easy-to-find ingredients and straightforward steps, you can create a bowl of warmth that reminds you of sunny days and family gatherings.

How to make Fresh Tomato Soup with Roma Tomatoes

Ingredients:

  • 3 pounds roma tomatoes
  • 2 tablespoons olive oil
  • 2 medium onions (thinly sliced)
  • 2 cloves garlic (minced)
  • Salt
  • Fresh ground black pepper
  • 4 cups vegetable broth
  • 1/2 cup heavy cream

Directions:

  1. Bring a large pot of water to a boil over high heat. Cut a small X in the stem end of each tomato.
  2. Drop the tomatoes into the boiling water and blanch them for about 1 minute.
  3. Using a slotted spoon, transfer them to a pot of cold water to cool.
  4. When cool enough to handle, remove and discard the skin from the tomatoes, remove the core, and coarsely chop the flesh.
  5. In a large soup pot over medium-high heat, warm the olive oil.
  6. Add onions and garlic and cook until onions are translucent and garlic is fragrant, about 5 minutes.
  7. Add the chopped tomatoes to the soup pot with onions, season with salt and pepper, and cook for 5 minutes.
  8. Turn the heat to high, add the vegetable broth, and bring to a boil.
  9. Turn the heat to low and simmer for 30 minutes.
  10. Use an immersion blender (or regular blender – careful, it’s hot!) and puree the soup until smooth.
  11. Return the soup to the pot, add the heavy cream and simmer over low heat for about 15 minutes.
  12. If the soup is too thin, simmer for about 10 more minutes until slightly thickened. Taste and adjust the seasoning, adding more salt and pepper if needed.
  13. Serve into bowls, adding croutons, Parmesan cheese, and fresh basil on top if preferred.

How to serve Fresh Tomato Soup with Roma Tomatoes

Serve hot in bowls and top with croutons, grated Parmesan cheese, or fresh basil for a garnish. Pair it with a slice of crusty bread to soak up every last drop.

How to store Fresh Tomato Soup with Roma Tomatoes

If you have leftover soup, let it cool completely before transferring it to an airtight container. Store it in the refrigerator for up to 4 days. If you want to keep it longer, freeze it in portions for up to 3 months. To reheat, thaw it in the fridge overnight and warm it on the stove.

Tips to make Fresh Tomato Soup with Roma Tomatoes

  • Use ripe tomatoes for the best flavor.
  • Adjust the seasoning to your taste; more salt or pepper can enhance the flavor.
  • For extra creaminess, add more heavy cream or a dollop of sour cream when serving.

Variation

For a twist, add fresh basil or other herbs like thyme or oregano while simmering to infuse extra flavor. You can also add a pinch of red pepper flakes for some heat.

FAQ SECTION

1. Can I use canned tomatoes instead of fresh?
Yes, you can use canned tomatoes. Just skip the blanching step and use about 2 cans of whole or diced tomatoes instead.

2. Is it possible to make this vegan?
Absolutely! Simply omit the heavy cream or substitute it with coconut cream or a non-dairy creamer.

3. Can I add other vegetables?
Certainly! Carrots, bell peppers, or zucchini can be added for more nutrition and flavor. Just chop them and sauté with the onions and garlic before adding the tomatoes.


[tasty-recipe id=”3330″]

Fresh Tomato Soup with Roma Tomatoes

A comforting and delicious fresh tomato soup made with ripe roma tomatoes, perfect for warm summer days and family gatherings.

Main Ingredients

  • 3 pounds roma tomatoes (Use ripe tomatoes for the best flavor.)
  • 2 tablespoons olive oil
  • 2 medium onions, thinly sliced
  • 2 cloves garlic, minced
  • to taste Salt (Adjust the seasoning to your taste.)
  • to taste Fresh ground black pepper (Adjust the seasoning to your taste.)
  • 4 cups vegetable broth
  • 1/2 cup heavy cream (For extra creaminess, add more heavy cream or a dollop of sour cream when serving.)

Preparation

  1. Bring a large pot of water to a boil over high heat. Cut a small X in the stem end of each tomato.
  2. Drop the tomatoes into the boiling water and blanch them for about 1 minute.
  3. Using a slotted spoon, transfer them to a pot of cold water to cool.
  4. When cool enough to handle, remove and discard the skin from the tomatoes, remove the core, and coarsely chop the flesh.

Cooking

  1. In a large soup pot over medium-high heat, warm the olive oil.
  2. Add onions and garlic and cook until onions are translucent and garlic is fragrant, about 5 minutes.
  3. Add the chopped tomatoes to the soup pot with onions, season with salt and pepper, and cook for 5 minutes.
  4. Turn the heat to high, add the vegetable broth, and bring to a boil.
  5. Turn the heat to low and simmer for 30 minutes.
  6. Use an immersion blender (or regular blender – careful, it’s hot!) and puree the soup until smooth.
  7. Return the soup to the pot, add the heavy cream and simmer over low heat for about 15 minutes.
  8. If the soup is too thin, simmer for about 10 more minutes until slightly thickened. Taste and adjust the seasoning, adding more salt and pepper if needed.

Serving

  1. Serve hot in bowls and top with croutons, grated Parmesan cheese, or fresh basil for a garnish. Pair it with a slice of crusty bread to soak up every last drop.

If you have leftover soup, let it cool completely before transferring it to an airtight container. Store it in the refrigerator for up to 4 days. If you want to keep it longer, freeze it in portions for up to 3 months. To reheat, thaw it in the fridge overnight and warm it on the stove.

Appetizer, Soup
American
Comfort Food, easy soup recipe, Fresh Tomatoes, Healthy Recipe, Tomato Soup

Arugula Citrus Salad

Fresh Arugula Citrus Salad with citrus fruits and a light dressing.

Arugula Citrus Salad is bright, fresh, and full of bite. The peppery arugula pairs with sweet citrus and a light dressing, and the salad feels fancy but is very easy to make. This Arugula Citrus Salad is a crowd-pleaser, with juicy orange slices, thin red onion, and a simple lemon vinaigrette that brings the whole dish to life. If you like simple fresh salads like Apple Broccoli Salad, you will enjoy this one too. Give it a try, and get ready to smile at how good simple things taste.

How to prepare Arugula Citrus Salad

Ingredients

  • 4 cups fresh arugula, washed and dried
  • 2 large oranges, peeled and sliced into rounds or segments
  • 1 small red onion, thinly sliced
  • 1/4 cup toasted walnuts or almonds, chopped
  • 1/4 cup crumbled feta or goat cheese, optional
  • 2 tablespoons olive oil
  • 1 tablespoon fresh lemon juice
  • 1 teaspoon honey or maple syrup
  • Salt and black pepper to taste

Directions

  1. Make the dressing, whisk olive oil, lemon juice, honey, salt, and pepper in a small bowl until mixed well. Taste and adjust salt or honey, keep it simple.
  2. Arrange arugula on a wide platter or in a bowl, spread it out so leaves sit flat.
  3. Place the orange slices over the arugula, tuck thin red onion slices around the oranges.
  4. Sprinkle the toasted nuts and cheese over the salad, add a little black pepper on top.
  5. Drizzle the dressing over the salad just before serving, toss lightly so the leaves get a light coat, do not overdress.

Arugula Citrus Salad

Why You’ll Love Arugula Citrus Salad

  • Fast to make, you can finish in about 10 to 15 minutes.
  • Flavor contrast, peppery arugula, sweet citrus, tangy lemon dressing mix well.
  • Light and healthy, it works as a side or a starter, perfect for warm days.
  • Easy to change, swap nuts, cheese, or citrus for what you have.

Tips for success

  • Dry the arugula well, wet leaves make the dressing slide off and the salad soggy.
  • Use ripe but firm oranges, they slice cleanly and stay juicy.
  • Toast nuts in a dry pan for a few minutes, they get more flavor and crunch.
  • Add dressing just before serving to keep leaves crisp.
  • Taste the dressing, add more lemon or honey little by little so it stays balanced.

Serving Suggestions

  • Serve with grilled chicken or fish for a light main meal.
  • Add avocado or sliced cucumber to bulk the salad for lunch.
  • Pair with crusty bread or a simple pasta dish for a fuller plate.
  • Great at parties, put the dressing on the side so guests can add what they like.

Arugula Citrus Salad

FAQs

Q: Can I use store-bought dressing?

A: Yes, a simple lemon or citrus vinaigrette from the store works, just choose one not too sweet, and add a splash of fresh lemon if you can.

Q: How long will this salad stay fresh?

A: It is best eaten right away. If you must store it, keep dressing separate and refrigerate up to one day, but leaves will lose some crispness.

Q: Can I use other greens instead of arugula?

A: Yes, baby spinach or mixed greens work well, but you will lose the peppery bite that arugula gives.

Q: Are there good citrus alternatives?

A: Try grapefruit, blood orange, or a mix of citrus for more color and layered flavor.

Conclusion

This Arugula Citrus Salad is fresh, simple, and full of bright flavors, and it makes a great side or light main. For another quick citrus and arugula idea with clear steps, see this take on a citrus salad for extra inspiration, 15-Minute Refreshing Citrus Salad with Arugula – Our Salty Kitchen. Enjoy making it, and have fun sharing it with friends or family.

Arugula Citrus Salad

A bright, fresh salad featuring peppery arugula, sweet citrus, and a light lemon vinaigrette. Perfect for warm days and easy to make!

Salad Base

  • 4 cups fresh arugula, washed and dried
  • 2 large oranges, peeled and sliced into rounds or segments (Use ripe but firm oranges for better texture.)
  • 1 small red onion, thinly sliced
  • 1/4 cup toasted walnuts or almonds, chopped (Toast nuts in a dry pan for extra flavor and crunch.)
  • 1/4 cup crumbled feta or goat cheese, optional (This is optional but adds a nice creaminess.)

Dressing

  • 2 tablespoons olive oil
  • 1 tablespoon fresh lemon juice (Adjust the amount to taste.)
  • 1 teaspoon honey or maple syrup (Use to balance the acidity.)
  • to taste Salt and black pepper (Add to taste.)

Preparation

  1. In a small bowl, whisk together olive oil, lemon juice, honey, salt, and pepper until well mixed. Taste and adjust seasoning if needed.
  2. Arrange the arugula on a wide platter or in a bowl, spreading it out so leaves sit flat.
  3. Place the orange slices over the arugula, tucking thin red onion slices around the oranges.
  4. Sprinkle the toasted nuts and cheese over the salad, adding a little black pepper on top.
  5. Drizzle the dressing over the salad just before serving, toss lightly to coat the leaves, but do not overdress.

For best results, dry the arugula thoroughly and add the dressing just before serving to keep the leaves crisp.

Salad, Side Dish
American
Arugula Salad, Citrus Salad, Fresh Salad, Healthy Salad, Quick Salad

Santa Fe Salad

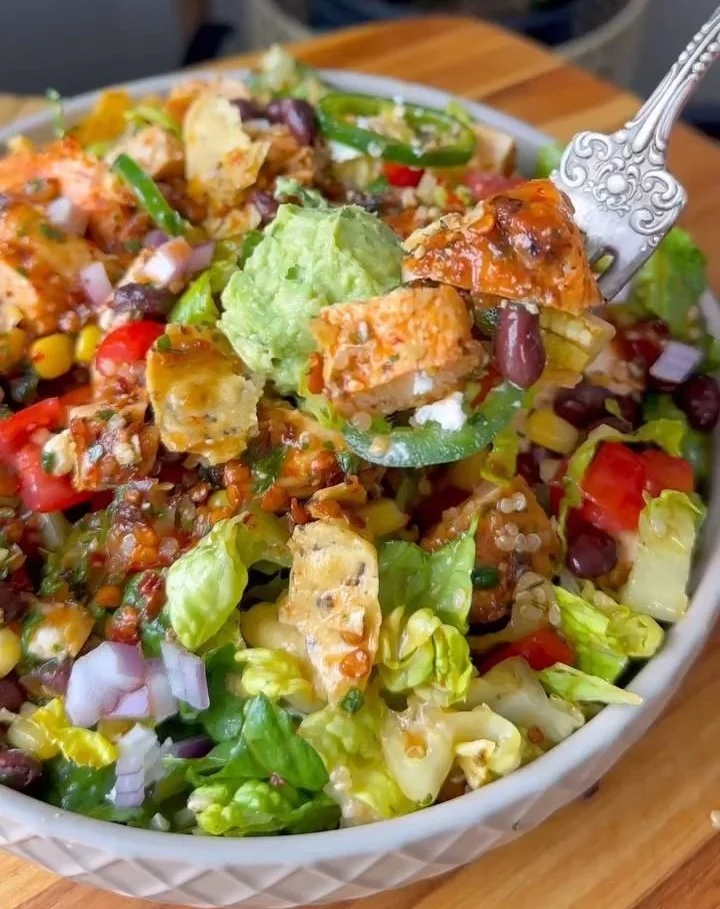
Colorful Santa Fe Salad with fresh ingredients and vibrant flavors

Santa Fe Salad feels bright, fresh, and a little spicy. It mixes crunchy greens, creamy avocado, sweet corn, and smoky spices. This featured Santa Fe Salad is a crowd-pleaser. It hits salty, tangy, and fresh notes in each bite. If you like simple, bold salads, try my chickpea cucumber feta salad for another easy meal that uses similar fresh flavors. Get ready to toss this together and enjoy a lively, colorful plate that makes weeknight dinners fun.

How to prepare Santa Fe Salad

Ingredients

  • Romaine lettuce or mixed greens, washed and chopped
  • Cooked chicken breast, sliced, or black beans for a vegetarian option
  • Canned black beans, drained and rinsed
  • Corn, fresh or thawed frozen
  • Cherry tomatoes, halved
  • Avocado, diced
  • Red onion or green onion, thin sliced
  • Shredded cheddar or pepper jack cheese
  • Tortilla strips or crushed tortilla chips
  • Fresh cilantro, chopped
  • Lime wedges

Simple dressing

  • Olive oil
  • Fresh lime juice
  • Cumin
  • Chili powder
  • Salt and pepper
  • A little honey or plain yogurt, optional

Directions

  1. Season the chicken with salt, pepper, cumin, and chili powder, then grill or pan sear until done. Let rest, then slice. For a vegetarian salad, skip the chicken and use extra black beans.
  2. Warm the corn in a pan or microwave, if you like it warm. Let it cool a bit.
  3. In a small bowl, whisk olive oil, lime juice, cumin, chili powder, salt, and a touch of honey or yogurt to make a bright dressing.
  4. In a large bowl, add lettuce, black beans, corn, tomatoes, onion, avocado, and cheese.
  5. Toss with a few tablespoons of dressing until the salad looks coated. Add more dressing if you like.
  6. Top with sliced chicken, tortilla strips, and chopped cilantro.
  7. Serve with lime wedges on the side.

Santa Fe Salad

Why You’ll Love Santa Fe Salad

  • It mixes warm and cool textures, like grilled chicken and fresh avocado.
  • The flavors are bold, with cumin, lime, and cilantro that make a southwest salad taste.
  • It is easy to make ahead, the dressing keeps the salad bright.
  • You can make it vegetarian with black beans and still feel full.
  • It looks great on the table, with bright corn, tomatoes, and greens.

Tips for success

  • Dry the lettuce well, so the dressing does not make it soggy.
  • Add avocado last, just before serving, to keep it green.
  • Warm the chicken or corn slightly for a nice contrast with cool greens.
  • Keep tortilla strips separate until you serve, so they stay crunchy.
  • Taste the dressing and adjust lime or salt, until it feels bright and lively.

Serving Suggestions

  • Serve with warm corn tortillas or crusty bread.
  • Pair with a chilled lager or iced tea for a casual meal.
  • Add a side of salsa or pickled jalapeños for more heat.
  • Make bowls for lunches, adding rice or quinoa for more bulk.

Santa Fe Salad

FAQs

Q: Can I make this salad ahead of time?

A: Yes, you can chop ingredients and make the dressing up to a day ahead. Keep avocado and tortilla strips separate until you serve.

Q: What can I use instead of chicken?

A: Use black beans, grilled shrimp, or tofu for a great swap.

Q: How do I keep the salad from getting soggy?

A: Dress the salad just before serving and keep crunchy toppings separate until the end.

Q: Is this salad spicy?

A: It can be mild to medium. Add more chili powder or jalapeño if you want more heat.

Conclusion

For another take on a lively southwest-style salad, check this recipe for inspiration, Santa Fe Salad – Nourished by Nic.

Santa Fe Salad

A bright and fresh salad featuring crunchy greens, creamy avocado, sweet corn, and smoky spices, perfect for a lively dinner.

Salad Ingredients

  • 1 head Romaine lettuce or mixed greens, washed and chopped (Choose your preferred green.)
  • 1 cup Cooked chicken breast, sliced, or black beans for a vegetarian option (Chicken or black beans can be used based on dietary preference.)
  • 1 can Canned black beans, drained and rinsed (Optional for additional protein.)
  • 1 cup Corn, fresh or thawed frozen (Can be warmed if desired.)
  • 1 cup Cherry tomatoes, halved (Gives sweetness and color.)
  • 1 medium Avocado, diced (Add just before serving to prevent browning.)
  • 1/4 cup Red onion or green onion, thin sliced (For a mild onion flavor.)
  • 1 cup Shredded cheddar or pepper jack cheese (Choose based on your spice preference.)
  • 1 cup Tortilla strips or crushed tortilla chips (Add crunch to the salad.)
  • 1/4 cup Fresh cilantro, chopped (Adds freshness.)
  • 2 pieces Lime wedges (For serving.)

Dressing Ingredients

  • 1/4 cup Olive oil (Base for the dressing.)
  • 2 tablespoons Fresh lime juice (Adjust to taste.)
  • 1 teaspoon Cumin (Adds warm flavor.)
  • 1 teaspoon Chili powder (For some spice.)
  • 1/2 teaspoon Salt (Enhances taste.)
  • 1/2 teaspoon Pepper (To taste.)
  • 1 teaspoon Honey or plain yogurt, optional (For a touch of sweetness.)

Preparation

  1. Season the chicken with salt, pepper, cumin, and chili powder, then grill or pan sear until done. Let rest, then slice.
  2. For a vegetarian salad, skip the chicken and use extra black beans.
  3. Warm the corn in a pan or microwave, if you like it warm. Let it cool a bit.

Make the Dressing

  1. In a small bowl, whisk together olive oil, lime juice, cumin, chili powder, salt, and a touch of honey or yogurt to make a bright dressing.

Assemble the Salad

  1. In a large bowl, add lettuce, black beans, corn, tomatoes, onion, avocado, and cheese.
  2. Toss with a few tablespoons of dressing until the salad looks coated. Add more dressing if you like.
  3. Top with sliced chicken, tortilla strips, and chopped cilantro.
  4. Serve with lime wedges on the side.

Dry the lettuce well to prevent the dressing from making it soggy. Add avocado last to keep it green. Keep tortilla strips separate until serving for crunch. Adjust lime juice and salt to taste.

Main Course, Salad
Southwestern
Easy Recipe, Healthy Salad, Meal Prep, Santa Fe Salad, southwest flavors

Apple Broccoli Salad

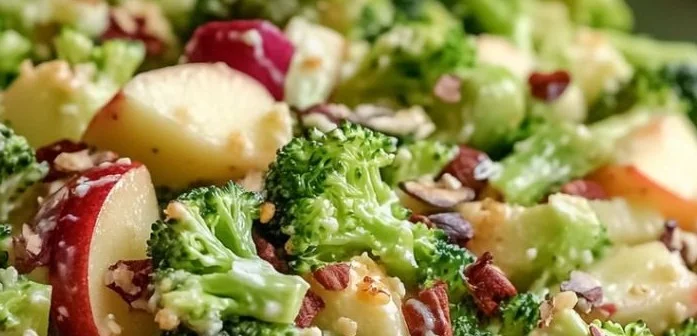
Fresh Apple Broccoli Salad with crunchy apples and tender broccoli

Apple Broccoli Salad is a fresh, crunchy dish that many people love. It mixes crisp broccoli, sweet apple, and a creamy dressing for a big mix of flavors. This salad works well for weeknight meals, potlucks, and summer cookouts. It is a crowd-pleaser, easy to make, and full of bright taste, with a balance of sweet and tangy notes.

If you like apple in salads, you might also enjoy an apple cobbler recipe for a warm dessert to follow this cool salad.

How to prepare Apple Broccoli Salad

  1. Wash and cut one head of broccoli into small florets. Trim the stalks and slice thin if you like them.
  2. Core and chop two medium apples into small bite-sized pieces. Keep the skin on for color and crunch.
  3. Thinly slice a small red onion or green onions, as you prefer.
  4. In a large bowl, mix broccoli, apples, and onion. Add 1/2 cup dried cranberries and 1/2 cup sunflower seeds or chopped nuts for crunch.
  5. Make the dressing by stirring together 1/2 cup mayonnaise, 2 tablespoons apple cider vinegar, 1 to 2 tablespoons honey, and a pinch of salt and pepper. Taste and adjust the sweetness or tang.
  6. Pour the dressing over the salad and toss to coat evenly. Add 1/2 cup shredded cheddar if you like a cheesy touch.
  7. Let the salad sit in the fridge for at least 30 minutes to let the flavors blend. Stir before serving.

Apple Broccoli Salad

Why You’ll Love Apple Broccoli Salad

You will love this broccoli apple salad because it mixes fresh crunch and sweet apple slices, with a creamy dressing that ties everything together. It is easy to make, stores well, and stays crisp when you use fresh ingredients. The salad is both a healthy side dish and a tasty dish that kids and adults enjoy. It fits many meals, from grilled chicken dinners to picnic spreads.

Tips for success

  • Cut the broccoli into small, even pieces, so every bite has a good mix of broccoli and apple.
  • Toss the cut apples in a little lemon juice if you want to slow browning and keep them bright.
  • Adjust the dressing, use yogurt or light mayo for a lighter version.
  • Add bacon bits for a smoky flavor, or keep it vegetarian with extra nuts and seeds.
  • Let the salad rest in the fridge at least 30 minutes, so flavors blend and the salad becomes more tasty.

Serving Suggestions

  • Serve this salad chilled as a side with grilled meats, sandwiches, or roasted chicken.
  • Put it on top of a bed of mixed greens for a larger salad meal.
  • Pack it for lunch; it keeps well in a sealed container for a day.
  • Bring it to a potluck, it pairs well with pasta salads and cold sides, and most guests enjoy the crisp, sweet mix.

Apple Broccoli Salad

FAQs

Q: How long will this salad stay fresh?

A: Keep it in an airtight container in the fridge, it will stay fresh for 3 to 4 days. Nuts or seeds may soften over time, so add them just before serving if you want extra crunch.

Q: Can I use frozen broccoli?

A: Fresh broccoli is best for crunch. If you use frozen, thaw and drain well, and the salad will be softer in texture.

Q: Can I make the dressing ahead of time?

A: Yes, make the dressing a day ahead and store it in the fridge. Mix it with the salad when you are ready to serve.

Q: What other fruits work in this salad?

A: Pears work well as a milder, sweet option. Dried cranberries or raisins add a chewy sweet bite.

Conclusion

For a reliable, crisp side that pleases many tastes, try this apple broccoli salad and enjoy the mix of textures and flavors. For another take on apples in salads, see the detailed Broccoli Apple Salad recipe at Cooking Classy which offers more tips and variations.

Apple Broccoli Salad

A fresh, crunchy salad that combines crisp broccoli, sweet apples, and a creamy dressing for a delightful mix of flavors, perfect for any occasion.

Salad Ingredients

  • 1 head broccoli (Cut into small florets)
  • 2 medium apples (Cored and chopped into small pieces, skin on)
  • 1 small red onion or green onions (Thinly sliced)
  • 1/2 cup dried cranberries
  • 1/2 cup sunflower seeds or chopped nuts (For added crunch)
  • 1/2 cup shredded cheddar (Optional for added flavor)

Dressing Ingredients

  • 1/2 cup mayonnaise
  • 2 tablespoons apple cider vinegar
  • 1-2 tablespoons honey (Adjust to taste)
  • 1 pinch salt
  • 1 pinch pepper

Preparation

  1. Wash and cut one head of broccoli into small florets. Trim the stalks and slice thin if desired.
  2. Core and chop two medium apples into small bite-sized pieces, keeping the skin on for color and crunch.
  3. Thinly slice a small red onion or green onions, as preferred.
  4. In a large bowl, mix broccoli, apples, and onion.
  5. Add 1/2 cup dried cranberries and 1/2 cup sunflower seeds or chopped nuts for crunch.

Make the Dressing

  1. In a separate bowl, stir together 1/2 cup mayonnaise, 2 tablespoons apple cider vinegar, 1 to 2 tablespoons honey, and a pinch of salt and pepper.
  2. Taste and adjust sweetness or tang as needed.

Combine Salad

  1. Pour the dressing over the salad and toss to coat evenly.
  2. Let the salad sit in the fridge for at least 30 minutes before serving to allow flavors to blend.

Toss apples in lemon juice to prevent browning. Use yogurt or light mayo for a lighter dressing version. Add bacon bits for a smoky flavor, or keep it vegetarian with extra nuts and seeds.

Salad, Side Dish
American
Apple Broccoli Salad, Creamy Dressing, Crisp Salad, Fresh Salad, Healthy Side Dish

Spring Roll Salad: 5 Delicious Ways to Elevate It

Colorful Spring Roll Salad with fresh vegetables and herbs, served in a bowl

Spring Roll Salad is a vibrant and delightful dish that brings the fresh flavors of traditional spring rolls to your bowl. This salad combines crispy vegetables, aromatic herbs, and a splash of zesty dressing, making it a favorite among friends and family. It’s the kind of dish that not only looks beautiful but also tastes amazing, hitting all the right notes of crunch and zest. Whether you’re hosting a gathering or preparing a light, healthy meal, this salad is sure to impress. So, let’s dig in and discover some delicious ways to elevate your Spring Roll Salad!

How to Prepare Spring Roll Salad

To make a Spring Roll Salad, you’ll need a mix of fresh ingredients. Gather up some rice noodles, colorful vegetables like bell peppers, carrots, and cucumbers, along with fresh herbs such as mint and cilantro. You can also add protein options like grilled shrimp or tofu for a heartier meal. Start by cooking the rice noodles according to package instructions, then rinse them under cold water. Chop your veggies and herbs, then toss them all together in a large bowl. Drizzle with a tasty dressing made from soy sauce, lime juice, and a pinch of sugar. Mix well, and you have a refreshing Spring Roll Salad that is sure to satisfy!

Spring Roll Salad: 5 Delicious Ways to Elevate It

Why You’ll Love Spring Roll Salad

Spring Roll Salad is not just good for your taste buds, it’s also a feast for your eyes. It’s colorful, fresh, and super easy to customize. You can swap out vegetables or proteins based on what you have or love. Plus, it’s a perfect meal for warm weather or a light lunch. The crunch of the veggies combined with the bright dressing makes every bite refreshing! This dish is healthy and packed with nutrients, making it a meal you can feel good about.

Tips for Success

  1. Use Fresh Ingredients: Fresh, crunchy vegetables like lettuce, carrots, and herbs make a big difference in flavor.
  2. Make Your Own Dressing: Try mixing soy sauce, lime juice, and a hint of sesame oil to elevate your salad’s taste.
  3. Don’t Overcook Noodles: Make sure not to overcook rice noodles; they should be firm to hold up in the salad.
  4. Chill the Ingredients: If possible, chill your veggies and herbs before mixing them for an extra refreshing bite.

Serving Suggestions

Serve your Spring Roll Salad in bowls or on a large platter for sharing. Garnish with extra herbs, sliced chili peppers, or chopped peanuts for added crunch. Pair it with spring rolls for a perfect meal or serve it alongside grilled meats for a heartier option. This salad also works as a fantastic side dish for picnics and barbecues, bringing a fresh twist to any summer spread.

FAQs

Can I make Spring Roll Salad ahead of time?
Yes, you can prep your ingredients ahead of time, but it’s best to add the dressing just before serving to keep the salad fresh and crisp.

What can I substitute for rice noodles?
You can substitute rice noodles with quinoa, soba noodles, or even spiralized vegetables for a gluten-free version.

How long does Spring Roll Salad last in the fridge?
If stored in an airtight container, Spring Roll Salad can last around 2-3 days in the fridge. Just keep in mind that the veggies may lose their crunch over time.

Making this Spring Roll Salad is not only easy but also a fun and tasty way to enjoy your veggies. Gather your ingredients, have fun mixing, and treat yourself to this delightful dish!

Spring Roll Salad

A vibrant and delightful dish that brings the fresh flavors of traditional spring rolls into a healthy salad bowl, combining crispy vegetables, aromatic herbs, and a zesty dressing.

Main Ingredients

  • 2 cups rice noodles (Cook according to package instructions.)
  • 1 cup bell peppers, chopped (Use a mix of colors for more visual appeal.)
  • 1 cup carrots, julienned (Fresh, crunchy carrots enhance flavor.)
  • 1 cup cucumbers, chopped (Can be peeled or unpeeled based on preference.)
  • 1/2 cup fresh mint, chopped (Adds a refreshing flavor.)
  • 1/2 cup fresh cilantro, chopped (Enhances the herbaceous notes.)
  • 1 cup grilled shrimp or tofu (Optional protein addition.)

Dressing

  • 3 tablespoons soy sauce (Provides the main flavor base.)
  • 2 tablespoons lime juice (Adds a tangy zest.)
  • 1 teaspoon sugar (Balances flavors.)

Preparation

  1. Cook the rice noodles according to package instructions, then rinse under cold water.
  2. Chop the bell peppers, carrots, cucumbers, mint, and cilantro.
  3. In a large bowl, combine the cooked rice noodles, chopped vegetables, herbs, and grilled shrimp or tofu (if using).

Dressing and Serving

  1. In a small bowl, whisk together soy sauce, lime juice, and sugar.
  2. Drizzle the dressing over the salad and mix well.
  3. Serve immediately, garnished with extra herbs, sliced chili peppers, or chopped peanuts.

Use fresh ingredients for the best flavor. Make your own dressing to elevate the taste. Don’t overcook the noodles and chill ingredients for extra freshness.

lunch, Salad, Side Dish
Asian, Healthy
Fresh Salad, Healthy Meal, Light Lunch, Spring Roll Salad, Vegetable Salad