Butterfinger Balls

Delicious Butterfinger Balls dessert made with chocolate and peanut butter.

There’s something truly magical about the combination of chocolate and peanut butter that takes us back to our childhood. I still remember the first time I bit into a Butterfinger candy bar; the crunchy, peanut-buttery goodness exploded in my mouth, leaving a lasting impression. Now, imagine transforming that classic candy into bite-sized wonders that you can make at home! Butterfinger Balls bring back those nostalgic flavors in an easy-to-make treat that everyone will love.

Why Make This Recipe

Butterfinger Balls are simple to prepare and require no baking. They are perfect for sharing at family gatherings, potlucks, or holiday parties. Plus, they’re incredibly delicious and satisfying, who doesn’t love the combination of chocolate, peanut butter, and the crunchy goodness of Butterfinger? They are also fun to make with kids, allowing them to get involved in the kitchen and create a tasty treat that they can enjoy.

How to Make Butterfinger Balls

Ingredients:

  • 4 tablespoons of softened butter (equivalent to ½ stick)
  • 1 teaspoon of vanilla extract
  • 8 ounces of chocolate bark or chocolate chips
  • ½ cup of crushed Butterfinger bars
  • 1 cup of powdered sugar
  • 1 cup of peanut butter (avoid using all-natural varieties)
  • ¾ cup of graham cracker crumbs
  • Optional garnishes: more crushed Butterfinger bars, festive sprinkles, or coarse sea salt

Directions:

  1. Ensure all ingredients are ready before you start.
  2. Use a ziplock bag and a rolling pin to crush the Butterfinger bars into fine grounds.
  3. In a mixing bowl, blend the softened butter, peanut butter, powdered sugar, vanilla extract, and graham cracker crumbs until you achieve a smooth mixture.
  4. Roll the dough into walnut-sized pieces and place them on a baking sheet lined with parchment paper.
  5. Melt the chocolate bark or chocolate chips in a double boiler or microwave, stirring often to prevent burning.
  6. Once melted, coat each ball in the chocolate and place them back on the baking sheet.
  7. Refrigerate for about an hour to allow them to set.

How to Serve Butterfinger Balls

Serve Butterfinger Balls chilled or at room temperature. You can place them in a festive bowl or on a decorative platter. For a fun twist, sprinkle some extra crushed Butterfinger bars, colorful sprinkles, or coarse sea salt on top before serving.

How to Store Butterfinger Balls

Store any leftover Butterfinger Balls in an airtight container in the refrigerator. They will stay fresh for up to one week. For longer storage, you can freeze them for up to three months. Just be sure to separate the layers with parchment paper to prevent sticking.

Tips to Make Butterfinger Balls

  • Make sure your butter is softened for easier mixing.
  • Use a good quality chocolate for coating to enhance the flavor of the balls.
  • If the mixture feels too sticky, you can add a little more graham cracker crumbs to help with rolling.
  • Have fun with the toppings! Get creative with different decorations to suit any occasion.

Variation

For a twist on the classic Butterfinger Balls, try adding a pinch of sea salt to the chocolate coating. You can also mix in other crushed candies or nuts for added flavor and texture.

FAQ SECTION

1. Can I use natural peanut butter for this recipe?
No, it’s best to avoid all-natural peanut butter as it can have a different texture and consistency that affects the dough.

2. How can I make these gluten-free?
You can use gluten-free graham crackers or crushed gluten-free cookies as a substitute for graham cracker crumbs.

3. Can I make Butterfinger Balls ahead of time?
Absolutely! You can make them a few days in advance and store them in the fridge or freezer until you’re ready to serve them.

With this easy recipe, you can impress family and friends with a delightful treat that’s sure to bring back sweet memories! Enjoy making and sharing your Butterfinger Balls.

[tasty-recipe id=”3297″]

Butterfinger Balls

A delightful no-bake treat that combines chocolate and peanut butter in bite-sized pieces, reminiscent of the classic Butterfinger candy bar.

Main Ingredients

  • 4 tablespoons softened butter (½ stick)
  • 1 teaspoon vanilla extract
  • 8 ounces chocolate bark or chocolate chips
  • ½ cup crushed Butterfinger bars
  • 1 cup powdered sugar
  • 1 cup peanut butter (Avoid using all-natural varieties)
  • ¾ cup graham cracker crumbs

Optional Garnishes

  • more crushed Butterfinger bars (For topping)
  • festive sprinkles (For topping)
  • coarse sea salt (For topping)

Preparation

  1. Ensure all ingredients are ready before you start.
  2. Use a ziplock bag and a rolling pin to crush the Butterfinger bars into fine grounds.
  3. In a mixing bowl, blend the softened butter, peanut butter, powdered sugar, vanilla extract, and graham cracker crumbs until you achieve a smooth mixture.
  4. Roll the dough into walnut-sized pieces and place them on a baking sheet lined with parchment paper.

Coating

  1. Melt the chocolate bark or chocolate chips in a double boiler or microwave, stirring often to prevent burning.
  2. Once melted, coat each ball in the chocolate and place them back on the baking sheet.

Setting

  1. Refrigerate for about an hour to allow them to set.

Serve chilled or at room temperature. Store any leftovers in an airtight container in the refrigerator for up to one week, or freeze for up to three months. Use parchment paper to separate layers when freezing. Tips include ensuring butter is softened for easier mixing and using good quality chocolate for coating.
Dessert, Snack
American
Butterfinger Balls, Chocolate and Peanut Butter, Easy Desserts, Kid-Friendly Treats, No-Bake Treats

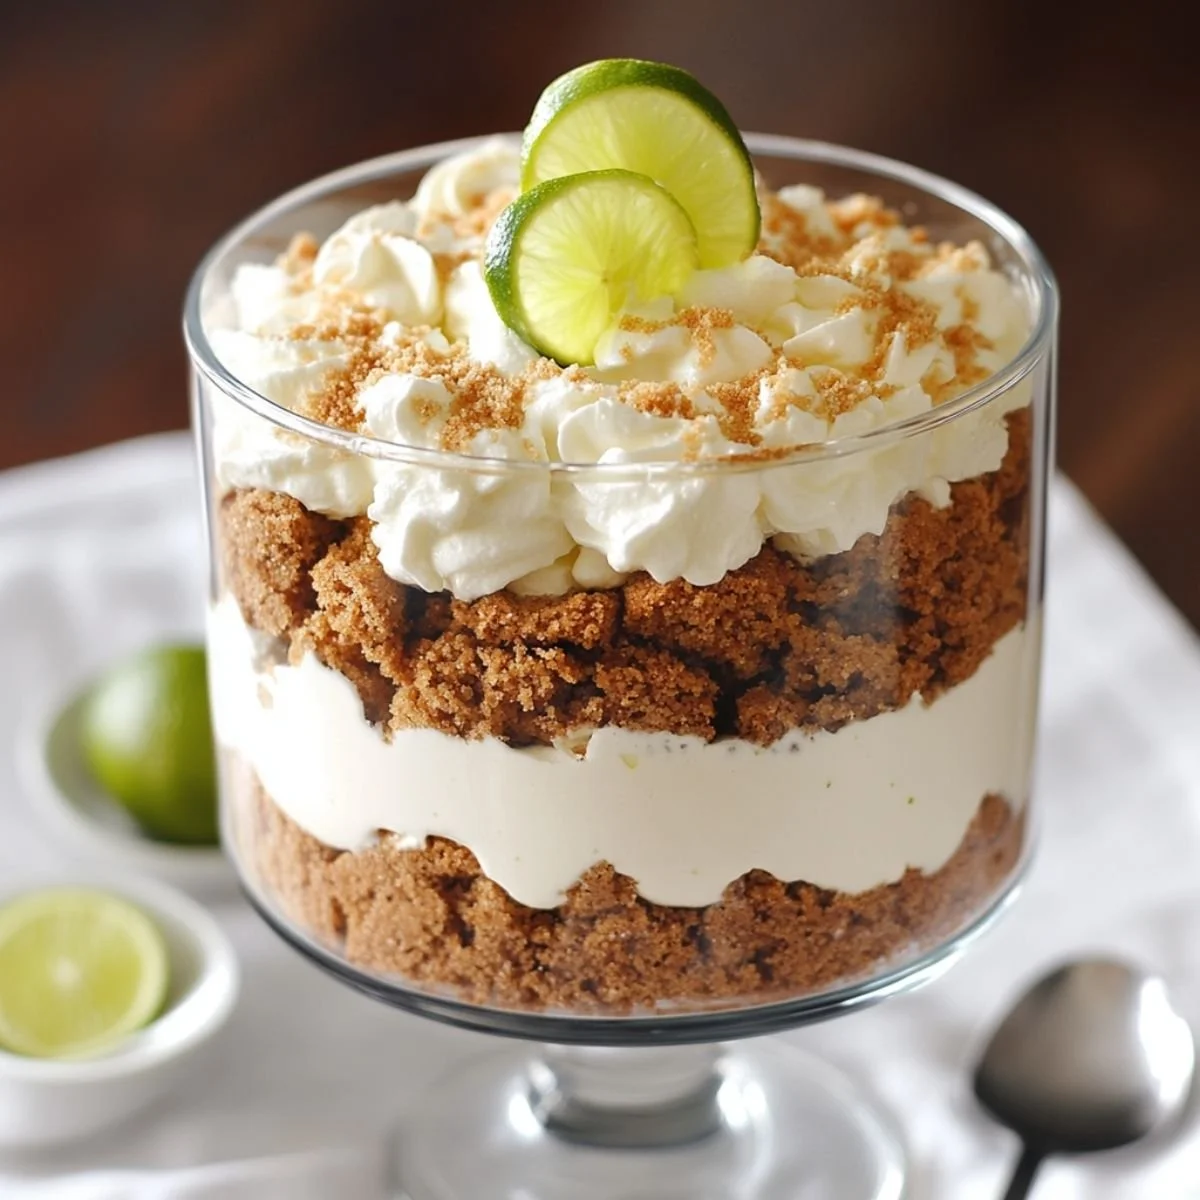
Key Lime Pie Trifle

Delicious Key Lime Pie Trifle dessert with layers of lime cream and graham crackers

Every summer, my family and I gather for a big barbecue. As the sun begins to set, we always look forward to one treat that everyone loves Key Lime Pie Trifle. This delightful dessert brings the zing of key lime combined with the sweetness of whipped cream and cake, creating a layered experience that’s both refreshing and satisfying. There’s something special about sharing a dessert that not only tastes good but also tells a story of sunny days and family fun.

Why Make This Recipe

This Key Lime Pie Trifle is perfect for any gathering. It’s easy to make, and you can prepare it in advance, letting the flavors meld and improve over time. The creamy, tart filling pairs wonderfully with the crunchy graham cracker layers and airy angel food cake. Not only is it delicious, but it also looks stunning when served, making it a fantastic centerpiece for your table. Plus, it captures the essence of a classic key lime pie in a fun and shareable way!

How to Make Key Lime Pie Trifle

Ingredients:

  • 13 full graham crackers, crushed finely
  • 6 tablespoons of brown sugar
  • 1 teaspoon of cinnamon
  • 8 tablespoons of salted butter, melted
  • 2 cups of heavy cream
  • 8 ounces of cream cheese, softened
  • 2 cans (14 oz each) of sweetened condensed milk
  • ¾ cup of key lime juice
  • 1 tablespoon of key lime zest
  • 16 ounces of angel food cake, diced into cubes
  • Whipped cream to top

Directions:

  1. Begin by preparing the graham cracker crumble. In a medium bowl, mix together the crushed graham crackers, brown sugar, and cinnamon. Pour in the melted butter and stir until everything looks like wet sand and smells wonderfully sweet and buttery.
  2. Next, make the key lime cream filling. Beat the softened cream cheese until it is smooth and creamy. Gradually add in the sweetened condensed milk, mixing until everything is smooth. Slowly pour in the key lime juice and zest, enjoying the fresh citrusy scent. Then, whip the heavy cream until soft peaks form and gently fold it into the cream cheese mixture until light and fluffy.
  3. To assemble your trifle, start with a layer of the graham cracker crumble in a serving dish. Add a layer of angel food cake cubes, then spoon on some of the key lime cream filling. Repeat these layers, pressing down gently, and finish with a final layer of cream filling on top.
  4. For a beautiful presentation, top the trifle with whipped cream and a sprinkle of graham cracker crumbs. You can also add lime slices or some zest for extra flair and flavor. The final dessert is both pretty and delicious, capturing the spirit of a classic key lime pie.

How to Serve Key Lime Pie Trifle

Serve the Key Lime Pie Trifle chilled, allowing it to be refreshing on warm days. You can use individual cups or a large bowl for sharing. Just make sure to have spoons handy to scoop out the delicious layers!

How to Store Key Lime Pie Trifle

Store any leftover trifle in the refrigerator. Cover it well with plastic wrap or a lid to keep it fresh. It should stay good for up to 2 to 3 days, but it’s always best enjoyed fresh.

Tips to Make Key Lime Pie Trifle

  • For an easier assembly, consider pre-crumbing the graham crackers and cubing the angel food cake beforehand.
  • Make sure your cream cheese is at room temperature to avoid lumps in the filling.
  • Use fresh key lime juice for the best flavor, but bottled juice works in a pinch.

Variation

You can easily switch up the ingredients! Try using lemon juice instead of key lime for a different citrus flavor. You can also experiment with different cake bases, like pound cake or a chocolate cake for a unique twist.

FAQ SECTION

1. Can I use a different type of cake for this trifle?
Yes, you can use a different type of cake! Pound cake or sponge cake also works well.

2. How long does this trifle last in the fridge?
The trifle can last for about 2 to 3 days in the refrigerator if stored properly.

3. Can I make this trifle vegan?
To make a vegan version, use coconut cream instead of heavy cream, and a non-dairy cream cheese substitute. Make sure to find a vegan graham cracker for the crumble.

[tasty-recipe id=”3285″]

Key Lime Pie Trifle

A refreshing layered dessert combining the zing of key lime with whipped cream, graham crackers, and angel food cake, perfect for summer gatherings.

Graham Cracker Crumble

  • 13 full full graham crackers, crushed finely
  • 6 tablespoons brown sugar
  • 1 teaspoon cinnamon
  • 8 tablespoons salted butter, melted

Key Lime Cream Filling

  • 2 cups heavy cream
  • 8 ounces cream cheese, softened (Make sure it’s at room temperature.)
  • 2 cans (14 oz each) sweetened condensed milk
  • ¾ cup key lime juice (Use fresh for best flavor.)
  • 1 tablespoon key lime zest

Assembly Ingredients

  • 16 ounces angel food cake, diced into cubes
  • to taste Whipped cream to top (Can add lime slices or more zest for garnish.)

Prepare Graham Cracker Crumble

  1. In a medium bowl, mix together the crushed graham crackers, brown sugar, and cinnamon.
  2. Pour in the melted butter and stir until everything looks like wet sand.

Make Key Lime Cream Filling

  1. Beat the softened cream cheese until smooth.
  2. Gradually add in the sweetened condensed milk, mixing until smooth.
  3. Slowly pour in the key lime juice and zest.
  4. Whip the heavy cream until soft peaks form and gently fold into the cream cheese mixture.

Assemble the Trifle

  1. Start with a layer of the graham cracker crumble in a serving dish.
  2. Add a layer of angel food cake cubes, then spoon on some of the key lime cream filling.
  3. Repeat these layers, pressing down gently, and finish with a final layer of cream filling on top.

Serve

  1. Top with whipped cream and a sprinkle of graham cracker crumbs.
  2. Serve chilled. You can use individual cups or a large bowl for sharing.

Store leftovers in the refrigerator, covered for 2 to 3 days. Use fresh ingredients for best flavor. Consider pre-crumbing graham crackers and cubing angel food cake beforehand for easier assembly.

Dessert
American
Family Gatherings, Key Lime Pie Trifle, Layered Dessert, No-Bake Dessert, Summer Dessert


Key Lime Pie Trifle

A refreshing layered dessert combining the zing of key lime with whipped cream, graham crackers, and angel food cake, perfect for summer gatherings.

Graham Cracker Crumble

  • 13 full full graham crackers, crushed finely
  • 6 tablespoons brown sugar
  • 1 teaspoon cinnamon
  • 8 tablespoons salted butter, melted

Key Lime Cream Filling

  • 2 cups heavy cream
  • 8 ounces cream cheese, softened (Make sure it’s at room temperature.)
  • 2 cans sweetened condensed milk (14 oz each)
  • ¾ cup key lime juice (Use fresh for best flavor.)
  • 1 tablespoon key lime zest

Assembly Ingredients

  • 16 ounces angel food cake, diced into cubes
  • to taste Whipped cream to top (Can add lime slices or more zest for garnish.)

Prepare Graham Cracker Crumble

  1. In a medium bowl, mix together the crushed graham crackers, brown sugar, and cinnamon.
  2. Pour in the melted butter and stir until everything looks like wet sand.

Make Key Lime Cream Filling

  1. Beat the softened cream cheese until smooth.
  2. Gradually add in the sweetened condensed milk, mixing until smooth.
  3. Slowly pour in the key lime juice and zest.
  4. Whip the heavy cream until soft peaks form and gently fold into the cream cheese mixture.

Assemble the Trifle

  1. Start with a layer of the graham cracker crumble in a serving dish.
  2. Add a layer of angel food cake cubes, then spoon on some of the key lime cream filling.
  3. Repeat these layers, pressing down gently, and finish with a final layer of cream filling on top.

Serve

  1. Top with whipped cream and a sprinkle of graham cracker crumbs.
  2. Serve chilled. You can use individual cups or a large bowl for sharing.

Store leftovers in the refrigerator, covered for 2 to 3 days. Use fresh ingredients for best flavor. Consider pre-crumbing graham crackers and cubing angel food cake beforehand for easier assembly.

Dessert
American
Dessert, Key Lime Pie, Layered Dessert, Summer, Trifle

Easy Apple Cinnamon Cake

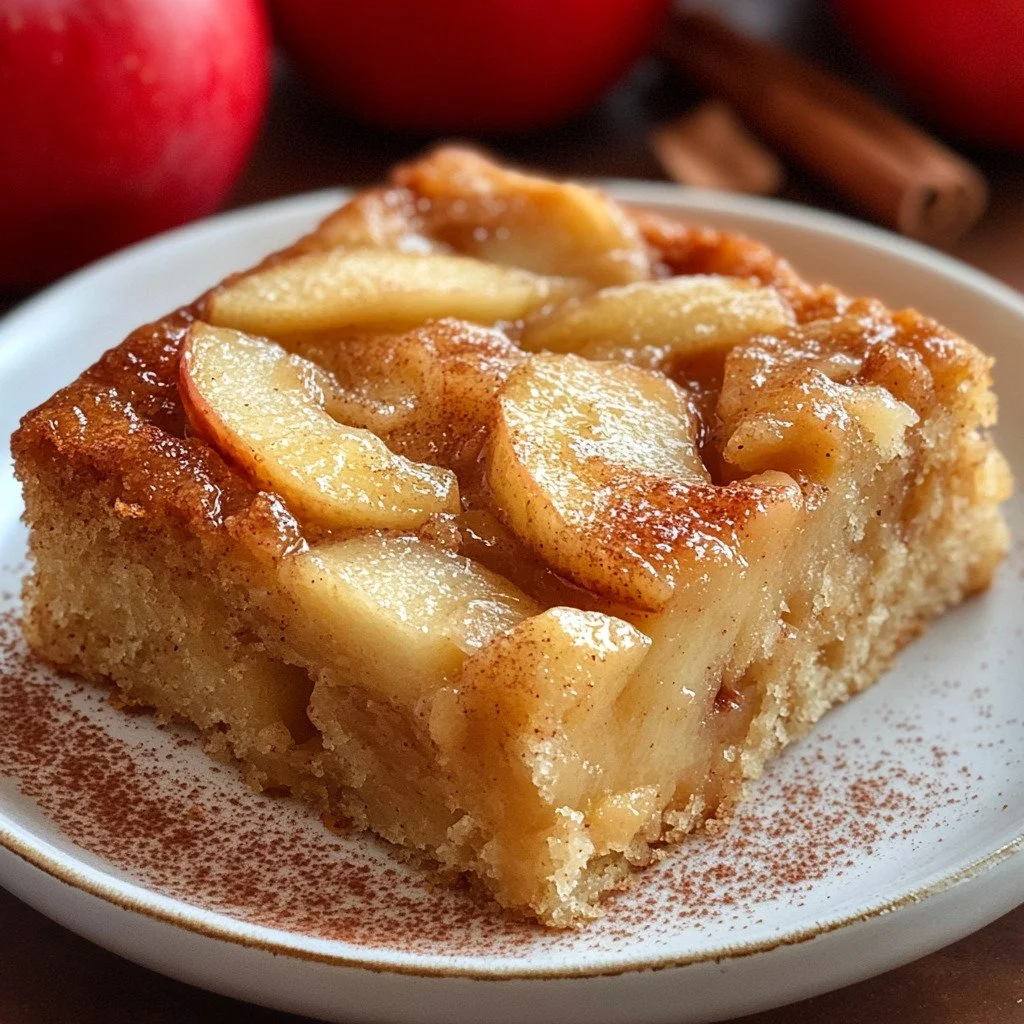
Slice of easy apple cinnamon sheet cake with a sprinkle of cinnamon

Apple Cinnamon Cake is one of those desserts that just feels like a warm hug on a chilly day. I wasn’t even planning to bake, but after a trip to the orchard left me with way too many apples and zero self-control, I figured, why not? I grabbed some cinnamon, turned on a playlist, and let the kitchen do its thing.

About halfway through, the smell hit me like fall just moved in and made itself comfortable. That cozy mix of sweet apples and warm spices? Unreal. One bite of this cake and I was hooked. It’s soft, moist, just the right amount of sweet, and honestly. I may or may not have eaten it for breakfast the next day (no regrets).

Why Make This Recipe

There’s nothing quite like the comforting aroma of apples and cinnamon baking in the oven. This Easy Apple Cinnamon Sheet Cake brings the joy of home baking without a lot of fuss. Whether you’re hosting a gathering, celebrating a birthday, or simply treating yourself on a cozy afternoon, this cake will satisfy your sweet tooth and bring smiles all around. It’s moist, flavorful, and perfect for any occasion.

How to Make Easy Apple Cinnamon Cake

Ingredients :

  • 2 cups all-purpose flour
  • 1 tsp baking soda
  • 1 tsp baking powder
  • ½ tsp salt
  • 1½ tsp ground cinnamon
  • ¼ tsp ground nutmeg
  • 1 cup brown sugar
  • ½ cup white sugar
  • ¾ cup vegetable oil
  • 2 large eggs
  • 2 tsp vanilla extract
  • 2½ cups chopped apples, peeled and cored

Directions :

  1. Preheat your oven to 350°F (175°C). Grease a 9×13″ pan.
  2. In a large bowl, whisk together the flour, baking soda, baking powder, salt, cinnamon, and nutmeg.
  3. In another bowl, whisk together the eggs, vegetable oil, brown sugar, white sugar, and vanilla extract until well combined.
  4. Pour the wet ingredients into the dry ingredients and mix until just combined. Be careful not to overmix.
  5. Gently fold in the chopped apples.
  6. Pour the batter into the prepared pan and smooth the top with a spatula.
  7. Bake for 30–35 minutes or until the cake is golden and set. A toothpick inserted in the center should come out clean.
  8. Allow the cake to cool before slicing it into squares.

How to Serve Easy Apple Cinnamon Cake

This cake is delicious on its own but can be enhanced with a dollop of whipped cream or a scoop of vanilla ice cream. You can also sprinkle powdered sugar on top for a lovely finish. Serve it warm for a delightful experience or at room temperature for a more casual treat. It’s perfect for an afternoon snack or dessert after a family dinner.

How to Store Easy Apple Cinnamon Sheet Cake

To keep your cake fresh, store it in an airtight container at room temperature for up to three days. If you want to keep it longer, you can refrigerate it for up to one week. Make sure to cover the cake to prevent it from drying out. You can also freeze the cake; just wrap it well in plastic wrap and then in aluminum foil to protect it from freezer burn. Thaw it overnight in the refrigerator before serving.

Tips to Make Easy Apple Cinnamon Sheet Cake

  1. Choose the Right Apples: For best results, use a mix of sweet and tart apples. Varieties like Granny Smith and Honeycrisp work well together.
  2. Don’t Skip the Spices: The cinnamon and nutmeg add depth to the flavor, so don’t skip or reduce them.
  3. Measure Accurately: For a perfect cake, make sure you measure your ingredients accurately. Use a kitchen scale if you have one.
  4. Let it Cool: Allow the cake to cool completely in the pan before cutting to ensure clean and neat slices.

Variation

You can easily adapt this recipe by adding nuts like walnuts or pecans for a crunchy texture. You can also mix in raisins or dried cranberries for a different taste. For a more decadent treat, consider drizzling a simple glaze made of powdered sugar and milk over the top of the cooled cake.

FAQ SECTION

1. Can I use other fruits instead of apples?
Yes, you can substitute apples with other fruits like pears or even mashed bananas. Just keep in mind that the moisture content may vary.

2. Can I use whole wheat flour?
Yes, you can use whole wheat flour instead of all-purpose flour. The texture might be denser, but it’ll still taste delicious.

3. What if I don’t have vegetable oil?
You can substitute vegetable oil with melted coconut oil, canola oil, or even melted butter for a richer flavor.

Now, you are ready to bake up this delightful sheet cake and enjoy every bite of its apple-cinnamon goodness!

[tasty-recipe id=”3320″]

Easy Apple Cinnamon Cake

A moist and flavorful apple cinnamon cake that’s perfect for any occasion, bringing the joy of home baking with warm spices and sweet apples.

Dry Ingredients

  • 2 cups all-purpose flour
  • 1 tsp baking soda
  • 1 tsp baking powder
  • ½ tsp salt
  • 1½ tsp ground cinnamon
  • ¼ tsp ground nutmeg

Wet Ingredients

  • 1 cup brown sugar
  • ½ cup white sugar
  • ¾ cup vegetable oil
  • 2 large eggs
  • 2 tsp vanilla extract

Main Ingredient

  • 2½ cups chopped apples, peeled and cored

Preparation

  1. Preheat your oven to 350°F (175°C). Grease a 9×13 inch pan.
  2. In a large bowl, whisk together the flour, baking soda, baking powder, salt, cinnamon, and nutmeg.
  3. In another bowl, whisk together the eggs, vegetable oil, brown sugar, white sugar, and vanilla extract until well combined.
  4. Pour the wet ingredients into the dry ingredients and mix until just combined. Be careful not to overmix.
  5. Gently fold in the chopped apples.
  6. Pour the batter into the prepared pan and smooth the top with a spatula.

Baking

  1. Bake for 30–35 minutes or until the cake is golden and set. A toothpick inserted in the center should come out clean.
  2. Allow the cake to cool before slicing it into squares.

This cake is delicious on its own but can be enhanced with whipped cream, vanilla ice cream, or powdered sugar. Store in an airtight container at room temperature for up to three days or refrigerate for up to one week. For longer storage, wrap and freeze.

Dessert
American
Apple Cinnamon Cake, Baking, cozy dessert, dessert recipe, Sheet Cake

Italian Lemon Cream Cake

Slice of Italian Lemon Cream Cake with lemon zest decoration

It was a sunny afternoon when I first tasted Italian Lemon Cream Cake at a small family gathering. Everyone was gathered, chatting and laughing, but the moment I took a bite of that soft, zesty cake, it was like the sun had brightened even more. The blend of lemon and creamy goodness was irresistible. Since then, this delightful cake has become a staple at our family events, always bringing smiles and sweet memories.

Why Make This Recipe

Italian Lemon Cream Cake is a perfect dessert for any occasion. Its light and refreshing lemon flavor pairs beautifully with the creamy filling, making it a great choice for spring and summer gatherings. Plus, it’s not just delicious but also visually appealing with its beautiful layers. Whether it’s a birthday, anniversary, or a simple weekend treat, this cake is sure to impress your guests and delight your taste buds.

How to Make Italian Lemon Cream Cake

Ingredients:

  • 1 15.25-ounce package white cake mix
  • ¾ cup milk
  • 1 tablespoon milk
  • 3½ tablespoons vegetable oil
  • 2 eggs
  • 2 tablespoons unsalted butter (melted)
  • ½ teaspoon vanilla extract
  • 4 ounces cream cheese (softened)
  • ⅔ cup confectioners’ sugar (divided, plus more for dusting)
  • 3 tablespoons lemon juice
  • 1 teaspoon grated lemon zest
  • 2 cups heavy whipping cream

Directions:

  1. Preheat the oven to 350°F (175°C). Lightly coat the bottom of a 10-inch springform pan with cooking spray.
  2. Set aside 1 cup of the cake mix for the crumb topping. Place the remaining cake mix in a large bowl. Add ¾ cup plus 1 tablespoon of milk, the vegetable oil, and the eggs. Use an electric mixer to beat the mixture until well combined, about 2 minutes. Pour the batter into the prepared pan.
  3. In another bowl, whisk together the melted butter and vanilla extract. Stir in the reserved 1 cup of cake mix until you have a crumbly texture. Sprinkle this over the cake batter evenly.
  4. Bake the cake in the preheated oven for 30 to 35 minutes, or until a toothpick inserted into the center comes out clean. Let the cake cool in the pan until it reaches room temperature.
  5. To prepare the filling, beat the cream cheese, ⅓ cup of confectioners’ sugar, lemon juice, and lemon zest in a bowl until smooth. In another bowl, whip the heavy cream with the remaining ⅓ cup of confectioners’ sugar until stiff peaks form. Gently fold the cream cheese mixture into the whipped cream.
  6. Carefully remove the cake from the springform pan. Use a serrated knife to slice the cake horizontally into two layers. Spread the cream filling evenly over the bottom layer, then place the top layer over it. Refrigerate the cake for at least 4 hours. Before serving, dust the top of the cake with extra confectioners’ sugar.

How to Serve Italian Lemon Cream Cake

Serve Italian Lemon Cream Cake chilled. It is best enjoyed after it has been refrigerated for a few hours. You can slice it into wedges and garnish it with fresh berries or extra lemon zest for an appealing presentation.

How to Store Italian Lemon Cream Cake

Store any leftovers in an airtight container in the refrigerator. The cake is best eaten within 3 to 4 days to enjoy its freshness. If you need to keep it longer, consider freezing the slices. Wrap them tightly in plastic wrap and then in aluminum foil before placing them in the freezer.

Tips to Make Italian Lemon Cream Cake

  • Ensure that the cream cheese is softened to room temperature for a smooth filling.
  • Don’t skip the resting time in the refrigerator. It helps the flavors meld together and the cake to set properly.
  • Feel free to experiment with more lemon zest or a splash of limoncello in the cream filling for an extra burst of flavor.

Variation

For a different twist, you can substitute the lemon with orange or lime, making an Orange Cream or Lime Cream Cake. The process remains the same, just switch out the citrus ingredients.

FAQs

1. Can I use homemade cake instead of cake mix?
Yes, you can make a homemade white cake instead of using a mix. Just ensure it has a similar texture to work with the filling.

2. Can I freeze Italian Lemon Cream Cake?
Yes, you can freeze the cake. Just wrap it well before placing it in the freezer. Thaw it overnight in the fridge before serving.

3. How do I make the cake more lemony?
You can add more lemon zest and juice to the filling for a stronger flavor. Adjust to your taste preference!

[tasty-recipe id=”3323″]

Italian Lemon Cream Cake

A light and refreshing dessert featuring layers of zesty lemon cake and creamy filling, perfect for any spring or summer gathering.

For the Cake

  • 1 package 15.25-ounce package white cake mix (Set aside 1 cup for crumb topping)
  • ¾ cup milk (Plus 1 tablespoon)
  • 3½ tablespoons vegetable oil
  • 2 large eggs
  • 2 tablespoons unsalted butter (melted)
  • ½ teaspoon vanilla extract

For the Filling

  • 4 ounces cream cheese (softened) (Ensure it’s softened to room temperature)
  • ⅔ cup confectioners’ sugar (divided) (Reserve ⅓ cup for whipping cream)
  • 3 tablespoons lemon juice
  • 1 teaspoon grated lemon zest
  • 2 cups heavy whipping cream

Preparation

  1. Preheat the oven to 350°F (175°C). Lightly coat the bottom of a 10-inch springform pan with cooking spray.
  2. In a large bowl, combine the remaining cake mix, ¾ cup plus 1 tablespoon of milk, vegetable oil, and eggs. Beat with an electric mixer for about 2 minutes until well combined. Pour the batter into the prepared pan.
  3. In another bowl, whisk together the melted butter and vanilla extract. Stir in the reserved 1 cup of cake mix until you have a crumbly texture. Sprinkle this crumb mixture evenly over the cake batter.

Baking

  1. Bake the cake in the preheated oven for 30 to 35 minutes, or until a toothpick inserted into the center comes out clean. Let the cake cool in the pan until it reaches room temperature.

Filling Preparation

  1. In a bowl, beat the cream cheese, ⅓ cup confectioners’ sugar, lemon juice, and lemon zest until smooth.
  2. In another bowl, whip the heavy cream with the remaining ⅓ cup of confectioners’ sugar until stiff peaks form. Gently fold the cream cheese mixture into the whipped cream.

Assembly

  1. Carefully remove the cake from the springform pan. Use a serrated knife to slice the cake horizontally into two layers.
  2. Spread the cream filling evenly over the bottom layer, then place the top layer over it.
  3. Refrigerate the cake for at least 4 hours.
  4. Before serving, dust the top of the cake with extra confectioners’ sugar.

Serve chilled. Best enjoyed after refrigerating for a few hours. Garnish with fresh berries or extra lemon zest if desired. Store leftovers in an airtight container in the refrigerator for up to 3-4 days. Can freeze leftovers wrapped in plastic wrap and aluminum foil.

Dessert
Italian
Cream Cake, Italian Dessert, Layered Cake, Lemon Cake, Spring Dessert

Garlic Herb Roasted Veggies

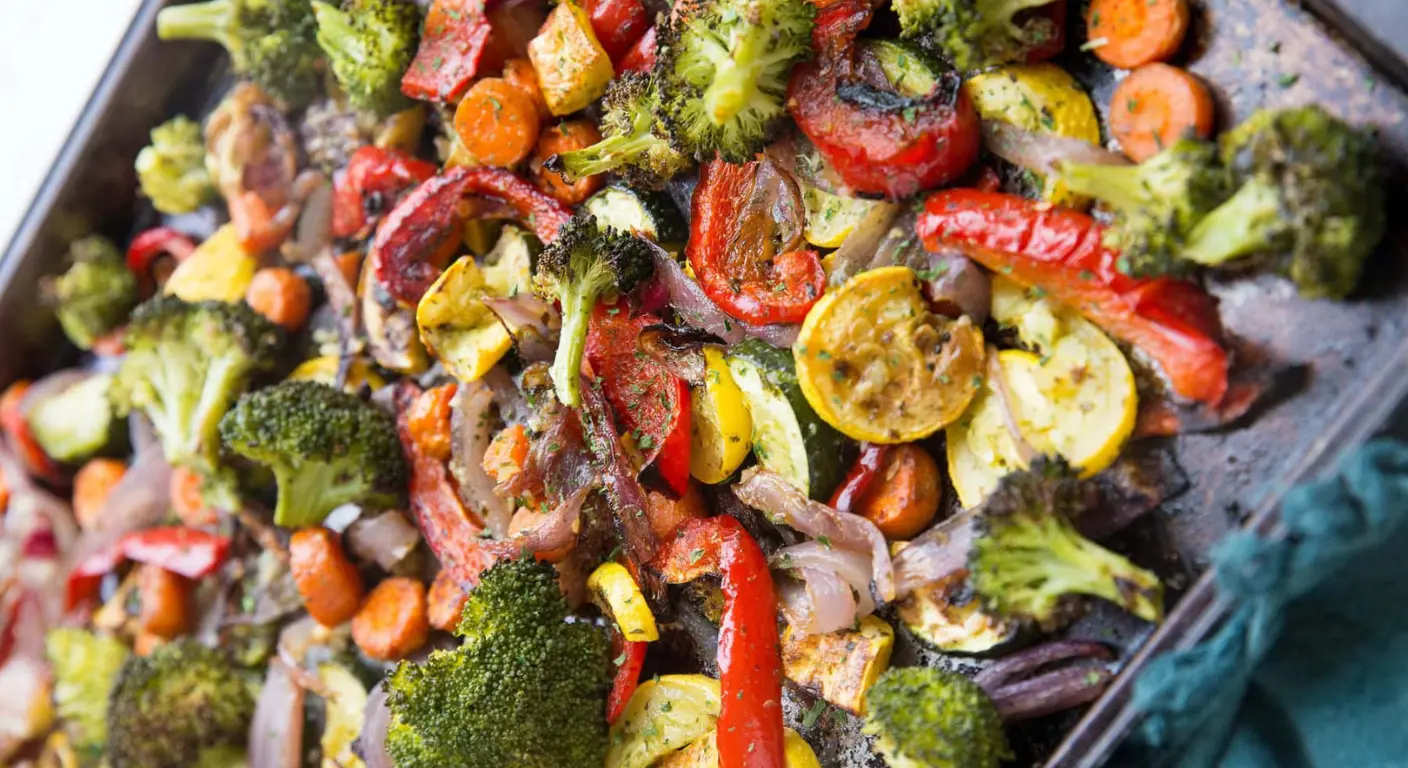
Garlic Herb Roasted Veggies

Garlic Herb Roasted Veggies are a fantastic way to enjoy colorful, healthy veggies with a delicious twist. This dish is simple to prepare and can be a perfect side at dinner or a delightful addition to any meal. With just a few ingredients, you achieve a burst of flavor that complements meats, grains, or can stand deliciously alone. Plus, roasting vegetables enhances their natural sweetness while giving them a nice crispy texture.

How to Make Garlic Herb Roasted Vegetables

Ingredients:

  • 1 lb baby potatoes (red or gold), halved
  • 1 cup baby carrots (or sliced regular carrots)
  • 1 cup fresh green beans, trimmed
  • 2 tbsp olive oil
  • 3 cloves garlic, minced
  • 1 tsp dried Italian seasoning
  • ½ tsp smoked paprika
  • ½ tsp salt
  • ½ tsp black pepper

Directions:

  1. Preheat your oven to 425°F (220°C).
  2. Wash and prep the vegetables. Halve the baby potatoes, ensure the carrots are of uniform size, and trim the ends of the green beans.
  3. In a small bowl, mix together the olive oil, minced garlic, Italian seasoning, smoked paprika, salt, and black pepper.
  4. Toss the vegetables in the bowl with the seasoning mixture until they are evenly coated.
  5. Spread the vegetables in a single layer on a rimmed baking sheet.
  6. Roast in the oven for 25-30 minutes. Stir halfway through cooking to ensure even roasting until the vegetables are tender and caramelized.
  7. Optional: finish with a squeeze of fresh lemon juice or sprinkle fresh herbs before serving.

How to Serve Garlic Herb Roasted Vegetables

These roasted veggies can be served hot as a delightful side dish with grilled meats, fish, or even atop a bed of rice or quinoa. They are also tasty when added to salads or sandwiches for that extra crunch and flavor.

How to Store Garlic Herb Roasted Vegetables

To store leftovers, allow them to cool completely and then place them in an airtight container. They can be kept in the refrigerator for about 3-4 days. When you’re ready to enjoy again, simply reheat in the oven or microwave until heated through.

Tips to Make Garlic Herb Roasted Vegetables

Garlic Herb Roasted Veggies

  • Cut all vegetables to uniform sizes to ensure even cooking.
  • Feel free to adjust the seasonings to suit your taste. Adding some red pepper flakes can give it a nice kick!
  • Experiment with different vegetables like bell peppers, zucchini, or Brussels sprouts for variety.

Variation

For a different twist, consider adding a sprinkle of parmesan cheese in the last few minutes of roasting. You could also substitute fresh herbs like thyme or rosemary for a unique flavor.

FAQs

1. Can I use frozen vegetables for this recipe?
Yes, you can use frozen vegetables! Just keep in mind that they may release more moisture, so you might need to increase your roasting time a little.

2. Is it necessary to use fresh herbs?
While fresh herbs add great flavor, you can definitely use dried herbs if that’s what you have. Just remember that dried herbs are typically more potent, so you might want to use a little less.

3. Can I prepare this dish ahead of time?
Absolutely! You can prep the vegetables and toss them in the seasoning mixture a few hours before roasting. Just keep them covered in the fridge until you’re ready to roast.

[tasty-recipe id=”4403″]

Garlic Herb Roasted Vegetables

A colorful and healthy dish that’s simple to make, perfect as a side at dinner or as a delightful addition to any meal.

Vegetables

  • 1 lb baby potatoes (red or gold), halved (Ensure they’re halved for even cooking.)
  • 1 cup baby carrots (or sliced regular carrots) (Cut to a uniform size for even roasting.)
  • 1 cup fresh green beans, trimmed (Trimmed to avoid tough ends.)

Seasoning

  • 2 tbsp olive oil
  • 3 cloves garlic, minced
  • 1 tsp dried Italian seasoning
  • ½ tsp smoked paprika
  • ½ tsp salt (Adjust according to taste.)
  • ½ tsp black pepper

Preparation

  1. Preheat your oven to 425°F (220°C).
  2. Wash and prep the vegetables. Halve the baby potatoes, ensure the carrots are of uniform size, and trim the ends of the green beans.

Mixing

  1. In a small bowl, mix together the olive oil, minced garlic, Italian seasoning, smoked paprika, salt, and black pepper.
  2. Toss the vegetables in the bowl with the seasoning mixture until they are evenly coated.

Roasting

  1. Spread the vegetables in a single layer on a rimmed baking sheet.
  2. Roast in the oven for 25-30 minutes. Stir halfway through cooking to ensure even roasting until the vegetables are tender and caramelized.
  3. Optional: finish with a squeeze of fresh lemon juice or sprinkle fresh herbs before serving.

Cut all vegetables to uniform sizes to ensure even cooking. Feel free to adjust the seasonings to suit your taste. Adding some red pepper flakes can give it a nice kick! Experiment with different vegetables like bell peppers, zucchini, or Brussels sprouts for variety.

Side Dish
American
Easy Recipe, Garlic Herb Vegetables, Healthy Side Dish, Roasted Vegetables, Vegetable Medley

No-Bake Pastel Oreo Cheesecake Cups

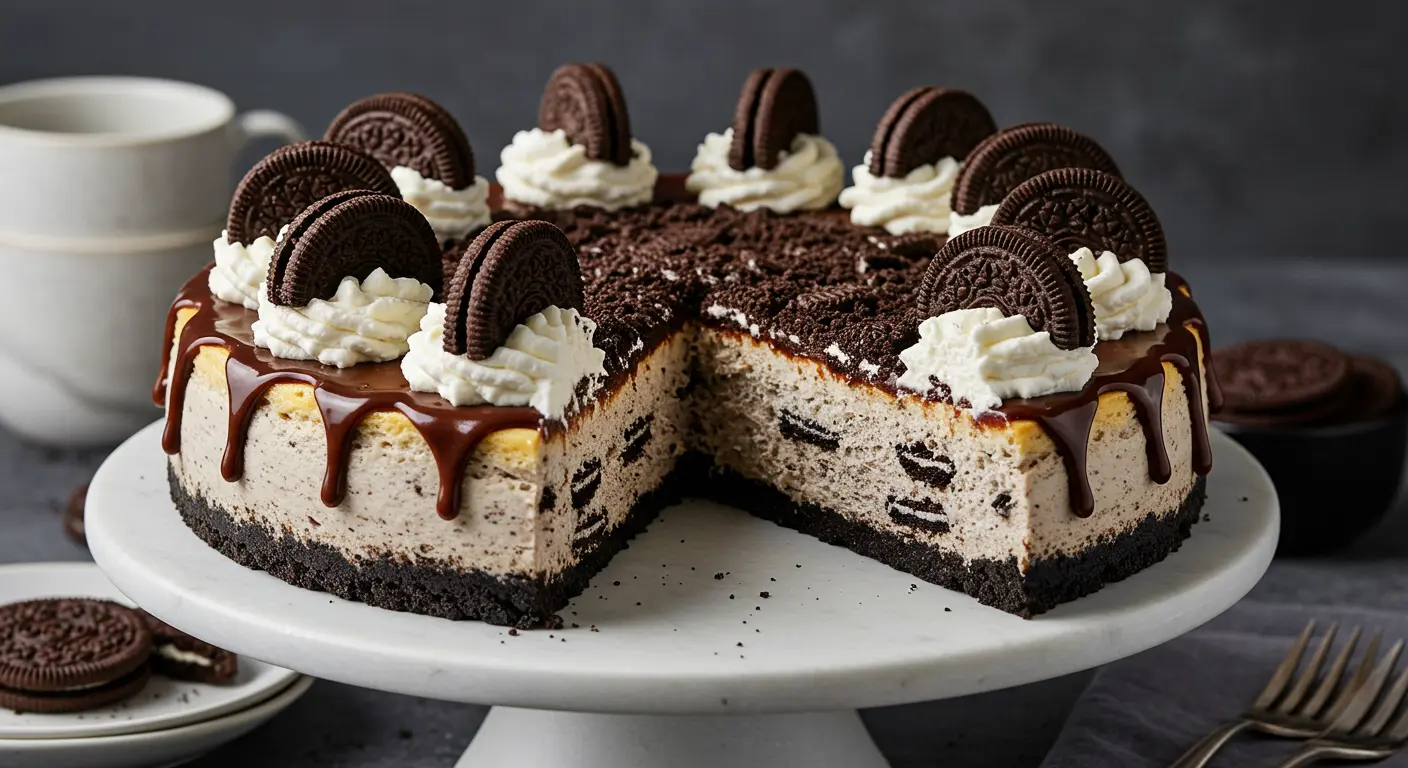
oreo cheesecake

Why Make This Recipe

No-Bake Pastel Oreo Cheesecake Cups are a delightful treat that not only look pretty but taste amazing too! They are perfect for spring picnics, birthday parties, or just a fun dessert after dinner. The creamy filling combined with the crunchy chocolate cookie base makes these cups irresistible. Plus, they are super easy to make and don’t require turning on the oven!

How to Make No-Bake Pastel Oreo Cheesecake Cups

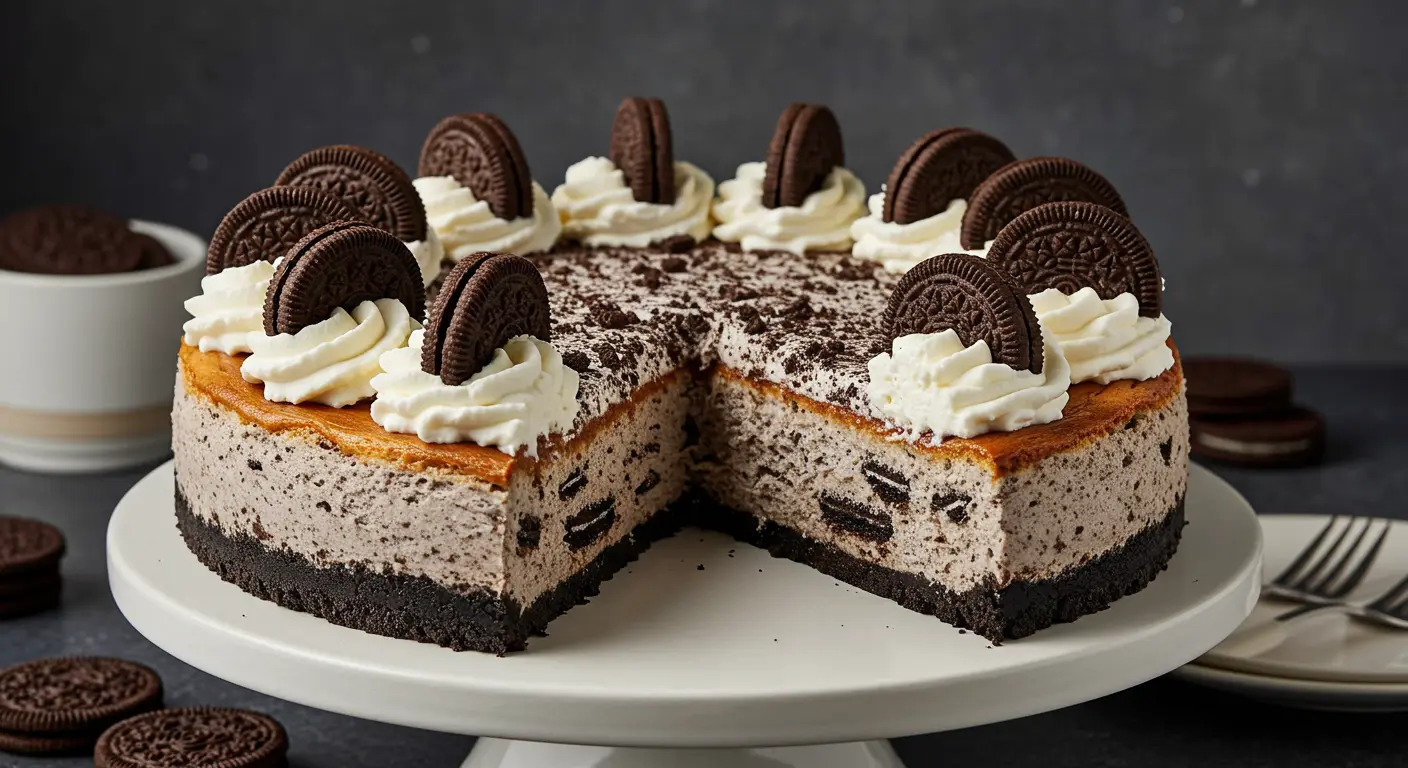
oreo cheesecake

Ingredients:

  • 20 chocolate sandwich cookies, crushed into fine crumbs
  • 4 tablespoons unsalted butter, melted
  • 16 oz cream cheese, softened
  • 1 cup powdered sugar
  • 1 teaspoon vanilla extract
  • 1 tablespoon lemon juice
  • 1 cup heavy whipping cream, cold
  • 2 cups whipped cream or stabilized frosting
  • Pink and pastel green food coloring
  • Piping bags with star tips
  • Optional toppings: Mini sandwich cookies, Colorful spring sprinkles

Directions:

  1. Start by combining the crushed cookie crumbs with melted butter. Press this mixture into the bottom of your serving cups to create a base.
  2. In a mixing bowl, beat the softened cream cheese until smooth. Then, add the powdered sugar, vanilla, and lemon juice. Mix until well combined.
  3. In a separate bowl, whip the heavy cream until stiff peaks form. Gently fold this whipped cream into the cream cheese mixture until everything is combined.
  4. Divide the filling into three equal portions. Color one portion pink, another green, and leave the third portion white.
  5. Layer the colored fillings into the cups, swirling them gently to create a marbled effect.
  6. Place the cups in the refrigerator for at least 4 hours until they are set.
  7. Once set, pipe some colored whipped cream on top of each cup. You can garnish them with mini cookies and colorful sprinkles if you like!

How to Serve No-Bake Pastel Oreo Cheesecake Cups

Serve these delightful cheesecake cups chilled. They are perfect as a dessert for parties or a sweet treat for family gatherings. Just grab a spoon and enjoy the fluffy, creamy layers!

How to Store No-Bake Pastel Oreo Cheesecake Cups

Store any leftovers in the refrigerator. Make sure to cover them with plastic wrap or a lid. They will stay fresh for about 3-4 days, but they are best enjoyed within the first couple of days.

Tips to Make No-Bake Pastel Oreo Cheesecake Cups

  • Make sure the cream cheese is fully softened to avoid lumps in your filling.
  • When whipping the heavy cream, ensure your mixing bowl and beaters are cold for better results.
  • Feel free to customize the colors to fit any occasion! Use any pastel shades you prefer.

Variation

You can add different flavors to the filling by mixing in your favorite extracts. For example, almond or coconut extract can add a unique twist to the cheesecake flavor.

FAQs

Q: Can I use different cookies for the base?
A: Yes! You can use any flavored cookies you like, such as vanilla wafers or graham crackers.

Q: Is this recipe gluten-free?
A: If you use gluten-free cookies and a gluten-free whipped cream, this recipe can be made gluten-free.

Q: How can I make this recipe dairy-free?
A: Substitute cream cheese with a dairy-free cream cheese and use coconut cream or another vegan heavy cream for the filling.

[tasty-recipe id=”4400″]

No-Bake Pastel Oreo Cheesecake Cups

Delicious and visually appealing cheesecake cups that are perfect for spring picnics, birthday parties, or just a fun dessert after dinner.

For the crust

  • 20 pieces chocolate sandwich cookies, crushed into fine crumbs
  • 4 tablespoons unsalted butter, melted

For the filling

  • 16 oz cream cheese, softened (Make sure it’s fully softened to avoid lumps.)
  • 1 cup powdered sugar
  • 1 teaspoon vanilla extract
  • 1 tablespoon lemon juice
  • 1 cup heavy whipping cream, cold (Keep the mixing bowl and beaters cold for better results.)
  • 2 cups whipped cream or stabilized frosting
  • Pink and pastel green food coloring (Feel free to customize the colors.)

Optional Toppings

  • Mini sandwich cookies
  • Colorful spring sprinkles

Preparation

  1. Combine the crushed cookie crumbs with melted butter and press this mixture into the bottom of serving cups to create a base.
  2. In a mixing bowl, beat the softened cream cheese until smooth. Add the powdered sugar, vanilla, and lemon juice, and mix until well combined.
  3. In a separate bowl, whip the heavy cream until stiff peaks form, then gently fold this whipped cream into the cream cheese mixture until fully combined.
  4. Divide the filling into three equal portions. Color one portion pink, another green, and leave the third portion white.
  5. Layer the colored fillings into the cups, swirling them gently to create a marbled effect.
  6. Refrigerate the cups for at least 4 hours until they are set.
  7. Once set, pipe some colored whipped cream on top of each cup and garnish with mini cookies and colorful sprinkles if desired.

Store any leftovers in the refrigerator, covered with plastic wrap or a lid. Best enjoyed within the first couple of days.

Dessert, Sweet Treat
American
Cheesecake Cups, No-Bake Cheesecake, Oreo Cups, Pastel Desserts, Spring Desserts

Butterfinger Caramel Cheesecake Bars

cheesecake bars

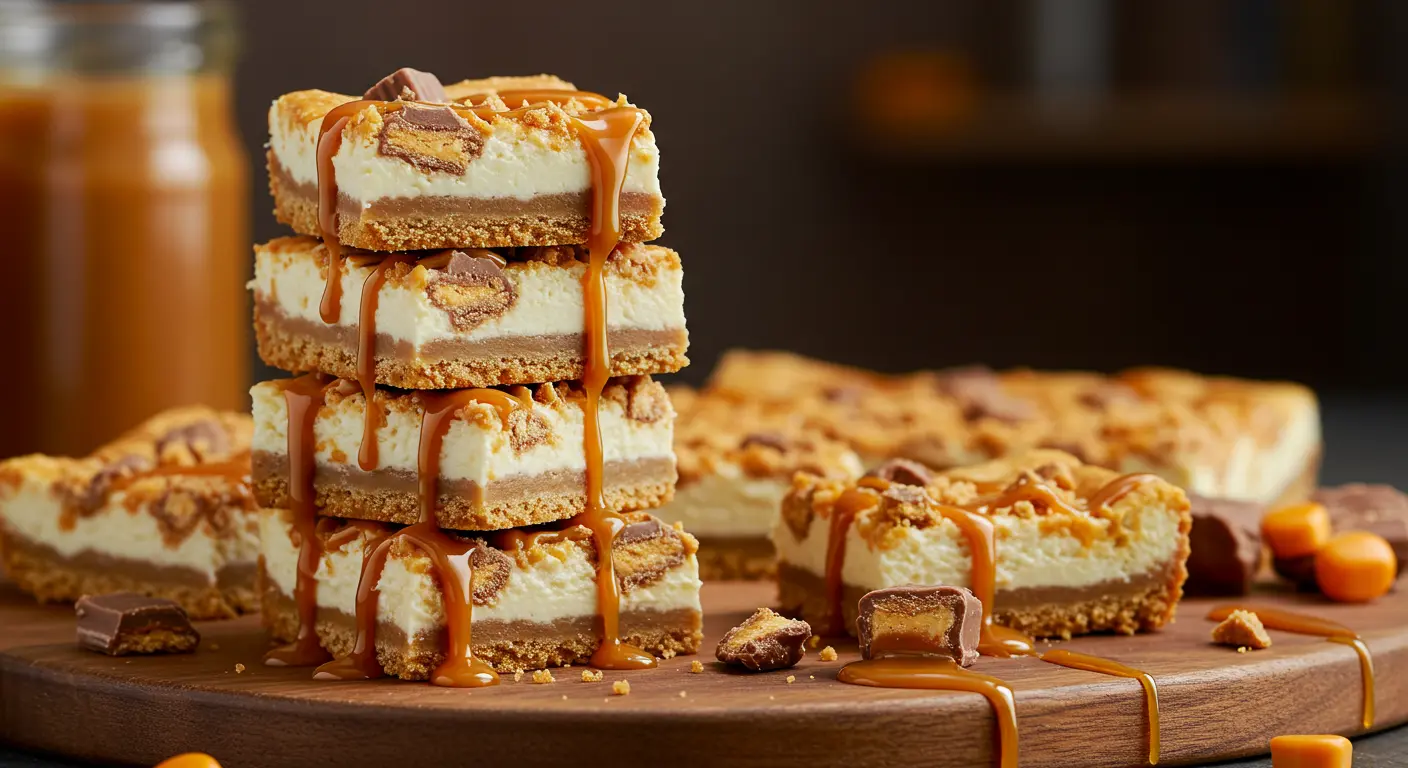
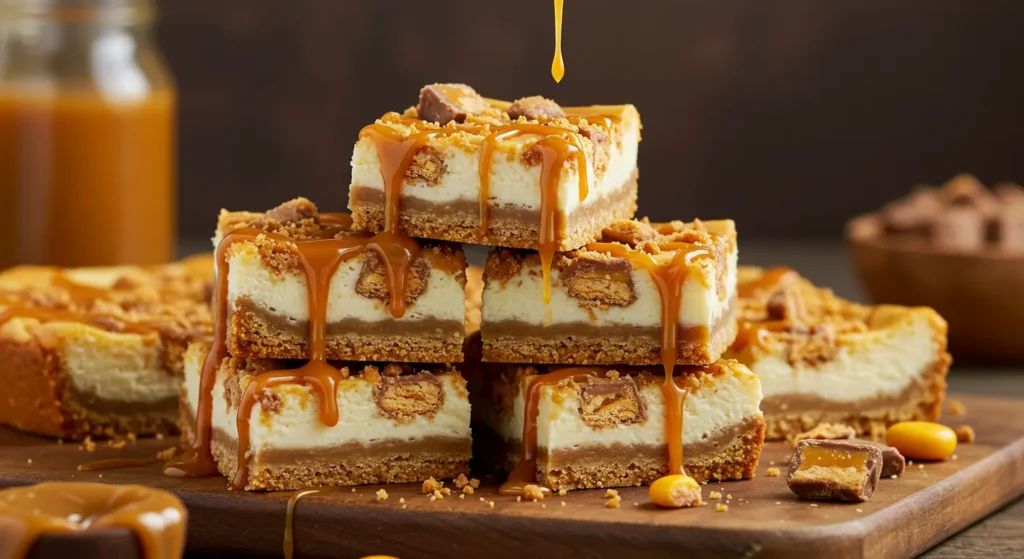
Butterfinger Caramel Cheesecake Bars are a delightful treat that combines the creaminess of cheesecake with the crunch of Butterfinger candy bars and the sweet drizzle of caramel. These bars are perfect for any occasion, from family gatherings to a simple afternoon snack. The combination of flavors and textures creates a dessert that is not only satisfying but also incredibly fun to make. If you love the classic combination of chocolate and caramel, these bars are sure to become a favorite!

How to Make Butterfinger Caramel Cheesecake Bars

cheesecake bars

Ingredients

  • 1 1/2 cups graham cracker crumbs
  • 1/4 cup granulated sugar
  • 1/2 cup unsalted butter, melted
  • 2 (8 ounce) packages cream cheese, softened
  • 3/4 cup granulated sugar
  • 1 teaspoon vanilla extract
  • 2 large eggs
  • 1 cup caramel sauce, divided
  • 5 fun-size Butterfinger candy bars, chopped

Directions

  1. Preheat your oven to 325°F (160°C). Line an 8×8-inch pan with parchment paper for easy removal.
  2. In a bowl, combine graham cracker crumbs, sugar, and melted butter. Press this mixture into the bottom of the prepared pan. Bake for 10 minutes.
  3. In another bowl, beat the cream cheese until it’s fluffy. Slowly add in 3/4 cup sugar, mixing until well combined. Stir in the vanilla extract.
  4. Add the eggs one at a time to the mixture, mixing minimally after each addition to keep the eggs from being overmixed.
  5. Fold in 1/2 cup of the caramel sauce into the cream cheese mixture.
  6. Pour this mixture over the baked crust. Sprinkle half of the chopped Butterfinger candy bars on top.
  7. Bake in the oven for 35-40 minutes until the center is slightly jiggly.
  8. Let the bars cool completely at room temperature before refrigerating for at least 3 hours.
  9. Before serving, drizzle the remaining caramel sauce and top with the remaining Butterfinger pieces.

How to Serve Butterfinger Caramel Cheesecake Bars

Once your Butterfinger Caramel Cheesecake Bars are chilled and set, cut them into squares. They can be served directly from the refrigerator for a refreshing treat. You might want to add an extra drizzle of caramel on top to enhance the presentation and flavor!

How to Store Butterfinger Caramel Cheesecake Bars

Store the leftover bars in an airtight container in the refrigerator. They will keep well for up to a week, making them a great choice for meal prep or to satisfy your sweet tooth throughout the week.

Tips to Make Butterfinger Caramel Cheesecake Bars

  • Make sure your cream cheese is really softened before mixing. This will help you achieve a smooth and creamy filling.
  • If you prefer a thicker crust, add a bit more graham cracker crumbs or reduce the butter slightly.
  • To beat the heat, try serving these bars chilled right out of the fridge.

Variation

For a twist on this recipe, you can substitute the Butterfinger candy bars with other favorite candies, such as Snickers or Reese’s Peanut Butter Cups. Each variation gives a unique flavor while maintaining the creamy cheesecake base.

FAQs

1. Can I use store-bought caramel sauce?
Yes, store-bought caramel sauce works perfectly in this recipe. Just make sure it’s nice and smooth for drizzling.

2. Can I freeze these cheesecake bars?
Yes, they can be frozen! Wrap them tightly in plastic wrap and place them in an airtight container. They should be good for about 2-3 months in the freezer.

3. What can I use instead of graham cracker crumbs?
You can use crushed vanilla wafers or Oreos as an alternative for the crust if you want different flavors!

[tasty-recipe id=”4405″]

Butterfinger Caramel Cheesecake Bars

Butterfinger Caramel Cheesecake Bars combine creamy cheesecake with crunchy Butterfinger candy bars and a sweet caramel drizzle, making for a delightful dessert.

Crust Ingredients

  • 1.5 cups graham cracker crumbs
  • 0.25 cups granulated sugar
  • 0.5 cups unsalted butter, melted

Filling Ingredients

  • 2 packages (8 ounces each) cream cheese, softened (Make sure it’s really softened for smooth mixing.)
  • 0.75 cups granulated sugar
  • 1 teaspoon vanilla extract
  • 2 large eggs (Add eggs one at a time.)
  • 1 cup caramel sauce, divided (Use half in the filling and half for drizzling.)
  • 5 fun-size Butterfinger candy bars, chopped (Divide for topping and mixing.)

Preparation

  1. Preheat your oven to 325°F (160°C). Line an 8×8-inch pan with parchment paper.
  2. In a bowl, combine graham cracker crumbs, sugar, and melted butter. Press this mixture into the bottom of the prepared pan. Bake for 10 minutes.

Mixing Filling

  1. In another bowl, beat the cream cheese until it’s fluffy. Add 3/4 cup sugar and mix well. Stir in vanilla extract.
  2. Add the eggs one at a time, mixing minimally after each addition.
  3. Fold in 1/2 cup of caramel sauce.

Baking

  1. Pour the cream cheese mixture over the baked crust. Sprinkle half of the chopped Butterfinger candy bars on top.
  2. Bake for 35-40 minutes until the center is slightly jiggly.

Cooling and Serving

  1. Let the bars cool completely at room temperature before refrigerating for at least 3 hours.
  2. Before serving, drizzle the remaining caramel sauce and top with the remaining Butterfinger pieces.
  3. Cut into squares and serve chilled.

Store leftover bars in an airtight container in the refrigerator for up to a week. For variations, substitute Butterfinger with Snickers or Reese’s Peanut Butter Cups.

Dessert, Snack
American
Butterfinger, Caramel, Cheesecake Bars, Chocolate, Dessert

Lemon Orzo Pasta Salad

Delicious Lemon Orzo Pasta Salad served in a bowl with fresh ingredients

Lemon Orzo Pasta Salad is a bright and refreshing dish that will add a burst of flavor to any meal. This delightful salad combines the lightness of orzo pasta with the zesty taste of lemon, fresh vegetables, and a hint of herbs. It’s a dish that feels both hearty and refreshing, making it perfect for warm days, picnics, or family gatherings. Imagine serving this colorful salad to your friends and hearing their delighted reactions, it’s sure to become a crowd-pleaser. You’ll find that its combination of tangy lemon, vibrant vegetables, and tender orzo creates a charming dish that everyone will enjoy. So, roll up your sleeves, grab some ingredients, and let’s whip up this tasty Lemon Orzo Pasta Salad!

How to prepare Lemon Orzo Pasta Salad

To prepare this delightful Lemon Orzo Pasta Salad, follow these simple steps:

  1. Cook the Orzo: Start by boiling a pot of salted water. Once it’s boiling, add the orzo pasta and cook it according to the package instructions until it’s al dente. Drain the pasta and set it aside to cool.
  2. Prepare the Vegetables: While the orzo cools, chop your vegetables. Dice the cucumbers, bell peppers, and cherry tomatoes. Thinly slice the red onion and place all the vegetables in a large bowl.
  3. Make the Lemon Dressing: In a small bowl, whisk together olive oil, lemon juice, salt, and pepper. You can add some chopped fresh herbs, like parsley or basil, for extra flavor.
  4. Combine: Once the orzo has cooled, add it to the bowl with the vegetables. Drizzle the lemon dressing over everything and toss gently until well combined.
  5. Serve: Let the salad sit for at least 15 minutes to allow the flavors to meld together. This salad can be served chilled or at room temperature.

Lemon Orzo Pasta Salad

Why You’ll Love Lemon Orzo Pasta Salad

You will love this Lemon Orzo Pasta Salad for many reasons. First, it’s so easy to make, which means you can whip it up quickly for last-minute gatherings. Second, the freshness of the ingredients brings a vibrant taste to your plate, making it perfect for summer barbecues or any occasion. Plus, it’s packed with healthy vegetables, so you can feel great about serving it to your family and friends. Best of all, it’s a versatile dish – feel free to add your favorite veggies, proteins, or even nuts to tailor it to your taste!

Tips for success

  1. Cook the Orzo Perfectly: Make sure not to overcook the orzo. It should be tender but still firm to the bite, known as al dente.
  2. Let It Chill: Allowing the salad to sit for a bit helps the flavors blend beautifully. If you have time, chill it in the fridge before serving.
  3. Add Fresh Herbs: Fresh herbs can elevate the flavor, so don’t hesitate to include parsley, basil, or even dill!

Serving Suggestions

Lemon Orzo Pasta Salad is a fantastic side dish for grilled chicken or fish, adding a fresh touch to your meal. It also works well as a light lunch by tossing in cooked shrimp or grilled veggies. For a complete meal, pair it with a loaf of hearty bread and a refreshing drink.

FAQs

Can I make Lemon Orzo Pasta Salad a day ahead?

Yes, you can make it a day in advance. Store it in the refrigerator and let it sit at room temperature for about 15 minutes before serving.

What other ingredients can I add?

Feel free to add ingredients like feta cheese, olives, or even avocado for a creamier texture.

How long does the salad last in the fridge?

The salad can last up to 3 days in the refrigerator. Just be aware that the vegetables may lose some crunch over time.

Lemon Orzo Pasta Salad

Lemon Orzo Pasta Salad

A bright and refreshing salad that combines the lightness of orzo pasta with zesty lemon, fresh vegetables, and herbs, perfect for warm days and gatherings.

For the Salad

  • 8 oz orzo pasta (Cook according to package instructions.)
  • 1 cup cucumbers, diced (Fresh and crunchy.)
  • 1 cup bell peppers, diced (Any color you prefer.)
  • 1 cup cherry tomatoes, halved (Adds sweetness.)
  • 1/2 small red onion, thinly sliced (For flavor.)

For the Lemon Dressing

  • 1/4 cup olive oil (Use extra virgin for best flavor.)
  • 2 tbsp lemon juice (Freshly squeezed for brightness.)
  • 1/2 tsp salt (To taste.)
  • 1/4 tsp pepper (To taste.)
  • 1 tbsp fresh herbs (parsley or basil), chopped (Optional for added flavor.)

Preparation

  1. Boil a pot of salted water and cook the orzo pasta until al dente. Drain and set aside to cool.
  2. Meanwhile, chop the cucumbers, bell peppers, cherry tomatoes, and slice the red onion. Place the vegetables in a large bowl.
  3. In a small bowl, whisk together olive oil, lemon juice, salt, and pepper. Add chopped fresh herbs if desired.

Combining

  1. Once the orzo has cooled, add it to the bowl with the vegetables.
  2. Drizzle the lemon dressing over everything and toss gently until well combined.

Serving

  1. Let the salad sit for at least 15 minutes to allow the flavors to meld. Serve chilled or at room temperature.

For best results, do not overcook the orzo. Let the salad sit to blend flavors, and consider chilling it in the fridge. Add fresh herbs for extra flavor.

Salad, Side Dish
American, Mediterranean
Easy Recipes, Lemon Orzo Pasta Salad, pasta salad, Refreshing Salad, Vegetable Salad

Lemon Blueberry Cake

Delicious Lemon Blueberry Cake topped with blueberries and lemon zest

This Lemon Blueberry Cake is bright, fresh, and easy to love. It mixes tangy lemon and sweet blueberries into a soft, moist cake that feels like sunshine in every bite. The cake works for a casual tea, a picnic, or a simple family dessert, and it makes the house smell wonderful while baking. If you enjoy cakes with citrus and fruit, you might also like a carrot cake twist like the Carrot Date Cake with Honey Lemon Glaze, it has a lovely lemon touch too. Get ready to bake something the whole room will smile at.

How to prepare Lemon Blueberry Cake

  1. Preheat your oven to 350°F, grease a 9-inch pan, and line the bottom with parchment.
  2. In a bowl, whisk 2 cups flour, 1 1/2 teaspoons baking powder, and 1/2 teaspoon salt.
  3. In another bowl, beat 1/2 cup butter and 1 cup sugar until light. Add 2 eggs one at a time, then stir in 1/4 cup milk, 1/4 cup fresh lemon juice, and the zest of 1 lemon.
  4. Fold the dry mix into the wet mix gently, do not overmix. Then fold in 1 cup fresh blueberries, tossed in a teaspoon of flour so they do not sink.
  5. Pour batter into the pan and smooth the top. Bake 35 to 40 minutes, until a toothpick comes out clean. Cool in the pan 10 minutes, then turn out to a rack to cool completely.
  6. For a simple glaze, mix 1 cup powdered sugar with 2 to 3 tablespoons lemon juice, drizzle over the cooled cake.

Lemon Blueberry Cake

Why You’ll Love Lemon Blueberry Cake

  • The cake is moist and tender, with a bright lemon flavor that is not too strong.
  • Fresh blueberries add soft bursts of sweetness in every bite.
  • It is quick to make with common ingredients, and it looks pretty on the table.
  • The glaze adds a tart finish that balances the sweet crumbs.

Tips for success

  • Use fresh blueberries when you can, they give the best taste and texture.
  • Toss berries in a little flour before folding, this helps them stay in the batter and not sink.
  • Do not overmix the batter, stir until just combined for a light cake.
  • Measure flour by spooning it into the cup and leveling, do not pack it down.
  • Let the cake cool well before glazing, so the glaze does not melt away.

Serving Suggestions

  • Serve warm with a scoop of vanilla ice cream for a cozy treat.
  • Pair a slice with a cup of tea or coffee for a simple afternoon break.
  • Cut into small squares for a party platter, the cake holds up well.
  • Add a dollop of whipped cream and extra berries for a pretty dessert.

Lemon Blueberry Cake

FAQs

Q: Can I use frozen blueberries?

A: Yes, you can use frozen blueberries, do not thaw them, toss in flour and fold in frozen to limit color bleeding.

Q: How long will the cake stay fresh?

A: Keep it in an airtight container at room temperature for 2 days, or refrigerate up to 5 days.

Q: Can I make this into cupcakes?

A: Yes, fill cupcake liners two thirds full and bake 18 to 22 minutes, check with a toothpick.

Q: Can I add poppy seeds for extra texture?

A: Yes, add a tablespoon of poppy seeds to the batter for a nice crunch and look.

Conclusion

This Lemon Blueberry Cake is a simple, bright dessert that brings summer flavor to any table. For another lovely lemon and blueberry idea, see Lemon Blueberry Layer Cake – Sally’s Baking Addiction, it has more tips and a layered version to try.

Lemon Blueberry Cake

This Lemon Blueberry Cake is bright, fresh, and easy to love, combining tangy lemon and sweet blueberries into a moist cake.

For the Cake

  • 2 cups flour (Measure by spooning into the cup and leveling.)
  • 1.5 teaspoons baking powder
  • 0.5 teaspoon salt
  • 0.5 cups butter, softened (Needs to be at room temperature.)
  • 1 cups sugar
  • 2 pieces eggs (Add one at a time.)
  • 0.25 cups milk
  • 0.25 cups fresh lemon juice
  • 1 pieces lemon zest (Zest one lemon.)
  • 1 cup fresh blueberries (Toss in a teaspoon of flour to prevent sinking.)

For the Glaze

  • 1 cup powdered sugar
  • 2-3 tablespoons lemon juice

Preparation

  1. Preheat your oven to 350°F, grease a 9-inch pan, and line the bottom with parchment.
  2. In a bowl, whisk together the flour, baking powder, and salt.
  3. In another bowl, beat the butter and sugar until light. Add eggs one at a time, then stir in milk, lemon juice, and lemon zest.
  4. Fold the dry mix into the wet mix gently, being careful not to overmix.
  5. Fold in the blueberries, which should be tossed in flour to prevent sinking.

Baking

  1. Pour the batter into the prepared pan and smooth the top.
  2. Bake for 35 to 40 minutes, until a toothpick comes out clean.
  3. Cool in the pan for 10 minutes, then turn out to a rack to cool completely.

Glazing

  1. To make the glaze, mix powdered sugar with lemon juice and drizzle over the cooled cake.

Use fresh blueberries for best taste. Do not overmix the batter, and let the cake cool well before glazing.

Dessert, Snack
American
Citrus Cake, Easy Cake, Fruit Dessert, Lemon Blueberry Cake, Summer Dessert

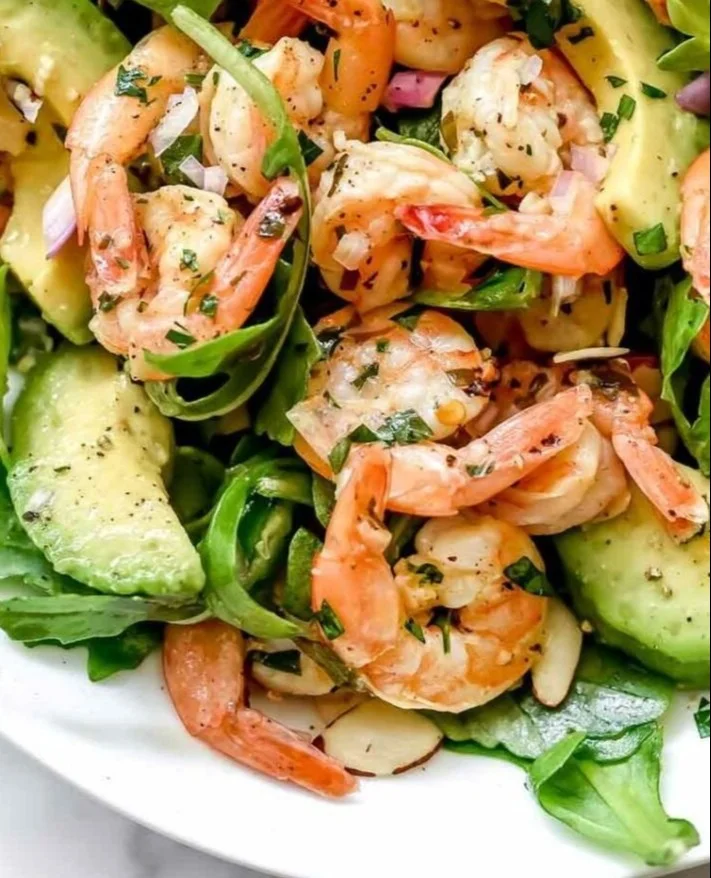
Citrus Shrimp and Avocado Salad

Citrus Shrimp and Avocado Salad in a bowl with vibrant ingredients

This Citrus Shrimp and Avocado Salad feels like sunshine on a plate. It mixes bright citrus, juicy shrimp, creamy avocado, and leafy greens. The mix gives sweet, tangy, and rich flavors in each bite. Friends and family love it at lunch and at summer dinners. It works as a light meal or a side dish for a cookout. If you like bright salads, try a similar arugula citrus salad recipe for more ideas. This recipe is a crowd-pleaser, easy to make, and full of fresh taste, so you will want to make it again and again, and maybe twice this week.

How to prepare Citrus Shrimp and Avocado Salad

  1. Peel and devein 1 pound of shrimp, rinse, and pat dry.
  2. In a bowl, mix juice of 1 orange and 1 lime, 1 tablespoon olive oil, 1 teaspoon honey, salt and pepper.
  3. Add the shrimp to the citrus mix and let them sit for 10 minutes.
  4. Heat a skillet over medium heat. Cook shrimp 2 minutes per side, until pink and firm. Remove and cool slightly.
  5. In a large bowl, combine 4 cups mixed greens, 1 diced avocado, 1 small red onion thinly sliced, and segments from 1 orange.
  6. Toss the cooled shrimp with the salad. Drizzle a little extra olive oil and a squeeze of lime. Add salt and pepper to taste.
  7. Serve right away so the avocado stays fresh.

Citrus Shrimp and Avocado Salad

Why You’ll Love Citrus Shrimp and Avocado Salad

  • It is bright and fresh, with citrus that wakes up the shrimp.
  • The avocado adds a rich, creamy bite that balances the tang.
  • It comes together fast, so it is perfect for weeknights.
  • It looks colorful and inviting on the table, a great choice for guests.

Tips for success

  • Use fresh citrus for the best flavor.
  • Do not overcook the shrimp, they cook fast.
  • Cut the avocado last to keep it from browning.
  • Taste the dressing and adjust salt, honey, or lime to your liking.
  • If you want more crunch, add toasted almonds or pepitas.

Serving Suggestions

  • Serve on a bed of mixed greens or baby spinach.
  • Pair with crusty bread or warm tortillas.
  • Add quinoa or couscous to make it more filling.
  • Offer extra lime wedges on the side for a bright finish.

Citrus Shrimp and Avocado Salad

FAQs

Q: Can I use frozen shrimp?

A: Yes, thaw and pat dry before marinating and cooking.

Q: Can I make this ahead?

A: You can cook the shrimp ahead, but toss avocado and dressing right before serving to keep it fresh.

Q: Is there a good substitute for avocado?

A: Try sliced cucumber or cooked chickpeas for a different texture.

Q: Can I grill the shrimp instead of pan cook?

A: Yes, grill shrimp 2 to 3 minutes per side for a nice char.

Conclusion

This salad is quick, tasty, and fresh, and it makes a great light lunch or a bright side dish. For a tested quick version and more tips, see 20-Minute Citrus Shrimp and Avocado Salad – FoodieCrush.com.

Citrus Shrimp and Avocado Salad

A bright and refreshing salad featuring juicy shrimp, creamy avocado, and a tangy citrus dressing.

For the Shrimp

  • 1 pound shrimp, peeled and deveined (Thaw and pat dry if using frozen shrimp)
  • 1 tablespoon olive oil (Extra for drizzling)
  • 1 teaspoon honey (Adjust to taste)
  • 1 orange juice of (Use fresh citrus for best flavor)
  • 1 lime juice of (Use fresh citrus for best flavor)
  • salt and pepper (To taste)

For the Salad

  • 4 cups mixed greens (Or baby spinach)
  • 1 small red onion, thinly sliced
  • 1 avocado, diced (Cut last to prevent browning)
  • 1 orange segments from

Preparation

  1. Peel and devein the shrimp, then rinse and pat dry.
  2. In a bowl, mix the juice of one orange, the juice of one lime, one tablespoon of olive oil, one teaspoon of honey, and season with salt and pepper.
  3. Add the shrimp to the citrus mixture and let them sit for 10 minutes.

Cooking

  1. Heat a skillet over medium heat and cook the shrimp for 2 minutes per side, until pink and firm. Remove from heat and cool slightly.

Assembly

  1. In a large bowl, combine mixed greens, diced avocado, sliced red onion, and orange segments.
  2. Toss in the cooled shrimp and drizzle with extra olive oil and a squeeze of lime. Add salt and pepper to taste.
  3. Serve immediately to prevent the avocado from browning.

For added crunch, you can mix in toasted almonds or pepitas. Pair with crusty bread or warm tortillas for a heartier meal. Offer extra lime wedges on the side.

lunch, Salad, Side Dish
American, Seafood
Avocado Salad, Citrus Salad, Healthy Recipe, Shrimp Salad, summer salad