Banana Bread Mug Cake Paleo

There’s nothing quite like a warm mug cake to satisfy a sweet craving, and this Banana Bread Mug Cake Paleo is a real treasure! It’s easy to make, packed with flavor, and definitely a crowd-pleaser with its moist texture and delicious banana goodness. Made with simple, wholesome ingredients, it aligns beautifully with a paleo diet. Imagine savoring a delightful treat that feels indulgent yet fits your lifestyle; it’s the perfect reason to whip this up in your kitchen.

How to prepare Banana Bread Mug Cake Paleo

  1. In a microwave-safe mug, mix together mashed banana, almond flour, coconut flour, baking powder, and cinnamon until well combined.
  2. Add a splash of almond milk and an egg, then stir the mixture until smooth.
  3. Microwave on high for about 1-2 minutes, or until the cake is set.
  4. Let it cool slightly before enjoying.

Banana Bread Mug Cake Paleo

Why You’ll Love Banana Bread Mug Cake Paleo

You’ll adore the warmth and comfort that this mug cake provides, making it an ideal snack or dessert. The blend of banana and warm spices brings a cozy flavor, and the best part? It’s guilt-free! For those days when you want something sweet but healthy, this cake is your go-to choice. Plus, if you’re a fan of banana-based treats, you might also enjoy making banana bread brownies which offer another fantastic twist on the classic flavor.

Tips for success

  • Ensure your banana is very ripe, as this will enhance the sweetness and flavor of your cake.
  • Don’t overmix the batter; a few lumps are perfectly fine.
  • Adjust microwave time based on your microwave’s power to prevent overcooking.

Banana Bread Mug Cake Paleo

Serving Suggestions

This Banana Bread Mug Cake is delicious on its own, but you can elevate it by adding a dollop of almond butter or a sprinkle of nuts on top. You could also enjoy it alongside a cup of herbal tea for a cozy afternoon treat or serve it with fresh berries for a pop of color and freshness.

FAQs

Can I make it without eggs?

Yes! You can replace the egg with a flaxseed meal mixed with water for a vegan option.

How do I store leftovers?

If you have any leftovers, store them in an airtight container in the refrigerator for up to two days.

Can I double the recipe?

While this recipe is designed for a single serving, feel free to multiply the ingredients and use a larger bowl for multiple servings, adjusting the cooking time as needed!

Banana Bread Mug Cake Paleo

This warm, moist Banana Bread Mug Cake is a quick and easy treat that satisfies sweet cravings while aligning with a paleo diet.

Main Ingredients

  • 1 medium ripe banana, mashed (Very ripe for best sweetness.)
  • 3 tablespoons almond flour
  • 1 tablespoon coconut flour
  • 1 teaspoon baking powder
  • 1/2 teaspoon cinnamon
  • 1 splash almond milk (Add just enough to combine.)
  • 1 large egg (Can be substituted with flaxseed meal for a vegan option.)

Preparation

  1. In a microwave-safe mug, mix together mashed banana, almond flour, coconut flour, baking powder, and cinnamon until well combined.
  2. Add a splash of almond milk and an egg, then stir the mixture until smooth.
  3. Microwave on high for about 1-2 minutes, or until the cake is set.
  4. Let it cool slightly before enjoying.

For best results, use very ripe bananas and avoid overmixing the batter. Microwave times may vary based on the wattage; adjust accordingly.

Dessert, Snack
Paleo
Banana Mug Cake, Healthy Treat, Mug Cake Recipe, Paleo Dessert, quick snack

Easy 2-Ingredient Cottage Cheese Bread

Sliced easy 2-ingredient cottage cheese bread on a wooden table

I love quick recipes that feel like a hug from the oven, and Easy 2-Ingredient Cottage Cheese Bread is just that. It is soft, slightly tangy, and so simple to make. This two-ingredient bread is a real crowd-pleaser, great for busy mornings, simple lunches, or when you want fresh bread without a lot of work. If you want a quick read on one version of this recipe, see this simple two-ingredient cottage cheese bread recipe for a clear how-to. You will smile when the kitchen fills with the bread smell, and you’ll be ready to slice it warm with butter in no time.

How to prepare Easy 2-Ingredient Cottage Cheese Bread

Ingredients

  • 2 cups self-rising flour
  • 2 cups cottage cheese

Directions

  1. Preheat your oven to 350°F, and grease a loaf pan or line it with parchment paper.
  2. In a bowl, add the self-rising flour.
  3. Add the cottage cheese to the flour.
  4. Mix with a spoon until a sticky dough forms. It should pull together and not be very runny.
  5. Turn the dough into the prepared pan, and smooth the top with a spatula or wet hands.
  6. Bake for 35 to 45 minutes, until the top is golden and a toothpick in the center comes out clean.
  7. Let the bread cool in the pan for 10 minutes, then remove and cool on a rack before slicing.

Easy 2-Ingredient Cottage Cheese Bread

Why You’ll Love Easy 2-Ingredient Cottage Cheese Bread

  • Very simple, only two main items needed, perfect for busy days.
  • Soft inside, with a light tang from the cottage cheese.
  • No yeast, no rise time, so you make it fast.
  • Works as a basic loaf to use with sweet or savory toppings.

Tips for success

  • Use self-rising flour for the best rise, do not substitute plain flour unless you add baking powder and salt.
  • If the dough seems too dry, add a tablespoon of milk at a time until it comes together.
  • If it is too sticky to handle, dust your hands with a little flour.
  • Check the bread after 35 minutes, ovens vary, and you don’t want to overbake.
  • Let it cool a bit before slicing, warm slices hold together better.

Serving Suggestions

  • Slice and toast, then spread with butter or jam.
  • Use as a sandwich bread with eggs, cheese, or deli meats.
  • Serve with soup or stew as a soft, comforting side.
  • Cut into cubes and toast for croutons or bread bites.

Easy 2-Ingredient Cottage Cheese Bread

FAQs

Q: Can I use low-fat cottage cheese? A: Yes, low-fat cottage cheese works. The bread may be a bit denser, but it still bakes well.

Q: Is this bread gluten-free? A: Not with regular self-rising flour. For a gluten-free version, use a gluten-free self-rising flour blend that is made to replace regular flour.

Q: How can I store leftover bread? A: Wrap the cooled bread in plastic or keep it in an airtight container at room temperature for 2 days, or freeze slices for up to 2 months.

Q: Can I add herbs or cheese to the dough? A: Yes, mix in chopped herbs, grated cheese, or garlic for extra flavor, about 1/2 cup total.

Conclusion

If you want another take or more tips, check this detailed version of the recipe at Easy 2 Ingredient Cottage Cheese Bread Recipe – Suzie The Foodie, it has helpful notes and photos to guide you.

Easy 2-Ingredient Cottage Cheese Bread

This soft and slightly tangy bread is made with just two ingredients, perfect for busy mornings and requires no yeast or rise time.

Bread Ingredients

  • 2 cups self-rising flour (Use self-rising flour for best results; do not substitute with plain flour.)
  • 2 cups cottage cheese (Low-fat cottage cheese can be used.)

Preparation

  1. Preheat your oven to 350°F (175°C) and grease a loaf pan or line it with parchment paper.
  2. In a bowl, add the self-rising flour.
  3. Add the cottage cheese to the flour.
  4. Mix with a spoon until a sticky dough forms. It should pull together and not be very runny.
  5. Turn the dough into the prepared pan, and smooth the top with a spatula or wet hands.

Baking

  1. Bake for 35 to 45 minutes, until the top is golden and a toothpick in the center comes out clean.
  2. Let the bread cool in the pan for 10 minutes, then remove and cool on a rack before slicing.

If the dough seems too dry, add a tablespoon of milk at a time until it comes together. If it is too sticky to handle, dust your hands with a little flour. Check the bread after 35 minutes, as oven times may vary.

Breakfast, Snack
American
2-Ingredient Bread, Cottage Cheese Bread, Easy Recipe, Homemade Bread, Quick Bread

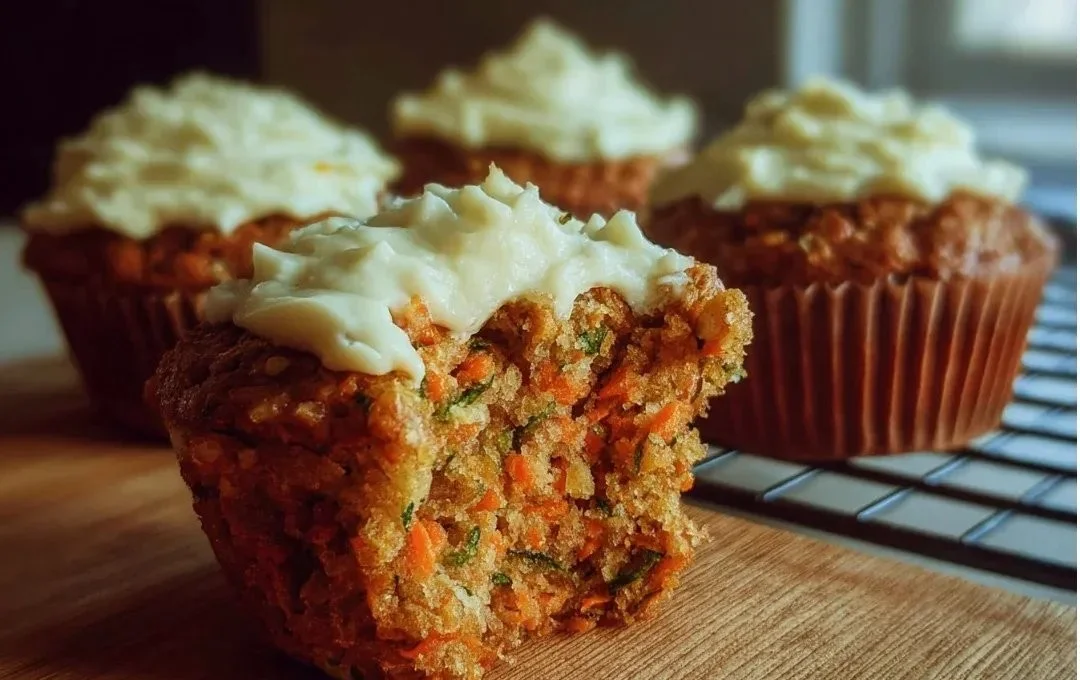
Carrot Apple Zucchini Muffins with Cream Cheese Frosting Bliss

Delicious Carrot Apple Zucchini Muffins with Cream Cheese Frosting

Carrot Apple Zucchini Muffins with Cream Cheese Frosting Bliss are a delightful treat that combines the sweetness of apples and carrots with the subtle flavor of zucchini. These muffins are moist, flavorful, and topped with a rich cream cheese frosting that takes them to the next level. Perfect for breakfast, snacks, or dessert, they are sure to become a family favorite.

Why Make This Recipe

Making Carrot Apple Zucchini Muffins is a wonderful way to enjoy a nutritious and delicious treat. These muffins are packed with healthy ingredients. Carrots provide a good source of vitamins and fiber, while zucchini adds moisture without overpowering the flavor. Apples bring natural sweetness and a touch of tartness, creating a delightful balance in every bite.

This recipe is also a great way to sneak in some veggies for those picky eaters. Each bite is bursting with flavor and texture. Plus, the cream cheese frosting is a simple yet indulgent touch that makes these muffins feel extra special.

These muffins are versatile too! You can enjoy them warm out of the oven or at room temperature. They’re perfect for breakfast on busy mornings or as an afternoon snack. You can even freeze them for later. Just pop them in the microwave for a quick treat. When you make these muffins, you are not just baking; you’re creating a wholesome treat that your family will love.

How to Make Carrot Apple Zucchini Muffins

To make Carrot Apple Zucchini Muffins, you’ll need simple ingredients: flour, sugar, carrots, apples, zucchini, eggs, oil, baking powder, baking soda, cinnamon, and nutmeg. Start by preheating your oven to 350°F (175°C). Line a muffin tin with paper liners or grease it lightly.

In a large bowl, mix the dry ingredients: flour, sugar, baking powder, baking soda, cinnamon, and nutmeg. In another bowl, beat the eggs and mix in the oil. Then, add grated carrots, zucchini, and apples to the egg mixture, stirring well.

Next, combine the wet and dry ingredients until just mixed. Be careful not to overmix. Spoon the batter into each muffin cup, filling them about two-thirds full. Bake for 20-25 minutes or until a toothpick inserted into the center comes out clean. Once baked, let the muffins cool in the pan for a few minutes before transferring them to a wire rack.

For the cream cheese frosting, beat together cream cheese, butter, powdered sugar, and vanilla extract until smooth. Once the muffins are completely cool, pipe or spread the frosting on top. Enjoy the delicious flavors and aromas of your homemade muffins!

How to Serve Carrot Apple Zucchini Muffins

Carrot Apple Zucchini Muffins are delightful on their own, but serving them right can enhance the experience. These muffins are great for breakfast or a snack at any time of the day. They pair perfectly with a cup of tea or coffee, making them an ideal choice for a cozy afternoon.

To serve, simply place the muffins on a beautiful platter or basket. If you want to impress your guests, you can dust them with powdered sugar for a nice touch. You might also consider adding a dollop of extra cream cheese frosting on the side for those who love a sweeter taste.

For a fun twist, you can serve the muffins warm alongside a scoop of vanilla ice cream for dessert. The warm muffins will melt the ice cream just a bit, creating a delicious combination. Whether at a gathering, a potluck, or just for family, these muffins will surely be a hit with everyone who tries them!

How to Store Carrot Apple Zucchini Muffins

Storing Carrot Apple Zucchini Muffins properly will help keep them fresh for longer. Once the muffins have cooled completely, you can store them in an airtight container. If you plan to eat them within a few days, keep them at room temperature, away from direct sunlight.

For longer storage, these muffins freeze beautifully. To freeze, wrap each muffin individually in plastic wrap or place them in a freezer-safe bag. Make sure to squeeze out as much air as possible to prevent freezer burn. When you’re ready to enjoy them again, just take out the desired number of muffins and let them thaw on the counter or warm them in the microwave.

If you have frosted muffins, it’s best to store them in the refrigerator to prevent the cream cheese frosting from melting. Just remember to let them come to room temperature before serving for the best taste.

Tips to Make Carrot Apple Zucchini Muffins

Here are some helpful tips to ensure your Carrot Apple Zucchini Muffins turn out great every time. First, make sure to use fresh and moist zucchini and perfectly ripe apples. This will enhance the flavor and moisture of your muffins. Grate the zucchini and squeeze out any excess moisture to prevent the batter from becoming overly wet.

When measuring your flour, spoon it into your measuring cup instead of scooping it directly from the bag. This prevents over-packing and keeps your muffins light and fluffy. If you want a little extra flavor, you can add chopped nuts or raisins into the batter.

Mixing the dry and wet ingredients separately before combining them helps maintain the right texture. Avoid overmixing the batter once combined—this can lead to dense muffins. Lastly, be creative with the cream cheese frosting! You can add cocoa powder for chocolate-flavored frosting or lemon zest for a citrusy twist.

Variation

You can easily adapt this recipe to suit your preferences. For a healthier option, substitute half of the flour for whole wheat flour or replace sugar with honey or maple syrup. You can also try adding spices like ginger or using different fruits, such as crushed pineapple instead of apples. If you’re a fan of nuts, consider adding chopped walnuts or pecans for added crunch and flavor.

FAQs

Can I make these muffins without the frosting?
Yes, you can absolutely enjoy these muffins without the cream cheese frosting. They are delicious on their own!

Can I freeze these muffins?
Yes, you can freeze Carrot Apple Zucchini Muffins for up to three months. Wrap them tightly and store them in a freezer-safe container.

How do I know when the muffins are done baking?
You can check if your muffins are done by inserting a toothpick into the center. If it comes out clean or with just a few crumbs, they are ready to be taken out of the oven.

Can I make these muffins gluten-free?
Yes, you can use a gluten-free flour blend to make these muffins gluten-free. Just ensure that the other ingredients you use are also gluten-free.

[tasty-recipe id=”4960″]

Carrot Apple Zucchini Muffins

Moist and flavorful muffins packed with carrots, apples, and zucchini, topped with a rich cream cheese frosting. Perfect for breakfast, snacks, or dessert.

Muffin Ingredients

  • 2 cups all-purpose flour (Spoon into the measuring cup to avoid overpacking.)
  • 1 cup granulated sugar (Can be replaced with honey or maple syrup for a healthier option.)
  • 1 cup grated carrots (Fresh and moist.)
  • 1 cup grated zucchini (Squeeze excess moisture before adding.)
  • 1 cup grated apples (Use perfectly ripe apples.)
  • 2 large eggs (Beaten.)
  • 1/2 cup vegetable oil
  • 2 teaspoons baking powder
  • 1 teaspoon baking soda
  • 1 teaspoon cinnamon
  • 1/2 teaspoon nutmeg

Cream Cheese Frosting Ingredients

  • 8 oz cream cheese (Softened.)
  • 1/2 cup butter (Softened.)
  • 2 cups powdered sugar
  • 1 teaspoon vanilla extract

Preparation

  1. Preheat your oven to 350°F (175°C) and line a muffin tin with paper liners or grease it lightly.
  2. In a large bowl, mix the dry ingredients: flour, sugar, baking powder, baking soda, cinnamon, and nutmeg.
  3. In another bowl, beat the eggs and mix in the vegetable oil.
  4. Add the grated carrots, zucchini, and apples to the egg mixture, stirring well.

Baking

  1. Combine the wet and dry ingredients until just mixed, being careful not to overmix.
  2. Spoon the batter into each muffin cup, filling them about two-thirds full.
  3. Bake for 20-25 minutes or until a toothpick inserted into the center comes out clean.
  4. Let the muffins cool in the pan for a few minutes before transferring them to a wire rack.

Frosting

  1. For the cream cheese frosting, beat together the cream cheese, butter, powdered sugar, and vanilla extract until smooth.
  2. Once the muffins are completely cool, pipe or spread the frosting on top.

Tips: Use fresh zucchini and ripe apples, grate the zucchini and squeeze out excess moisture, avoid overmixing, and get creative with the frosting by adding cocoa or lemon zest.

Breakfast, Dessert, Snack
American
Apple, Carrot, Cream Cheese Frosting, Muffins, Zucchini

Low-Calorie Fudgy Brownies

Delicious low-calorie fudgy brownies topped with chocolate drizzle.

These Low-Calorie Fudgy Brownies make it easy to enjoy a chocolate treat without the guilt. They keep the classic fudgy texture you love, while using lighter ingredients to cut calories. This recipe is a crowd-pleaser because it tastes like a real brownie, not a diet version, and it pairs well with coffee, fruit, or a scoop of light ice cream. Get ready to bake a batch that will disappear fast, and enjoy the sweet reward with less worry.

how to prepare Low-Calorie Fudgy Brownies

Ingredients

  • 1/2 cup unsweetened applesauce
  • 1/2 cup plain nonfat Greek yogurt
  • 1/3 cup light brown sugar or a sugar substitute to taste
  • 2 large egg whites
  • 1 tsp vanilla extract
  • 1/3 cup unsweetened cocoa powder
  • 3/4 cup whole wheat flour or almond flour for lower carbs
  • 1/2 tsp baking powder
  • 1/8 tsp salt
  • 2 tbsp melted dark chocolate or 2 tbsp mini dark chocolate chips, optional

Directions

  1. Preheat your oven to 350 F, and lightly grease an 8×8 inch pan or line it with parchment paper.
  2. In a bowl, mix the applesauce, Greek yogurt, and sugar until smooth. Add the egg whites and vanilla, stir well.
  3. Sift in the cocoa powder, then add the flour, baking powder, and salt. Fold until just mixed, do not overmix.
  4. If you like extra fudgy bites, fold in the melted dark chocolate or chocolate chips.
  5. Pour the batter into the prepared pan, smooth the top with a spatula.
  6. Bake 18 to 22 minutes, until the top looks set but a toothpick comes out with a few moist crumbs. Do not overbake, you want a fudgy center.
  7. Cool in the pan for 15 minutes, then move to a wire rack to cool more. Cut into 9 or 12 squares and enjoy.


Low-Calorie Fudgy Brownies

Why You’ll Love Low-Calorie Fudgy Brownies

  • They are fudgy, not dry, so you get real brownie texture with fewer calories.
  • Greek yogurt adds moisture and protein, making these healthier brownies.
  • Simple pantry ingredients, no special items needed.
  • Quick bake time means you can have a treat in under an hour.
  • They work well as a light dessert or an after-lunch snack.

tips for success

  • Measure flour by spooning it into the cup and leveling, do not pack, this keeps brownies tender.
  • Use nonfat Greek yogurt for lower calories and a moist crumb.
  • Do not overbake, check early, a few moist crumbs mean fudgy brownies.
  • Let brownies cool before cutting, this helps clean slices.
  • For extra chocolate flavor, add a teaspoon of instant espresso powder to the dry mix.
  • If using a sugar substitute, check how it swaps by volume to keep sweetness right.

Serving Suggestions

  • Warm a square and top with a spoon of light whipped cream or fat free yogurt.
  • Serve with fresh berries for a fresh contrast to the rich chocolate.
  • Pair with a small scoop of low-calorie vanilla ice cream for a classic treat.
  • Cut small squares to serve at a party, they make a great reduced calorie dessert option.
  • Wrap chilled pieces for a portable snack, good for lunch boxes.


Low-Calorie Fudgy Brownies

FAQs

Q: Are these brownies really low calorie?

A: Yes, they use applesauce and Greek yogurt to cut fat and calories, so one square is much lower in calories than a traditional brownie.

Q: Can I use whole eggs instead of egg whites?

A: Yes, you can use one whole egg, but calories and fat will rise a bit, and texture may be slightly richer.

Q: Can I make these gluten free?

A: Yes, swap the whole wheat flour for a 1 to 1 gluten free flour or almond flour, but baking time may change slightly.

Q: How do I store leftovers?

A: Keep brownies in an airtight container at room temperature for 2 days, or in the fridge for up to 5 days.

Q: Can I add nuts or fruit?

A: Yes, fold in a small handful of chopped nuts or dried fruit, but note this adds calories.

Conclusion

If you want another low-calorie brownie idea that uses Greek yogurt for a moist, fudgy result, check this recipe for Greek Yogurt Brownies (Under 100 Calories!) – The Big Man’s World, it has a similar light twist you may enjoy.

Low-Calorie Fudgy Brownies

These Low-Calorie Fudgy Brownies offer a guilt-free chocolate treat with a fudgy texture and lighter ingredients, making them a crowd-pleaser.

Brownie Base

  • 1/2 cup unsweetened applesauce
  • 1/2 cup plain nonfat Greek yogurt (For lower calories and added moisture)
  • 1/3 cup light brown sugar or a sugar substitute to taste
  • 2 large egg whites
  • 1 tsp vanilla extract
  • 1/3 cup unsweetened cocoa powder
  • 3/4 cup whole wheat flour or almond flour for lower carbs (Use almond flour for lower carbs)
  • 1/2 tsp baking powder
  • 1/8 tsp salt
  • 2 tbsp melted dark chocolate or mini dark chocolate chips, optional (For extra fudginess)

Preparation

  1. Preheat your oven to 350 F and lightly grease an 8×8 inch pan or line it with parchment paper.
  2. In a bowl, mix the applesauce, Greek yogurt, and sugar until smooth. Add the egg whites and vanilla, stir well.
  3. Sift in the cocoa powder, then add the flour, baking powder, and salt. Fold until just mixed, do not overmix.
  4. If you like extra fudgy bites, fold in the melted dark chocolate or chocolate chips.
  5. Pour the batter into the prepared pan and smooth the top with a spatula.

Baking

  1. Bake for 18 to 22 minutes, until the top looks set but a toothpick comes out with a few moist crumbs. Do not overbake for a fudgy center.
  2. Cool in the pan for 15 minutes, then move to a wire rack to cool more.
  3. Cut into 9 or 12 squares and enjoy.

Measure flour carefully by spooning it into the cup and leveling to keep brownies tender. For extra chocolate flavor, add a teaspoon of instant espresso powder to the dry mix.

Dessert, Snack
American
Fudgy Brownies, Healthy Desserts, Low-Calorie Brownies

2-Ingredient Cottage Cheese Bread

Freshly baked 2-ingredient cottage cheese bread loaf on a wooden cutting board.

This 2-Ingredient Cottage Cheese Bread is warm, soft, and easy to make. It uses simple items and little time, so it is perfect for busy days and small kitchens. The bread has a light crumb and a mild, slightly tangy taste from the cottage cheese. It works well for sandwiches, toast, or just warm with butter.

If you like easy recipes, you might also enjoy a related simple dessert, like a two-ingredient yogurt cheesecake for a quick sweet finish.

This featured recipe is a crowd-pleaser, gentle on flavor, and very forgiving. You will love how it fills the house with a fresh bread smell in under an hour. Get your hands ready to mix and bake, you will smile when you slice the first piece.

how to prepare 2-Ingredient Cottage Cheese Bread

Ingredients

  • 1 cup cottage cheese
  • 1 cup self-rising flour

Directions

  1. Preheat the oven to 350°F, and grease a small loaf pan or line it with parchment.
  2. In a bowl, blend the cottage cheese and self-rising flour until a soft dough forms. Mix with a spoon or a hand mixer on low for about 30 seconds.
  3. Turn the dough into the prepared pan. Smooth the top with a spatula or wet fingers.
  4. Bake for 30 to 40 minutes, until the top is golden and a toothpick comes out clean.
  5. Let the bread cool in the pan for 10 minutes, then remove and cool on a rack before slicing.

2-Ingredient Cottage Cheese Bread

Why You’ll Love 2-Ingredient Cottage Cheese Bread

  • It uses just two common ingredients, so it is fast and simple.
  • The bread is soft and moist, with a mild tang from the cottage cheese.
  • It bakes quickly, so you get fresh bread without long prep.
  • It is great for quick lunches, snacks, or a simple side for soup.

tips for success

  • Use full-fat cottage cheese for a richer texture.
  • If the dough seems too wet, add a tablespoon of flour at a time until it firms.
  • Do not overmix, mix until just combined for a light crumb.
  • Check the bread at 30 minutes, ovens vary, and bake until the center is set.
  • Cool the loaf enough before slicing, it finishes setting as it cools.

Serving Suggestions

  • Slice and toast, then spread with butter and honey.
  • Make a quick sandwich with ham and cheese.
  • Serve warm with soup or a salad for a simple meal.
  • Turn slices into croutons, cube and bake until crisp.

2-Ingredient Cottage Cheese Bread

FAQs

Q: Can I use low-fat cottage cheese? A: Yes, you can. Low-fat will work, but the bread may be a bit less rich.

Q: Can I make this gluten-free? A: Use a gluten-free self-rising flour blend made for baking. Check the package for rising agents.

Q: How long does this bread keep? A: Store in an airtight bag or container at room temperature for 2 days, or in the fridge for up to 5 days.

Q: Can I add herbs or cheese? A: Yes, fold in a tablespoon or two of chopped herbs, or 1/4 cup grated cheese, before baking.

Conclusion

This simple 2-Ingredient Cottage Cheese Bread is quick, tasty, and comforting. If you want to try a similar tested recipe, see the Easy 2 Ingredient Cottage Cheese Bread Recipe – Suzie The Foodie for another take and photo guide.

2-Ingredient Cottage Cheese Bread

This bread is warm, soft, and easy to make with just two ingredients—cottage cheese and self-rising flour. Perfect for busy days, it has a mild, slightly tangy flavor and is great for sandwiches or toasting.

Main Ingredients

  • 1 cup cottage cheese (Use full-fat for a richer texture.)
  • 1 cup self-rising flour (Can substitute with gluten-free self-rising flour.)

Preparation

  1. Preheat the oven to 350°F, and grease a small loaf pan or line it with parchment.
  2. In a bowl, blend the cottage cheese and self-rising flour until a soft dough forms, about 30 seconds using a spoon or hand mixer on low.
  3. Turn the dough into the prepared pan and smooth the top with a spatula or wet fingers.

Baking

  1. Bake for 30 to 40 minutes, until the top is golden and a toothpick comes out clean.
  2. Let the bread cool in the pan for 10 minutes, then remove and cool on a rack before slicing.

If the dough seems too wet, add a tablespoon of flour at a time until it firms. Do not overmix; mix until just combined for a light crumb. Check the bread at 30 minutes, ovens vary, and bake until the center is set. Cool the loaf enough before slicing, it finishes setting as it cools.

Breakfast, Snack
American
Comfort Food, Cottage Cheese Bread, Easy Bread Recipe, Quick Bread, Two Ingredient Bread

Cottage Cheese Blueberry Muffins

Delicious Cottage Cheese Blueberry Muffins on a wooden table

Cottage Cheese Blueberry Muffins are a delightful treat that combines the creamy texture of cottage cheese with the sweetness of juicy blueberries. These muffins are not only delicious but also packed with protein, making them a great start to your day or a tasty snack. They are perfect for sharing with friends and family, as they are easy to make and sure to please everyone. If you’re looking for a recipe that’s simple, fun, and oh-so-yummy, you’ve just found it! Let’s dive into making these mouthwatering muffins together.

how to prepare Cottage Cheese Blueberry Muffins

Ingredients

  • 1 cup cottage cheese
  • 1/2 cup sugar
  • 2 large eggs
  • 1/4 cup vegetable oil
  • 1 teaspoon vanilla extract
  • 1 cup all-purpose flour
  • 1 teaspoon baking powder
  • 1/2 teaspoon baking soda
  • 1/2 teaspoon salt
  • 1 cup fresh or frozen blueberries

Directions

  1. Preheat your oven to 375°F (190°C).
  2. In a mixing bowl, combine cottage cheese, sugar, eggs, vegetable oil, and vanilla extract. Stir until well mixed.
  3. In a separate bowl, whisk together flour, baking powder, baking soda, and salt.
  4. Gradually add the dry ingredients to the wet mixture, stirring gently until just combined. Be careful not to overmix.
  5. Gently fold in the blueberries.
  6. Line a muffin tin with paper liners or grease it lightly. Fill each muffin cup about two-thirds full with the batter.
  7. Bake for 20-25 minutes or until a toothpick comes out clean.
  8. Allow the muffins to cool for a few minutes before transferring them to a wire rack.

Cottage Cheese Blueberry Muffins

Why You’ll Love Cottage Cheese Blueberry Muffins

These muffins are a game-changer, trust us! The cottage cheese adds a unique creaminess and keeps them moist, while the blueberries burst with flavor. They’re not overly sweet, making them a fantastic breakfast or snack option. Plus, they’re healthier than your average muffin, thanks to the added protein. You’ll fall in love with them after the first bite!

tips for success

  • Don’t overmix: When combining the wet and dry ingredients, mix just until blended. Overmixing can lead to dense muffins.
  • Use fresh blueberries: If you can, use fresh blueberries for the best flavor and texture. If you use frozen, do not thaw them before mixing.
  • Let them cool: Allow your muffins to cool slightly in the pan before transferring them to a wire rack. This helps them maintain their shape.

Serving Suggestions

These Cottage Cheese Blueberry Muffins are delightful on their own, but you can also serve them with a spread of cream cheese or butter for extra richness. Pair them with a hot cup of coffee or a refreshing glass of iced tea for a perfect snack. They also make a lovely addition to breakfast brunches or family gatherings.

FAQs

Can I use other fruits instead of blueberries?

Absolutely! You can try raspberries, cranberries, or chopped strawberries for a fun twist.

How should I store the muffins?

Keep them in an airtight container at room temperature for up to three days. For longer storage, you can freeze them for up to three months.

Can I make them gluten-free?

Yes! You can replace all-purpose flour with your favorite gluten-free flour blend. Just ensure the blend has a binding agent for best results.

Now that you have everything you need to whip up these Cottage Cheese Blueberry Muffins, it’s time to grab your apron and get started! Happy baking!

Cottage Cheese Blueberry Muffins

Delightful muffins combining creamy cottage cheese and sweet blueberries; packed with protein and perfect for breakfast or a snack.

Wet Ingredients

  • 1 cup cottage cheese
  • 1/2 cup sugar
  • 2 large eggs
  • 1/4 cup vegetable oil
  • 1 teaspoon vanilla extract

Dry Ingredients

  • 1 cup all-purpose flour
  • 1 teaspoon baking powder
  • 1/2 teaspoon baking soda
  • 1/2 teaspoon salt

Fruits

  • 1 cup fresh or frozen blueberries (Use fresh for best flavor; do not thaw if frozen.)

Preparation

  1. Preheat your oven to 375°F (190°C).
  2. In a mixing bowl, combine cottage cheese, sugar, eggs, vegetable oil, and vanilla extract. Stir until well mixed.
  3. In a separate bowl, whisk together flour, baking powder, baking soda, and salt.
  4. Gradually add the dry ingredients to the wet mixture, stirring gently until just combined. Be careful not to overmix.
  5. Gently fold in the blueberries.
  6. Line a muffin tin with paper liners or grease it lightly. Fill each muffin cup about two-thirds full with the batter.

Baking

  1. Bake for 20-25 minutes or until a toothpick comes out clean.
  2. Allow the muffins to cool for a few minutes before transferring them to a wire rack.

Store muffins in an airtight container at room temperature for up to three days. For longer storage, freeze them for up to three months. You can experiment with other fruits like raspberries, cranberries, or chopped strawberries.

Breakfast, Snack
American
Baking, Blueberries, Cottage Cheese Blueberry Muffins, Healthy Snacks, Muffins