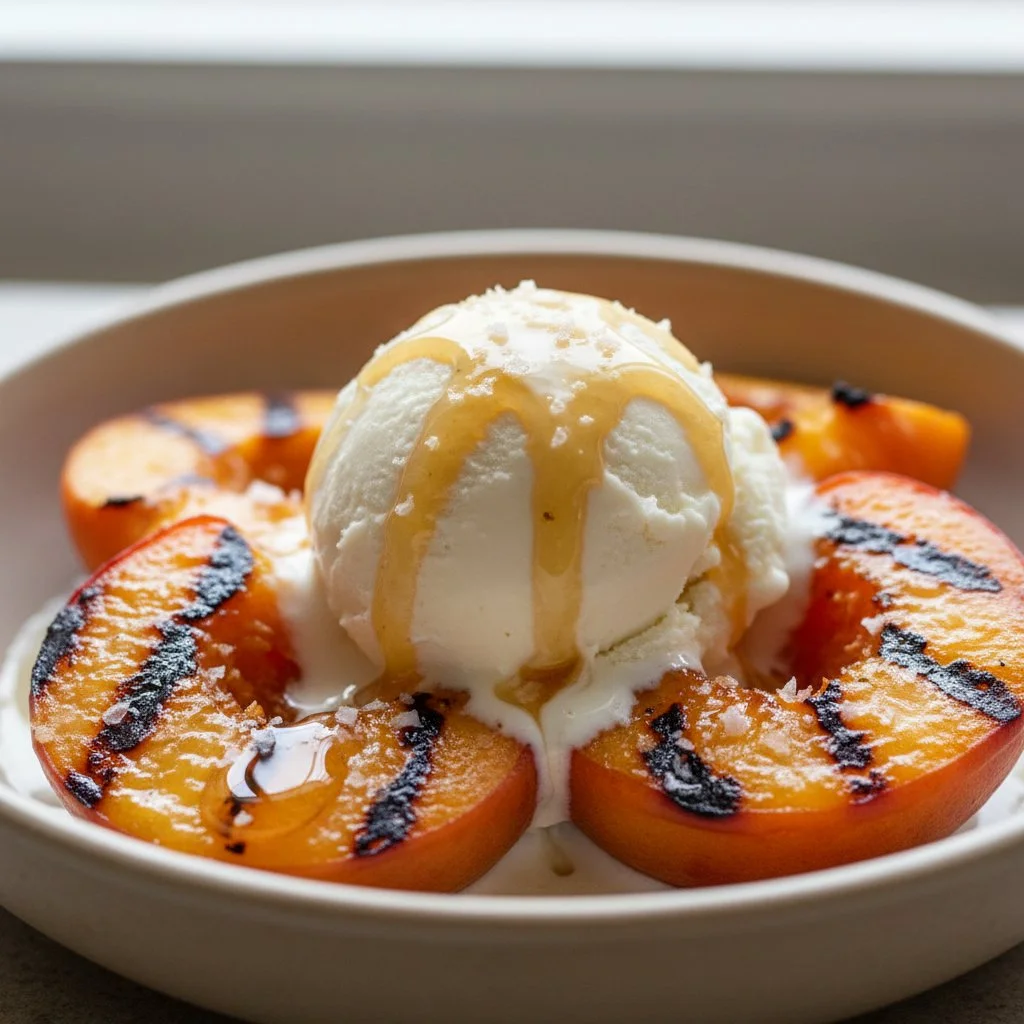
Irresistible Grilled Peaches with Brown Butter Cinnamon-Sugar Glaze

Grilled peaches topped with brown butter and cinnamon-sugar glaze on a plate.

Grilled peaches are a delightful summer treat that will change your dessert game. Imagine juicy, tender peaches caramelized to perfection on the grill, dripping with a rich brown butter cinnamon-sugar glaze. This simple yet fabulous recipe is perfect for gatherings, picnics, or even a cozy night in. It’s a dish that everyone will rave about, with its sweet, smoky flavor and warm spice. Once you try it, you’ll find yourself dreaming about grilled peaches all year long!

How to Prepare Irresistible Grilled Peaches with Brown Butter Cinnamon-Sugar Glaze

To start making these tasty treats, first gather your ingredients. You’ll need fresh peaches, butter, brown sugar, cinnamon, and a pinch of salt. Slice the peaches in half and remove the pits. Melt the butter in a pan until it turns golden brown, then add the brown sugar, cinnamon, and salt to create your glaze.

Next, grill the peach halves cut side down for about 3-4 minutes until they are grill-marked and tender. Once off the grill, brush them with the brown butter cinnamon-sugar glaze to give them that irresistible taste. Serve warm, and watch as your friends and family smile with every bite!

Irresistible Grilled Peaches with Brown Butter Cinnamon-Sugar Glaze

Why You’ll Love Irresistible Grilled Peaches with Brown Butter Cinnamon-Sugar Glaze

These grilled peaches are not just a dessert, they are an experience. The sweet, juicy fruit paired with the nutty, rich flavor of brown butter creates a heavenly taste that’s hard to resist. The addition of cinnamon-sugar adds warmth and comfort, making this dish perfect for any occasion. Plus, it’s a simple recipe that requires minimal ingredients and time, making it a go-to for busy cooks and sweet tooth enthusiasts alike.

Tips for Success

  • Choose Ripe Peaches: Look for peaches that are slightly soft to the touch but not overly mushy. Their natural sweetness will shine through.
  • Watch the Grill: Keep an eye on the peaches while they grill to prevent burning. You want those lovely grill marks, not charred fruit!
  • Customize the Glaze: Feel free to add a splash of vanilla or a sprinkle of nutmeg for an extra flavor twist.

Serving Suggestions

Grilled peaches are versatile! Serve them as a delightful dessert on their own, or add a scoop of vanilla ice cream for a decadent treat. Pair them with yogurt and granola for a delicious breakfast or brunch option. They also make an excellent topping for pancakes or waffles. Get creative and enjoy!

FAQs

Can I use frozen peaches instead?

While fresh peaches yield the best flavor, you can use frozen peaches; just be sure to let them thaw completely before grilling.

What if I don’t have a grill?

No worries! You can cook the peaches in a grill pan on the stovetop or even roast them in the oven.

How should I store leftovers?

If you have any leftovers (though they might not last long!), store them in an airtight container in the fridge for up to two days. Reheat on the stove for a few minutes before serving again.

Now that you know how to make these delicious grilled peaches, it’s time to fire up that grill and impress your friends and family. Enjoy every bite of this sweet summer treat!

Grilled Peaches with Brown Butter Cinnamon-Sugar Glaze
Delicious grilled peaches caramelized to perfection with a rich brown butter cinnamon-sugar glaze, perfect for summer gatherings or cozy nights in.

Main Ingredients

  • 4 pieces fresh peaches (Choose ripe peaches.)
  • 4 tablespoons butter (Melt until golden brown.)
  • 1/4 cup brown sugar
  • 1 teaspoon cinnamon (For added warmth.)
  • a pinch salt (To enhance flavor.)

Preparation

  1. Gather your ingredients: fresh peaches, butter, brown sugar, cinnamon, and a pinch of salt.
  2. Slice the peaches in half and remove the pits.
  3. Melt the butter in a pan until it turns golden brown, then add the brown sugar, cinnamon, and salt to create your glaze.

Grilling

  1. Grill the peach halves cut side down for about 3-4 minutes until they are grill-marked and tender.
  2. Once off the grill, brush them with the brown butter cinnamon-sugar glaze.

Serving

  1. Serve warm and enjoy!

Tips: Choose ripe peaches for sweetness, watch the grill to avoid burning, and customize the glaze with vanilla or nutmeg for extra flavor. Grilled peaches are versatile; serve them solo, with ice cream, or as pancake toppings.
Dessert, Snack
American, Summer
Brown Butter, Cinnamon-Sugar, Easy Recipe, Grilled Peaches, Summer Dessert

Creamy Chickpea Feta Avocado Salad with Zesty Tahini Twist

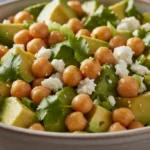
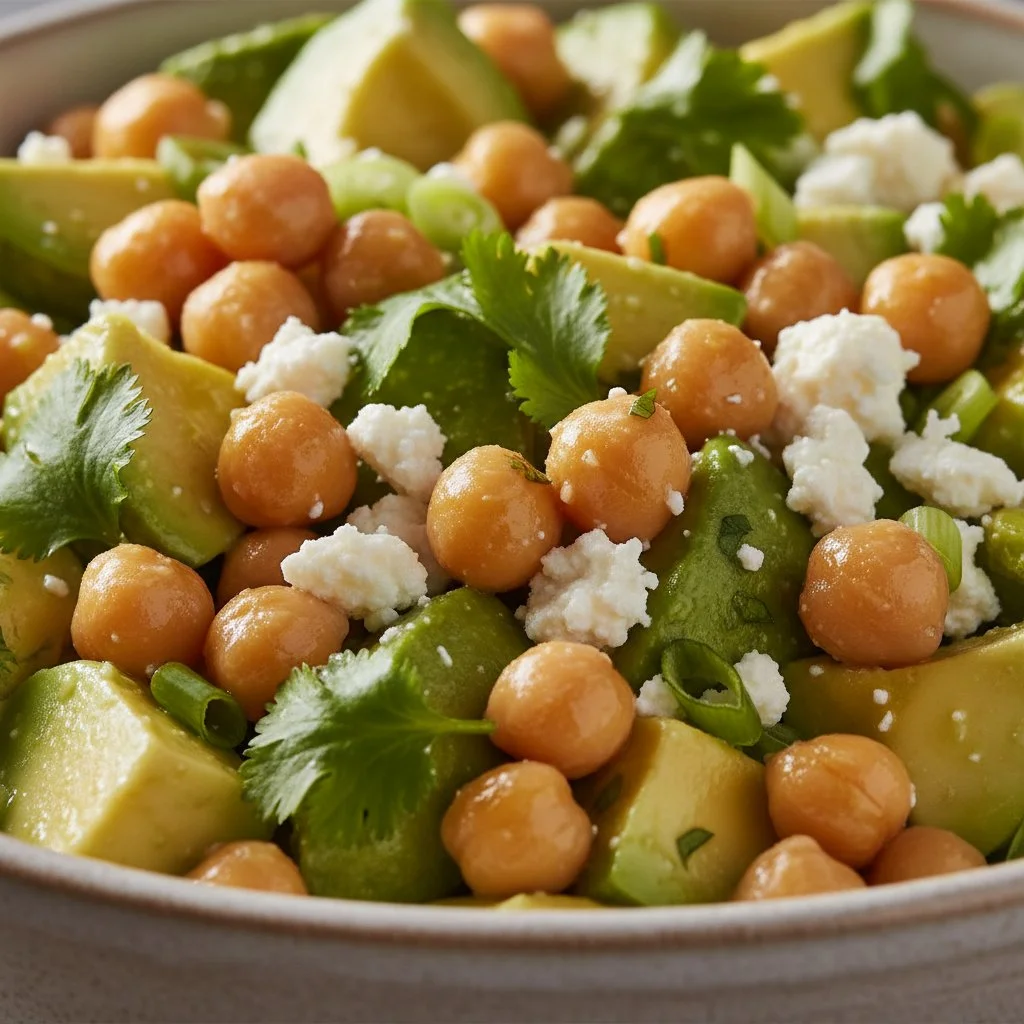
Creamy chickpea feta salad with avocado and zesty tahini dressing

If you’re looking for a refreshing and hearty salad that can steal the show at any gathering, look no further! The Creamy Chickpea Feta Avocado Salad with Zesty Tahini Twist is a delightful mix that’s not only packed with flavor but also loaded with nutrition. This salad combines creamy avocado, protein-rich chickpeas, and tangy feta cheese, all brought together with a zesty tahini dressing. It’s a true crowd-pleaser that makes for a perfect side dish or light lunch. Imagine digging into a bowl of vibrant colors and satisfying textures; you’re sure to impress your friends and family. Ready to whip up a batch? Let’s get started!

How to Prepare Creamy Chickpea Feta Avocado Salad with Zesty Tahini Twist

  1. Gather the Ingredients: You will need:
  • 1 can of chickpeas, rinsed and drained
  • 1 ripe avocado, diced
  • 1 cup cherry tomatoes, halved
  • 1/2 cup crumbled feta cheese
  • 1/4 cup red onion, finely chopped
  • 2 tablespoons fresh parsley, chopped
  • Salt and pepper to taste
  1. Make the Zesty Tahini Dressing:
  • In a bowl, whisk together 3 tablespoons of tahini, 2 tablespoons of lemon juice, 1 tablespoon of olive oil, and a bit of water to thin it out. Season with salt and pepper to taste.
  1. Combine the Salad:
  • In a large bowl, mix together the chickpeas, avocado, cherry tomatoes, feta cheese, red onion, and parsley.
  1. Add the Dressing:
  • Drizzle the zesty tahini dressing over the salad and toss gently to combine all the flavors.
  1. Serve and Enjoy:
  • Serve immediately or let it chill in the fridge for a bit to let the flavors meld together.

Creamy Chickpea Feta Avocado Salad with Zesty Tahini Twist

Why You’ll Love Creamy Chickpea Feta Avocado Salad with Zesty Tahini Twist

This delicious salad is not just easy to make, it’s also incredibly satisfying. The creaminess of the avocado paired with the salty feta creates a delightful contrast, while the chickpeas offer a hearty base that fills you up without weighing you down. The zesty tahini dressing adds a unique twist that elevates the overall taste. Perfect for warm summer days, picnics, or even as a healthy meal prep option, this salad is sure to become a favorite in your recipe collection!

Tips for Success

  • Choose the Right Avocado: Make sure your avocado is ripe but not overripe to prevent a mushy salad.
  • Chill the Salad: Let the salad sit in the fridge for 30 minutes. This will help the flavors blend together beautifully.
  • Customize it: Feel free to add additional veggies like cucumber or bell peppers for extra crunch and nutrition.

Serving Suggestions

Serve this Creamy Chickpea Feta Avocado Salad as a light lunch alongside crusty bread or pair it with grilled chicken or fish for a more filling dinner. It also makes an excellent side dish for barbecues or family gatherings. Either way, you’ll love how versatile it is!

FAQs

Can I make this salad ahead of time?

Yes, you can prepare the salad a few hours in advance and store it in the fridge. Just hold off on adding the avocado until just before serving to keep it fresh.

What can I substitute for tahini?

If you don’t have tahini on hand, you can use peanut butter or almond butter as a substitute, though the flavor will be slightly different.

Can I make this salad vegan?

Absolutely! Just skip the feta cheese or replace it with a plant-based cheese alternative. The salad will still be delicious and packed with flavor!

Dive into this scrumptious Creamy Chickpea Feta Avocado Salad with Zesty Tahini Twist, and you won’t regret it! Enjoy your fresh, tasty creation!

Creamy Chickpea Feta Avocado Salad

A refreshing and hearty salad featuring creamy avocado, protein-rich chickpeas, and tangy feta, all combined with a zesty tahini dressing.

Salad Ingredients

  • 1 can chickpeas, rinsed and drained
  • 1 ripe avocado, diced (Choose a ripe avocado for best texture.)
  • 1 cup cherry tomatoes, halved
  • 1/2 cup crumbled feta cheese (Can be replaced with a plant-based cheese for vegan option.)
  • 1/4 cup red onion, finely chopped
  • 2 tablespoons fresh parsley, chopped
  • to taste Salt and pepper

Zesty Tahini Dressing

  • 3 tablespoons tahini
  • 2 tablespoons lemon juice
  • 1 tablespoon olive oil
  • to thin as needed water

Preparation

  1. Gather all salad ingredients.
  2. In a bowl, whisk together tahini, lemon juice, olive oil, and water to thin it out. Season with salt and pepper to taste.

Combine the Salad

  1. In a large bowl, mix together the chickpeas, avocado, cherry tomatoes, feta cheese, red onion, and parsley.

Add the Dressing

  1. Drizzle the zesty tahini dressing over the salad and toss gently to combine all the flavors.

Serve

  1. Serve immediately or let it chill in the fridge for 30 minutes to let the flavors meld.

Choose a ripe avocado for the best texture. Letting the salad chill allows the flavors to blend beautifully. Customize by adding other veggies like cucumber or bell peppers.

lunch, Salad, Side Dish
Healthy, Mediterranean
Avocado Salad, Chickpea Salad, Feta Cheese, Healthy Salad, Tahini Dressing

Ultimate Ground Turkey Sweet Potato Casserole

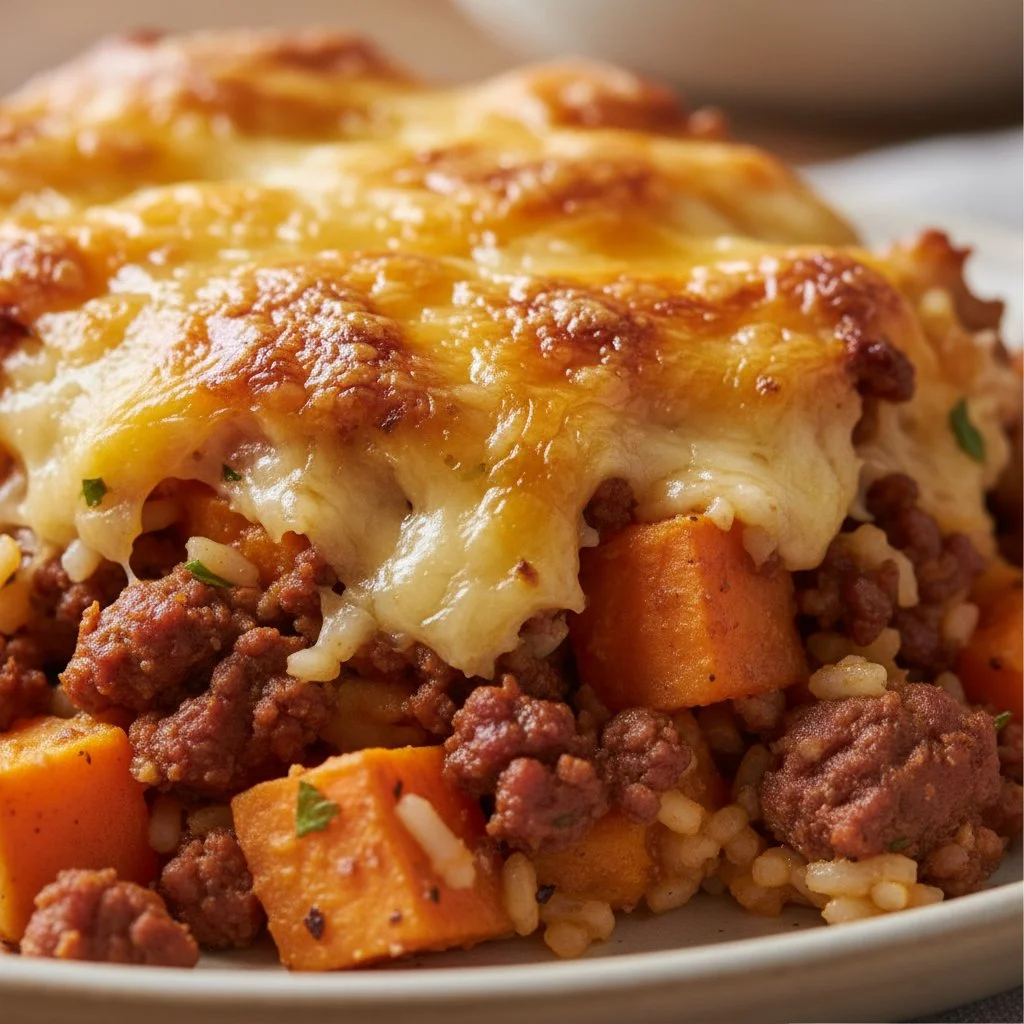
Healthy ground turkey sweet potato casserole ready to serve

Ultimate Ground Turkey Sweet Potato Casserole is a delightful dish that brings comfort and joy to your family table. This casserole is not only hearty but also nutritious, combining lean ground turkey with the sweet, earthy flavor of sweet potatoes, all baked to perfection. It’s a dish everyone loves, whether it’s a busy weeknight dinner or a special weekend gathering. The blend of spices and textures creates an unforgettable experience, making it a true crowd-pleaser. So, if you’re craving something delicious and easy to prepare, you’re in for a treat!

How to Prepare Ultimate Ground Turkey Sweet Potato Casserole

Preparing this Ultimate Ground Turkey Sweet Potato Casserole is quite simple. Start by cooking the ground turkey in a skillet until it’s browned. Next, mix it with diced onions, garlic, and your favorite seasonings to pump up the flavor. In another bowl, mash cooked sweet potatoes with a little butter, salt, and pepper until smooth. Layer the turkey mixture in a baking dish, spread the sweet potato mash on top, and finish it off with cheese. Bake it until everything is heated through and the cheese is golden. This dish is as functional as it is tasty!

Ultimate Ground Turkey Sweet Potato Casserole

Why You’ll Love Ultimate Ground Turkey Sweet Potato Casserole

You’re going to adore this casserole for many reasons! First, it’s packed with protein and vitamins, thanks to the turkey and sweet potatoes. It’s a balanced meal in one dish, making dinner prep super easy for busy nights. Plus, the flavors blend beautifully, making each bite a wonderful explosion of taste. The creamy sweet potatoes paired with the savory turkey will leave everyone going back for seconds. It’s the kind of meal that not only satisfies those hunger pangs but also warms your heart.

Tips for Success

  1. Choose Fresh Ingredients: The quality of your ground turkey and sweet potatoes will make a big difference in taste.
  2. Don’t Overcook the Turkey: Make sure not to overcook the turkey, as it can become dry. Cook it just until it’s no longer pink.
  3. Customize Your Spices: Feel free to add your favorite herbs or spices to make the dish your own, such as cumin or paprika for a little kick.
  4. Mash the Sweet Potatoes Smoothly: Ensure your sweet potatoes are well-mashed so they spread easily on top of the turkey mixture. Adding a splash of milk can help achieve a creamy texture.

Serving Suggestions

This casserole pairs well with a simple side salad or steamed vegetables for added crunch and freshness. You can also serve it with a dollop of Greek yogurt or sour cream on top for a creamy finish. Don’t forget some crusty bread on the side for extra comfort!

FAQs

Can I make this casserole ahead of time?
Yes, you can prepare the casserole a day in advance. Just assemble it, cover it in the fridge, and bake it when you’re ready.

What can I substitute for ground turkey?
You can easily swap out ground turkey for ground chicken, lean beef, or even plant-based meat alternatives if you want a vegetarian option.

How long can I store leftovers?
Leftovers can be stored in the fridge for up to 3 days. Make sure to cover it tightly to keep it fresh!

Get ready to bring Ultimate Ground Turkey Sweet Potato Casserole into your kitchen, and watch as it becomes a delightful favorite for everyone who tries it! Enjoy your cooking adventure, and have fun savoring each bite!

Ultimate Ground Turkey Sweet Potato Casserole

A hearty and nutritious casserole combining lean ground turkey and sweet potatoes, perfect for weeknight dinners or special gatherings.

Main Ingredients

  • 1 lb ground turkey (Choose lean ground turkey for a healthier option.)
  • 2 medium sweet potatoes (Cooked and mashed.)
  • 1 medium onion (Diced.)
  • 2 cloves garlic (Minced.)
  • 1 cup cheddar cheese (Shredded, for topping.)
  • 2 tbsp butter (For mashing the sweet potatoes.)
  • to taste salt
  • to taste pepper
  • optional spices (like cumin or paprika) (Customize to your liking.)

Preparation

  1. In a skillet over medium heat, cook the ground turkey until browned.
  2. Add diced onions, minced garlic, and your favorite seasonings, and stir until fragrant.
  3. In a separate bowl, mash the cooked sweet potatoes with butter, salt, and pepper until smooth.

Assembly

  1. Layer the turkey mixture in a baking dish.
  2. Spread the sweet potato mash on top of the turkey mixture.
  3. Sprinkle shredded cheddar cheese over the sweet potato layer.

Baking

  1. Bake in a preheated oven until heated through and cheese is golden, about 25-30 minutes.

The casserole can be prepared a day in advance and stored in the fridge before baking. Leftovers can be stored for up to 3 days.

Dinner, Main Course
American
Casserole, Comfort Food, Ground Turkey, Healthy Dinner, Sweet Potato

Dill Pickle Pasta Salad: 7 Refreshing Summer Delights

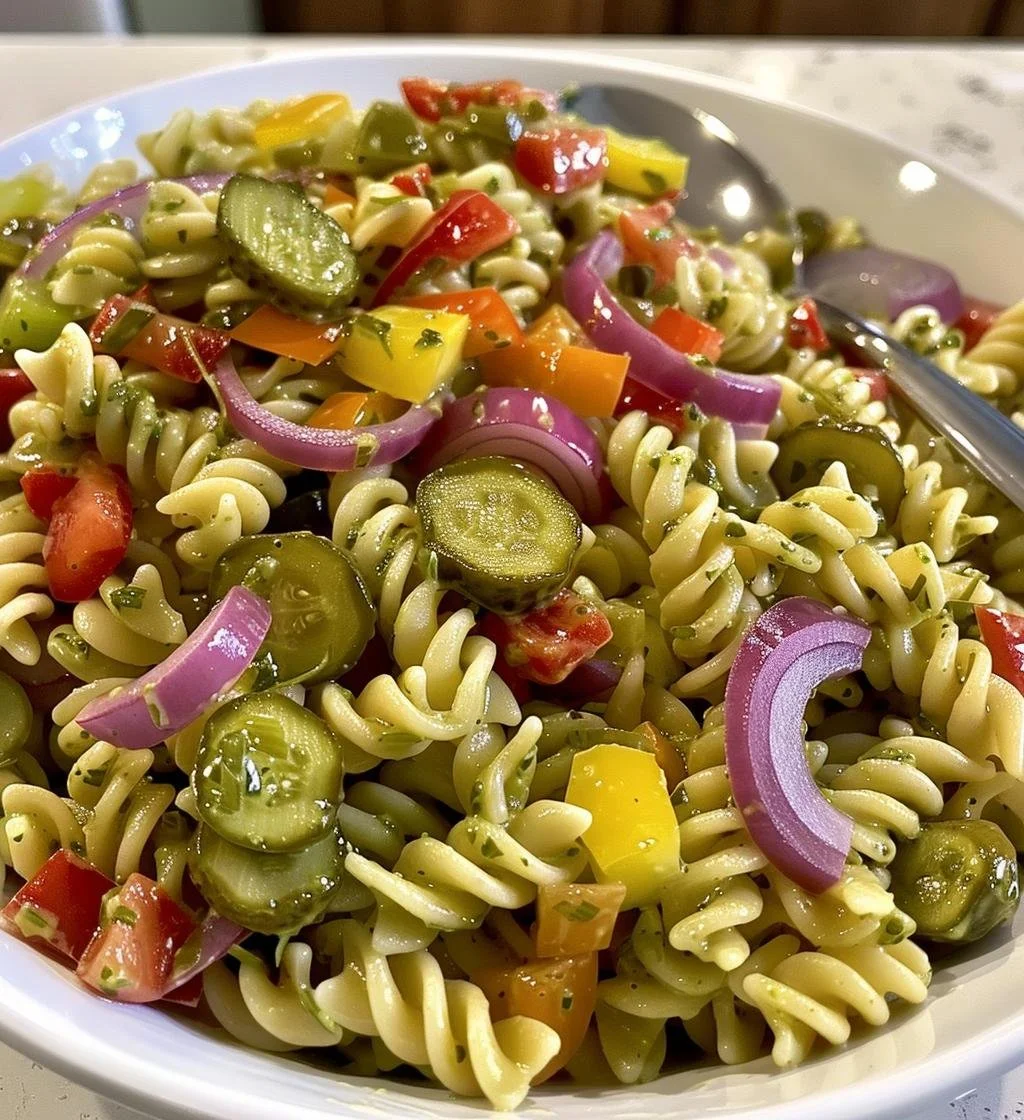
Colorful Dill Pickle Pasta Salad served in a bowl with fresh ingredients.

How to Prepare Dill Pickle Pasta Salad

Making Dill Pickle Pasta Salad is easy and fun! Here’s how you can whip it up in no time:

  1. Cook the pasta: Start by boiling a pot of water, add your favorite pasta, and cook it according to the package directions until it’s al dente. Drain it and let it cool.

  2. Mix the dressing: In a bowl, combine mayonnaise, chopped dill pickles, pickle juice, and spices to make a creamy dressing.

  3. Combine everything: In a large bowl, add the cooled pasta, chopped veggies (like bell peppers and onions), and the dressing. Stir well until everything is coated.

  4. Chill: Cover your bowl and place it in the fridge for at least 30 minutes. This lets the flavors blend together.

  5. Serve: Give it a good stir before serving, and enjoy this delicious salad!

Dill Pickle Pasta Salad: 7 Refreshing Summer Delights

Why You’ll Love Dill Pickle Pasta Salad

Dill Pickle Pasta Salad is a delightful twist on traditional pasta salads. The tangy flavor of dill pickles combined with creamy dressing makes every bite refreshing and exciting. It’s a perfect dish for summer gatherings, picnics, or even a quick lunch at home. Friends and family will be asking for seconds, making it a true crowd-pleaser!

Tips for Success

  • Choose your pasta wisely: Short pasta shapes like shells or bow ties hold the dressing better.
  • Adjust the pickle flavor: If you love pickles, add more chopped dill pickles or even some dill weed for an extra kick.
  • Let it chill: Chilling the salad allows the flavors to meld together beautifully.

Serving Suggestions

Dill Pickle Pasta Salad pairs wonderfully with grilled meats, sandwiches, or can simply be enjoyed on its own. Serve it as a side at your backyard BBQ or at a potluck for a dish everyone will enjoy. Sprinkle some extra dill on top for a pop of flavor and color!

FAQs

Can I make this salad ahead of time?
Yes, this pasta salad can be made a day in advance. Just keep it covered in the fridge until you are ready to serve.

What can I substitute for mayonnaise?
If you want a lighter option, you can use Greek yogurt or a vegan mayo instead.

How long will this salad last in the fridge?
Dill Pickle Pasta Salad can last about 3 to 5 days in the fridge when stored in an airtight container.

So grab those ingredients, and let’s create a delicious Dill Pickle Pasta Salad that brighten up your summer meals!

Dill Pickle Pasta Salad

A refreshing pasta salad featuring the tangy flavor of dill pickles combined with a creamy dressing, perfect for summer gatherings.

For the pasta salad

  • 8 oz Pasta (your favorite type) (Short pasta shapes like shells or bow ties work best.)
  • 1 cup Chopped dill pickles (Adjust for stronger pickle flavor if desired.)
  • 1/2 cup Pickle juice (From the jar of dill pickles.)
  • 1/2 cup Mayonnaise (Can substitute with Greek yogurt or vegan mayo.)
  • 1 cup Chopped veggies (bell peppers and onions) (Feel free to add other vegetables as desired.)

Preparation

  1. Boil a pot of water, add your favorite pasta, and cook according to package directions until al dente. Drain and let cool.
  2. In a bowl, combine mayonnaise, chopped dill pickles, pickle juice, and spices to make the dressing.
  3. In a large bowl, add the cooled pasta, chopped veggies, and the dressing. Stir well until everything is coated.
  4. Cover your bowl and place it in the fridge for at least 30 minutes to blend the flavors.
  5. Give it a good stir before serving, and enjoy!

Chilling the salad allows the flavors to meld. This dish pairs wonderfully with grilled meats, sandwiches, or can be enjoyed on its own.

Salad, Side Dish
American, Summer
Dill Pickle Pasta Salad, easy salad recipe, pasta salad, picnic food, summer salad

Honey BBQ Chicken Rice: 5 Reasons You’ll Love This Comfort Dish

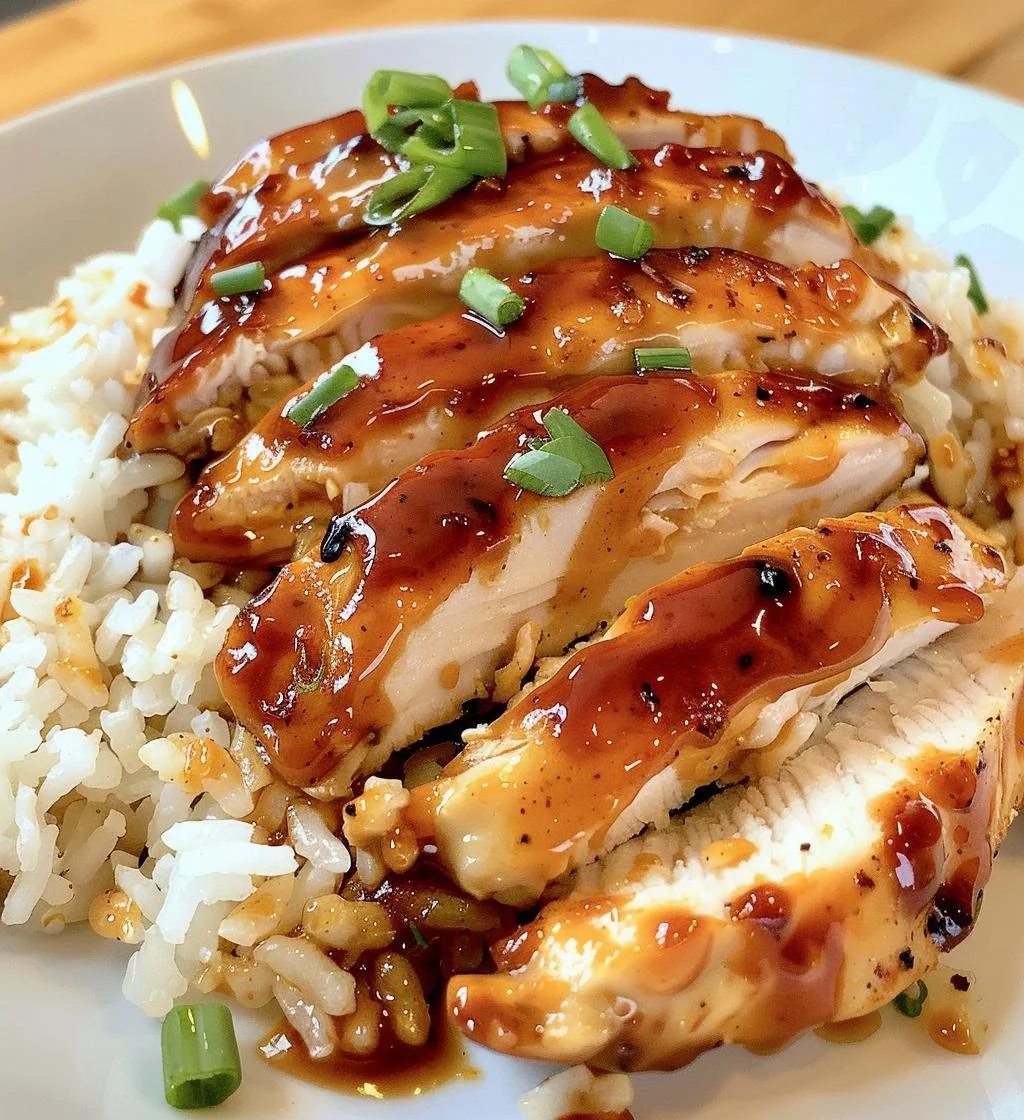
Delicious Honey BBQ Chicken served over rice, a comforting meal option.

Honey BBQ Chicken Rice: 5 Reasons You’ll Love This Comfort Dish

When it comes to comfort food that warms the heart and delights the senses, it’s hard to beat Honey BBQ Chicken Rice. This dish is not just a meal, it’s an experience that brings people together around the table. With juicy, tender chicken coated in a sweet and tangy BBQ sauce, fluffy rice to soak up all the flavors, and a hint of honey to add that irresistible sweetness, this recipe is sure to please anyone who tries it. Whether you’re cooking for your family, friends, or just treating yourself, this dish is a crowd-pleaser that shines in any setting. Trust me, once you make it, you’ll be dreaming about those flavors long after the last bite!

How to prepare Honey BBQ Chicken Rice
To whip up this delicious dish, you’ll need a few key ingredients: chicken breasts, honey, BBQ sauce, rice, and your choice of seasonings. Start by marinating the chicken in honey and BBQ sauce, letting the flavors meld together beautifully. While the chicken is soaking up that goodness, cook your rice according to package instructions. Once the chicken is marinated, grill or bake it until it’s cooked through and caramelized. Finally, serve the chicken over a bed of rice and drizzle any leftover sauce on top for that extra flavor kick. It’s as simple as that!

Honey BBQ Chicken Rice: 5 Reasons You'll Love This Comfort Dish

Why You’ll Love Honey BBQ Chicken Rice

  1. Delicious Flavors: The blend of honey and BBQ sauce creates a mouth-watering taste that everyone loves.
  2. Easy to Make: This dish requires minimal effort and is perfect for busy weeknights.
  3. Comforting and Filling: Hearty rice paired with juicy chicken makes for a satisfying meal.
  4. Customizable: You can easily add your favorite veggies or spices to make it your own.
  5. Great for Leftovers: This dish is just as tasty the next day, making it perfect for meal prep.

Tips for Success
To make the most out of your Honey BBQ Chicken Rice, try these tips:

  • Let the chicken marinate for at least 30 minutes, or overnight for the best flavor.
  • Use a meat thermometer to ensure your chicken is cooked to perfection, reaching 165°F.
  • Feel free to add vegetables like bell peppers or corn to the rice while cooking for added nutrition and flavor.

Serving Suggestions
Serve your Honey BBQ Chicken Rice with a side of steamed broccoli or a crisp salad to balance out the meal. You can also offer some fresh fruit for dessert, keeping the meal light and refreshing. For a fun twist, try serving it inside tortilla wraps for a BBQ chicken burrito!

FAQs

  1. Can I use other meats besides chicken?
    Yes, you can use pork, turkey, or even tofu for a vegetarian option. Just adjust cooking times accordingly.

  2. What if I don’t have BBQ sauce?
    You can make a quick homemade BBQ sauce with ketchup, vinegar, and spices if you’re in a pinch!

  3. Can I make this dish in advance?
    Absolutely! You can prepare the chicken and rice ahead of time and reheat them when you are ready to serve.

So, gather your ingredients, roll up your sleeves, and make some Honey BBQ Chicken Rice tonight. Your taste buds will thank you!

Honey BBQ Chicken Rice

A comforting and flavorful dish featuring juicy chicken coated in a sweet and tangy BBQ sauce served over fluffy rice.

Main Ingredients

  • 4 pieces chicken breasts (Boneless and skinless)
  • 1/4 cup honey (For marinating)
  • 1/2 cup BBQ sauce (Use your favorite brand)
  • 2 cups rice (White or brown rice, cooked according to package instructions)

Optional Additions

  • 1 cup bell peppers (Chopped, can be added to rice)
  • 1 cup corn (Can be added to rice for extra flavor)

Preparation

  1. Marinate the chicken breasts in honey and BBQ sauce for at least 30 minutes, or overnight for best flavor.
  2. Cook the rice according to package instructions.

Cooking

  1. Grill or bake the marinated chicken until cooked through and caramelized, reaching an internal temperature of 165°F.
  2. If desired, add bell peppers or corn to the rice while it’s cooking.

Serving

  1. Serve the grilled chicken over a bed of rice, drizzling any leftover BBQ sauce on top.

For best results, let chicken marinate longer. Serve with steamed broccoli or salad for a balanced meal. This dish makes great leftovers.

Dinner, Main Course
American
Chicken Dish, Comfort Food, Easy Recipe, Honey BBQ Chicken, Meal Prep

Spring Roll Salad: 5 Delicious Ways to Elevate It

Colorful Spring Roll Salad with fresh vegetables and herbs, served in a bowl

Spring Roll Salad is a vibrant and delightful dish that brings the fresh flavors of traditional spring rolls to your bowl. This salad combines crispy vegetables, aromatic herbs, and a splash of zesty dressing, making it a favorite among friends and family. It’s the kind of dish that not only looks beautiful but also tastes amazing, hitting all the right notes of crunch and zest. Whether you’re hosting a gathering or preparing a light, healthy meal, this salad is sure to impress. So, let’s dig in and discover some delicious ways to elevate your Spring Roll Salad!

How to Prepare Spring Roll Salad

To make a Spring Roll Salad, you’ll need a mix of fresh ingredients. Gather up some rice noodles, colorful vegetables like bell peppers, carrots, and cucumbers, along with fresh herbs such as mint and cilantro. You can also add protein options like grilled shrimp or tofu for a heartier meal. Start by cooking the rice noodles according to package instructions, then rinse them under cold water. Chop your veggies and herbs, then toss them all together in a large bowl. Drizzle with a tasty dressing made from soy sauce, lime juice, and a pinch of sugar. Mix well, and you have a refreshing Spring Roll Salad that is sure to satisfy!

Spring Roll Salad: 5 Delicious Ways to Elevate It

Why You’ll Love Spring Roll Salad

Spring Roll Salad is not just good for your taste buds, it’s also a feast for your eyes. It’s colorful, fresh, and super easy to customize. You can swap out vegetables or proteins based on what you have or love. Plus, it’s a perfect meal for warm weather or a light lunch. The crunch of the veggies combined with the bright dressing makes every bite refreshing! This dish is healthy and packed with nutrients, making it a meal you can feel good about.

Tips for Success

  1. Use Fresh Ingredients: Fresh, crunchy vegetables like lettuce, carrots, and herbs make a big difference in flavor.
  2. Make Your Own Dressing: Try mixing soy sauce, lime juice, and a hint of sesame oil to elevate your salad’s taste.
  3. Don’t Overcook Noodles: Make sure not to overcook rice noodles; they should be firm to hold up in the salad.
  4. Chill the Ingredients: If possible, chill your veggies and herbs before mixing them for an extra refreshing bite.

Serving Suggestions

Serve your Spring Roll Salad in bowls or on a large platter for sharing. Garnish with extra herbs, sliced chili peppers, or chopped peanuts for added crunch. Pair it with spring rolls for a perfect meal or serve it alongside grilled meats for a heartier option. This salad also works as a fantastic side dish for picnics and barbecues, bringing a fresh twist to any summer spread.

FAQs

Can I make Spring Roll Salad ahead of time?
Yes, you can prep your ingredients ahead of time, but it’s best to add the dressing just before serving to keep the salad fresh and crisp.

What can I substitute for rice noodles?
You can substitute rice noodles with quinoa, soba noodles, or even spiralized vegetables for a gluten-free version.

How long does Spring Roll Salad last in the fridge?
If stored in an airtight container, Spring Roll Salad can last around 2-3 days in the fridge. Just keep in mind that the veggies may lose their crunch over time.

Making this Spring Roll Salad is not only easy but also a fun and tasty way to enjoy your veggies. Gather your ingredients, have fun mixing, and treat yourself to this delightful dish!

Spring Roll Salad

A vibrant and delightful dish that brings the fresh flavors of traditional spring rolls into a healthy salad bowl, combining crispy vegetables, aromatic herbs, and a zesty dressing.

Main Ingredients

  • 2 cups rice noodles (Cook according to package instructions.)
  • 1 cup bell peppers, chopped (Use a mix of colors for more visual appeal.)
  • 1 cup carrots, julienned (Fresh, crunchy carrots enhance flavor.)
  • 1 cup cucumbers, chopped (Can be peeled or unpeeled based on preference.)
  • 1/2 cup fresh mint, chopped (Adds a refreshing flavor.)
  • 1/2 cup fresh cilantro, chopped (Enhances the herbaceous notes.)
  • 1 cup grilled shrimp or tofu (Optional protein addition.)

Dressing

  • 3 tablespoons soy sauce (Provides the main flavor base.)
  • 2 tablespoons lime juice (Adds a tangy zest.)
  • 1 teaspoon sugar (Balances flavors.)

Preparation

  1. Cook the rice noodles according to package instructions, then rinse under cold water.
  2. Chop the bell peppers, carrots, cucumbers, mint, and cilantro.
  3. In a large bowl, combine the cooked rice noodles, chopped vegetables, herbs, and grilled shrimp or tofu (if using).

Dressing and Serving

  1. In a small bowl, whisk together soy sauce, lime juice, and sugar.
  2. Drizzle the dressing over the salad and mix well.
  3. Serve immediately, garnished with extra herbs, sliced chili peppers, or chopped peanuts.

Use fresh ingredients for the best flavor. Make your own dressing to elevate the taste. Don’t overcook the noodles and chill ingredients for extra freshness.

lunch, Salad, Side Dish
Asian, Healthy
Fresh Salad, Healthy Meal, Light Lunch, Spring Roll Salad, Vegetable Salad

Strawberry Crumble Cheesecake: 7 Steps to Pure Bliss

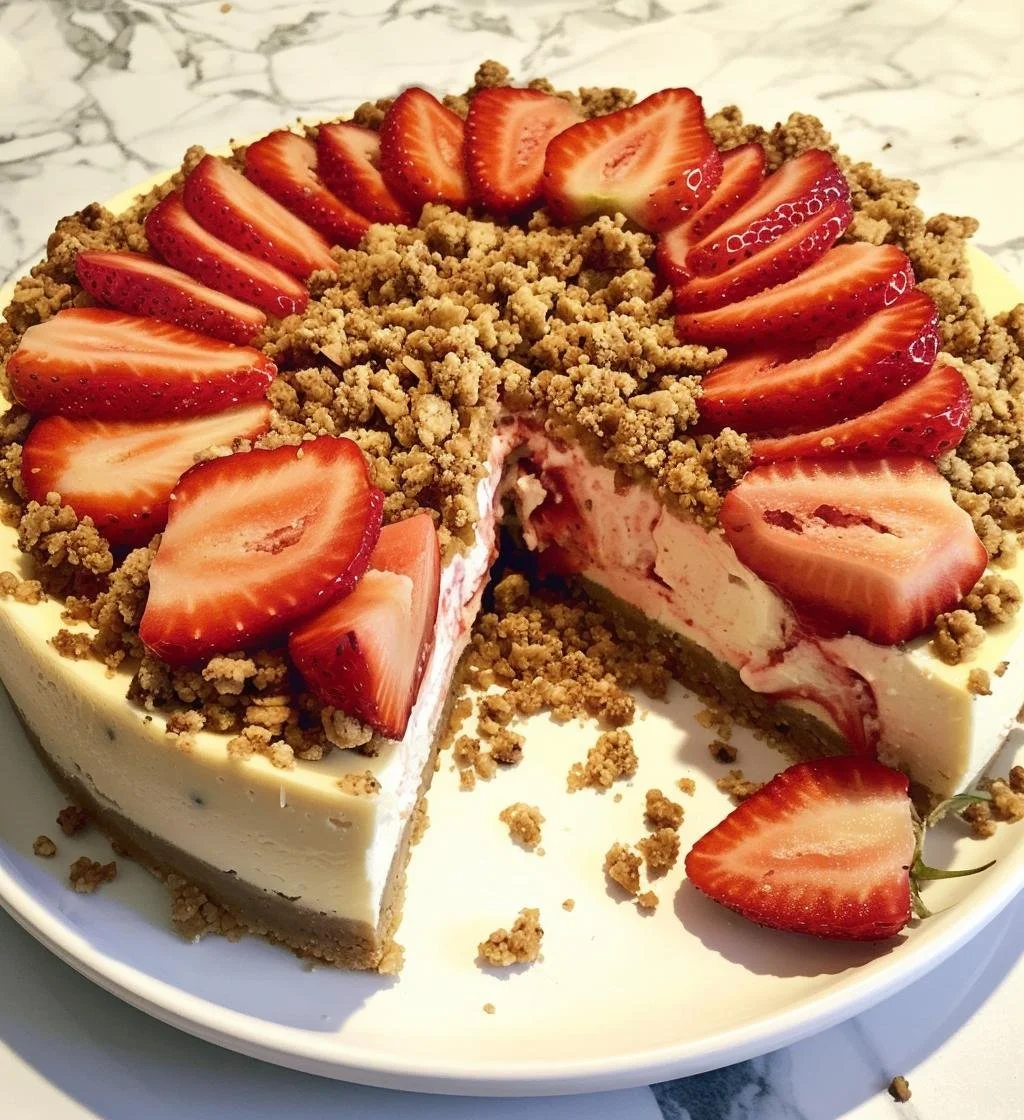
Delicious strawberry crumble cheesecake topped with fresh strawberries and crumbs

Making a Strawberry Crumble Cheesecake is easier than you think! Follow these simple steps to create a dessert that will impress your family and friends.

  1. Gather Your Ingredients: You will need graham cracker crumbs, butter, cream cheese, sugar, eggs, vanilla extract, fresh strawberries, and crumble topping ingredients.
  2. Prepare the Crust: Start by mixing the graham cracker crumbs and melted butter in a bowl. Press this mixture firmly into the bottom of a greased springform pan to create a solid crust.
  3. Make the Cheesecake Filling: In another bowl, beat the cream cheese and sugar until smooth. Add in the eggs one at a time, mixing well after each addition. Stir in the vanilla extract until everything is well combined.
  4. Add the Strawberries: Gently fold in fresh strawberries, ensuring they are evenly distributed throughout the cheesecake filling.
  5. Layer the Filling: Pour the cheesecake mixture over the prepared crust in the springform pan. Smooth the top with a spatula.
  6. Prepare the Crumble Topping: In a separate bowl, mix flour, sugar, and butter until you get a crumbly texture. Sprinkle this mixture over the cheesecake.
  7. Bake: Place the springform pan in a preheated oven and bake until the cheesecake is set and the crumble is golden brown. Let it cool before refrigerating for a few hours. Slice and enjoy!

Strawberry Crumble Cheesecake: 7 Steps to Pure Bliss

Why You’ll Love Strawberry Crumble Cheesecake

This Strawberry Crumble Cheesecake is not just a treat for the eyes, but its taste is truly irresistible! The creamy cheesecake pairs perfectly with fresh strawberries, and the crumble topping adds a delicious crunch. Each bite is a delightful mix of textures and flavors. It’s great for any occasion, whether it is a birthday party, family gathering, or just a simple dessert at home. Everyone will be raving about this dessert once they try it!

tips for success

To make sure your Strawberry Crumble Cheesecake turns out perfectly, keep these tips in mind:

  • Room Temperature Ingredients: Let your cream cheese and eggs sit out for a bit before mixing. This helps them blend more easily and makes the cheesecake smooth.
  • Don’t Overmix: When adding the eggs, mix just until combined. Overmixing can make your cheesecake dense.
  • Chill Properly: Let your cheesecake cool to room temperature before refrigerating. Allow it to chill for at least 4 hours, or overnight for the best texture.

Serving Suggestions

Serve your Strawberry Crumble Cheesecake chilled, and consider adding a dollop of whipped cream on top. You can also sprinkle some extra fresh strawberries around the plate for a beautiful presentation. A drizzle of strawberry sauce would make it even more tempting!

FAQs

Can I make this cheesecake in advance?
Yes, it’s perfect for making ahead! Just store it in the refrigerator.

Can I use frozen strawberries instead?
Yes, you can use frozen strawberries, but be sure to thaw and drain them well before adding to the cheesecake.

How do I store leftovers?
Keep any leftovers in an airtight container in the fridge. Enjoy them within 3-4 days for the best taste!

Get ready to bake, slice, and share this Strawberry Crumble Cheesecake, and let the flavors whisk you away to dessert heaven!

Strawberry Crumble Cheesecake

A delightful Strawberry Crumble Cheesecake, featuring a creamy filling with fresh strawberries and a crunchy crumble topping, perfect for impressing guests.

For the crust

  • 1 cup graham cracker crumbs
  • 5 tablespoons butter, melted

For the cheesecake filling

  • 16 ounces cream cheese, softened (Let it sit at room temperature before mixing.)
  • 3/4 cup sugar
  • 3 eggs (Use room temperature eggs.)
  • 1 teaspoon vanilla extract
  • 2 cups fresh strawberries, chopped (Fold into the cheesecake batter.)

For the crumble topping

  • 1 cup flour
  • 1/2 cup sugar
  • 5 tablespoons butter, softened (Mix until crumbly.)

Preparation

  1. Preheat your oven to 350°F (175°C).
  2. In a bowl, mix graham cracker crumbs and melted butter together until combined.
  3. Press the mixture firmly into the bottom of a greased springform pan.

Cheesecake Filling

  1. In another bowl, beat cream cheese and sugar until smooth.
  2. Add eggs one at a time, mixing well after each addition.
  3. Stir in vanilla extract.
  4. Gently fold in chopped strawberries.

Assembly

  1. Pour the cheesecake mixture over the prepared crust and smooth the top with a spatula.
  2. In a separate bowl, mix flour, sugar, and butter until you achieve a crumbly texture.
  3. Sprinkle the crumble mixture over the cheesecake.

Baking

  1. Bake in the preheated oven until the cheesecake is set and the crumble is golden brown, approximately 50 minutes.
  2. Let cool before refrigerating for a few hours.
  3. Slice and serve chilled.

For best results, chill the cheesecake for at least 4 hours or overnight. Serve with whipped cream and additional strawberries if desired.

Dessert
American
Baking, cheesecake, Dessert, strawberry, Strawberry Crumble Cheesecake

Strawberry Crumb Bars: 7 Irresistible Tips for Perfection

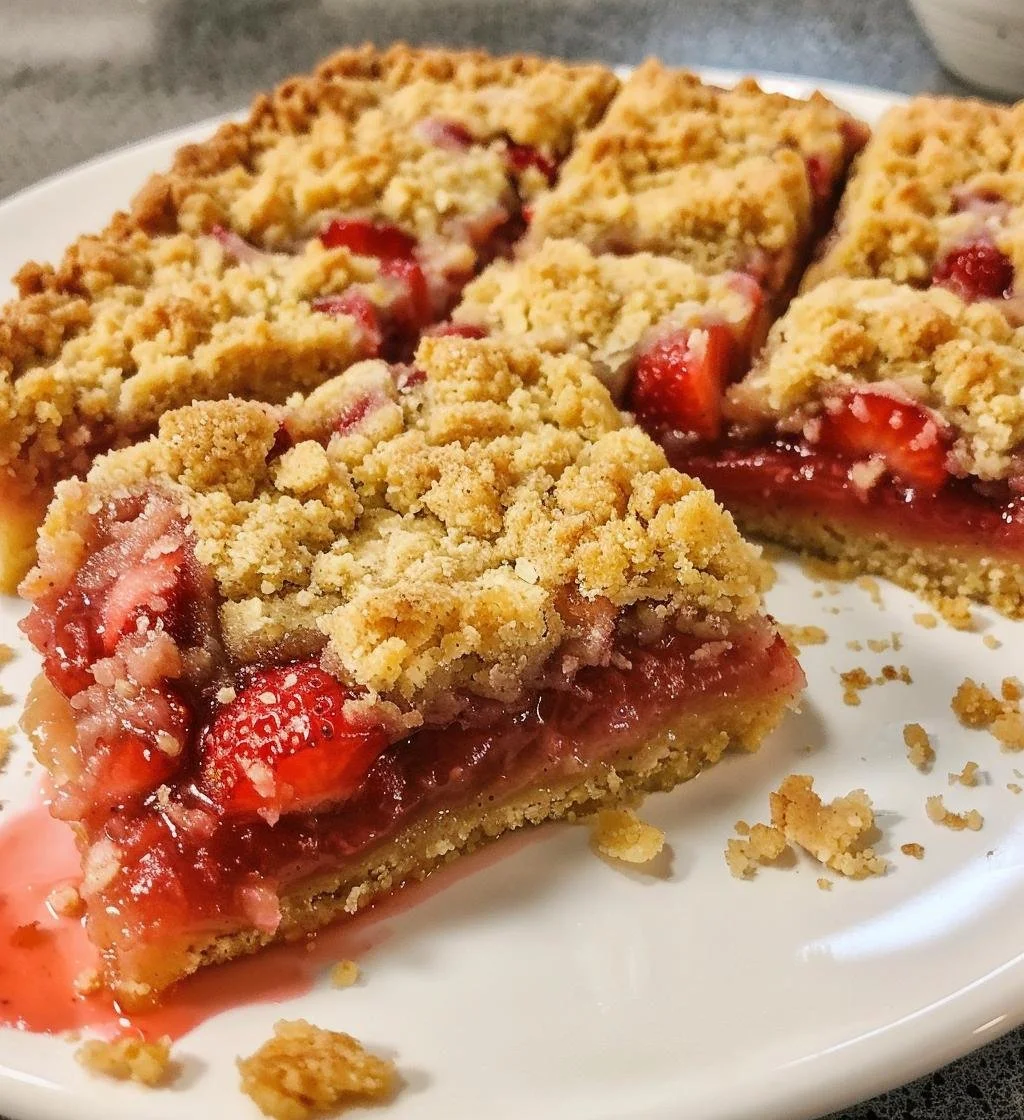
Delicious homemade strawberry crumb bars with buttery crumb topping

how to prepare Strawberry Crumb Bars

Making Strawberry Crumb Bars is easier than you might think! Start by preheating your oven to 350°F (175°C). Here’s a simple breakdown of how to get these delicious bars ready:

  1. Prepare the Crust: In a mixing bowl, combine flour, sugar, and cold butter until you have a crumbly texture. Press about two-thirds of this mixture into the bottom of a baking dish to form the crust.

  2. Make the Strawberry Filling: In another bowl, mix fresh strawberries, sugar, and a bit of cornstarch. Spread this mixture evenly over the crust.

  3. Top with Crumbs: Use the remaining crumb mixture to sprinkle over the strawberry filling.

  4. Bake: Place in the preheated oven and bake for about 35-40 minutes or until the top is golden brown.

  5. Cool and Serve: Allow the bars to cool completely before cutting into squares. Enjoy your homemade treat!

Strawberry Crumb Bars: 7 Irresistible Tips for Perfection

Why You’ll Love Strawberry Crumb Bars

Strawberry Crumb Bars are a delightful dessert that brings a taste of summer to any day. The combination of crumbly crust, sweet strawberries, and crunchy topping makes it a favorite for families and gatherings. They are not only simple to make, but they also look gorgeous and mouth-watering on the table. Serve them at parties, picnics, or even as a cozy treat at home, and watch everyone reach for seconds!

tips for success

  1. Use Fresh Strawberries: Fresh strawberries will give the best flavor. If they are out of season, you can use frozen ones, but make sure to thaw and drain them first.

  2. Don’t Overmix the Dough: When making the crust and topping, mix just until combined to keep it crumbly and flaky.

  3. Chill the Dough: If your butter is too warm, the dough won’t hold together well. Chill it for about 30 minutes before pressing it into the pan.

  4. Add Lemon Zest: A little lemon zest in the filling will brighten the flavor of the strawberries.

  5. Allow to Cool Completely: This ensures that the bars set properly and are easy to cut.

  6. Experiment with Flavors: Try adding different fruits like blueberries or raspberries for a twist on the classic recipe.

  7. Serve with Ice Cream: These bars are extra delightful when paired with a scoop of vanilla ice cream on top!

Serving Suggestions

Strawberry Crumb Bars can be served in various delightful ways. Enjoy them chilled alongside a cup of tea or coffee. For a festive touch, serve them warm with a scoop of ice cream or whipped cream on top. You can also sprinkle powdered sugar for a beautiful presentation. These bars are perfect for summer picnics or as a sweet treat at gatherings.

FAQs

Can I use other fruits instead of strawberries?
Absolutely! Feel free to try blueberries, raspberries, or peaches for a different flavor.

How do I store the leftover bars?
Store the bars in an airtight container in the fridge for up to a week. You can also freeze them for longer storage.

Can I make these bars ahead of time?
Yes, you can prepare the bars a day in advance. Just remember to let them cool completely before storing.

Let your kitchen fill with the sweet aroma of strawberry goodness, and make these crumb bars today. You’ll be glad you did!

Strawberry Crumb Bars

Delightful strawberry crumb bars with a crumbly crust and sweet strawberry filling, perfect for summer gatherings.

For the Crust and Topping

  • 2 cups all-purpose flour (Fresh or organic flour for best results.)
  • 3/4 cup sugar
  • 1/2 cup cold butter (Cut into cubes for easier mixing.)

For the Strawberry Filling

  • 4 cups fresh strawberries (Sliced, can substitute with thawed frozen strawberries.)
  • 1/4 cup sugar (Adjust to taste.)
  • 2 tablespoons cornstarch (To thicken the filling.)

Preparation

  1. Preheat your oven to 350°F (175°C).
  2. In a mixing bowl, combine flour, sugar, and cold butter until crumbly.
  3. Press about two-thirds of the mixture into the bottom of a baking dish to form the crust.

Filling and Topping

  1. In another bowl, mix fresh strawberries, sugar, and cornstarch.
  2. Spread the strawberry mixture evenly over the crust.
  3. Sprinkle the remaining crumb mixture over the strawberry filling.

Baking

  1. Bake in the preheated oven for about 35-40 minutes, or until golden brown.

Serving

  1. Allow the bars to cool completely before cutting into squares.
  2. Serve as is, or with a scoop of ice cream for extra delight.

For best results, use fresh strawberries and avoid overmixing the dough. Chill if necessary, and consider adding lemon zest for enhanced flavor. Experiment with other fruits for different variations.

Dessert, Snack
American
Dessert Bars, Easy Recipes, Fruit Desserts, Strawberry Crumb Bars, Summer Treat

Pineapple Bliss Bars: 7 Sweet Reasons to Indulge Today

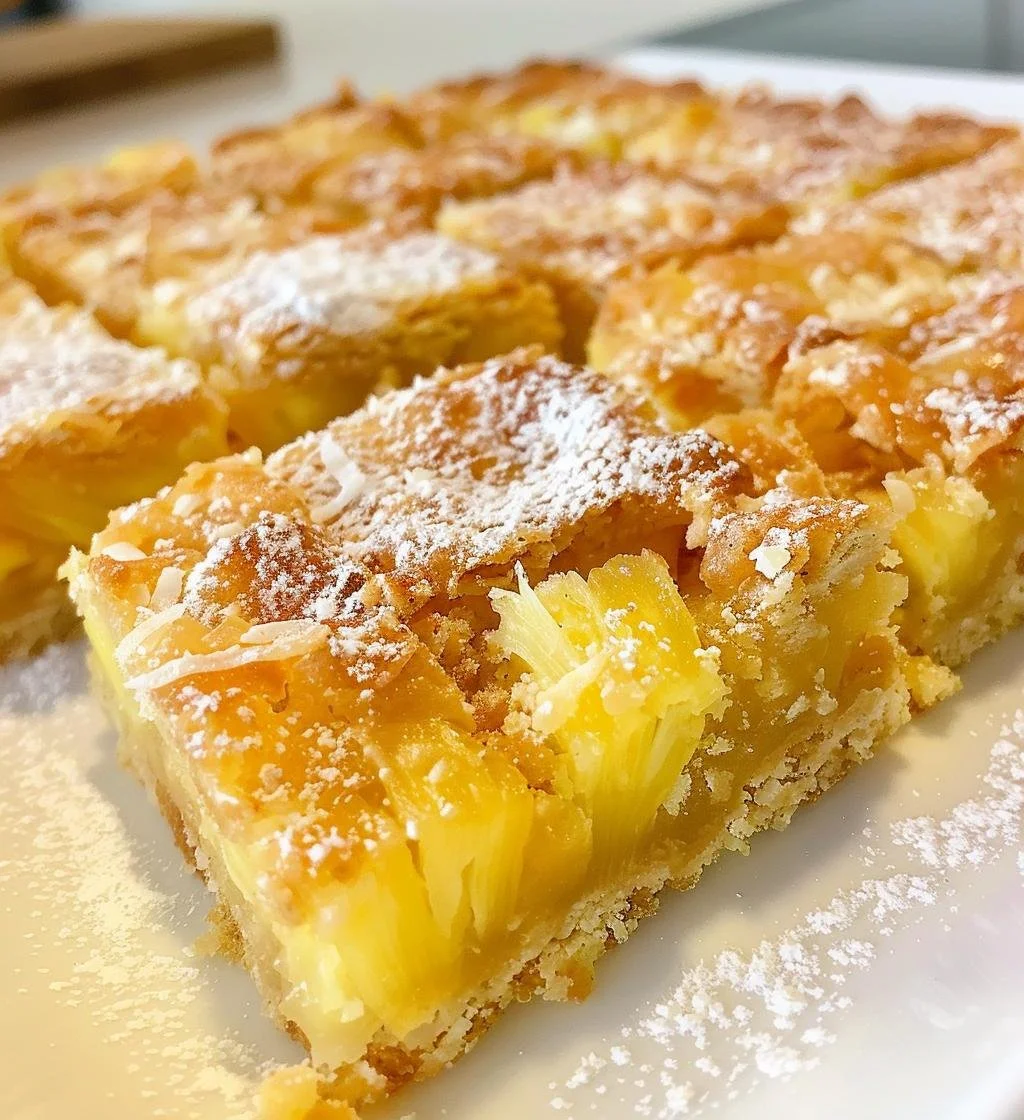
Delicious Pineapple Bliss Bars showcasing a tropical dessert delight

How to Prepare Pineapple Bliss Bars

Making Pineapple Bliss Bars is quick and easy! Here’s how to whip up these delicious treats in no time. You’ll need some simple ingredients like crushed pineapple, butter, and sugar. Just follow these steps:

  1. Preheat your oven to 350°F (175°C).
  2. In a bowl, combine crushed pineapple, melted butter, and sugar. Mix well.
  3. Add in flour, baking powder, and a pinch of salt. Stir until everything is combined.
  4. Pour the mixture into a greased baking pan and spread it evenly.
  5. Bake for about 25-30 minutes or until golden brown.
  6. Let it cool, then cut into bars and enjoy!

Pineapple Bliss Bars: 7 Sweet Reasons to Indulge Today

Why You’ll Love Pineapple Bliss Bars

Pineapple Bliss Bars are more than just a dessert, they’re a burst of sunshine in your mouth! With their sweet pineapple flavor and buttery texture, every bite feels like a mini vacation. Plus, they are super easy to share at parties or potlucks, making them a perfect crowd-pleaser. If you love tropical treats, this recipe is a must-try — you won’t regret it!

Tips for Success

  1. Use Fresh Pineapple: If you prefer, you can use fresh pineapple instead of canned. Just chop it finely and make sure to drain excess moisture.
  2. Don’t Overmix: When combining the ingredients, mix just until everything is nicely incorporated. Overmixing can make the bars tough.
  3. Cool Completely: Let the bars cool fully before cutting them. This helps them hold together nicely.

Serving Suggestions

Pineapple Bliss Bars can be enjoyed in many ways! Serve them with a scoop of vanilla ice cream for a delightful dessert. You can also dust them with powdered sugar for a pretty touch. For a tropical twist, add a dollop of whipped cream or fresh fruit on top. Enjoy them at breakfast, as an afternoon snack, or after dinner, they’re good any time of the day!

FAQs

Can I use other fruits?
Definitely! While pineapple is the star here, you can try using mashed bananas or other fruits if you prefer.

How should I store the bars?
Store them in an airtight container at room temperature for up to a week. You can also refrigerate them for longer freshness.

Can I freeze Pineapple Bliss Bars?
Yes, you can freeze them! Wrap individual bars in plastic wrap and then place them in a freezer bag. They should stay fresh for up to 3 months.

Indulging in Pineapple Bliss Bars is just a recipe away, so gather your ingredients and get ready to whip up this sweet delight!

Pineapple Bliss Bars

A delightful tropical treat with sweet pineapple flavor and buttery texture, perfect for any occasion.

Main Ingredients

  • 1 can crushed pineapple, drained (Use fresh pineapple if preferred, chopped finely.)
  • 1/2 cup butter, melted (Melted for easy mixing.)
  • 1 cup sugar
  • 1 cup all-purpose flour
  • 1 teaspoon baking powder
  • 1 pinch salt

Preparation

  1. Preheat your oven to 350°F (175°C).
  2. In a bowl, combine crushed pineapple, melted butter, and sugar. Mix well.
  3. Add in flour, baking powder, and a pinch of salt. Stir until everything is combined.
  4. Pour the mixture into a greased baking pan and spread it evenly.
  5. Bake for about 25-30 minutes or until golden brown.
  6. Let it cool, then cut into bars and enjoy!

Use fresh pineapple for a better flavor. Don’t overmix the batter to avoid tough bars. Let bars cool completely before cutting for the best texture.

Dessert, Snack
American, Tropical
bars, easy dessert, party treat, Pineapple Bliss Bars, tropical dessert

Maple Balsamic Roasted Asparagus

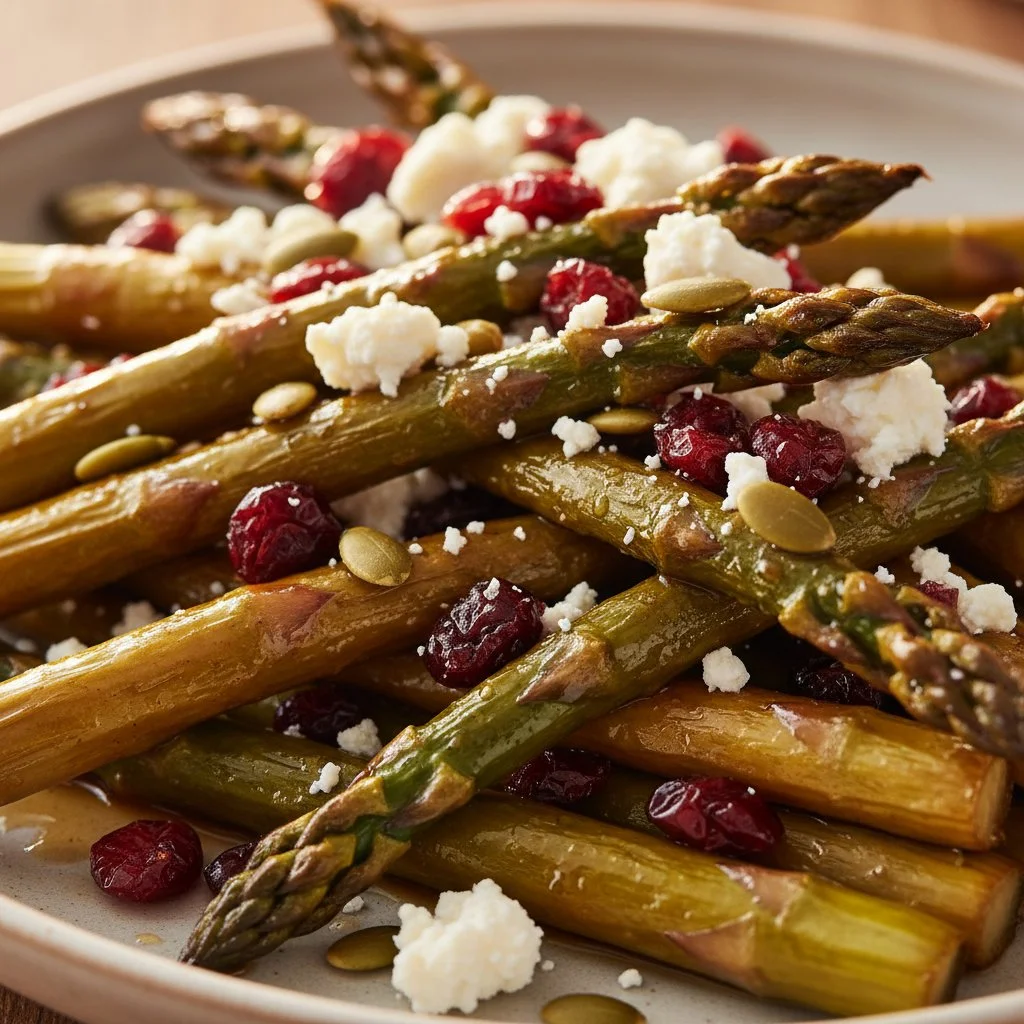
Plate of Maple Balsamic Roasted Asparagus garnished and ready to serve.

How to Prepare Maple Balsamic Roasted Asparagus

Making Maple Balsamic Roasted Asparagus is simple and fun! First, you’ll want to gather your fresh asparagus, maple syrup, balsamic vinegar, olive oil, garlic, salt, and pepper.

  1. Start by preheating your oven to 400°F (200°C).
  2. Wash the asparagus and trim the tough ends.
  3. In a bowl, mix together the maple syrup, balsamic vinegar, olive oil, minced garlic, salt, and pepper. This tasty mix will bring out the wonderful flavors of the asparagus.
  4. Toss the asparagus in the bowl with the mixture until it is well-coated.
  5. Spread the asparagus out in a single layer on a baking sheet.
  6. Roast in the oven for about 15 to 20 minutes, until the asparagus is tender and just starts to caramelize.
  7. Serve warm and enjoy!

Maple Balsamic Roasted Asparagus

Why You’ll Love Maple Balsamic Roasted Asparagus

This recipe is perfect for any occasion, whether it’s a weeknight dinner or a holiday feast. The sweetness of the maple syrup blends perfectly with the tanginess of the balsamic vinegar, creating a rich flavor that everyone will enjoy. Plus, the roasted asparagus is bright and beautiful, making it a great addition to your table. It’s simple enough for beginners, yet impressive enough to impress guests. After trying it, you’ll find yourself coming back for more!

Tips for Success

  • Make sure to use fresh asparagus for the best flavor.
  • You can adjust the amount of maple syrup and balsamic vinegar to suit your taste. If you prefer a sweeter dish, add a little more maple.
  • Keep an eye on the asparagus as it roasts, you don’t want it to get too soft.

Serving Suggestions

Maple Balsamic Roasted Asparagus pairs well with a variety of main dishes. Try it alongside grilled chicken, fish, or a hearty vegetable stew. It also makes a great addition to pasta dishes or as part of a fresh salad. Don’t forget to sprinkle some grated parmesan on top for an extra touch of flavor!

FAQs

Can I use frozen asparagus for this recipe?
While fresh asparagus is best, you can use frozen if that’s what you have. Just keep in mind that frozen asparagus may not get as crispy.

Can I prepare this dish ahead of time?
You can toss the asparagus in the maple balsamic mixture a few hours before roasting. Just keep it in the fridge until you’re ready to roast.

What can I use instead of balsamic vinegar?
If you don’t have balsamic vinegar, you can substitute with red wine vinegar or apple cider vinegar, though the flavor will be slightly different. Enjoy your cooking adventure with Maple Balsamic Roasted Asparagus!

Maple Balsamic Roasted Asparagus

Deliciously roasted asparagus coated in a sweet and tangy maple balsamic mixture, perfect as a side dish for any occasion.

Main ingredients

  • 1 bunch fresh asparagus (Trim the tough ends before use.)
  • 2 tablespoons maple syrup (Adjust for sweetness preference.)
  • 2 tablespoons balsamic vinegar (Can substitute with red wine or apple cider vinegar.)
  • 1 tablespoon olive oil
  • 2 cloves garlic, minced
  • 1 teaspoon salt (Adjust to taste.)
  • 1 teaspoon black pepper (Adjust to taste.)

Preparation

  1. Preheat your oven to 400°F (200°C).
  2. Wash the asparagus and trim the tough ends.
  3. In a bowl, mix together the maple syrup, balsamic vinegar, olive oil, minced garlic, salt, and pepper.
  4. Toss the asparagus in the bowl with the mixture until it is well-coated.

Cooking

  1. Spread the asparagus out in a single layer on a baking sheet.
  2. Roast in the oven for about 15 to 20 minutes, until the asparagus is tender and just starts to caramelize.

Serving

  1. Serve warm and enjoy!

Ensure fresh asparagus is used for the best flavor. Adjust maple syrup and balsamic vinegar to your taste. Keep an eye on the asparagus while roasting to avoid it getting too soft.

Side Dish, Vegetable
American
Easy Asparagus Recipe, Maple Balsamic Roasted Asparagus, Maple Syrup, Roasted Asparagus, Vegetable Side Dish