No-Bake Strawberry Dessert

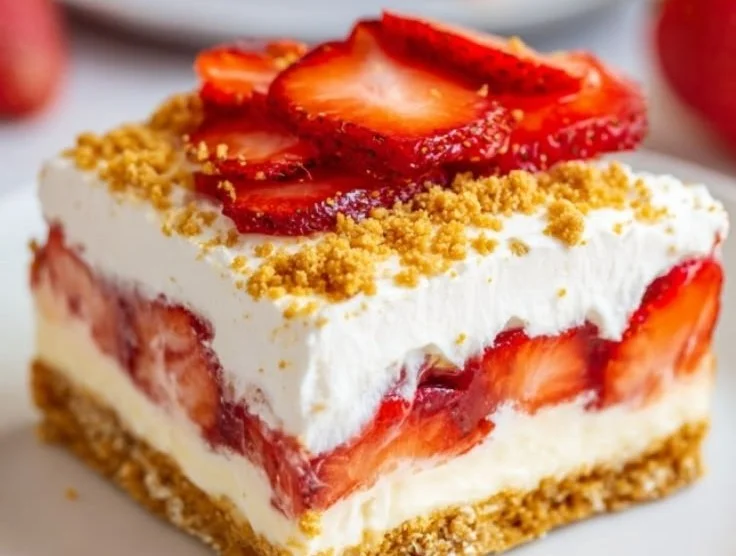
Delicious no-bake strawberry dessert topped with fresh strawberries and whipped cream

When the weather gets warm, there’s nothing quite like a refreshing dessert to cool you down. This No-Bake Strawberry Dessert is a delightful way to enjoy the sweetness of fresh strawberries without turning on the oven. Packed with creamy goodness and a buttery crust, it’s a treat that will have everyone coming back for seconds. Whether you’re hosting a summer barbecue or enjoying a quiet evening at home, this dessert is sure to impress. So grab your mixing bowl, and let’s dive into making this luscious treat that is as fun to make as it is to eat!

How to prepare No-Bake Strawberry Dessert

To make this no-bake treat, gather the following ingredients:

Ingredients

  • 1 cup crushed graham crackers
  • 1/2 cup unsalted butter, melted
  • 1 cup cream cheese, softened
  • 1 cup powdered sugar
  • 1 cup whipped topping
  • 2 cups fresh strawberries, sliced
  • 1 cup strawberry gelatin
  • 1 cup boiling water
  • Extra strawberries for garnish

Now, let’s get started on how to prepare this delicious dessert!

  1. In a medium bowl, mix the crushed graham crackers with melted butter until well combined. Press this mixture firmly into the bottom of a 9×9 inch baking dish to form the crust.
  2. In another bowl, beat the softened cream cheese and powdered sugar together until smooth. Gently fold in the whipped topping until fully incorporated.
  3. Spread the cream cheese mixture over the crust in the baking dish.
  4. In a separate bowl, dissolve the strawberry gelatin in boiling water. Allow it to cool slightly before pouring it over the cream cheese layer.
  5. Arrange the sliced strawberries on top of the gelatin layer, ensuring they’re well distributed.
  6. Refrigerate the dessert for at least four hours, or until the gelatin is set.
  7. Once set, cut into squares and serve chilled. You can add extra strawberries as a garnish if desired.

No-Bake Strawberry Dessert

Why You’ll Love No-Bake Strawberry Dessert

This No-Bake Strawberry Dessert is not just easy to whip up, it’s also incredibly satisfying. The combination of the sweet, creamy filling with the tartness of the strawberries creates a delightful balance. Plus, the no-bake aspect means you won’t have to deal with any complicated baking steps, making it an ideal recipe for beginners. It’s the perfect way to enjoy a summer treat without fuss, making it a hit not just for families, but for gatherings and parties too. If you love no-bake desserts, this one is sure to become a favorite!

Tips for Success

To make sure your No-Bake Strawberry Dessert turns out perfectly, keep these tips in mind:

  • Use fresh strawberries for the best flavor. They will add a burst of freshness that complements the creamy filling.
  • Allow the dessert to sit in the fridge for the full four hours; this will ensure that the gelatin sets properly.
  • For a creative twist, consider adding other fruits like blueberries or raspberries along with the strawberries.

No-Bake Strawberry Dessert

Serving Suggestions

This No-Bake Strawberry Dessert can be served on its own or paired with a scoop of vanilla ice cream for extra indulgence. You might even consider serving it alongside a refreshing glass of iced tea or lemonade. It’s simple, yet elegant enough for any occasion!

FAQs

Can I use frozen strawberries instead of fresh ones?

Yes, you can use frozen strawberries, but fresh ones give the best flavor and texture.

How long will this dessert last in the fridge?

It can last for about 3-4 days in the refrigerator, but it’s best enjoyed fresh on the first couple of days.

Can I make this dessert a day ahead?

Absolutely! This dessert is perfect for making ahead of time, giving it ample time to set before serving.

For those who enjoy exploring more no-bake options, check out this decadent dessert that you might adore just as much! Enjoy making this delightful No-Bake Strawberry Dessert and let those sweet summer vibes shine through!

No-Bake Strawberry Dessert
A refreshing no-bake dessert featuring creamy layers and fresh strawberries, perfect for warm weather gatherings.

For the crust

  • 1 cup crushed graham crackers
  • 1/2 cup unsalted butter, melted

For the filling

  • 1 cup cream cheese, softened
  • 1 cup powdered sugar
  • 1 cup whipped topping

For the gelatin layer

  • 1 cup strawberry gelatin
  • 1 cup boiling water (Use to dissolve the gelatin)
  • 2 cups fresh strawberries, sliced (Use extra for garnish)

Preparation

  1. In a medium bowl, mix the crushed graham crackers with melted butter until well combined. Press this mixture firmly into the bottom of a 9×9 inch baking dish to form the crust.
  2. In another bowl, beat the softened cream cheese and powdered sugar together until smooth. Gently fold in the whipped topping until fully incorporated.
  3. Spread the cream cheese mixture over the crust in the baking dish.
  4. In a separate bowl, dissolve the strawberry gelatin in boiling water. Allow it to cool slightly before pouring it over the cream cheese layer.
  5. Arrange the sliced strawberries on top of the gelatin layer, ensuring they are well distributed.
  6. Refrigerate the dessert for at least four hours, or until the gelatin is set.
  7. Once set, cut into squares and serve chilled. You can add extra strawberries as a garnish if desired.

Use fresh strawberries for the best flavor. Ensure to refrigerate for the full four hours for proper gelatin setting. Can add other fruits like blueberries or raspberries for a twist.
Dessert
American
Creamy Dessert, easy dessert, No-Bake Dessert, Strawberry Dessert, Summer Treat

Strawberry Crumble Cheesecake: 7 Steps to Pure Bliss

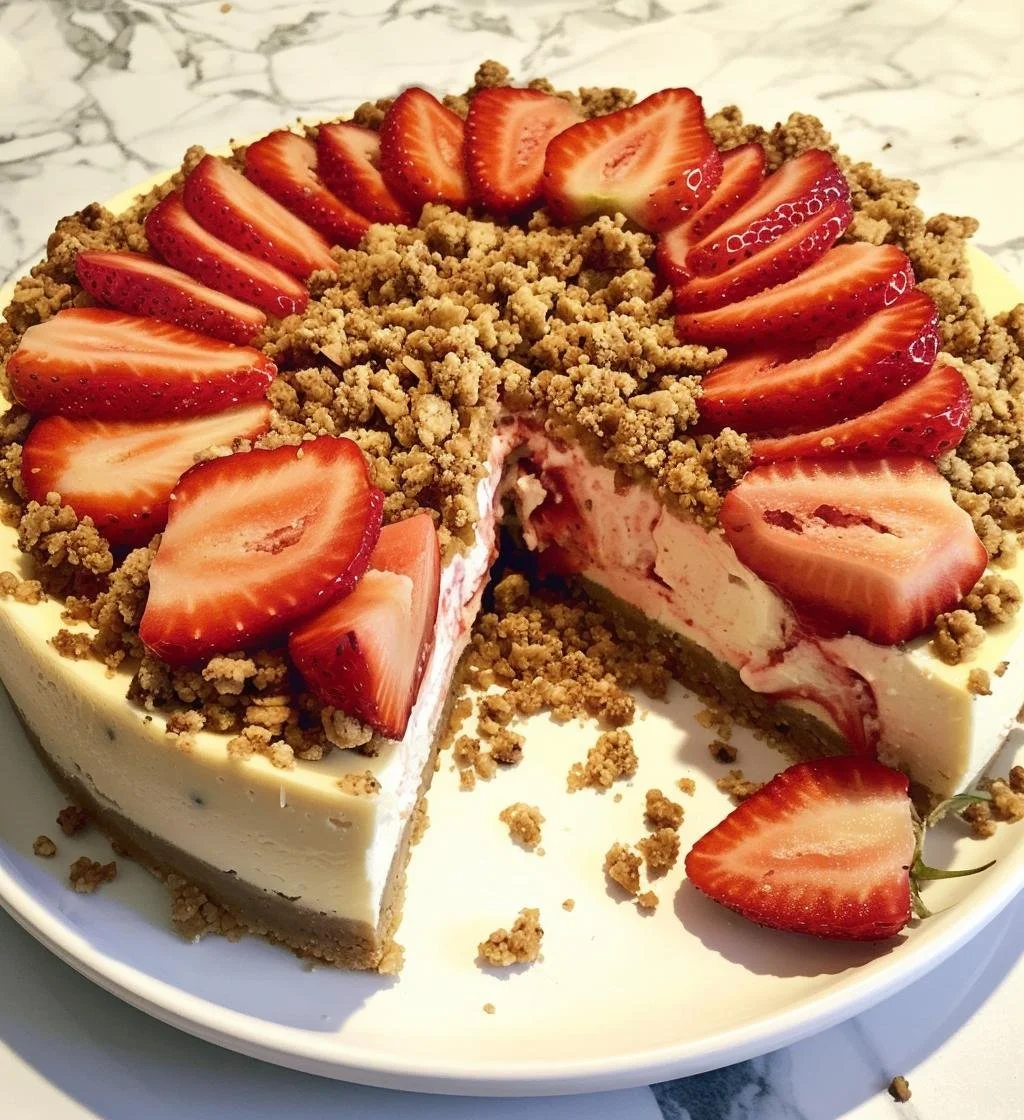
Delicious strawberry crumble cheesecake topped with fresh strawberries and crumbs

Making a Strawberry Crumble Cheesecake is easier than you think! Follow these simple steps to create a dessert that will impress your family and friends.

  1. Gather Your Ingredients: You will need graham cracker crumbs, butter, cream cheese, sugar, eggs, vanilla extract, fresh strawberries, and crumble topping ingredients.
  2. Prepare the Crust: Start by mixing the graham cracker crumbs and melted butter in a bowl. Press this mixture firmly into the bottom of a greased springform pan to create a solid crust.
  3. Make the Cheesecake Filling: In another bowl, beat the cream cheese and sugar until smooth. Add in the eggs one at a time, mixing well after each addition. Stir in the vanilla extract until everything is well combined.
  4. Add the Strawberries: Gently fold in fresh strawberries, ensuring they are evenly distributed throughout the cheesecake filling.
  5. Layer the Filling: Pour the cheesecake mixture over the prepared crust in the springform pan. Smooth the top with a spatula.
  6. Prepare the Crumble Topping: In a separate bowl, mix flour, sugar, and butter until you get a crumbly texture. Sprinkle this mixture over the cheesecake.
  7. Bake: Place the springform pan in a preheated oven and bake until the cheesecake is set and the crumble is golden brown. Let it cool before refrigerating for a few hours. Slice and enjoy!

Strawberry Crumble Cheesecake: 7 Steps to Pure Bliss

Why You’ll Love Strawberry Crumble Cheesecake

This Strawberry Crumble Cheesecake is not just a treat for the eyes, but its taste is truly irresistible! The creamy cheesecake pairs perfectly with fresh strawberries, and the crumble topping adds a delicious crunch. Each bite is a delightful mix of textures and flavors. It’s great for any occasion, whether it is a birthday party, family gathering, or just a simple dessert at home. Everyone will be raving about this dessert once they try it!

tips for success

To make sure your Strawberry Crumble Cheesecake turns out perfectly, keep these tips in mind:

  • Room Temperature Ingredients: Let your cream cheese and eggs sit out for a bit before mixing. This helps them blend more easily and makes the cheesecake smooth.
  • Don’t Overmix: When adding the eggs, mix just until combined. Overmixing can make your cheesecake dense.
  • Chill Properly: Let your cheesecake cool to room temperature before refrigerating. Allow it to chill for at least 4 hours, or overnight for the best texture.

Serving Suggestions

Serve your Strawberry Crumble Cheesecake chilled, and consider adding a dollop of whipped cream on top. You can also sprinkle some extra fresh strawberries around the plate for a beautiful presentation. A drizzle of strawberry sauce would make it even more tempting!

FAQs

Can I make this cheesecake in advance?
Yes, it’s perfect for making ahead! Just store it in the refrigerator.

Can I use frozen strawberries instead?
Yes, you can use frozen strawberries, but be sure to thaw and drain them well before adding to the cheesecake.

How do I store leftovers?
Keep any leftovers in an airtight container in the fridge. Enjoy them within 3-4 days for the best taste!

Get ready to bake, slice, and share this Strawberry Crumble Cheesecake, and let the flavors whisk you away to dessert heaven!

Strawberry Crumble Cheesecake

A delightful Strawberry Crumble Cheesecake, featuring a creamy filling with fresh strawberries and a crunchy crumble topping, perfect for impressing guests.

For the crust

  • 1 cup graham cracker crumbs
  • 5 tablespoons butter, melted

For the cheesecake filling

  • 16 ounces cream cheese, softened (Let it sit at room temperature before mixing.)
  • 3/4 cup sugar
  • 3 eggs (Use room temperature eggs.)
  • 1 teaspoon vanilla extract
  • 2 cups fresh strawberries, chopped (Fold into the cheesecake batter.)

For the crumble topping

  • 1 cup flour
  • 1/2 cup sugar
  • 5 tablespoons butter, softened (Mix until crumbly.)

Preparation

  1. Preheat your oven to 350°F (175°C).
  2. In a bowl, mix graham cracker crumbs and melted butter together until combined.
  3. Press the mixture firmly into the bottom of a greased springform pan.

Cheesecake Filling

  1. In another bowl, beat cream cheese and sugar until smooth.
  2. Add eggs one at a time, mixing well after each addition.
  3. Stir in vanilla extract.
  4. Gently fold in chopped strawberries.

Assembly

  1. Pour the cheesecake mixture over the prepared crust and smooth the top with a spatula.
  2. In a separate bowl, mix flour, sugar, and butter until you achieve a crumbly texture.
  3. Sprinkle the crumble mixture over the cheesecake.

Baking

  1. Bake in the preheated oven until the cheesecake is set and the crumble is golden brown, approximately 50 minutes.
  2. Let cool before refrigerating for a few hours.
  3. Slice and serve chilled.

For best results, chill the cheesecake for at least 4 hours or overnight. Serve with whipped cream and additional strawberries if desired.

Dessert
American
Baking, cheesecake, Dessert, strawberry, Strawberry Crumble Cheesecake

Strawberry Crumb Bars: 7 Irresistible Tips for Perfection

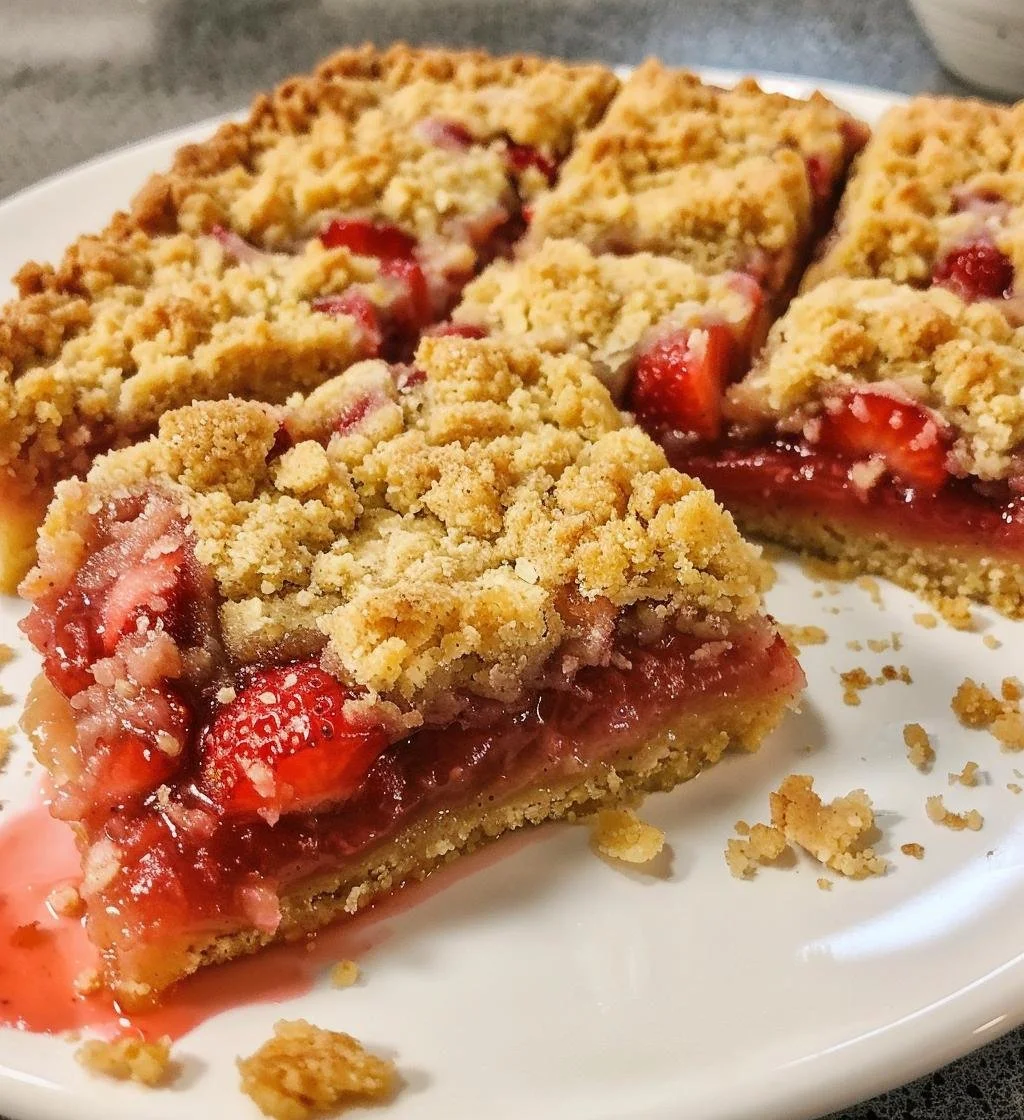
Delicious homemade strawberry crumb bars with buttery crumb topping

how to prepare Strawberry Crumb Bars

Making Strawberry Crumb Bars is easier than you might think! Start by preheating your oven to 350°F (175°C). Here’s a simple breakdown of how to get these delicious bars ready:

  1. Prepare the Crust: In a mixing bowl, combine flour, sugar, and cold butter until you have a crumbly texture. Press about two-thirds of this mixture into the bottom of a baking dish to form the crust.

  2. Make the Strawberry Filling: In another bowl, mix fresh strawberries, sugar, and a bit of cornstarch. Spread this mixture evenly over the crust.

  3. Top with Crumbs: Use the remaining crumb mixture to sprinkle over the strawberry filling.

  4. Bake: Place in the preheated oven and bake for about 35-40 minutes or until the top is golden brown.

  5. Cool and Serve: Allow the bars to cool completely before cutting into squares. Enjoy your homemade treat!

Strawberry Crumb Bars: 7 Irresistible Tips for Perfection

Why You’ll Love Strawberry Crumb Bars

Strawberry Crumb Bars are a delightful dessert that brings a taste of summer to any day. The combination of crumbly crust, sweet strawberries, and crunchy topping makes it a favorite for families and gatherings. They are not only simple to make, but they also look gorgeous and mouth-watering on the table. Serve them at parties, picnics, or even as a cozy treat at home, and watch everyone reach for seconds!

tips for success

  1. Use Fresh Strawberries: Fresh strawberries will give the best flavor. If they are out of season, you can use frozen ones, but make sure to thaw and drain them first.

  2. Don’t Overmix the Dough: When making the crust and topping, mix just until combined to keep it crumbly and flaky.

  3. Chill the Dough: If your butter is too warm, the dough won’t hold together well. Chill it for about 30 minutes before pressing it into the pan.

  4. Add Lemon Zest: A little lemon zest in the filling will brighten the flavor of the strawberries.

  5. Allow to Cool Completely: This ensures that the bars set properly and are easy to cut.

  6. Experiment with Flavors: Try adding different fruits like blueberries or raspberries for a twist on the classic recipe.

  7. Serve with Ice Cream: These bars are extra delightful when paired with a scoop of vanilla ice cream on top!

Serving Suggestions

Strawberry Crumb Bars can be served in various delightful ways. Enjoy them chilled alongside a cup of tea or coffee. For a festive touch, serve them warm with a scoop of ice cream or whipped cream on top. You can also sprinkle powdered sugar for a beautiful presentation. These bars are perfect for summer picnics or as a sweet treat at gatherings.

FAQs

Can I use other fruits instead of strawberries?
Absolutely! Feel free to try blueberries, raspberries, or peaches for a different flavor.

How do I store the leftover bars?
Store the bars in an airtight container in the fridge for up to a week. You can also freeze them for longer storage.

Can I make these bars ahead of time?
Yes, you can prepare the bars a day in advance. Just remember to let them cool completely before storing.

Let your kitchen fill with the sweet aroma of strawberry goodness, and make these crumb bars today. You’ll be glad you did!

Strawberry Crumb Bars

Delightful strawberry crumb bars with a crumbly crust and sweet strawberry filling, perfect for summer gatherings.

For the Crust and Topping

  • 2 cups all-purpose flour (Fresh or organic flour for best results.)
  • 3/4 cup sugar
  • 1/2 cup cold butter (Cut into cubes for easier mixing.)

For the Strawberry Filling

  • 4 cups fresh strawberries (Sliced, can substitute with thawed frozen strawberries.)
  • 1/4 cup sugar (Adjust to taste.)
  • 2 tablespoons cornstarch (To thicken the filling.)

Preparation

  1. Preheat your oven to 350°F (175°C).
  2. In a mixing bowl, combine flour, sugar, and cold butter until crumbly.
  3. Press about two-thirds of the mixture into the bottom of a baking dish to form the crust.

Filling and Topping

  1. In another bowl, mix fresh strawberries, sugar, and cornstarch.
  2. Spread the strawberry mixture evenly over the crust.
  3. Sprinkle the remaining crumb mixture over the strawberry filling.

Baking

  1. Bake in the preheated oven for about 35-40 minutes, or until golden brown.

Serving

  1. Allow the bars to cool completely before cutting into squares.
  2. Serve as is, or with a scoop of ice cream for extra delight.

For best results, use fresh strawberries and avoid overmixing the dough. Chill if necessary, and consider adding lemon zest for enhanced flavor. Experiment with other fruits for different variations.

Dessert, Snack
American
Dessert Bars, Easy Recipes, Fruit Desserts, Strawberry Crumb Bars, Summer Treat