Berry Watermelon Fruit Salad

Berry Watermelon Fruit Salad is a delightful treat that brings together the juicy sweetness of watermelon and the vibrant flavors of fresh berries. This cheerful, colorful dish makes for a stunning centerpiece at any summer gathering or barbecue, and it’s perfect for satisfying those warm-weather cravings. It’s a crowd-pleaser with its refreshing and light taste, ensuring it disappears from the table in no time. Once you try this fruit salad, you’ll understand why everyone is buzzing about it! You may also find Honey Lime Fruit Saladthe Best useful.

How to prepare Berry Watermelon Fruit Salad

Making this delicious fruit salad is easy and quick. Start by gathering your favorite berries such as strawberries, blueberries, and raspberries. You’ll also need ripe watermelon, lime juice, and a little honey for added sweetness.

Berry Watermelon Fruit Salad

  1. Begin by cutting the watermelon into bite-sized cubes.
  2. In a large bowl, mix together the watermelon cubes, halved strawberries, blueberries, and raspberries.
  3. Drizzle lime juice over the fruit mixture.
  4. If desired, add a bit of honey and gently toss to combine.

Be sure to serve it chilled for the best taste!

Berry Watermelon Fruit Salad

Why You’ll Love Berry Watermelon Fruit Salad

There are many reasons to love this salad! First, it’s bursting with flavor from the juicy watermelon and mixed berries. Each bite is refreshing, making it a perfect dish for hot days. Plus, it’s a healthy choice, packed with vitamins and antioxidants. To make your fruit experience even more delightful, consider pairing it with a light dessert like easy blueberry crisp.

Tips for success

To ensure your Berry Watermelon Fruit Salad steals the show, here are some handy tips:

  • Use ripe fruits for the best taste. Check that your watermelon is sweet and firm.
  • Experiment with different berries based on your preference or seasonal availability.
  • For extra flavor, consider adding fresh mint or basil.

Serving Suggestions

This vibrant fruit salad is great on its own, but you can also serve it alongside yogurt, as a topping for pancakes, or even with grilled chicken for a delightful summer meal. The options are endless!

FAQs

  1. Can I use frozen berries?
  2. Yes, you can, but be aware that they may release more juice, which can affect the texture of the salad.
  3. How long does the salad last in the fridge?
  4. For the best taste, enjoy it within 1-2 days of making, as the fruit can become mushy over time.
  5. Can I make this ahead of time?
  6. Yes, you can prepare the fruit salad a few hours in advance, but add the lime juice and honey close to serving time to maintain freshness.

Conclusion

Berry Watermelon Fruit Salad is a fantastic addition to your recipe collection. For more fruit-filled recipes, check out Berry Watermelon Fruit Salad – Fork Knife Swoon. Enjoy the freshness and flavor of summer!

Berry Watermelon Fruit Salad

A refreshing and colorful salad combining juicy watermelon and vibrant berries, perfect for summer gatherings.

Fruits

  • 4 cups ripe watermelon, cubed (Choose a sweet and firm watermelon.)
  • 1 cup strawberries, halved (Fresh strawberries are recommended.)
  • 1 cup blueberries (Use fresh blueberries, or frozen if necessary.)
  • 1 cup raspberries (Fresh raspberries work best.)

Dressing

  • 2 tablespoons lime juice (Freshly squeezed is preferred.)
  • 1 tablespoon honey (Adjust the amount to taste.)

Preparation

  1. Cut the watermelon into bite-sized cubes.
  2. In a large bowl, mix together the watermelon cubes, halved strawberries, blueberries, and raspberries.
  3. Drizzle lime juice over the fruit mixture.
  4. If desired, add honey and gently toss to combine.
  5. Serve chilled for the best taste.

Use ripe fruits for the best taste. Experiment with different berries based on preference. For added flavor, consider adding fresh mint or basil.
Salad, Side Dish
American, Healthy
Berry Watermelon Fruit Salad, Fruit Salad, Healthy Recipe, Refreshing Dessert, summer salad

No-Churn Mulberry Ice Cream

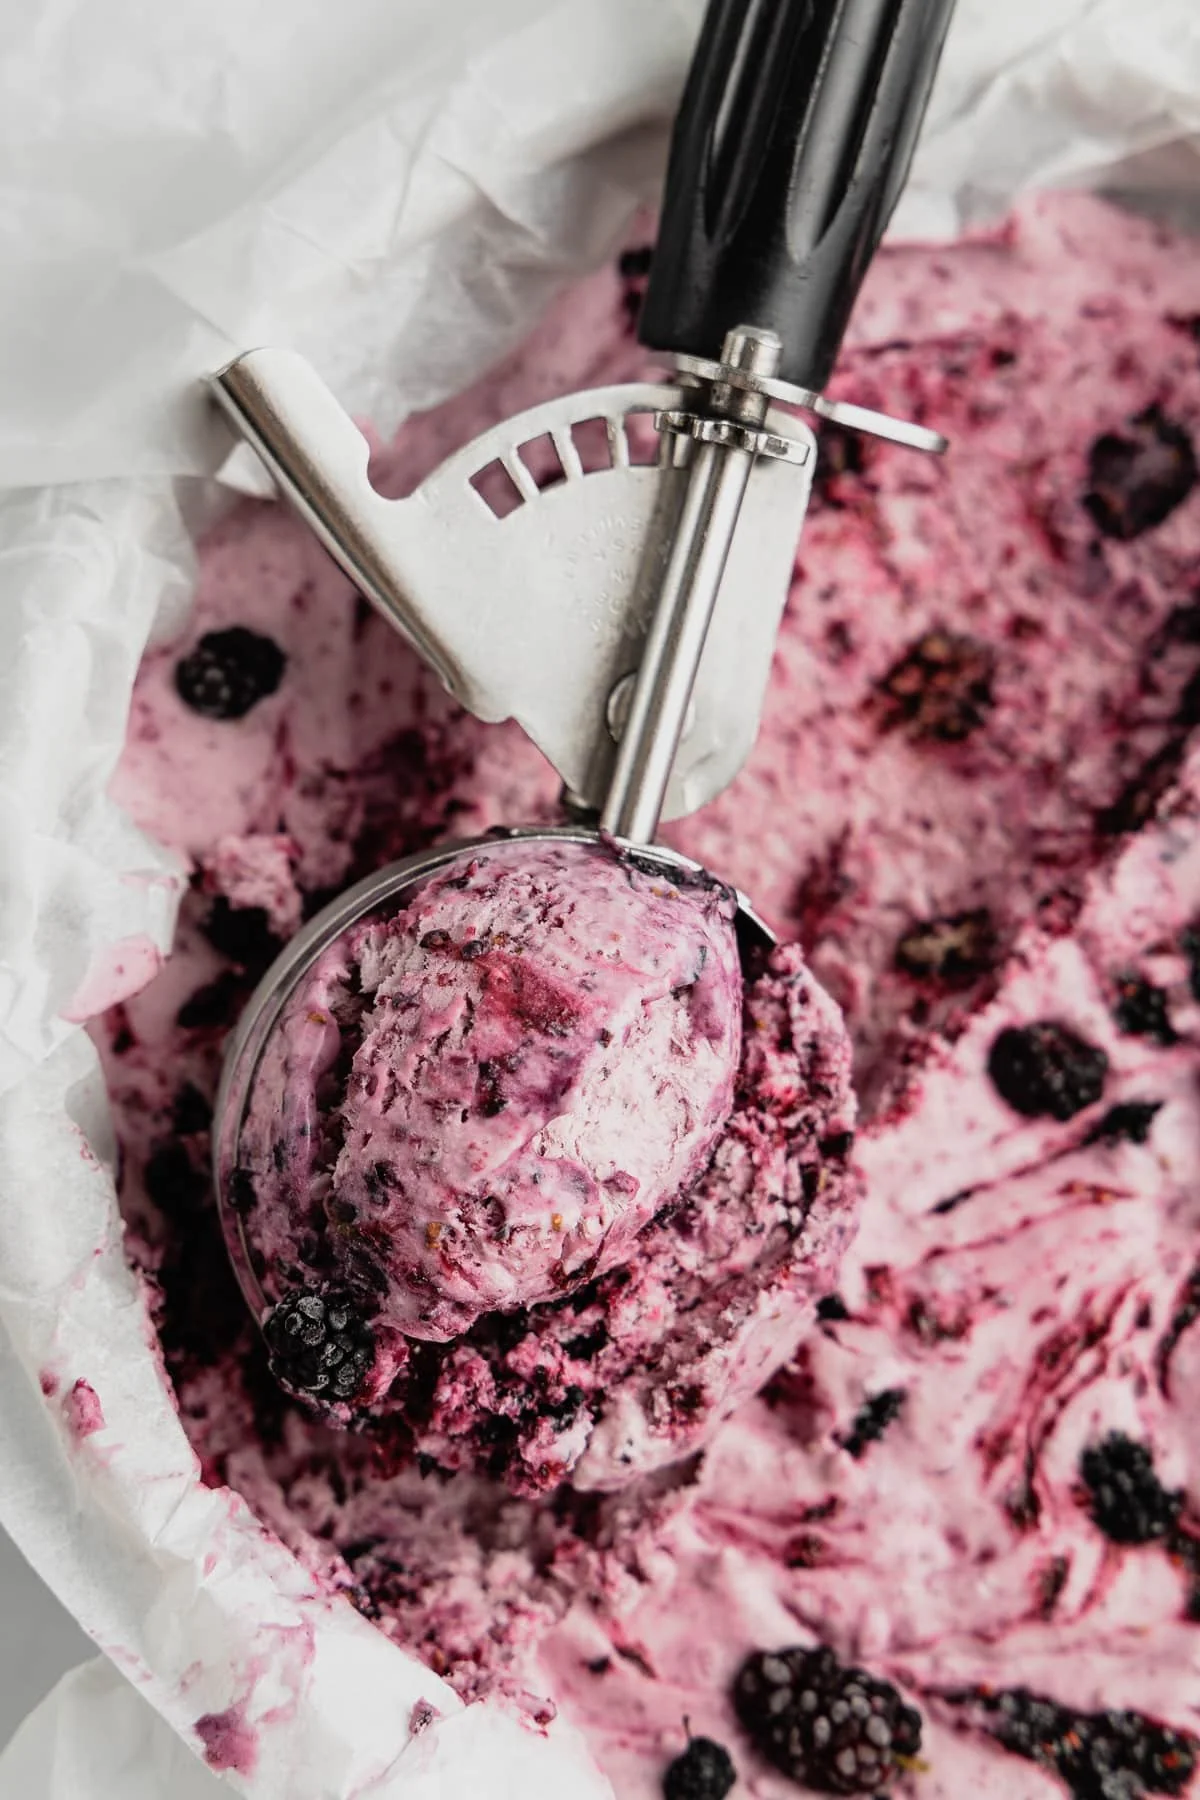
Delicious homemade no-churn mulberry ice cream in a bowl

Mulberries are a delightful fruit that can turn any recipe into something special, and when they are transformed into a creamy, dreamy ice cream, they truly shine. No-Churn Mulberry Ice Cream is the perfect treat for warm days and gatherings with friends and family. This easy recipe is not only delicious but also doesn’t require an ice cream maker, making it accessible for everyone. The sweet and slightly tangy flavor of mulberries combined with rich cream creates a crowd-pleaser that is sure to leave everyone asking for seconds. So, grab your mixing bowl and get ready to make something fun and tasty!

How to prepare No-Churn Mulberry Ice Cream

To prepare your No-Churn Mulberry Ice Cream, you will need the following ingredients:

  • 2 cups fresh mulberries, washed and stems removed
  • 1 cup heavy cream
  • 1 can (14 oz) sweetened condensed milk
  • 1 teaspoon vanilla extract
  • A pinch of salt
  1. In a blender, puree the mulberries until smooth. Set aside a few whole mulberries for garnish.
  2. In a mixing bowl, combine the heavy cream, sweetened condensed milk, vanilla extract, and salt. Beat with an electric mixer until the mixture is thick and smooth.
  3. Gently fold the mulberry puree into the cream mixture until well combined. Be careful not to over-mix; you want to keep that beautiful color.
  4. Pour the mixture into a freezer-safe container and spread it evenly.
  5. Cover with a lid or plastic wrap and freeze for at least 6 hours, or until firm.
  6. Scoop into bowls and top with reserved whole mulberries for a pretty and tasty finish.

No-Churn Mulberry Ice Cream

Why You’ll Love No-Churn Mulberry Ice Cream

This No-Churn Mulberry Ice Cream is a delightful balance of creamy and fruity flavors. It’s simple to make, and you can impress your guests with a homemade dessert that feels indulgent. Plus, using fresh mulberries not only adds a unique twist but also provides a burst of nutrients. Whether you are enjoying it on a hot summer day or serving it as a sweet treat after dinner, this ice cream is sure to be a hit.

Tips for success

  • For the best flavor, use ripe mulberries that are sweet and juicy.
  • If you don’t have mulberries, feel free to substitute them with other berries like blackberries or raspberries.
  • Make sure to whip the cream well for a light and fluffy texture.

Serving Suggestions

Serve your No-Churn Mulberry Ice Cream in waffle cones for a fun experience, or pour it into bowls topped with chocolate syrup, chopped nuts, or fresh mint. You can also accompany it with a slice of your favorite cake, or use it to make a stunning sundae with various toppings.

FAQs

  1. Can I use frozen mulberries for this recipe? Yes, frozen mulberries can be used, but be sure to thaw and drain them before blending.
  2. How long does this ice cream last in the freezer? Properly stored, No-Churn Mulberry Ice Cream can last for about 2-3 weeks in the freezer.
  3. Can I make this ice cream dairy-free? You can use coconut cream and a dairy-free sweetened condensed milk alternative for a dairy-free version of this recipe.

If you’re looking for more delicious recipes, check out this creamy chicken and rice dish that pairs perfectly with your sweet ice cream treat. Enjoy your homemade No-Churn Mulberry Ice Cream and share it with loved ones!

No-Churn Mulberry Ice Cream

A delightful creamy ice cream made with fresh mulberries that’s easy to prepare without an ice cream maker.

For the Ice Cream Base

  • 1 cup heavy cream (Whipped well for light texture.)
  • 1 can sweetened condensed milk
  • 1 teaspoon vanilla extract
  • a pinch salt

For the Mulberry Puree

  • 2 cups fresh mulberries, washed and stems removed (Set aside a few for garnish.)

Preparation

  1. In a blender, puree the mulberries until smooth. Set aside a few whole mulberries for garnish.
  2. In a mixing bowl, combine the heavy cream, sweetened condensed milk, vanilla extract, and salt. Beat with an electric mixer until the mixture is thick and smooth.
  3. Gently fold the mulberry puree into the cream mixture until well combined, being careful not to over-mix.

Freezing

  1. Pour the mixture into a freezer-safe container and spread it evenly.
  2. Cover with a lid or plastic wrap and freeze for at least 6 hours or until firm.

Serving

  1. Scoop into bowls and top with reserved whole mulberries for a pretty and tasty finish.

For the best flavor, use ripe mulberries that are sweet and juicy. If you don’t have mulberries, you can substitute them with other berries like blackberries or raspberries. Properly stored, the ice cream can last for 2-3 weeks in the freezer.

Dessert
American
dessert recipe, Easy Ice Cream, Mulberry Ice Cream, No-Churn Ice Cream, Summer Dessert

Key Lime Pie Trifle

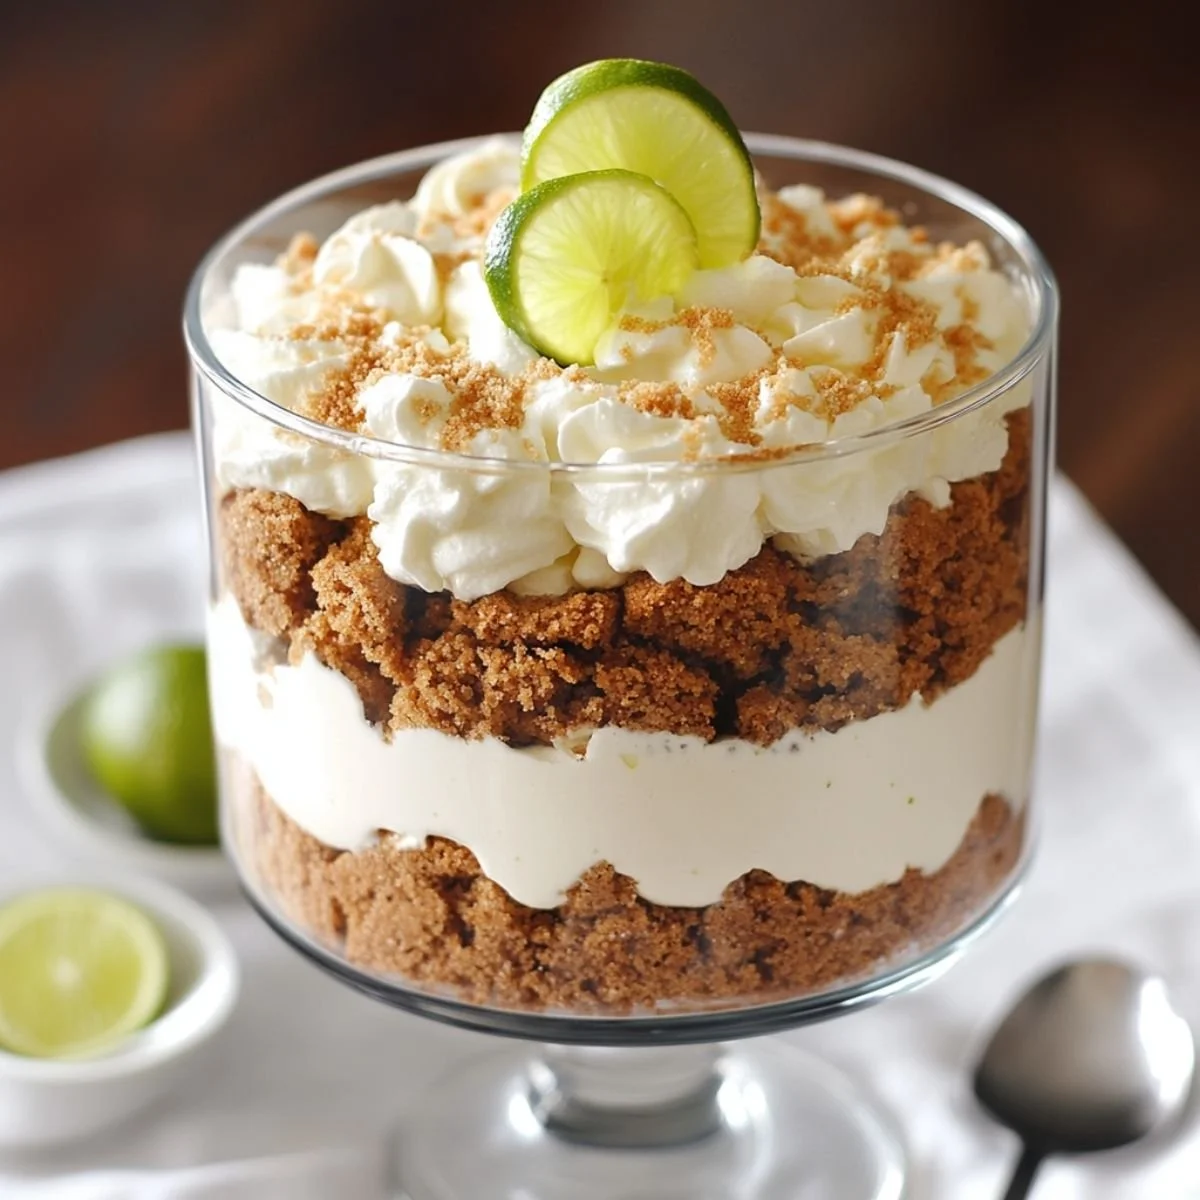
Delicious Key Lime Pie Trifle dessert with layers of lime cream and graham crackers

Every summer, my family and I gather for a big barbecue. As the sun begins to set, we always look forward to one treat that everyone loves Key Lime Pie Trifle. This delightful dessert brings the zing of key lime combined with the sweetness of whipped cream and cake, creating a layered experience that’s both refreshing and satisfying. There’s something special about sharing a dessert that not only tastes good but also tells a story of sunny days and family fun.

Why Make This Recipe

This Key Lime Pie Trifle is perfect for any gathering. It’s easy to make, and you can prepare it in advance, letting the flavors meld and improve over time. The creamy, tart filling pairs wonderfully with the crunchy graham cracker layers and airy angel food cake. Not only is it delicious, but it also looks stunning when served, making it a fantastic centerpiece for your table. Plus, it captures the essence of a classic key lime pie in a fun and shareable way!

How to Make Key Lime Pie Trifle

Ingredients:

  • 13 full graham crackers, crushed finely
  • 6 tablespoons of brown sugar
  • 1 teaspoon of cinnamon
  • 8 tablespoons of salted butter, melted
  • 2 cups of heavy cream
  • 8 ounces of cream cheese, softened
  • 2 cans (14 oz each) of sweetened condensed milk
  • ¾ cup of key lime juice
  • 1 tablespoon of key lime zest
  • 16 ounces of angel food cake, diced into cubes
  • Whipped cream to top

Directions:

  1. Begin by preparing the graham cracker crumble. In a medium bowl, mix together the crushed graham crackers, brown sugar, and cinnamon. Pour in the melted butter and stir until everything looks like wet sand and smells wonderfully sweet and buttery.
  2. Next, make the key lime cream filling. Beat the softened cream cheese until it is smooth and creamy. Gradually add in the sweetened condensed milk, mixing until everything is smooth. Slowly pour in the key lime juice and zest, enjoying the fresh citrusy scent. Then, whip the heavy cream until soft peaks form and gently fold it into the cream cheese mixture until light and fluffy.
  3. To assemble your trifle, start with a layer of the graham cracker crumble in a serving dish. Add a layer of angel food cake cubes, then spoon on some of the key lime cream filling. Repeat these layers, pressing down gently, and finish with a final layer of cream filling on top.
  4. For a beautiful presentation, top the trifle with whipped cream and a sprinkle of graham cracker crumbs. You can also add lime slices or some zest for extra flair and flavor. The final dessert is both pretty and delicious, capturing the spirit of a classic key lime pie.

How to Serve Key Lime Pie Trifle

Serve the Key Lime Pie Trifle chilled, allowing it to be refreshing on warm days. You can use individual cups or a large bowl for sharing. Just make sure to have spoons handy to scoop out the delicious layers!

How to Store Key Lime Pie Trifle

Store any leftover trifle in the refrigerator. Cover it well with plastic wrap or a lid to keep it fresh. It should stay good for up to 2 to 3 days, but it’s always best enjoyed fresh.

Tips to Make Key Lime Pie Trifle

  • For an easier assembly, consider pre-crumbing the graham crackers and cubing the angel food cake beforehand.
  • Make sure your cream cheese is at room temperature to avoid lumps in the filling.
  • Use fresh key lime juice for the best flavor, but bottled juice works in a pinch.

Variation

You can easily switch up the ingredients! Try using lemon juice instead of key lime for a different citrus flavor. You can also experiment with different cake bases, like pound cake or a chocolate cake for a unique twist.

FAQ SECTION

1. Can I use a different type of cake for this trifle?
Yes, you can use a different type of cake! Pound cake or sponge cake also works well.

2. How long does this trifle last in the fridge?
The trifle can last for about 2 to 3 days in the refrigerator if stored properly.

3. Can I make this trifle vegan?
To make a vegan version, use coconut cream instead of heavy cream, and a non-dairy cream cheese substitute. Make sure to find a vegan graham cracker for the crumble.

[tasty-recipe id=”3285″]

Key Lime Pie Trifle

A refreshing layered dessert combining the zing of key lime with whipped cream, graham crackers, and angel food cake, perfect for summer gatherings.

Graham Cracker Crumble

  • 13 full full graham crackers, crushed finely
  • 6 tablespoons brown sugar
  • 1 teaspoon cinnamon
  • 8 tablespoons salted butter, melted

Key Lime Cream Filling

  • 2 cups heavy cream
  • 8 ounces cream cheese, softened (Make sure it’s at room temperature.)
  • 2 cans (14 oz each) sweetened condensed milk
  • ¾ cup key lime juice (Use fresh for best flavor.)
  • 1 tablespoon key lime zest

Assembly Ingredients

  • 16 ounces angel food cake, diced into cubes
  • to taste Whipped cream to top (Can add lime slices or more zest for garnish.)

Prepare Graham Cracker Crumble

  1. In a medium bowl, mix together the crushed graham crackers, brown sugar, and cinnamon.
  2. Pour in the melted butter and stir until everything looks like wet sand.

Make Key Lime Cream Filling

  1. Beat the softened cream cheese until smooth.
  2. Gradually add in the sweetened condensed milk, mixing until smooth.
  3. Slowly pour in the key lime juice and zest.
  4. Whip the heavy cream until soft peaks form and gently fold into the cream cheese mixture.

Assemble the Trifle

  1. Start with a layer of the graham cracker crumble in a serving dish.
  2. Add a layer of angel food cake cubes, then spoon on some of the key lime cream filling.
  3. Repeat these layers, pressing down gently, and finish with a final layer of cream filling on top.

Serve

  1. Top with whipped cream and a sprinkle of graham cracker crumbs.
  2. Serve chilled. You can use individual cups or a large bowl for sharing.

Store leftovers in the refrigerator, covered for 2 to 3 days. Use fresh ingredients for best flavor. Consider pre-crumbing graham crackers and cubing angel food cake beforehand for easier assembly.

Dessert
American
Family Gatherings, Key Lime Pie Trifle, Layered Dessert, No-Bake Dessert, Summer Dessert


Key Lime Pie Trifle

A refreshing layered dessert combining the zing of key lime with whipped cream, graham crackers, and angel food cake, perfect for summer gatherings.

Graham Cracker Crumble

  • 13 full full graham crackers, crushed finely
  • 6 tablespoons brown sugar
  • 1 teaspoon cinnamon
  • 8 tablespoons salted butter, melted

Key Lime Cream Filling

  • 2 cups heavy cream
  • 8 ounces cream cheese, softened (Make sure it’s at room temperature.)
  • 2 cans sweetened condensed milk (14 oz each)
  • ¾ cup key lime juice (Use fresh for best flavor.)
  • 1 tablespoon key lime zest

Assembly Ingredients

  • 16 ounces angel food cake, diced into cubes
  • to taste Whipped cream to top (Can add lime slices or more zest for garnish.)

Prepare Graham Cracker Crumble

  1. In a medium bowl, mix together the crushed graham crackers, brown sugar, and cinnamon.
  2. Pour in the melted butter and stir until everything looks like wet sand.

Make Key Lime Cream Filling

  1. Beat the softened cream cheese until smooth.
  2. Gradually add in the sweetened condensed milk, mixing until smooth.
  3. Slowly pour in the key lime juice and zest.
  4. Whip the heavy cream until soft peaks form and gently fold into the cream cheese mixture.

Assemble the Trifle

  1. Start with a layer of the graham cracker crumble in a serving dish.
  2. Add a layer of angel food cake cubes, then spoon on some of the key lime cream filling.
  3. Repeat these layers, pressing down gently, and finish with a final layer of cream filling on top.

Serve

  1. Top with whipped cream and a sprinkle of graham cracker crumbs.
  2. Serve chilled. You can use individual cups or a large bowl for sharing.

Store leftovers in the refrigerator, covered for 2 to 3 days. Use fresh ingredients for best flavor. Consider pre-crumbing graham crackers and cubing angel food cake beforehand for easier assembly.

Dessert
American
Dessert, Key Lime Pie, Layered Dessert, Summer, Trifle

Irresistible Grilled Peaches with Brown Butter Cinnamon-Sugar Glaze

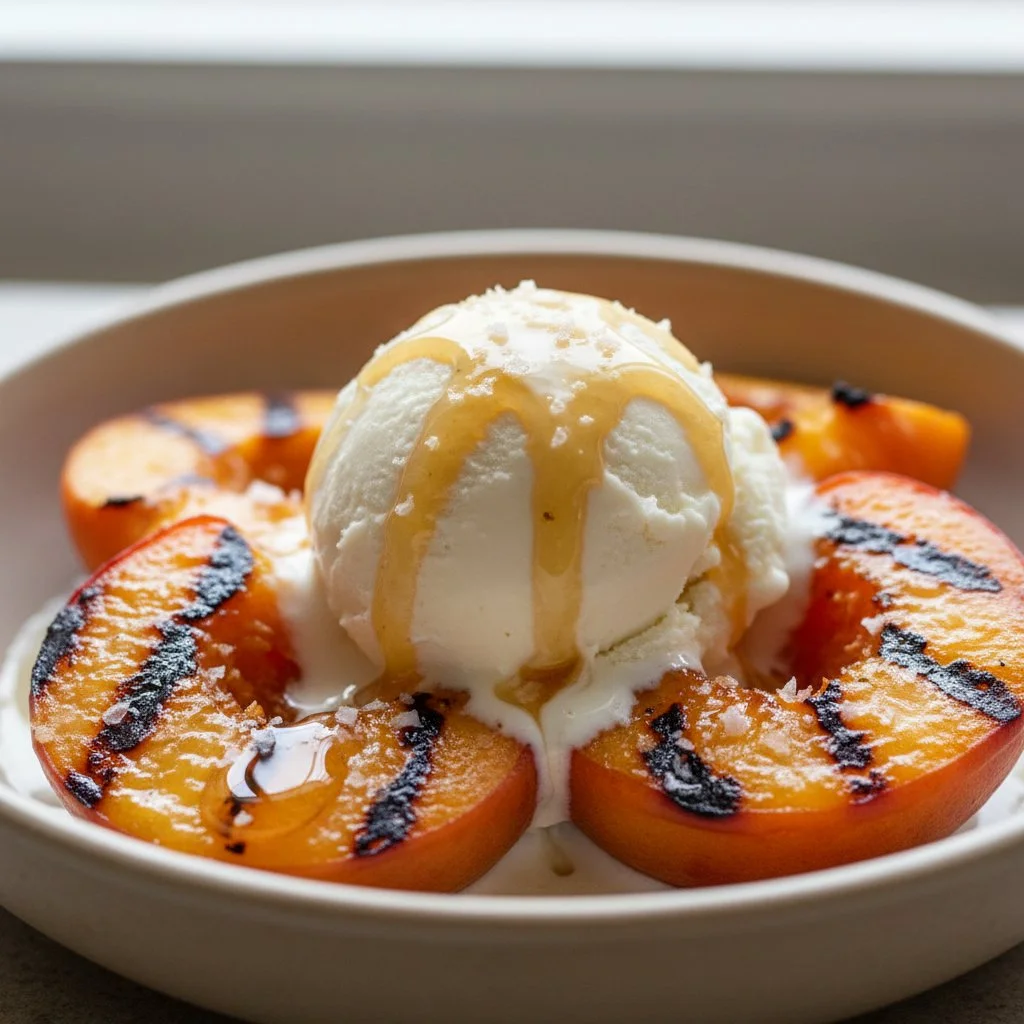
Grilled peaches topped with brown butter and cinnamon-sugar glaze on a plate.

Grilled peaches are a delightful summer treat that will change your dessert game. Imagine juicy, tender peaches caramelized to perfection on the grill, dripping with a rich brown butter cinnamon-sugar glaze. This simple yet fabulous recipe is perfect for gatherings, picnics, or even a cozy night in. It’s a dish that everyone will rave about, with its sweet, smoky flavor and warm spice. Once you try it, you’ll find yourself dreaming about grilled peaches all year long!

How to Prepare Irresistible Grilled Peaches with Brown Butter Cinnamon-Sugar Glaze

To start making these tasty treats, first gather your ingredients. You’ll need fresh peaches, butter, brown sugar, cinnamon, and a pinch of salt. Slice the peaches in half and remove the pits. Melt the butter in a pan until it turns golden brown, then add the brown sugar, cinnamon, and salt to create your glaze.

Next, grill the peach halves cut side down for about 3-4 minutes until they are grill-marked and tender. Once off the grill, brush them with the brown butter cinnamon-sugar glaze to give them that irresistible taste. Serve warm, and watch as your friends and family smile with every bite!

Irresistible Grilled Peaches with Brown Butter Cinnamon-Sugar Glaze

Why You’ll Love Irresistible Grilled Peaches with Brown Butter Cinnamon-Sugar Glaze

These grilled peaches are not just a dessert, they are an experience. The sweet, juicy fruit paired with the nutty, rich flavor of brown butter creates a heavenly taste that’s hard to resist. The addition of cinnamon-sugar adds warmth and comfort, making this dish perfect for any occasion. Plus, it’s a simple recipe that requires minimal ingredients and time, making it a go-to for busy cooks and sweet tooth enthusiasts alike.

Tips for Success

  • Choose Ripe Peaches: Look for peaches that are slightly soft to the touch but not overly mushy. Their natural sweetness will shine through.
  • Watch the Grill: Keep an eye on the peaches while they grill to prevent burning. You want those lovely grill marks, not charred fruit!
  • Customize the Glaze: Feel free to add a splash of vanilla or a sprinkle of nutmeg for an extra flavor twist.

Serving Suggestions

Grilled peaches are versatile! Serve them as a delightful dessert on their own, or add a scoop of vanilla ice cream for a decadent treat. Pair them with yogurt and granola for a delicious breakfast or brunch option. They also make an excellent topping for pancakes or waffles. Get creative and enjoy!

FAQs

Can I use frozen peaches instead?

While fresh peaches yield the best flavor, you can use frozen peaches; just be sure to let them thaw completely before grilling.

What if I don’t have a grill?

No worries! You can cook the peaches in a grill pan on the stovetop or even roast them in the oven.

How should I store leftovers?

If you have any leftovers (though they might not last long!), store them in an airtight container in the fridge for up to two days. Reheat on the stove for a few minutes before serving again.

Now that you know how to make these delicious grilled peaches, it’s time to fire up that grill and impress your friends and family. Enjoy every bite of this sweet summer treat!

Grilled Peaches with Brown Butter Cinnamon-Sugar Glaze

Delicious grilled peaches caramelized to perfection with a rich brown butter cinnamon-sugar glaze, perfect for summer gatherings or cozy nights in.

Main Ingredients

  • 4 pieces fresh peaches (Choose ripe peaches.)
  • 4 tablespoons butter (Melt until golden brown.)
  • 1/4 cup brown sugar
  • 1 teaspoon cinnamon (For added warmth.)
  • a pinch salt (To enhance flavor.)

Preparation

  1. Gather your ingredients: fresh peaches, butter, brown sugar, cinnamon, and a pinch of salt.
  2. Slice the peaches in half and remove the pits.
  3. Melt the butter in a pan until it turns golden brown, then add the brown sugar, cinnamon, and salt to create your glaze.

Grilling

  1. Grill the peach halves cut side down for about 3-4 minutes until they are grill-marked and tender.
  2. Once off the grill, brush them with the brown butter cinnamon-sugar glaze.

Serving

  1. Serve warm and enjoy!

Tips: Choose ripe peaches for sweetness, watch the grill to avoid burning, and customize the glaze with vanilla or nutmeg for extra flavor. Grilled peaches are versatile; serve them solo, with ice cream, or as pancake toppings.

Dessert, Snack
American, Summer
Brown Butter, Cinnamon-Sugar, Easy Recipe, Grilled Peaches, Summer Dessert