Air Fryer Stuffed Peppers

Colorful air fryer stuffed peppers filled with savory ingredients

I love simple meals that taste like you worked hard, when you did not. Air fryer stuffed peppers make a cozy, bright plate with little fuss. This recipe is a crowd-pleaser because it mixes sweet bell peppers, savory meat, and melty cheese in one fun bite. If you like quick air fryer meals, try this dish and later check a fun spin on air fryer sandwiches like air fryer grilled cheese hot dogs for another easy meal idea. You will smile when you see how good it smells, and you might want to make it every week.

How to prepare Air Fryer Stuffed Peppers.

Preheat your air fryer to 350°F (175°C). Wash four bell peppers, cut off the tops, and remove the seeds. In a bowl, cook 1 pound ground beef or turkey with one chopped onion until browned, then drain any extra fat. Stir in 1 cup cooked rice, 1 cup tomato sauce, 1 teaspoon salt, 1/2 teaspoon pepper, and 1/2 cup shredded cheese. Spoon the filling into each pepper, top with a little extra cheese if you like, and place the peppers upright in the air fryer basket. Cook for 10 to 15 minutes, until the peppers are tender and the cheese is melted. Let sit two minutes before serving.

Air Fryer Stuffed Peppers

Why You’ll Love Air Fryer Stuffed Peppers

  • Fast cook time, they are ready in about 20 to 30 minutes.
  • Easy to change, use beef, turkey, or a vegetarian mix with beans and veggies.
  • Healthy and filling, the peppers give color, vitamins, and fiber.
  • Great one-dish meal for kids and guests, this stuffed peppers recipe is simple to scale.

tips for success

  • Choose peppers that sit flat so they stay upright in the basket.
  • Par-cook rice or use leftover rice to save time.
  • Do not overfill, leave a little room so cheese melts on top.
  • Check at 10 minutes, air fryer models cook differently, add time if peppers are still firm.
  • For softer peppers, cook at 350°F for 15 minutes, for firmer peppers, check at 10 minutes.

Serving Suggestions

  • Serve with a simple green salad and a squeeze of lemon for brightness.
  • Add a spoon of sour cream or plain yogurt on top for creaminess.
  • Offer warm crusty bread or garlic bread on the side.
  • Leftovers reheat well in the air fryer for 5 minutes at 350°F.

Air Fryer Stuffed Peppers

FAQs

Q: Can I make stuffed peppers ahead of time?

A: Yes, stuff the peppers and keep them covered in the fridge for up to one day. Air fry when ready.

Q: Can I use frozen peppers?

A: Fresh peppers work best. If frozen, thaw and pat dry, then cook a bit longer.

Q: How do I make this recipe vegetarian?

A: Replace the meat with cooked lentils, chopped mushrooms, or a mix of beans and corn.

Q: Can I add more cheese?

A: Yes, add extra cheese on top before the last few minutes of cooking for a golden finish.

Q: What if my filling is wet?

A: Drain excess liquid from cooked ingredients and add a bit more rice or breadcrumbs to thicken.

Conclusion

Air fryer stuffed peppers bring comfort food to your table with less time and less fuss, they are an easy stuffed peppers recipe you will return to again and again. For another clear step by step air fryer stuffed peppers guide, see this helpful recipe on Air Fryer Stuffed Peppers – The Recipe Critic, and for more tips and variations check the recipe collection at Air Fryer Stuffed Peppers | AirFried.com.

Air Fryer Stuffed Peppers

These air fryer stuffed peppers are a quick, crowd-pleasing dish that combines bell peppers, savory meat, and melty cheese for a flavorful meal.

Main Ingredients

  • 4 pieces bell peppers (Choose peppers that sit flat for stability.)
  • 1 pound ground beef or turkey (Use your preferred type of meat or a vegetarian mix.)
  • 1 cup cooked rice (Par-cook rice or use leftover rice to save time.)
  • 1 cup tomato sauce (For added flavor, use your favorite brand.)
  • 1 teaspoon salt
  • 1/2 teaspoon black pepper
  • 1/2 cup shredded cheese (Add more cheese on top for a golden finish.)

Preparation

  1. Preheat your air fryer to 350°F (175°C).
  2. Wash the bell peppers, cut off the tops, and remove the seeds.
  3. In a bowl, cook the ground beef or turkey with the chopped onion until browned, then drain any extra fat.
  4. Stir in the cooked rice, tomato sauce, salt, pepper, and shredded cheese.
  5. Spoon the filling into each pepper, topping with extra cheese if desired.
  6. Place the peppers upright in the air fryer basket.

Cooking

  1. Cook for 10 to 15 minutes, or until the peppers are tender and the cheese is melted.
  2. Let sit for two minutes before serving.

Check at 10 minutes; air fryer models cook differently. Add time if peppers are still firm. Leftovers can be reheated in the air fryer for 5 minutes at 350°F.
Main Course
American
Air Fryer Stuffed Peppers, Easy Recipes, Healthy Dinners, Quick Meals, Stuffed Peppers

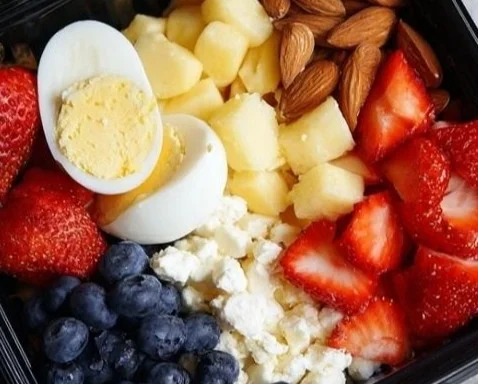
Easy High Protein Breakfast Boxes

Easy high protein breakfast boxes with healthy ingredients

Easy mornings get easier with a warm, friendly note. These Easy High Protein Breakfast Boxes are a smart way to start busy days with real food that fills you up, keeps you focused, and tastes great. They mix eggs, lean meat or beans, whole grains, and fresh fruit into a neat grab-and-go box. This recipe is a crowd-pleaser because it is colorful, balanced, and ready ahead, so everyone can eat well even on rushed mornings. You can also pair it with other simple make-ahead treats like 3-ingredient banana oatmeal muffins for more variety. Get ready to make a batch, feel proud, and smile on your way out the door.

How to prepare Easy High Protein Breakfast Boxes

  1. Cook the protein, choose one or mix:
  • Scramble or hard-boil 6 eggs, or
  • Cook 1 pound lean turkey sausage or diced chicken, or
  • Drain and season 2 cans of beans for a vegetarian option.
  1. Make the grain:
  • Cook 2 cups of quinoa, brown rice, or prepare whole grain toast slices.
  1. Add veggies:
  • Roast or sauté a mix of bell peppers, spinach, or broccoli until tender.
  1. Portion fruit:
  • Wash and cut berries, apple slices, or orange segments.
  1. Assemble boxes:
  • In 4 to 6 meal boxes, add a portion of grains, a portion of protein, a serving of veggies, and some fruit.
  1. Add extras:
  • Include a small container of hummus, salsa, or yogurt for dipping or topping.
  1. Store and reheat:
  • Seal boxes and keep in fridge up to 4 days. Reheat the protein and grain in microwave for 60 to 90 seconds, or enjoy cold.

Easy High Protein Breakfast Boxes: Healthy Meal Prep for Busy Mornings

Why You’ll Love Easy High Protein Breakfast Boxes

  • They save time, you make many breakfasts at once and just grab a box.
  • They are filling, high protein keeps hunger away until lunch.
  • They are flexible, swap proteins, grains, and fruits you like.
  • They help you eat healthy, balanced portions of protein, carbs, and veggies.
  • They work for kids, adults, and anyone who needs a quick, tasty meal.

tips for success

  • Use airtight containers, they keep food fresh longer.
  • Cool cooked food before sealing, to avoid soggy boxes.
  • Mix flavors, add different sauces or herbs to avoid boredom.
  • Prep ingredients separately, then assemble for best texture.
  • Balance portions, aim for about 20 to 30 grams of protein per box.

Serving Suggestions

  • Add hot sauce or salsa for a spicy kick.
  • Swap fruit for a small smoothie if you need a drinkable option.
  • Pack a small ice pack for longer trips to keep boxes cool.
  • Serve with a side of plain Greek yogurt topped with nuts for extra protein.

Easy High Protein Breakfast Boxes: Healthy Meal Prep for Busy Mornings

FAQs

Q: How long do these breakfast boxes stay good in the fridge? A: They keep well for up to 4 days if stored in airtight containers.

Q: Can I freeze the boxes? A: Yes, freeze without fresh fruit. Thaw in fridge overnight and reheat gently.

Q: What are good vegetarian protein choices? A: Use beans, lentils, tofu, tempeh, or Greek yogurt for strong protein options.

Q: Are these boxes good for weight loss? A: They can be, because they focus on protein and balanced portions that help control hunger.

Q: Can I make these for kids? A: Yes, use kid-friendly flavors and smaller portions so they enjoy them.

Conclusion

These Easy High Protein Breakfast Boxes make busy mornings calm, tasty, and healthy. They are simple to make, easy to change, and great for meal prep. For another high-protein, make-ahead morning idea, check out High Protein Egg & Hashbrown Breakfast Bowls (Easy Meal Prep), it pairs well with this style of breakfast planning.

Easy High Protein Breakfast Boxes

A quick and nutritious breakfast option filled with protein, grains, veggies, and fruits, perfect for busy mornings.

Protein Options

  • 6 eggs eggs (Scrambled or hard-boiled)
  • 1 pound lean turkey sausage (Cooked and crumbled)
  • 2 cans beans (Drained and seasoned for vegetarian option)

Grain Options

  • 2 cups quinoa (Cooked)
  • 2 cups brown rice (Cooked)
  • 4 slices whole grain toast (Prepared)

Veggies

  • 1 cup mixed bell peppers (Roasted or sautéed until tender)
  • 1 cup spinach (Roasted or sautéed until tender)
  • 1 cup broccoli (Roasted or sautéed until tender)

Fruits

  • 2 cups berries (Washed and cut)
  • 2 slices apple (Cut into slices)
  • 2 segments orange (Cut into segments)

Extras

  • 1 container hummus (For dipping or topping)
  • 1 container salsa (For dipping or topping)
  • 1 container yogurt (For dipping or topping)

Preparation

  1. Choose a protein option: scramble or hard-boil 6 eggs, or cook 1 pound of lean turkey sausage or diced chicken, or drain and season 2 cans of beans.
  2. Prepare the grain: Cook 2 cups of quinoa or brown rice, or prepare 4 slices of whole grain toast.
  3. Add veggies: roast or sauté a mix of bell peppers, spinach, or broccoli until tender.
  4. Portion fruit: wash and cut berries, apple slices, or orange segments.
  5. Assemble boxes: in 4 to 6 meal boxes, add a portion of grains, a portion of protein, a serving of veggies, and some fruit.
  6. Add extras: include a small container of hummus, salsa, or yogurt for dipping or topping.
  7. Seal boxes and keep in the fridge for up to 4 days. Reheat the protein and grain in the microwave for 60 to 90 seconds, or enjoy cold.

Use airtight containers to keep food fresh longer. Cool cooked food before sealing to avoid soggy boxes. Mix flavors by adding different sauces or herbs to avoid boredom. Prep ingredients separately, then assemble for best texture.

Breakfast, Meal Prep
American, Healthy
Breakfast Boxes, Easy Recipes, Healthy Eating, High Protein, Meal Prep

Lemon Garlic Pasta

Bowl of Lemon Garlic Pasta garnished with fresh parsley and lemon slices

Lemon garlic pasta is bright, warm, and easy to make. The lemon lifts the pasta, the garlic adds depth, and a little butter or olive oil ties it all together. This dish feels fancy, but it comes together fast, so it is great for weeknights or for guests. If you love simple pasta dishes, you might also enjoy this baked chicken parmesan pasta. Try this lemon garlic pasta, and you will see how a few fresh ingredients can turn into a crowd-pleaser. Trust me, you will want to make it again and again.

how to prepare Lemon Garlic Pasta

Ingredients:

  • 12 ounces pasta, such as spaghetti or linguine
  • 3 tablespoons olive oil
  • 2 tablespoons butter
  • 4 garlic cloves, minced
  • Zest and juice of 2 lemons
  • 1/2 cup grated Parmesan cheese
  • 1/4 cup reserved pasta water, more if needed
  • Salt and black pepper to taste
  • Fresh parsley, chopped, for garnish
  • Optional, red pepper flakes for heat

Directions:

  1. Bring a large pot of salted water to a boil. Cook the pasta until al dente, following package time. Reserve 1/2 cup pasta water, then drain the pasta.
  2. While the pasta cooks, heat olive oil and butter in a large pan over medium heat.
  3. Add the minced garlic and cook 1 to 2 minutes, until fragrant and soft, do not let it burn.
  4. Turn off the heat for a moment, add lemon zest and lemon juice to the pan, stir well.
  5. Add the drained pasta to the pan, toss to coat. Add Parmesan and 1/4 cup reserved pasta water. Toss again, adding more pasta water if the sauce seems dry.
  6. Season with salt, pepper, and red pepper flakes if you like heat.
  7. Serve with chopped parsley and extra Parmesan on top.

Lemon Garlic Pasta

Why You’ll Love Lemon Garlic Pasta

  • It is simple to make, with few ingredients and quick steps.
  • The lemon gives a fresh, bright taste that pairs well with garlic and cheese.
  • You can change it easily, add chicken, shrimp, or vegetables for a full meal.
  • It feels light, but the Parmesan and pasta make it filling and satisfying.

tips for success

  • Save some pasta water, it helps make a smooth, creamy sauce.
  • Use fresh lemon juice and zest for the best bright flavor.
  • Do not overcook the garlic, it should be soft and golden, not brown.
  • Toss the pasta in the pan off heat to keep the cheese from clumping.
  • Taste and adjust salt and lemon at the end, small changes make a big difference.

Serving Suggestions

  • Add grilled chicken or sautéed shrimp for protein.
  • Serve with a simple green salad and a light vinaigrette.
  • Top with extra Parmesan and a squeeze of lemon for more zing.
  • Pair with crusty bread to soak up any sauce.

Lemon Garlic Pasta

FAQs

Q: Can I make this pasta creamy without cream?
A: Yes, use pasta water and Parmesan. The cheese and starchy water make a light, creamy sauce.

Q: Can I use bottled lemon juice?
A: Fresh lemon juice tastes best, but bottled will work in a pinch.

Q: How do I keep the garlic from burning?
A: Cook garlic on medium or medium-low heat and watch it closely. Remove from heat if it starts to brown.

Q: Can I make this gluten free?
A: Yes, use gluten free pasta and cook it to the right doneness.

Q: Can I keep leftovers?
A: Store in the fridge in a covered container for 2 to 3 days, reheat gently with a little water or oil.

Conclusion

If you want another take on lemon pasta ideas and extra tips, check this Love and Lemons lemon pasta recipe for inspiration and bright flavor ideas.

Lemon Garlic Pasta

Bright, warm, and easy to make, this lemon garlic pasta dish is perfect for weeknights or guests, combining simple ingredients for a crowd-pleaser.

Pasta and Base

  • 12 ounces pasta, such as spaghetti or linguine
  • 3 tablespoons olive oil
  • 2 tablespoons butter

Flavoring

  • 4 cloves garlic, minced
  • 2 lemons Zest and juice of
  • 1/2 cup grated Parmesan cheese
  • 1/4 cup reserved pasta water, more if needed
  • Salt and black pepper to taste
  • Fresh parsley, chopped, for garnish (Optional, red pepper flakes for heat)

Cooking Pasta

  1. Bring a large pot of salted water to a boil. Cook the pasta until al dente, following package time. Reserve 1/2 cup pasta water, then drain the pasta.

Preparing the Sauce

  1. While the pasta cooks, heat olive oil and butter in a large pan over medium heat.
  2. Add the minced garlic and cook for 1 to 2 minutes, until fragrant and soft, do not let it burn.
  3. Turn off the heat for a moment, add lemon zest and lemon juice to the pan, stir well.

Combining Ingredients

  1. Add the drained pasta to the pan, toss to coat. Add Parmesan and 1/4 cup reserved pasta water. Toss again, adding more pasta water if the sauce seems dry.
  2. Season with salt, pepper, and red pepper flakes if you like heat.
  3. Serve with chopped parsley and extra Parmesan on top.

Make sure to save some pasta water to help make a smooth, creamy sauce. For best results, use fresh lemon juice and zest, and avoid overcooking the garlic.

Dinner, Main Course
Italian
Easy Pasta Dish, Lemon Garlic Pasta, Pasta Recipe, Quick Dinner, Weeknight Meal

2-Ingredient Cottage Cheese Bread

Freshly baked 2-ingredient cottage cheese bread loaf on a wooden cutting board.

This 2-Ingredient Cottage Cheese Bread is warm, soft, and easy to make. It uses simple items and little time, so it is perfect for busy days and small kitchens. The bread has a light crumb and a mild, slightly tangy taste from the cottage cheese. It works well for sandwiches, toast, or just warm with butter.

If you like easy recipes, you might also enjoy a related simple dessert, like a two-ingredient yogurt cheesecake for a quick sweet finish.

This featured recipe is a crowd-pleaser, gentle on flavor, and very forgiving. You will love how it fills the house with a fresh bread smell in under an hour. Get your hands ready to mix and bake, you will smile when you slice the first piece.

how to prepare 2-Ingredient Cottage Cheese Bread

Ingredients

  • 1 cup cottage cheese
  • 1 cup self-rising flour

Directions

  1. Preheat the oven to 350°F, and grease a small loaf pan or line it with parchment.
  2. In a bowl, blend the cottage cheese and self-rising flour until a soft dough forms. Mix with a spoon or a hand mixer on low for about 30 seconds.
  3. Turn the dough into the prepared pan. Smooth the top with a spatula or wet fingers.
  4. Bake for 30 to 40 minutes, until the top is golden and a toothpick comes out clean.
  5. Let the bread cool in the pan for 10 minutes, then remove and cool on a rack before slicing.

2-Ingredient Cottage Cheese Bread

Why You’ll Love 2-Ingredient Cottage Cheese Bread

  • It uses just two common ingredients, so it is fast and simple.
  • The bread is soft and moist, with a mild tang from the cottage cheese.
  • It bakes quickly, so you get fresh bread without long prep.
  • It is great for quick lunches, snacks, or a simple side for soup.

tips for success

  • Use full-fat cottage cheese for a richer texture.
  • If the dough seems too wet, add a tablespoon of flour at a time until it firms.
  • Do not overmix, mix until just combined for a light crumb.
  • Check the bread at 30 minutes, ovens vary, and bake until the center is set.
  • Cool the loaf enough before slicing, it finishes setting as it cools.

Serving Suggestions

  • Slice and toast, then spread with butter and honey.
  • Make a quick sandwich with ham and cheese.
  • Serve warm with soup or a salad for a simple meal.
  • Turn slices into croutons, cube and bake until crisp.

2-Ingredient Cottage Cheese Bread

FAQs

Q: Can I use low-fat cottage cheese? A: Yes, you can. Low-fat will work, but the bread may be a bit less rich.

Q: Can I make this gluten-free? A: Use a gluten-free self-rising flour blend made for baking. Check the package for rising agents.

Q: How long does this bread keep? A: Store in an airtight bag or container at room temperature for 2 days, or in the fridge for up to 5 days.

Q: Can I add herbs or cheese? A: Yes, fold in a tablespoon or two of chopped herbs, or 1/4 cup grated cheese, before baking.

Conclusion

This simple 2-Ingredient Cottage Cheese Bread is quick, tasty, and comforting. If you want to try a similar tested recipe, see the Easy 2 Ingredient Cottage Cheese Bread Recipe – Suzie The Foodie for another take and photo guide.

2-Ingredient Cottage Cheese Bread

This bread is warm, soft, and easy to make with just two ingredients—cottage cheese and self-rising flour. Perfect for busy days, it has a mild, slightly tangy flavor and is great for sandwiches or toasting.

Main Ingredients

  • 1 cup cottage cheese (Use full-fat for a richer texture.)
  • 1 cup self-rising flour (Can substitute with gluten-free self-rising flour.)

Preparation

  1. Preheat the oven to 350°F, and grease a small loaf pan or line it with parchment.
  2. In a bowl, blend the cottage cheese and self-rising flour until a soft dough forms, about 30 seconds using a spoon or hand mixer on low.
  3. Turn the dough into the prepared pan and smooth the top with a spatula or wet fingers.

Baking

  1. Bake for 30 to 40 minutes, until the top is golden and a toothpick comes out clean.
  2. Let the bread cool in the pan for 10 minutes, then remove and cool on a rack before slicing.

If the dough seems too wet, add a tablespoon of flour at a time until it firms. Do not overmix; mix until just combined for a light crumb. Check the bread at 30 minutes, ovens vary, and bake until the center is set. Cool the loaf enough before slicing, it finishes setting as it cools.

Breakfast, Snack
American
Comfort Food, Cottage Cheese Bread, Easy Bread Recipe, Quick Bread, Two Ingredient Bread

Creamy Egg Casserole

Delicious creamy egg casserole baked to perfection for brunch.

Creamy Egg Casserole is a warm, simple dish that feels like a hug on a plate. It mixes eggs, milk or cream, and cheese into a soft, rich bake that works for breakfast, brunch, or a quick family dinner. This easy egg casserole is a crowd-pleaser because it tastes creamy, mild, and comforting, and you can add bacon, veggies, or potatoes to make it heartier. If you like simple baked eggs and cheesy breakfast casserole ideas, you might also enjoy a savory twist like a bacon potato egg casserole shared elsewhere. Get ready to make something that smells great, fills the house, and makes mornings easier.

how to prepare Creamy Egg Casserole

Ingredients

  • 8 large eggs
  • 2 cups milk or half and half
  • 2 cups shredded cheddar cheese
  • 4 cups cubed day old bread, or 4 cups thawed hash browns
  • 1 small onion, chopped, optional
  • 1 cup cooked bacon or sausage, chopped, optional
  • 1 teaspoon salt
  • 1/2 teaspoon black pepper
  • 2 tablespoons butter, melted

Directions

  1. Preheat the oven to 350 F, grease a 9×13 inch baking dish with butter.
  2. If using bread, spread the bread cubes in the dish, if using hash browns, spread them evenly.
  3. Scatter the chopped onion and cooked meat over the bread or potatoes.
  4. In a bowl, beat the eggs, then add milk, salt, pepper, and half the cheese. Stir until smooth.
  5. Pour the egg mixture over the dish, press the bread down a little so it soaks up the eggs.
  6. Sprinkle the rest of the cheese on top. Drizzle melted butter over the casserole.
  7. Let it sit for 10 minutes so the bread soaks the eggs, this helps make it creamy.
  8. Bake for 35 to 45 minutes, until the center is set and the top is lightly browned.
  9. Let the casserole cool for 5 to 10 minutes before slicing and serving.

Creamy Egg Casserole

Why You’ll Love Creamy Egg Casserole

  • It is easy to make with simple ingredients you likely have on hand.
  • The texture is soft and creamy, not dry, so each bite feels rich and satisfying.
  • You can change mix-ins, cheese, or bread to match what your family likes.
  • It makes a large dish, so it is great for feeding a group or for leftovers.
  • It fits many meals, from a slow Sunday breakfast to a quick weeknight dinner.

tips for success

  • Use day old bread or well-drained hash browns so the casserole does not get soggy.
  • Let the egg mix soak into the bread for at least 10 minutes before baking, this makes it creamier.
  • Don’t overbeat the eggs, stir until mixed, this keeps the texture tender.
  • If the top browns too fast, cover with foil for the last 10 minutes of baking.
  • Test the center with a knife, it should come out mostly clean when done.

Serving Suggestions

  • Serve with fresh fruit or a green salad for a light meal.
  • Add salsa, hot sauce, or chopped herbs on top for more flavor.
  • Pair with toast or warm biscuits for a fuller breakfast.
  • Reheat slices in the oven or microwave, they keep well for a few days.

Creamy Egg Casserole

FAQs

Q: Can I make this casserole the night before?

A: Yes, assemble it, cover, and refrigerate. Bake it the next morning, you may need a few extra minutes in the oven.

Q: Can I use milk instead of cream?

A: Yes, milk works fine. Using half and half or cream makes it richer and more creamy.

Q: How do I make it vegetarian?

A: Skip the meat and add extra veggies like bell peppers, spinach, or mushrooms.

Q: Can I freeze the casserole?

A: Yes, cool it first, wrap well, and freeze. Thaw in the fridge before reheating in the oven.

Q: How long will leftovers last?

A: Store in the fridge for 3 to 4 days, reheat until warm.

Conclusion

This Creamy Egg Casserole is easy to love, easy to make, and great for mornings when you want warm, cheesy comfort. For another creamy egg bake idea, you can read a similar take in the recipe called Creamy Scrambled Egg Casserole on The Runaway Spoon, it gives more ideas for a soft, creamy breakfast casserole.

Creamy Egg Casserole

A warm, simple dish that mixes eggs, milk, and cheese into a rich bake, perfect for breakfast, brunch, or dinner.

Casserole Base

  • 8 large large eggs
  • 2 cups milk or half and half (Using half and half makes it creamier.)
  • 2 cups shredded cheddar cheese (Use your favorite cheese.)
  • 4 cups cubed day old bread or thawed hash browns (Day old bread or well-drained hash browns recommended.)
  • 1 small onion, chopped (Optional ingredient.)
  • 1 cup cooked bacon or sausage, chopped (Optional ingredient.)
  • 1 teaspoon salt
  • 1/2 teaspoon black pepper
  • 2 tablespoons butter, melted (For greasing the dish.)

Preparation

  1. Preheat the oven to 350°F and grease a 9×13 inch baking dish with melted butter.
  2. If using bread, spread the bread cubes in the dish; if using hash browns, spread them evenly.
  3. Scatter the chopped onion and cooked bacon or sausage over the bread or potatoes.
  4. In a bowl, beat the eggs, then add milk, salt, pepper, and half the cheese. Stir until smooth.
  5. Pour the egg mixture over the dish and press down the bread slightly to soak up the eggs.
  6. Sprinkle the rest of the cheese on top and drizzle melted butter over the casserole.
  7. Let it sit for 10 minutes so the bread can soak up the egg mixture.

Baking

  1. Bake for 35 to 45 minutes, until the center is set and the top is lightly browned.
  2. Let the casserole cool for 5 to 10 minutes before slicing and serving.

For extra success, use day old bread or well-drained hash browns, let the egg mixture soak at least 10 minutes, and avoid overbeating the eggs.

Breakfast, Brunch, Dinner
American, Comfort Food
Breakfast Bake, Creamy Casserole, Easy Recipe, Egg Casserole, Family Dinner

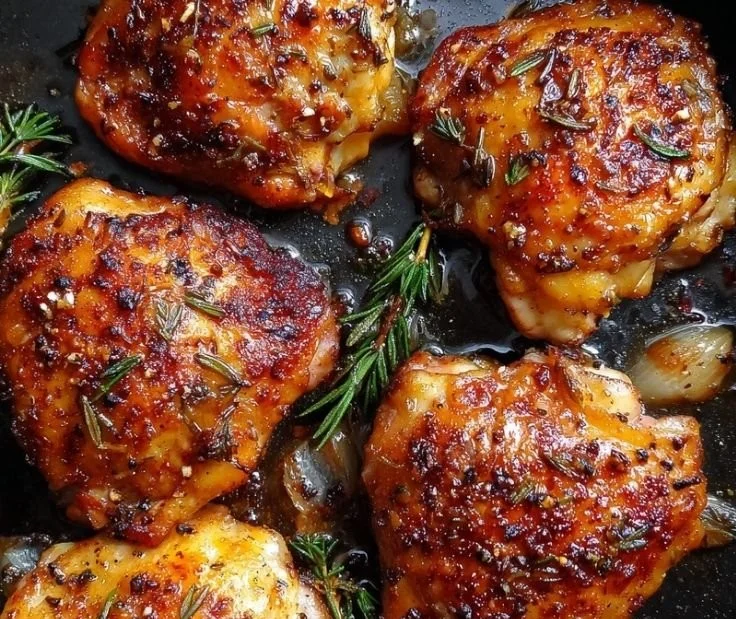
Oven-Roasted Chicken Thighs

Delicious oven-roasted chicken thighs seasoned and ready to serve

Oven-roasted chicken thighs are simple, cozy, and full of flavor. The skin gets crispy, the meat stays juicy, and the smell fills the kitchen fast. This recipe for Oven-Roasted Chicken Thighs is a real crowd-pleaser, great for weeknights and easy dinners with little fuss. It tastes savory, a bit golden, and very comforting, and many people keep coming back for seconds. If you like bold, easy chicken dishes, you might also enjoy this easy hot honey chicken thighs recipe. Give it a try, you might find a new favorite for busy nights, and you will smile when you see how simple it is to make.

how to prepare Oven-Roasted Chicken Thighs

  1. Preheat your oven to 425°F, this gives a hot blast to crisp the skin.
  2. Pat the chicken thighs dry with paper towels, dry skin gets crispier.
  3. Rub each thigh with a little oil, then season with salt, pepper, garlic powder, and paprika, or your favorite spice mix.
  4. Place the thighs skin-side up on a baking sheet or in a shallow roasting pan, give them some space so air can move around each piece.
  5. Roast for 30 to 40 minutes, until the skin is golden and a meat thermometer reads 165°F at the thickest part.
  6. Let the thighs rest 5 minutes before serving, this keeps the juices inside.

Follow this temperature.

  • At 180°C (350°F), cook for 45–50 minutes.
  • At 200°C (400°F), cook for 35–40 minutes.
  • At 220°C (425°F), cook for 30–35 minutes.

Oven-Roasted Chicken Thighs

Why You’ll Love Oven-Roasted Chicken Thighs

You will love this dish because it is easy and forgiving, the thighs stay juicy even if you are new to cooking. The skin turns crispy, so you get a nice contrast between crunch and tender meat. It works with simple spices, and you can change the seasoning to suit your taste. The recipe fits into a busy week, but it also looks good for guests, so it is a true crowd-pleaser.

Tips for Juicy and Flavorful Chicken

  • Dry the skin well before seasoning, this helps the skin crisp.
  • Use a hot oven, 425°F makes the outside brown fast without drying the meat.
  • Space the thighs apart on the pan, crowded pieces steam and lose crispiness.
  • Check temperature with a meat thermometer, 165°F is safe and keeps the meat juicy.
  • Let the meat rest a few minutes, juices settle and the meat becomes tender.

Serving Suggestions

  • Serve with roasted vegetables, like carrots, potatoes, or Brussels sprouts.
  • Pair with a light salad and a lemon vinaigrette for a fresh balance.
  • Spoon a simple pan sauce over the thighs, or add a touch of hot honey for a sweet glaze.
  • Make a plate with rice or mashed potatoes and steamed greens for a full meal.

Oven-Roasted Chicken Thighs

FAQs

How long do I cook bone-in chicken thighs in the oven?

Roast at 425°F for about 30 to 40 minutes, until the thickest part reads 165°F.

Can I use boneless thighs instead?

Yes, boneless thighs cook faster, about 20 to 30 minutes at 425°F, watch the internal temperature.

How do I keep the skin from getting soggy?

Dry the skin well, use oil, and make sure the oven is hot. Do not cover the pan while roasting.

Can I marinate the thighs ahead of time?

Yes, marinate for a few hours or overnight for more flavor, then bake as usual.

How do I store leftovers?

Cool the chicken, store in an airtight container in the fridge for up to 3 days, reheat in the oven to keep the skin crisp.

Conclusion

For another way to get extra crisp skin and a simple flavor mix, see this detailed guide to Crispy Baked Chicken Thighs – The Salty Marshmallow, it has tips that match well with this oven-roasted method and can help you get an even crispier finish.

Oven-Roasted Chicken Thighs

Simple, cozy, and full of flavor, oven-roasted chicken thighs feature crispy skin and juicy meat, making them a perfect choice for weeknight dinners.

Chicken Thighs

  • 4 pieces bone-in chicken thighs (Skin-on for extra crispiness)

Seasoning

  • 2 tablespoons olive oil (To rub on the chicken)
  • 1 teaspoon salt (To taste)
  • 1 teaspoon black pepper (To taste)
  • 1 teaspoon garlic powder (Optional seasoning)
  • 1 teaspoon paprika (Optional seasoning)

Preparation

  1. Preheat your oven to 425°F (220°C) to get a hot blast for crispy skin.
  2. Pat the chicken thighs dry with paper towels to ensure crispy skin.
  3. Rub each thigh with olive oil and season with salt, pepper, garlic powder, and paprika.
  4. Place the thighs skin-side up on a baking sheet or in a shallow roasting pan, giving them enough space.

Cooking

  1. Roast in the oven for 30 to 40 minutes, until the skin is golden and a meat thermometer reads 165°F at the thickest part.
  2. Let the thighs rest for 5 minutes before serving.

Dry the skin well before seasoning to help it crisp. Make sure to space the thighs apart to avoid steaming. A meat thermometer ensures proper cooking.

Dinner, Main Course
American
Chicken Thighs, Comfort Food, Crispy Chicken, easy chicken recipe, Oven-Roasted Chicken

Easy Lemon Butter Chicken

Plate of easy lemon butter chicken garnished with fresh herbs

Easy Lemon Butter Chicken is a simple dish that tastes fresh and rich. It mixes bright lemon, smooth butter, and tender chicken. This recipe is a crowd-pleaser, easy for weeknights, and great when you want a homey meal that still feels special. If you like light lemon flavors, try this after a salad like Greek yogurt chicken salad with dill and lemon zest for a full, bright meal. You will love how fast it comes together, and how great it smells, you might want to make it every week.

how to prepare Easy Lemon Butter Chicken

  1. Pat 4 chicken breasts dry, salt and pepper both sides.
  2. Heat 2 tablespoons oil in a large skillet over medium heat.
  3. Brown chicken 4 to 5 minutes per side, until golden, then remove to a plate.
  4. Lower heat, add 3 tablespoons butter and 3 garlic cloves, minced, cook 30 seconds until fragrant.
  5. Stir in juice of 1 lemon and 1/2 cup chicken broth, scrape pan bits.
  6. Return chicken to skillet, simmer 5 to 8 minutes, spoon sauce over chicken until cooked through.
  7. Stir in 1 tablespoon butter and a little chopped parsley at the end for shine and color.
  8. Taste and add salt, pepper, or extra lemon if you like more tang.

Easy Lemon Butter Chicken

Why You’ll Love Easy Lemon Butter Chicken

Easy Lemon Butter Chicken is quick to make, and it has bright lemon taste with rich butter sauce. The sauce is simple, but it coats the chicken and makes each bite juicy. It is a great choice for busy nights, small dinners, or when you want a tasty meal with few steps. The recipe uses common ingredients, so you can make it without a special trip to the store.

tips for success

  • Use room temperature chicken so it cooks evenly.
  • Don’t rush the browning, it adds flavor.
  • Taste the sauce, add a little more lemon or salt to match your taste.
  • If sauce is thin, simmer a bit longer to reduce and thicken.
  • For extra flavor, add a pinch of red pepper flakes or a splash of white wine with the broth.

Serving Suggestions

  • Serve with steamed rice or mashed potatoes to soak up the sauce.
  • Roast or steamed green beans, asparagus, or a simple salad work well.
  • A slice of crusty bread is great for dipping in the lemon butter sauce.
  • Garnish with chopped parsley or a thin lemon slice for a fresh look.

Easy Lemon Butter Chicken

FAQs

Q: How long does this take to cook?

A: From start to finish, plan about 25 to 30 minutes.

Q: Can I use thighs instead of breasts?

A: Yes, bone-in or boneless thighs work. Adjust cooking time until they reach safe internal temp.

Q: Can I make the sauce ahead?

A: You can make the sauce base, but add butter and lemon at the end for best fresh taste.

Q: Is this recipe freezer friendly?

A: Cooked chicken with sauce freezes okay, but sauce may change texture after thawing. Reheat gently and stir in a little fresh butter if needed.

Conclusion

If you want another take or extra tips on lemon butter chicken, see this detailed version at Easy Lemon Butter Chicken recipe at Salt & Lavender.

Easy Lemon Butter Chicken

A simple dish that combines fresh lemon, smooth butter, and tender chicken, making it a crowd-pleaser for weeknights and special meals.

Main Ingredients

  • 4 pieces chicken breasts (Pat dry before cooking)
  • 2 tablespoons oil (For frying the chicken)
  • 3 tablespoons butter (For the sauce and finishing)
  • 3 cloves garlic, minced (Adds flavor to the sauce)
  • 1 piece lemon, juiced (Provides freshness)
  • 1/2 cup chicken broth (For making the sauce)
  • 1 tablespoon parsley, chopped (For garnish)

Seasoning

  • to taste salt (Season chicken and sauce)
  • to taste pepper (Season chicken and sauce)
  • optional red pepper flakes (For extra heat)
  • optional white wine (For additional flavor)

Preparation

  1. Pat the chicken breasts dry and season both sides with salt and pepper.
  2. Heat the oil in a large skillet over medium heat.

Cooking

  1. Brown the chicken for 4 to 5 minutes per side, until golden, then remove to a plate.
  2. Lower heat, add the butter and minced garlic, cooking for 30 seconds until fragrant.
  3. Stir in the lemon juice and chicken broth, scraping the bottom of the pan.
  4. Return the chicken to the skillet and let it simmer for 5 to 8 minutes, spooning sauce over the chicken until it is cooked through.
  5. Stir in an additional tablespoon of butter and chopped parsley at the end for shine and color.

For the best results, use room temperature chicken and don’t rush the browning process for added flavor. Taste the sauce and adjust with lemon or salt to your liking. If the sauce is thin, simmer longer to thicken. Serve with rice or potatoes to soak up the sauce.

Dinner, Main Course
American
Comfort Food, easy chicken recipe, Lemon Butter Chicken, Quick Dinner, Weeknight Meal

German Chocolate Cake

Delicious slice of homemade German Chocolate Cake with coconut and pecan frosting

German chocolate cake feels like a warm hug on a plate. It is a rich, chocolate layer cake topped with a sweet coconut and pecan frosting. Many people love its mix of deep chocolate and chewy, nutty topping. This featured recipe is a true crowd-pleaser, perfect for birthdays, family dinners, or any time you want a special treat. The cake is moist, the frosting is sweet and textured, and every bite brings a mix of flavors that many people ask for seconds of. If you like rich chocolate treats, you might also enjoy chocolate protein pancakes, they are a fun twist for breakfast. Get ready to bake a cake that will make smiles, and maybe a few happy crumbs on your shirt.

how to prepare German Chocolate Cake

  1. Preheat the oven to 350°F, grease and flour two 9-inch round pans.
  2. In a bowl, mix flour, sugar, cocoa, baking soda, baking powder, and salt.
  3. In another bowl, whisk eggs, milk, oil, and vanilla. Stir wet mix into dry mix until smooth.
  4. Pour batter into pans and bake 25 to 30 minutes, or until a toothpick comes out clean.
  5. Let the cakes cool in pans 10 minutes, then turn them onto a rack to cool completely.
  6. For the coconut pecan frosting, mix evaporated milk, sugar, egg yolks, and butter in a saucepan. Cook and stir until thick and bubbly. Remove from heat, then stir in vanilla, shredded coconut, and chopped pecans.
  7. Once cakes are cool, place one layer on a plate, spread some frosting on top, add the second layer, then frost the top and sides with more frosting.
  8. Chill the cake for 30 minutes to set the frosting, then serve.

German Chocolate Cake

Why You’ll Love German Chocolate Cake

  • It balances deep chocolate flavor with sweet, chewy coconut and crunchy pecans.
  • The cake stays moist, so it tastes great the next day.
  • It looks impressive for little extra work, making it great for parties and holidays.

tips for success

  • Measure flour with a spoon and level it with a knife, do not pack it down.
  • Use room temperature eggs and milk for a smooth batter.
  • Do not overbake, check the cake a few minutes before the time is up.
  • Stir the frosting constantly while cooking so it does not burn or clump.
  • Cool the cake fully before frosting, or the frosting can melt and slide off.
  • Toast the pecans lightly for extra flavor, but let them cool before adding to the frosting.

Serving Suggestions

  • Serve with a scoop of vanilla ice cream for contrast.
  • Add fresh berries on the side to cut the sweetness.
  • Serve with a simple cup of coffee or milk.
  • Cut thin slices, the cake is rich and a small piece is very satisfying.

German Chocolate Cake

FAQs

Q: Can I make this cake ahead of time?

A: Yes, you can bake the layers a day ahead and wrap them. Make the frosting the same day you plan to assemble for best texture.

Q: Can I use a different nut in the frosting?

A: Yes, walnuts or almonds work fine, but pecans are the classic choice.

Q: Is there a lighter version of this cake?

A: You can use less sugar in the frosting or use lower fat milk, but the cake will change in taste and texture.

Q: How do I store the cake?

A: Keep it in the fridge in a cake box or covered dish for up to 4 days. Let it sit at room temperature 15 minutes before serving.

Conclusion

If you want a trusted, detailed version of this classic, try the recipe guide at Homemade German Chocolate Cake – Tastes Better From Scratch for extra tips and step by step photos. This cake brings bold chocolate and sweet coconut pecan frosting together, it is worth the time and will make people ask for the recipe.

German Chocolate Cake

A rich chocolate layer cake topped with a sweet coconut and pecan frosting, perfect for birthdays and special occasions.

For the cake

  • 2 cups all-purpose flour (Measure with a spoon and level with a knife.)
  • 2 cups sugar
  • 3/4 cup cocoa powder
  • 1 teaspoon baking soda
  • 1 teaspoon baking powder
  • 1 teaspoon salt
  • 4 large eggs (Use room temperature for a smooth batter.)
  • 1 cup milk (Room temperature.)
  • 1/2 cup vegetable oil
  • 2 teaspoons vanilla extract

For the coconut pecan frosting

  • 1 can evaporated milk
  • 1 1/2 cups sugar
  • 3 large egg yolks
  • 1/2 cup butter
  • 1 teaspoon vanilla extract
  • 1 1/2 cups shredded coconut
  • 1 cup chopped pecans (Toast lightly for extra flavor.)

Preparation

  1. Preheat the oven to 350°F (175°C) and grease and flour two 9-inch round pans.
  2. In a bowl, mix flour, sugar, cocoa, baking soda, baking powder, and salt.
  3. In another bowl, whisk eggs, milk, oil, and vanilla. Stir the wet mixture into the dry mixture until smooth.
  4. Pour the batter into the prepared pans and bake for 25 to 30 minutes, or until a toothpick comes out clean.
  5. Let the cakes cool in the pans for 10 minutes, then turn them onto a rack to cool completely.

Frosting

  1. In a saucepan, mix evaporated milk, sugar, egg yolks, and butter. Cook and stir until thick and bubbly.
  2. Remove from heat, then stir in vanilla, shredded coconut, and chopped pecans.

Assembly

  1. Once the cakes are cool, place one layer on a plate, spread some frosting on top, add the second layer, then frost the top and sides.
  2. Chill the cake for 30 minutes to set the frosting, then serve.

Serve with a scoop of vanilla ice cream for contrast, and add fresh berries on the side to cut the sweetness.

Cake, Dessert
American
birthday cake, chocolate cake, coconut pecan frosting, Dessert, German chocolate cake

Creamy Egg Salad

Bowl of creamy egg salad with fresh herbs and spices

I love a good, creamy egg salad for a quick lunch or snack. It tastes rich, soft, and fresh, and it works well on bread, crackers, or a bed of greens. This Creamy Egg Salad is a crowd-pleaser because it feels simple and homey, yet it has bright flavor from lemon and mustard. If you want a different creamy salad for a change, try a tasty variation like creamy chickpea feta avocado salad with zesty tahini, it gives a fresh spin on creamy salads. You will smile when you take the first bite, and you may want to make it again tomorrow.

how to prepare Creamy Egg Salad

This easy recipe makes a smooth, creamy egg salad you can make in minutes. You will need hard boiled eggs, mayonnaise, a little mustard, salt, pepper, and a splash of lemon or vinegar to brighten the taste. Chop the eggs small and mix gently so the salad stays creamy.

Simple steps

  1. Place eggs in a pot and cover with cold water. Bring to a boil, then lower heat and cook 9 to 12 minutes. Cool in ice water, peel, and chop.
  2. In a bowl, add 3 to 4 chopped eggs, 2 to 3 tablespoons mayonnaise, 1 teaspoon mustard, 1 teaspoon lemon juice or vinegar, salt and pepper to taste.
  3. Add a spoon of chopped celery or chives for crunch, if you like.
  4. Stir gently until smooth but still a bit chunky. Taste and adjust salt or lemon.
  5. Chill 10 to 30 minutes for best flavor, or serve right away.

Creamy Egg Salad

Why You’ll Love Creamy Egg Salad

  • It is quick to make, you can finish in 15 to 30 minutes.
  • The texture is soft and creamy, perfect for sandwiches or dips.
  • You can change it easily, add herbs, pickles, or a bit of curry powder.
  • It stores well in the fridge for a couple days, great for meal prep.

tips for success

  • Use eggs that are not too fresh for easier peeling, older eggs peel better.
  • Chill the eggs in ice water after boiling to stop cooking and make peeling simple.
  • Chop eggs to your preferred size, fine chops give a smoother salad.
  • Start with less mayo, add more until you reach the creaminess you like.
  • Add a little acid, lemon juice or vinegar, to lift the flavor.
  • Keep the salad cold before serving, it tastes best chilled.

Serving Suggestions

  • Spoon on toasted bread for a classic egg salad sandwich.
  • Serve on lettuce leaves for a light meal.
  • Offer with crackers for a quick snack or party tray.
  • Add slices of tomato and cucumber for a fresh plate.
  • Mix in avocado for extra creaminess and a rich taste.

Creamy Egg Salad

FAQs

Q: How long does egg salad last in the fridge?

A: Keep it in a sealed container, up to 3 to 4 days. Toss if it smells off.

Q: Can I make egg salad without mayonnaise?

A: Yes, use Greek yogurt or mashed avocado for a healthier creamy option.

Q: How do I make sure my eggs are not overcooked?

A: Remove from heat right after cooking time and cool in ice water to stop cooking.

Q: Can I add herbs or spices?

A: Yes, dill, parsley, chives, or a pinch of paprika work well.

Q: Is it safe to leave egg salad out?

A: No, do not leave it at room temperature more than 2 hours, or 1 hour if hot.

Conclusion

This simple Creamy Egg Salad is easy, tasty, and perfect for sandwiches or a light meal, and for a creamy avocado twist you can see Creamy Egg Salad with Avocado – Daen’s Kitchen for another idea.

Creamy Egg Salad

This Creamy Egg Salad is rich, soft, and fresh, perfect for a quick lunch or snack. It features the bright flavors of lemon and mustard.

Egg Salad Ingredients

  • 4 large hard boiled eggs (Older eggs peel better.)
  • 2-3 tablespoons mayonnaise (Start with less and add more to achieve desired creaminess.)
  • 1 teaspoon mustard
  • 1 teaspoon lemon juice or vinegar (Adds brightness to the flavor.)
  • to taste salt
  • to taste pepper
  • optional chopped celery or chives (For added crunch.)

Cooking Eggs

  1. Place eggs in a pot and cover with cold water.
  2. Bring to a boil, then lower heat and cook for 9 to 12 minutes.
  3. Cool eggs in ice water, then peel and chop.

Preparing the Salad

  1. In a bowl, add 3 to 4 chopped eggs, mayonnaise, mustard, lemon juice or vinegar, salt, and pepper.
  2. Add chopped celery or chives for crunch if desired.
  3. Stir gently until smooth but still slightly chunky.
  4. Taste and adjust salt or lemon as needed.
  5. Chill for 10 to 30 minutes for best flavor or serve immediately.

Store the salad in a sealed container in the fridge for up to 3 to 4 days. For a healthier alternative, use Greek yogurt or mashed avocado instead of mayonnaise.

lunch, Snack
American
Creamy Salad, Easy Recipe, Egg Salad, Quick Lunch, Snack Idea

Chicken Caesar Wraps

Delicious Chicken Caesar Wraps with crisp lettuce and grilled chicken

Chicken Caesar Wraps are simple, fresh, and full of flavor. Warm grilled chicken meets crisp romaine lettuce and creamy Caesar dressing, all wrapped in a soft tortilla. This recipe is a real crowd pleaser, good for a quick lunch, a picnic, or an easy weeknight dinner. It tastes like a classic Caesar salad, but you can eat it with your hands, which makes it even more fun. Give it a try, and get ready to make it again and again.

How to prepare Chicken Caesar Wraps

  1. Cook the chicken, season with salt and pepper, then slice or chop. Use grilled or pan seared chicken for extra flavor.
  2. Toss chopped romaine lettuce with Caesar dressing, a little lemon juice, and grated Parmesan cheese. Add freshly ground black pepper if you like.
  3. Warm the tortilla for a few seconds in a pan or microwave so it folds easily.
  4. Place some dressed lettuce in the center of the tortilla, add the sliced chicken, and sprinkle with extra Parmesan and croutons for crunch.
  5. Fold the sides over, then roll the wrap tightly from one end to the other. Cut in half if you want.
  6. Serve right away, or wrap in foil to take on the go.

Chicken Caesar Wraps

Why You’ll Love Chicken Caesar Wraps

  • They are quick to make, great for an easy lunch or fast dinner.
  • The flavors are familiar and comforting, with tangy Caesar dressing and savory grilled chicken.
  • They are easy to change, use leftover chicken, rotisserie chicken, or make a lighter version with Greek yogurt.
  • Wraps are portable, so they are perfect for work lunches, school, or a packed picnic.

tips for success

  • Use good quality Caesar dressing, or make a small batch at home for better taste.
  • Dry the lettuce well, so the tortilla does not get soggy.
  • Warm the tortilla before rolling, it will fold without cracking.
  • Add crunch with croutons or toasted breadcrumbs right before serving.
  • If you plan to store the wraps, wrap each one in parchment or foil, and keep the dressing separate if you want extra crispness.

Serving Suggestions

  • Serve with a side of kettle chips, sweet potato fries, or a light soup.
  • Pair with a simple fruit salad for a fresh contrast.
  • Offer lemon wedges for a bright squeeze of juice.
  • Try adding roasted red peppers, bacon, or sliced avocado for variety.

Chicken Caesar Wraps

FAQs

Q: Can I use rotisserie chicken for these wraps?

A: Yes, rotisserie chicken works great, it saves time and adds good flavor.

Q: How long can I store Chicken Caesar Wraps?

A: Store in the fridge for up to 24 hours. For best texture, keep dressing or croutons separate until ready to eat.

Q: Can I make the dressing lighter?

A: Yes, swap half the mayonnaise for plain Greek yogurt to cut calories and keep creaminess.

Q: Are these wraps good warm or cold?

A: Both work well. Warm chicken makes them cozy, cold makes them crisp and refreshing.

Q: Can I make them gluten free?

A: Yes, use a gluten free tortilla and gluten free croutons or omit the croutons.

Conclusion

If you want another clear recipe idea and step by step photos for Chicken Caesar Wraps, see Chicken Caesar Wrap – Tastes Better From Scratch for more tips and a photo guide.

Chicken Caesar Wraps

Chicken Caesar Wraps are simple, fresh, and full of flavor. This recipe combines warm grilled chicken with crisp romaine lettuce and creamy Caesar dressing, all wrapped in a soft tortilla, making it a perfect quick lunch or easy weeknight dinner.

Main Ingredients

  • 2 pieces chicken breasts (Use grilled or pan-seared for extra flavor.)
  • 4 cups romaine lettuce, chopped (Dry the lettuce well to prevent sogginess.)
  • 1/2 cup Caesar dressing (Use good quality or homemade dressing.)
  • 1 tablespoon lemon juice (Add a bright flavor.)
  • 1/4 cup grated Parmesan cheese (Add more for topping if desired.)
  • 8 pieces tortillas (Warm before rolling.)
  • 1/2 cup croutons (For added crunch.)

Preparation

  1. Cook the chicken, season with salt and pepper, then slice or chop.
  2. Toss chopped romaine lettuce with Caesar dressing, lemon juice, and grated Parmesan cheese. Add freshly ground black pepper if desired.
  3. Warm the tortilla in a pan or microwave for a few seconds so it folds easily.

Assembly

  1. Place some dressed lettuce in the center of the tortilla.
  2. Add the sliced chicken and sprinkle with extra Parmesan and croutons.
  3. Fold the sides over, then roll the wrap tightly from one end to the other.
  4. Cut in half if desired, and serve immediately or wrap in foil to take on the go.

Store in the fridge for up to 24 hours. For best texture, keep dressing or croutons separate until ready to eat. You can use rotisserie chicken for convenience, try adding roasted red peppers, bacon, or sliced avocado for variation.

Dinner, lunch
American
Chicken Caesar Wrap, Easy Lunch, Healthy Wrap, Quick Dinner, Tortilla Wrap