Orange Chicken

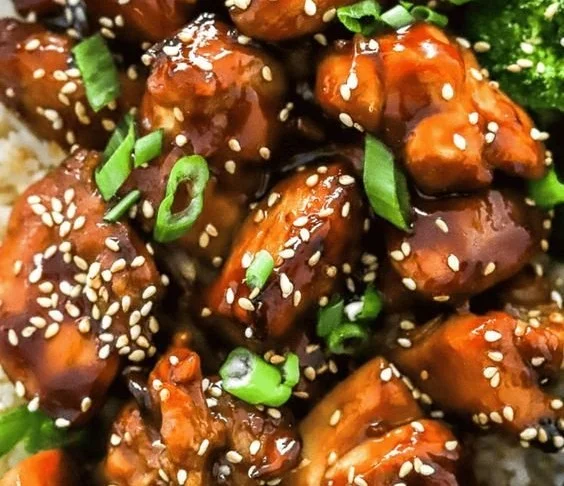
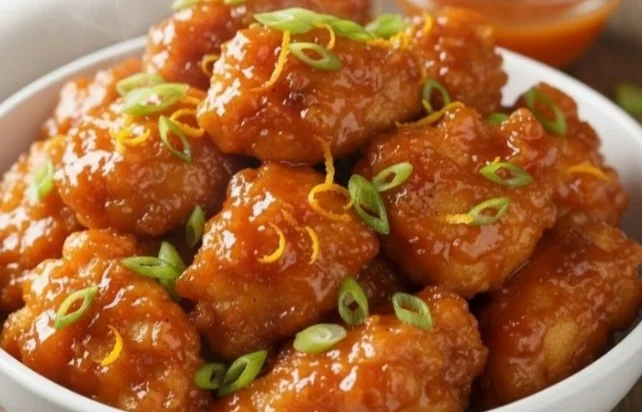
Plate of crispy orange chicken with a tangy sauce and garnishes

Orange Chicken is a bright, warm dish many people love. It mixes crisp chicken with a sweet and tangy orange sauce. This dish feels like happy takeout at home, and it fills the room with a fresh citrus smell. The featured recipe is a crowd-pleaser, with a sticky orange glaze that clings to every bite, and a nice crunch from the fried chicken. It tastes sweet, a little sour, and a bit spicy if you like heat, so it makes people smile. If you like orange flavors, try my take on orange cranberry chicken thighs for another easy meal. Get ready to make this and enjoy a plate that feels like your favorite takeout, right at home.

how to prepare Orange Chicken

  1. Cut boneless chicken into bite sized pieces. Pat dry with paper towel.
  2. Toss chicken in a little salt and pepper. Coat with flour or cornstarch for a crisp crust.
  3. Heat oil in a pan or deep fryer to medium high heat. Fry chicken until golden and cooked through, drain on paper towel.
  4. Make the orange sauce, mix orange juice, sugar, soy sauce, vinegar, garlic, and a bit of ginger in a small pot. Add a splash of water and taste, add chili flakes if you want heat.
  5. Bring sauce to a simmer, then stir in a cornstarch slurry to thicken. Cook until glossy and sticky.
  6. Toss the fried chicken in the sauce until every piece is coated. Serve hot with rice or noodles, and top with sesame seeds and sliced green onion.

Orange Chicken

Why You’ll Love Orange Chicken

  • It has a sweet and tangy orange flavor that feels fresh.
  • The sauce is sticky and clings to crispy chicken for a great texture.
  • It is fast to make and works for weeknights or a party.
  • You can change the heat level or make it more sweet, so it fits your taste.
  • It tastes like takeout, but it is homemade and you control the ingredients.

tips for success

  • Dry the chicken well before coating, this keeps it crisp.
  • Use cornstarch or a mix of flour and cornstarch for a light, crunchy crust.
  • Fry at the right oil temperature, not too low, so the chicken does not get soggy.
  • Make the sauce a little thicker than you think, it will thin a bit when you toss the chicken.
  • Taste the sauce as you cook, add more soy sauce for salt, or more sugar for sweetness.
  • If you want less oil, you can bake or air fry the chicken, then toss with the sauce.

Serving Suggestions

  • Serve with steamed white rice or brown rice to soak the sauce.
  • Try it with fried rice, lo mein, or steamed vegetables for a full meal.
  • Add steamed broccoli or snap peas for color and crunch.
  • Garnish with sesame seeds, sliced green onion, or thin orange slices for a fresh look.

Orange Chicken

FAQs

Q: Can I make the sauce without fresh orange juice?

A: Yes, you can use bottled orange juice. Fresh juice is brighter, but bottled works fine.

Q: Can I bake the chicken instead of frying?

A: Yes, bake or air fry the chicken for a lighter dish, then toss with sauce for the same flavor.

Q: How do I store leftovers?

A: Put chicken and sauce in an airtight box in the fridge. Eat within 2 to 3 days. Reheat in a pan or oven to keep it crisp.

Q: Can I make this gluten free?

A: Yes, use tamari or a gluten free soy sauce and cornstarch to coat the chicken.

Conclusion

I hope this simple Orange Chicken recipe helps you enjoy a sweet and tangy meal at home. For another take on orange flavored chicken, you can compare methods with Chinese Orange Chicken – Modern Honey, which shows a classic style and more sauce tips. Give this recipe a try and have fun cooking a bright, tasty dinner.

Orange Chicken

A bright and tangy dish featuring crisp chicken coated in a sweet orange sauce, reminiscent of your favorite takeout.

For the Chicken

  • 1 pound boneless chicken, cut into bite-sized pieces (Pat dry with a paper towel)
  • 1 teaspoon salt
  • 1/2 teaspoon black pepper
  • 1/2 cup flour or cornstarch (For coating chicken)

For the Sauce

  • 1 cup orange juice (Freshly squeezed recommended)
  • 1/2 cup sugar
  • 1/4 cup soy sauce (Use tamari for gluten-free option)
  • 2 tablespoons vinegar (White or rice vinegar)
  • 1 clove garlic, minced
  • 1/2 teaspoon ginger, minced (Optional for flavor)
  • 1 cup water (Add splash to taste)
  • 1 tablespoon cornstarch (Mixed with water to form slurry)
  • 1/2 teaspoon chili flakes (Optional for heat)

Preparation

  1. Cut boneless chicken into bite-sized pieces and pat dry with paper towel.
  2. Toss chicken with salt and pepper, then coat with flour or cornstarch.

Cooking Chicken

  1. Heat oil in a pan or deep fryer to medium-high heat.
  2. Fry chicken until golden and cooked through, then drain on paper towels.

Making the Sauce

  1. In a small pot, mix together orange juice, sugar, soy sauce, vinegar, garlic, ginger, and a splash of water.
  2. Bring sauce to a simmer, then stir in a cornstarch slurry to thicken.
  3. Cook until the sauce is glossy and sticky.

Combining

  1. Toss the fried chicken in the sauce until every piece is coated.
  2. Serve hot with rice or noodles, and top with sesame seeds and sliced green onion.

Dry the chicken well before coating, fry at the right temperature, and adjust sauce according to taste. Baking or air frying is an alternative for reduced oil without losing flavor.
Dinner, Main Course
Asian, Chinese
Crispy Chicken, Orange Chicken, Quick Dinner, Sweet and Tangy, Takeout Style

High-Protein Cottage Cheese Pizza Bowl

High-protein cottage cheese pizza bowl topped with fresh ingredients

This High-Protein Cottage Cheese Pizza Bowl feels like a quick pizza, but it is lighter and packed with protein. It blends cottage cheese, rich tomato, and your favorite pizza toppings in a bowl. The taste is fresh, cheesy, and savory, and many people find it a great healthy snack or simple dinner. If you enjoy cottage cheese in other treats, try a soft muffin like the cottage cheese blueberry muffins, it shows how versatile cottage cheese can be. This recipe is a crowd-pleaser, easy to make, and fun to change up, so get ready to enjoy a protein-packed pizza bowl you will want again and again.

how to prepare High-Protein Cottage Cheese Pizza Bowl

Ingredients

  • 1 cup low-fat cottage cheese
  • 1/2 cup marinara or pizza sauce
  • 1/4 cup shredded mozzarella
  • 6-8 cherry tomatoes, halved
  • 1/4 cup sliced black olives
  • 1/4 cup diced bell pepper
  • 1 tablespoon chopped fresh basil or a pinch of dried basil
  • Salt and pepper to taste
  • Optional, red pepper flakes for heat

Directions

  1. Spoon the cottage cheese into a bowl as the base.
  2. Warm the marinara sauce in a small pan or microwave for 20-30 seconds, then spoon over the cottage cheese.
  3. Sprinkle shredded mozzarella on top while the sauce is warm, so it melts a little.
  4. Add cherry tomatoes, sliced olives, and diced bell pepper for color and crunch.
  5. Season with salt, pepper, and basil, and add red pepper flakes if you like a little spice.
  6. Stir a bit if you want the flavors mixed, or leave layered for bites of cheese and sauce.

High-Protein Cottage Cheese Pizza Bowl

Why You’ll Love High-Protein Cottage Cheese Pizza Bowl

  • High in protein, this bowl helps keep you full and supports muscle recovery.
  • It is quick to make, perfect for busy weeknights or a fast lunch.
  • You get pizza flavor with less fat and fewer carbs than a regular slice.
  • It is flexible, so you can add veggies, pepperoni, or fresh herbs to fit your taste.
  • Great for meal prep, it stores well for a next-day lunch.

tips for success

  • Use low-sodium cottage cheese if you watch salt, then add salt to taste.
  • Warm the sauce, it brings out the flavor and helps melt the cheese.
  • Choose a smooth cottage cheese for a creamier bowl, or curds if you like texture.
  • Add fresh basil or oregano at the end for a bright, fresh note.
  • If you want extra protein, stir in a spoon of Greek yogurt or top with a soft-boiled egg.

Serving Suggestions

  • Serve with whole grain crackers or a small side salad for a fuller meal.
  • Add a few slices of cooked chicken breast or turkey pepperoni for more protein.
  • Pair with raw veggies, like cucumber and carrot sticks, for crunch.
  • Drizzle a little olive oil and balsamic vinegar for a richer finish.

High-Protein Cottage Cheese Pizza Bowl

FAQs

Q: Can I use full-fat cottage cheese? A: Yes, full-fat cottage cheese works fine and gives a richer taste, just adjust salt if needed.

Q: Is this bowl good for meal prep? A: Yes, keep the sauce and toppings separate until ready to eat to keep things fresh, then combine.

Q: Can I make this dairy-free? A: You can try a high-protein dairy-free cottage cheese alternative, and use vegan cheese, but texture and protein will vary.

Q: How long will it keep in the fridge? A: Store in a sealed container for up to 2 days, but fresh toppings like tomatoes are best the same day.

Q: Is this suitable for low-carb diets? A: Yes, it is lower in carbs than a pizza, especially if you use a low-sugar marinara and skip sweet toppings.

Conclusion

If you want another take on cottage cheese meals, you can compare ideas and nutrition from this trusted recipe source: High Protein Cottage Cheese Pizza Bowls (27g!) – Clean & Delicious.

High-Protein Cottage Cheese Pizza Bowl

A light and protein-packed pizza bowl made with cottage cheese, marinara sauce, and your favorite toppings.

Base Ingredients

  • 1 cup low-fat cottage cheese (Use low-sodium if watching salt.)
  • 1/2 cup marinara or pizza sauce (Warm before adding.)

Toppings

  • 1/4 cup shredded mozzarella (Add while sauce is warm.)
  • 6-8 pieces cherry tomatoes, halved (Adds color and crunch.)
  • 1/4 cup sliced black olives
  • 1/4 cup diced bell pepper
  • 1 tablespoon chopped fresh basil or a pinch of dried basil (Add for flavor.)
  • Salt and pepper to taste
  • Optional, red pepper flakes for heat

Preparation

  1. Spoon the cottage cheese into a bowl as the base.
  2. Warm the marinara sauce in a small pan or microwave for 20-30 seconds, then spoon over the cottage cheese.
  3. Sprinkle shredded mozzarella on top while the sauce is warm, so it melts a little.
  4. Add cherry tomatoes, sliced olives, and diced bell pepper for color and crunch.
  5. Season with salt, pepper, and basil, and add red pepper flakes if desired.
  6. Stir a bit if you want the flavors mixed, or leave layered for bites of cheese and sauce.

This bowl is great for meal prep; store sauce and toppings separately until ready to eat. You can add veggies, pepperoni, or fresh herbs to fit your taste.

Dinner, Snack
American
Cottage Cheese, Healthy Snack, High-Protein, Pizza Bowl, Quick Meal

Easy Homemade Strawberry Jam

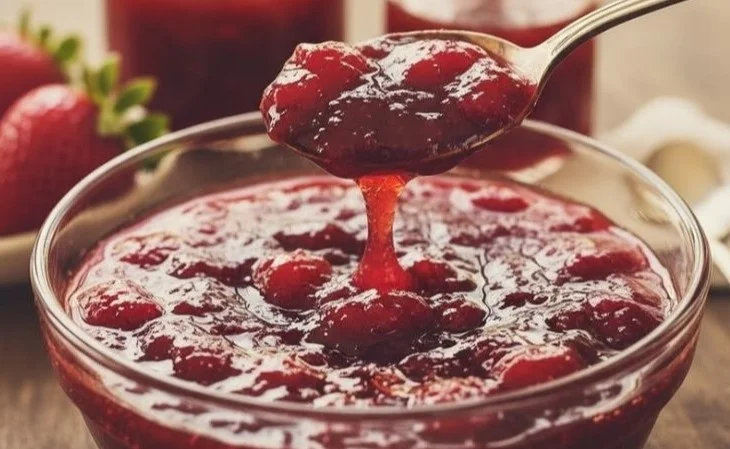
Jar of easy homemade strawberry jam with fresh strawberries and bread.

This easy homemade strawberry jam warms your kitchen with bright fruit smell and makes toast, yogurt, and treats taste like summer. The jam uses simple ingredients, cooks fast, and gives you sweet, slightly tangy strawberry preserves that many people love. It is a crowd-pleaser at brunch and a nice gift in a small jar. If you like using fresh strawberry flavors in desserts, you might also enjoy a fun recipe like the strawberry jello flag cake recipe, which uses the same bright taste. Get ready to make a pot of jam that smells great and brings smiles, you will want to spread it on everything.

how to prepare Easy Homemade Strawberry Jam

Ingredients

  • 2 pounds fresh strawberries, hulled and halved
  • 3 cups granulated sugar
  • 2 tablespoons lemon juice

Directions

  1. Place strawberries in a large pot. Mash them a little with a potato masher or fork so you still have small pieces.
  2. Add sugar and lemon juice, stir well. Let sit 10 minutes so the fruit and sugar start to mix.
  3. Turn the heat to medium high and bring the mix to a steady boil, stirring often.
  4. Lower the heat to medium and cook, stirring, until jam thickens. This takes about 15 to 25 minutes. Skim foam from the top with a spoon.
  5. To test thickness, drop a small spoon of hot jam on a chilled plate, wait a few seconds, then push it with your finger. If it wrinkles, it is ready.
  6. Remove from heat and let sit 5 minutes. Spoon jam into clean jars, leaving about 1/4 inch space at the top.
  7. Wipe jar rims, seal with lids, and let cool to room temperature. Store in the fridge for up to 3 weeks, or process jars in a water bath for long term storage.

Easy Homemade Strawberry Jam

Why You’ll Love Easy Homemade Strawberry Jam

  • It uses few, common ingredients you can find at any store.
  • The taste is bright, fresh, and sweet, with a nice lemon lift.
  • You control the sugar and texture, making it chunky or smooth.
  • It is quick to make and needs no special tools.
  • It makes your toast, biscuits, and desserts better right away.

tips for success

  • Use ripe, sweet strawberries for the best flavor.
  • Stir often to prevent burning on the pot bottom.
  • Chill a small plate before testing jam thickness, the cold helps you read the result.
  • If you want less sugar, start with 2 1/2 cups and taste as you cook, but keep lemon juice to help set.
  • Sterilize jars and lids if you plan to store jam outside the fridge for a long time.

Serving Suggestions

  • Spread on warm toast, bagels, or a buttered English muffin.
  • Spoon over plain yogurt or ice cream for a quick dessert.
  • Use as a filling for thumbprint cookies or layer in a cake.
  • Mix a spoon into salad dressing for a sweet fruit twist.
  • Give small jars as a homemade gift for neighbors or friends.

Easy Homemade Strawberry Jam

FAQs

Q: How long does homemade strawberry jam last in the fridge?

A: Keep it in the fridge up to 3 weeks if you do not process the jars. If you sterilize and seal in a water bath, it can last many months unopened.

Q: Do I need pectin to make this jam?

A: No, this recipe makes jam without added pectin. The fruit and lemon help the jam set as it cooks.

Q: Can I freeze this jam?

A: Yes, freeze in freezer safe jars or bags for up to one year. Leave some space for the jam to expand.

Q: How do I remove foam from the jam?

A: Skim foam with a large spoon during cooking. Foam is harmless but can make the jar look cloudy.

Q: Can I use frozen strawberries?

A: You can, thaw and drain extra liquid first, then follow the same steps. Cooking time may change slightly.

Conclusion

For another straightforward, no pectin method you can compare to, see Easy Strawberry Jam (No Pectin) – The Baker’s Almanac.

Easy Homemade Strawberry Jam

This easy homemade strawberry jam uses simple ingredients to create a sweet, slightly tangy preserve that is perfect for spreading on toast, yogurt, or desserts. It’s quick to make and is a delightful treat.

Main Ingredients

  • 2 pounds fresh strawberries, hulled and halved (Use ripe, sweet strawberries for the best flavor.)
  • 3 cups granulated sugar (You can adjust the sugar level if desired.)
  • 2 tablespoons lemon juice (Helps with setting the jam.)

Preparation

  1. Place strawberries in a large pot. Mash them a little with a potato masher or fork to keep small pieces.
  2. Add sugar and lemon juice, stir well and let sit for 10 minutes to mix.

Cooking

  1. Turn the heat to medium-high and bring the mix to a steady boil, stirring often.
  2. Lower the heat to medium and cook, stirring, until the jam thickens, about 15 to 25 minutes. Skim foam from the top with a spoon.
  3. To test thickness, drop a small spoonful of hot jam on a chilled plate, wait a few seconds and push it with your finger. If it wrinkles, it is ready.

Jarring

  1. Remove from heat and let sit for 5 minutes. Spoon jam into clean jars, leaving about 1/4 inch space at the top.
  2. Wipe jar rims, seal with lids, and let cool to room temperature. Store in the fridge for up to 3 weeks or process jars in a water bath for long-term storage.

Stir often to prevent burning on the pot bottom. Chill a small plate before testing jam thickness to help read the result. Sterilize jars and lids if storing outside of the fridge.

Brunch, Dessert, Spread
American
Easy Recipe, homemade jam, preserves, strawberry jam, sweet treat

Air Fryer Teriyaki Chicken

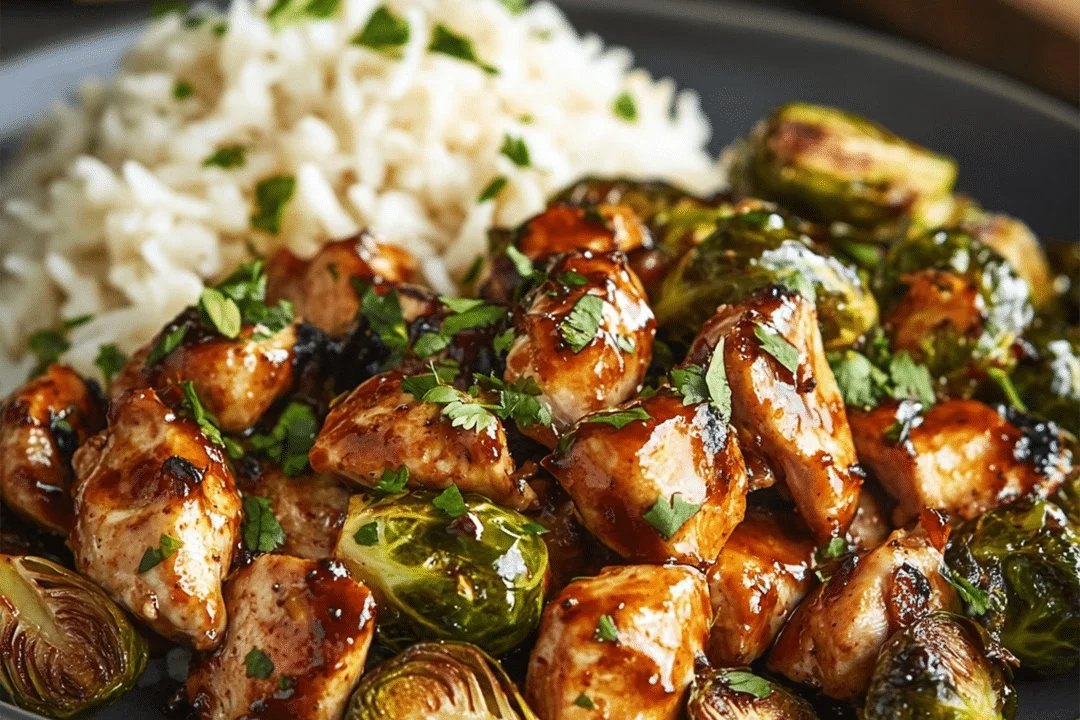
Delicious air fryer teriyaki chicken served with vegetables

I love simple meals that taste like you spent hours cooking, and Air Fryer Teriyaki Chicken is one of those. It cooks fast, it smells great, and it has sweet, sticky sauce that everyone will want more of. This recipe is a crowd-pleaser, great for weeknights and for feeding friends. If you like quick air fryer meals, you might also enjoy an air fryer grilled cheese hot dogs recipe for a fun side or snack. Get ready, this dish is easy, tasty, and fun to make, you will want to make it again and again.

how to prepare Air Fryer Teriyaki Chicken

  • Pat the chicken pieces dry, then season lightly with salt and pepper.
  • Mix teriyaki sauce, a little honey, garlic, and soy sauce in a bowl. Add a splash of sesame oil if you like.
  • Put the chicken in the sauce and let it marinate for 15 to 30 minutes, if you have time.
  • Preheat the air fryer to 380°F, about 5 minutes.
  • Place the chicken in the air fryer basket in a single layer. Do not crowd the pieces.
  • Cook for 10 minutes, flip the chicken, then cook 5 to 8 more minutes, until the chicken reaches 165°F and looks golden.
  • Brush extra teriyaki sauce on the chicken in the last 2 minutes to make it sticky and shiny.
  • Let the chicken rest for a few minutes, then slice or serve whole.

Air Fryer Teriyaki Chicken

Why You’ll Love Air Fryer Teriyaki Chicken

  • It cooks fast, so dinner is ready in under 30 minutes.
  • The air fryer makes the outside a little crisp, and the sauce stays sticky.
  • The taste is sweet, salty, and savory, it pleases many palates.
  • You use fewer pans, so cleanup is easy.
  • It works with chicken breasts, thighs, or tenders, you can pick what you like.

tips for success

  • Do not crowd the air fryer basket, leave space for air to move.
  • Dry the chicken first, the skin or surface will crisp better.
  • Check the internal temp, aim for 165°F for safe, juicy chicken.
  • If your sauce is thin, simmer it on the stove to thicken before brushing.
  • Add sesame seeds or green onions at the end for fresh color and flavor.
Serving Suggestions

  • Serve with steamed rice and simple steamed vegetables.
  • Add a side salad with a light dressing for a fresh contrast.
  • Put the chicken into bowls with rice, avocado, and pickled veggies.
  • Use the sliced chicken in sandwiches, wraps, or on top of noodles.
  • Garnish with green onion and sesame seeds for a nice finish.

Air Fryer Teriyaki Chicken

FAQs

Q: Can I use frozen chicken in the air fryer? A: You can, but thawing first gives more even cook and better sauce stick. If you cook from frozen, add time and check the center.

Q: How do I make the teriyaki sauce thicker? A: Simmer the sauce in a small pan until it reduces, or mix a bit of cornstarch with water and stir into the hot sauce, cook until it thickens.

Q: Can I make this gluten free? A: Yes, use gluten free soy sauce or tamari instead of regular soy sauce.

Q: How long does leftover teriyaki chicken keep? A: Store in the fridge in a covered container for up to 3 days. Reheat gently in the air fryer or microwave.

Q: Can I double the recipe for a crowd? A: Yes, but cook in batches so the air can circulate and chicken stays crisp.

Conclusion

For another simple take on air fryer meals, you can follow the detailed steps from Air fryer Teriyaki Chicken – Rachna cooks to compare tips and sauce ideas. If you want a version with different spices and sides, see the notes in Air Fryer Teriyaki Chicken – Hungry Lankan for more ideas.

Air Fryer Teriyaki Chicken

Quick and easy Air Fryer Teriyaki Chicken with a sweet and sticky sauce, ready in under 30 minutes.

Chicken and Marinade

  • 1 lb chicken pieces (breasts, thighs, or tenders) (Pat dry before seasoning.)
  • 1/4 cup teriyaki sauce (You can thicken it if desired.)
  • 1 tbsp honey (Adds sweetness.)
  • 2 cloves garlic (Minced.)
  • 2 tbsp soy sauce (Use gluten-free if necessary.)
  • 1 tbsp sesame oil (Optional for added flavor.)
  • salt to taste (Season the chicken.)
  • pepper to taste (Season the chicken.)

Garnishes

  • 1 tbsp sesame seeds (For topping.)
  • 2 tbsp green onions (Chopped, for garnishing.)

Preparation

  1. Pat the chicken pieces dry, then season lightly with salt and pepper.
  2. Mix teriyaki sauce, honey, minced garlic, and soy sauce in a bowl. Add sesame oil if desired.
  3. Marinate the chicken in the sauce for 15 to 30 minutes if time allows.
  4. Preheat the air fryer to 380°F (about 5 minutes).

Cooking

  1. Place the chicken in the air fryer basket in a single layer, ensuring not to crowd the pieces.
  2. Cook for 10 minutes, flip the chicken, then cook for an additional 5 to 8 minutes until the chicken reaches 165°F and is golden.
  3. Brush extra teriyaki sauce on the chicken in the last 2 minutes of cooking for a sticky finish.

Serving

  1. Let the chicken rest for a few minutes, then slice or serve whole.

Serve with steamed rice and vegetables. Add salad for a fresh contrast. Store leftovers in the fridge for up to 3 days.

Dinner, Main Course
Asian, Japanese
Air Fryer, Dinner Recipe, easy chicken recipe, Quick Meal, Teriyaki Chicken

Crispy Air Fryer Honey Garlic Salmon Bites (20-Minutes)

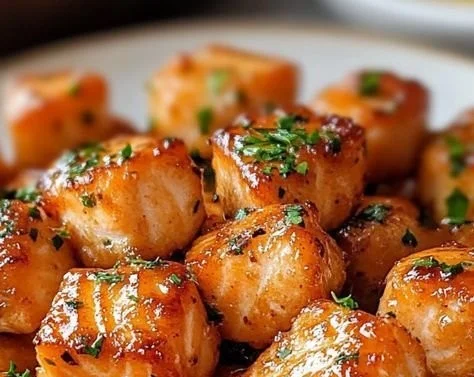
Crispy air fryer honey garlic salmon bites plated with garnish

This recipe is a warm, friendly way to enjoy salmon in a small, crispy bite. The outside gets golden and slightly crisp in the air fryer, while the inside stays tender and flaky. A simple honey garlic sauce adds sweet and savory flavor, and it sticks to each bite for a tasty finish. These Crispy Air Fryer Honey Garlic Salmon Bites are a crowd-pleaser at parties, family dinners, and quick weeknight meals. If you love easy air fryer snacks, you might also enjoy crispy air fryer apple fries for a fun side. You will smile when you taste them, and they are fun to make, so get ready to try them yourself.

how to prepare Crispy Air Fryer Honey Garlic Salmon Bites (20-Minutes)

  1. Cut salmon into bite-sized cubes, about 1 inch each. Pat pieces dry with a paper towel, this helps them get crisp.
  2. In a small bowl, mix 2 tablespoons cornstarch, a pinch of salt, and black pepper. Toss salmon pieces in this mix until lightly coated.
  3. Lightly spray the air fryer basket with oil or brush with a little oil to prevent sticking.
  4. Place salmon bites in a single layer in the air fryer basket. Do not crowd them, work in batches if needed.
  5. Air fry at 400°F for 8 to 10 minutes, flipping halfway through, until the outside is golden and the inside flakes easily.
  6. While salmon cooks, make the sauce. In a small pan, warm 2 tablespoons oil, add 2 cloves minced garlic and cook 30 seconds until fragrant. Stir in 3 tablespoons honey, 2 tablespoons soy sauce, and 1 teaspoon rice vinegar, simmer for 1 to 2 minutes until slightly thick.
  7. Toss cooked salmon bites in the honey garlic sauce until well coated.
  8. Serve warm, garnish with chopped green onions and sesame seeds if you like.

Crispy Air Fryer Honey Garlic Salmon Bites (20-Minutes)

Why You’ll Love Crispy Air Fryer Honey Garlic Salmon Bites (20-Minutes)

  • Fast to make, ready in about 20 minutes from start to finish.
  • Crispy outside and tender inside, a great texture contrast.
  • Sweet and savory sauce that sticks to every bite.
  • Healthy, high in protein, and easy to serve as a snack or main.
  • Great for kids and adults, and perfect for picky eaters.

tips for success

  • Pat the salmon dry, a dry surface makes it crisp better.
  • Do not overcrowd the air fryer basket, this keeps pieces crisp.
  • Use fresh garlic for best flavor, but garlic powder can work in a pinch.
  • If sauce gets too thick, add a little water to loosen it.
  • Test one piece before tossing all in sauce, to be sure cooking time is right for your air fryer.

Serving Suggestions

  • Serve with steamed rice or quinoa for a full meal.
  • Pair with a simple green salad, cucumber slices, or steamed broccoli.
  • Offer dipping sauces like extra soy sauce, spicy mayo, or a squeeze of lemon.
  • Make them part of a small plates spread with other air fryer snacks.

Crispy Air Fryer Honey Garlic Salmon Bites (20-Minutes)

FAQs

Q: Can I use frozen salmon for this recipe?

A: You can, but thaw it first for best texture. Pat it dry well before coating and cooking.

Q: Can I make the sauce ahead of time?

A: Yes, make the sauce and store it in the fridge for up to 3 days, reheat gently before tossing with salmon.

Q: How do I know when the salmon is done?

A: The salmon flakes easily with a fork and reaches an internal temperature of 145°F, or is opaque through the center.

Q: Can I use a different sweetener instead of honey?

A: Yes, maple syrup or agave work, but flavor will change slightly.

Q: Can I make these without cornstarch?

A: You can skip cornstarch, but the coating will not be as crispy.

Conclusion

These bites are an easy way to enjoy salmon with big flavor and little fuss. For a quick air fryer method to try with other salmon ideas, see this helpful guide on frozen salmon preparation, it shows a fast, no thaw method that can save time: Easy Air Fryer Frozen Salmon (No Thaw Method!) – Mary’s Whole Life. For another version of honey garlic salmon in the air fryer for comparison and tips, check this recipe post for useful ideas: Air Fryer Honey Garlic Salmon Bites – Hannah Magee RD. Enjoy making these crispy, sticky bites, and have fun sharing them with friends and family.

Crispy Air Fryer Honey Garlic Salmon Bites

These crispy salmon bites are golden on the outside and tender on the inside, tossed in a sweet and savory honey garlic sauce, perfect for parties or quick weeknight meals.

For the Salmon Bites

  • 1 lb salmon fillet (Cut into 1-inch cubes)
  • 2 tablespoons cornstarch (For coating)
  • to taste salt
  • to taste black pepper
  • 2 tablespoons oil (For spraying the air fryer)

For the Honey Garlic Sauce

  • 2 tablespoons oil (For cooking garlic)
  • 2 cloves minced garlic (Fresh for best flavor)
  • 3 tablespoons honey (To add sweetness)
  • 2 tablespoons soy sauce
  • 1 teaspoon rice vinegar

For Garnish

  • to taste chopped green onions
  • to taste sesame seeds

Preparation

  1. Cut salmon into bite-sized cubes, about 1 inch each. Pat pieces dry with a paper towel.
  2. In a small bowl, mix cornstarch, a pinch of salt, and black pepper. Toss salmon pieces in this mix until lightly coated.
  3. Lightly spray the air fryer basket with oil or brush with a little oil to prevent sticking.

Cooking

  1. Place salmon bites in a single layer in the air fryer basket, do not crowd them.
  2. Air fry at 400°F for 8 to 10 minutes, flipping halfway through, until the outside is golden and the inside flakes easily.
  3. While the salmon cooks, prepare the sauce. In a small pan, warm oil, add minced garlic, and cook for 30 seconds until fragrant.
  4. Stir in honey, soy sauce, and rice vinegar; simmer for 1 to 2 minutes until slightly thick.
  5. Toss cooked salmon bites in the honey garlic sauce until well coated.

Serving

  1. Serve warm, garnished with chopped green onions and sesame seeds if desired.

Tips for success: Pat salmon dry for crispiness, do not overcrowd the air fryer, use fresh garlic for best flavor, and adjust sauce consistency with water if too thick.

Appetizer, Main Course, Snack
American, Healthy
Air Fryer Recipes, Honey Garlic, Salmon Bites

Air Fryer Chicken and Veggies

A plate of air fryer chicken and veggies, beautifully arranged and ready to eat

This Air Fryer Chicken and Veggies recipe is warm, simple, and made for busy nights. The chicken turns golden and juicy, the vegetables get a nice crisp, and you get a full meal with little work. It is a crowd-pleaser because it tastes great, looks colorful, and cooks fast. If you like easy air fryer meals, check this air fryer grilled cheese hot dogs recipe for another quick idea. You will smile when you taste this, and you may make it again this week.

how to prepare Air Fryer Chicken and Veggies

Ingredients, simple and clear:

  • Boneless chicken breasts or thighs, cut into even pieces
  • Mixed veggies, like bell peppers, zucchini, carrots, broccoli
  • Olive oil, salt, black pepper, garlic powder, paprika, dried herbs
  • Lemon wedges and fresh parsley to finish, optional

Directions, step by step:

  1. Pat the chicken pieces dry with a paper towel, then put them in a bowl.
  2. Add 1 to 2 tablespoons olive oil, 1 teaspoon salt, 1/2 teaspoon pepper, 1 teaspoon garlic powder, 1 teaspoon paprika, and 1/2 teaspoon dried herbs. Toss to coat the chicken well.
  3. Chop the vegetables into similar size pieces. Put them in a bowl, add a little oil, salt, and pepper, toss.
  4. Preheat the air fryer to 380 F for about 3 minutes.
  5. Place chicken in the basket in one layer, add veggies around the chicken, do not crowd the basket.
  6. Cook for 10 minutes, open and shake the basket or turn pieces, then cook another 8 to 10 minutes until chicken reaches 165 F and veggies are tender and crisp.
  7. Let the food rest for 3 minutes, squeeze lemon if you like, and sprinkle parsley. Serve warm.

Air Fryer Chicken and Veggies

Why You’ll Love Air Fryer Chicken and Veggies

  • Fast cook time, you get dinner in about 30 minutes.
  • Uses little oil, it is lighter than pan frying.
  • Chicken stays juicy, veggies stay crisp.
  • One basket, less clean up, great for busy nights.
  • Flexible, you can use many veggies or different spices for new flavors.

tips for success

  • Cut chicken and veggies to the same size for even cooking.
  • Dry the chicken first, oil and spice stick better.
  • Don’t crowd the basket, leave space for hot air to move.
  • Shake the basket or flip pieces halfway for even browning.
  • Use a meat thermometer to check chicken, aim for 165 F.
  • If pieces are small, reduce time, if thick, add a few minutes.
  • Add delicate greens like spinach at the end so they don’t burn.

Serving Suggestions

  • Serve with steamed rice or quinoa for a filling meal.
  • Add crusty bread or warm pita for dipping.
  • Top with a spoon of yogurt sauce, tzatziki, or ranch.
  • Serve with a fresh salad or a squeeze of lemon for brightness.
  • Make bowls with grains, chicken, veggies, and your favorite sauce.

Air Fryer Chicken and Veggies

FAQs

Q: How long does this take to cook in the air fryer?

A: About 18 to 20 minutes total, plus a few minutes to preheat. Check chicken for 165 F.

Q: Can I use frozen vegetables or chicken?

A: You can use frozen items, but thaw first for best texture, and you may need longer cook time.

Q: Can I use bone-in chicken?

A: Yes, but bone-in pieces need more time, check often and aim for 165 F near the bone.

Q: How do I store leftovers?

A: Cool, then put in an airtight container and keep in the fridge up to 3 days. Reheat in the air fryer for best crisp.

Conclusion

This Air Fryer Chicken and Veggies recipe is easy, healthy, and great for weeknights. For a light and healthy take, see this Healthy Air Fryer Chicken and Veggies recipe that gives simple tips and swaps. If you want a spicier option, try this Air Fryer Cajun Chicken and Vegetables variation for bold flavor.

Air Fryer Chicken and Veggies

A warm, simple, and quick meal perfect for busy nights, featuring juicy chicken and crispy vegetables made in an air fryer.

For the chicken

  • 1-2 pounds Boneless chicken breasts or thighs, cut into even pieces
  • 1-2 tablespoons Olive oil
  • 1 teaspoon Salt
  • 1/2 teaspoon Black pepper
  • 1 teaspoon Garlic powder
  • 1 teaspoon Paprika
  • 1/2 teaspoon Dried herbs

For the vegetables

  • 4 cups Mixed veggies, like bell peppers, zucchini, carrots, broccoli (Chop into similar size pieces)

To finish

  • 1 whole Lemon, cut into wedges (Optional)
  • 1/4 cup Fresh parsley, chopped (Optional)

Preparation

  1. Pat the chicken pieces dry with a paper towel, then put them in a bowl.
  2. Add olive oil, salt, black pepper, garlic powder, paprika, and dried herbs. Toss to coat the chicken well.
  3. Chop the vegetables into similar size pieces. Put them in a bowl, add a little olive oil, salt, and pepper, toss.
  4. Preheat the air fryer to 380°F (193°C) for about 3 minutes.

Cooking

  1. Place chicken in the air fryer basket in one layer, add veggies around the chicken, do not crowd the basket.
  2. Cook for 10 minutes, open and shake the basket or turn pieces, then cook for another 8 to 10 minutes until chicken reaches 165°F (74°C) and veggies are tender and crisp.
  3. Let the food rest for 3 minutes, squeeze lemon if desired, and sprinkle with parsley. Serve warm.

Cut chicken and veggies to the same size for even cooking. Dry the chicken first for better oil and spice adhesion. Avoid overcrowding the basket. Shake the basket halfway for even cooking. Use a meat thermometer to check doneness. Adjust cooking time based on chicken piece size.

Dinner, Main Course
American
Air Fryer Chicken, Crispy Veggies, Easy Dinner, Healthy Recipe, Quick Meal

Cheesecake Factory Air Fryer Fried Macaroni and Cheese Balls

Air fryer fried macaroni and cheese balls from Cheesecake Factory recipe

I love a snack that feels special but is easy to make, and Cheesecake Factory Air Fryer Fried Macaroni and Cheese Balls fit that bill. These little bites are crispy on the outside and gooey on the inside, they bring comfort and fun to any table. They work great for parties, family nights, or when you want a tasty treat. If you like air fryer comfort food, you might also enjoy a simple twist like air fryer grilled cheese hot dogs, they are fun to make too. This recipe is a crowd-pleaser, rich, cheesy, and crunchy, and it will make everyone smile. Get ready to make a plate of golden, cheesy balls that disappear fast.

how to prepare Cheesecake Factory Air Fryer Fried Macaroni and Cheese Balls

  1. Cook macaroni until tender, drain well, and let cool a bit.
  2. Mix the macaroni with a good amount of sharp cheddar and a little cream or milk, stir until creamy. Add a pinch of salt and pepper.
  3. Chill the mac and cheese in the fridge for at least 1 hour, this helps the balls keep their shape.
  4. Scoop the chilled mix and form into small balls, about 1 to 1 1/2 inches wide.
  5. Set up three bowls, one with flour, one with beaten eggs, and one with breadcrumbs. Roll each ball in flour, then egg, then breadcrumbs. Press crumbs gently so they stick.
  6. Preheat the air fryer to 375 F, spray the basket with a little oil. Place the balls in the basket in a single layer, do not crowd them.
  7. Lightly spray the tops with oil, air fry for about 6 to 8 minutes, turn once, then cook another 4 to 6 minutes until golden and crispy. Times vary by air fryer, watch for color.
  8. Let the balls cool a few minutes so the cheese firms slightly, then serve with your favorite dipping sauce.

Cheesecake Factory Air Fryer Fried Macaroni and Cheese Balls

Why You’ll Love Cheesecake Factory Air Fryer Fried Macaroni and Cheese Balls

  • They are crisp outside and creamy inside, a perfect texture mix.
  • The air fryer makes them less greasy than deep frying, but still very tasty.
  • You can make them ahead, freeze them, and cook from frozen for a quick snack.
  • Kids and adults both love them, they are a real crowd-pleaser.

tips for success

  • Chill the mac and cheese well before shaping, it helps the balls hold their form.
  • Use sharp cheddar for bold flavor, or mix cheeses for more depth.
  • Press breadcrumbs on gently so they stay on while cooking.
  • Do not overcrowd the air fryer basket, give each ball space to get crispy.
  • If you freeze the formed balls first, flash-freeze on a tray, then store in a bag, they cook well from frozen.

Serving Suggestions

  • Serve with marinara sauce, ranch, or spicy mayo for dipping.
  • Pair with a simple salad to balance the richness.
  • Offer as an appetizer with other finger foods for a party.
  • Make a plate with fries and a cold drink for a fun comfort meal.

Cheesecake Factory Air Fryer Fried Macaroni and Cheese Balls

FAQs

Q: Can I make these ahead and freeze them?

A: Yes, freeze the shaped balls on a tray until firm, then store in a bag. Air fry from frozen, add a few minutes to cook time.

Q: What cheeses work best?

A: Sharp cheddar is great for flavor, mix in mozzarella for stretch, or add a little Parmesan for extra taste.

Q: Can I bake them instead of using an air fryer?

A: Yes, bake at 400 F on a greased sheet for about 12 to 18 minutes, turn halfway, until golden.

Q: How do I stop them from falling apart?

A: Chill the mac and cheese well and press the crumbs on firmly. A little cornstarch in the mix can help bind.

Q: Are they spicy friendly?

A: Yes, add a pinch of cayenne or chopped jalapeño to the mix, or serve with a spicy dip.

Conclusion

These fried macaroni and cheese balls are an easy, tasty treat that feel special and bake up crisp in the air fryer. For a full step by step copycat version you can try the Cheesecake Factory style recipe here, Cheesecake Factory Air Fryer Fried Macaroni and Cheese Balls. If you want another classic fried version with tips and tricks, see this detailed guide, Fried Macaroni and Cheese Balls Recipe – MidgetMomma.

Cheesecake Factory Air Fryer Fried Macaroni and Cheese Balls

These crispy on the outside, gooey on the inside macaroni and cheese balls are a perfect snack for parties or family nights.

Macaroni and Cheese Mixture

  • 2 cups Macaroni (Cook until tender)
  • 1 cup Sharp Cheddar Cheese (Shredded)
  • 1/4 cup Cream or Milk (To mix until creamy)
  • 1 pinch Salt
  • 1 pinch Pepper

Coating

  • 1/2 cup Flour
  • 2 large Eggs (Beaten)
  • 1 cup Breadcrumbs

For Frying

  • 1 spray Cooking Oil (For air fryer basket and tops)

Preparation

  1. Cook macaroni until tender, drain well, and let cool.
  2. Mix macaroni with sharp cheddar cheese and cream or milk until creamy.
  3. Add salt and pepper, then chill mac and cheese in the fridge for at least 1 hour.
  4. Scoop chilled mixture and form into small balls, about 1 to 1 1/2 inches wide.

Coating

  1. Set up three bowls: one with flour, one with beaten eggs, and one with breadcrumbs.
  2. Roll each ball in flour, then egg, and finally breadcrumbs. Press crumbs gently so they stick.

Cooking

  1. Preheat the air fryer to 375°F and spray the basket with oil.
  2. Place the balls in the basket in a single layer, avoiding overcrowding.
  3. Lightly spray the tops with oil and air fry for 6 to 8 minutes, turn once, and cook another 4 to 6 minutes until golden and crispy.
  4. Let cool for a few minutes before serving with your favorite dipping sauce.

Chill mac and cheese well before shaping to help hold form. You can mix cheeses and freeze the formed balls for future cooking.

Appetizer, Snack
American
Air Fryer, Cheesecake Factory Copycat, Comfort Food, Fried Snack, Macaroni and Cheese Balls

Air Fryer Calzones

Delicious homemade air fryer calzones filled with cheese and toppings

Warm, cheesy, and ready fast, Air Fryer Calzones are a quick way to get a hot, homemade meal on the table. They give you the same cozy pizza flavors wrapped in a golden pocket, and kids and adults both love them. This recipe is a crowd-pleaser because it is crispy outside, gooey inside, and easy to make with simple ingredients. If you like easy air fryer meals, you might also enjoy the air fryer grilled cheese hot dogs for another fun snack idea. Get your apron on, because you will want to make these again and again.

how to prepare Air Fryer Calzones

Ingredients

  • 1 pound pizza dough, store bought or homemade
  • 1 cup marinara sauce, plus more for dipping
  • 1 1/2 cups shredded mozzarella cheese
  • 12-16 slices pepperoni, or cooked sausage, or vegetables
  • 1 egg, beaten, for egg wash
  • 1 tablespoon olive oil
  • 1/2 teaspoon garlic powder
  • 1/2 teaspoon dried oregano
  • Salt and pepper, to taste
  • Optional, grated Parmesan for topping

Directions

  1. Preheat your air fryer to 370°F, about 3 to 5 minutes.
  2. Lightly flour a clean surface and roll the pizza dough into a rough circle, about 10 to 12 inches across.
  3. Cut the dough into 4 equal pieces, or use a round cutter to make 4 to 6 circles, depending on your size choice.
  4. Mix olive oil, garlic powder, oregano, salt, and pepper. Brush a little oil on the edges of each dough piece.
  5. Spoon 2 tablespoons marinara on one half of each piece, leaving a clean edge. Add a handful of mozzarella and a few pepperoni slices. Do not overfill.
  6. Fold the dough over to cover the filling, press edges to seal, and crimp with a fork or pinch firmly to close.
  7. Brush each calzone with beaten egg for a golden top, and sprinkle a little Parmesan if you want.
  8. Place calzones in the air fryer basket, seam side down, leaving space so air can move. Cook at 370°F for 8 to 12 minutes, until the crust is golden brown and the cheese is melted. You may need to cook in batches.
  9. Let the calzones rest for 2 minutes before serving, they will be very hot inside. Serve with warm marinara for dipping.

Air Fryer Calzones

Why You’ll Love Air Fryer Calzones

  • Fast cooking time, you get a hot meal in under 20 minutes.
  • Crispy outside and melty cheese inside, a perfect contrast.
  • Easy to change the filling, use pepperoni, veggies, or chicken.
  • Less oil than frying, and less heat in your kitchen than an oven.

tips for success

  • Don’t overfill the calzones, too much filling makes them leak.
  • Seal edges well, pinch and crimp or use a fork to press the dough closed.
  • Use parchment or a light spray in the basket to stop sticking.
  • Cook in a single layer with space between calzones so air flows.
  • If the top browns too fast, lower the temperature a little and add a minute or two to the time.
  • Let them cool for a minute or two before cutting, so the cheese sets a bit.

Serving Suggestions

  • Serve with warm marinara sauce for dipping.
  • Add a side salad, simple greens with lemon and olive oil.
  • Try garlic butter brushed on top for extra flavor.
  • Serve with roasted veggies or a cup of soup for a fuller meal.
  • Great as a party snack, cut into smaller pieces for sharing.

Air Fryer Calzones

FAQs

Q: Can I freeze calzones before cooking?

A: Yes, shape and freeze on a tray until firm, then wrap each one and store in a freezer bag. Cook from frozen, add a few extra minutes to the cook time at 370°F.

Q: How do I reheat leftover calzones?

A: Reheat in the air fryer at 350°F for 3 to 5 minutes, or until warm. This keeps the crust crisp.

Q: Can I use store bought pizza sauce?

A: Yes, store bought marinara works great. You can also use pesto or alfredo for a different taste.

Q: What fillings are good for kids?

A: Keep it simple, mozzarella and pepperoni or cooked chicken and cheese are usually a hit.

Q: Do I need to brush with egg?

A: No, egg gives a nice golden color, but olive oil works fine if you want to skip the egg.

Conclusion

Air Fryer Calzones are a simple, tasty way to enjoy pizza flavors fast, and they work for weeknight dinners or weekend snacks. For another easy air fryer calzone idea, check this helpful recipe for Air Fryer Calzones (Crazy Easy) – Momsdish that shows a basic method and tips. If you want a spicy twist, see this version for Air Fryer Buffalo Chicken Calzones – The Creative Bite for a buffalo chicken filling idea.

Air Fryer Calzones

Warm, cheesy, and ready fast, Air Fryer Calzones are a quick way to get a hot, homemade meal with cozy pizza flavors wrapped in a golden pocket.

Dough and Filling

  • 1 pound pizza dough, store bought or homemade
  • 1 cup marinara sauce, plus more for dipping
  • 1.5 cups shredded mozzarella cheese
  • 12-16 slices pepperoni, or cooked sausage, or vegetables (Choose your favorite filling)
  • 1 large egg, beaten, for egg wash (Optional, for golden top)
  • 1 tablespoon olive oil (For brushing)

Spices and Seasoning

  • 0.5 teaspoon garlic powder
  • 0.5 teaspoon dried oregano
  • to taste Salt and pepper
  • optional grated Parmesan for topping (For extra flavor)

Preparation

  1. Preheat your air fryer to 370°F, about 3 to 5 minutes.
  2. Lightly flour a clean surface and roll the pizza dough into a rough circle, about 10 to 12 inches across.
  3. Cut the dough into 4 equal pieces, or use a round cutter to make 4 to 6 circles, depending on your size choice.
  4. Mix olive oil, garlic powder, oregano, salt, and pepper. Brush a little oil on the edges of each dough piece.
  5. Spoon 2 tablespoons marinara on one half of each piece, leaving a clean edge. Add a handful of mozzarella and a few pepperoni slices. Do not overfill.
  6. Fold the dough over to cover the filling, press edges to seal, and crimp with a fork or pinch firmly to close.
  7. Brush each calzone with beaten egg for a golden top, and sprinkle a little Parmesan if you want.

Cooking

  1. Place calzones in the air fryer basket, seam side down, leaving space so air can move.
  2. Cook at 370°F for 8 to 12 minutes, until the crust is golden brown and the cheese is melted. You may need to cook in batches.
  3. Let the calzones rest for 2 minutes before serving, they will be very hot inside.

Tips for success include: Don’t overfill the calzones to prevent leakage, seal edges well, and use parchment or a light spray in the basket to stop sticking.

Dinner, Snack
Italian
Air Fryer Calzones, Easy Calzones, Homemade Calzones, Quick Meals

Garlic Butter Steak Bites

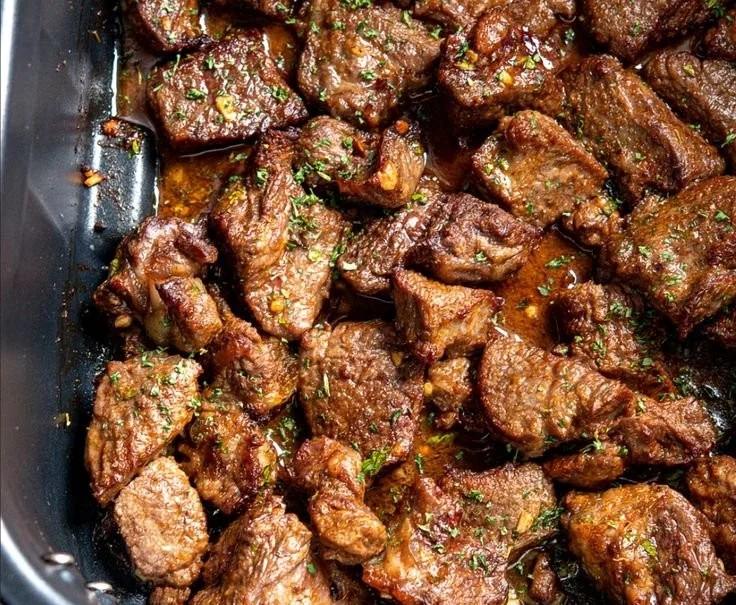
Delicious garlic butter steak bites served on a plate

Garlic Butter Steak Bites are small pieces of steak cooked in garlic and butter until they are brown and tender. This dish uses simple ingredients, and it cooks fast. It works for busy weeknights, easy dinners, or when you want a tasty snack to share.

This featured recipe for Garlic Butter Steak Bites is a real crowd-pleaser, full of rich garlic flavor and buttery crust, with juicy beef in every bite. The mix of garlic, butter, and seared steak makes a very savory and comforting dish. If you like quick steak recipes, try this one and you will see why friends and family come back for more. For a creamy twist, you can also check a related version like garlic butter steak bites with parmesan cream sauce which pairs well with pasta.

how to prepare Garlic Butter Steak Bites

  1. Cut steak into bite-size cubes, pat dry with paper towels.
  2. Season the steak with salt and pepper on all sides.
  3. Heat a heavy skillet over medium-high heat, add oil until hot.
  4. Add steak in a single layer, do not crowd the pan. Cook 2 to 3 minutes per side until browned. Remove steak and keep warm.
  5. Lower heat to medium, add butter to the pan. Stir in minced garlic and cook 30 to 60 seconds until fragrant.
  6. Return steak to the pan, toss with the garlic butter and any pan juices. Cook 1 more minute to combine flavors.
  7. Finish with chopped fresh parsley if you like, then serve immediately.

Garlic Butter Steak Bites

Why You’ll Love Garlic Butter Steak Bites

  • They cook very fast, ready in about 15 to 20 minutes.
  • Big garlic and butter flavor makes the steak taste rich and savory.
  • The recipe uses few ingredients you likely have at home, beef, garlic, and butter.
  • It works as an easy weeknight dinner, appetizer, or game day snack.
  • You can pair it with rice, salad, pasta, or roasted vegetables.

tips for success

  • Pat the steak dry before seasoning, this helps get a good sear.
  • Do not crowd the pan, cook in batches if needed so the steak browns well.
  • Use a hot pan and a high smoke point oil, like canola or vegetable oil.
  • Add butter near the end so it does not burn, then toss the steak quickly.
  • Let steak rest a minute off the heat to keep the juices inside.

Serving Suggestions

  • Serve over white rice or mashed potatoes for a simple meal.
  • Add to a salad for a hearty steak salad.
  • Toss with pasta and a spoonful of the garlic butter for a fast dinner.
  • Place on toothpicks for an easy party appetizer.
  • Pair with steamed vegetables or roasted green beans for a balanced plate.

Garlic Butter Steak Bites

FAQs

Q: What cut of steak is best for steak bites?
A: Use tender cuts like sirloin, ribeye, or New York strip. They stay tender when cut into bites.

Q: Can I use frozen steak?
A: It is best to thaw fully and pat dry first. Frozen steak will not brown well.

Q: How do I keep the steak from getting tough?
A: Cook quickly on high heat and do not overcook. Let the meat rest a short time before serving.

Q: Can I make this ahead of time?
A: You can cook the steak and reheat gently, but it is best fresh for the juiciest bites.

Q: Can I add other seasonings?
A: Yes, add a pinch of smoked paprika, onion powder, or a splash of Worcestershire sauce for extra flavor.

Conclusion

Garlic Butter Steak Bites are an easy, tasty dish that fits many meals, from weeknight dinners to party snacks. If you want another take on the same idea, see the detailed recipe on Garlic Butter Steak Bites – Simply Recipes for more tips and variations, or compare notes with the version on Garlic Butter Steak Bites Recipe – Allrecipes for reader reviews and serving ideas. Enjoy making this quick and flavorful beef dish at home.

Garlic Butter Steak Bites

These Garlic Butter Steak Bites are quick to make, full of rich garlic flavor and buttery crust, perfect for busy weeknights or as an appetizer for gatherings.

Main Ingredients

  • 1 pound beef steak (sirloin, ribeye, or New York strip) (Cut into bite-size cubes)
  • 2 tablespoons canola or vegetable oil (For cooking)
  • 3 tablespoons butter (Add at the end to avoid burning)
  • 4 cloves garlic (Minced)
  • 1 teaspoon salt (To season steak)
  • 1 teaspoon black pepper (To season steak)
  • 2 tablespoons parsley (Chopped for garnish (optional))

Preparation

  1. Cut steak into bite-size cubes and pat dry with paper towels.
  2. Season the steak with salt and pepper on all sides.

Cooking

  1. Heat a heavy skillet over medium-high heat and add oil until hot.
  2. Add the steak in a single layer, avoiding crowding the pan. Cook for 2 to 3 minutes per side until browned. Remove the steak and keep warm.
  3. Lower the heat to medium, add butter to the pan, then stir in minced garlic and cook for 30 to 60 seconds until fragrant.
  4. Return the steak to the pan and toss with the garlic butter and any pan juices. Cook for 1 more minute to combine flavors.
  5. Finish with chopped fresh parsley if desired, then serve immediately.

Pat the steak dry before seasoning for better sear. Don’t crowd the pan; cook in batches if needed. Use a hot pan with high smoke point oil. Add butter near the end to prevent burning. Let steak rest briefly to retain juices.

Appetizer, Dinner
American
Appetizer, Garlic Butter Steak Bites, Quick Dinner, Snack, Steak Recipe

Air Fryer Sweet Chili Chicken and Brussels Sprouts

Plate of Air Fryer Sweet Chili Chicken and Brussels Sprouts

This Air Fryer Sweet Chili Chicken and Brussels Sprouts recipe is warm, friendly, and easy. It mixes sweet, sticky chili sauce with tender chicken, and crispy, caramelized Brussels sprouts. The flavors are bright, a little sweet, and a little spicy, and the air fryer makes them both quick and nicely crisp.

If you like simple air fryer dinners, try another easy idea, air fryer grilled cheese hot dogs for more quick meal inspiration. This recipe is a crowd-pleaser, great for weeknights, and fun to share. You will want to make it again and again, and maybe lick the plate, no shame there.

how to prepare Air Fryer Sweet Chili Chicken and Brussels Sprouts

Ingredients

  • 1 pound boneless chicken breasts or thighs, cut into bite-size pieces
  • 1 pound Brussels sprouts, trimmed and halved
  • 3 tablespoons sweet chili sauce
  • 1 tablespoon soy sauce or tamari
  • 1 tablespoon olive oil
  • 1 teaspoon garlic powder
  • Salt and pepper to taste
  • Optional, sesame seeds and sliced green onion for garnish

Directions

  1. In a bowl, mix sweet chili sauce, soy sauce, olive oil, garlic powder, salt, and pepper.
  2. Add chicken pieces, toss to coat, and let sit 5 to 10 minutes.
  3. Toss Brussels sprouts with a little oil, salt, and pepper.
  4. Preheat the air fryer to 400°F (200°C) for a few minutes.
  5. Place Brussels sprouts in the basket in one layer. Cook 5 minutes.
  6. Add the chicken pieces on top of the Brussels sprouts in one layer. Cook 10 to 12 more minutes, shake basket or stir halfway, until chicken is cooked and sprouts are crisp.
  7. If you want more glaze, toss the cooked chicken with a little extra sweet chili sauce.
  8. Garnish with sesame seeds and green onion, serve hot.

Air Fryer Sweet Chili Chicken and Brussels Sprouts

Why You’ll Love Air Fryer Sweet Chili Chicken and Brussels Sprouts

  • Fast, cooks in about 20 minutes from start to finish.
  • Uses one air fryer basket, so cleanup is quick.
  • Bright sweet chili flavor that both kids and adults enjoy.
  • Crisp sprouts and juicy chicken, great mix of textures.
  • Healthy dinner option with protein and veggies.

tips for success

  • Cut chicken into similar size pieces so it cooks evenly.
  • Don’t crowd the basket, shake or stir halfway for even browning.
  • If your air fryer heats hot, lower temp to 380°F and add 2 to 4 minutes.
  • Taste sauce before cooking, add a splash of soy or a pinch of salt if needed.
  • Use dried garlic or fresh minced garlic for stronger flavor, add with the sauce.

Serving Suggestions

  • Serve over steamed rice or cauliflower rice for a full meal.
  • Add a side of pickled cucumber or a simple salad to balance the sweet sauce.
  • Wrap leftovers in a tortilla for a quick lunch wrap.
  • Garnish with lime wedges for a fresh squeeze of juice.

Air Fryer Sweet Chili Chicken and Brussels Sprouts

FAQs

Q: Can I use frozen Brussels sprouts?

A: Yes, but thaw and pat dry first, they crisp better if not wet.

Q: Can I make this with thighs instead of breasts?

A: Yes, thighs work well and stay juicy. Cut into even pieces.

Q: Is sweet chili sauce spicy?

A: It is mildly spicy and sweet, adjust by adding more soy or a little hot sauce if you want heat.

Q: Can I double the recipe?

A: You can, but cook in batches or use a larger air fryer, do not overcrowd the basket.

Q: How do I store leftovers?

A: Cool, place in an airtight container, and keep in the fridge up to 3 days.

Conclusion

This recipe is a quick, tasty weeknight winner that gives you crisp Brussels sprouts and sticky sweet chili chicken with very little fuss. For another version focused on roasted sprouts with sweet chili flavor, see this take on Sweet Chili Roasted Brussels Sprouts – Easy Side Dish. If you want to compare a different method that still uses the air fryer for fast meals, check out this Air Fryer Sweet Chili Chicken and Brussels Sprouts – Mason Woodruff write-up for more tips.

Air Fryer Sweet Chili Chicken and Brussels Sprouts

This quick and easy Air Fryer Sweet Chili Chicken and Brussels Sprouts recipe features tender chicken and crispy Brussels sprouts coated in a sweet and spicy chili sauce.

Main Ingredients

  • 1 pound boneless chicken breasts or thighs, cut into bite-size pieces (Thighs work well and stay juicy.)
  • 1 pound Brussels sprouts, trimmed and halved (Can use frozen but must thaw and pat dry.)

Sauce and Seasoning

  • 3 tablespoons sweet chili sauce (Adjust for more spice.)
  • 1 tablespoon soy sauce or tamari (Add a splash to taste.)
  • 1 tablespoon olive oil
  • 1 teaspoon garlic powder (Use fresh minced garlic for stronger flavor.)
  • to taste Salt and pepper

Optional Garnish

  • as needed sesame seeds (Optional)
  • as needed sliced green onion (Optional)

Preparation

  1. In a bowl, mix sweet chili sauce, soy sauce, olive oil, garlic powder, salt, and pepper.
  2. Add chicken pieces, toss to coat, and let sit for 5 to 10 minutes.
  3. Toss Brussels sprouts with a little oil, salt, and pepper.
  4. Preheat the air fryer to 400°F (200°C) for a few minutes.

Cooking

  1. Place Brussels sprouts in the basket in one layer. Cook for 5 minutes.
  2. Add the chicken pieces on top of the Brussels sprouts in one layer. Cook for an additional 10 to 12 minutes, shaking the basket or stirring halfway, until chicken is cooked and sprouts are crisp.
  3. If you want more glaze, toss the cooked chicken with a little extra sweet chili sauce.

Serving

  1. Garnish with sesame seeds and green onion, serve hot.

Cut chicken into similar size pieces for even cooking. Avoid overcrowding the basket for even browning.

Dinner, Main Course
American, Asian
Air Fryer Chicken, Brussels Sprouts, Easy Recipe, Quick Dinner, Sweet Chili Chicken