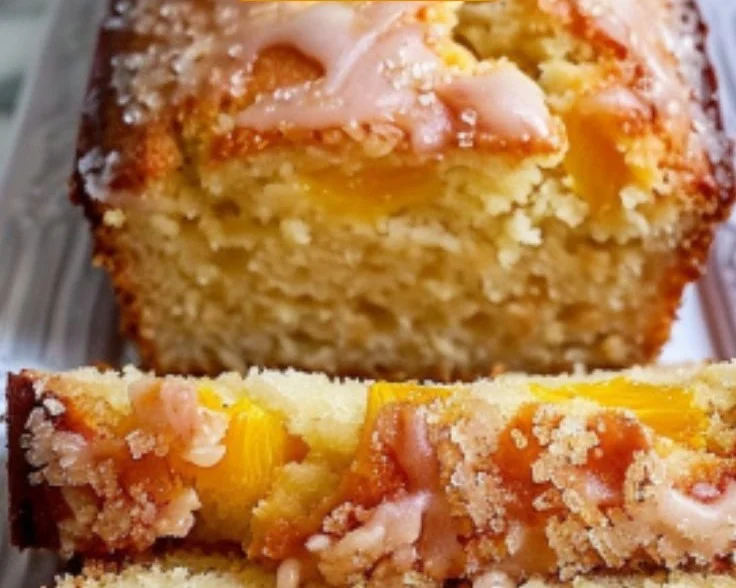
3-Ingredient Peach Dump Cake

Delicious 3-Ingredient Peach Dump Cake fresh out of the oven.

Nothing warms the heart quite like a simple dessert made with love, and the 3-Ingredient Peach Dump Cake is the perfect treat to conjure up those cozy feelings. This delightful cake is not only easy to make, but it’s also a crowd-pleaser, filled with sweet peach flavor that dances on your taste buds. Imagine the delightful aroma of baked peaches filling your kitchen, tempting everyone to gather around the table. With just three ingredients and minimal preparation, this recipe is great for busy nights or last-minute gatherings. Let’s get started and bring this sweet treat to life in your kitchen!

How to prepare 3-Ingredient Peach Dump Cake

Here’s how you can whip up this enticing dessert that everyone will adore:

  1. Preheat your oven to 350°F (175°C).
  2. Pour a can of sliced peaches (with juice) into a baking dish.
  3. Sprinkle a cake mix evenly over the peaches.
  4. Drizzle melted butter over the cake mix.
  5. Bake in the preheated oven for about 30-35 minutes, or until the top is golden brown.
  6. Let it cool for a few moments before serving.

3-Ingredient Peach Dump Cake

Why You’ll Love 3-Ingredient Peach Dump Cake

This Peach Dump Cake is incredibly simple and quick to make, perfect for both novice and experienced bakers. With just three ingredients, it allows for easy preparation without the need for complicated steps or fancy tools. The combination of juicy peaches and a buttery cake topping is a match made in dessert heaven, making it a delightful treat for any occasion. Each bite covers your palate with warm, sweet goodness that pairs perfectly with a scoop of vanilla ice cream. Whether it’s a family gathering or just a cozy evening at home, this dessert is bound to impress.

Tips for success

To make sure your 3-Ingredient Peach Dump Cake turns out perfectly, consider these tips:

  • Use fresh or frozen peaches if you prefer, but canned peaches give it a classic taste and quick preparation.
  • Don’t skip the butter, as it adds moisture and richness that elevates the cake.
  • You can add spices like cinnamon or nutmeg for an extra flavor boost.
  • For a fun twist, try using different flavors of cake mix to change things up.

Serving Suggestions

Serve your Peach Dump Cake warm, enhancing its delicious flavor. It pairs beautifully with a scoop of vanilla ice cream or whipped cream on top. You could also add a sprinkle of chopped nuts or fresh peach slices for added texture and flavor. This dessert is best enjoyed fresh from the oven, but it can also be stored in the fridge for a few days, making it perfect for leftovers.

FAQs

Can I use fresh peaches instead of canned?

Yes, you can use fresh peaches! Just make sure to slice them and mix with a bit of sugar to enhance their sweetness.

How should I store leftovers?

Store any leftovers in an airtight container in the fridge for up to three days. You can reheat servings in the microwave for a few seconds.

Can I use a different flavor of cake mix?

Absolutely! Feel free to experiment with any flavor of cake mix you enjoy, such as yellow, white, or even chocolate for a unique twist.

The 3-Ingredient Peach Dump Cake is a simple, yet irresistible dessert that everyone will love. Its ease of preparation makes it a go-to recipe for any occasion. If you want to explore more delicious peach treats, check out this amazing easy peach cake from scratch. Indulge yourself in this sweet delight today!

3-Ingredient Peach Dump Cake

A simple and delightful dessert made with just three ingredients, filled with sweet peach flavor and easy to prepare.

Main Ingredients

  • 1 can sliced peaches with juice (Fresh or frozen peaches can be used as alternatives.)
  • 1 box cake mix (Any flavor of cake mix can be used.)
  • 1/2 cup butter, melted (Essential for moisture and richness.)

Preparation

  1. Preheat your oven to 350°F (175°C).
  2. Pour the can of sliced peaches (with juice) into a baking dish.
  3. Sprinkle the cake mix evenly over the peaches.
  4. Drizzle the melted butter over the cake mix.
  5. Bake in the preheated oven for about 30-35 minutes, or until the top is golden brown.
  6. Let it cool for a few moments before serving.

Serve warm with a scoop of vanilla ice cream or whipped cream. This dessert is best enjoyed fresh from the oven but can be stored in the fridge for up to three days.

Dessert, Sweet Treat
American
3-Ingredient Cake, easy dessert, Peach Dessert, Peach Dump Cake, quick recipe

Cucumber Carrot Salad

Cucumber Carrot Salad with fresh ingredients on a plate

Cucumber Carrot Salad is a refreshing and vibrant dish, perfect for warm days or as a crunchy side. Imagine the crispness of cucumbers paired with the sweetness of carrots, all dressed in a tangy dressing that brings everything together. This salad is not only delicious but also a crowd-pleaser at gatherings. It’s light yet filling, making it a wonderful addition to any meal. Let’s dive into making this tasty salad which is sure to brighten up your plate!

How to prepare Cucumber Carrot Salad

To make a delightful Cucumber Carrot Salad, you will need the following ingredients:

  • 2 medium cucumbers
  • 2 large carrots
  • 2 tablespoons olive oil
  • 1 tablespoon apple cider vinegar
  • Salt and pepper to taste
  • Optional: fresh herbs like parsley or cilantro for added flavor

Directions:

  1. Start by washing the cucumbers and carrots thoroughly. Peel the carrots if you prefer, but the skin can add a nice texture.
  2. Slice the cucumbers and julienne the carrots into thin strips.
  3. In a large bowl, combine the sliced cucumbers and julienned carrots.
  4. In a small bowl, whisk together the olive oil, apple cider vinegar, and a pinch of salt and pepper.
  5. Pour the dressing over the cucumber and carrot mixture. Toss gently to coat all the vegetables evenly.
  6. For best flavor, let the salad sit for at least 10 minutes before serving. You can also garnish it with fresh herbs if desired.

Cucumber Carrot Salad

Why You’ll Love Cucumber Carrot Salad

Cucumber Carrot Salad is incredibly versatile. Whether you’re serving it at a BBQ, enjoying it on the side of grilled chicken, or simply having it as a light lunch, this salad fits perfectly into any occasion. The fresh, crunchy texture will keep you coming back for more. Plus, it’s healthy, packed with vitamins, and takes very little time to prepare!

Tips for success

  • Use fresh vegetables for the best flavor and crunch.
  • Feel free to experiment with different dressings. A splash of lemon juice can also enhance the taste.
  • If you like a bit of sweetness, add honey or maple syrup to the dressing.

Serving Suggestions

This salad pairs wonderfully with grilled meats, seafood, or even as part of a vegetarian meal. You can also serve it alongside other salads, like an Asian Carrot Salad, for a colorful spread on your table.

Cucumber Carrot Salad

FAQs

Can I make this salad ahead of time?

Yes, you can prepare the salad a few hours in advance. Just keep it in the fridge and add the dressing before serving for the best freshness.

What other ingredients can I add?

You can add bell peppers, cherry tomatoes, or even nuts for some crunch. The options are endless!

Is this salad suitable for meal prep?

Absolutely! Just store it in an airtight container in the fridge, and it will stay fresh for a few days.

Cucumber Carrot Salad is a delightful addition to any meal and a fantastic way to enjoy fresh vegetables. With its simple ingredients and quick preparation, it’s perfect for busy days or entertaining guests. If you want to explore more delicious salads, check out this Cucumber and Carrot Salad (Asian inspired) to inspire your next culinary adventure. Happy cooking!

Cucumber Carrot Salad

A refreshing and vibrant salad combining crisp cucumbers and sweet carrots, all dressed in a tangy dressing.

Salad Ingredients

  • 2 medium cucumbers (Fresh and crisp)
  • 2 large carrots (Peel if desired)

Dressing

  • 2 tablespoons olive oil (Extra virgin for best flavor)
  • 1 tablespoon apple cider vinegar (Add more for tanginess)
  • to taste Salt (Adjust according to preference)
  • to taste Pepper (Freshly ground is best)
  • Optional: fresh herbs (parsley or cilantro) (For added flavor and garnish)

Preparation

  1. Wash the cucumbers and carrots thoroughly.
  2. Peel the carrots if you prefer, but the skin can add a nice texture.
  3. Slice the cucumbers and julienne the carrots into thin strips.

Mixing

  1. In a large bowl, combine the sliced cucumbers and julienned carrots.
  2. In a small bowl, whisk together the olive oil, apple cider vinegar, salt, and pepper.
  3. Pour the dressing over the cucumber and carrot mixture, tossing gently to coat.

Serving

  1. Let the salad sit for at least 10 minutes before serving for best flavor.
  2. Garnish with fresh herbs if desired.

Use fresh vegetables for the best flavor and crunch. You can experiment with different dressings, such as adding lemon juice or a bit of honey for sweetness.

Salad, Side Dish
American, Healthy
Carrot Salad, Cucumber Salad, Easy Salad, Healthy Salad, Refreshing Salad

Banana Split Fluff

Delicious Banana Split Fluff dessert with bananas, whipped cream, and chocolate sauce

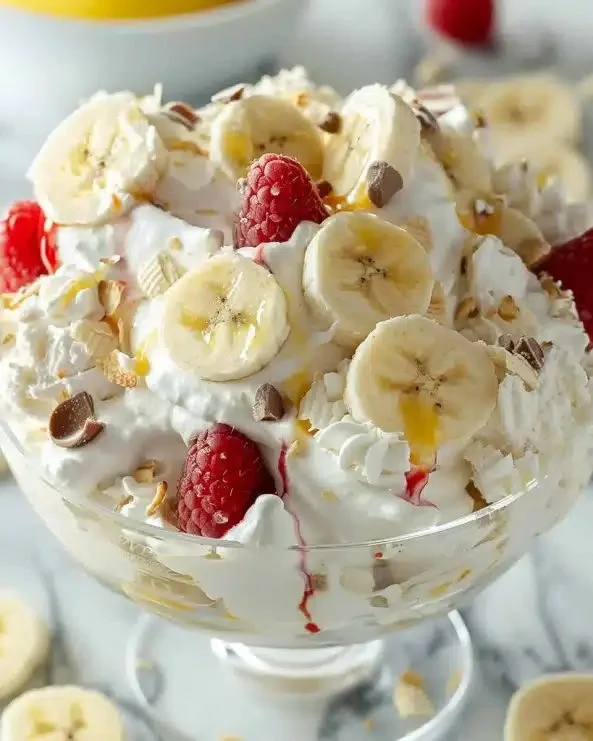
Banana Split Fluff is a fun and delightful treat that takes all the vivacious flavors of a classic banana split and transforms them into an easy, fluffy dessert. It’s a perfect addition to any picnic, party, or family gathering because it appeals to both kids and adults alike. With its creamy texture, fresh fruit flavors, and delightful sweetness, Banana Split Fluff is sure to be a hit. You’ll love how simple it is to make, and it will definitely have everyone coming back for more!

How to prepare Banana Split Fluff

To make this mouthwatering treat, gather all the necessary ingredients and follow these straightforward steps. You won’t need to be a professional chef; just a little enthusiasm will do!

Ingredients

  • 1 cup of mini marshmallows
  • 1 cup of sliced bananas
  • 1 cup of crushed pineapple, drained
  • 1 cup of whipped topping
  • ½ cup of chopped strawberries
  • ½ cup of chocolate syrup
  • Chopped nuts for topping (optional)

Directions

  1. In a mixing bowl, combine the mini marshmallows, sliced bananas, and crushed pineapple.
  2. Gently fold in the whipped topping until everything is well mixed.
  3. Add in the chopped strawberries and mix once again.
  4. Drizzle chocolate syrup throughout the fluff, carefully folding it in for a marbled effect.
  5. Once everything is combined, transfer it to a serving bowl.
  6. Top with chopped nuts if desired.
  7. Chill for at least an hour before serving to let the flavors meld together.

Banana Split Fluff

Why You’ll Love Banana Split Fluff

You’ll love Banana Split Fluff for its delightful combination of flavors and textures. The creamy whipped topping mixes beautifully with the fresh fruits and sweet marshmallows. This dessert is not only delicious but also super easy to prepare. It’s a fantastic way to enjoy the taste of a banana split without the fuss of traditional ice cream. Plus, it’s a great way to use up extra fruits you may have lying around! It’s definitely a dessert that will warm hearts and put smiles on faces.

Tips for success

  • Make sure to drain the crushed pineapple well, so it doesn’t make the fluff soggy.
  • For added flavor, you can sprinkle some extra chocolate syrup on top just before serving.
  • If you want to get creative, feel free to mix in other fruits or toppings based on your preference!

Serving Suggestions

Banana Split Fluff is best served chilled, making it a perfect refreshing dessert for hot days. You can scoop it into individual cups for easy serving or place it in a big bowl for everyone to enjoy. Pair it with a scoop of vanilla ice cream for an extra indulgent treat. Whether it’s a picnic, a birthday party, or a casual get-together, this fluff is sure to impress your guests!

Banana Split Fluff

FAQs

What can I do with leftovers?

Leftovers can be stored in the fridge for up to two days. Just make sure to cover it tightly to keep it fresh.

Can I use other fruits?

Absolutely! Feel free to experiment with fruits like blueberries, peaches, or raspberries to create your own twist on this classic dessert.

Is this recipe suitable for kids?

Yes, it is a fun and kid-friendly dessert! Kids can even help with mixing and assembling, making it a great bonding activity.

Banana Split Fluff is not just a delicious dessert but also a nostalgic favorite for many. If you’re looking to try out this fluffy treat, check out this Banana Split Fluff Salad Recipe for more inspiration. Enjoy making this delightful treat, and watch it disappear at your next gathering!

Banana Split Fluff

Banana Split Fluff is a fun and delightful treat that captures all the flavors of a classic banana split in a fluffy dessert, perfect for any gathering.

Main Ingredients

  • 1 cup mini marshmallows
  • 1 cup sliced bananas
  • 1 cup crushed pineapple, drained
  • 1 cup whipped topping
  • 1/2 cup chopped strawberries
  • 1/2 cup chocolate syrup
  • Chopped nuts for topping (optional)

Preparation

  1. In a mixing bowl, combine the mini marshmallows, sliced bananas, and crushed pineapple.
  2. Gently fold in the whipped topping until everything is well mixed.
  3. Add in the chopped strawberries and mix once again.
  4. Drizzle chocolate syrup throughout the fluff, carefully folding it in for a marbled effect.
  5. Once everything is combined, transfer it to a serving bowl.
  6. Top with chopped nuts if desired.
  7. Chill for at least an hour before serving to let the flavors meld together.

Make sure to drain the crushed pineapple well to avoid sogginess. For added flavor, sprinkle some extra chocolate syrup on top just before serving. Feel free to mix in other fruits or toppings based on your preference.

Dessert
American
Banana Split Fluff, easy dessert, fluffy dessert, No-Bake Dessert, Party dessert

Butterfinger Pie

Delicious Butterfinger Pie with crispy Butterfinger candy topping

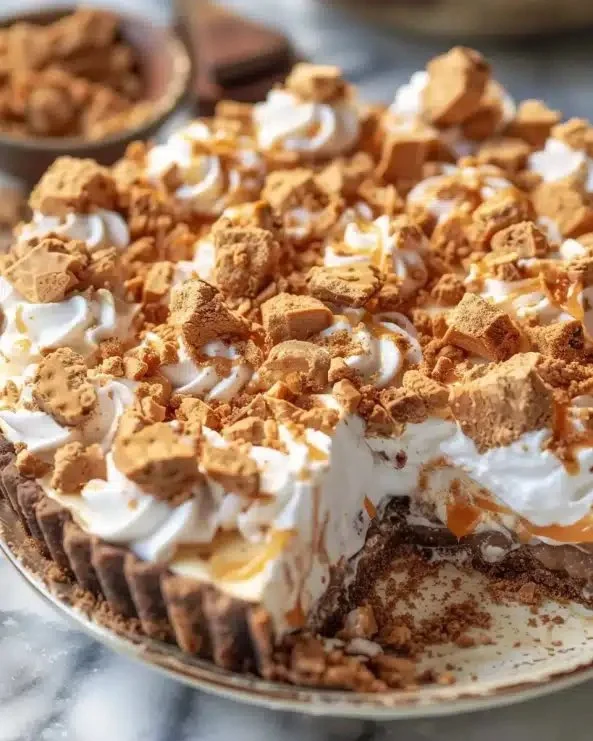
Butterfinger Pie is a delightful dessert that brings together the creamy goodness of peanut butter and the crunchy sweetness of Butterfinger candy bars. This pie is not just a treat for your taste buds, but also a feast for the eyes. With its rich layers and a graham cracker crust, it has everything you need to impress friends and family. It’s a perfect dessert for any occasion, whether it’s a holiday gathering or a casual get-together. Just one bite of this pie will make you understand why it’s a crowd-pleaser! You’ll want to dive right in and make it yourself after hearing how simple it is to whip up.

How to prepare Butterfinger Pie

To make this delicious Butterfinger Pie, you will need the following ingredients:

Ingredients

  • 1 (9-inch) graham cracker crust
  • 1 cup creamy peanut butter
  • 1 cup powdered sugar
  • 1 (8-ounce) package cream cheese, softened
  • 1 (12-ounce) container whipped topping
  • 2-3 Butterfinger candy bars, crushed (plus extra for garnish)
  • Chocolate syrup for drizzling (optional)

Directions

  1. In a large bowl, mix together the peanut butter, powdered sugar, and softened cream cheese until smooth and creamy.
  2. Gently fold in the whipped topping until it’s well combined.
  3. Add the crushed Butterfinger candy bars and mix them into the filling.
  4. Pour the mixture into the graham cracker crust and spread it evenly.
  5. Refrigerate for at least 4 hours, or overnight for best results.
  6. Before serving, drizzle chocolate syrup on top and sprinkle with extra crushed Butterfinger bars.

Butterfinger Pie

Why You’ll Love Butterfinger Pie

You will love Butterfinger Pie for its incredible flavor and texture. The combination of creamy peanut butter and crunchy candy is simply irresistible. It’s not too sweet, making it perfect for those who enjoy a well-balanced dessert. Plus, it’s a no-bake recipe, which means less time in the kitchen and more time enjoying your pie! Whether you are a peanut butter fan or just love a good dessert, this pie is sure to become a favorite in your household.

Tips for success

To make your Butterfinger Pie even better, consider these tips:

  • Allow the cream cheese to soften completely for a smoother filling.
  • Use fresh whipped topping rather than a thawed version for the best texture.
  • If you prefer a stronger chocolate flavor, feel free to add more chocolate syrup on top.
  • To make it even more festive, try adding whipped cream decorations around the edges before serving.

Serving Suggestions

This pie is perfect as a standalone dessert. However, you can take it to the next level by serving it with a scoop of vanilla ice cream on the side or fresh whipped cream on top. A sprinkle of crushed Butterfinger makes for a delightful garnish, and a drizzle of chocolate sauce can make it look extra special.

FAQs

1. How long can Butterfinger Pie be stored in the fridge?

Butterfinger Pie can be stored in the refrigerator for up to 5 days. Just make sure to cover it well so it stays fresh.

2. Can I use a different candy bar?

Absolutely! Feel free to swap out Butterfinger for your favorite candy bar, such as Reese’s or Snickers for a fun twist.

3. Is it necessary to refrigerate before serving?

Yes, refrigerating the pie is important because it helps set the filling, giving it the perfect texture when you slice into it.

Butterfinger Pie

Now that you have all the information you need to make this delightful Butterfinger Pie, why not give it a try? Its rich flavors and creamy texture make it a perfect choice for any gathering. For more ideas on fun desserts, check out this amazing recipe on Butterfinger Pie for some inspiration! Enjoy your baking adventure!

Butterfinger Pie

A delightful no-bake dessert combining creamy peanut butter with crunchy Butterfinger candy bars, perfect for any occasion.

Crust

  • 1 9-inch graham cracker crust

Filling

  • 1 cup creamy peanut butter (Use smooth peanut butter for the best texture.)
  • 1 cup powdered sugar
  • 1 8-ounce package cream cheese, softened (Allow to soften completely for a smoother filling.)
  • 1 12-ounce container whipped topping (Use fresh whipped topping for best results.)
  • 2-3 pieces Butterfinger candy bars, crushed (Plus extra for garnish.)
  • to taste chocolate syrup (For drizzling (optional).)

Preparation

  1. In a large bowl, mix together the peanut butter, powdered sugar, and softened cream cheese until smooth and creamy.
  2. Gently fold in the whipped topping until well combined.
  3. Add the crushed Butterfinger candy bars and mix them into the filling.
  4. Pour the mixture into the graham cracker crust and spread it evenly.
  5. Refrigerate for at least 4 hours, or overnight for best results.
  6. Before serving, drizzle chocolate syrup on top and sprinkle with extra crushed Butterfinger bars.

Butterfinger Pie can be stored in the refrigerator for up to 5 days. Consider serving with a scoop of vanilla ice cream or whipped cream on top.

Dessert
American
Butterfinger Pie, Chocolate Dessert, Crowd-Pleaser, No-Bake Dessert, Peanut Butter Dessert

Butter Toffee Sugar Cookies

Delicious Butter Toffee Sugar Cookies topped with toffee pieces

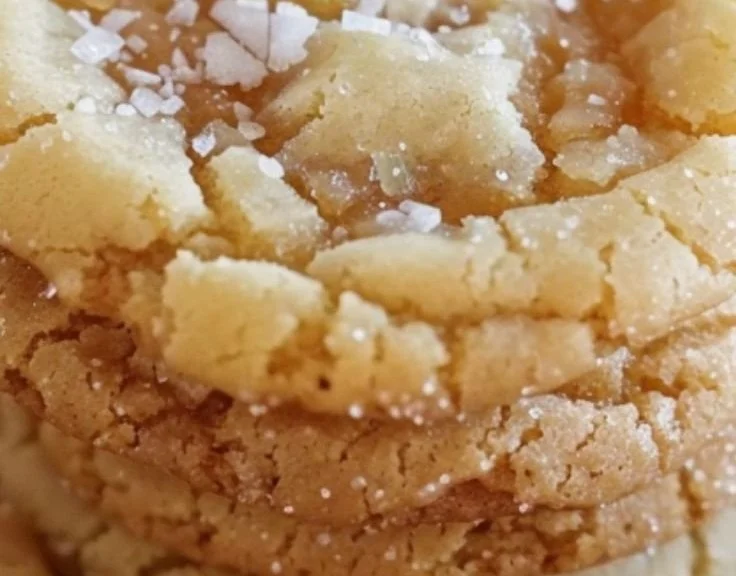
Butter Toffee Sugar Cookies are truly a delightful treat that brightens any occasion. With a perfect balance of sweetness and a hint of buttery richness, these cookies are sure to impress your family and friends. The crunchy toffee bits add an unexpected and delightful texture, making each bite enjoyable. These cookies are not just delicious, but they’re also simple to make, which means you can whip up a batch in no time. So, if you’re looking for a crowd-pleaser that brings joy to your taste buds, let’s dive into the recipe for these scrumptious Butter Toffee Sugar Cookies.

How to prepare Butter Toffee Sugar Cookies

To make these delightful cookies, here’s what you’ll need:

Ingredients

  • 1 cup unsalted butter, softened
  • 1 cup granulated sugar
  • 1 cup brown sugar, packed
  • 2 large eggs
  • 1 teaspoon vanilla extract
  • 3 cups all-purpose flour
  • 1 teaspoon baking soda
  • 1 teaspoon salt
  • 1 cup toffee bits (or chopped toffee candy)

Directions

  1. Preheat your oven to 350°F (175°C). Line baking sheets with parchment paper.
  2. In a large bowl, cream together the softened butter, granulated sugar, and brown sugar until light and fluffy.
  3. Beat in the eggs, one at a time, followed by the vanilla extract.
  4. In another bowl, whisk together the flour, baking soda, and salt.
  5. Gradually mix the dry ingredients into the wet ingredients until just combined.
  6. Fold in the toffee bits gently.
  7. Drop rounded tablespoons of dough onto the prepared baking sheets, spacing them about 2 inches apart.
  8. Bake for 10-12 minutes, or until the edges are lightly golden. Let the cookies cool on the baking sheets for a few minutes before transferring them to wire racks to cool completely.

Butter Toffee Sugar Cookies

Why You’ll Love Butter Toffee Sugar Cookies

You will love Butter Toffee Sugar Cookies for so many reasons! They are soft, chewy, and filled with a delightful crunch from the toffee bits. The combination of buttery flavors with the sweetness of sugar creates a warm, comforting taste that everyone loves. These cookies are perfect for any occasion, whether it’s a cozy family gathering, a potluck, or just an afternoon snack. The best part is, they’ll make your kitchen smell heavenly as they bake!

Tips for success

To ensure your Butter Toffee Sugar Cookies turn out perfectly, keep these tips in mind:

  • Make sure your butter is softened but not melted, as this helps achieve the desired texture.
  • For extra flavor, consider adding a pinch of cinnamon or nutmeg to the cookie dough.
  • To keep cookies chewy, do not overbake them. They might seem a little soft when you take them out, but they will firm up as they cool.

Serving Suggestions

These Butter Toffee Sugar Cookies are delightful on their own, but you can elevate your serving game by pairing them with a scoop of ice cream or a glass of milk. They also make a wonderful addition to gift baskets or holiday cookie platters. Feel free to sprinkle some extra toffee bits on top before baking for a decorative touch!

FAQs

1. Can I use other types of chocolate in this recipe?

Yes, you can substitute toffee bits with chocolate chips or nuts for a different flavor and texture.

2. How should I store the cookies?

Store the cookies in an airtight container at room temperature for up to one week. You can also freeze them for longer freshness.

3. Can I make the dough ahead of time?

Absolutely! You can prepare the dough and refrigerate it for up to three days before baking.

Butter Toffee Sugar Cookies are not only a delicious treat, but they also bring joy to any gathering. They are easy to make and perfect for sharing. If you want to explore even more variations of these cookies, check out this delightful recipe for Crinkly Crackly Butter Toffee Sugar Cookies. Enjoy baking and indulging in these sweet delights!

Butter Toffee Sugar Cookies

Delightful cookies featuring a perfect balance of sweetness and buttery richness, topped with crunchy toffee bits.

For the cookie dough

  • 1 cup unsalted butter, softened (Make sure butter is softened but not melted.)
  • 1 cup granulated sugar
  • 1 cup brown sugar, packed
  • 2 large eggs
  • 1 teaspoon vanilla extract
  • 3 cups all-purpose flour
  • 1 teaspoon baking soda
  • 1 teaspoon salt
  • 1 cup toffee bits (or chopped toffee candy) (Can substitute with chocolate chips or nuts for variation.)

Preparation

  1. Preheat your oven to 350°F (175°C) and line baking sheets with parchment paper.
  2. In a large bowl, cream together the softened butter, granulated sugar, and brown sugar until light and fluffy.
  3. Beat in the eggs, one at a time, followed by the vanilla extract.
  4. In another bowl, whisk together the flour, baking soda, and salt.
  5. Gradually mix the dry ingredients into the wet ingredients until just combined.
  6. Fold in the toffee bits gently.
  7. Drop rounded tablespoons of dough onto the prepared baking sheets, spacing them about 2 inches apart.
  8. Bake for 10-12 minutes, or until the edges are lightly golden.
  9. Let the cookies cool on the baking sheets for a few minutes before transferring them to wire racks to cool completely.

To keep cookies chewy, do not overbake them. They might seem soft when you take them out, but they will firm up as they cool. Consider adding a pinch of cinnamon or nutmeg for extra flavor.

Dessert, Snack
American
Baking, Butter Toffee Sugar Cookies, Cookies, Dessert, toffee

Vampire Bite Red Velvet Cheesecake

Vampire Bite Red Velvet Cheesecake with chocolate drizzle and festive decorations

When you think of desserts that impress, the Vampire Bite Red Velvet Cheesecake stands out as a showstopper. This delightful treat combines the beloved red velvet flavor with the creamy richness of cheesecake, creating a dessert that is both beautiful and delicious. Imagine the rich, velvety texture topped with a sweet, slightly tangy cream cheese layer, and you’ll understand why this cheesecake is a crowd-pleaser. Perfect for Halloween parties, special occasions, or just a treat for yourself, this dessert is sure to leave everyone wanting more. So grab your apron, and let’s dive into making this delightful cheesecake that’s as fun to make as it is to eat!

How to prepare Vampire Bite Red Velvet Cheesecake

To get started on your Vampire Bite Red Velvet Cheesecake, you will need a few simple ingredients. The beauty of making this cheesecake lies in its straightforward preparation. Here’s how you can whip it up effortlessly:

Ingredients

  • 1 1/2 cups crushed graham crackers
  • 1/2 cup melted butter
  • 2 cups cream cheese, softened
  • 1 cup granulated sugar
  • 1 cup sour cream
  • 3 large eggs
  • 1 tablespoon vanilla extract
  • 2 tablespoons cocoa powder
  • 1 cup all-purpose flour
  • Red gel food coloring

Directions

  1. Preheat your oven to 325°F (163°C).
  2. In a bowl, mix crushed graham crackers and melted butter to create the crust. Press the mixture into the bottom of a springform pan.
  3. In a large mixing bowl, combine the cream cheese and sugar, beating until smooth.
  4. Add the sour cream, eggs, vanilla extract, cocoa powder, flour, and red gel food coloring. Mix everything until well combined and smooth.
  5. Pour the cheesecake batter over the crust and smooth the top.
  6. Bake for about 60 minutes, or until set. Avoid overbaking to keep it creamy.
  7. Let the cheesecake cool to room temperature before refrigerating for at least 4 hours, or overnight if possible.
  8. Before serving, consider adding a drizzle of chocolate or raspberry sauce for a blood-like effect, enhancing its spooky charm.

Vampire Bite Red Velvet Cheesecake

Why You’ll Love Vampire Bite Red Velvet Cheesecake

This Vampire Bite Red Velvet Cheesecake is very special. It combines the classic flavor of red velvet cake with creamy cheesecake that everyone loves. The rich cream cheese and the slight hint of cocoa create a perfect balance of flavors. Not only does it taste amazing, but its vibrant red color and striking presentation make it a centerpiece dessert. You will impress your friends and family with this delightful creation!

Tips for success

  • Make sure your cream cheese is at room temperature. This will help you achieve a smoother batter.
  • Don’t skip the chilling time. It ensures your cheesecake sets correctly and enhances the flavors.
  • For a fun twist, consider decorating the top with spooky decorations or edible glitter to match the vampire theme.

Serving Suggestions

Serve slices of Vampire Bite Red Velvet Cheesecake with a side of whipped cream or a scoop of vanilla ice cream. You can also pair it with fresh berries for a fruity contrast. For Halloween parties, use fun props or themed plates to enhance the spooky atmosphere.

Vampire Bite Red Velvet Cheesecake

FAQs

1. Can I use a different color instead of red?

Yes, you can use different gel colors to create other themed cheesecakes. Just keep in mind that the flavor may change slightly with different colors.

2. Can I freeze the cheesecake?

Yes, this cheesecake can be frozen! Wrap it tightly and store it for up to 3 months. Let it thaw in the fridge before serving.

3. How do I store leftover cheesecake?

Keep any leftovers covered in the refrigerator. It should stay fresh for about 5 days.

The Vampire Bite Red Velvet Cheesecake is not just a treat for the eyes but also a delight for the taste buds. Make it your go-to dessert for gatherings or a special occasion. For more spooky inspiration, check out this Bloody Red Velvet Cheesecake. It’s a perfect way to keep the festive spirit alive! Enjoy making this irresistible cheesecake, and don’t forget to share it with those you love!

Vampire Bite Red Velvet Cheesecake

A delightful red velvet cheesecake with a creamy texture, perfect for Halloween and special occasions.

For the crust

  • 1.5 cups crushed graham crackers (Crushed to form the base)
  • 0.5 cups melted butter (To bind the crust)

For the cheesecake filling

  • 2 cups cream cheese, softened (At room temperature for smooth mixing)
  • 1 cups granulated sugar (For sweetness)
  • 1 cups sour cream (Adds creaminess and tang)
  • 3 large eggs eggs (Room temperature for better mixing)
  • 1 tablespoon vanilla extract (For flavor enhancement)
  • 2 tablespoons cocoa powder (Adds a hint of chocolate flavor)
  • 1 cups all-purpose flour (To stabilize the cheesecake)
  • red gel food coloring (Add to achieve desired color)

Preparation

  1. Preheat your oven to 325°F (163°C).
  2. In a bowl, mix crushed graham crackers and melted butter to create the crust. Press the mixture into the bottom of a springform pan.

Mixing

  1. In a large mixing bowl, combine the cream cheese and sugar, beating until smooth.
  2. Add the sour cream, eggs, vanilla extract, cocoa powder, flour, and red gel food coloring. Mix everything until well combined and smooth.

Baking

  1. Pour the cheesecake batter over the crust and smooth the top.
  2. Bake for about 60 minutes, or until set. Avoid overbaking to keep it creamy.
  3. Let the cheesecake cool to room temperature before refrigerating for at least 4 hours, or overnight if possible.

Serving

  1. Before serving, consider adding a drizzle of chocolate or raspberry sauce for a blood-like effect, enhancing its spooky charm.

Make sure your cream cheese is at room temperature for a smoother batter. Don’t skip the chilling time for proper setting. Consider spooky decorations for a fun twist.

Dessert, Sweet
American, Halloween
cheesecake, dessert recipe, Halloween Dessert, Red Velvet Cheesecake, Vampire Theme

Peach Bread

Freshly baked peach bread with slices and peaches on a rustic table

Peach Bread is a delightful treat that combines the sweetness of ripe peaches with the comforting texture of freshly baked bread. This recipe is not just a simple quick bread, it’s a crowd-pleaser that brings smiles to faces and warmth to hearts. Imagine biting into a slice filled with chunks of juicy peaches, which are perfectly complemented by hints of cinnamon and vanilla. It’s a wonderful way to use fresh summer peaches and a perfect breakfast or snack option that everyone in the family will enjoy. So grab your ingredients and let’s make some Peach Bread!

How to prepare Peach Bread

Preparing Peach Bread is a breeze! Here’s what you need to do to create this sweet and fruity loaf.

  1. Preheat your oven to 350°F (175°C).
  2. In a mixing bowl, combine the dry ingredients: flour, sugar, baking powder, and cinnamon.
  3. In another bowl, mix together the wet ingredients: mashed bananas, melted butter, eggs, and vanilla extract.
  4. Gently fold the wet mixture into the dry ingredients until just combined.
  5. Stir in diced peaches, ensuring they’re well distributed.
  6. Pour the batter into a greased loaf pan, smoothing the top.
  7. Bake for about 50-60 minutes or until a toothpick comes out clean.
  8. Allow it to cool in the pan for a few minutes before transferring to a wire rack to cool completely.

Peach Bread

Why You’ll Love Peach Bread

Peach Bread is great for so many reasons. It’s simple, scrumptious, and versatile! You can enjoy it for breakfast, as a snack during the day, or even as a dessert. The juicy peach pieces leave you feeling refreshed, making every bite a joy. Plus, with the added cinnamon flavor, it’s almost like enjoying a piece of summer in every slice!

Tips for success

To make sure your Peach Bread turns out perfect, keep these tips in mind:

  1. Use ripe peaches for the best sweetness and flavor.
  2. Don’t overmix the batter, it’s okay if there are a few lumps!
  3. Adjust the baking time according to your oven, as oven temperatures can vary.
  4. Let the bread cool completely before slicing to get cleaner cuts.

Serving Suggestions

This Peach Bread is delicious on its own, but you can also try spreading a little butter or cream cheese on top for an extra treat. Pair it with fresh fruit or a scoop of vanilla ice cream for a delightful dessert that will impress everyone.

Peach Bread

FAQs

1. Can I use frozen peaches for this recipe?

Yes, you can use frozen peaches! Just make sure to thaw and drain them before adding to the batter.

2. How do I store leftovers?

Store the Peach Bread in an airtight container at room temperature for up to three days. You can also freeze it for longer storage.

3. Can I add nuts or other fruits?

Absolutely! Feel free to mix in some chopped nuts or substitute other fruits like plums or apples for a twist on the original recipe.

Peach Bread is a wonderful way to savor the sweetness of summer peaches while enjoying a freshly baked loaf. For a more detailed recipe, you can check out this Peach Bread Recipe from Tastes of Lizzy T that offers easy steps to create this delicious treat. Enjoy every slice and share the joy with your friends and family!

Peach Bread

A delightful quick bread that combines the sweetness of ripe peaches with hints of cinnamon and vanilla, perfect for breakfast or snacks.

Dry Ingredients

  • 2 cups all-purpose flour
  • 1 cup granulated sugar
  • 2 teaspoons baking powder
  • 1 teaspoon ground cinnamon

Wet Ingredients

  • 2 medium ripe bananas, mashed
  • 1/2 cup unsalted butter, melted
  • 2 large eggs
  • 1 teaspoon vanilla extract

Add-ins

  • 2 cups fresh peaches, diced (Use ripe, fresh peaches for best flavor.)

Preparation

  1. Preheat your oven to 350°F (175°C).
  2. In a mixing bowl, combine the dry ingredients: flour, sugar, baking powder, and cinnamon.
  3. In a separate bowl, mix together the wet ingredients: mashed bananas, melted butter, eggs, and vanilla extract.
  4. Gently fold the wet mixture into the dry ingredients until just combined.
  5. Stir in diced peaches, ensuring they are well distributed.
  6. Pour the batter into a greased loaf pan, smoothing the top.
  7. Bake for about 50-60 minutes or until a toothpick comes out clean.
  8. Allow it to cool in the pan for a few minutes before transferring to a wire rack to cool completely.

For best results, use ripe peaches. Don’t overmix the batter; a few lumps are okay. Adjust baking time based on your oven.

Breakfast, Dessert, Snack
American
Peach Bread, Peach Dessert, Quick Bread, Summer Recipe

Creamy Crack Chicken Pasta

Creamy Crack Chicken Pasta served in a bowl with herbs and cheese garnish

This Creamy Crack Chicken Pasta is one of those meals that instantly brings comfort and joy to the dinner table. It’s rich, creamy, and packed with flavors that will make everyone coming back for more. If you’re looking for a dish that’s easy to prepare and loved by both adults and kids, you’ve found it! Imagine tender pasta mixed with shredded chicken, crispy bacon, and a creamy sauce that ties it all together. Not only is this recipe a crowd-pleaser, but it also gives you that “homemade with love” feeling. So grab your apron and let’s whip up this delightful dish!

How to prepare Creamy Crack Chicken Pasta

  1. Start by cooking your pasta according to the package instructions. You can use any type of pasta you love.
  2. While the pasta cooks, heat a large skillet over medium heat. Add chopped bacon and cook until crispy. Remove and set aside.
  3. In the same skillet, add diced onion and cook until soft.
  4. Add cooked chicken, cream cheese, ranch seasoning, and garlic powder. Stir until everything is well mixed and creamy.
  5. Once the pasta is cooked, drain it and add it to the skillet. Mix until the pasta is fully coated with the creamy sauce.
  6. Finally, stir in the crispy bacon and garnish with green onions or parsley for a fresh touch.

Creamy Crack Chicken Pasta

Why You’ll Love Creamy Crack Chicken Pasta

This dish is not only delicious but also incredibly easy to make. It’s perfect for busy weeknights or when you’re entertaining guests. The combination of creamy sauce, tender chicken, and crispy bacon is simply irresistible. Plus, you can customize it by adding veggies if you want a bit more color and nutrition on your plate. Everyone will love this dish, and it’s sure to become a family favorite.

Tips for success

  • For extra flavor, consider using grilled or rotisserie chicken instead of boiled chicken.
  • Don’t overcook the pasta; a little bite (al dente) is perfect.
  • Feel free to mix in some of your favorite vegetables, like spinach or bell peppers, for added nutrition.
  • If you want a bit of heat, add red pepper flakes to the creamy sauce.

Serving Suggestions

Serve your Creamy Crack Chicken Pasta with a side of garlic bread and a fresh garden salad. This meal looks beautiful on the plate and makes for a complete dinner experience. You can also pair it with a glass of white wine for a touch of elegance.

FAQs

Can I use different pasta types?

Absolutely! You can use any pasta you prefer, such as penne, rigatoni, or even gluten-free pasta.

Can I make this dish ahead of time?

Yes, you can prepare the chicken and sauce ahead of time and mix them with freshly cooked pasta when you’re ready to serve.

Is there a vegetarian option?

Yes, you can substitute the chicken with grilled vegetables and the bacon with mushrooms or tempeh for a delicious vegetarian twist!

The Creamy Crack Chicken Pasta is a fun, tasty dish that your family will love. With easy steps and ingredients, it can become a weeknight favorite. If you want to explore more recipes like this, check out this Crack Chicken Pasta Recipe that highlights even more deliciousness. Happy cooking!

Creamy Crack Chicken Pasta

A rich and creamy pasta dish featuring tender chicken, crispy bacon, and a flavorful sauce that is sure to delight the whole family.

Main ingredients

  • 12 oz pasta (Any type of pasta you love.)
  • 6 slices bacon (Chopped and cooked until crispy.)
  • 1 onion (Diced.)
  • 2 cups cooked chicken (Shredded.)
  • 8 oz cream cheese (Softened for easier mixing.)
  • 1 packet ranch seasoning
  • 1 tsp garlic powder
  • green onions or parsley (For garnish.)

Preparation

  1. Cook the pasta according to the package instructions until al dente.
  2. While the pasta cooks, heat a large skillet over medium heat and add the chopped bacon. Cook until crispy, then remove and set aside.
  3. In the same skillet, add the diced onion and cook until soft.
  4. Add the cooked chicken, cream cheese, ranch seasoning, and garlic powder to the skillet. Stir until well mixed and creamy.
  5. Once the pasta is cooked, drain it and add it to the skillet. Mix until the pasta is fully coated with the creamy sauce.
  6. Finally, stir in the crispy bacon and garnish with green onions or parsley.

For extra flavor, consider using grilled or rotisserie chicken instead of boiled chicken. Don’t overcook the pasta; al dente is perfect. Feel free to mix in vegetables like spinach or bell peppers for added nutrition. For heat, add red pepper flakes to the sauce.

Dinner, Main Course
American
Chicken, Comfort Food, Creamy Pasta, Pasta, Quick Dinner

Garlic Butter Shrimp and Sausage Skillet Pasta Recipe

Delicious Garlic Butter Shrimp and Sausage in a skillet with pasta.

Garlic Butter Shrimp and Sausage Skillet Pasta is the kind of dish that lights up a dinner table. Its wonderful blend of shrimp and sausage tossed in creamy, garlic butter sauce brings joy to everyone who tries it. This recipe is not just flavorsome, but it’s also a great crowd-pleaser for family gatherings or casual get-togethers with friends. The crisp, savory notes of sausage combined with the juicy shrimp create a deliciously comforting meal. Plus, it’s quick to make, making it perfect for busy evenings when you want to impress without the hassle. Get ready to bring this tasty delight into your kitchen!

How to prepare Garlic Butter Shrimp and Sausage Skillet Pasta

Getting started with this delightful dish is quite simple. Here’s how to prepare Garlic Butter Shrimp and Sausage Skillet Pasta in just a few easy steps:

  1. First, gather your ingredients. You will need shrimp, sausage, pasta, garlic, butter, and a few seasonings.
  2. Start by cooking your pasta according to package instructions. Drain and set it aside.
  3. In a large skillet, melt the butter over medium heat. Once melted, add minced garlic and sauté until fragrant.
  4. Next, add sliced sausage to the skillet and cook it until it’s browned.
  5. Stir in the shrimp and cook until they turn pink, which usually takes about 3-4 minutes.
  6. Add the cooked pasta to the skillet and toss everything together. Season with salt, pepper, and any other spices you prefer.
  7. Serve hot, garnished with parsley or grated parmesan cheese if desired.

Garlic Butter Shrimp and Sausage Skillet Pasta Recipe

Why You’ll Love Garlic Butter Shrimp and Sausage Skillet Pasta

This recipe is packed with flavor and perfect for seafood lovers, making it a must-try. The garlic butter sauce creates a rich, savory finish that will have you going back for seconds. Not only does it taste amazing, but it is also an all-in-one meal that combines protein, carbs, and flavor in one skillet. Additionally, the recipe can easily be modified to include more vegetables or spices, making it a versatile dish for various dietary preferences. If you enjoy delightful meals that don’t take all evening to prepare, this Garlic Butter Shrimp and Sausage Skillet Pasta won’t disappoint.

Tips for success

To make sure your dish turns out perfect every time, keep these tips in mind:

  • Always use fresh shrimp for the best flavor; frozen shrimp can work as well, just ensure they’re thawed before cooking.
  • Adjust the spices according to your taste; adding a pinch of red pepper flakes can give it a nice kick.
  • Don’t overcook the shrimp; they cook very quickly and can become rubbery if overdone.
  • Feel free to add vegetables like spinach or cherry tomatoes to make the dish even healthier and colorful.

Serving Suggestions

Serve your Garlic Butter Shrimp and Sausage Skillet Pasta with a side of warm garlic bread to soak up that delicious sauce. A light, green salad drizzled with a lemon vinaigrette pairs perfectly, complementing the rich flavors. For a cozy feel, consider serving it in large bowls for family-style dining.

FAQs

1. Can I use chicken instead of sausage?

Yes, you can absolutely substitute chicken for sausage! It’ll change the flavor profile, but it will still be delicious.

2. What kind of pasta works best for this recipe?

Short pasta like penne or fusilli works well, but you can use any pasta you prefer, including spaghetti or fettuccine.

3. Can I prepare this dish ahead of time?

It’s best enjoyed fresh, but you can cook the sausage and shrimp ahead of time and reheat when ready to combine with pasta.

Garlic Butter Shrimp and Sausage Skillet Pasta Recipe

Garlic Butter Shrimp and Sausage Skillet Pasta is a delightful meal that everyone will love. The abundance of flavors and quick preparation makes it perfect for weeknight dinners or special occasions. For more ideas on creating delicious meals, you can check out this Skillet Garlic Butter Shrimp and Sausage recipe from Mel’s Kitchen Cafe. Happy cooking!

Garlic Butter Shrimp and Sausage Skillet Pasta

A delightful and quick dish featuring shrimp and sausage tossed in a creamy, garlic butter sauce that’s perfect for busy evenings or special occasions.

Main Ingredients

  • 1 pound shrimp, peeled and deveined (Use fresh shrimp for best flavor; frozen is fine if thawed.)
  • 8 ounces sausage, sliced (Use your preferred type of sausage.)
  • 8 ounces pasta (Short pasta like penne or fusilli works best.)
  • 3 cloves garlic, minced (Sauté until fragrant.)
  • 1/2 cup butter
  • to taste salt and pepper (Adjust according to your preference.)
  • optional parsley or grated parmesan cheese for garnish (For serving.)

Preparation

  1. Gather all the ingredients needed for the recipe.
  2. Cook the pasta according to package instructions, then drain and set aside.

Cooking

  1. In a large skillet, melt the butter over medium heat.
  2. Add minced garlic to the skillet and sauté until fragrant.
  3. Add sliced sausage to the skillet and cook until browned.
  4. Stir in the shrimp and cook until they turn pink, about 3-4 minutes.
  5. Add the cooked pasta to the skillet and toss everything together. Season with salt, pepper, and any other spices you prefer.

Serving

  1. Serve hot, garnished with parsley or grated parmesan cheese if desired.

Feel free to add vegetables like spinach or cherry tomatoes for added nutrition. Serve with garlic bread and a light salad for a complete meal.

Dinner, Main Course
American, Seafood
Easy Recipe, Garlic Butter Shrimp, One-Pan Meal, Quick Dinner, Sausage Pasta

Rhubarb Custard Bars

Delicious rhubarb custard bars with a creamy filling and crispy crust

Rhubarb Custard Bars are a delightful treat that combines the tartness of rhubarb with a creamy custard layer. These bars are perfect for springtime gatherings, picnics, or just a cozy dessert at home. The sweet and tangy flavor of rhubarb paired with the rich, smooth custard creates a dessert that’s not only delicious but also visually appealing. They are sure to be a crowd-pleaser at any event and will have everyone coming back for seconds. Let’s dive into this delightful recipe that you’ll want to make again and again!

How to prepare Rhubarb Custard Bars

To prepare Rhubarb Custard Bars, start by gathering your ingredients. You will need fresh rhubarb, sugar, eggs, milk, and a few other simple items. Follow these steps for a delicious result:

  1. Preheat your oven to 350°F (175°C).
  2. Prepare a baking dish by greasing it lightly.
  3. Chop the rhubarb into small pieces and set it aside.
  4. In a bowl, mix the sugar and flour.
  5. Add eggs and milk to the sugar mixture and whisk until smooth.
  6. Stir in the chopped rhubarb and pour the mixture into the prepared baking dish.
  7. Bake for 40-45 minutes or until the custard is set and lightly golden on top.
  8. Let it cool before slicing it into bars.

Rhubarb Custard Bars

Why You’ll Love Rhubarb Custard Bars

These Rhubarb Custard Bars are loved for their unique combination of tart and sweet flavors, which makes every bite a tasty experience. The soft and creamy custard blended with the vibrant rhubarb creates a textured treat that everyone enjoys. Plus, they are easy to make and a great way to use fresh rhubarb, especially in late spring when it is in season.

Tips for success

  1. Choose firm, fresh rhubarb for the best results.
  2. For a sweeter taste, you can adjust the sugar to your liking.
  3. Let the bars cool completely in the baking dish to ensure they are easy to cut.

Serving Suggestions

Rhubarb Custard Bars are delicious on their own, but you can elevate the experience by serving them with a scoop of vanilla ice cream or a dollop of whipped cream. Fresh strawberries or a sprinkle of powdered sugar on top can also add a beautiful touch to your dessert.

FAQs

Can I use frozen rhubarb for this recipe?

Yes, you can use frozen rhubarb, but make sure to thaw it completely and drain off excess moisture before using.

How do I store the Rhubarb Custard Bars?

Store the bars in an airtight container in the refrigerator for up to a week. They can also be frozen for longer storage.

Can I substitute other fruits for rhubarb?

Yes, you can certainly try this recipe with other fruits such as strawberries or cherries, but keep in mind that the taste will change.

Rhubarb Custard Bars

A delightful treat combining the tartness of rhubarb with a creamy custard layer, perfect for springtime gatherings and cozy desserts.

For the custard

  • 2 cups chopped fresh rhubarb (Choose firm, fresh rhubarb.)
  • 1 cup sugar (Adjust to taste for sweetness.)
  • 1 cup milk (Any type of milk can be used.)
  • 2 large eggs (Large eggs preferred.)
  • 1/2 cup all-purpose flour (Provides structure to the custard.)

Preparation

  1. Preheat your oven to 350°F (175°C).
  2. Prepare a baking dish by greasing it lightly.
  3. Chop the rhubarb into small pieces and set it aside.
  4. In a bowl, mix the sugar and flour.
  5. Add eggs and milk to the sugar mixture and whisk until smooth.
  6. Stir in the chopped rhubarb and pour the mixture into the prepared baking dish.
  7. Bake for 40-45 minutes or until the custard is set and lightly golden on top.
  8. Let it cool before slicing into bars.

Store the bars in an airtight container in the refrigerator for up to a week. They can also be frozen for longer storage.

Dessert
American
Baking, Custard Recipe, Rhubarb Custard Bars, Rhurbard Dessert, Spring Dessert