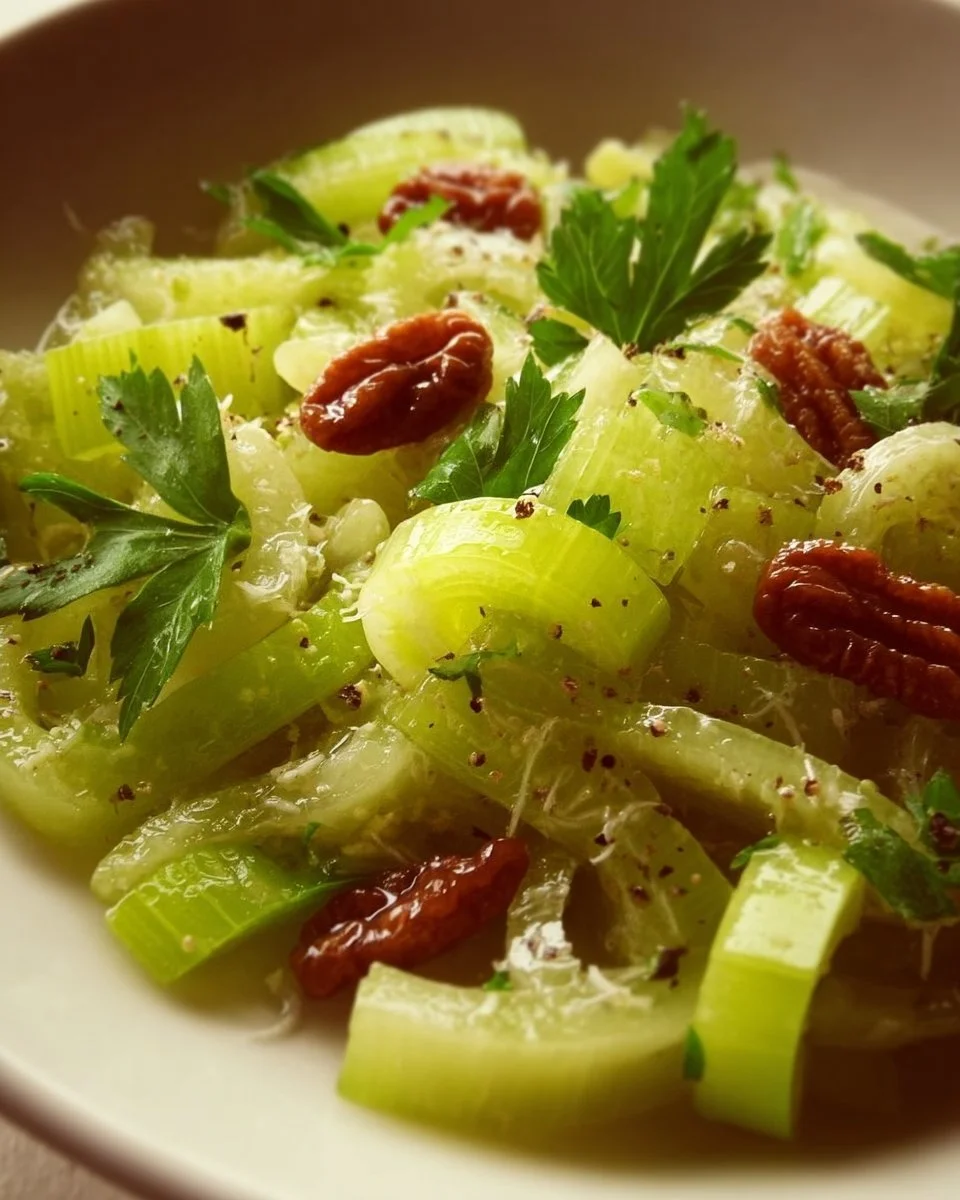
Simple Celery Salad recipe

Simple Celery Salad with fresh ingredients and dressing

When you think of salads, you might picture a bowl full of greens and veggies, but let’s take a moment to appreciate the crisp and refreshing taste of celery salad. This dish brings together the crunchy texture of celery with flavorful ingredients, making it a perfect side dish for any meal. It’s not just healthy, but also incredibly tasty and easy to whip up. Whether you’re hosting a gathering or just craving something light and fresh, this celery salad will surely impress your family and friends.

This featured recipe for celery salad is a crowd-pleaser that combines the crunch of celery with zesty dressing, making it a delightful addition to any table. The combination of flavors enchants your taste buds while providing a satisfying crunch with every bite. Plus, it’s a breeze to prepare, so even the busiest cook can get it done in no time! Get ready to toss together a salad that’s sure to win hearts and tummies alike.

How to prepare Celery Salad

To make this delicious celery salad, you’ll need the following ingredients:

Ingredients:

  • 4 cups of fresh celery, chopped
  • 1 cup of diced apples
  • ½ cup of walnuts, chopped
  • ½ cup of raisins
  • ½ cup of plain yogurt or mayonnaise
  • 1 tablespoon of lemon juice
  • Salt and pepper to taste

Now, let’s dive into the directions:

  1. In a large bowl, combine the chopped celery, diced apples, walnuts, and raisins.
  2. In a separate bowl, mix together the yogurt (or mayonnaise), lemon juice, salt, and pepper.
  3. Pour the dressing over the celery mixture and toss until everything is well coated.
  4. Chill in the refrigerator for at least 30 minutes before serving.

Celery Salad

Why You’ll Love Celery Salad

This salad is not just about good taste, it’s also packed with nutrients. Celery is low in calories and high in fiber, making it a guilt-free option. Plus, the apples add a touch of sweetness, while the walnuts give a satisfying crunch that you won’t be able to resist. It’s an excellent dish for any season, and it pairs well with grilled chicken or fish. It’s also great for picnics and potlucks, as it holds up well and tastes even better when chilled.

Tips for success

  • Choose crisp and fresh celery for the best crunch.
  • Feel free to customize the salad by adding other ingredients like carrots, cranberries, or even a sprinkle of feta cheese for a unique twist.
  • If using mayonnaise, consider a lighter version for a healthier option.

Celery Salad

Serving Suggestions

Celery salad can shine as a side dish alongside grilled meats, sandwiches, or wraps. It also works beautifully as a light lunch with some crusty bread. For an appetizer, serve it in small cups or lettuce wraps for a fun presentation.

FAQs

1. Can I make celery salad ahead of time?

Yes, you can prepare the salad a day in advance. Just keep it covered in the refrigerator and enjoy it chilled!

2. Is celery salad gluten-free?

Absolutely! All the ingredients in this salad are gluten-free, making it suitable for those with gluten sensitivity.

3. How long will the salad last in the fridge?

If stored in an airtight container, celery salad will stay fresh for about 3 days. Just give it a good stir before enjoying it again!

With all these tips and ideas, it’s time to bring out your chopping board and create this delightful celery salad yourself. Happy cooking!

Celery Salad

A crisp and refreshing celery salad with a zesty dressing, perfect as a side dish or light lunch.

Salad Ingredients

  • 4 cups fresh celery, chopped (Choose crisp and fresh celery for the best crunch.)
  • 1 cup diced apples (Apples add sweetness.)
  • ½ cup walnuts, chopped (Gives a satisfying crunch.)
  • ½ cup raisins (Adds sweetness.)

Dressing

  • ½ cup plain yogurt or mayonnaise (Consider a lighter version for a healthier option.)
  • 1 tablespoon lemon juice (Adds zest.)
  • to taste Salt and pepper (Adjust according to preference.)

Preparation

  1. In a large bowl, combine the chopped celery, diced apples, walnuts, and raisins.
  2. In a separate bowl, mix together the yogurt (or mayonnaise), lemon juice, salt, and pepper.
  3. Pour the dressing over the celery mixture and toss until everything is well coated.
  4. Chill in the refrigerator for at least 30 minutes before serving.

This salad pairs well with grilled chicken or fish. It’s great for picnics and potlucks as it holds up well and tastes better when chilled. Feel free to customize with other ingredients like carrots or cranberries.

Salad, Side Dish
American
Celery Salad, Healthy Salad, Quick Salad, Refreshing Salad, Vegetable Salad

Green Chilaquiles

Plate of Green Chilaquiles topped with avocado and cilantro

Green Chilaquiles is a delicious dish that brings a burst of flavors to your breakfast or brunch table. This vibrant Mexican dish features crispy tortilla chips smothered in a rich green salsa, making it a perfect crowd-pleaser for family gatherings or weekend feasts. Topped with creamy avocado, crumbled cheese, and a sprinkle of cilantro, Green Chilaquiles is not only tasty but visually appealing too. Whether you’re serving it at a Sunday brunch or enjoying a quiet morning at home, this dish is sure to bring smiles and satisfaction. Get ready to dive into this delightful recipe and enjoy every bite!

Green Chilaquiles

How to prepare Green Chilaquiles

To make Green Chilaquiles at home, you’ll need a handful of simple ingredients and a little bit of your time. Gather these ingredients:

  • Corn tortillas
  • Green salsa (store-bought or homemade)
  • Olive oil
  • Avocado
  • Crumbled queso fresco or feta cheese
  • Fresh cilantro
  • Sour cream (optional)

Here’s how to bring it all together:

Green Chilaquiles

  1. Cut the corn tortillas into triangles and fry them in olive oil until they are golden and crispy.
  2. In a large pan, heat the green salsa over medium heat.
  3. Once the salsa is bubbling, add the fried tortilla chips to the pan and stir until they are well coated.
  4. Remove from heat and let it sit for a couple of minutes.
  5. Serve your chilaquiles warm, topped with avocado slices, crumbled cheese, cilantro, and a dollop of sour cream if desired.

{image_2}

Why You’ll Love Green Chilaquiles

There are many reasons to fall in love with Green Chilaquiles. First, it’s versatile, allowing you to customize the toppings based on your preferences. You can add eggs for extra protein, top it with your favorite hot sauce, or throw in some beans for heartiness. This dish is also perfect for using up leftover tortillas or salsa, making it a clever choice for busy mornings. Plus, with its vibrant colors and fresh flavors, it’s a feast for the eyes as well as the stomach.

Tips for success

  1. Use Fresh Ingredients: Opt for fresh corn tortillas for the best flavor and texture.
  2. Make Your Own Salsa: If you have the time, making homemade green salsa can elevate the dish with personalized flavors.
  3. Don’t Overcook the Tortillas: Fry the tortilla chips until they are just golden; they should remain crispy when coated with salsa.

{image_1}

Serving Suggestions

Green Chilaquiles can be served as a standalone dish or accompanied by sides like black beans, scrambled eggs, or a fresh fruit salad. For a complete meal, consider serving it with a refreshing drink, such as iced coffee or a zesty limeade.

FAQs

Can I make Green Chilaquiles in advance?

Yes, you can prepare the salsa and fry the tortillas in advance. Just assemble when ready to serve, but keep in mind that they are best served immediately to maintain their crunch.

Can I use store-bought salsa?

Absolutely! Store-bought green salsa works perfectly for a quick meal.

Can I make it vegan?

Yes, just skip the cheese and sour cream, or use vegan alternatives to keep it plant-based.

Now that you know how to make Green Chilaquiles, get ready to whip them up in your kitchen and amaze your family and friends with this delightful dish!

Green Chilaquiles

Green Chilaquiles is a delicious Mexican dish featuring crispy tortilla chips smothered in a rich green salsa, topped with avocado, crumbled cheese, and cilantro. Perfect for breakfast or brunch!

Main ingredients

  • 8 pieces Corn tortillas (Cut into triangles)
  • 1 cup Green salsa (Store-bought or homemade)
  • 2 tablespoons Olive oil (For frying)
  • 1 medium Avocado (Sliced for topping)
  • 1 cup Crumbled queso fresco or feta cheese (For topping)
  • 1/4 cup Fresh cilantro (Chopped for garnish)
  • 1/2 cup Sour cream (Optional for serving)

Preparation

  1. Cut the corn tortillas into triangles and fry them in olive oil until they are golden and crispy.
  2. In a large pan, heat the green salsa over medium heat.
  3. Once the salsa is bubbling, add the fried tortilla chips to the pan and stir until they are well coated.
  4. Remove from heat and let it sit for a couple of minutes.
  5. Serve your chilaquiles warm, topped with avocado slices, crumbled cheese, cilantro, and a dollop of sour cream if desired.

Use fresh ingredients for best flavor, and consider making your own salsa for personalized flavors. Fry the tortillas until just golden so they remain crispy.

Breakfast, Brunch
Mexican
Chilaquiles, Easy Brunch, Healthy Breakfast, Mexican Breakfast, Salsa

Cucumber Carrot Salad

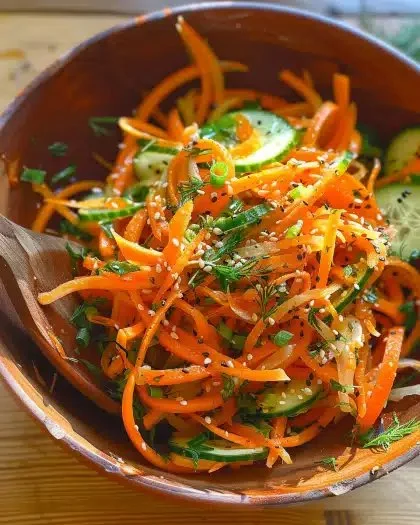
Cucumber Carrot Salad with fresh ingredients on a plate

Cucumber Carrot Salad is a refreshing and vibrant dish, perfect for warm days or as a crunchy side. Imagine the crispness of cucumbers paired with the sweetness of carrots, all dressed in a tangy dressing that brings everything together. This salad is not only delicious but also a crowd-pleaser at gatherings. It’s light yet filling, making it a wonderful addition to any meal. Let’s dive into making this tasty salad which is sure to brighten up your plate!

How to prepare Cucumber Carrot Salad

To make a delightful Cucumber Carrot Salad, you will need the following ingredients:

  • 2 medium cucumbers
  • 2 large carrots
  • 2 tablespoons olive oil
  • 1 tablespoon apple cider vinegar
  • Salt and pepper to taste
  • Optional: fresh herbs like parsley or cilantro for added flavor

Directions:

  1. Start by washing the cucumbers and carrots thoroughly. Peel the carrots if you prefer, but the skin can add a nice texture.
  2. Slice the cucumbers and julienne the carrots into thin strips.
  3. In a large bowl, combine the sliced cucumbers and julienned carrots.
  4. In a small bowl, whisk together the olive oil, apple cider vinegar, and a pinch of salt and pepper.
  5. Pour the dressing over the cucumber and carrot mixture. Toss gently to coat all the vegetables evenly.
  6. For best flavor, let the salad sit for at least 10 minutes before serving. You can also garnish it with fresh herbs if desired.

Cucumber Carrot Salad

Why You’ll Love Cucumber Carrot Salad

Cucumber Carrot Salad is incredibly versatile. Whether you’re serving it at a BBQ, enjoying it on the side of grilled chicken, or simply having it as a light lunch, this salad fits perfectly into any occasion. The fresh, crunchy texture will keep you coming back for more. Plus, it’s healthy, packed with vitamins, and takes very little time to prepare!

Tips for success

  • Use fresh vegetables for the best flavor and crunch.
  • Feel free to experiment with different dressings. A splash of lemon juice can also enhance the taste.
  • If you like a bit of sweetness, add honey or maple syrup to the dressing.

Serving Suggestions

This salad pairs wonderfully with grilled meats, seafood, or even as part of a vegetarian meal. You can also serve it alongside other salads, like an Asian Carrot Salad, for a colorful spread on your table.

Cucumber Carrot Salad

FAQs

Can I make this salad ahead of time?

Yes, you can prepare the salad a few hours in advance. Just keep it in the fridge and add the dressing before serving for the best freshness.

What other ingredients can I add?

You can add bell peppers, cherry tomatoes, or even nuts for some crunch. The options are endless!

Is this salad suitable for meal prep?

Absolutely! Just store it in an airtight container in the fridge, and it will stay fresh for a few days.

Cucumber Carrot Salad is a delightful addition to any meal and a fantastic way to enjoy fresh vegetables. With its simple ingredients and quick preparation, it’s perfect for busy days or entertaining guests. If you want to explore more delicious salads, check out this Cucumber and Carrot Salad (Asian inspired) to inspire your next culinary adventure. Happy cooking!

Cucumber Carrot Salad

A refreshing and vibrant salad combining crisp cucumbers and sweet carrots, all dressed in a tangy dressing.

Salad Ingredients

  • 2 medium cucumbers (Fresh and crisp)
  • 2 large carrots (Peel if desired)

Dressing

  • 2 tablespoons olive oil (Extra virgin for best flavor)
  • 1 tablespoon apple cider vinegar (Add more for tanginess)
  • to taste Salt (Adjust according to preference)
  • to taste Pepper (Freshly ground is best)
  • Optional: fresh herbs (parsley or cilantro) (For added flavor and garnish)

Preparation

  1. Wash the cucumbers and carrots thoroughly.
  2. Peel the carrots if you prefer, but the skin can add a nice texture.
  3. Slice the cucumbers and julienne the carrots into thin strips.

Mixing

  1. In a large bowl, combine the sliced cucumbers and julienned carrots.
  2. In a small bowl, whisk together the olive oil, apple cider vinegar, salt, and pepper.
  3. Pour the dressing over the cucumber and carrot mixture, tossing gently to coat.

Serving

  1. Let the salad sit for at least 10 minutes before serving for best flavor.
  2. Garnish with fresh herbs if desired.

Use fresh vegetables for the best flavor and crunch. You can experiment with different dressings, such as adding lemon juice or a bit of honey for sweetness.

Salad, Side Dish
American, Healthy
Carrot Salad, Cucumber Salad, Easy Salad, Healthy Salad, Refreshing Salad

Roasted Autumn Vegetable Pot Pies

Delicious roasted autumn vegetable pot pies with flaky crust and fresh ingredients

Roasted Autumn Vegetable Pot Pies are the ultimate comfort food, especially as the chilly weather rolls in. Imagine a flaky, golden crust encasing a delicious mix of roasted vegetables, herbs, and creamy sauce, creating a warm and hearty meal. This dish isn’t just a feast for your taste buds; it’s also a beautiful way to showcase autumn’s bounty, like carrots, sweet potatoes, and Brussels sprouts. Making these pot pies will surely be a hit at your dinner table, pleasing both family and friends alike. Whether it’s a cozy family gathering or a casual get-together, these pot pies are sure to bring everyone together with their deliciousness. So roll up your sleeves and get ready to bring some warmth and cheer into your kitchen with this scrumptious recipe.

How to Prepare Roasted Autumn Vegetable Pot Pies

To make Roasted Autumn Vegetable Pot Pies, start by preheating your oven to 400°F (200°C). Chop your favorite autumn vegetables, like carrots, sweet potatoes, and Brussels sprouts. Toss them with olive oil, salt, and pepper on a baking sheet. Roast them in the oven for about 25-30 minutes, until they are tender and slightly caramelized. Meanwhile, make a creamy sauce by combining vegetable broth, milk, and your choice of herbs in a saucepan. Once the vegetables are ready, mix them into the sauce. Allow it to simmer for a few minutes so everything is nicely combined. Next, prepare your pie crust in a baking dish. Pour the delicious vegetable filling into the crust and cover it with another layer of crust. Seal the edges, and cut a few slits on top for steam to escape. Bake the pot pies in the oven for about 30-35 minutes or until golden brown. Let them cool for a bit, then serve warm. Enjoy every bite!

Why You’ll Love Roasted Autumn Vegetable Pot Pies

You will absolutely love Roasted Autumn Vegetable Pot Pies for so many reasons. First, they are incredibly comforting and perfect for cool autumn evenings. Each bite of flaky crust combined with the savory filling will make you feel warm and satisfied. The mix of seasonal vegetables not only adds flavor but also brings vibrant colors to your plate, making it more appealing. These pot pies are also very versatile as you can use whatever vegetables you have on hand. Plus, they are easy to make ahead of time and taste even better the next day. Whether you are entertaining guests or simply enjoying a night in, these pot pies will always impress. Best of all, they are a great way to sneak in those healthy veggies, providing a balanced and hearty meal that everyone will adore.

Tips for Success

To ensure your Roasted Autumn Vegetable Pot Pies turn out perfectly, here are some simple tips. First, make sure to roast your vegetables until they are caramelized, as this adds extra flavor. Don’t rush the roasting process, as it really enhances the taste! When making the sauce, taste and adjust seasoning as needed; you can add garlic or your favorite herbs for extra depth. If you prefer a crispier crust, brush the top with an egg wash or milk before baking. Always remember to let the pot pies cool for a few minutes after baking, as the filling will be very hot. This prevents steam burns and makes them easier to serve. Finally, feel free to experiment with different vegetables and spices; the beauty of these pot pies lies in their versatility.

Serving Suggestions

When it comes to serving your Roasted Autumn Vegetable Pot Pies, there are many delicious ideas to enhance the meal. A simple side salad with mixed greens and a light vinaigrette pairs wonderfully with the hearty pot pies. You could also serve them with a side of creamy mashed potatoes or buttery corn for a comforting lunch or dinner. For something different, consider a warm bread, like garlic bread or fresh rolls, to soak up any leftover sauce. If you want to add a bit more flavor, serve them with a dollop of sour cream or a sprinkle of fresh herbs on top. These pot pies are filling on their own, but adding light sides helps create a well-rounded feast. Enjoy serving your pot pies in a cozy setting, surrounded by family or friends, for that perfect autumn meal experience.

FAQs

1. Can I use frozen vegetables instead of fresh?
Yes, you can use frozen vegetables for this recipe. Just ensure to thaw and drain them before adding to the filling.

2. How can I store leftovers?
Leftover pot pies can be stored in an airtight container in the fridge for up to 3 days. You can also freeze them for longer storage.

3. Can I make this recipe vegan?
Absolutely! You can substitute the milk with plant-based milk and use a vegan pie crust to make it completely vegan-friendly.

[tasty-recipe id=”5050″]

Roasted Autumn Vegetable Pot Pies

These comforting pot pies feature a flaky crust filled with a savory mix of roasted autumn vegetables and creamy sauce, perfect for chilly evenings.

For the roasted vegetables

  • 2 cups chopped carrots (Cut into bite-sized pieces)
  • 2 cups chopped sweet potatoes (Peeled and cut into cubes)
  • 2 cups chopped Brussels sprouts (Halved)
  • 2 tablespoons olive oil (For tossing the vegetables)
  • to taste salt and pepper (For seasoning)

For the creamy sauce

  • 1 cup vegetable broth (Use low-sodium for less salt)
  • 1/2 cup milk (Regular or plant-based for a vegan option)
  • to taste herbs (such as thyme or rosemary) (Fresh or dried)

For the pie crust

  • 2 crusts store-bought or homemade pie crust (One for the bottom and one for covering the filling)
  • 1 egg or milk egg wash or milk for brushing (Optional for a golden crust)

Preparation

  1. Preheat your oven to 400°F (200°C).
  2. Chop your autumn vegetables including carrots, sweet potatoes, and Brussels sprouts.
  3. Toss the chopped vegetables with olive oil, salt, and pepper on a baking sheet.
  4. Roast the vegetables in the oven for about 25-30 minutes, until they are tender and slightly caramelized.

Making the sauce

  1. In a saucepan, combine vegetable broth, milk, and herbs.
  2. Once the vegetables are ready, mix them into the sauce and let it simmer for a few minutes.

Assembly and baking

  1. Prepare your pie crust in a baking dish.
  2. Pour the vegetable filling into the crust and cover it with another layer of crust.
  3. Seal the edges and cut a few slits on top for steam to escape.
  4. Bake the pot pies in the oven for about 30-35 minutes or until golden brown.
  5. Allow the pot pies to cool for a few minutes before serving.

Tip: Brush the top with egg wash or milk for a crispier crust. These pot pies can be made ahead of time and taste even better the next day.

Dinner, Main Course
American, Comfort Food
Autumn Recipe, Comfort Food, Easy Recipe, Roasted Vegetable Pot Pie, Vegetarian

Chickpea Feta Avocado Salad

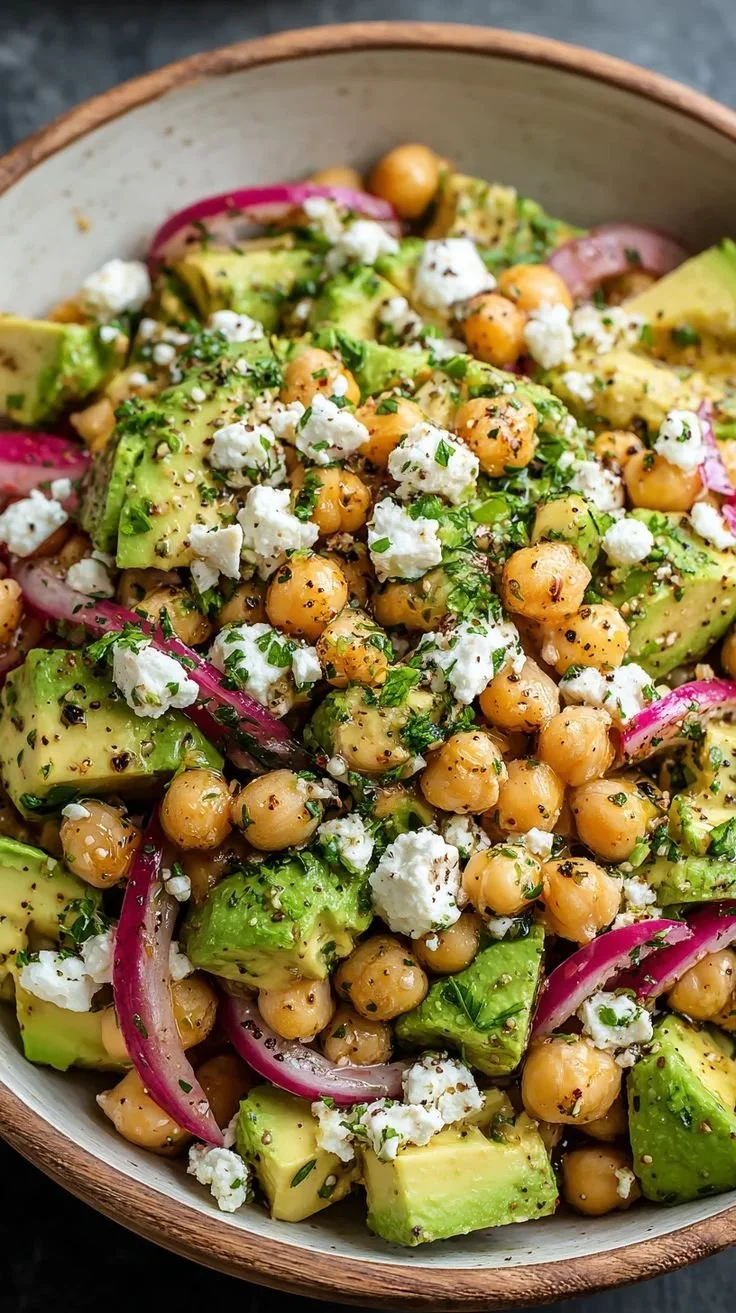
Chickpea Feta Avocado Salad with fresh ingredients in a vibrant bowl.

This Chickpea Feta Avocado Salad is bright, fresh, and very easy to make. It mixes creamy avocado, salty feta, and hearty chickpeas for a tasty and healthy dish. You get protein from the chickpeas, healthy fat from the avocado, and a fresh crunch from veggies. This salad works as a quick lunch, a light dinner, or a side for a picnic. If you want the full set of measurements and notes, see the SavoryLine recipe page. You will love how simple it is, and it will please a crowd, every time.

How to prepare Chickpea Feta Avocado Salad

  1. Rinse and drain two cans of chickpeas, then pat dry.
  2. Cut 2 ripe avocados into cubes, and squeeze a little lemon to slow browning.
  3. Halve 1 cup cherry tomatoes, dice 1 cucumber, and finely chop 1 small red onion.
  4. Crumble 1 cup feta cheese and chop a handful of fresh parsley.
  5. In a large bowl, combine chickpeas, avocado, tomatoes, cucumber, onion, and parsley.
  6. Make a simple dressing, whisking 3 tablespoons olive oil, 2 tablespoons lemon juice, 1 teaspoon Dijon mustard, salt, and pepper.
  7. Pour the dressing over the salad and toss gently to coat, try not to mash the avocado.
  8. Taste and adjust salt, pepper, or lemon juice, serve right away or chill for 20 minutes to blend flavors.

Chickpea Feta Avocado Salad

Why You’ll Love strawberry-salad

  • It is quick to make, ready in about 15 minutes.
  • The salad has a mix of textures, creamy avocado, crumbly feta, and firm chickpeas.
  • It is healthy and filling, perfect for a light lunch or side dish.
  • The flavors are bright, lemony, and a little salty from the feta, very refreshing.
  • You can change it easily, add herbs or spices for a new taste.

Tips for success

  • Use ripe but firm avocados, they hold shape better when tossed.
  • Pat the chickpeas dry to avoid a watery salad.
  • Add salt slowly, feta adds salt too.
  • Toss gently to keep avocado pieces whole.
  • If you need to make ahead, keep avocado and dressing separate and add just before serving.

Serving Suggestions

  • Serve over greens like baby spinach or arugula for a fuller salad.
  • Spoon onto toasted pita or whole grain bread for a sandwich.
  • Pair with grilled chicken or fish for a complete meal.
  • Bring to picnics or potlucks, it travels well if dressed lightly.

Chickpea Feta Avocado Salad

FAQs

Q: Can I make this salad ahead of time?

A: Yes, you can prep the chickpeas and veggies ahead. Keep the avocado and dressing separate and combine them right before serving.

Q: Is this salad gluten free?

A: Yes, the basic salad is gluten free, just check any added sides or bread.

Q: Can I swap the feta for a dairy-free option?

A: Yes, use a vegan cheese or skip the cheese and add extra herbs for flavor.

Q: How long will leftovers keep?

A: Keep leftovers in an airtight container in the fridge for 1 to 2 days, best eaten the same day to keep avocado fresh.

Q: Can I add other beans or grains?

A: Yes, try adding cooked quinoa, farro, or white beans for more bulk.

Conclusion

This Chickpea Feta Avocado Salad is simple, fresh, and full of flavor, a great go-to for many meals. For another version and extra ideas, check Two Peas & Their Pod’s Chickpea, Avocado, & Feta Salad.

Chickpea Feta Avocado Salad

This bright and fresh salad combines creamy avocado, salty feta, and hearty chickpeas for a tasty and healthy dish, perfect for lunch, dinner, or a side at a picnic.

Salad Ingredients

  • 2 cans canned chickpeas, rinsed and drained (Pat dry to avoid a watery salad.)
  • 2 pieces ripe avocados, cubed (Use ripe but firm avocados for better texture.)
  • 1 cup cherry tomatoes, halved
  • 1 piece cucumber, diced
  • 1 small red onion, finely chopped
  • 1 cup feta cheese, crumbled (Can substitute with dairy-free cheese if desired.)
  • 1 handful fresh parsley, chopped

Dressing Ingredients

  • 3 tablespoons olive oil
  • 2 tablespoons lemon juice (Freshly squeezed is best.)
  • 1 teaspoon Dijon mustard
  • Salt and pepper to taste (Add salt slowly, as feta adds salt too.)

Preparation

  1. Rinse and drain the canned chickpeas, then pat dry.
  2. Cut the ripe avocados into cubes and squeeze a little lemon juice to slow browning.
  3. Halve the cherry tomatoes, dice the cucumber, and finely chop the red onion.
  4. Crumble the feta cheese and chop a handful of fresh parsley.

Combine Ingredients

  1. In a large bowl, combine the chickpeas, avocado, tomatoes, cucumber, onion, and parsley.

Make Dressing

  1. In a separate bowl, whisk together olive oil, lemon juice, Dijon mustard, salt, and pepper.

Final Steps

  1. Pour the dressing over the salad and toss gently to coat, taking care not to mash the avocado.
  2. Taste and adjust salt, pepper, or lemon juice as needed.
  3. Serve right away or chill for 20 minutes to blend flavors.

This salad is quick to make, healthy, and filling. You can serve it over greens like baby spinach or arugula, spoon it onto toasted pita or whole grain bread, or pair it with grilled chicken or fish. It travels well for picnics or potlucks.

lunch, Salad, Side Dish
Healthy, Mediterranean
Avocado Salad, Chickpea Salad, Feta Salad, Healthy Salad, Quick Salad

Cucumber Caprese Salad

Cucumber Caprese Salad with fresh tomatoes and mozzarella on a plate

This Cucumber Caprese Salad is light, bright, and full of fresh taste. It uses crisp cucumber, soft mozzarella, and sweet tomatoes, with fresh basil and a splash of balsamic. People love it as a quick side or a simple lunch, and it works well for picnics and potlucks. If you like other cucumber dishes, you might enjoy a spicier take like the Asian spicy cucumber salad for a bold contrast. This recipe is a crowd-pleaser, easy to make, and tastes like summer in a bowl, so you will want to make it again and again.

How to prepare Cucumber Caprese Salad

Ingredients

  • 2 large cucumbers, thinly sliced
  • 1 cup cherry tomatoes, halved
  • 8 oz fresh mozzarella, small balls or sliced
  • A handful of fresh basil leaves, torn
  • 2 tbsp extra virgin olive oil
  • 1 tbsp balsamic vinegar or glaze
  • Salt and black pepper to taste

Directions

  1. Wash and slice the cucumbers and tomatoes.
  2. Place cucumber slices on a serving plate.
  3. Add mozzarella and tomato pieces on top.
  4. Sprinkle torn basil over the salad.
  5. Drizzle olive oil and balsamic vinegar evenly.
  6. Season with salt and black pepper, taste, and adjust.
  7. Serve right away for best crunch, or chill for 10 minutes.

Cucumber Caprese Salad

Why You’ll Love Cucumber Caprese Salad

You will love this salad because it feels fresh and clean. The cucumber gives a cool crunch, the mozzarella adds soft cream, and basil brings a fresh herb note. It comes together fast with simple ingredients you likely have on hand. It is healthy, low in work, and looks bright on the plate.

Tips for success

  • Use fresh mozzarella for best texture and mild taste.
  • Slice cucumbers thin so each bite has a mix of cucumber, tomato, and cheese.
  • Pat cucumber slices dry if they are very wet, so dressing does not get watery.
  • Let the salad sit 5 to 10 minutes after dressing so flavors meld, but do not wait too long or cucumbers get soggy.
  • Try a little lemon juice with olive oil if you do not have balsamic.

Serving Suggestions

  • Serve with grilled bread or crostini for a light meal.
  • Pair with grilled chicken or fish for a fuller main meal.
  • Add a few olives or a sprinkle of toasted pine nuts for extra flavor.
  • Offer as a side at summer barbecues, potlucks, or simple weeknight dinners.

Cucumber Caprese Salad

FAQs

Q, Can I make this salad ahead of time? A, You can prepare the ingredients ahead, but dress the salad just before serving to keep cucumbers crisp.

Q, What type of cucumber works best? A, English cucumbers work well because they have fewer seeds and thin skin, but any cucumber will work.

Q, Can I use a different cheese? A, Yes, burrata or a soft fresh goat cheese are good swaps, though the classic is fresh mozzarella.

Q, How long will leftovers keep? A, Keep leftovers in the fridge up to 1 day, but the cucumbers will soften over time.

Conclusion

Try this easy Cucumber Caprese Salad for a quick fresh side dish, and learn another simple version by visiting Cucumber Caprese Salad – Lemon Tree Dwelling for another take on this fresh favorite.

Cucumber Caprese Salad

A light and refreshing salad featuring crisp cucumbers, soft mozzarella, and sweet tomatoes, perfect for picnics and potlucks.

Main Ingredients

  • 2 large large cucumbers, thinly sliced (English cucumbers preferred for fewer seeds)
  • 1 cup cherry tomatoes, halved
  • 8 oz fresh mozzarella, small balls or sliced (Fresh mozzarella recommended for best texture)
  • a handful fresh basil leaves, torn (Adds freshness)

Dressing

  • 2 tbsp extra virgin olive oil
  • 1 tbsp balsamic vinegar or glaze (Alternatively, try lemon juice with olive oil)
  • Salt and black pepper to taste (Adjust seasoning as needed)

Preparation

  1. Wash and slice the cucumbers and tomatoes.
  2. Place cucumber slices on a serving plate.
  3. Add mozzarella and tomato pieces on top.
  4. Sprinkle torn basil over the salad.
  5. Drizzle olive oil and balsamic vinegar evenly.
  6. Season with salt and black pepper, taste, and adjust.
  7. Serve right away for best crunch, or chill for 10 minutes.

Pat cucumber slices dry if very wet to prevent watery dressing. Let salad sit for 5-10 minutes after dressing for flavor melding, but serve quickly to avoid sogginess.

Salad, Side Dish
Italian, Mediterranean
Caprese, Cucumber Salad, Easy Recipe, Fresh Salad, Light Meal