Grinder Grilled Cheese: 7 Irresistible Ways to Indulge

Seven delicious grilled cheese recipes for a perfect indulgent meal

Grinder Grilled Cheese is a fun twist on a classic grilled cheese sandwich. It mixes the melting cheese comfort we love with the hearty feel of a grinder, or sub style bread. This recipe shows seven simple, tasty ways to enjoy that gooey, golden bite. Each version layers cheese with different fillings like meats, veggies, or sauces, so you can pick what fits your mood. It is a crowd-pleaser because it is easy, fast, and full of flavor. Warm bread, melted cheese, and tasty fillings make it hard to resist. Get ready to make a sandwich that feels both simple and special, and have fun trying each version at home.

how to prepare Grinder Grilled Cheese

Start by gathering your bread, cheese, butter, and any fillings you like. Use a sturdy grinder roll or a long sub roll, split it lengthwise but not all the way through, so the halves stay connected. For best melt, choose cheeses that melt well, such as provolone, mozzarella, cheddar, or a mix. Thinly slice any meats like ham, turkey, or roast beef, and wash and slice vegetables like peppers, onions, or tomatoes.

Butter the outside of the roll on both sides, or brush with olive oil if you prefer. Heat a large skillet or griddle over medium heat. Place the bottom half of the roll in the pan, then layer cheese first, then your chosen fillings, and finish with a final layer of cheese on top. This helps the sandwich stick together when melted. Close the roll and press gently with a spatula or a weight, like another pan, to help the cheese melt evenly.

Cook until the bread is golden and the cheese begins to melt, about 3 to 5 minutes, then carefully flip and press the other side. If the cheese needs more time, lower the heat and cover the pan with a lid for a minute to trap the heat. For a crisp outside and fully melted inside, keep the heat moderate, not too high. Remove the sandwich, let it rest a minute, then slice into portions. Serve warm so each bite is gooey and satisfying.

Why You’ll Love Grinder Grilled Cheese

You will love Grinder Grilled Cheese because it gives you the comfort of grilled cheese with more texture and flavor. The long roll holds more fillings, so you can add meats, pickles, or roasted vegetables without losing the melted cheese focus. Each bite has a crisp outside and a soft, cheesy inside, making it satisfying and filling.

This sandwich is flexible, so you can make it quick for lunch or dressed up for a party. It works with many cheeses and toppings, so picky eaters and food lovers both find a version they enjoy. It also reheats well, and the flavors often taste even better the next day. The mix of warm cheese, toasted bread, and your favorite fillings makes it an easy go-to for comfort food that still feels a bit special.

tips for success

Choose bread that is sturdy enough to hold fillings but not so thick it blocks heat. A good grinder roll or sub roll works best. Use cheeses that melt well, like provolone, mozzarella, cheddar, or fontina. Mixing two cheeses often gives better melt and richer flavor. Slice cheese thinly for even melting.

Don’t use too-high heat, it will brown the bread before the cheese melts. Cook on medium heat and cover briefly if needed to trap steam and help cheese melt. Press gently while cooking to compact the sandwich and make a neat crust. If adding wet items like tomatoes, pat them dry first, or place them between cheese layers to avoid soggy bread.

For even toasting, butter the outside evenly or brush with olive oil. If you like a crunchy top, sprinkle a little grated Parmesan on the outside before toasting. Make extras and wrap them to keep warm in foil, they hold heat well and stay soft inside. Try different fillings in small amounts first to find the combo you love.

Serving Suggestions

Serve Grinder Grilled Cheese with simple sides that balance the richness of the sandwich. A light green salad with a bright vinaigrette cuts through the cheese and adds freshness. Pickles, sliced cucumbers, or a small bowl of coleslaw give a crisp contrast to the meltiness.

For a cozy meal, pair the sandwich with a warm tomato soup, the classic match to any grilled cheese. Offer chips or fries for a more casual plate, or roasted vegetables for a heartier side. If you made a meat-heavy grinder, serve with a small fruit salad for a sweet note.

Sauces help, too, include ketchup, spicy mayo, or a mustard dip for extra flavor. For a party, slice sandwiches into smaller pieces and serve with toothpicks so guests can try different versions. Keep drinks simple, like iced tea or soda, or a light beer for adult gatherings.

FAQs

Q: Can I make these ahead and reheat them?
A: Yes, you can assemble and wrap them in foil, store in the fridge, and reheat in a low oven or a skillet. Reheat slowly so the cheese melts evenly.

Q: What cheeses work best?
A: Provolone, mozzarella, cheddar, fontina, and Swiss all melt well. Mixing a mild cheese with a sharp cheese gives good flavor and melt.

Q: Can I make a vegetarian version?
A: Absolutely, use roasted peppers, mushrooms, spinach, tomatoes, and your favorite cheese. Add a spread like pesto for extra taste.

Q: How do I keep the bread from getting soggy?
A: Place wet items like tomatoes between cheese layers or pat them dry before adding. Butter the outside of the roll, not the inside, to help crisp the bread.

Q: Can these be made in an oven or sandwich press?
A: Yes, you can bake them at 350°F until golden, or use a sandwich press for quick and even toasting.

Conclusion

Try different fillings and find your favorite Grinder Grilled Cheese twist, then enjoy it with simple sides and good company. For bread ideas, check a local bakery menu to find sturdy rolls, like those shown on Our Menu — Grand Central Bakery. If you want another hearty sandwich idea that pairs well with grinder flavors, read a tasty take on subs like the one at Indulge in the Irresistible: Savory & Tender French Dip Subs.

[tasty-recipe id=”5337″]

Grinder Grilled Cheese

Grinder Grilled Cheese is a fun twist on a classic sandwich that combines melting cheese with hearty grinder-style bread and various fillings for a delicious, satisfying meal.

Bread

  • 4 pieces Grinder rolls or sub rolls (Choose sturdy rolls that can hold fillings.)

Cheese

  • 8 oz Provolone, mozzarella, cheddar, or a mix (Use cheeses that melt well.)

Fillings

  • 4 oz Thinly sliced meats (ham, turkey, roast beef) (Choose any preferred meats.)
  • 1 cup Sliced vegetables (peppers, onions, tomatoes) (Wash and slice vegetables.)

Additional Ingredients

  • 4 tbsp Butter or olive oil (For spreading on the outside of the bread.)

Preparation

  1. Gather bread, cheese, butter, and any fillings you like.
  2. Split the grinder roll lengthwise but not all the way through.
  3. Butter the outside of the roll on both sides or brush with olive oil.

Cooking

  1. Heat a large skillet or griddle over medium heat.
  2. Place the bottom half of the roll in the pan, layer cheese first, then fillings, and finish with more cheese on top.
  3. Close the roll and press gently to help melt the cheese evenly.
  4. Cook until the bread is golden and cheese begins to melt, about 3 to 5 minutes.
  5. Carefully flip and press the other side.
  6. If cheese needs more time, lower heat and cover the pan with a lid for a minute.
  7. Once cooked, let the sandwich rest a minute, then slice into portions and serve warm.

Consider using a mix of two cheeses for better melt and richer flavor. For extra crunch, sprinkle grated Parmesan on the outside before toasting. Keep drinks simple and consider side pairings like salad or tomato soup.
lunch, Main Course
American
Comfort Food, Easy Recipes, Grilled Cheese, Quick Meals, Sandwich

Chocolate Turtle Cake

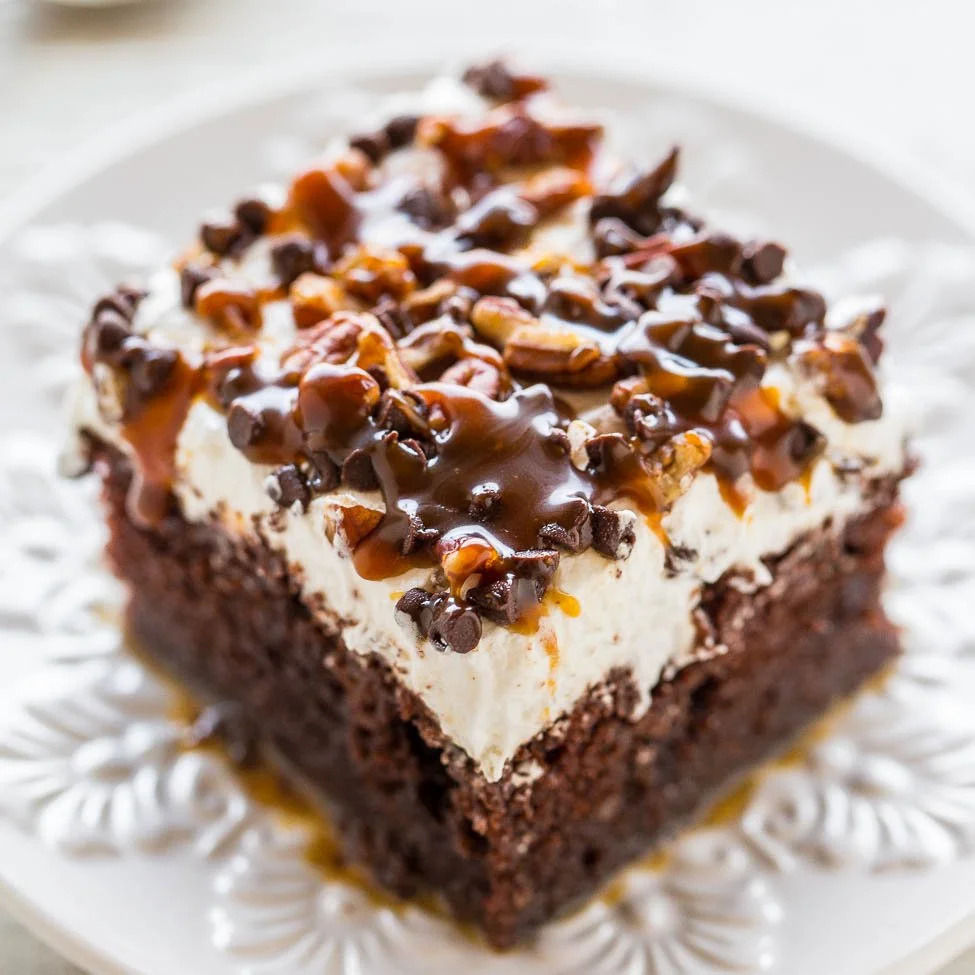
Delicious Chocolate Turtle Cake with caramel and pecans on a decorative plate.

Chocolate Turtle Cake blends rich chocolate, sticky caramel, and crunchy pecans in one simple dessert. It feels fancy, yet you make it with everyday ingredients, so it works for weeknights, parties, or family dinners. This version uses a boxed mix to save time, and the warm caramel and chocolate make the cake gooey and comforting. It is a real crowd-pleaser, the kind of cake people ask for seconds of, and it pairs well with coffee or cold milk. Get ready to enjoy a sweet, nutty treat that almost everyone will love, and have fun making it yourself.

How to prepare Chocolate Turtle Cake

Ingredients:

  • 1 box chocolate cake mix, plus ingredients called for on the box (eggs, oil, water)
  • 1 cup packed brown sugar
  • 1/2 cup butter
  • 1/2 cup heavy cream or evaporated milk
  • 1 cup chopped pecans, toasted
  • 1 cup chocolate chips or chopped dark chocolate
  • 1/2 cup caramel sauce, plus extra for topping
  • 1 teaspoon vanilla
  • Pinch of salt
  • Whipped cream or ice cream, for serving

Directions:

  1. Preheat the oven to the temperature on the cake mix box, usually 350°F, and grease a 9×13 inch pan.
  2. Mix and bake the chocolate cake batter as the box says. Pour into the pan and bake until a toothpick comes out clean, about the time on the box.
  3. While the cake bakes, make the caramel pecan topping. In a small saucepan, melt the butter and brown sugar together, stir in the cream, vanilla, and salt, and simmer 2 to 3 minutes until slightly thick. Remove from heat and stir in the toasted pecans.
  4. When the cake is hot from the oven, poke holes all over with the handle of a wooden spoon or a skewer.
  5. Pour half of the warm caramel pecan sauce over the cake, letting it sink into the holes.
  6. Melt the chocolate chips in a microwave safe bowl in 20 second bursts, stirring until smooth. Drizzle the melted chocolate over the cake, then spoon the remaining caramel sauce on top.
  7. Let the cake cool, then chill for at least 1 hour so the caramel sets a bit. Top with extra chopped pecans, whipped cream or a scoop of vanilla ice cream when serving.

Chocolate Turtle Cake

Why You’ll Love Chocolate Turtle Cake

  • Big, familiar flavors, chocolate, caramel, and pecans, all in one bite.
  • Easy to make, you can use a boxed cake mix and a quick caramel sauce.
  • Great texture, soft cake with gooey caramel and crunchy pecans.
  • Works for many occasions, from birthdays to potlucks, and it looks special without much fuss.

tips for success

  • Toast the pecans in a dry pan for a few minutes, they taste stronger and add nice crunch.
  • Poke the holes while the cake is hot so the caramel sinks in easily.
  • Warm the caramel before pouring, it spreads better into the cake.
  • If your caramel thickens too fast, add a tablespoon of cream or milk to loosen it.
  • For a deeper chocolate flavor, use dark chocolate chips or add 1/4 cup cocoa to the cake batter.

Serving Suggestions

  • Serve warm with vanilla ice cream or cool with whipped cream.
  • Drizzle extra caramel and sprinkle extra pecans on each slice.
  • Cut into small squares for parties, or large slices for dessert after dinner.
  • Pair with coffee, milk, or a simple dessert wine for an adult treat.

Chocolate Turtle Cake

FAQs

Q: Can I make the cake from scratch instead of using a box mix? A: Yes, you can use your favorite homemade chocolate cake batter. The method stays the same, just poke holes and pour the caramel over the warm cake.

Q: How far in advance can I make Chocolate Turtle Cake? A: You can make it a day ahead and chill it. Add whipped cream or ice cream just before serving for best texture.

Q: Can I use walnuts instead of pecans? A: Yes, walnuts work fine. Toast them first for better flavor.

Q: Is there a way to make this less sweet? A: Use dark chocolate for the drizzle and cut back a little on the caramel, or use a less sweet frosting in place of some caramel.

Q: How do I store leftovers? A: Cover the cake and keep it in the fridge for up to 3 days. Warm slices in the microwave a few seconds to soften the caramel.

Conclusion

For a fun variation that uses a poke cake method, see Turtle Chocolate Poke Cake – Averie Cooks, it gives ideas you can use to change up this recipe.

Chocolate Turtle Cake

Chocolate Turtle Cake blends rich chocolate, sticky caramel, and crunchy pecans for a delightful dessert that’s perfect for any occasion.

Cake Ingredients

  • 1 box chocolate cake mix, plus ingredients called for on the box (eggs, oil, water) (Follow the instructions on the cake mix box for additional ingredients.)
  • 1 cup packed brown sugar
  • 1/2 cup butter (For the caramel topping.)
  • 1/2 cup heavy cream or evaporated milk
  • 1 cup chopped pecans, toasted (Toast in a dry pan for better flavor.)
  • 1 cup chocolate chips or chopped dark chocolate (Use dark chocolate for a deeper flavor.)
  • 1/2 cup caramel sauce, plus extra for topping (Warm before pouring.)
  • 1 teaspoon vanilla
  • 1 pinch salt
  • to taste Whipped cream or ice cream, for serving

Preparation

  1. Preheat the oven to the temperature on the cake mix box, usually 350°F, and grease a 9×13 inch pan.
  2. Mix and bake the chocolate cake batter as instructed on the box. Pour into the pan and bake until a toothpick comes out clean.
  3. While the cake bakes, make the caramel pecan topping by melting the butter and brown sugar together in a small saucepan. Stir in the cream, vanilla, and salt, then simmer for 2 to 3 minutes until slightly thick. Remove from heat and stir in the toasted pecans.
  4. When the cake is out of the oven, poke holes all over with the handle of a wooden spoon or a skewer.
  5. Pour half of the warm caramel pecan sauce over the cake, allowing it to sink into the holes.
  6. Melt the chocolate chips in a microwave-safe bowl in 20-second bursts, stirring until smooth. Drizzle the melted chocolate over the cake and spoon the remaining caramel sauce on top.
  7. Let the cake cool, then chill for at least 1 hour to set the caramel.

For serving, top with extra chopped pecans and whipped cream or a scoop of vanilla ice cream. Works well for many occasions.

Cake, Dessert
American
Caramel, Chocolate, easy dessert, Pecans, Turtle Cake

Irresistible Cheeseburger Sliders

Delicious cheeseburger sliders on a platter with toppings and condiments

These Irresistible Cheeseburger Sliders are warm, cheesy, and made for sharing. They are small burgers with big flavor, soft buns, melty cheese, and a little sauce that makes each bite sticky and fun. People love them at parties, for game day, or for a simple family dinner. If you like easy mini burgers, try this and also see a related baked beef and cheese sliders recipe for more ideas. Get ready to smile, these sliders are a real crowd-pleaser and easy to make at home.

how to prepare Irresistible Cheeseburger Sliders

Ingredients

  • 1 pound ground beef, 1 small onion, finely chopped
  • 1 teaspoon salt, 1/2 teaspoon black pepper
  • 1/2 cup breadcrumbs, 1 egg, beaten
  • 8 small slider buns, split
  • 8 slices cheddar cheese, cut to fit
  • Butter, melted, and a little mustard or ketchup
  • Optional, pickles or sliced tomato

Directions

  1. Preheat the oven to 375°F, lightly grease a baking dish.
  2. In a bowl, mix the ground beef, onion, breadcrumbs, egg, salt, and pepper. Use a fork or your hands, mix just until combined.
  3. Shape the mix into 8 even small patties, about the size of the buns.
  4. Heat a skillet on medium, cook the patties 2 to 3 minutes per side until browned, they will finish in the oven.
  5. Place the bottom buns in the baking dish, add a cooked patty to each, top each with a slice of cheese.
  6. Add a little sauce or mustard, then the top buns. Brush the tops with melted butter.
  7. Cover with foil, bake 8 to 10 minutes until the cheese melts and buns warm. Remove foil and bake 2 more minutes for a light brown top.
  8. Serve hot, add pickles or tomato if you like.

Irresistible Cheeseburger Sliders

Why You’ll Love Irresistible Cheeseburger Sliders

  • They are small, so people can try more than one, they are perfect for parties and snacks.
  • The cheese melts over the patty, they taste rich and comforting.
  • You can make them fast, they use simple ingredients and cook in one pan and the oven.
  • They work for kids and adults, and you can change toppings to suit each person.

tips for success

  • Do not overmix the beef, mix just enough to bind the meat.
  • Make patties slightly larger than the buns, they shrink as they cook.
  • Brown the patties first, this adds flavor.
  • Add cheese at the end so it melts but does not overcook.
  • Brush the buns with butter for a golden top.
  • Keep a small bowl of sauce for dipping, it makes them more fun.

Serving Suggestions

  • Serve with fries, potato chips, or a green salad for a full meal.
  • Make a tray of various toppings, let people build their own sliders.
  • Offer pickles, sliced onions, or coleslaw on the side.
  • Great for game day, potlucks, picnics, or a quick weeknight dinner.

Irresistible Cheeseburger Sliders

FAQs

Q, Can I make these ahead of time?

A, Yes, cook the patties and assemble the sliders, cover and chill. Bake when you are ready, add 5 to 10 minutes extra if cold.

Q, How do I reheat leftovers?

A, Reheat in a 350°F oven for 8 to 10 minutes, or microwave for a short time, but the oven keeps the bun better.

Q, Can I use ground turkey or a plant based meat?

A, Yes, you can swap the beef for turkey or a plant based meat, watch cook time as they may dry faster.

Q, How do I stop the buns from getting soggy?

A, Spread a thin layer of butter or a little mayo on the inside of the top and bottom buns, this makes a barrier and keeps them firmer.

Conclusion

If you want a fun twist with bacon and ranch for your sliders, check this popular take on the idea, Viral Bacon Ranch Cheeseburger Sliders aka Crack Burgers, for a tasty extra option.

Cheeseburger Sliders

These Irresistible Cheeseburger Sliders are warm, cheesy, and perfect for sharing, making them a crowd-pleaser at parties or family dinners.

Main Ingredients

  • 1 pound ground beef
  • 1 small onion, finely chopped
  • 1 teaspoon salt
  • 1/2 teaspoon black pepper
  • 1/2 cup breadcrumbs
  • 1 large egg, beaten
  • 8 small slider buns, split
  • 8 slices cheddar cheese, cut to fit
  • To taste butter, melted
  • To taste mustard or ketchup (Optional)
  • To taste pickles or sliced tomato (Optional)

Preparation

  1. Preheat the oven to 375°F and lightly grease a baking dish.
  2. In a bowl, mix the ground beef, onion, breadcrumbs, egg, salt, and pepper. Use a fork or your hands to mix just until combined.
  3. Shape the mix into 8 even small patties, about the size of the buns.

Cooking

  1. Heat a skillet on medium and cook the patties for 2 to 3 minutes per side until browned; they will finish cooking in the oven.
  2. Place the bottom buns in the baking dish and add a cooked patty to each. Top each patty with a slice of cheese.
  3. Add a little sauce or mustard, then place the top buns on. Brush the tops with melted butter.
  4. Cover with foil and bake for 8 to 10 minutes until the cheese melts and buns are warm. Remove foil and bake for 2 more minutes for a light brown top.

Serving

  1. Serve hot, and add pickles or tomato if desired.

Do not overmix the beef; mix just enough to bind the meat. Make patties slightly larger than the buns as they shrink during cooking. Brown the patties first for added flavor and brush the buns with butter for a golden top. Keep a small bowl of sauce for dipping to make them more fun.

Appetizer, Main Course, Snack
American
Cheeseburger Sliders, Game Day Snacks, Mini Burgers, Party Food, Sliders

Creamy Rotisserie Chicken Mushroom Soup

Creamy rotisserie chicken mushroom soup served in a bowl with herbs

Making Creamy Rotisserie Chicken Mushroom Soup is simple and rewarding. To start, gather your ingredients: rotisserie chicken, mushrooms, onions, garlic, chicken broth, heavy cream, and some seasonings. First, shred the rotisserie chicken and set it aside. In a large pot, sauté the onions and garlic until soft. Add in the mushrooms and cook until they are tender. Next, pour in the chicken broth and bring it to a light boil. Stir in the shredded chicken, and let everything simmer for a bit to blend the flavors. Finally, add the heavy cream and season with salt and pepper to taste. This hearty soup is ready to be enjoyed!

Creamy Rotisserie Chicken Mushroom Soup

Why You’ll Love Creamy Rotisserie Chicken Mushroom Soup

Creamy Rotisserie Chicken Mushroom Soup is not just filling, it’s also incredibly flavorful. The tender chicken paired with the earthy mushrooms creates a delightful mix that warms your soul. This soup is perfect for family dinners or even when you want to impress guests. Plus, it’s made with ingredients you probably already have at home! The comforting creamy texture will remind you of cozy nights spent with loved ones, making it a true crowd-pleaser. Once you try it, you’ll want to make it again and again.

tips for success

To ensure your soup is a hit, here are a few tips:

  • Use fresh mushrooms for the best flavor.
  • Don’t rush the sautéing process; allowing the onions and garlic to caramelize will add depth to your soup.
  • Adjust the thickness by adding more or less heavy cream, depending on your preference.
  • For added flavor, sprinkle some fresh herbs like thyme or parsley before serving.

Serving Suggestions

Creamy Rotisserie Chicken Mushroom Soup pairs wonderfully with crusty bread or a simple side salad. You can also serve it with grilled cheese sandwiches for that classic combination. For a fun twist, consider topping your soup with crispy fried onions or fresh herbs. This versatile dish is great for any occasion!

FAQs

Can I use leftover chicken instead of rotisserie chicken?

Absolutely! Leftover chicken works great in this recipe, just make sure it’s cooked and shredded.

How long does this soup last in the fridge?

This soup can be stored in the refrigerator for up to three days in an airtight container. Just reheat it on the stove when you’re ready to enjoy it again.

Can I freeze Creamy Rotisserie Chicken Mushroom Soup?

Yes, you can freeze it! Just make sure to leave out the heavy cream until you’re ready to serve, as it can change texture when frozen. It will last up to three months in the freezer.

Now that you’re all set, it’s time to gather your ingredients and start cooking up a warm pot of delicious goodness! Happy cooking!

Creamy Rotisserie Chicken Mushroom Soup

This hearty and flavorful soup combines rotisserie chicken and earthy mushrooms in a creamy broth, perfect for family dinners or impressing guests.

Main Ingredients

  • 2 cups shredded rotisserie chicken (Use leftovers if available.)
  • 8 oz fresh mushrooms (Sliced or chopped.)
  • 1 onion (Diced.)
  • 3 cloves garlic (Minced.)
  • 4 cups chicken broth (Low sodium preferred.)
  • 1 cup heavy cream (Adjust for thickness preference.)
  • to taste salt and pepper (For seasoning.)

Preparation

  1. Shred the rotisserie chicken and set it aside.

Cooking

  1. In a large pot, sauté the onions and garlic until soft.
  2. Add in the mushrooms and cook until they are tender.
  3. Pour in the chicken broth and bring it to a light boil.
  4. Stir in the shredded chicken and let everything simmer to blend the flavors.
  5. Add the heavy cream and season with salt and pepper to taste.

To enhance flavor, use fresh herbs like thyme or parsley before serving. Soup pairs wonderfully with crusty bread, simple salads, or grilled cheese sandwiches.

Dinner, Soup
American
Comfort Food, Creamy Soup, Hearty Soup, Mushroom Soup, Rotisserie Chicken

High Protein Honey Garlic Shrimp | Velvety & Sticky Sauce

Delicious honey garlic shrimp with a sticky sauce served on a plate

These 10-minute honey garlic shrimp are irresistibly delicious and incredibly quick to make. Tender, juicy shrimp are lightly coated in a silky soy-based marinade, then sautéed with fragrant garlic and ginger until perfectly cooked. Everything is finished with a glossy, sticky honey sauce that clings to every bite. Serve them as a flavorful starter for an Asian-inspired meal or enjoy them as a speedy main dish over a bowl of warm rice.

This recipe also introduces a classic Asian cooking method known as “velveting” (explained in detail later). Once you get comfortable with that simple technique, you’ll be ready to try other shrimp favorites, like Bang Bang Shrimp. My version comes with a creamy, slightly Western-style mayo dipping sauce, maybe not traditional, but undeniably tasty.

How to Prepare High Protein Honey Garlic Shrimp

Making High Protein Honey Garlic Shrimp is easy and fun. First, gather all your ingredients for a delicious meal that everyone will love. Here’s how to prepare it:

  1. Ingredients:
  • 1 pound shrimp, peeled and deveined
  • 1/4 cup honey
  • 1/4 cup soy sauce
  • 2 cloves garlic, minced
  • 1 tablespoon cornstarch
  • 1 tablespoon olive oil
  • 1/4 teaspoon red pepper flakes (optional)
  • Salt and pepper to taste
  • Chopped green onions for garnish
  1. Directions:
  • In a bowl, mix honey, soy sauce, garlic, and cornstarch. Set aside.
  • Heat olive oil in a pan over medium heat.
  • Add shrimp, seasoning with salt and pepper. Cook until pink, about 2-3 minutes per side.
  • Pour the honey mixture over the shrimp, and add red pepper flakes if you like some heat. Stir well and cook until the sauce thickens.
  • Garnish with chopped green onions before serving.

High Protein Honey Garlic Shrimp | Velvety & Sticky Sauce

Why You’ll Love High Protein Honey Garlic Shrimp

You will absolutely love High Protein Honey Garlic Shrimp because it packs a flavorful punch that’s hard to resist. The shrimp are juicy and tender, swimming in a velvety and sticky sauce that’s both sweet and savory. With its high protein content, this dish is great for a healthy meal that still feels indulgent. Plus, it’s quick to make, so it’s perfect for busy weeknights or surprise guests.

Tips for Success

To make sure your shrimp turn out just right, here are some helpful tips:

  • Use fresh shrimp: Fresh shrimp taste better than frozen ones, but if you use frozen, make sure to thaw them properly.
  • Don’t overcook: Shrimp cook quickly. Keep an eye on them so they don’t turn tough and rubbery.
  • Customize the sauce: Feel free to adjust the honey and soy sauce levels to fit your taste. Want it sweeter? Add more honey, or if you like it salty, increase the soy sauce.

Serving Suggestions

Serve your High Protein Honey Garlic Shrimp over a bed of fluffy rice or with steamed veggies. It also makes a fantastic filling for lettuce wraps or a delicious topping for quinoa bowls. Pair it with a cool drink, and you have a complete meal that’s sure to impress!

FAQs

1. Can I use frozen shrimp for this recipe?

Yes, you can use frozen shrimp. Just be sure to thaw them completely and drain off any excess water before cooking.

2. How can I store leftovers?

Store any leftovers in an airtight container in the fridge for up to 2 days. Reheat in a pan over medium heat before serving.

3. Can I make this dish spicy?

Absolutely! If you like a kick, add more red pepper flakes or even a splash of hot sauce to the sauce for extra flavor.

Enjoy making this delightful dish, and watch how quickly it disappears at the dinner table!

High Protein Honey Garlic Shrimp

These 10-minute honey garlic shrimp are tender and juicy, coated in a silky soy-based marinade and finished with a glossy, sticky honey sauce. Ideal as a starter or a quick main dish.

Shrimp Ingredients

  • 1 pound shrimp, peeled and deveined (Fresh shrimp is preferable, but frozen can be used if properly thawed.)
  • 1/4 cup honey (Adjust sweetness as desired.)
  • 1/4 cup soy sauce (Increase for saltiness if preferred.)
  • 2 cloves garlic, minced
  • 1 tablespoon cornstarch
  • 1 tablespoon olive oil (For cooking the shrimp.)
  • 1/4 teaspoon red pepper flakes (Optional, for added heat.)
  • to taste salt and pepper
  • to garnish Chopped green onions

Preparation

  1. In a bowl, mix honey, soy sauce, garlic, and cornstarch. Set aside.
  2. Heat olive oil in a pan over medium heat.

Cooking

  1. Add shrimp, seasoning with salt and pepper. Cook until pink, about 2-3 minutes per side.
  2. Pour the honey mixture over the shrimp, and add red pepper flakes if desired. Stir well and cook until the sauce thickens.
  3. Garnish with chopped green onions before serving.

Use fresh shrimp for better flavor, and don’t overcook to avoid toughness. Customize sauce ingredients to your taste.

Appetizer, Main Course
Asian
High Protein Meal, Honey Garlic Shrimp, Quick Shrimp Recipe

Ultimate Ninja Creami Protein Ice Cream

Ultimate Ninja Creami Protein Ice Cream dessert bowl with toppings

Have you ever made homemade protein ice cream that ended up chalky, icy, or just disappointing? You’re definitely not the only one. Perfecting Ninja Creami protein recipes in my kitchen took plenty of experimenting, but after many attempts, I finally found the method that works.

This recipe delivers a smooth, rich, and ultra-creamy texture every time. Instead of another dull “healthy” dessert, you get a truly indulgent Salted Mocha Fudge treat that feels decadent while still packing plenty of protein. It might just change the way you think about high-protein desserts

How to Prepare Ultimate Ninja Creami Protein Ice Cream

Making your own Ultimate Ninja Creami Protein Ice Cream is easier than you think! Here’s how to whip up this delicious treat that everyone will love:

Ingredients

  • 2 cups of your favorite Greek yogurt
  • 1 scoop of protein powder (vanilla or chocolate)
  • 1 cup of milk (any type)
  • 1/2 cup of natural sweetener (like honey or agave)
  • 1/2 cup of chocolate chips or fruit chunks (as desired)

Directions

  1. In a mixing bowl, combine Greek yogurt, protein powder, milk, and sweetener. Stir until smooth.
  2. Fold in chocolate chips or fruit chunks for extra flavor.
  3. Pour the mixture into the Ninja Creami ice cream maker.
  4. Follow the manufacturer’s instructions to churn until creamy.
  5. Serve immediately for a soft-serve texture or transfer to a container to freeze for a firmer consistency.

Ultimate Ninja Creami Protein Ice Cream

Why You’ll Love Ultimate Ninja Creami Protein Ice Cream

This ice cream isn’t just a tasty treat, it’s packed with protein to fuel your day! It’s creamy, rich, and satisfies your sweet tooth without guilt. Plus, you can customize it with different flavors and mix-ins, making it a fun treat for the whole family. Everyone will definitely want a scoop (or two) of this deliciously healthy ice cream!

Tips for Success

  1. Chill Your Ingredients: Make sure your ingredients are cold before mixing. This helps the ice cream come out creamier.
  2. Customize It: Feel free to play with flavors by adding ingredients like cocoa powder, vanilla extract, or even peanut butter for a personal touch.
  3. Don’t Overmix: When combining your ingredients, mix just enough to blend everything. Too much mixing can create a grainy texture.

Serving Suggestions

Serve your Ultimate Ninja Creami Protein Ice Cream in bowls or cones. Add toppings like fresh fruits, nuts, or drizzles of chocolate syrup. For an extra special treat, create sundae-style bowls and layer with more yogurt or a dollop of whipped cream!

FAQs

Can I use a different type of yogurt?

Yes, you can! Feel free to use regular yogurt or a dairy-free alternative if you prefer.

How long does it take to make?

Making this ice cream takes about 15-20 minutes, plus freezing time if you want it firmer.

How should I store leftovers?

Store any leftovers in an airtight container in the freezer. It’s best enjoyed within a week for the best texture and flavor!

Now that you know how to make Ultimate Ninja Creami Protein Ice Cream, it’s time to gather your ingredients and get churning! Can’t wait to see what flavors you create!

Ultimate Ninja Creami Protein Ice Cream

A smooth, rich, and ultra-creamy protein ice cream that feels decadent yet healthy, perfect for satisfying your sweet tooth.

For the Ice Cream Base

  • 2 cups Greek yogurt (Your favorite variety)
  • 1 scoop protein powder (Vanilla or chocolate)
  • 1 cup milk (Any type)
  • 1/2 cup natural sweetener (Like honey or agave)
  • 1/2 cup chocolate chips or fruit chunks (Optional for additional flavor)

Preparation

  1. In a mixing bowl, combine Greek yogurt, protein powder, milk, and sweetener. Stir until smooth.
  2. Fold in chocolate chips or fruit chunks for extra flavor.
  3. Pour the mixture into the Ninja Creami ice cream maker.
  4. Follow the manufacturer’s instructions to churn until creamy.
  5. Serve immediately for a soft-serve texture or transfer to a container to freeze for a firmer consistency.

Chill your ingredients to ensure a creamier texture. Customize flavors with ingredients like cocoa powder or peanut butter. Do not overmix to prevent a grainy texture.

Dessert, Snack
American
Frozen Dessert, Healthy Dessert, High-Protein Treat, Ninja Creami, Protein Ice Cream

High Protein Slow Cooker Garlic Butter Beef Bites

High protein slow cooker garlic butter beef bites ready to serve

Making High Protein Slow Cooker Garlic Butter Beef Bites is simple and can be done with just a few easy steps. Here’s how to get started:

  1. Gather your ingredients: beef bites, garlic, butter, seasonings, soy sauce, and any additional herbs or spices you prefer.
  2. In a slow cooker, add the beef bites alongside minced garlic and butter.
  3. Pour in soy sauce and sprinkle your chosen seasonings over the top.
  4. Mix everything gently to combine.
  5. Set your slow cooker to low heat and let it cook for about 6-8 hours. If you’re short on time, you can set it to high heat for about 3-4 hours.
  6. Once cooked, the beef should be tender and juicy. Feel free to add fresh herbs for an extra touch before serving.

High Protein Slow Cooker Garlic Butter Beef Bites

Why You’ll Love High Protein Slow Cooker Garlic Butter Beef Bites

This dish is a delightful crowd-pleaser, perfect for sharing at family dinners or gatherings. Each bite is packed with flavor thanks to the rich garlic butter sauce, making it not just a meal but an experience. The high protein content of the beef ensures you stay full and satisfied, while the slow cooking method guarantees tender, mouth-watering bites. Every forkful feels special, making dinner times feel like an event. You’ll love how easy it is to make, too!

tips for success

  • Choose the right beef: Look for bite-sized pieces of beef, such as chuck or sirloin, for optimal tenderness and flavor.
  • Don’t rush the cooking: It’s best to let the beef cook slowly to absorb all the flavors. If in a hurry, adjust accordingly but keep an eye on the texture.
  • Adjust seasoning to taste: Feel free to customize the recipe by adding your preferred spices or adjusting the garlic amount for your own flavor preference.

Serving Suggestions

High Protein Slow Cooker Garlic Butter Beef Bites go wonderfully with a variety of sides. Consider serving them over rice or mashed potatoes to soak up that delicious garlic butter. A fresh green salad or steamed vegetables can add a nice crunch to the meal. If you’re feeling adventurous, serve them in tacos or as a filling for wraps – the options are endless!

FAQs

1. Can I use chicken instead of beef?

Yes, you can! Just keep in mind that cooking times may vary, so check until the chicken is tender.

2. How long can I store leftovers?

Leftovers can be stored in the fridge for up to three days. Make sure to keep them in an airtight container.

3. Can I freeze the beef bites?

Absolutely! You can freeze them for up to three months. Just reheat in the microwave or on the stovetop when you’re ready to enjoy them again.

Now that you know how to make High Protein Slow Cooker Garlic Butter Beef Bites, it’s time to get cooking. Happy meal prepping!

High Protein Slow Cooker Garlic Butter Beef Bites

A delightful dish of tender beef bites cooked slowly in a rich garlic butter sauce, perfect for gatherings.

Main ingredients

  • 1 lb beef bites (chuck or sirloin) (Choose bite-sized pieces for optimal tenderness.)
  • 4 cloves garlic, minced
  • 1/4 cup butter (For a richer flavor.)
  • 1/4 cup soy sauce (Adjust to taste.)

Seasonings

  • to taste seasonings of choice (Adjust according to your flavor preference.)
  • optional fresh herbs or spices (Feel free to add for extra flavor.)

Preparation

  1. Gather your ingredients: beef bites, garlic, butter, seasonings, soy sauce, and any additional herbs or spices you prefer.
  2. In a slow cooker, add the beef bites alongside minced garlic and butter.
  3. Pour in soy sauce and sprinkle your chosen seasonings over the top.
  4. Mix everything gently to combine.

Cooking

  1. Set your slow cooker to low heat and let it cook for about 6-8 hours, or high heat for about 3-4 hours.
  2. Once cooked, ensure the beef is tender and juicy before serving.
  3. Feel free to add fresh herbs for an extra touch before serving.

To enjoy your High Protein Slow Cooker Garlic Butter Beef Bites, consider serving them over rice or mashed potatoes. A fresh salad or steamed vegetables can add a nice crunch. They also work well in tacos or wraps. Store leftovers in an airtight container for up to three days or freeze for up to three months.

Dinner, Main Course
American
Easy Dinner, Family Meal, Garlic Butter Beef, High Protein Recipe, Slow Cooker Beef

Cottage Cheese Blueberry Muffins

Delicious Cottage Cheese Blueberry Muffins on a wooden table

Cottage Cheese Blueberry Muffins are a delightful treat that combines the creamy texture of cottage cheese with the sweetness of juicy blueberries. These muffins are not only delicious but also packed with protein, making them a great start to your day or a tasty snack. They are perfect for sharing with friends and family, as they are easy to make and sure to please everyone. If you’re looking for a recipe that’s simple, fun, and oh-so-yummy, you’ve just found it! Let’s dive into making these mouthwatering muffins together.

how to prepare Cottage Cheese Blueberry Muffins

Ingredients

  • 1 cup cottage cheese
  • 1/2 cup sugar
  • 2 large eggs
  • 1/4 cup vegetable oil
  • 1 teaspoon vanilla extract
  • 1 cup all-purpose flour
  • 1 teaspoon baking powder
  • 1/2 teaspoon baking soda
  • 1/2 teaspoon salt
  • 1 cup fresh or frozen blueberries

Directions

  1. Preheat your oven to 375°F (190°C).
  2. In a mixing bowl, combine cottage cheese, sugar, eggs, vegetable oil, and vanilla extract. Stir until well mixed.
  3. In a separate bowl, whisk together flour, baking powder, baking soda, and salt.
  4. Gradually add the dry ingredients to the wet mixture, stirring gently until just combined. Be careful not to overmix.
  5. Gently fold in the blueberries.
  6. Line a muffin tin with paper liners or grease it lightly. Fill each muffin cup about two-thirds full with the batter.
  7. Bake for 20-25 minutes or until a toothpick comes out clean.
  8. Allow the muffins to cool for a few minutes before transferring them to a wire rack.

Cottage Cheese Blueberry Muffins

Why You’ll Love Cottage Cheese Blueberry Muffins

These muffins are a game-changer, trust us! The cottage cheese adds a unique creaminess and keeps them moist, while the blueberries burst with flavor. They’re not overly sweet, making them a fantastic breakfast or snack option. Plus, they’re healthier than your average muffin, thanks to the added protein. You’ll fall in love with them after the first bite!

tips for success

  • Don’t overmix: When combining the wet and dry ingredients, mix just until blended. Overmixing can lead to dense muffins.
  • Use fresh blueberries: If you can, use fresh blueberries for the best flavor and texture. If you use frozen, do not thaw them before mixing.
  • Let them cool: Allow your muffins to cool slightly in the pan before transferring them to a wire rack. This helps them maintain their shape.

Serving Suggestions

These Cottage Cheese Blueberry Muffins are delightful on their own, but you can also serve them with a spread of cream cheese or butter for extra richness. Pair them with a hot cup of coffee or a refreshing glass of iced tea for a perfect snack. They also make a lovely addition to breakfast brunches or family gatherings.

FAQs

Can I use other fruits instead of blueberries?

Absolutely! You can try raspberries, cranberries, or chopped strawberries for a fun twist.

How should I store the muffins?

Keep them in an airtight container at room temperature for up to three days. For longer storage, you can freeze them for up to three months.

Can I make them gluten-free?

Yes! You can replace all-purpose flour with your favorite gluten-free flour blend. Just ensure the blend has a binding agent for best results.

Now that you have everything you need to whip up these Cottage Cheese Blueberry Muffins, it’s time to grab your apron and get started! Happy baking!

Cottage Cheese Blueberry Muffins

Delightful muffins combining creamy cottage cheese and sweet blueberries; packed with protein and perfect for breakfast or a snack.

Wet Ingredients

  • 1 cup cottage cheese
  • 1/2 cup sugar
  • 2 large eggs
  • 1/4 cup vegetable oil
  • 1 teaspoon vanilla extract

Dry Ingredients

  • 1 cup all-purpose flour
  • 1 teaspoon baking powder
  • 1/2 teaspoon baking soda
  • 1/2 teaspoon salt

Fruits

  • 1 cup fresh or frozen blueberries (Use fresh for best flavor; do not thaw if frozen.)

Preparation

  1. Preheat your oven to 375°F (190°C).
  2. In a mixing bowl, combine cottage cheese, sugar, eggs, vegetable oil, and vanilla extract. Stir until well mixed.
  3. In a separate bowl, whisk together flour, baking powder, baking soda, and salt.
  4. Gradually add the dry ingredients to the wet mixture, stirring gently until just combined. Be careful not to overmix.
  5. Gently fold in the blueberries.
  6. Line a muffin tin with paper liners or grease it lightly. Fill each muffin cup about two-thirds full with the batter.

Baking

  1. Bake for 20-25 minutes or until a toothpick comes out clean.
  2. Allow the muffins to cool for a few minutes before transferring them to a wire rack.

Store muffins in an airtight container at room temperature for up to three days. For longer storage, freeze them for up to three months. You can experiment with other fruits like raspberries, cranberries, or chopped strawberries.

Breakfast, Snack
American
Baking, Blueberries, Cottage Cheese Blueberry Muffins, Healthy Snacks, Muffins

Greek Yogurt Chicken Salad with Dill & Lemon Zest (Healthy & Easy)

Delicious Greek yogurt chicken salad with dill and lemon zest in a bowl.

Few things compare to a fresh, satisfying meal that nourishes your body while still delivering amazing flavor. In my kitchen, this vibrant Greek yogurt chicken salad has become both a weeknight favorite and a reliable meal-prep option. It’s a lighter, healthier alternative to classic mayonnaise-based chicken salads, making it perfect when you want something wholesome yet filling. Best of all, it’s simple to make, loaded with protein, and finished with a fresh, herby touch that makes every bite feel bright and memorable

How make Greek yogurt chicken salad

Ingredients:

  • 2 cups cooked chicken, shredded
  • 1 cup Greek yogurt
  • 1/4 cup mayonnaise (optional for creaminess)
  • 1/4 cup diced celery
  • 1/4 cup chopped onion
  • 1/4 cup fresh dill, chopped (or 1 tablespoon dried dill)
  • Zest of 1 lemon
  • Juice of 1/2 lemon
  • Salt and pepper to taste

Directions:

  1. In a large bowl, combine the shredded chicken, Greek yogurt, and mayonnaise (if using).
  2. Add the diced celery, chopped onion, dill, lemon zest, and lemon juice.
  3. Mix everything together until well combined.
  4. Season with salt and pepper to taste.
  5. Chill in the fridge for at least 30 minutes before serving for the best flavor.

Greek Yogurt Chicken Salad with Dill & Lemon Zest (Healthy & Easy)

Why You’ll Love Greek Yogurt Chicken Salad with Dill & Lemon Zest

This Greek Yogurt Chicken Salad is not just another boring salad! It’s packed with flavors that come together beautifully. The Greek yogurt gives a creamy texture without all the extra calories, and the lemon zest adds a bright, zesty twist that you will love. Plus, the fresh dill infuses the salad with a delightful herbaceous flavor, making every bite a treat. It’s a perfect dish for lunch, a picnic, or any gathering, and it’s sure to impress your friends and family!

tips for success

  1. Cook Your Chicken Right: You can use leftover cooked chicken, rotisserie chicken, or poach your chicken breast for this recipe. Just make sure it’s fully cooked and shredded well.
  2. Balance the Flavors: Taste your salad before serving and adjust the salt, pepper, or lemon juice if needed. Everyone’s palate is different, so make it your own!
  3. Chill: Letting the salad chill in the fridge enhances the flavors. Try to prepare it a few hours in advance for the best result.

Serving Suggestions

This Greek Yogurt Chicken Salad pairs wonderfully with whole-grain bread, lettuce wraps, or even on top of a fresh garden salad. You can also serve it as a dip with crackers or fresh veggie sticks for a healthy snack. It’s versatile enough to fit any occasion!

FAQs

Q: Can I make this salad ahead of time?

A: Yes, you can make this chicken salad a day in advance. Just keep it stored in the fridge, and it will taste even better the next day!

Q: What can I substitute if I don’t have dill?

A: If you don’t have dill, you can substitute with parsley, basil, or chives for a different yet delicious flavor.

Q: Is this salad gluten-free?

A: Yes, this Greek Yogurt Chicken Salad is naturally gluten-free as long as you serve it with gluten-free bread or veggies.

Get ready to enjoy a light, refreshing meal that’s full of flavor! You’ll love how easy and satisfying this Greek Yogurt Chicken Salad with Dill & Lemon Zest is. Give it a try, and let me know how you like it!

Greek Yogurt Chicken Salad

A lighter, healthier alternative to classic chicken salads, bursting with flavors from fresh dill and lemon zest, making it perfect for any meal occasion.

Main Ingredients

  • 2 cups cooked chicken, shredded (Use leftover chicken, rotisserie chicken, or poach your chicken breast.)
  • 1 cup Greek yogurt (For a creamy texture with less calories.)
  • 1/4 cup mayonnaise (Optional for extra creaminess.)
  • 1/4 cup diced celery
  • 1/4 cup chopped onion
  • 1/4 cup fresh dill, chopped (Or 1 tablespoon of dried dill.)
  • 1 unit zest of 1 lemon
  • 1/2 unit Juice of 1/2 lemon
  • Salt and pepper to taste

Preparation

  1. In a large bowl, combine the shredded chicken, Greek yogurt, and mayonnaise (if using).
  2. Add the diced celery, chopped onion, dill, lemon zest, and lemon juice.
  3. Mix everything together until well combined.
  4. Season with salt and pepper to taste.
  5. Chill in the fridge for at least 30 minutes before serving for the best flavor.

Taste your salad before serving and adjust the seasonings as necessary. Make it a few hours in advance for the best flavor enhancement.

Healthy, lunch, Salad
Greek, Mediterranean
Dill and Lemon Salad, Greek Yogurt Chicken Salad, Healthy Chicken Salad, High Protein Salad, Meal Prep

Frozen Hot Chocolate

Delicious Frozen Hot Chocolate topped with whipped cream and chocolate shavings

Looking for a cool, chocolatey treat to satisfy your sweet cravings? This delicious frozen hot chocolate is exactly what you need. It transforms the classic cozy drink into a rich, icy dessert that’s perfect whenever you want something refreshing and indulgent.

The best part is how simple it is to make. With only three main ingredients, you can blend up this creamy drink in just minutes. It’s an easy and fun option for beginners, busy parents, or anyone who wants a quick chocolate treat without much effort

how to prepare Frozen Hot Chocolate

Making Frozen Hot Chocolate is easy and fun! Here’s how you can whip it up:

Ingredients:

  • 2 cups milk
  • 1 cup heavy cream
  • 1/2 cup chocolate syrup
  • 2 cups ice
  • Whipped cream (for topping)
  • Chocolate shavings or sprinkles (for garnish)

Directions:

  1. In a blender, combine the milk, heavy cream, chocolate syrup, and ice.
  2. Blend on high speed until everything is smooth and frosty.
  3. Pour the mixture into glasses.
  4. Top each glass with whipped cream and sprinkle with chocolate shavings or sprinkles.
  5. Enjoy your delicious Frozen Hot Chocolate!

Frozen Hot Chocolate

Why You’ll Love Frozen Hot Chocolate

Frozen Hot Chocolate is like a sweet dream come true! It brings together the rich flavor of hot chocolate and the fun, chilliness of a frozen treat. Whether it’s a hot summer day or a cozy winter evening, this drink is perfect for anyone who loves chocolate. It’s a great choice to serve at parties and gatherings, making it a delightful treat that everyone will adore. Plus, it’s super simple to make!

tips for success

To make the best Frozen Hot Chocolate, keep a few tips in mind. First, use good-quality chocolate syrup for a richer flavor. Don’t hesitate to adjust the sweetness based on your taste. If you want it even creamier, add more heavy cream or milk. And remember, blending it well is key to getting that perfect frosty texture. You can also experiment with different toppings like marshmallows or flavored syrups to make it your own!

Serving Suggestions

Frozen Hot Chocolate is delicious on its own, but you can elevate the experience by serving it with some tasty snacks. Pair it with cookies, brownies, or even a slice of chocolate cake for a chocolate lover’s feast! You can also serve this drink as a special treat at movie nights or birthday parties to impress your guests.

FAQs

How can I make Frozen Hot Chocolate vegan?

You can easily make a vegan version by using almond milk or coconut milk, and dairy-free whipped cream.

Can I make this ahead of time?

Yes, you can prepare the mix ahead of time and blend it when you’re ready to serve, but it’s best enjoyed fresh!

What if I don’t have a blender?

If you don’t have a blender, you can mix the ingredients by hand, but it may not have the same frosty texture. A whisk can be helpful!

Dive into the fun of making Frozen Hot Chocolate today, and get ready for a sweet treat that will surely bring smiles all around!

Frozen Hot Chocolate

A delicious frozen dessert that combines the cozy flavors of hot chocolate with a refreshing icy texture, perfect for any occasion.

Main ingredients

  • 2 cups milk (Use whole milk for creaminess.)
  • 1 cup heavy cream (Adjust for desired creaminess.)
  • 1/2 cup chocolate syrup (Use high-quality syrup for better flavor.)
  • 2 cups ice (Crushed ice works best for blending.)

Toppings

  • to taste whipped cream (For topping.)
  • to taste chocolate shavings or sprinkles (For garnish.)

Preparation

  1. In a blender, combine the milk, heavy cream, chocolate syrup, and ice.
  2. Blend on high speed until everything is smooth and frosty.
  3. Pour the mixture into glasses.
  4. Top each glass with whipped cream and sprinkle with chocolate shavings or sprinkles.
  5. Enjoy your delicious Frozen Hot Chocolate!

For a vegan version, use almond or coconut milk and dairy-free whipped cream. You can also play with different toppings like marshmallows or flavored syrups.

Beverage, Dessert
American
Chocolate Drink, Frozen Dessert, Frozen Hot Chocolate, Indulgent Beverage, Summer Treat