3-Ingredient Mounds Bars

Making 3-Ingredient Mounds Bars is a simple and rewarding experience. These delightful treats blend sweet coconut and rich chocolate into a bite-sized snack that both kids and adults love. Perfect for gatherings or as a personal treat, this easy recipe has the power to impress with its minimal ingredients while delivering maximum flavor. You won’t believe how quickly they disappear once you put them out. Now, let’s dive into how to prepare these delicious bars and see how they can bring smiles to your table.

3-Ingredient Mounds Bars

To make 3-Ingredient Mounds Bars, you will need shredded coconut, sweetened condensed milk, and dark chocolate. Here’s how to prepare this simple recipe:

  1. In a bowl, mix together the shredded coconut and sweetened condensed milk until fully combined.
  2. Shape the mixture into small bars or balls and place them on a lined baking sheet.
  3. Chill the coconut bites in the fridge for about 30 minutes to set.
  4. While the coconut bars chill, melt the dark chocolate in a microwave-safe dish or using a double boiler.
  5. Once melted, dip each coconut bar into the chocolate, allowing any excess to drip off.
  6. Return the chocolate-covered bars to the baking sheet and let them cool until the chocolate hardens.

After following these steps, you’ll have your very own batch of Mounds Bars, ready to be enjoyed!

Why You’ll Love 3-Ingredient Mounds Bars

These Mounds Bars are not only quick and easy to make, but they also offer a pleasure that is hard to resist. The coconut gives a delightful chewiness, while the chocolate adds an irresistible richness. Perfect as an afternoon snack or a dessert, they cater to both coconut lovers and chocolate enthusiasts alike. If you’re craving something sweet, these bars are your ticket to happiness.

Tips for success

To ensure your 3-Ingredient Mounds Bars turn out perfectly, consider the following tips:

  • Use sweetened condensed milk for the best combination of sweetness and moisture.
  • If you prefer a different flavor, try adding a few drops of almond extract for an added layer of taste.
  • For a fun twist, sprinkle some crushed nuts or sprinkles on top of the chocolate before it hardens.

Always remember, practice makes perfect, so don’t hesitate to experiment and find what works best for your taste!

3-Ingredient Mounds Bars

Serving Suggestions

Enjoy your 3-Ingredient Mounds Bars on their own, or pair them with a cup of coffee or tea for a delightful treat. They also make for a wonderful addition to dessert platters or gift boxes during holidays and parties. For an extra indulgent experience, serve them alongside vanilla ice cream and a drizzle of chocolate sauce.

FAQs

Can I use unsweetened coconut? Yes, you can use unsweetened coconut if you prefer a less sweet bite. Just adjust the amount of sweetened condensed milk to achieve your desired taste.

How do I store leftovers? Store your Mounds Bars in an airtight container at room temperature for up to a week, or in the fridge for longer freshness.

Can I freeze these bars? Absolutely! They freeze well. Just make sure to wrap them individually in plastic wrap, and they can last for up to three months in the freezer. Enjoy your homemade delights whenever you crave them!

If you want to explore more delicious variations, check out this 3-Ingredient Mounds Bar recipe.

3-Ingredient Mounds Bars

These delightful 3-Ingredient Mounds Bars blend sweet coconut and rich chocolate into a bite-sized snack that’s loved by all.

Main ingredients

  • 2 cups shredded coconut (Sweetened or unsweetened, as per your preference.)
  • 1 can sweetened condensed milk (Use for optimal sweetness and moisture.)
  • 1 cup dark chocolate (Melted for dipping the coconut bars.)

Preparation

  1. In a bowl, mix together the shredded coconut and sweetened condensed milk until fully combined.
  2. Shape the mixture into small bars or balls and place them on a lined baking sheet.
  3. Chill the coconut bites in the fridge for about 30 minutes to set.

Chocolate Coating

  1. While the coconut bars chill, melt the dark chocolate in a microwave-safe dish or using a double boiler.
  2. Once melted, dip each coconut bar into the chocolate, allowing any excess to drip off.
  3. Return the chocolate-covered bars to the baking sheet and let them cool until the chocolate hardens.

Add a few drops of almond extract for extra flavor, or sprinkle crushed nuts or sprinkles on top of the chocolate before it hardens. Store leftovers in an airtight container.

Dessert, Snack
American
Chocolate Treats, Coconut Bars, Easy Desserts, Mounds Bars, No-Bake Cookies

Chocolate Orange Cheesecake Layer Cake

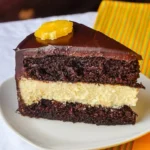
Decadent chocolate orange cheesecake layer cake garnished with orange slices and chocolate shavings.

There’s something truly special about a Chocolate Orange Cheesecake Layer Cake that brings joy to any occasion. The rich, creamy cheesecake layered between moist chocolate cake layers is a heavenly treat that plays on the beloved combination of chocolate and orange. With a delightful burst of citrus paired with rich cocoa, this cake is sure to wow your family and friends. Whether you’re celebrating a birthday, having a casual get-together, or just indulging in a sweet craving, this recipe is a guaranteed crowd-pleaser. Get ready to roll up your sleeves and dive into making this delicious dessert!

How to prepare Chocolate Orange Cheesecake Layer Cake

  1. Gather Your Ingredients: Collect all the ingredients you’ll need for both the cheesecake and the cake layers. This includes cream cheese, chocolate, sugar, eggs, flour, and, of course, fresh oranges for that zesty flavor.
  2. Make the Cheesecake Filling: Start by beating the cream cheese and sugar until smooth. Add the eggs and orange zest, mixing well. Pour the mixture into a prepared springform pan and bake until set. Allow it to cool completely before removing it from the pan.
  3. Bake the Chocolate Cake Layers: Prepare a chocolate cake batter by combining flour, cocoa powder, sugar, baking powder, and eggs. Divide the batter into two greased round cake pans. Bake until a toothpick comes out clean.
  4. Assemble the Cake: Once everything has cooled, place the first chocolate layer on a cake plate. Spread a layer of the cheesecake filling on top, add the second chocolate layer, and finish with more cheesecake on top.
  5. Decorate: For the final touch, you can add whipped cream and orange slices.
  6. Chill and Serve: Refrigerate the cake for a few hours or overnight to let the flavors meld together before slicing into this stunning dessert.

Chocolate Orange Cheesecake Layer Cake

Why You’ll Love Chocolate Orange Cheesecake Layer Cake

This recipe is not just about looks, but taste as well. The combination of smooth cheesecake and rich chocolate creates a beautiful harmony that dances on your taste buds. Each bite is creamy, decadent, and refreshing, thanks to the citrus burst. It’s perfect for any occasion, from birthdays to family dinners. Plus, who doesn’t love layers? This cake is not just a dessert, it’s an experience that you, your friends, and family will remember.

Tips for Success

  • Be sure to let the cheesecake cool completely before assembling the cake. This prevents melting and gives you clean layers.
  • Use high-quality chocolate and fresh oranges for best flavors.
  • If you’re in a hurry, you can make the cheesecake a day in advance and assemble the cake later.

Serving Suggestions

Pair your Chocolate Orange Cheesecake Layer Cake with a scoop of vanilla ice cream or some fresh berries for a delightful contrast. A cup of coffee or tea also complements the cake beautifully, making it a perfect choice for an afternoon treat.

FAQs

Can I make this cheesecake layer ahead of time?

Yes, you can prepare the cheesecake layer a day in advance, just remember to give it time to cool completely before storing it.

Can I use a different flavor than orange?

Absolutely! You can experiment with other flavors like lemon or raspberry for a different twist.

How should I store any leftovers?

Keep any leftovers in the refrigerator, well wrapped. It should stay fresh for up to five days.

Chocolate Orange Cheesecake Layer Cake

With this lovely Chocolate Orange Cheesecake Layer Cake, your next gathering will surely be a hit! Happy baking!

Chocolate Orange Cheesecake Layer Cake

A delicious and visually stunning layer cake combining rich chocolate cake with creamy cheesecake and a zesty orange flavor, perfect for any occasion.

For the Cheesecake Filling

  • 16 oz cream cheese (Softened)
  • 1 cup sugar (Granulated)
  • 3 large eggs (Room temperature)
  • 1 tbsp orange zest (Freshly grated)

For the Chocolate Cake Layers

  • 2 cups all-purpose flour
  • 3/4 cup cocoa powder (Unsweetened)
  • 1.5 cups sugar (Granulated)
  • 1 tbsp baking powder
  • 4 large eggs (Room temperature)

For Assembly and Decoration

  • 1 cup whipped cream (For topping)
  • 1 orange sliced (For decoration)

Preparation

  1. Gather all the ingredients needed for both the cheesecake and the chocolate cake layers.
  2. Preheat your oven and prepare a springform pan for the cheesecake.

Cheesecake Filling

  1. Beat the cream cheese and sugar together until smooth.
  2. Add the eggs and orange zest, mixing well.
  3. Pour the mixture into the prepared springform pan and bake until set.
  4. Allow the cheesecake to cool completely before removing it from the pan.

Chocolate Cake Layers

  1. Prepare the chocolate cake batter by combining flour, cocoa powder, sugar, baking powder, and eggs.
  2. Divide the batter into two greased round cake pans.
  3. Bake until a toothpick comes out clean.

Assembly

  1. Once everything has cooled, place the first chocolate layer on a cake plate.
  2. Spread a layer of the cheesecake filling on top, then add the second chocolate layer.
  3. Finish with more cheesecake on top.

Decoration and Serving

  1. For the decoration, add whipped cream and orange slices on top.
  2. Refrigerate the cake for a few hours or overnight before cutting and serving.

Be sure to let the cheesecake cool completely before assembling to prevent melting. Use high-quality chocolate and fresh oranges for the best flavor. You can make cheesecake a day in advance and assemble the cake later.

Cake, Dessert
American
Celebration Cake, cheesecake, chocolate cake, Layer Cake, Orange Dessert

Chocolate Turtle Cake

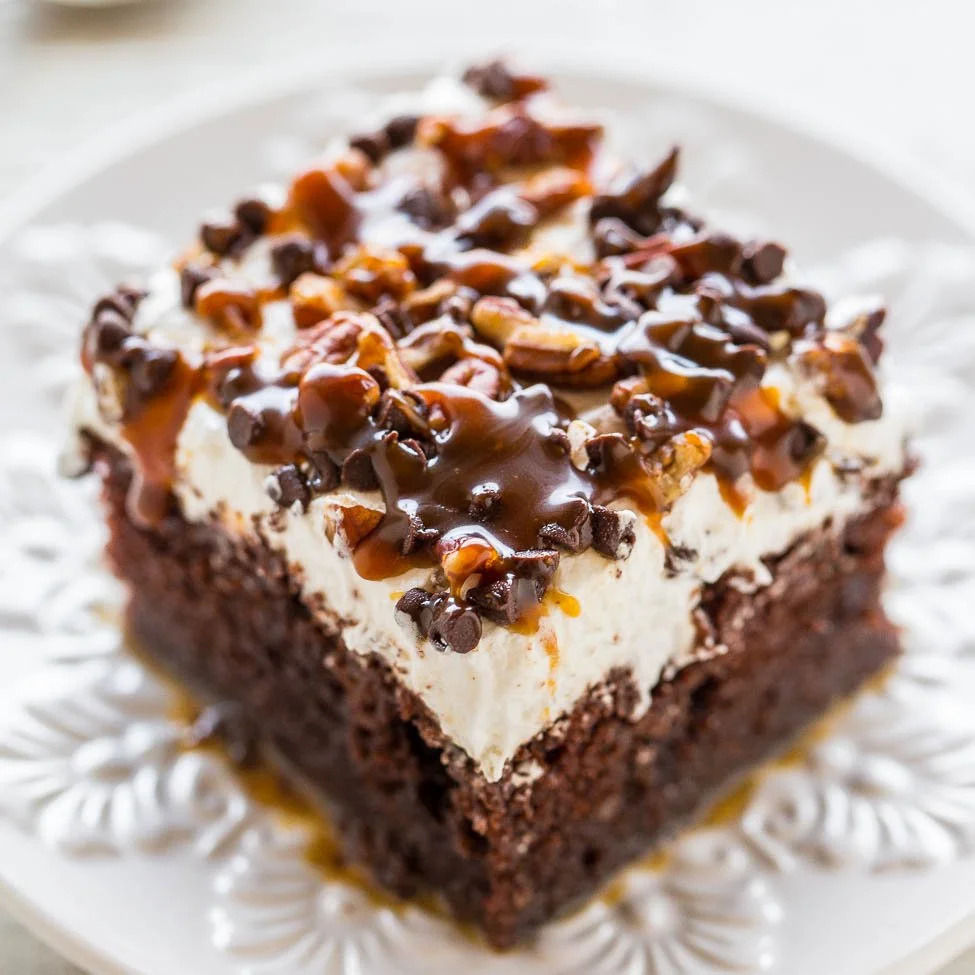
Delicious Chocolate Turtle Cake with caramel and pecans on a decorative plate.

Chocolate Turtle Cake blends rich chocolate, sticky caramel, and crunchy pecans in one simple dessert. It feels fancy, yet you make it with everyday ingredients, so it works for weeknights, parties, or family dinners. This version uses a boxed mix to save time, and the warm caramel and chocolate make the cake gooey and comforting. It is a real crowd-pleaser, the kind of cake people ask for seconds of, and it pairs well with coffee or cold milk. Get ready to enjoy a sweet, nutty treat that almost everyone will love, and have fun making it yourself.

How to prepare Chocolate Turtle Cake

Ingredients:

  • 1 box chocolate cake mix, plus ingredients called for on the box (eggs, oil, water)
  • 1 cup packed brown sugar
  • 1/2 cup butter
  • 1/2 cup heavy cream or evaporated milk
  • 1 cup chopped pecans, toasted
  • 1 cup chocolate chips or chopped dark chocolate
  • 1/2 cup caramel sauce, plus extra for topping
  • 1 teaspoon vanilla
  • Pinch of salt
  • Whipped cream or ice cream, for serving

Directions:

  1. Preheat the oven to the temperature on the cake mix box, usually 350°F, and grease a 9×13 inch pan.
  2. Mix and bake the chocolate cake batter as the box says. Pour into the pan and bake until a toothpick comes out clean, about the time on the box.
  3. While the cake bakes, make the caramel pecan topping. In a small saucepan, melt the butter and brown sugar together, stir in the cream, vanilla, and salt, and simmer 2 to 3 minutes until slightly thick. Remove from heat and stir in the toasted pecans.
  4. When the cake is hot from the oven, poke holes all over with the handle of a wooden spoon or a skewer.
  5. Pour half of the warm caramel pecan sauce over the cake, letting it sink into the holes.
  6. Melt the chocolate chips in a microwave safe bowl in 20 second bursts, stirring until smooth. Drizzle the melted chocolate over the cake, then spoon the remaining caramel sauce on top.
  7. Let the cake cool, then chill for at least 1 hour so the caramel sets a bit. Top with extra chopped pecans, whipped cream or a scoop of vanilla ice cream when serving.

Chocolate Turtle Cake

Why You’ll Love Chocolate Turtle Cake

  • Big, familiar flavors, chocolate, caramel, and pecans, all in one bite.
  • Easy to make, you can use a boxed cake mix and a quick caramel sauce.
  • Great texture, soft cake with gooey caramel and crunchy pecans.
  • Works for many occasions, from birthdays to potlucks, and it looks special without much fuss.

tips for success

  • Toast the pecans in a dry pan for a few minutes, they taste stronger and add nice crunch.
  • Poke the holes while the cake is hot so the caramel sinks in easily.
  • Warm the caramel before pouring, it spreads better into the cake.
  • If your caramel thickens too fast, add a tablespoon of cream or milk to loosen it.
  • For a deeper chocolate flavor, use dark chocolate chips or add 1/4 cup cocoa to the cake batter.

Serving Suggestions

  • Serve warm with vanilla ice cream or cool with whipped cream.
  • Drizzle extra caramel and sprinkle extra pecans on each slice.
  • Cut into small squares for parties, or large slices for dessert after dinner.
  • Pair with coffee, milk, or a simple dessert wine for an adult treat.

Chocolate Turtle Cake

FAQs

Q: Can I make the cake from scratch instead of using a box mix? A: Yes, you can use your favorite homemade chocolate cake batter. The method stays the same, just poke holes and pour the caramel over the warm cake.

Q: How far in advance can I make Chocolate Turtle Cake? A: You can make it a day ahead and chill it. Add whipped cream or ice cream just before serving for best texture.

Q: Can I use walnuts instead of pecans? A: Yes, walnuts work fine. Toast them first for better flavor.

Q: Is there a way to make this less sweet? A: Use dark chocolate for the drizzle and cut back a little on the caramel, or use a less sweet frosting in place of some caramel.

Q: How do I store leftovers? A: Cover the cake and keep it in the fridge for up to 3 days. Warm slices in the microwave a few seconds to soften the caramel.

Conclusion

For a fun variation that uses a poke cake method, see Turtle Chocolate Poke Cake – Averie Cooks, it gives ideas you can use to change up this recipe.

Chocolate Turtle Cake

Chocolate Turtle Cake blends rich chocolate, sticky caramel, and crunchy pecans for a delightful dessert that’s perfect for any occasion.

Cake Ingredients

  • 1 box chocolate cake mix, plus ingredients called for on the box (eggs, oil, water) (Follow the instructions on the cake mix box for additional ingredients.)
  • 1 cup packed brown sugar
  • 1/2 cup butter (For the caramel topping.)
  • 1/2 cup heavy cream or evaporated milk
  • 1 cup chopped pecans, toasted (Toast in a dry pan for better flavor.)
  • 1 cup chocolate chips or chopped dark chocolate (Use dark chocolate for a deeper flavor.)
  • 1/2 cup caramel sauce, plus extra for topping (Warm before pouring.)
  • 1 teaspoon vanilla
  • 1 pinch salt
  • to taste Whipped cream or ice cream, for serving

Preparation

  1. Preheat the oven to the temperature on the cake mix box, usually 350°F, and grease a 9×13 inch pan.
  2. Mix and bake the chocolate cake batter as instructed on the box. Pour into the pan and bake until a toothpick comes out clean.
  3. While the cake bakes, make the caramel pecan topping by melting the butter and brown sugar together in a small saucepan. Stir in the cream, vanilla, and salt, then simmer for 2 to 3 minutes until slightly thick. Remove from heat and stir in the toasted pecans.
  4. When the cake is out of the oven, poke holes all over with the handle of a wooden spoon or a skewer.
  5. Pour half of the warm caramel pecan sauce over the cake, allowing it to sink into the holes.
  6. Melt the chocolate chips in a microwave-safe bowl in 20-second bursts, stirring until smooth. Drizzle the melted chocolate over the cake and spoon the remaining caramel sauce on top.
  7. Let the cake cool, then chill for at least 1 hour to set the caramel.

For serving, top with extra chopped pecans and whipped cream or a scoop of vanilla ice cream. Works well for many occasions.

Cake, Dessert
American
Caramel, Chocolate, easy dessert, Pecans, Turtle Cake