Banana Protein Muffins

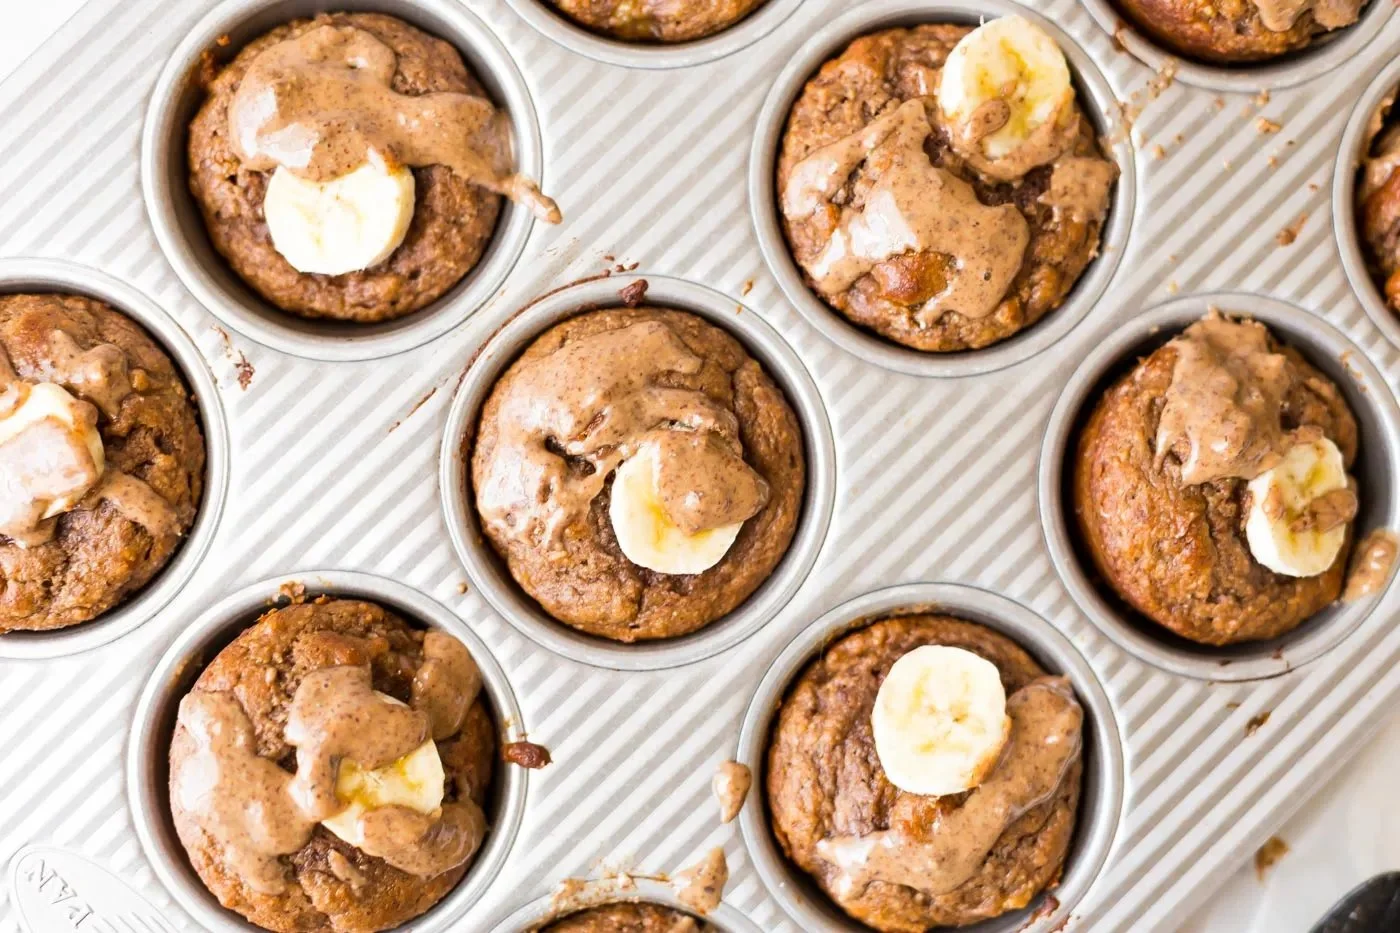
Delicious banana protein muffins arranged on a plate, perfect for a healthy snack.

I love a muffin that feels like a treat, and also helps keep you full, light, and happy. Banana Protein Muffins do just that. They mix ripe bananas, protein powder, and simple pantry items to make soft, tasty muffins. They work well for busy mornings, quick snacks, or to bring to a small get together. This recipe is a crowd-pleaser, with sweet banana taste, a soft crumb, and extra protein to fuel your day. If you like simple banana recipes, you might also enjoy this 3-ingredient banana oatmeal muffins recipe. Give these a try, and get ready to smile when you take your first bite.

How to prepare Banana Protein Muffins

Ingredients

  • 3 ripe bananas, mashed
  • 2 eggs
  • 1 cup flour, whole wheat or all purpose
  • 1 scoop vanilla or plain protein powder
  • 1/4 cup honey or maple syrup
  • 1/4 cup milk, any kind
  • 1 tsp baking powder
  • 1/2 tsp baking soda
  • 1/2 tsp salt
  • 1 tsp cinnamon, optional
  • 1/4 cup oil or melted butter
  • 1/4 cup nuts or chocolate chips, optional

Directions

  1. Preheat the oven to 350 F, and line a muffin tin with paper liners or grease it lightly.
  2. In a bowl, mash the ripe bananas with a fork until smooth.
  3. Add eggs, honey, milk, and oil to the bananas, mix well.
  4. In another bowl, whisk flour, protein powder, baking powder, baking soda, salt, and cinnamon.
  5. Pour the dry mix into the wet mix, stir until just combined, do not overmix.
  6. Fold in nuts or chocolate chips if you use them.
  7. Scoop batter into the muffin tin, fill each about two thirds full.
  8. Bake for 15 to 20 minutes, or until a toothpick comes out clean.
  9. Let muffins cool in the tin for 5 minutes, then move to a rack to cool more.

Banana Protein Muffins

Why You’ll Love Banana Protein Muffins

  • They taste like banana bread, but are quick to make.
  • The protein powder adds a filling boost, good for breakfast or after a workout.
  • You can change mix ins, like nuts or chocolate, to suit your taste.
  • They freeze well, so you can make a batch and save some for later.
  • The texture is soft, moist, and easy to eat on the go.

Tips for success

  • Use very ripe bananas, they give the best banana taste.
  • Do not overmix the batter, mix until you just combine dry and wet parts.
  • If your protein powder is very thick, add a splash more milk to the batter.
  • Test one muffin with a toothpick to check doneness, oven times vary.
  • Let muffins cool a bit before cutting, they set as they cool.

Serving Suggestions

  • Serve warm with a little butter or nut butter on top.
  • Pair with yogurt and fruit for a full breakfast.
  • Pack one with coffee for a simple morning snack.
  • Serve with a glass of milk or a protein shake after a workout.

Banana Protein Muffins

FAQs

Q: Can I use plant based protein powder? A: Yes, plant based protein works fine. You may need a little more liquid if it absorbs more.

Q: How long do these muffins last? A: Keep them in an airtight container at room temperature for 2 to 3 days. Put them in the fridge for up to a week.

Q: Can I freeze the muffins? A: Yes, wrap muffins individually or store in a freezer bag for up to 3 months. Thaw at room temperature or heat briefly.

Q: Can I make these without added sweetener? A: Yes, if your bananas are very ripe you can skip honey or syrup, or reduce it to taste.

Conclusion

If you want another clear, healthy take on banana protein muffins, check this recipe for more ideas and tips, Healthy Banana Protein Muffins – Eat With Clarity.

Banana Protein Muffins

Soft and tasty Banana Protein Muffins combine ripe bananas and protein powder for a filling treat, perfect for any time of the day.

Wet Ingredients

  • 3 pieces ripe bananas, mashed (Use very ripe bananas for the best taste.)
  • 2 pieces eggs
  • 1/4 cup honey or maple syrup (Can be omitted if bananas are very ripe.)
  • 1/4 cup milk, any kind (Add more if the batter is thick.)
  • 1/4 cup oil or melted butter

Dry Ingredients

  • 1 cup flour, whole wheat or all purpose
  • 1 scoop vanilla or plain protein powder
  • 1 tsp baking powder
  • 1/2 tsp baking soda
  • 1/2 tsp salt
  • 1 tsp cinnamon, optional (Adds extra flavor.)

Mix-Ins (Optional)

  • 1/4 cup nuts or chocolate chips (Could vary based on preference.)

Preparation

  1. Preheat the oven to 350°F (175°C) and line a muffin tin with paper liners or grease it lightly.
  2. In a bowl, mash the ripe bananas with a fork until smooth.
  3. Add eggs, honey, milk, and oil to the bananas, and mix well.

Mixing

  1. In another bowl, whisk together flour, protein powder, baking powder, baking soda, salt, and cinnamon.
  2. Pour the dry mix into the wet mix and stir until just combined; do not overmix.
  3. Fold in nuts or chocolate chips if using.

Baking

  1. Scoop batter into the muffin tin, filling each about two-thirds full.
  2. Bake for 15 to 20 minutes, or until a toothpick comes out clean.
  3. Let muffins cool in the tin for 5 minutes, then move to a wire rack to cool completely.

These muffins taste like banana bread, are quick to make, and are great for meals or snacks. They freeze well for later use.
Breakfast, Snack
American
Baked Goods, Banana Protein Muffins, Healthy Muffins, Quick Snacks

Easy Protein Bistro Snack Box

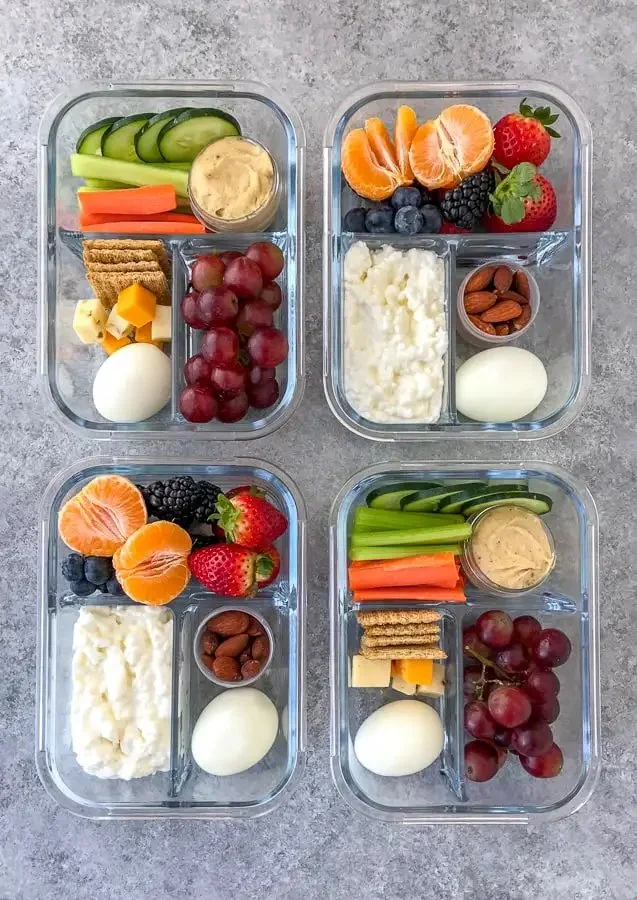
Easy Protein Bistro Snack Box filled with nutritious protein snacks

Easy Protein Bistro Snack Box is a fun and simple snack that fills you up and tastes great. It mixes protein rich foods, fresh veggies, and tasty bites in one box. This snack box works well for busy days, quick lunch, or a light dinner. The flavors are bright, the textures are nice, and it feels special even when you are in a hurry. This Easy Protein Bistro Snack Box is a crowd pleaser, with salty and fresh bits that everyone likes. Give it a try, and you might find yourself making it all the time, with a smile on your face.

How to prepare Easy Protein Bistro Snack Box

  1. Gather ingredients, wash and dry fresh items.
  2. Cook or warm any protein, for example grilled chicken or turkey slices. Let it cool.
  3. Slice cheese into cubes or sticks. Hard boiled eggs, cut in half, work well too.
  4. Arrange items in a box or container, keeping wet items separate if possible. Place protein, cheese, eggs in one section.
  5. Add fresh veggies, like cherry tomatoes, cucumber slices, or carrot sticks.
  6. Add a small cup of hummus or Greek yogurt dip, and a handful of nuts or seeds.
  7. Put crackers, olives, or grapes in their own small area.
  8. Close the box, refrigerate if not eating right away, and enjoy when ready.

Easy Protein Bistro Snack Box

Why You’ll Love Easy Protein Bistro Snack Box

  • It gives you lots of protein to keep you full and focused.
  • It is quick to make, with no cooking skills needed for many parts.
  • The box looks nice, so it feels like a treat, even for a weekday.
  • It is flexible, you can swap foods to match your taste or what you have.
  • It makes a great on the go protein snack for work, school, or travel.

Tips for success

  • Use cooked, cooled protein, such as roasted chicken or canned tuna, for easy prep.
  • Keep dips in small containers to avoid soggy veggies and crackers.
  • Chop vegetables to bite size, so they are easy to eat.
  • Choose firm cheeses and nuts, they travel well and stay fresh.
  • Make boxes the night before for busy mornings, but add delicate greens right before serving.

Serving Suggestions

  • Serve with a simple side salad or fresh fruit for a fuller meal.
  • Pair with sparkling water or a light iced tea.
  • Use small containers to portion dips and nuts, and add lemon or herbs for extra flavor.
  • Turn it into a light picnic dish by adding whole grain bread or pita.

Easy Protein Bistro Snack Box

FAQs

Q: Can I make the Easy Protein Bistro Snack Box ahead of time?

A: Yes, you can prep the box the night before. Keep wet items separate and add them just before eating if possible.

Q: How long will it stay fresh?

A: Store in the fridge and eat within 24 hours for best taste and texture.

Q: Can I make a vegetarian version?

A: Yes, swap meat with extra hard boiled eggs, tofu cubes, or chickpeas for protein.

Q: What if I do not like one of the ingredients?

A: Swap it for something you prefer, like different cheese, fruit, or a seed mix.

Conclusion

If you want more ideas for a protein box, you can see a lovely DIY example at Easy DIY Bistro Box from Good Cheap Eats.

Easy Protein Bistro Snack Box

A fun and simple snack box filled with protein-rich foods, fresh veggies, and tasty bites, perfect for busy days or quick meals.

Protein

  • 1 cup cooked and cooled protein (grilled chicken, turkey slices, or other protein) (Use cooked protein for easy prep.)
  • 2 large hard boiled eggs (Cut in half.)

Cheese

  • 1 cup cubed or sliced cheese (Choose firm cheese that travels well.)

Fresh Veggies

  • 1 cup cherry tomatoes (Wash and dry before using.)
  • 1 cup cucumber slices (Chop into bite-size pieces.)
  • 1 cup carrot sticks (Chop into bite-size pieces.)

Dips and Extras

  • 1 small cup hummus or Greek yogurt dip (Keep dips in small containers to avoid sogginess.)
  • 1/2 cup nuts or seeds (Choose firm types that travel well.)

Carbs/Fruits

  • 1 cup crackers, olives, or grapes (Put in their own small area.)

Preparation

  1. Gather ingredients and wash and dry fresh items.
  2. Cook or warm any protein if necessary, then let it cool.
  3. Slice cheese into cubes or sticks.
  4. Arrange items in a box or container, keeping wet items separate if possible.

Assembly

  1. Place protein, cheese, and eggs in one section.
  2. Add fresh veggies like cherry tomatoes, cucumber slices, and carrot sticks.
  3. Include a small cup of hummus or Greek yogurt dip, and a handful of nuts or seeds.
  4. Put crackers, olives, or grapes in their own small area.
  5. Close the box, refrigerate if not eating right away, and enjoy when ready.

Make boxes the night before for busy mornings, but add delicate greens right before serving. This recipe is flexible, you can swap foods based on taste or availability.

Light Meal, Snack
American, Healthy
Bistro Box, Easy Meal Prep, Healthy Eating, Protein Snack

Ultimate Ninja Creami Protein Ice Cream

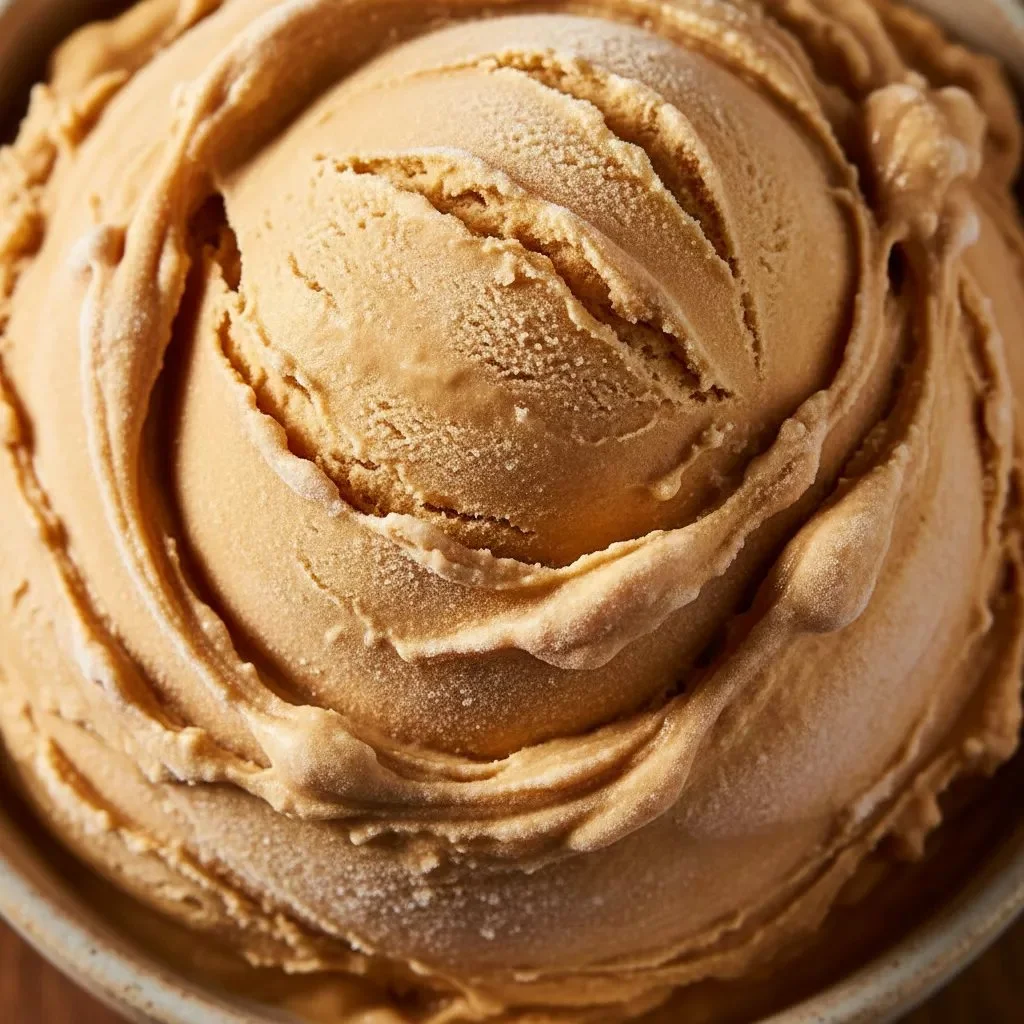
Ultimate Ninja Creami Protein Ice Cream dessert bowl with toppings

Have you ever made homemade protein ice cream that ended up chalky, icy, or just disappointing? You’re definitely not the only one. Perfecting Ninja Creami protein recipes in my kitchen took plenty of experimenting, but after many attempts, I finally found the method that works.

This recipe delivers a smooth, rich, and ultra-creamy texture every time. Instead of another dull “healthy” dessert, you get a truly indulgent Salted Mocha Fudge treat that feels decadent while still packing plenty of protein. It might just change the way you think about high-protein desserts

How to Prepare Ultimate Ninja Creami Protein Ice Cream

Making your own Ultimate Ninja Creami Protein Ice Cream is easier than you think! Here’s how to whip up this delicious treat that everyone will love:

Ingredients

  • 2 cups of your favorite Greek yogurt
  • 1 scoop of protein powder (vanilla or chocolate)
  • 1 cup of milk (any type)
  • 1/2 cup of natural sweetener (like honey or agave)
  • 1/2 cup of chocolate chips or fruit chunks (as desired)

Directions

  1. In a mixing bowl, combine Greek yogurt, protein powder, milk, and sweetener. Stir until smooth.
  2. Fold in chocolate chips or fruit chunks for extra flavor.
  3. Pour the mixture into the Ninja Creami ice cream maker.
  4. Follow the manufacturer’s instructions to churn until creamy.
  5. Serve immediately for a soft-serve texture or transfer to a container to freeze for a firmer consistency.

Ultimate Ninja Creami Protein Ice Cream

Why You’ll Love Ultimate Ninja Creami Protein Ice Cream

This ice cream isn’t just a tasty treat, it’s packed with protein to fuel your day! It’s creamy, rich, and satisfies your sweet tooth without guilt. Plus, you can customize it with different flavors and mix-ins, making it a fun treat for the whole family. Everyone will definitely want a scoop (or two) of this deliciously healthy ice cream!

Tips for Success

  1. Chill Your Ingredients: Make sure your ingredients are cold before mixing. This helps the ice cream come out creamier.
  2. Customize It: Feel free to play with flavors by adding ingredients like cocoa powder, vanilla extract, or even peanut butter for a personal touch.
  3. Don’t Overmix: When combining your ingredients, mix just enough to blend everything. Too much mixing can create a grainy texture.

Serving Suggestions

Serve your Ultimate Ninja Creami Protein Ice Cream in bowls or cones. Add toppings like fresh fruits, nuts, or drizzles of chocolate syrup. For an extra special treat, create sundae-style bowls and layer with more yogurt or a dollop of whipped cream!

FAQs

Can I use a different type of yogurt?

Yes, you can! Feel free to use regular yogurt or a dairy-free alternative if you prefer.

How long does it take to make?

Making this ice cream takes about 15-20 minutes, plus freezing time if you want it firmer.

How should I store leftovers?

Store any leftovers in an airtight container in the freezer. It’s best enjoyed within a week for the best texture and flavor!

Now that you know how to make Ultimate Ninja Creami Protein Ice Cream, it’s time to gather your ingredients and get churning! Can’t wait to see what flavors you create!

Ultimate Ninja Creami Protein Ice Cream

A smooth, rich, and ultra-creamy protein ice cream that feels decadent yet healthy, perfect for satisfying your sweet tooth.

For the Ice Cream Base

  • 2 cups Greek yogurt (Your favorite variety)
  • 1 scoop protein powder (Vanilla or chocolate)
  • 1 cup milk (Any type)
  • 1/2 cup natural sweetener (Like honey or agave)
  • 1/2 cup chocolate chips or fruit chunks (Optional for additional flavor)

Preparation

  1. In a mixing bowl, combine Greek yogurt, protein powder, milk, and sweetener. Stir until smooth.
  2. Fold in chocolate chips or fruit chunks for extra flavor.
  3. Pour the mixture into the Ninja Creami ice cream maker.
  4. Follow the manufacturer’s instructions to churn until creamy.
  5. Serve immediately for a soft-serve texture or transfer to a container to freeze for a firmer consistency.

Chill your ingredients to ensure a creamier texture. Customize flavors with ingredients like cocoa powder or peanut butter. Do not overmix to prevent a grainy texture.

Dessert, Snack
American
Frozen Dessert, Healthy Dessert, High-Protein Treat, Ninja Creami, Protein Ice Cream