High Protein Chicken Orzo

High Protein Chicken Orzo is a delightful dish that packs a punch with its rich flavors and wholesome ingredients. This recipe combines tender chicken with the delightful chewiness of orzo pasta, making it a perfect choice for family dinners or gatherings. Not only is it satisfying, but it’s also an excellent way to boost your protein intake while enjoying a comforting meal. Picture this: a warm bowl of savory goodness that both kids and adults will love, bringing everyone together around the table. Let’s dive into the steps to whip up this crowd-pleaser.

High Protein Chicken Orzo

Why You’ll Love High Protein Chicken Orzo

This dish stands out for many reasons. First, the combination of chicken and orzo not only makes for a great texture but also ensures that you are getting a good amount of protein in each serving. Additionally, the flavors meld beautifully, creating a satisfying taste that feels like a warm hug. It’s also a versatile recipe; you can easily add vegetables like spinach or bell peppers to enhance the nutritional value. If you’re looking for a quick meal that doesn’t sacrifice taste or nutrition, then this recipe is perfect for you.

Tips for success

To ensure your High Protein Chicken Orzo turns out perfectly, here are some tips to follow. First, make sure to sauté the chicken until it’s golden brown to seal in the flavors. Also, cook the orzo separately to avoid it becoming mushy if it’s added too early. When seasoning, feel free to experiment with herbs; adding fresh basil or thyme can elevate the flavor. Finally, for an extra layer of taste, consider finishing the dish with a sprinkle of parmesan cheese. If you’re interested in similar simple recipes, check out this quick and easy recipe for boiled chicken thighs.

High Protein Chicken Orzo

Serving Suggestions

This dish pairs wonderfully with a light salad or garlic bread. You can also serve it with a side of steamed vegetables, like broccoli or green beans, to round out the meal. For those looking for a heartier option, consider serving it alongside a creamy risotto or a fresh vegetable medley. No matter how you choose to enjoy it, this High Protein Chicken Orzo is sure to become a favorite.

FAQs

Can I prepare High Protein Chicken Orzo in advance?

Yes, you can prepare the ingredients in advance and store them separately. Just combine them when you’re ready to cook.

What type of chicken works best for this recipe?

Boneless, skinless chicken thighs or breasts work best as they remain juicy while cooking.

Can I swap orzo for another type of pasta?

Absolutely! If you prefer, you can use other small pasta shapes like ditalini or even quinoa for a gluten-free option.

High Protein Chicken Orzo

A delightful dish combining tender chicken with orzo pasta, perfect for boosting your protein intake while enjoying a comforting meal.

Main Ingredients

  • 2 cups orzo pasta (Cook separately to avoid mushiness.)
  • 1 lb boneless, skinless chicken thighs or breasts (Juicy when cooked.)
  • 1 tbsp olive oil (For sautéing chicken.)

Seasoning and Extras

  • to taste salt and pepper (For general seasoning.)
  • 1/4 cup grated parmesan cheese (Optional, for finishing the dish.)
  • 1 cup spinach or bell peppers (Optional, for added nutrition and flavor.)
  • 1 tbsp fresh basil or thyme (Optional, for enhancing flavor.)

Preparation

  1. Heat olive oil in a pan over medium heat.
  2. Sauté the chicken until golden brown and cooked through.
  3. While the chicken is cooking, boil the orzo according to package instructions.
  4. Add optional vegetables, such as spinach or bell peppers, during the last few minutes of cooking.
  5. Once cooked, drain orzo and set aside.

Assembly

  1. Combine the sautéed chicken with the orzo in the pan.
  2. Season with salt, pepper, and herbs to taste.
  3. If using, sprinkle with parmesan cheese before serving.

Prepare ingredients in advance and store them separately; combine when ready to cook. Experiment with herbs for different flavors.

Dinner, Main Course
American
Chicken Orzo, Comfort Food, Family Dinner, High Protein, Quick Meal

High Protein One Pan Shrimp Stir Fry with Noodles

You’re in for a treat with the High-Protein One-Pan Shrimp Stir Fry with Noodles. This dish is not only delicious and satisfying but also quick to prepare, making it perfect for busy weeknights. The combination of tender shrimp, colorful veggies, and flavorful noodles creates a delightful meal that appeals to both adults and kids alike. Plus, with the added protein, you’ll feel good about serving it to your loved ones. Let’s dive into this tasty recipe that’s sure to get everyone excited to eat!

How to prepare One Pan Shrimp Stir Fry with Noodles

  1. Begin by gathering your ingredients: shrimp, noodles, bell peppers, broccoli, carrots, and your favorite stir-fry sauce.
  2. Cook the noodles according to the package directions, then set them aside.
  3. In a large pan over medium heat, add a splash of oil and sauté the shrimp until they turn pink.
  4. Add the chopped vegetables to the pan and stir-fry until they are tender yet crisp.
  5. Mix in the cooked noodles and sauce, stirring everything together until well combined.
  6. Serve hot and enjoy!

High-Protein One-Pan Shrimp Stir Fry with Noodles

Why You’ll Love One Pan Shrimp Stir Fry with Noodles

This stir fry is a fan favorite because of its simplicity and versatility. You can customize it easily by adding different vegetables or proteins based on what you have on hand. It’s also quick to make, allowing you to enjoy a delightful homemade meal in less than 30 minutes. The freshness of the shrimp paired with the crunch of the vegetables creates a harmony of flavors that will have everyone coming back for seconds. If you’re looking for another hearty stir fry, you might want to check out this spicy ground beef stir fry bowl.

Tips for success

  • Use fresh shrimp for the best flavor, but frozen shrimp can work too as long as they’re thawed properly.
  • Make sure not to overcook the shrimp; they should just turn pink and opaque.
  • Feel free to add any other preferred vegetables, such as snap peas or zucchini, for extra variety.

High-Protein One-Pan Shrimp Stir Fry with Noodles

Serving Suggestions

This dish is fantastic on its own, but you can serve it with a side of spring rolls or a fresh salad to complete your meal. It also pairs wonderfully with a light sprinkle of sesame seeds on top for added crunch and aesthetics.

FAQs

Can I use another type of protein instead of shrimp?

Absolutely! Chicken, beef, or tofu would all work well in this stir fry.

How can I make this dish gluten-free?

To make it gluten-free, choose rice noodles or gluten-free stir-fry sauce.

How do I store leftovers?

Store leftover stir fry in an airtight container in the fridge for up to three days. Reheat in the microwave or on the stovetop.

Enjoy preparing this vibrant and protein-packed dish that’s sure to impress everyone at your table!

One-Pan Shrimp Stir Fry with Noodles

A delicious, high-protein stir fry featuring tender shrimp, colorful veggies, and flavorful noodles, perfect for busy weeknights.

Main Ingredients

  • 1 pound shrimp, peeled and deveined (Use fresh shrimp for best flavor.)
  • 8 ounces noodles (Cook according to package directions.)
  • 1 bell pepper bell peppers, chopped (Any color bell pepper can be used.)
  • 1 cup broccoli florets (Fresh or frozen can be used.)
  • 1 cup carrots, sliced (Add other preferred vegetables if desired.)
  • 1/3 cup stir-fry sauce (Use favorite brand.)

Preparation

  1. Gather all your ingredients: shrimp, noodles, bell peppers, broccoli, carrots, and stir-fry sauce.
  2. Cook the noodles according to the package directions, then set them aside.

Cooking

  1. In a large pan over medium heat, add a splash of oil and sauté the shrimp until they turn pink.
  2. Add the chopped vegetables to the pan and stir-fry until they are tender yet crisp.
  3. Mix in the cooked noodles and sauce, stirring everything together until well combined.
  4. Serve hot and enjoy!

For added crunch, top with sesame seeds. You can substitute shrimp with chicken, beef, or tofu if preferred.

Dinner, Main Course
Asian, Stir Fry
Easy Recipe, High-Protein, One-Pan Meal, Quick Dinner, Shrimp Stir Fry

High-Protein Creamy Philly Cheesesteak Mac & Cheese Bliss

If you’re looking for a dish that brings comfort and excitement to the dinner table, look no further than High-Protein Creamy Philly Cheesesteak Mac & Cheese Bliss. This delightful recipe combines the creamy goodness of mac and cheese with the savory flavors of a classic Philly cheesesteak, creating a meal that is both filling and satisfying. Packed with protein and bursting with flavor, it’s sure to become a favorite for family and friends. So, grab your apron, and let’s dive into this crowd-pleasing dish that will have everyone asking for seconds!

How to prepare High-Protein Creamy Philly Cheesesteak Mac & Cheese Bliss

To create this delicious dish, start by gathering all your ingredients. First, cook your pasta according to the package instructions until al dente. Once done, set it aside. In a large skillet, cook sliced beef, onions, and bell peppers until the beef is browned and the vegetables are tender. Then, mix in a creamy cheese sauce made with your choice of cheeses and a splash of milk. Combine the macaroni with the beef mixture and stir until everything is well coated in that cheesy goodness. Finally, bake until bubbly and golden on top.

High-Protein Creamy Philly Cheesesteak Mac & Cheese Bliss

Why You’ll Love High-Protein Creamy Philly Cheesesteak Mac & Cheese Bliss

This recipe is packed with flavor and nutrition. Each bite offers the rich taste of creamy cheese combined with tender beef and crisp veggies, making it a delightful meal any time of the year. Plus, if you’re looking for a low-carb alternative, you might want to check out this low-carb version of Philly cheesesteak. The combination of high protein and delicious flavors makes it a fantastic choice for anyone looking to indulge guilt-free.

Tips for success

  1. Choose the Right Pasta: Using small pasta shapes like macaroni or shells will help hold onto the creamy sauce better.
  2. Customize Your Cheese: Feel free to mix different kinds of cheese to suit your taste; provolone, cheddar, and cream cheese all work well.
  3. Add Extra Veggies: You can enhance the nutritional value of your dish by adding spinach or mushrooms to the beef mixture.

High-Protein Creamy Philly Cheesesteak Mac & Cheese Bliss

Serving Suggestions

Once ready, serve your High-Protein Creamy Philly Cheesesteak Mac & Cheese Bliss hot from the oven with a sprinkle of fresh parsley on top. This dish pairs nicely with a crisp green salad or even some garlic bread for dipping!

FAQs

Can I make this dish ahead of time?

Yes, you can prepare the mac and cheese in advance and store it in the fridge before baking. Just cover it tightly and bake when you’re ready.

How can I make this dish vegetarian?

To make a vegetarian version, substitute the beef with your favorite meat alternative or a hearty vegetable mix.

What type of cheese works best?

A combination of mozzarella for creaminess and cheddar for flavor works wonderfully, but you can customize it based on your preference.

Get ready to create a spectacular dish that your family will love, and enjoy the delightful flavors of High-Protein Creamy Philly Cheesesteak Mac & Cheese Bliss!

High-Protein Creamy Philly Cheesesteak Mac & Cheese Bliss

A delicious blend of creamy mac and cheese with the savory flavors of a classic Philly cheesesteak, packed with protein and bursting with flavor.

For the Mac and Cheese

  • 2 cups pasta (macaroni or shells) (Use small pasta shapes to hold the creamy sauce.)
  • 1 cup milk (For the creamy cheese sauce.)
  • 1 cup cheddar cheese, shredded (Customize your cheese mix as desired.)
  • 1 cup mozzarella cheese, shredded (Provides creaminess.)

For the Philly Cheesesteak Mixture

  • 1 pound sliced beef (Cook until browned.)
  • 1 medium onion, sliced (Add to beef mixture.)

For Toppings

  • 1 tablespoon fresh parsley, chopped (For garnish before serving.)

Preparation

  1. Cook the pasta according to package instructions until al dente, then set aside.
  2. In a large skillet, cook sliced beef, onions, and bell peppers until the beef is browned and the vegetables are tender.
  3. Incorporate the milk and cheese into the skillet to create a creamy cheese sauce.
  4. Combine the cooked macaroni with the beef and cheese mixture, stirring until well coated.

Baking

  1. Preheat the oven to 350°F (175°C).
  2. Transfer the mixture to a baking dish and bake until bubbly and golden on top.

Serving

  1. Serve hot from the oven with a sprinkle of fresh parsley on top.

You can prepare the mac and cheese in advance and store it in the fridge before baking. To make a vegetarian version, substitute beef with a meat alternative or vegetables.

Dinner, Main Course
American
Comfort Food, Family Meal, High Protein, Mac and Cheese, Philly Cheesesteak

Honey Lime Chicken & Avocado Rice Bowl – High Protein Healthy Dinner Idea

If you’re looking for a meal that is both nutritious and utterly delicious, then the Honey Lime Chicken & Avocado Rice Bowl is your next must-try dish. This incredible recipe harmonizes tender chicken, creamy avocado, and zesty lime, making it a pleasing option for family dinners. Not only is it packed with protein, but it’s also bursting with flavor, making it a real crowd-pleaser. You’ll be excited to whip this up in your kitchen, and your family will love every bite!

How to prepare Honey Lime Chicken and Avocado Rice Bowl

Preparing this delightful dish is straightforward and fun. Start by marinating your chicken in a mixture of honey, lime juice, garlic, and a touch of soy sauce. This marinade infuses the chicken with vibrant flavor and ensures each bite is juicy. While the chicken marinates, you can cook your rice, which provides a hearty base for the dish. Once everything is ready, grill or sauté the chicken before assembling your bowl with sliced avocado and fresh veggies. It’s that simple to create a plate that looks as good as it tastes!

Honey Lime Chicken & Avocado Rice Bowl – High Protein Healthy Dinner Idea

Why You’ll Love Honey Lime Chicken and Avocado Rice Bowl

One taste of this Honey Lime Chicken & Avocado Rice Bowl and you’ll understand why it’s such a beloved recipe. The tangy lime and sweet honey combo creates an unforgettable taste, while the protein-rich chicken ensures you feel full and satisfied. Plus, it’s versatile; feel free to add your favorite toppings, such as cilantro, cherry tomatoes, or a sprinkle of cheese. This dish is not just a meal, it’s a wholesome experience that can transport you to a sunny beachside getaway with its fresh flavors.

Tips for success

  • Marinate Longer: If you can, let the chicken marinate for a few hours or even overnight to develop deeper flavors.
  • Use Fresh Ingredients: Fresh lime juice and ripe avocados will enhance the dish’s overall taste and quality.
  • Experiment with Grains: While rice is an excellent base, consider using quinoa or farro for a different texture and taste.

Honey Lime Chicken & Avocado Rice Bowl – High Protein Healthy Dinner Idea

Serving Suggestions

This bowl is perfect as is, but you can enhance it with a side of mixed greens or a light salad to add crunch and variety. If you’re feeling adventurous, try pairing it with a refreshing mango salsa for a fruity twist. You could also serve it alongside tortilla chips for a casual dinner vibe with friends.

FAQs

Can I use a different protein?

Absolutely! This recipe works great with shrimp, beef, or even tofu if you’re looking for a vegetarian option.

How do I store leftovers?

You can store leftovers in an airtight container in the refrigerator for up to three days. Just reheat the chicken and rice before enjoying.

Is there a way to make this recipe ahead of time?

Yes, you can prepare the chicken and rice ahead of time. Store them separately until you’re ready to assemble your bowls for fresh flavors.

For more delicious inspiration, check out this Honey Lime Chicken Stack Recipe that offers a creative twist on this favorite!

Honey Lime Chicken & Avocado Rice Bowl

A nutritious and delicious meal featuring marinated chicken, creamy avocado, and zesty lime, making it a perfect dish for family dinners.

For the Marinade

  • 1 cup honey (For sweetness and flavor.)
  • 1/4 cup lime juice (Freshly squeezed for best taste.)
  • 2 cloves garlic (Minced.)
  • 2 tablespoons soy sauce (For seasoning.)

For the Bowl

  • 2 cups cooked rice (Base of the bowl.)
  • 2 large avocados (Sliced.)
  • 1 cup fresh veggies (Choose your favorites.)

Preparation

  1. In a bowl, combine honey, lime juice, minced garlic, and soy sauce to create a marinade.
  2. Add the chicken to the marinade and let it sit for at least 20 minutes, or refrigerate for a few hours for deeper flavors.
  3. While the chicken is marinating, cook your rice according to package instructions.

Cooking

  1. Once the chicken is marinated, grill or sauté the chicken until fully cooked.

Assembly

  1. In a bowl, layer the cooked rice, sliced avocado, and any additional fresh veggies.
  2. Top with the grilled chicken slices.
  3. Serve immediately.

For best results, marinate the chicken longer, use fresh ingredients, and consider experimenting with different grains like quinoa or farro.

Dinner, Main Course
American, Tex-Mex
Avocado Rice Bowl, Easy Recipe, Family Meal, Healthy Dinner, Honey Lime Chicken

High Protein Lasagna Soup

High Protein Lasagna Soup is a delicious blend of comforting flavors and satisfying ingredients, perfect for those cold evenings. This crowd-pleaser captures the essence of traditional lasagna in a delightful soup form, making it both easy to prepare and enjoyable to eat. With layers of rich tomato sauce, creamy cheese, and hearty protein, it’s a meal that everyone will love. Plus, it offers a fun twist on a classic dish, making it an exciting recipe to try out on your next cooking adventure.

How to prepare High Protein Lasagna Soup

Begin your culinary journey by gathering the necessary ingredients: ground beef or turkey, diced tomatoes, vegetable broth, lasagna noodles, ricotta cheese, and mozzarella cheese. In a large pot, brown the meat over medium heat until cooked through, then add the diced tomatoes and broth. Bring the mixture to a simmer before adding the broken lasagna noodles. Cook until tender, then stir in the ricotta and mozzarella until melted.

High Protein Lasagna Soup

Why You’ll Love High Protein Lasagna Soup

This High Protein Lasagna Soup is not only flavorful but also packed with protein, perfect for a healthy diet. It’s a meal that warms the heart, while the soft noodles and melted cheese create a delightful texture. Moreover, it’s a great way to sneak in veggies, making it nutritious as well. If you enjoy dishes like High Protein Creamy Taco Soup, this recipe will surely tickle your taste buds.

Tips for success

  1. Customize the Protein: Feel free to substitute ground turkey for ground beef, or even use a plant-based protein if you prefer.
  2. Vegetable Add-ins: Consider adding spinach, zucchini, or mushrooms for extra nutrients and flavor.
  3. Storage: This soup keeps well in the fridge for up to three days, making it a great option for meal prep.

High Protein Lasagna Soup

Serving Suggestions

Serve the soup with a fresh side salad or some garlic bread for a complete meal. You can also sprinkle extra cheese or fresh herbs on top for added flavor.

FAQs

  1. Can I use gluten-free noodles? Yes, you can substitute gluten-free lasagna noodles to make this soup suitable for those with gluten sensitivities.
  2. How can I make it vegetarian? Simply replace the meat with lentils or a meat substitute and increase the vegetable content for a hearty vegetarian option.
  3. Is it freezer-friendly? Yes, this soup freezes well, so you can store portions for future meals. Just make sure to cool it completely before transferring it to a freezer-safe container.

High Protein Lasagna Soup

A comforting and delicious blend of traditional lasagna flavors in a hearty soup, perfect for cold evenings.

Protein & Base Ingredients

  • 1 pound ground beef or turkey (Use plant-based protein for a vegetarian option.)
  • 1 can diced tomatoes (Use fire-roasted for extra flavor.)
  • 4 cups vegetable broth (Chicken broth can be used for extra richness.)
  • 8 ounces lasagna noodles (Broken into smaller pieces.)
  • 1 cup ricotta cheese (Can substitute with cottage cheese if preferred.)
  • 1 cup mozzarella cheese (Shredded for easier melting.)

Optional Vegetable Add-ins

  • 1 cup spinach (Fresh or frozen.)
  • 1 cup zucchini (Diced.)
  • 1 cup mushrooms (Sliced.)

Preparation

  1. In a large pot, brown the ground beef or turkey over medium heat until cooked through.
  2. Add the diced tomatoes and vegetable broth to the pot, bringing the mixture to a simmer.
  3. Stir in the broken lasagna noodles and cook until they are tender.
  4. Finally, stir in the ricotta and mozzarella cheeses until melted.

Customize with additional vegetables, and serve with a fresh side salad or garlic bread for a complete meal. This soup is freezer-friendly and can be stored for up to three days in the fridge.

Main Course, Soup
Italian
Comfort Food, Easy meal, Healthy Soup, High Protein Lasagna Soup, Lasagna Twist

High Protein Crustless Chicken Pot Pie

If you’re looking for a dish that brings both comfort and nutrition, look no further than High Protein Crustless Chicken Pot Pie. This recipe combines the classic flavors of chicken pot pie with a protein-packed twist, making it a dish that everyone will love. With tender chicken, fresh vegetables, and a creamy sauce, it’s a delightful meal that’s perfect for family dinners or cozy nights in. The best part? You won’t miss the crust at all! It’s so good that your taste buds will be begging for more.

How to Prepare High Protein Crustless Chicken Pot Pie

To get started, gather your ingredients, which typically include chicken breast, mixed vegetables, and a few basic spices. You will sauté the chicken and vegetables before combining everything in a baking dish with a creamy mixture. It’s as easy as that! For a visual guide, you can check out similar comforting recipes like the savory chicken pot pie cooked in a crockpot.

High Protein Crustless Chicken Pot Pie

Why You’ll Love High Protein Crustless Chicken Pot Pie

This dish is not only delicious but also nutritious. The absence of crust cuts down on carbohydrates while the protein-rich chicken fills you up. Each bite is creamy and full of flavor, making it a true crowd-pleaser that fits well into a balanced diet. Plus, it takes minimal time to prepare, which means more time for you to enjoy with family or friends.

Tips for Success

  1. Make sure to use fresh vegetables for the best flavor and texture.
  2. You can customize the protein by adding turkey or tofu for a vegetarian option.
  3. Allow the pie to cool slightly before serving to help it hold its shape.

High Protein Crustless Chicken Pot Pie

Serving Suggestions

Pair this dish with a side salad or some crusty bread for a complete meal. It’s also delicious on its own and can easily serve as a hearty lunch the next day!

FAQs

Can I use frozen vegetables?

Absolutely! Frozen vegetables work great and are convenient, just make sure to thaw and drain them before mixing.

How can I make this dish dairy-free?

You can substitute the creamy ingredients with coconut milk or a dairy-free cream alternative to keep it creamy without dairy.

How do I store the leftovers?

Store any leftovers in an airtight container in the fridge for up to three days. You can reheat it in the oven or microwave when you’re ready to enjoy it again.

With its comforting flavors and healthy profile, High Protein Crustless Chicken Pot Pie is sure to become a family favorite. Enjoy making this easy recipe!

High Protein Crustless Chicken Pot Pie

A nutritious twist on the classic chicken pot pie, this crustless version is packed with protein and fresh vegetables, offering comfort and flavor without the carbs.

Main Ingredients

  • 2 cups chicken breast, cooked and shredded (Use rotisserie chicken for a quicker option.)
  • 2 cups mixed vegetables, fresh or frozen (Use a mix of your favorite vegetables.)
  • 1 cup cream or dairy-free cream alternative (Coconut milk works great for dairy-free.)
  • 1 teaspoon salt (Adjust to taste.)
  • 0.5 teaspoon black pepper (Freshly ground preferred.)

Preparation

  1. Preheat your oven to 375°F (190°C).
  2. In a skillet, sauté the shredded chicken and mixed vegetables over medium heat until heated through.
  3. In a large bowl, combine the sautéed mixture with the cream, salt, and pepper.
  4. Pour the mixture into a greased baking dish.

Baking

  1. Bake in the preheated oven for 25-30 minutes or until the top is slightly golden.
  2. Remove from the oven and allow to cool for a few minutes before serving.

For added protein, consider using turkey or tofu as a substitute. Store leftovers in an airtight container in the fridge for up to three days. Reheat in the oven or microwave when ready to enjoy again.

Dinner, Main Course
American
Chicken Pot Pie, Comfort Food, Crustless, Healthy Dinner, High Protein

High Protein Overnight Oats

High-Protein Overnight Oats are a delightful way to start your day. They are simple to make, filling, and packed with nutrients. Imagine waking up to a creamy bowl of oats that have soaked overnight, infused with flavors and topped with your favorite ingredients. This recipe is not just a breakfast, it’s a treat that many people rave about because of its great taste and satisfying texture. Plus, if you’re looking to add a bit more protein to your morning routine, these oats are a perfect choice. You’ll find yourself eager to measure out those ingredients, ready to enjoy a nutritious and delicious breakfast!

Why You’ll Love High-Protein Overnight Oats

These High-Protein Overnight Oats are a fantastic option for busy mornings. They are incredibly versatile, allowing you to customize with fruits, nuts, and seeds. Each bite is creamy and flavorful, making it hard to believe something so healthy can taste this good. You can prepare several servings ahead of time, so breakfast is ready whenever you are. They are not only convenient but also help keep you full and energized throughout the morning.

Tips for Success

When making these overnight oats, consider the texture you enjoy. If you like a thicker consistency, use less liquid, whereas if you prefer a creamier bowl, add a bit more. Another great tip is to let your oats chill in the refrigerator for at least a few hours or overnight, allowing the flavors to meld together beautifully. If you’re looking for additional inspiration, try variations of overnight oats like this high-protein tiramisu overnight oats recipe for a unique twist.

High-Protein Overnight Oats

Serving Suggestions

These oats are delightful served straight from the jar, but you can also dress them up. Top with fresh fruits like berries or banana slices for a burst of flavor and nutrients. A drizzle of honey or maple syrup adds a hint of sweetness, while a sprinkle of nuts or seeds gives a satisfying crunch. You can also experiment with yogurt or nut butter for added creaminess and protein. The possibilities are endless, so have fun creating your perfect bowl!

FAQs

Can I use quick oats instead of rolled oats?

Yes, you can use quick oats. They will give a different texture, becoming softer and creamier.

How long can I store overnight oats in the fridge?

Overnight oats can be stored in the fridge for up to five days, making them great for meal prep.

Can I make these oats vegan?

Absolutely! Use plant-based milk like almond milk or oat milk and choose a vegan protein powder if needed.

High-Protein Overnight Oats

Start your day with creamy and nutritious High-Protein Overnight Oats, perfect for busy mornings and easily customizable with your favorite toppings.

Base Ingredients

  • 1 cup rolled oats (Use quick oats for a softer texture.)
  • 2 cups milk of choice (Almond milk or oat milk can be used for a vegan option.)
  • 2 scoops protein powder (Choose a flavor that complements your oats.)

Toppings

  • 1 banana sliced banana (Fresh or can use frozen.)
  • 1 cup berries (Any mix of berries works well.)
  • 2 tablespoons honey or maple syrup (Adjust to taste.)
  • 2 tablespoons nuts or seeds (Choose your favorites for crunch.)

Preparation

  1. In a bowl or jar, combine rolled oats, milk, and protein powder.
  2. Mix thoroughly to ensure the oats are well-coated with the liquid.
  3. Cover and refrigerate for at least 4 hours or overnight.

Serving

  1. Remove from the fridge and stir the oats before serving.
  2. Top with sliced banana, berries, and your choice of sweetener.
  3. Add nuts or seeds for extra crunch and enjoy!

Consider the texture you prefer; use more or less liquid to achieve desired consistency. Overnight oats can be stored in the fridge for up to five days.

Breakfast, Snack
American
Easy Recipe, Healthy Breakfast, high-protein breakfast, Meal Prep, Overnight Oats

High Protein Freezer Breakfast

Starting your day with a healthy meal can set a positive tone for everything that follows. If you’re looking for a simple and delicious breakfast that’s quick to prepare and easy to store, then you will absolutely adore these high protein freezer friendly breakfast bowls. They are not only nutritious but also packed with flavor, making them a favorite among busy folks who still want to enjoy a hearty meal in the morning. Imagine waking up to a warm, savory bowl filled with wholesome ingredients that give you the energy to tackle your day. Sounds delightful, right?

How to prepare High Protein Freezer Breakfast

Preparing these bowls is easy and fun. Start by gathering all your favorite ingredients, such as eggs, vegetables, and a good source of protein like chicken or beans. Whisk your eggs and mix in the vegetables along with seasoning to taste. Next, cook everything in a skillet until the eggs are just set. Portion the mixture into freezer-safe containers and let them cool. Finally, freeze your breakfast bowls for later enjoyment.

High Protein Freezer Friendly Breakfast Bowls You'll Love

Why You’ll Love High Protein Freezer Breakfast

One of the many reasons you’ll love these breakfast bowls is their versatility. You can customize them with different protein sources, veggies, and spices, creating variations that suit your taste buds. Not only are they convenient, but they also make sure you start your day with enough protein to keep you full and satisfied. Plus, if you’re in a rush, you can quickly reheat them, giving you a warm meal in minutes.

Tips for success

To make your breakfast bowls even better, consider these helpful tips. First, choose vegetables that freeze well, such as bell peppers and spinach, to maintain their flavor and texture. Secondly, allow the cooked ingredients to cool before sealing them in containers to avoid condensation. Lastly, don’t forget to label your containers; it makes it easier to grab the right bowl in the morning rush. For more meal prep ideas, check out these easy high protein breakfast boxes that are just as delicious and satisfying.

High Protein Freezer Friendly Breakfast Bowls You'll Love

Serving Suggestions

These breakfast bowls can be enjoyed as is, but you might want to add some toppings for extra flavor. A dollop of Greek yogurt or a sprinkle of feta cheese can elevate your meal beautifully. You could also pair them with a side of fresh fruit or whole grain toast for a complete breakfast experience. Get creative and make it your own!

FAQs

1. Can I prepare these breakfast bowls ahead of time?

Absolutely! These bowls are designed to be made in advance and frozen for later use.

2. How long do they last in the freezer?

These breakfast bowls can be stored in the freezer for up to three months.

3. Can I reheat them in the microwave?

Yes, just make sure to remove any plastic wrap and cover them with a microwave-safe lid or plate to retain moisture while reheating.

High Protein Freezer Breakfast Bowls

Start your day with these delicious and nutritious breakfast bowls that are high in protein and easy to store and reheat.

For the Breakfast Bowls

  • 8 large large eggs (Whisked)
  • 1 cup mixed vegetables (bell peppers, spinach, etc.) (Choose vegetables that freeze well)
  • 1 cup cooked chicken or beans (Good source of protein)
  • to taste seasoning (salt, pepper, etc.) (Adjust according to preference)

Preparation

  1. Gather all your ingredients: eggs, vegetables, and a protein source.
  2. Whisk the eggs and mix in the vegetables and seasoning to taste.
  3. Cook the mixture in a skillet until the eggs are just set.
  4. Portion the mixture into freezer-safe containers and let them cool.
  5. Freeze the breakfast bowls for later enjoyment.

For added flavor, consider topping your breakfast bowls with Greek yogurt or feta cheese. Pair with fresh fruit or whole grain toast for a complete breakfast. Label your containers for easy retrieval in the morning rush.

Breakfast, Meal Prep
American
Breakfast Bowls, Freezer Friendly, Healthy, High Protein, Meal Prep

High Protein Creamy Taco Soup

High protein creamy taco soup with garnishes in a bowl

Creamy Taco Soup is a warm and comforting dish that combines the zing of taco flavors with a creamy finish. It’s a great way to enjoy a hearty meal that’s packed with protein, making it perfect for busy weeknights or for meal prep. This soup is delicious, easy to make, and can be customized to fit your taste preferences. Whether you’re looking for something satisfying after a workout or a cozy dish for a family dinner, this soup is sure to please. Let’s dive into why this recipe is worth making.

Why Make This Recipe

High Protein Creamy Taco Soup is not just delicious; it also offers several benefits. First, it is loaded with protein, making it a perfect meal choice for anyone looking to support their muscle growth or weight loss goals. Ingredients like ground turkey or beef provide a hearty base that is both filling and nutritious. Additionally, the creamy texture comes from healthy additions like Greek yogurt or reduced-fat cream cheese, which adds flavor while keeping the dish light.

Moreover, making this soup is simple and can be done in one pot, saving time on both cooking and cleanup. It is a great choice for families, as kids usually enjoy the familiar taco flavors, ensuring everyone at the table is happy. The soup can also be easily customized with your favorite toppings, such as cheese, avocado, or cilantro, making it versatile enough to suit various tastes. Overall, this recipe is an excellent way to enjoy a delicious and nutritious meal that’s both satisfying and fun to eat.

How to Make High Protein Creamy Taco Soup

To prepare High Protein Creamy Taco Soup, start by gathering your ingredients. You’ll need ground turkey or any lean meat, diced onion, red bell pepper, canned tomatoes, black beans, corn, taco seasoning, and some low-sodium broth. Also, have Greek yogurt or cream cheese on hand for the creamy consistency.

Begin by cooking the ground meat in a large pot over medium heat until browned. Add the diced onion and bell pepper, cooking until they soften and become fragrant. Then stir in the canned tomatoes, black beans, corn, and taco seasoning. Pour in the broth and bring everything to a simmer, allowing the flavors to meld together. After about 15-20 minutes, reduce the heat and stir in the Greek yogurt or cream cheese until it’s well combined. This will give your soup that creamy texture.

Taste your soup and adjust the seasoning as necessary. Cook for an additional few minutes to warm through, then serve hot. This soup is perfect to enjoy right away, or you can let it cool and save it for later.

How to Serve High Protein Creamy Taco Soup

Serving High Protein Creamy Taco Soup is easy and enjoyable. Start by ladling the soup into bowls. For an extra touch, consider adding toppings that enhance the flavors and textures. Shredded cheese, like cheddar or Mexican blend, adds a rich and cheesy element. Fresh avocado slices can give a creamy texture that complements the soup well. A sprinkle of chopped cilantro adds a fresh taste and brightens the dish.

You can also set up a toppings bar where everyone can customize their bowls. Include items like sliced jalapeños, tortilla strips, or sour cream to give each person the chance to create their perfect bowl of taco soup. This interactive approach makes the meal not just tasty but also fun and engaging. Serve with warm, crusty bread or tortilla chips for a complete meal that keeps everyone satisfied.

How to Store High Protein Creamy Taco Soup

To store any leftover High Protein Creamy Taco Soup, let it cool completely at room temperature. Then transfer it to an airtight container. The soup can be kept in the refrigerator for up to three to four days. If you want to save it for a longer period, consider freezing it. Pour the cooled soup into freezer-safe bags or containers, ensuring there’s enough space for expansion. Properly stored, it can last in the freezer for up to three months.

When you’re ready to enjoy your soup again, thaw it in the refrigerator overnight. Reheat it on the stove over low heat, stirring occasionally until it’s heated through. If it seems too thick after reheating, add a little broth or water to reach your desired consistency. Always make sure to check the taste and seasoning again before serving.

Tips to Make High Protein Creamy Taco Soup

Here are some handy tips to ensure your High Protein Creamy Taco Soup turns out great every time. First, don’t skip on browning the meat. This step adds depth of flavor to the soup, making it more delicious. Use lean meat options to keep the soup lighter but still packed with protein.

To enhance the flavor even more, consider making your own taco seasoning. Combining spices like chili powder, cumin, garlic powder, and onion powder can give you a fresh taste that store-bought mixes might lack. If you enjoy a bit of heat, add diced jalapeños or cayenne pepper to your soup.

For those looking to make it healthier, feel free to load the soup with more veggies, such as spinach, zucchini, or carrots. Finally, remember to adjust the creaminess based on your preference. You can use more or less Greek yogurt or cream cheese to customize the texture just right for you.

Variation

You can easily customize this recipe to suit your dietary needs or preferences. For a vegetarian version, use plant-based ground meat or beans as the protein source. You can also substitute regular cream cheese with dairy-free alternatives for a vegan option. Additionally, spice it up with different varieties of beans like kidney or pinto beans for a twist on flavor.

FAQs

1. Can I use other meats besides ground turkey?
Yes, you can use any ground meat you prefer, such as chicken or even beef. You can also make it vegetarian by using plant-based proteins or extra beans.

2. Can I make this soup in advance?
Absolutely! This soup keeps well and flavors may deepen if made a day ahead. Just store it in an airtight container in the fridge.

3. How can I spice up my taco soup?
For extra spice, add diced jalapeños, a dash of hot sauce, or cayenne pepper while cooking. You can also top it with spicy salsa.

4. Is this soup gluten-free?
Yes, as long as you check the labels on your taco seasoning and other ingredients you are using, this soup can be easily made gluten-free.

5. Can I freeze the leftovers?
Yes, you can freeze leftovers for up to three months. Just make sure to let it cool and store it in an airtight container or freezer-safe bag.

[tasty-recipe id=”4912″]

High Protein Creamy Taco Soup

A warm, comforting soup that combines hearty taco flavors with a creamy finish, perfect for busy weeknights or meal prep.

Main Ingredients

  • 1 lb ground turkey or lean meat (Can substitute with chicken or beef.)
  • 1 cup diced onion (For flavor base.)
  • 1 cup diced red bell pepper
  • 1 can canned tomatoes
  • 1 can black beans (Rinsed and drained.)
  • 1 cup corn (Can use frozen corn.)
  • 2 tbsp taco seasoning (Use homemade or store-bought.)
  • 4 cups low-sodium broth (Chicken or vegetable broth works.)
  • 1 cup Greek yogurt or reduced-fat cream cheese (For a creamy texture.)

Preparation

  1. In a large pot over medium heat, cook the ground meat until browned.
  2. Add the diced onion and bell pepper, cooking until softened and fragrant.
  3. Stir in the canned tomatoes, black beans, corn, and taco seasoning.
  4. Pour in the broth and bring to a simmer, allowing flavors to meld for about 15-20 minutes.
  5. Reduce the heat and stir in the Greek yogurt or cream cheese until well combined for creaminess.
  6. Taste and adjust seasoning as necessary, then cook for a few more minutes to warm through.

Serving

  1. Ladle soup into bowls and add desired toppings such as shredded cheese, avocado, or cilantro.
  2. Consider setting up a toppings bar for a customizable meal.

Storage

  1. Let any leftovers cool completely at room temperature and transfer to an airtight container.
  2. Store in the refrigerator for up to 3-4 days or freeze for up to three months.
  3. To reheat, thaw in the refrigerator overnight and warm on the stove, adding broth or water if too thick.

Tip: Browning the meat adds depth of flavor. Customize creaminess with more or less Greek yogurt or cream cheese. Try loading more veggies for a healthier soup.

Main Course, Soup
Mexican
Creamy Taco Soup, Easy Dinner, Healthy Soup, High Protein Soup, Meal Prep

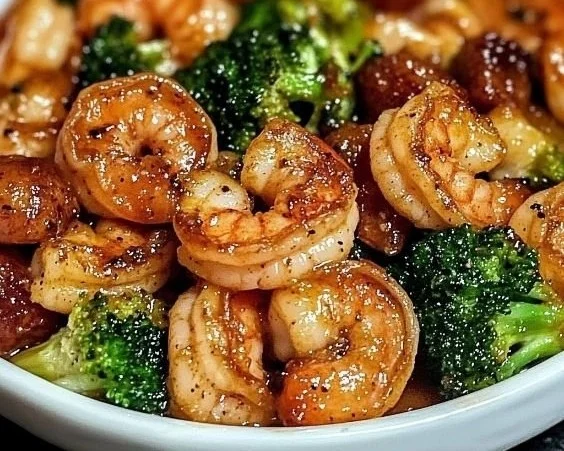
High-Protein Honey Garlic Shrimp

High-protein honey garlic shrimp dish served with vegetables

This High-Protein Honey Garlic Shrimp is warm, simple, and full of flavor. It mixes sweet honey with garlic and a little soy for a bright sauce. The shrimp cook fast and stay juicy. It is a great high-protein meal that fits weeknight dinners and meal prep. People love this shrimp because it tastes rich, but it feels light and healthy. Give it a try, you might find yourself making it again and again.

How to prepare High-Protein Honey Garlic Shrimp

Ingredients

  • 1 pound large shrimp, peeled and deveined
  • 2 tablespoons olive oil
  • 3 garlic cloves, minced
  • 3 tablespoons honey
  • 2 tablespoons low-sodium soy sauce
  • 1 tablespoon rice vinegar or lemon juice
  • 1 teaspoon grated ginger (optional)
  • Salt and pepper to taste
  • Chopped green onion or parsley for garnish

Directions

  1. Pat the shrimp dry and season with a little salt and pepper.
  2. In a small bowl mix honey, soy sauce, rice vinegar, garlic, and ginger if you use it.
  3. Heat olive oil in a large pan over medium-high heat.
  4. Add shrimp in one layer, cook 1 to 2 minutes per side until pink and curled. Do not overcook.
  5. Lower the heat, pour the honey garlic sauce into the pan. Stir and cook 1 more minute until sauce thickens and coats the shrimp.
  6. Remove from heat, garnish with green onion or parsley, serve right away.


High-Protein Honey Garlic Shrimp

Why You’ll Love High-Protein Honey Garlic Shrimp

  • Fast to cook, ready in about 15 minutes.
  • High-protein, great for muscle building and a filling meal.
  • Sweet and savory sauce that most people enjoy, a true crowd-pleaser.
  • Works for quick dinner, meal prep, or a light healthy lunch.
  • Uses simple pantry ingredients, no hard steps.

tips for success

  • Pat shrimp dry before cooking, this helps a nice sear.
  • Use large or extra-large shrimp for more protein per bite.
  • Don’t overcook, shrimp go from perfect to rubbery fast.
  • Taste the sauce before adding, adjust honey or soy to your taste.
  • If sauce gets too thick, add a splash of water to loosen it.

Serving Suggestions

  • Serve over steamed rice or cauliflower rice for a low-carb option.
  • Spoon over a green salad for a warm salad bowl.
  • Try with noodles, quinoa, or in lettuce wraps.
  • Add steamed broccoli or snap peas on the side for more veggies.
  • Top with sesame seeds for a nice crunch.


High-Protein Honey Garlic Shrimp

FAQs

Q: Can I use frozen shrimp?

A: Yes, thaw fully and pat dry before cooking for best texture.

Q: How long does this keep in the fridge?

A: Keep in an airtight box for 2 to 3 days. Reheat gently so shrimp do not overcook.

Q: Can I make the sauce ahead?

A: Yes, mix the sauce in advance and store in the fridge. Add it to the pan when shrimp are nearly done.

Q: Is this recipe low calorie?

A: It can be, if you use moderate honey and serve with veggies or cauliflower rice.

Q: Can I use a sugar substitute?

A: You can, but the taste and sauce texture may change. Try a small test batch.

Conclusion

For another trusted take on honey garlic shrimp and extra tips, see Honey-Garlic Shrimp – Allrecipes.

High-Protein Honey Garlic Shrimp

This High-Protein Honey Garlic Shrimp is a warm, simple dish that mixes sweet honey with garlic and soy for a bright sauce. Packed with flavor and high in protein, it’s perfect for weeknight dinners or meal prep.

Main Ingredients

  • 1 pound large shrimp, peeled and deveined
  • 2 tablespoons olive oil
  • 3 cloves garlic, minced
  • 3 tablespoons honey
  • 2 tablespoons low-sodium soy sauce
  • 1 tablespoon rice vinegar or lemon juice
  • 1 teaspoon grated ginger (optional) (Can be omitted if desired.)
  • Salt and pepper to taste
  • Chopped green onion or parsley for garnish

Preparation

  1. Pat the shrimp dry and season with a little salt and pepper.
  2. In a small bowl, mix honey, soy sauce, rice vinegar, garlic, and ginger (if using).
  3. Heat olive oil in a large pan over medium-high heat.

Cooking

  1. Add shrimp in one layer and cook for 1 to 2 minutes per side until pink and curled. Do not overcook.
  2. Lower the heat and pour the honey garlic sauce into the pan. Stir and cook for 1 more minute until the sauce thickens and coats the shrimp.
  3. Remove from heat, garnish with green onion or parsley, and serve right away.

Pat shrimp dry before cooking for a nice sear. Use large or extra-large shrimp for more protein per bite. Taste the sauce before adding, and adjust honey or soy to your taste. If sauce gets too thick, add a splash of water to loosen it.

Dinner, Main Course
Asian
Healthy, High Protein, Honey Garlic Shrimp, Meal Prep, Quick Dinner