Garlic Sourdough Focaccia

Imagine biting into a warm piece of focaccia, the rich flavors of garlic and cheese melting together in every mouthful. Garlic Sourdough Focaccia is not just a loaf of bread; it’s a celebration of tanginess and aroma that fills your kitchen with irresistible comfort. This recipe is ideal for gatherings or simply enjoying a cozy evening at home, making it a crowd-pleaser that will keep everyone coming back for more. You’ll find that making this focaccia at home is a delightful experience, and soon enough, you’ll want it on your table every week! You may also find Air Fryer Honey Butter Garlic Chicken Tenders Recipe useful.

How to prepare Garlic Sourdough Focaccia

To make your own Garlic Sourdough Focaccia, you’ll need a few simple ingredients and a little patience. Start by gathering your main ingredients: sourdough starter, flour, water, salt, garlic, and cheese. The first thing you’ll want to do is mix the starter with flour and water, then let it rise. After that, incorporate salt and minced garlic, along with shredded cheese for that ultimate cheesiness. Knead the dough gently before placing it in a greased baking dish to rise again. Once it has doubled in size, press your fingers into the top to create dimples, drizzle with olive oil, and sprinkle more garlic and cheese on top. Bake until golden brown, and enjoy the glorious aromas wafting through your home!

Garlic Sourdough Focaccia: The Ultimate Cheesy & Garlicky Recipe

Why You’ll Love Garlic Sourdough Focaccia

There are countless reasons to adore Garlic Sourdough Focaccia. Firstly, it has a delightful chewy crust, perfectly paired with a soft center that melts in your mouth. The blend of savory garlic and gooey cheese elevates each bite, making it an ideal accompaniment to soups and salads or as a standalone snack. What’s more, sourdough bread is known for its health benefits, such as better digestion and more nutrients compared to regular bread. Plus, making it can be a fun activity to share with family or friends, where everyone can get involved in the kneading or the baking process. Check out some mouth-watering dessert suggestions that pair beautifully with this focaccia, like a delicious German chocolate cake.

Tips for success

To ensure that your Garlic Sourdough Focaccia comes out perfect every time, keep a few handy tips in mind. First, using a mature sourdough starter is key as it ensures good fermentation and rise. Second, don’t rush the rising process, as allowing the dough to ferment longer can enhance the flavor. A third tip is to be generous with olive oil; it not only helps with flavor but also gives the focaccia that signature crunchy crust. Lastly, consider testing different cheeses to find your favorite combination, whether it’s mozzarella, cheddar, or even feta!

Garlic Sourdough Focaccia: The Ultimate Cheesy & Garlicky Recipe

Serving Suggestions

This focaccia is versatile and pairs beautifully with many dishes. Serve it alongside a fresh garden salad or a hearty bowl of soup for a complete meal. You can also present it as an appetizer with dips like hummus or olive tapenade. For a cozy movie night, slice it into strips and serve with garlic butter for dipping or drizzle it with balsamic glaze. The possibilities are endless!

FAQs

What can I do if my focaccia doesn’t rise?

If your focaccia isn’t rising, check that your sourdough starter is active. It should have a pleasant smell and bubbles on the surface. If not, give it more time or feed it before using.

Can I store Garlic Sourdough Focaccia?

Yes, you can store it in an airtight container at room temperature for a couple of days. For longer storage, slice and freeze pieces, then reheat when needed.

How do I know when the focaccia is done baking?

The focaccia is ready when it is golden brown on top and has a hollow sound when tapped on the bottom. It should also have an internal temperature of about 200°F (93°C).

Making Garlic Sourdough Focaccia is a rewarding experience that brings joy to both the cook and those who get to enjoy the end result. Don’t hesitate to experiment with garlic levels or toppings, and savor the deliciousness that you create!

Garlic Sourdough Focaccia

A rich and flavorful focaccia infused with garlic and cheese, perfect for gatherings or simply enjoying at home.

Main Ingredients

  • 1 cup Sourdough starter (Mature starter is recommended.)
  • 4 cups All-purpose flour (For best results, use bread flour.)
  • 1.5 cups Water (Room temperature.)
  • 1 tablespoon Salt (Adjust to taste.)
  • 4 cloves Garlic (Minced.)
  • 1 cup Shredded cheese (Mozzarella, cheddar, or your favorite type.)

Topping

  • 2 tablespoons Olive oil (For drizzling on top.)
  • 2 cloves Garlic (Minced, for topping.)
  • 1 cup Additional shredded cheese (Optional, for extra cheesiness.)

Preparation

  1. Mix the sourdough starter with flour and water in a large bowl.
  2. Let the mixture rise for about 3 hours or until doubled in size.
  3. Incorporate salt, minced garlic, and shredded cheese into the dough.
  4. Knead the dough gently until well combined.
  5. Place the dough in a greased baking dish and let it rise again until doubled.

Baking

  1. Preheat your oven to 400°F (200°C).
  2. Once the dough has risen, press your fingers into the top to create dimples.
  3. Drizzle with olive oil and sprinkle additional minced garlic and cheese on top.
  4. Bake in the oven for about 25 minutes or until golden brown.

Use a mature sourdough starter for best results. Allow the dough to ferment longer for enhanced flavor. Be generous with olive oil for a crunchy crust.

Appetizer, Snack
Italian
Baking, Focaccia, Garlic Bread, Homemade Bread, sourdough

Ultimate Double-Garlic Sourdough Bread

There’s nothing quite like the smell of fresh-baked bread wafting through your home, especially when it’s packed with a delicious double dose of garlic. The Ultimate Double-Garlic Sourdough Bread is sure to steal the spotlight at any gathering. With its crispy crust and soft, flavorful interior, this bread combines the tangy goodness of sourdough with the rich, aromatic taste of garlic. Whether slathered with butter or served alongside your favorite soup, this bread is a crowd-pleaser that will have everyone coming back for seconds. Get ready to roll up your sleeves and whip up a batch of your own delicious sourdough creation!

How to prepare Ultimate Double-Garlic Sourdough Bread

To make the Ultimate Double-Garlic Sourdough Bread, you’ll need to gather a few simple ingredients and follow some easy steps. Here’s how you can bring this amazing bread to life in your very own kitchen.

Ultimate Double-Garlic Sourdough Bread

Ingredients

  • 3 cups all-purpose flour
  • 1 cup active sourdough starter
  • 1 cup water, room temperature
  • 2 teaspoons salt
  • 4 cloves garlic, minced
  • 2 tablespoons olive oil
  • Additional garlic for topping (optional)

Directions

  1. In a large bowl, mix the flour, salt, and minced garlic together.
  2. In another bowl, combine the sourdough starter, water, and olive oil.
  3. Gradually add the wet mixture to the dry ingredients, stirring until a shaggy dough forms.
  4. Knead the dough for about 10 minutes on a floured surface until smooth and elastic.
  5. Place the dough in a lightly greased bowl, cover with a damp cloth, and let it rise for about 4-6 hours or until doubled in size.
  6. Once risen, shape the dough into a round loaf and place it on a baking sheet lined with parchment paper.
  7. Let the loaf rise for another hour, covered.
  8. Preheat your oven to 450°F (230°C).
  9. Optional: sprinkle additional minced garlic on top before baking.
  10. Bake in the preheated oven for 30-35 minutes, or until the bread is golden brown and sounds hollow when tapped.
  11. Let it cool on a wire rack before slicing.

Why You’ll Love Ultimate Double-Garlic Sourdough Bread

The Ultimate Double-Garlic Sourdough Bread is not only easy to make, but it is also incredibly satisfying to eat. The burst of flavor from the garlic pairs perfectly with the tangy essence of the sourdough. Each bite is a delightful mix of crunchy crust and soft, fluffy bread that will leave you craving more. Plus, the aroma that fills your kitchen will have everyone asking for the recipe!

Tips for success

  • Make sure your sourdough starter is active and bubbly to ensure the best rise.
  • Adjust the garlic amount to suit your taste; more garlic means more flavor!
  • Allow the bread to cool completely before slicing to maintain its texture.

Ultimate Double-Garlic Sourdough Bread

Serving Suggestions

This bread is fantastic served warm with butter, or alongside your favorite pasta dishes and soups. It also makes a great base for sandwiches, especially with roasted vegetables or cheeses. Enjoy it at your next dinner party, barbecue, or cozy family meal!

FAQs

Can I use fresh garlic instead of minced?

Yes, fresh finely chopped garlic works great for this recipe, just remember to use it sparingly if you’re concerned about the strength of the flavor!

How long does the bread last?

This bread stays fresh for up to 3 days at room temperature. For longer storage, wrap it tightly and freeze.

Can I add herbs to the bread?

Absolutely! Adding fresh herbs like rosemary or thyme can elevate the flavor even further. Just mix them in with the garlic.

Get ready, because your kitchen is about to become the new favorite spot for baking! Enjoy making the Ultimate Double-Garlic Sourdough Bread and share it with friends and family for a lovely bonding experience.

Ultimate Double-Garlic Sourdough Bread

A deliciously aromatic and flavorful sourdough bread loaded with garlic, featuring a crispy crust and a soft interior.

Main ingredients

  • 3 cups all-purpose flour
  • 1 cup active sourdough starter (Make sure the starter is active and bubbly.)
  • 1 cup water, room temperature
  • 2 teaspoons salt
  • 4 cloves garlic, minced (Adjust garlic amount to suit taste.)
  • 2 tablespoons olive oil

Topping (optional)

  • additional garlic for topping (Optional, for enhanced garlic flavor.)

Preparation

  1. In a large bowl, mix the flour, salt, and minced garlic together.
  2. In another bowl, combine the sourdough starter, water, and olive oil.
  3. Gradually add the wet mixture to the dry ingredients, stirring until a shaggy dough forms.
  4. Knead the dough for about 10 minutes on a floured surface until smooth and elastic.
  5. Place the dough in a lightly greased bowl, cover with a damp cloth, and let it rise for about 4-6 hours or until doubled in size.

Baking

  1. Once risen, shape the dough into a round loaf and place it on a baking sheet lined with parchment paper.
  2. Let the loaf rise for another hour, covered.
  3. Preheat your oven to 450°F (230°C).
  4. Optional: sprinkle additional minced garlic on top before baking.
  5. Bake in the preheated oven for 30-35 minutes, or until the bread is golden brown and sounds hollow when tapped.
  6. Let it cool on a wire rack before slicing.

Allow the bread to cool completely before slicing to maintain its texture. This bread pairs wonderfully with butter, soups, or as the base for sandwiches.

Bread, Side Dish
American
Baking, Easy Bread Recipe, Garlic Bread, Homemade Bread, sourdough

Artisan Sourdough Garlic Parmesan Bread (Roasted Garlic Twist)

Everyone loves a good loaf of bread, especially when it’s filled with flavors that make your taste buds dance. Artisan Sourdough Garlic Parmesan Bread, also known as Roasted Garlic Twist, fits this bill perfectly. With its crispy crust, soft interior, and delicious blend of roasted garlic and parmesan, it’s a true crowd-pleaser. Whether served alongside a warm bowl of soup, as a tasty snack, or as the main star at a gathering, this delightful bread is sure to impress. As you pull the warm loaf apart and breathe in that savory aroma, you’ll wonder why you waited so long to try it. So, grab your apron, and let’s make this bread a reality!

How to prepare Artisan Sourdough Garlic Parmesan Bread (Roasted Garlic Twist)

  1. Ingredients Needed:
  • 3 cups of all-purpose flour
  • 1 cup of active sourdough starter
  • 1 1/2 teaspoons of salt
  • 1 cup of warm water
  • 1 whole bulb of garlic (roasted)
  • 1/2 cup of freshly grated parmesan cheese
  • 1 tablespoon of olive oil
  • Optional: fresh herbs for extra flavor
  1. Directions:
  2. In a large mixing bowl, combine the flour and salt. Mix well.
  3. Add the sourdough starter and warm water to the flour mixture. Stir until you have a sticky dough.
  4. Fold in the roasted garlic and parmesan cheese, ensuring even distribution.
  5. Cover the dough with a kitchen towel and let it rest for 4-6 hours at room temperature, or until it has doubled in size.
  6. Once risen, turn the dough onto a floured surface and knead it gently for a few minutes.
  7. Shape the dough into a braid or twist and place it on a baking sheet lined with parchment paper.
  8. Let the dough rise again for about 1-2 hours.
  9. Preheat your oven to 450°F (230°C).
  10. Brush the top of the dough with olive oil and sprinkle some extra parmesan if desired.
  11. Bake for 25-30 minutes, or until the bread is golden brown and sounds hollow when tapped on the bottom.
  12. Let it cool slightly before slicing. Enjoy your delicious Artisan Sourdough Garlic Parmesan Bread!

Artisan Sourdough Garlic Parmesan Bread (Roasted Garlic Twist)

Why You’ll Love Artisan Sourdough Garlic Parmesan Bread (Roasted Garlic Twist)

This Artisan Sourdough Garlic Parmesan Bread is more than just a side dish; it’s a celebration of flavors. The perfect balance of crispy crust and soft garlic-infused interior makes every bite irresistible. Plus, using a sourdough starter adds a tangy depth that enhances the overall taste. The combination of roasted garlic and parmesan will have everyone coming back for seconds (or thirds!). It’s simple to make yet feels special, perfect for any occasion.

Tips for success

  • Make sure your sourdough starter is active for the best rise and flavor.
  • Feel free to experiment with additional herbs, like rosemary or thyme, for an extra flavor boost.
  • If you’re short on time, you can let the dough rise in the refrigerator overnight.
  • Don’t skip the brushing with olive oil before baking; it helps create that beautiful golden crust.

Artisan Sourdough Garlic Parmesan Bread (Roasted Garlic Twist)

Serving Suggestions

This delicious Artisan Sourdough Garlic Parmesan Bread pairs well with soups, salads, or can be enjoyed on its own with some butter. You can also slice it and make a fantastic sandwich filled with your favorite ingredients. For a tasty snack, serve it with a selection of cheeses and olives.

FAQs

  1. Can I use store-bought sourdough starter?
  2. Yes, you can use store-bought sourdough starter. Just ensure it’s active before use.
  3. What can I do if I don’t have roasted garlic?
  4. If you don’t have roasted garlic, you can sauté fresh garlic lightly in olive oil until soft and fragrant.
  5. How do I store the leftover bread?
  6. Store the cool bread in an airtight container or plastic bag at room temperature for up to three days. For longer storage, slice it and freeze.

Now that you have the recipe, there’s no reason not to dive into the world of homemade bread. Happy baking!

Artisan Sourdough Garlic Parmesan Bread

This delicious bread features a crispy crust and a soft, garlic-infused interior, making it a perfect accompaniment to meals or a delightful snack.

For the bread

  • 3 cups all-purpose flour
  • 1 cup active sourdough starter
  • 1.5 teaspoons salt
  • 1 cup warm water
  • 1 whole bulb garlic (roasted)
  • 0.5 cup freshly grated parmesan cheese
  • 1 tablespoon olive oil
  • to taste fresh herbs (optional) (For extra flavor.)

Preparation

  1. In a large mixing bowl, combine the flour and salt. Mix well.
  2. Add the sourdough starter and warm water to the flour mixture. Stir until you have a sticky dough.
  3. Fold in the roasted garlic and parmesan cheese, ensuring even distribution.
  4. Cover the dough with a kitchen towel and let it rest for 4-6 hours at room temperature, or until it has doubled in size.
  5. Once risen, turn the dough onto a floured surface and knead it gently for a few minutes.
  6. Shape the dough into a braid or twist and place it on a baking sheet lined with parchment paper.
  7. Let the dough rise again for about 1-2 hours.

Baking

  1. Preheat your oven to 450°F (230°C).
  2. Brush the top of the dough with olive oil and sprinkle some extra parmesan if desired.
  3. Bake for 25-30 minutes, or until the bread is golden brown and sounds hollow when tapped on the bottom.
  4. Let it cool slightly before slicing.

Make sure your sourdough starter is active for the best rise and flavor. Feel free to experiment with herbs like rosemary or thyme for added flavor. If short on time, the dough can rise in the refrigerator overnight. Brushing with olive oil is essential for a beautiful crust.

Baking, Side Dish
Italian
Artisan Bread, Garlic Bread, Homemade Bread, Parmesan Bread, Sourdough Bread

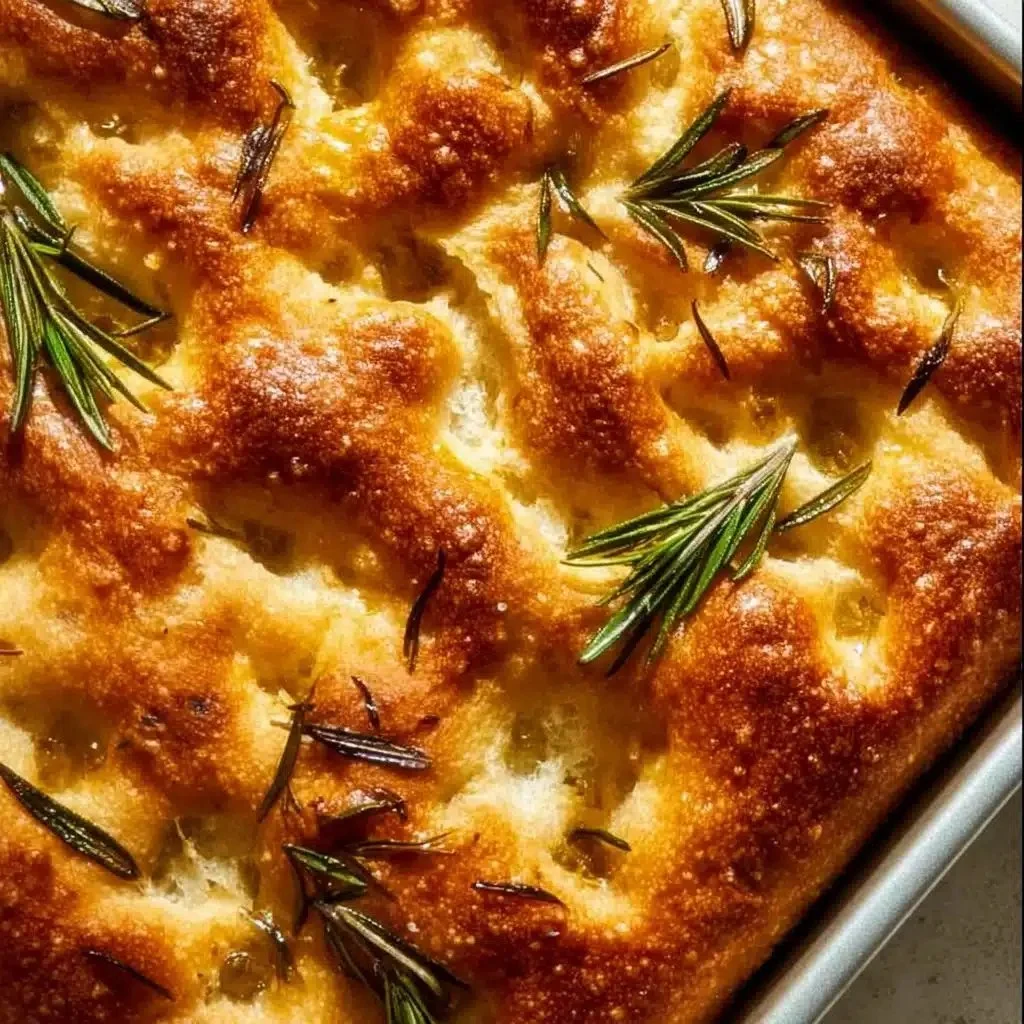
Garlic Sourdough Focaccia

Homemade Garlic Sourdough Focaccia topped with fresh herbs and garlic

There’s something magical about freshly baked bread, and when it comes to comfort food, Garlic Sourdough Focaccia truly steals the spotlight. This soft, golden flatbread is infused with the rich aroma of garlic and a hint of herbs, making it an irresistible treat for any gathering. Whether served warm as an appetizer, enjoyed with a hearty meal, or simply dipped in olive oil, this focaccia is sure to impress your friends and family. Plus, it’s easy to make and requires just a few simple ingredients. So, let’s dive into how you can whip up this delightful bread that everyone will rave about.

How to prepare Garlic Sourdough Focaccia

To make this Garlic Sourdough Focaccia, gather your ingredients and get ready to embark on a baking adventure. It’s all about mixing, kneading, and letting your dough rise to achieve that perfect texture. Here’s how to do it:

  1. Ingredients:
  • 2 cups active sourdough starter
  • 3 cups all-purpose flour
  • 1 ½ teaspoons salt
  • 1 cup water (lukewarm)
  • 4 tablespoons olive oil
  • 6 cloves garlic (minced)
  • Fresh herbs (like rosemary or thyme)
  • Flaky sea salt (for topping)
  1. Directions:
  2. In a large bowl, combine the sourdough starter, flour, salt, and water. Mix until a rough dough forms.
  3. Add 2 tablespoons of olive oil and the minced garlic to the dough, mixing until well incorporated.
  4. Turn the dough out onto a floured surface and knead for about 5-7 minutes until it’s smooth and elastic.
  5. Place the dough in a greased bowl, cover it, and let it rise for 4-6 hours, or until doubled in size.
  6. Once risen, punch down the dough and spread it in a greased baking pan.
  7. Dimple the surface with your fingers, drizzle the remaining olive oil, and sprinkle with herbs and flaky sea salt.
  8. Allow it to rise again for 1-2 hours.
  9. Preheat the oven to 425°F (220°C) and bake the focaccia for 20-25 minutes or until golden.
  10. Let it cool slightly before slicing and enjoying.

Garlic Sourdough Focaccia

Why You’ll Love Garlic Sourdough Focaccia

This focaccia is not just about its delicious taste, it also embodies a wonderful variety of textures. The crust is crisp and golden, while the inside is light and soft, inviting you to take another slice. The garlic enhances the flavors, making it a delightful addition to any meal. It’s perfect for sharing at parties, family gatherings, or even a cozy night in. Plus, it’s a great way to use your sourdough starter, making every bite a testament to your baking skills.

Tips for success

  • Use an active sourdough starter: It’s crucial for achieving that airy and fluffy focaccia.
  • Don’t skip the rising times: Allowing the dough to rise properly is key to developing flavor and texture.
  • Experiment with toppings: Feel free to top your focaccia with cheeses, olives, or different herbs to suit your taste.

Garlic Sourdough Focaccia

Serving Suggestions

Serve your Garlic Sourdough Focaccia warm to really savor its amazing flavor. It pairs wonderfully with a side of marinara sauce for dipping, or simply drizzle it with extra olive oil and balsamic vinegar. It also makes a fantastic base for sandwiches or can be enjoyed alongside soups and salads.

FAQs

Can I make this focaccia without sourdough starter? Yes, you can substitute the sourdough with instant yeast, although the flavor and texture will differ slightly.

How do I store leftover focaccia? Store it in an airtight container at room temperature for up to three days. You can also freeze it for longer storage.

Can I add cheese or other toppings to the focaccia? Absolutely! Cheese, olives, sun-dried tomatoes, or even vegetables can add a delightful twist to your focaccia. Enjoy experimenting!

Now that you know how to make this Garlic Sourdough Focaccia, why not gather your ingredients and start baking? Your kitchen is about to smell heavenly!

Garlic Sourdough Focaccia

This soft, golden flatbread is infused with the rich aroma of garlic and a hint of herbs, making it an irresistible treat perfect for any gathering.

Dough Ingredients

  • 2 cups active sourdough starter (Make sure it’s active for best results.)
  • 3 cups all-purpose flour
  • 1.5 teaspoons salt
  • 1 cup water (lukewarm) (Should be warm to the touch.)
  • 4 tablespoons olive oil (Divided for the dough and topping.)
  • 6 cloves garlic (minced) (Can adjust to taste.)

Toppings

  • to taste Fresh herbs (like rosemary or thyme) (Choose your favorite herbs.)
  • to taste Flaky sea salt (for topping)

Preparation

  1. In a large bowl, combine the sourdough starter, flour, salt, and lukewarm water. Mix until a rough dough forms.
  2. Add 2 tablespoons of olive oil and the minced garlic to the dough, mixing until well incorporated.
  3. Turn the dough out onto a floured surface and knead for about 5-7 minutes until it’s smooth and elastic.
  4. Place the dough in a greased bowl, cover it, and let it rise for 4-6 hours, or until doubled in size.
  5. Once risen, punch down the dough and spread it in a greased baking pan.
  6. Dimple the surface with your fingers, drizzle the remaining olive oil, and sprinkle with herbs and flaky sea salt.

Baking

  1. Allow it to rise again for 1-2 hours.
  2. Preheat the oven to 425°F (220°C) and bake the focaccia for 20-25 minutes or until golden.
  3. Let it cool slightly before slicing and enjoying.

Use an active sourdough starter for the best texture. Don’t skip the rising times for optimal flavor. Experiment with various toppings like cheeses or olives for added flair.

Appetizer, Bread
Italian
Bread Recipe, Comfort Food, Easy Focaccia, Garlic Sourdough Focaccia, Sourdough Bread

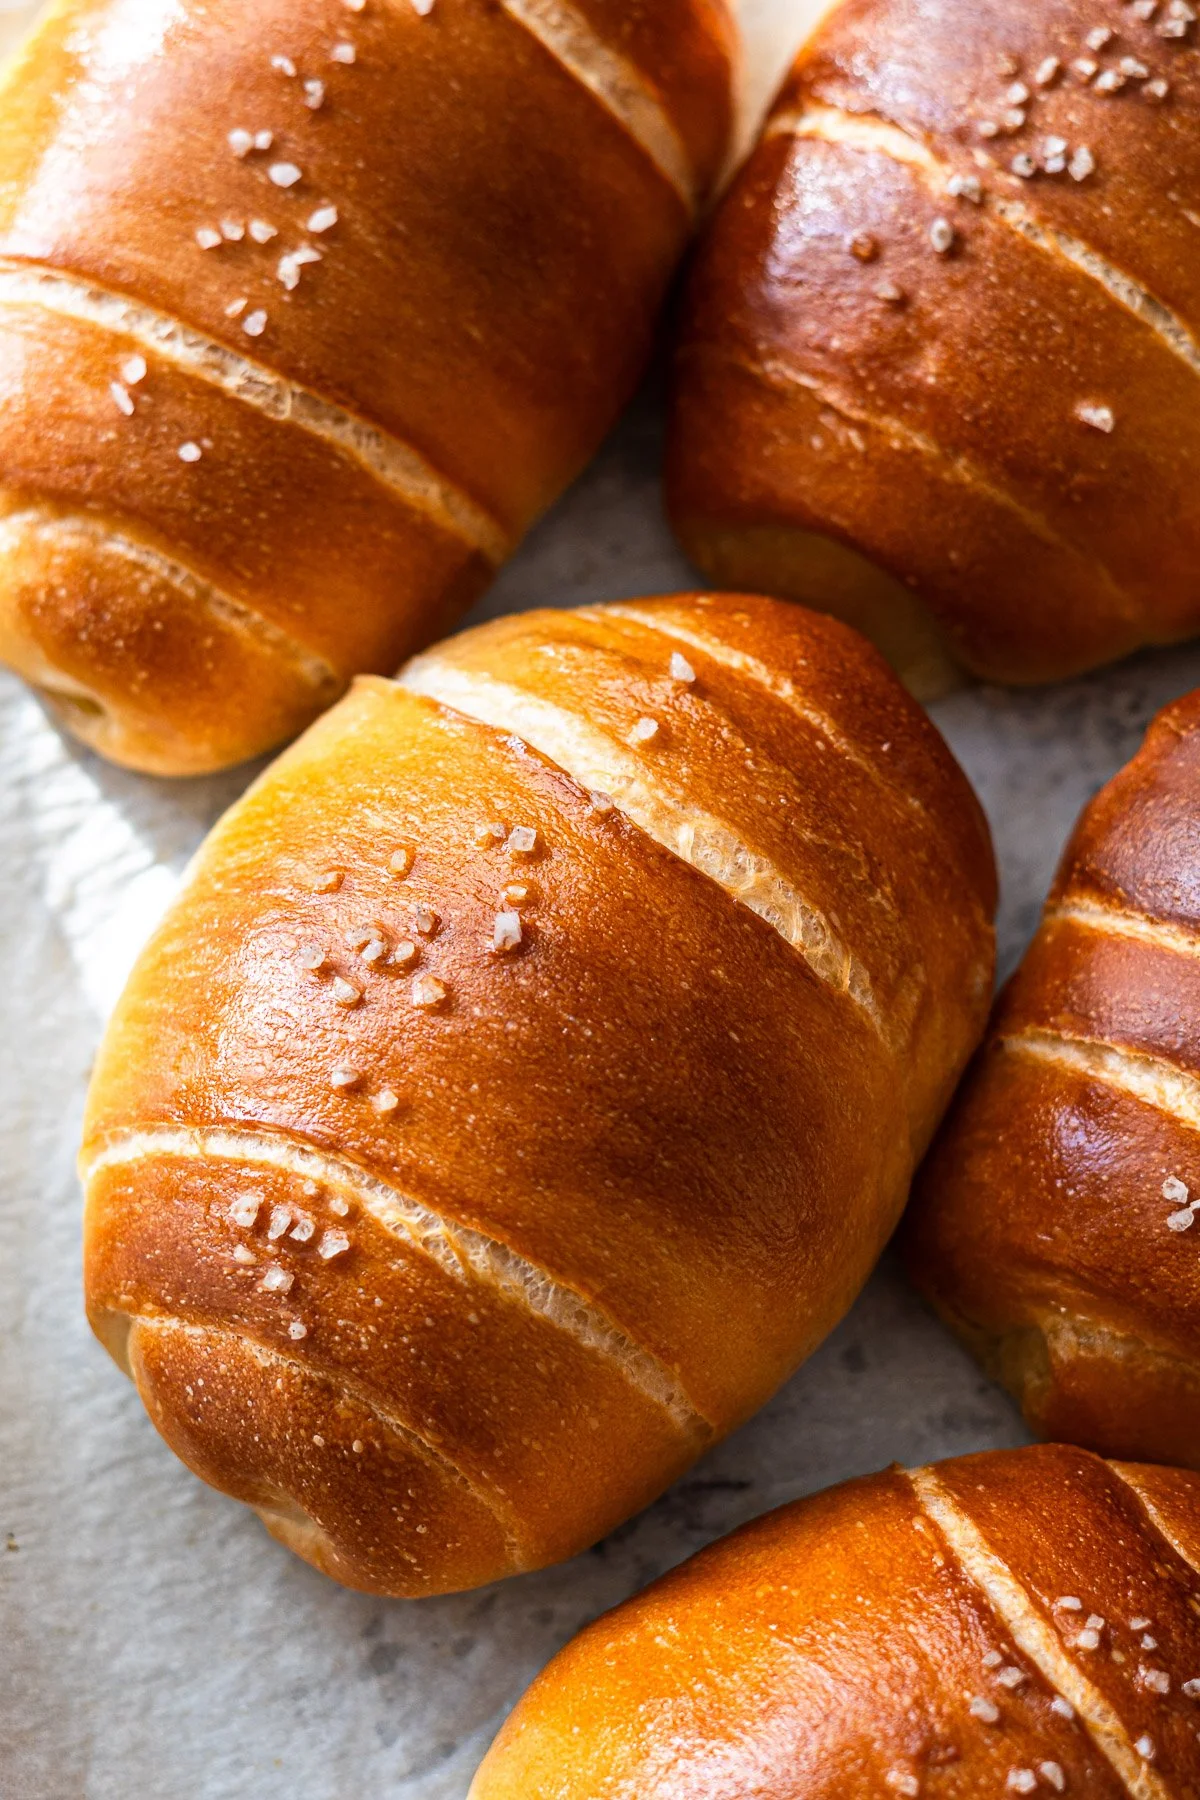
Sourdough Pita Bread

Freshly baked sourdough pita bread on a wooden table

Making Sourdough Pita Bread is a delightful experience that fills your kitchen with the warm scent of fresh bread. This pita bread is soft, fluffy, and has a lovely tang from the sourdough starter. It can be enjoyed with various dips, used to make sandwiches, or just enjoyed on its own. Let’s dive into how to make this amazing bread!

Sourdough Pita Bread

Ingredients

  • 1 cup sourdough starter, fed and bubbly
  • 1 cup warm water
  • 3 to 4 cups all-purpose flour
  • 1 teaspoon salt
  • 1 tablespoon olive oil

Directions

  1. In a large bowl, whisk together the sourdough starter, warm water, and 2 cups of flour until well combined.
  2. Add the salt and olive oil, mixing until incorporated.
  3. Gradually add the remaining flour, as needed, until a soft dough forms.
  4. Knead the dough on a floured surface for about 5-7 minutes, until it’s smooth and elastic.
  5. Place the dough in a greased bowl, cover it, and let it rise for about 4-6 hours, or until it has doubled in size.
  6. Preheat your oven to 475°F (245°C) and place a baking stone or an inverted baking sheet inside to heat.
  7. Divide the risen dough into 8 equal pieces and shape each piece into a ball.
  8. Roll each ball into a circle about ¼ inch thick.
  9. Carefully place the rolled-out dough onto the hot baking stone and bake for 5-7 minutes, or until the pitas puff up and turn lightly golden.
  10. Remove the pitas from the oven and let them cool on a wire rack.

{image_1}

Why You’ll Love Sourdough Pita Bread

Sourdough Pita Bread is not only delicious, but it also has a unique flavor profile that makes it stand out. The tangy notes from the sourdough starter complement almost any filling. This bread has a fantastic texture, puffing beautifully in the oven to create a pocket perfect for stuffing. Plus, the satisfaction of making your own bread is hard to beat!

Sourdough Pita Bread

Tips for success

  • Ensure your sourdough starter is active for the best flavor and rise.
  • If your dough feels sticky, don’t be afraid to add a little extra flour, but avoid adding too much to keep it soft.
  • Bake your pitas on a hot surface for better puffing.
  • Keep an eye on them as they bake, as ovens can vary in temperature.

{image_2}

Serving Suggestions

Enjoy these Sourdough Pita Breads warm with your favorite dips, such as hummus or tzatziki. They also make great wraps for fresh veggies or grilled meats. You can even slice them into wedges and toast them for a delicious snack!

FAQs

Can I use whole wheat flour instead of all-purpose flour? Yes, you can substitute whole wheat flour, but you might need to adjust the water amount as whole wheat flour absorbs more moisture.

How do I store leftover pita bread? Store leftover pita bread in an airtight container at room temperature for up to 2 days or freeze them for longer storage.

What can I do if my pita doesn’t puff up? If your pita doesn’t puff up, it could be due to a cold oven or not enough steam. Make sure your oven is preheated well and consider adding a little water to create steam.

Making Sourdough Pita Bread at home can be a fun and rewarding process. Try it out, and get ready to impress your family and friends with your baking skills!

Sourdough Pita Bread

This soft and fluffy sourdough pita bread has a lovely tang from the sourdough starter, perfect for dips, sandwiches, or on its own.

For the bread

  • 1 cup sourdough starter, fed and bubbly (Ensure the starter is active for best results.)
  • 1 cup warm water
  • 3-4 cups all-purpose flour (Add gradually until a soft dough forms.)
  • 1 teaspoon salt
  • 1 tablespoon olive oil

Preparation

  1. In a large bowl, whisk together the sourdough starter, warm water, and 2 cups of flour until well combined.
  2. Add the salt and olive oil, mixing until incorporated.
  3. Gradually add the remaining flour, as needed, until a soft dough forms.
  4. Knead the dough on a floured surface for about 5-7 minutes, until it’s smooth and elastic.
  5. Place the dough in a greased bowl, cover it, and let it rise for about 4-6 hours, or until it has doubled in size.

Baking

  1. Preheat your oven to 475°F (245°C) and place a baking stone or an inverted baking sheet inside to heat.
  2. Divide the risen dough into 8 equal pieces and shape each piece into a ball.
  3. Roll each ball into a circle about ¼ inch thick.
  4. Carefully place the rolled-out dough onto the hot baking stone and bake for 5-7 minutes, or until the pitas puff up and turn lightly golden.
  5. Remove the pitas from the oven and let them cool on a wire rack.

Ensure your sourdough starter is active for the best flavor and rise. If your dough feels sticky, don’t be afraid to add a little extra flour, but avoid adding too much to keep it soft. Bake your pitas on a hot surface for better puffing. Keep an eye on them as they bake, as ovens can vary in temperature.

Bread, Snack
Mediterranean
Baking, Homemade Bread, Pita Bread, Sourdough Bread

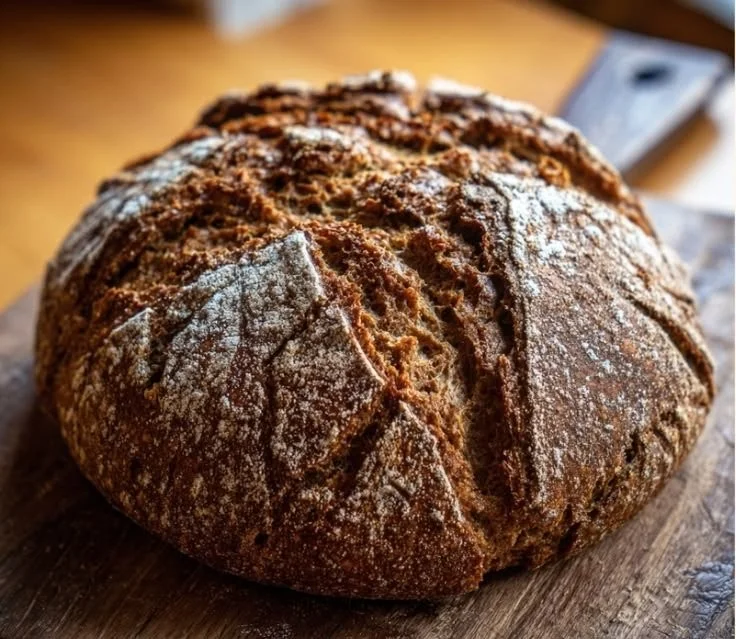
Rye Sourdough Bread

Freshly baked rye sourdough bread with a crispy crust and soft interior.

Rye Sourdough Bread is a delightful twist on the classic sourdough loaf. With its earthy flavor and chewy texture, this bread is sure to become a favorite in your household. Made with rye flour, it offers a unique taste that pairs well with a variety of toppings, from creamy butter to savory cheeses. Whether you’re enjoying it for breakfast, lunch, or dinner, this bread is a real crowd-pleaser. Plus, the aroma of freshly baked rye sourdough wafting through your kitchen is enough to make anyone’s mouth water. So, roll up your sleeves and get ready to create something delicious!

Rye Sourdough Bread

How to prepare Rye Sourdough Bread

To make your own Rye Sourdough Bread, you will need the following ingredients:

  • 2 cups rye flour
  • 1 cup all-purpose flour
  • 1 ½ cups water
  • 1 cup active sourdough starter
  • 1 tablespoon salt

Start by mixing the rye flour and all-purpose flour in a large bowl. In another bowl, combine the water, sourdough starter, and salt. Gradually add the wet mixture to the dry ingredients, mixing until a sticky dough forms. Knead the dough for about 10 minutes until it becomes smooth.

Rye Sourdough Bread

Cover the bowl with a damp cloth and let it rise in a warm spot for about 4 to 6 hours, or until it has doubled in size. Once risen, shape the dough into a round loaf and place it on a floured surface. Let it rest for another hour while you preheat your oven to 450°F (230°C).

Now, transfer the loaf to a baking stone or a baking sheet lined with parchment paper. Bake for 30-35 minutes, or until the crust is golden brown and the bread sounds hollow when tapped.

Let your Rye Sourdough Bread cool on a rack before slicing. This will ensure that the bread holds its shape and texture well.

{image_2}

Why You’ll Love Rye Sourdough Bread

You will fall in love with Rye Sourdough Bread for many reasons. Firstly, it’s packed with robust flavor that makes each bite enjoyable. The combination of rye and sourdough gives a tangy undertone, making it perfect for sandwiches or toasted with a bit of butter. Additionally, it is full of fiber and nutrients, making it a healthier choice compared to white bread. The texture is chewy yet tender, ensuring a satisfying experience. And, as an added bonus, this recipe allows you to impress friends and family with your baking skills!

Tips for success

  1. Make sure your sourdough starter is active and bubbly before using it. This will help your bread rise better.
  2. Don’t rush the rising times, as proper fermentation is key to great flavor.
  3. Use a digital kitchen scale for accurate measurements, especially with flour.
  4. Experiment with adding seeds or grains for added flavor and texture.

{image_1}

Serving Suggestions

Rye Sourdough Bread is versatile and pairs wonderfully with various toppings. Try it with cream cheese, smoked salmon, or your favorite jam. It’s also great for making classic sandwiches, especially with cured meats or strong cheeses. You can even enjoy it simply with a bit of olive oil and balsamic vinegar for dipping. The possibilities are endless!

FAQs

Can I use 100% rye flour for this recipe?

Yes, you can, but keep in mind that 100% rye flour will create a denser bread. Adjustments in water might be necessary to achieve the desired dough consistency.

How do I store leftover rye sourdough bread?

To keep it fresh, wrap the bread in a clean kitchen towel and store it at room temperature for a couple of days. For longer storage, slice the bread and freeze it in an airtight bag.

How can I tell if my bread is done baking?

Your loaf is done when it is golden brown and sounds hollow when you tap the bottom. You can also use a kitchen thermometer; the internal temperature should be around 200°F (93°C).

With these tips and their deliciousness waiting to be shared, you’re all set to bake your own Rye Sourdough Bread! Enjoy the process and the tasty results.

Rye Sourdough Bread

A delightful twist on the classic sourdough loaf, featuring earthy flavor and chewy texture, perfect for various toppings.

For the Dough

  • 2 cups rye flour
  • 1 cup all-purpose flour
  • 1.5 cups water (room temperature)
  • 1 cup active sourdough starter (must be bubbly)
  • 1 tablespoon salt

Preparation

  1. Mix the rye flour and all-purpose flour in a large bowl.
  2. In another bowl, combine the water, sourdough starter, and salt.
  3. Gradually add the wet mixture to the dry ingredients, mixing until a sticky dough forms.
  4. Knead the dough for about 10 minutes until it becomes smooth.
  5. Cover the bowl with a damp cloth and let it rise in a warm spot for about 4 to 6 hours, or until it has doubled in size.

Baking

  1. Shape the dough into a round loaf and place it on a floured surface. Let it rest for another hour while preheating your oven to 450°F (230°C).
  2. Transfer the loaf to a baking stone or a baking sheet lined with parchment paper.
  3. Bake for 30-35 minutes, or until the crust is golden brown and the bread sounds hollow when tapped.
  4. Let the bread cool on a rack before slicing to ensure it holds its shape and texture.

Make sure your sourdough starter is active and bubbly before using it. Don’t rush the rising times as proper fermentation is key to great flavor. Use a digital kitchen scale for accurate measurements, especially with flour. Experiment with adding seeds or grains for added flavor and texture.

Bread, Breakfast, Snack
Baking
Baking Recipes, Healthy Bread, Homemade Bread, Rye Bread, sourdough

No Knead Salt Bread

Loaf of no knead salt bread fresh out of the oven, golden crust and soft interior.

No Knead Salt Bread is a simple, rustic bread that uses time instead of elbow work. You mix flour, water, yeast, and salt, let the dough rest for hours, then bake it in a hot covered pot or on a tray. The long rest builds flavor, the hot container makes a great crust, and you get a loaf that looks and tastes like artisan bread.

This featured recipe is a crowd-pleaser, its crust is crisp, the inside is tender, and the salty edge makes it a great match for butter, soups, and salads. It is also forgiving, so even new bakers can do well. Get your hands ready, because this bread is fun to make and even better to eat.

I love bread that feels like it came from a bakery, but that I made at home with little fuss. No Knead Salt Bread fits that wish, it gives a crunchy crust, a soft center, and a bright, clean salt taste. It is simple to make, needs only a few ingredients, and it makes a warm house feel even cozier. If you like easy breads, you might also enjoy a sweeter treat like Amish apple fritter bread for another simple baking day.

How to prepare No Knead Salt Bread

  1. In a large bowl, stir together 3 cups all-purpose flour, 1 teaspoon instant yeast, and 1 teaspoon salt.
  2. Add 1 1/2 cups warm water, stir with a spoon until a sticky shaggy dough forms.
  3. Cover the bowl with plastic wrap or a clean towel, leave it at room temperature for 12 to 18 hours, the dough will rise and look bubbly.
  4. Dust your work surface with flour, turn the dough out gently, shape it into a round by folding the edges under.
  5. Place the shaped dough on a piece of parchment paper, cover and let rest 30 to 60 minutes.
  6. Preheat your oven to 450 F, place a heavy pot with lid, like a Dutch oven, inside the oven to heat for 30 minutes.
  7. Carefully lift the dough with the parchment into the hot pot, cover with the lid, and bake 30 minutes.
  8. Remove the lid and bake another 10 to 15 minutes until the crust is deep golden.
  9. Lift the loaf out with the parchment, cool on a rack at least 20 minutes before slicing.


No Knead Salt Bread

Why You’ll Love No Knead Salt Bread

  • It needs very little active time, you mostly wait while the dough rests.
  • The crust turns out crisp and the inside stays soft, a nice contrast.
  • It uses common pantry ingredients, no special flour needed.
  • It pairs well with many foods, from soups to spreads, and works for plain toast or fancy meals.

tips for success

  • Use warm water, not hot, to help the yeast wake up.
  • Do not add too much flour when shaping, the dough should stay a bit sticky for good crumb.
  • Let the dough rest long enough, the slow rise builds flavor.
  • Heat the pot well before you bake, the hot pot gives the best crust.
  • Cool the bread before slicing, cutting too soon can make the crumb gummy.

Serving Suggestions

  • Slice and serve with butter and a sprinkle of sea salt.
  • Use for sandwiches, it holds up to fillings without getting soggy.
  • Serve with soup or stew for a simple, filling meal.
  • Make garlic toast from slices, or use it to soak up olive oil and herbs.


No Knead Salt Bread

FAQs

Q: How long can I keep No Knead Salt Bread? A: Store at room temperature in a bread bag for 2 to 3 days, or freeze slices for up to 1 month.

Q: Can I make this bread without a Dutch oven? A: Yes, bake on a hot baking stone or a heavy tray, and add a small pan of water to the oven to make steam for a better crust.

Q: Can I add seeds or herbs to the dough? A: Yes, fold in a handful of seeds or chopped herbs during shaping, they add flavor and texture.

Q: Do I need to use instant yeast? A: Instant yeast works well, but you can use active dry yeast if you let it sit in warm water for a few minutes first.

Conclusion

This No Knead Salt Bread is a simple way to get fresh, crusty bread at home with little work and big reward. For another take on easy home baking and a different flavor profile, see this helpful resource on a similar simple loaf, No Knead Salt Bread – Okonomi Kitchen.

No Knead Salt Bread

A simple, rustic bread that uses time instead of elbow work, resulting in a crunchy crust and tender inside that’s perfect for various pairings.

Main ingredients

  • 3 cups all-purpose flour (Use high-quality flour for better results.)
  • 1 teaspoon instant yeast (Instant yeast works best but you can use active dry yeast.)
  • 1 teaspoon salt (Adjust according to taste.)
  • 1.5 cups warm water (Not hot, to properly activate the yeast.)

Preparation

  1. In a large bowl, stir together flour, yeast, and salt.
  2. Add warm water and stir with a spoon until a sticky shaggy dough forms.
  3. Cover the bowl with plastic wrap or a clean towel and leave at room temperature for 12 to 18 hours until dough rises and looks bubbly.
  4. Dust your work surface with flour, turn the dough out gently, and shape it into a round by folding the edges under.
  5. Place the shaped dough on parchment paper, cover, and let rest for 30 to 60 minutes.
  6. Preheat your oven to 450°F (232°C) and place a heavy pot with lid inside to heat for 30 minutes.

Baking

  1. Carefully lift the dough with the parchment into the hot pot, cover with the lid, and bake for 30 minutes.
  2. Remove the lid and bake for an additional 10 to 15 minutes until the crust is deep golden.
  3. Lift the loaf out with the parchment and cool on a rack for at least 20 minutes before slicing.

Use warm water to help the yeast wake up, avoid adding too much flour when shaping, and heat the pot well for best crust.

Bread, Snack
American
Artisan Bread, Easy Bread Recipe, Homemade Bread, No Knead Bread, Rustic Bread

Sourdough Focaccia Bread

Freshly baked sourdough focaccia bread topped with herbs and sea salt.

This Same Day Sourdough Focaccia Bread is a simple, happy loaf. It gives you a crisp top, soft inside, and a bright sourdough taste without waiting all day. The bread soaks up olive oil, holds herbs and salt, and pleases a crowd at any table. It works great for a snack, a meal side, or a sandwich base. You will love how easy it feels to make something that looks and tastes special, and you might find yourself baking it again next week.

how to prepare Sourdough Focaccia Bread

  1. Mix starter, water, and flour in a bowl until you have a shaggy dough. Cover and rest 20 minutes.
  2. Add salt and a little olive oil, fold the dough until it feels smoother.
  3. Move dough to an oiled pan, spread gently with wet hands to fill the pan.
  4. Let the dough rise in a warm spot about 1 to 2 hours, until puffed and light.
  5. Press dimples into the dough with your fingertips, drizzle more olive oil, and sprinkle salt and herbs.
  6. Bake in a hot oven about 20 to 30 minutes, until the top is golden and crisp.
  7. Cool a little, cut, and serve warm.

Same Day Sourdough Focaccia Bread

Why You’ll Love Sourdough Focaccia Bread

  • You get real sourdough flavor the same day, no long wait.
  • The crust turns crisp while the inside stays soft and airy.
  • Olive oil and salt make each bite rich and simple.
  • It fits quick weeknight meals and also shines at a party.

tips for success

  • Use an active starter that bubbles well.
  • Keep your hands wet when you spread the dough, it will not stick.
  • Let the dough get puffy, but don’t overproof it.
  • Heat the oven well before you bake, a hot oven gives a better crust.
  • Use good olive oil and coarse salt for the best flavor.

Serving Suggestions

  • Serve warm with extra olive oil and balsamic for dipping.
  • Top with roasted garlic, sliced tomatoes, or olives for a simple meal.
  • Use slices to make sandwiches with greens and cheese.
  • Cut into small pieces for a party board with cheese and charcuterie.

Same Day Sourdough Focaccia Bread

FAQs

Q: Can I make this without a sourdough starter? A: You can use commercial yeast, but the flavor will change. Sourdough gives a tangy taste you will miss.

Q: How long does focaccia keep? A: Store at room temperature up to 2 days in a covered container. Reheat in the oven to refresh the crust.

Q: Can I add toppings before baking? A: Yes, add toppings like herbs, olives, or tomatoes after you dimple the dough and before baking.

Q: Do I need a lot of kneading? A: No, simple folding and a few stretches are enough for this wet dough style.

Conclusion

If you want a clear recipe and step by step help to make this bread today, check this detailed same day sourdough guide, Same Day Sourdough Focaccia Recipe.

Sourdough Focaccia Bread

This Same Day Sourdough Focaccia Bread is a simple and delicious loaf with a crisp top and soft inside, perfect for snacks, side dishes, or sandwiches.

Dough Ingredients

  • 200 grams Active sourdough starter (Use a bubbly starter for best results.)
  • 250 ml Water (Room temperature.)
  • 400 grams All-purpose flour
  • 10 grams Salt (Coarse salt recommended.)
  • 50 ml Olive oil (Use good quality for flavor.)

Topping Ingredients

  • Salt to taste Coarse salt
  • Herbs to taste Fresh herbs (e.g., rosemary) (Optional, for added flavor.)

Dough Preparation

  1. In a bowl, mix sourdough starter, water, and flour until you have a shaggy dough.
  2. Cover and let rest for 20 minutes.
  3. Add salt and a little olive oil; fold the dough until smooth.
  4. Transfer the dough to an oiled pan and gently spread it with wet hands to fill the pan.
  5. Allow the dough to rise in a warm place for about 1 to 2 hours until it is puffed and light.

Toppings and Baking

  1. Press dimples into the dough with your fingertips.
  2. Drizzle additional olive oil over the dough and sprinkle with salt and herbs.
  3. Bake in a preheated oven for about 20 to 30 minutes or until the top is golden and crisp.
  4. Cool slightly, cut, and serve warm.

Use an active starter for best results; wet hands when spreading the dough to prevent sticking. Don’t overproof the dough and preheat the oven well for a better crust.

Appetizer, Side Dish, Snack
Italian
Baking, Easy Bread, Homemade Bread, Quick Bread, Sourdough Focaccia